
Rear Diffuser install PIC HEAVY!
 07-19-2016, 08:20 PM
#61
Drifting


I went to ACE True Value and gathered all of the mounting hardware. Mine was absent as well. For the vent mounts I got 4- 1/4" � 1.5" long flanged head bolts for the vent mounts. 4-1/4"�2" wide flanged metal washers and 4-1/4"x2" wide flanged rubber washers. For the lower outer fin mounts I believe I bought 2- #8�1"long flanged head bolts with washers. I also bought 2 aluminum storm window brackets to hold the fin secure to the lower part of the bumper near the wheel opening. The four tabs on the diffuser above.the exhaust need to be drilled with either a 1/2" to 9-1/6" hole. Use your exsisting plastic push rivets to secure these four mounting points. Hope this helps.


Last edited by Stealth02; 07-19-2016 at 08:28 PM.

The following users liked this post:
mtndv8 (08-13-2016)
07-19-2016, 08:26 PM
#62
Melting Slicks

Member Since: Sep 2007
Location: Rockland County NY
Posts: 2,182
Received 470 Likes
on
145 Posts
2020 C5 of the Year Finalist - Modified
2016 C5 of the Year Finalist
St. Jude Donor '12, '14

JD,
I went to ACE True Value and gathered all of the mounting hardware. Mine was absent as well. For the vent mounts I got 4- 1/4" � 1.5" long flanged head bolts for the vent mounts. 4-1/4"�2" wide flanged metal washers and 4-1/4"x2" wide flanged rubber washers. For the lower outer fin mounts I believe I bought 2- #8�1"long flanged head bolts with washers. I also bought 2 aluminum storm window brackets to hold the fin secure to the lower part of the bumper near the wheel opening. The four tabs on the diffuser above.the exhaust need to be drilled with either a 1/2" to 9-1/6" hole. Use your exsisting plastic push rivets to secure these four mounting points. Hope this helps.
I went to ACE True Value and gathered all of the mounting hardware. Mine was absent as well. For the vent mounts I got 4- 1/4" � 1.5" long flanged head bolts for the vent mounts. 4-1/4"�2" wide flanged metal washers and 4-1/4"x2" wide flanged rubber washers. For the lower outer fin mounts I believe I bought 2- #8�1"long flanged head bolts with washers. I also bought 2 aluminum storm window brackets to hold the fin secure to the lower part of the bumper near the wheel opening. The four tabs on the diffuser above.the exhaust need to be drilled with either a 1/2" to 9-1/6" hole. Use your exsisting plastic push rivets to secure these four mounting points. Hope this helps.
07-19-2016, 08:41 PM
#63
Drifting
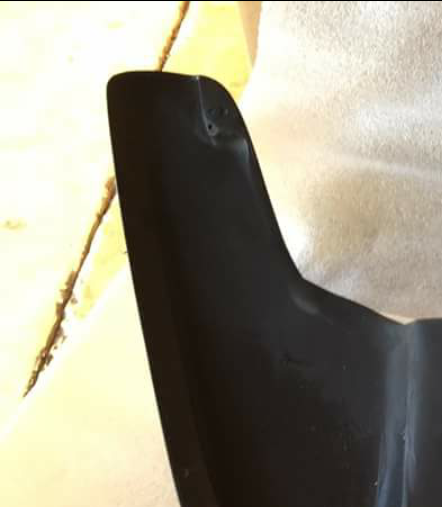
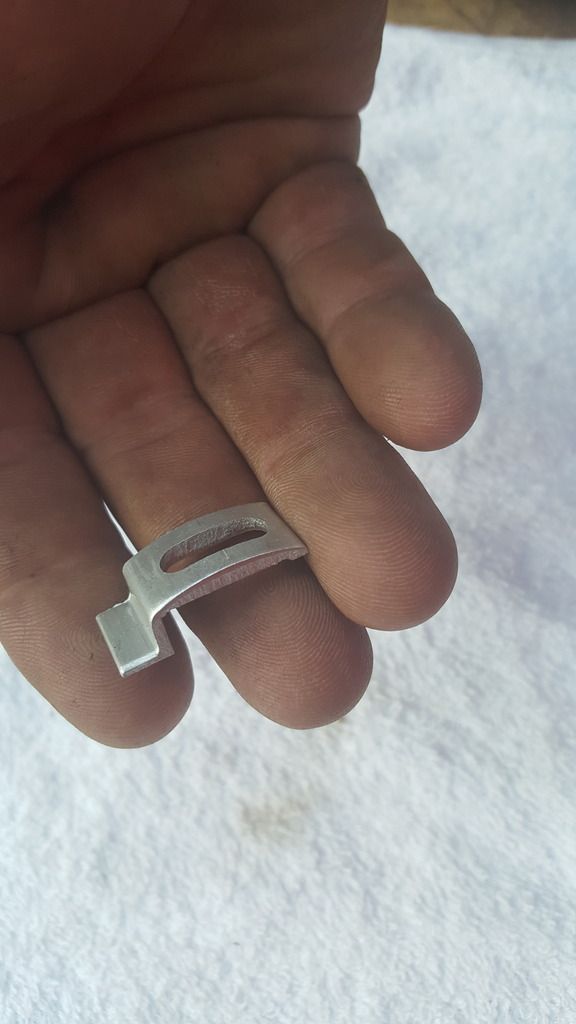
I guess you will need to drill a small hole in the center of the the raised part but not all the way through and use a pan head screw to hold the bracket. Not sure why they didn't put the screw insert on that mount. Here are some pics. I added one to the previous response.


Last edited by Stealth02; 07-19-2016 at 08:44 PM.
 07-20-2016, 10:45 AM
#65
Melting Slicks
Member Since: Sep 2007
Location: Rockland County NY
Posts: 2,182
Received 470 Likes
on
145 Posts
2020 C5 of the Year Finalist - Modified
2016 C5 of the Year Finalist
St. Jude Donor '12, '14
I guess you will need to drill a small hole in the center of the the raised part but not all the way through and use a pan head screw to hold the bracket. Not sure why they didn't put the screw insert on that mount. Here are some pics. I added one to the previous response.
07-20-2016, 05:18 PM
#67
Burning Brakes

Thread Starter
 07-20-2016, 06:08 PM
#68
Drifting
crazystevex
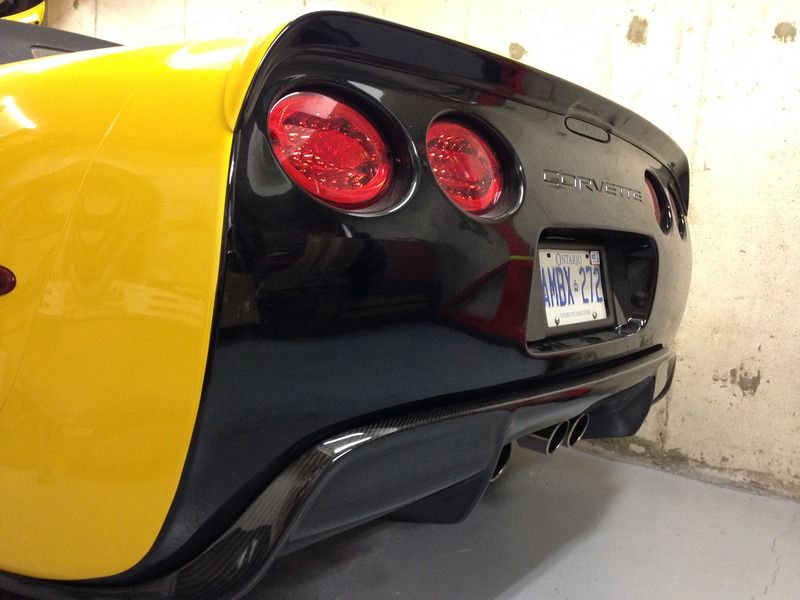
Do you have anymore pics of your car in more sunlight so as to see the brilliance of the green next to the diffuser.
Do you have anymore pics of your car in more sunlight so as to see the brilliance of the green next to the diffuser.
Last edited by Stealth02; 07-20-2016 at 06:08 PM.
07-21-2016, 12:25 PM
#69
Burning Brakes
Thread Starter


 07-24-2016, 07:46 PM
#71
Drifting
Really wish I could find those window brackets that you used. Home Depot in Canada doesn't have them and they actually just recently stopped carrying Stanley products. Their inventory compared to the American stores is astonishingly terrible. 
The following users liked this post:
doublec4 (07-25-2016)
08-12-2016, 02:28 PM
#74
Burning Brakes

I like the overall look of this �diffuser.� However, I�d be somewhat concerned about the lack of ventilation, and hence, the parachute effect. Even as a cosmetic, it not only doesn�t add much (if any) in the way of diffusion, but goes in the opposite direction - basically a counter-diffuser. Not necessarily a big deal as most of the add-on skirts and rear spoilers are mostly cosmetic anyway.
Question: does this mount using all four of the rear vents, or just two? If the latter, would it be feasible to open up the other two in order to provide some form of heat extraction? If trimmed properly with a mesh grille behind, perhaps some of the heat could escape�?

Question: does this mount using all four of the rear vents, or just two? If the latter, would it be feasible to open up the other two in order to provide some form of heat extraction? If trimmed properly with a mesh grille behind, perhaps some of the heat could escape�?
10-15-2016, 09:59 PM
#75
Drifting
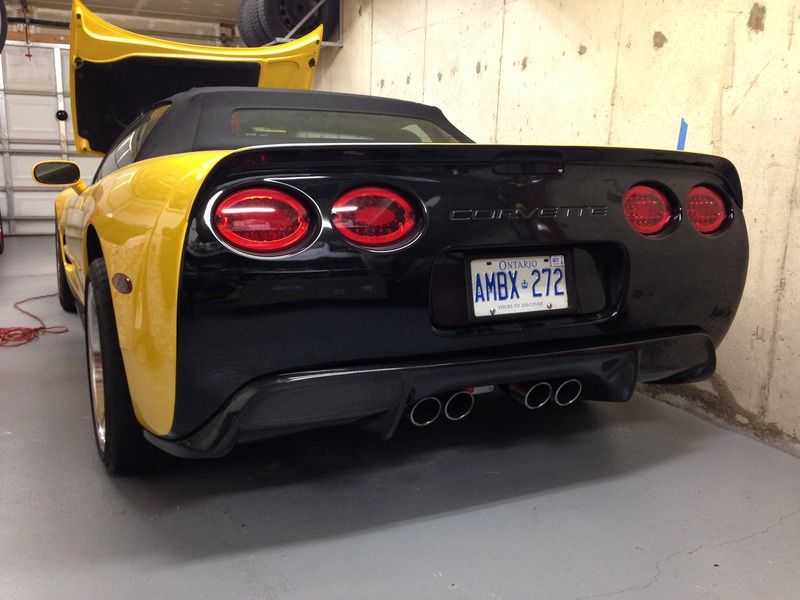
Going to revive this thread with my own input after installing mine today.
First, it's a nice product but the install can be frustrating.
Before attempting the install, tap the threads for the inserts in the back. They get filled with resin and partially covered. Test some 1/4" bolts to make sure they thread in VERY easily.
The biggest obstacle during the installation is the exhaust. I have the stock Z06 exhaust and if you drop the exhaust and install the diffuser you won't be able to get the exhaust back over the diffuser.
What you have to do is drop the exhaust, keep it supported, install the diffuser with the mufflers still above the diffuser (but loose and unbolted). You need to leave them unbolted so you can move them around to get your arms behind the bumper. You will have very little space to work with since the mufflers have to stay above the diffuser. This makes locating the threaded inserts in the rear bumper vents extremely frustrating. This is also why it's extremely important that you tapped the threads, otherwise you will fight for an hour trying to start the 1/4" bolts.
I neglected to use any double sided tape during the install, it doesn't stick well to the back of the diffuser anyways.
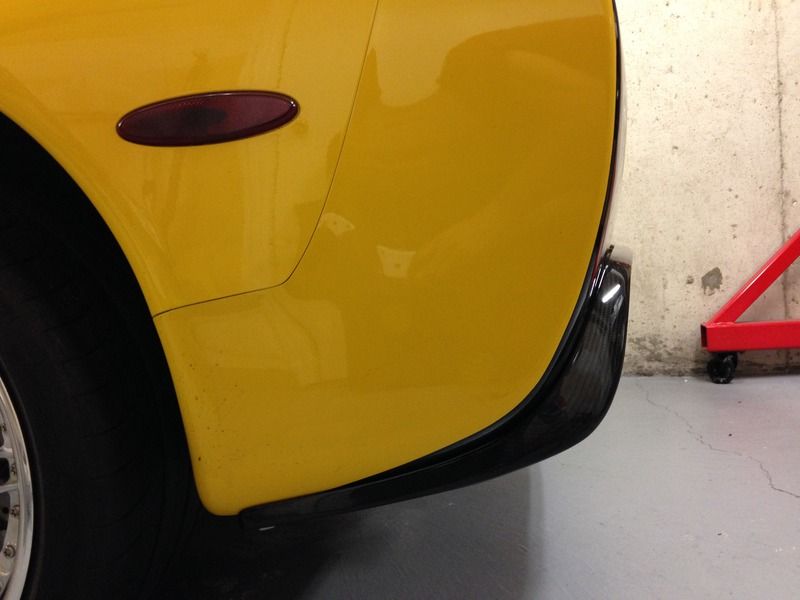
Lastly, since the carbon fiber diffuser doesn't have any threaded inserts on the outer most fins, I decided to just drill right through the bottom and use a long 1/4" bolt with a nylon finishing washer to keep it all together.
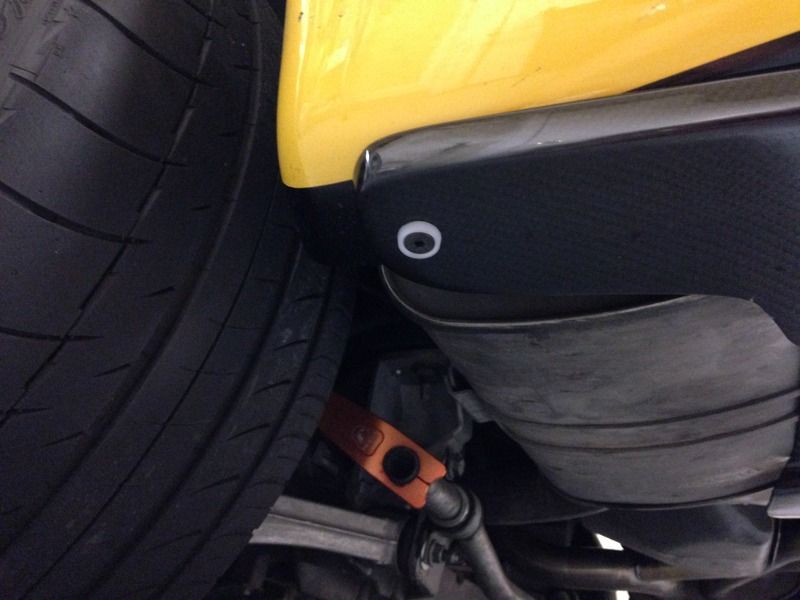
Looks like it would stand out, but with the car on the ground you can't see it at all when standing beside the car. It's obviously hidden under the diffuser.

First, it's a nice product but the install can be frustrating.
Before attempting the install, tap the threads for the inserts in the back. They get filled with resin and partially covered. Test some 1/4" bolts to make sure they thread in VERY easily.
The biggest obstacle during the installation is the exhaust. I have the stock Z06 exhaust and if you drop the exhaust and install the diffuser you won't be able to get the exhaust back over the diffuser.
What you have to do is drop the exhaust, keep it supported, install the diffuser with the mufflers still above the diffuser (but loose and unbolted). You need to leave them unbolted so you can move them around to get your arms behind the bumper. You will have very little space to work with since the mufflers have to stay above the diffuser. This makes locating the threaded inserts in the rear bumper vents extremely frustrating. This is also why it's extremely important that you tapped the threads, otherwise you will fight for an hour trying to start the 1/4" bolts.
I neglected to use any double sided tape during the install, it doesn't stick well to the back of the diffuser anyways.
Lastly, since the carbon fiber diffuser doesn't have any threaded inserts on the outer most fins, I decided to just drill right through the bottom and use a long 1/4" bolt with a nylon finishing washer to keep it all together.

Looks like it would stand out, but with the car on the ground you can't see it at all when standing beside the car. It's obviously hidden under the diffuser.


Last edited by doublec4; 10-15-2016 at 10:00 PM.
The following users liked this post:
crazystevex (10-18-2016)
10-16-2016, 02:13 PM
#76
Racer


Is there a functional purpose to this modification?
I think I sort of like how it looks in the pictures, but given the overall mass that is my C5's rear end, I'm just not clear as to why one would do this.
Is this an attempt to copy the looks of late model sports cars?? Please tell me that's not what's going on here.
I think I sort of like how it looks in the pictures, but given the overall mass that is my C5's rear end, I'm just not clear as to why one would do this.
Is this an attempt to copy the looks of late model sports cars?? Please tell me that's not what's going on here.
10-16-2016, 03:31 PM
#77
Is there a functional purpose to this modification?
I think I sort of like how it looks in the pictures, but given the overall mass that is my C5's rear end, I'm just not clear as to why one would do this.
Is this an attempt to copy the looks of late model sports cars?? Please tell me that's not what's going on here.
I think I sort of like how it looks in the pictures, but given the overall mass that is my C5's rear end, I'm just not clear as to why one would do this.
Is this an attempt to copy the looks of late model sports cars?? Please tell me that's not what's going on here.
It's a vanity piece.
I should be getting a Carbon Fiber version soon.

 10-18-2016, 09:58 AM
#79
Melting Slicks
Is there a functional purpose to this modification?
I think I sort of like how it looks in the pictures, but given the overall mass that is my C5's rear end, I'm just not clear as to why one would do this.
Is this an attempt to copy the looks of late model sports cars?? Please tell me that's not what's going on here.
I think I sort of like how it looks in the pictures, but given the overall mass that is my C5's rear end, I'm just not clear as to why one would do this.
Is this an attempt to copy the looks of late model sports cars?? Please tell me that's not what's going on here.
10-18-2016, 12:46 PM
#80
Drifting
Is there a functional purpose to this modification?
I think I sort of like how it looks in the pictures, but given the overall mass that is my C5's rear end, I'm just not clear as to why one would do this.
Is this an attempt to copy the looks of late model sports cars?? Please tell me that's not what's going on here.
I think I sort of like how it looks in the pictures, but given the overall mass that is my C5's rear end, I'm just not clear as to why one would do this.
Is this an attempt to copy the looks of late model sports cars?? Please tell me that's not what's going on here.

Last edited by doublec4; 10-18-2016 at 12:46 PM.