
Bird Poop Stain on 02 Z06 Removed...But
 07-09-2014, 06:17 PM
#1
Racer

Thread Starter

Member Since: Sep 2003
Location: Gap PA
Posts: 322
Likes: 0
Received 0 Likes
on
0 Posts

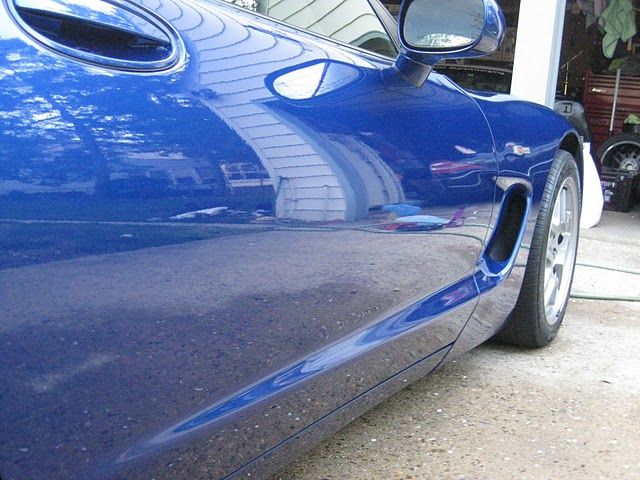
Well, I had some birds poop on the roof of the Z the other day, then it sat in the sun and baked. Electron Blue is the color, if that helps.
After a wash, some detailer that didn't work the next thing I had was 3M rubbing compound. Now, with a dime sized drop of that and enough some force (thanks to reading the forum) the marks came out, and actually came out quite well!
My problem now is, in certain light (like if you look at the roof across the top with a direct light/sunlight) you can see very light areas where there was some aggressive "polishing" to get the stain out. On a cloudy day, or if your not looking for it you won't be able to pick it out...but I can.
I still need to wash again, and re-apply Meguires NXT (good stuff, btw) to the roof to see if those "light" spots go away.
If they don't, does anyone have any suggestions on how to fix the "light" spots? It almost seems like there are small swirls...
Thanks in advance.
Ben
 07-09-2014, 06:29 PM
#2
Administrator


Member Since: Mar 2001
Location: In a parallel universe. Currently own 2014 Stingray Coupe.
Posts: 343,252
Received 19,370 Likes
on
14,018 Posts
C7 of the Year - Modified Finalist 2021
MO Events Coordinator
St. Jude Co-Organizer
St. Jude Donor '03-'04-'05-'06-'07-'08-'09-'10-'11-'12-'13-'14-'15-'16-'17-'18-'19-
'20-'21-'22-'23-'24
NCM Sinkhole Donor
CI 5, 8 & 11 Veteran


Perhaps a good body shop could polish the spots out.
07-09-2014, 06:34 PM
#3
Team Owner


Member Since: Mar 2001
Location: small town in S.E Pa. PA
Posts: 21,325
Received 3,812 Likes
on
1,925 Posts
St. Jude Donor '03-'04
Well, I had some birds poop on the roof of the Z the other day, then it sat in the sun and baked. Electron Blue is the color, if that helps.
After a wash, some detailer that didn't work the next thing I had was 3M rubbing compound. Now, with a dime sized drop of that and enough some force (thanks to reading the forum) the marks came out, and actually came out quite well!
My problem now is, in certain light (like if you look at the roof across the top with a direct light/sunlight) you can see very light areas where there was some aggressive "polishing" to get the stain out. On a cloudy day, or if your not looking for it you won't be able to pick it out...but I can.
I still need to wash again, and re-apply Meguires NXT (good stuff, btw) to the roof to see if those "light" spots go away.
If they don't, does anyone have any suggestions on how to fix the "light" spots? It almost seems like there are small swirls...
Thanks in advance.
Ben
After a wash, some detailer that didn't work the next thing I had was 3M rubbing compound. Now, with a dime sized drop of that and enough some force (thanks to reading the forum) the marks came out, and actually came out quite well!
My problem now is, in certain light (like if you look at the roof across the top with a direct light/sunlight) you can see very light areas where there was some aggressive "polishing" to get the stain out. On a cloudy day, or if your not looking for it you won't be able to pick it out...but I can.
I still need to wash again, and re-apply Meguires NXT (good stuff, btw) to the roof to see if those "light" spots go away.
If they don't, does anyone have any suggestions on how to fix the "light" spots? It almost seems like there are small swirls...
Thanks in advance.
Ben
You can find some good buildable products but if it was me, I would buy Zaino.
 07-09-2014, 09:28 PM
#5
Team Owner
Member Since: Mar 2001
Location: small town in S.E Pa. PA
Posts: 21,325
Received 3,812 Likes
on
1,925 Posts
St. Jude Donor '03-'04
you can use compound to remove a micron from the whole top. Compound is a remover. I would rather leave the rest of the top alone ( no compound ) and fill in the quarter sized depression you created by removing the poop. a topical polish that fills is the way to go, not removing material from the whole top to match the area you worked.
07-09-2014, 11:12 PM
#6
Safety Car


Sounds like you marred the clear with aggressive polishing. Did you do it by hand? If so, what kind of microfiber did you use? I would recommend finding someone who does paint correction in your area and have them fix it for you. Waxes or other similar things will only be temporary fixes and the marks will come back as soon as they wear off. You need to fix the clear coat first, and then protect it with wax or sealant.
07-10-2014, 12:46 AM
#7
Drifting


You've gotta be some kind of determined Arnold to remove enough clear coat by hand-polishing to cause severe damage. In the future, don't start with a rubbing compound. (Almost nothing is as abrasive; the next step would have been "heavy duty" rubbing compound [intended for machine polishing only], and then 4000 wet/dry sandpaper.) Instead, work from 'fine' polishes to 'abrasive' compounds; there are probably 6-8 grades of ever-increasing abrasive "polishes" or polishing/cutting agents amongst a manufacturer's product line.
Try to work your way backward now. The dull imperfection you're seeing is the heavy grits' effect of a rubbing compound that's abraded your clear coat. What it did was as you say, left 'swirl' marks. Stay with the same manufacturer of the rubbing compound you used and look up that OEM's various grades of polishes, creams, and paste abrasives. Get some of every other listed product... for instance, if that OEM has 5 grades of these creams (rubbing compound being the most abrasive, "#5"), skip every other cream product and buy the 3rd and 1st product--i. e., the middle-grade polishing/cleaner (whatever that OEM calls it), and the premium polish. Then go back and Ahnold wax-on-wax-off that affected region until it looks like your "deep sanding" marks have been reduced (and the finish shines better). When you're exasperated with your lack of progress, move to the premium polish and continue to wear your arm out until the middle stage marks are gone. Once your finished with the repair, wax it.
You can't hurt anything if you're doing this by hand, believe me. If you do, the consolation is, a pro would have ruined it faster with a pnuematic buffer. (And no pro worth his salt would've ever guarantee success; you'd have served up a 'gimme' with your tale and the dulled area--they'd be a hero if they're successful, but they can't be blamed for failure since failure's a stronger possibility than if they'd have been working on a virgin surface.)
Next time you get pooped on, start with #1, go to #2, then #3, etc. until you accomplish the deed. Lots of elbow grease and patience, otherwise you'll end up using too strong an abrasive, as you did in this case.
There's nothing to be afraid of; tackle it yourself. A pro would only do what I'm telling you to do unless he was fairly sure from the appearance that you've done such minimal damage that he could power-buff it. The only advantage to power buffing is the ability to corn starch the finish when he's done, which cannot be done successfully by hand.
edited to add: by "OEM" and "manufacturer", I mean specifically, an auto paint manufacturer, not a polish and wax manufacturer. The difference between Ditzler or Dupont and Meguiar's or Turtle Wax.
Last edited by dork; 07-10-2014 at 12:53 AM.
07-10-2014, 06:51 AM
#8
Safety Car

Thanks to reading the forum, you used rubbing compound to remove bird droppings.
Perhaps this is not advice to be thankful for, since it screwed up your pant. I have had good results with claybar for baked on crud, but it is not instant.
I hope your problem is easily corrected. Your story reinforces my concern about prank advice here, as I wouldn't often know better. I know your particular cleaning methods are viable, but kind of extreme , considering the downside available if you mess up.
Nothing wrong with an extra clearcoat, makes the car look nice, if it comes to that.
07-10-2014, 06:57 AM
#9
Racer
Thread Starter
Member Since: Sep 2003
Location: Gap PA
Posts: 322
Likes: 0
Received 0 Likes
on
0 Posts
You've gotta be some kind of determined Arnold to remove enough clear coat by hand-polishing to cause severe damage. In the future, don't start with a rubbing compound. (Almost nothing is as abrasive; the next step would have been "heavy duty" rubbing compound [intended for machine polishing only], and then 4000 wet/dry sandpaper.) Instead, work from 'fine' polishes to 'abrasive' compounds; there are probably 6-8 grades of ever-increasing abrasive "polishes" or polishing/cutting agents amongst a manufacturer's product line.
Try to work your way backward now. The dull imperfection you're seeing is the heavy grits' effect of a rubbing compound that's abraded your clear coat. What it did was as you say, left 'swirl' marks. Stay with the same manufacturer of the rubbing compound you used and look up that OEM's various grades of polishes, creams, and paste abrasives. Get some of every other listed product... for instance, if that OEM has 5 grades of these creams (rubbing compound being the most abrasive, "#5"), skip every other cream product and buy the 3rd and 1st product--i. e., the middle-grade polishing/cleaner (whatever that OEM calls it), and the premium polish. Then go back and Ahnold wax-on-wax-off that affected region until it looks like your "deep sanding" marks have been reduced (and the finish shines better). When you're exasperated with your lack of progress, move to the premium polish and continue to wear your arm out until the middle stage marks are gone. Once your finished with the repair, wax it.
You can't hurt anything if you're doing this by hand, believe me. If you do, the consolation is, a pro would have ruined it faster with a pnuematic buffer. (And no pro worth his salt would've ever guarantee success; you'd have served up a 'gimme' with your tale and the dulled area--they'd be a hero if they're successful, but they can't be blamed for failure since failure's a stronger possibility than if they'd have been working on a virgin surface.)
Next time you get pooped on, start with #1, go to #2, then #3, etc. until you accomplish the deed. Lots of elbow grease and patience, otherwise you'll end up using too strong an abrasive, as you did in this case.
There's nothing to be afraid of; tackle it yourself. A pro would only do what I'm telling you to do unless he was fairly sure from the appearance that you've done such minimal damage that he could power-buff it. The only advantage to power buffing is the ability to corn starch the finish when he's done, which cannot be done successfully by hand.
edited to add: by "OEM" and "manufacturer", I mean specifically, an auto paint manufacturer, not a polish and wax manufacturer. The difference between Ditzler or Dupont and Meguiar's or Turtle Wax.
Try to work your way backward now. The dull imperfection you're seeing is the heavy grits' effect of a rubbing compound that's abraded your clear coat. What it did was as you say, left 'swirl' marks. Stay with the same manufacturer of the rubbing compound you used and look up that OEM's various grades of polishes, creams, and paste abrasives. Get some of every other listed product... for instance, if that OEM has 5 grades of these creams (rubbing compound being the most abrasive, "#5"), skip every other cream product and buy the 3rd and 1st product--i. e., the middle-grade polishing/cleaner (whatever that OEM calls it), and the premium polish. Then go back and Ahnold wax-on-wax-off that affected region until it looks like your "deep sanding" marks have been reduced (and the finish shines better). When you're exasperated with your lack of progress, move to the premium polish and continue to wear your arm out until the middle stage marks are gone. Once your finished with the repair, wax it.
You can't hurt anything if you're doing this by hand, believe me. If you do, the consolation is, a pro would have ruined it faster with a pnuematic buffer. (And no pro worth his salt would've ever guarantee success; you'd have served up a 'gimme' with your tale and the dulled area--they'd be a hero if they're successful, but they can't be blamed for failure since failure's a stronger possibility than if they'd have been working on a virgin surface.)
Next time you get pooped on, start with #1, go to #2, then #3, etc. until you accomplish the deed. Lots of elbow grease and patience, otherwise you'll end up using too strong an abrasive, as you did in this case.
There's nothing to be afraid of; tackle it yourself. A pro would only do what I'm telling you to do unless he was fairly sure from the appearance that you've done such minimal damage that he could power-buff it. The only advantage to power buffing is the ability to corn starch the finish when he's done, which cannot be done successfully by hand.
edited to add: by "OEM" and "manufacturer", I mean specifically, an auto paint manufacturer, not a polish and wax manufacturer. The difference between Ditzler or Dupont and Meguiar's or Turtle Wax.
So, what I already did:
1. 3m rubbing compound (#5 as you say)
next
2. 3m polish/cleaner (#3 as you say)
3. 3m premium polish (#1 as you say)
4. NXT wax (what I use)
I believe this is what you are describing above?
To be clear to all, I don't believe I have rubbed "through" the clearcoat, I have just assentially changed the reflective properties of it by using compound. I did do this by hand, and use a microfiber towel from Wal-Mart (cheap, I know)
As I stated originally, its only in bright light where you can see it. In the garage, a cloudy day, walking towards the car it is un-noticable. When you look flat across the roof on a sunny day, you can pick the areas out.
07-10-2014, 06:58 AM
#10
Melting Slicks

Member Since: Oct 2007
Location: It's true money can't buy happiness, but it is more comfortable crying in a Corvette than on a bicyc
Posts: 2,798
Likes: 0
Received 5 Likes
on
5 Posts
St. Jude Donor '13
A decent hi speed buff by a professional will solve your problem. I say professional because a buffer in the wrong hands can be worse than the repair.
07-10-2014, 07:51 AM
#11
Safety Car
I'll try this.
So, what I already did:
1. 3m rubbing compound (#5 as you say)
next
2. 3m polish/cleaner (#3 as you say)
3. 3m premium polish (#1 as you say)
4. NXT wax (what I use)
I believe this is what you are describing above?
To be clear to all, I don't believe I have rubbed "through" the clearcoat, I have just assentially changed the reflective properties of it by using compound. I did do this by hand, and use a microfiber towel from Wal-Mart (cheap, I know)
As I stated originally, its only in bright light where you can see it. In the garage, a cloudy day, walking towards the car it is un-noticable. When you look flat across the roof on a sunny day, you can pick the areas out.
A product such as Adams paint correcting polish applied on a foam pad via a dual action polisher (Porter Cable, Griots garage, Rupes, Flex) is probably all you need. Follow it with finer grade polish and then wax for flawless results.
07-10-2014, 08:12 AM
#12
Safety Car
Member Since: Jul 2012
Location: Houston Texas
Posts: 4,543
Received 277 Likes
on
85 Posts
C5 COTM Coordinator
If sounds like you are going to be chasing your tail for awhile on this. I would recommend a product applied by machine for best results. The last thing you want to do is keep trying to "fix it" with wal mart products and end up making the area more and more noticeable to the naked eye.
A product such as Adams paint correcting polish applied on a foam pad via a dual action polisher (Porter Cable, Griots garage, Rupes, Flex) is probably all you need. Follow it with finer grade polish and then wax for flawless results.
A product such as Adams paint correcting polish applied on a foam pad via a dual action polisher (Porter Cable, Griots garage, Rupes, Flex) is probably all you need. Follow it with finer grade polish and then wax for flawless results.

Listen to the guy, he knows his stuff. Adams products are also quite affordable. You can get the Step 1 & Step 2 polishes for about 50 bucks. Do it once and do it right.
07-10-2014, 11:28 AM
#14
Drifting
For your purposes, microfiber is microfiber no matter where you bought it. Walmart's as cheap as anyplace. The money goes to China, but that's a different issue the whole country seems tolerable of (including me, at times). Buy the products you need wherever you can find them; if Walmart's the cheapest place to find them you have a decision to make.
And no, you didn't come close to rubbing through the clear coat. (and if you did, you won't hurt anything by continuing to attempt your fix. It's what a pro would do.. if they burned through, as I said, they'd deny liability ([rightfully], and you'd have to fix it anyway).
If you're gonna machine buff it, a dual-action buffer is the ONLY way to do it if one is a novice. Leave the actual professional single-orbitals to the pros. However, you don't need to spend all that to get the results you desire.
Essentially what you've done on a 'microscopic' level is, you've "sanded" the surface with too rough a grit abrasive. Now you have to go over it with finer and finer grits and polishes until it's gone. Your "mistake" is minor--it's akin to sanding a pine (wooden) board with 80 grit sandpaper, and having to get those marks out. You'd progress to maybe 180, 320, and then 600 -grit papers to remove the 80-grit marks. No one could tell you've been there except with wood the 600'd area would be smoother than the rest of the milled wood.
With a clear coat, you're doing the same thing (but the polished area won't contrast nearly as obviously as a repaired area on a pine board). A dual action buffer *will* solve the problem. It might take you all of 3 minutes with that method. But there's no need for the buffer ever again unless you're so pressed for time that applying polishes requires you to cut the time by ~1/3. (That's my WAG; it's not that much faster when the clear coat surface is in good condition, and even "scratched" with rubbing compound, yours is). Machine buffing causes splattering- you'd still have to clean up with towels, so there's not a LOT of time saved. Also, consider that on a finished, well-maintained vehicle, only the horizontal panels need machine attention, if at all.
If doing it by hand is "chasing your tail", then chase, and in good conscience and extreme confidence in your endeavor. There's nothing wrong with 'slow' polishing; this isn't a race. The biggest benefit of doing it by hand is that you can see the changes as they happen. The only way you can see the results of your work with a buffer is to lift the buffer off the surface you're working on, and see what 'damage' or 'progress' you've made underneath the pad... and you can only do that well and clearly after you've turned off the machine buffer and toweled out the buffer-caused swirl marks so the area is cleaned of whatever polish or abrasive cream you applied.
If you decide to go the dual-action buffer route, buy a pad for each abrasive/polish you use. Each different grade of abrasive/polish should have it's own pad. The reason is, one doesn't want to mix 'grits' on a single pad; you won't get the full benefit of 'stepping down' in grades of polish that way.
Also... Strand Rider said, "I have had good results with claybar for baked on crud, but it is not instant."
What he said! Claybar works well, too, for future reference... and "instant" isn't a term that's viable with 'Claybar'.
Last edited by dork; 07-10-2014 at 11:44 AM.
07-10-2014, 11:46 AM
#15
Race Director

I'm no detail expert but I would agree with ET on the Zaino. I have the same car as you (EB C5Z) and my car is no garage queen (was my DD for 3 years in NJ and has been ungaraged), but I have been very happy with the results of Zaino.
I primarily use the Z5 and Z8 for EB.
Plenty of advice on using their products. If you are switching to them from NXT, you are going to want to wash the car with Dawn and I'd recommend a clay bar. Then start applying the appropriate Z products.
http://www.zainostore.com/
I primarily use the Z5 and Z8 for EB.
Plenty of advice on using their products. If you are switching to them from NXT, you are going to want to wash the car with Dawn and I'd recommend a clay bar. Then start applying the appropriate Z products.
http://www.zainostore.com/

 07-10-2014, 12:34 PM
#17
Melting Slicks
Have you watched this video series? It was really helpful to me and I just did my wife's entire Navy Blue Vert using this procedure. Navy Blue is not forgiving as you can see the flaws very easily. It at least made me understand the process of paint correction and gave me the basic ideas of what i should have on hand.
07-10-2014, 01:07 PM
#18
Safety Car
For your purposes, microfiber is microfiber no matter where you bought it. Walmart's as cheap as anyplace. The money goes to China, but that's a different issue the whole country seems tolerable of (including me, at times). Buy the products you need wherever you can find them; if Walmart's the cheapest place to find them you have a decision to make.
And no, you didn't come close to rubbing through the clear coat. (and if you did, you won't hurt anything by continuing to attempt your fix. It's what a pro would do.. if they burned through, as I said, they'd deny liability ([rightfully], and you'd have to fix it anyway).
If you're gonna machine buff it, a dual-action buffer is the ONLY way to do it if one is a novice. Leave the actual professional single-orbitals to the pros. However, you don't need to spend all that to get the results you desire.
Essentially what you've done on a 'microscopic' level is, you've "sanded" the surface with too rough a grit abrasive. Now you have to go over it with finer and finer grits and polishes until it's gone. Your "mistake" is minor--it's akin to sanding a pine (wooden) board with 80 grit sandpaper, and having to get those marks out. You'd progress to maybe 180, 320, and then 600 -grit papers to remove the 80-grit marks. No one could tell you've been there except with wood the 600'd area would be smoother than the rest of the milled wood.
With a clear coat, you're doing the same thing (but the polished area won't contrast nearly as obviously as a repaired area on a pine board). A dual action buffer *will* solve the problem. It might take you all of 3 minutes with that method. But there's no need for the buffer ever again unless you're so pressed for time that applying polishes requires you to cut the time by ~1/3. (That's my WAG; it's not that much faster when the clear coat surface is in good condition, and even "scratched" with rubbing compound, yours is). Machine buffing causes splattering- you'd still have to clean up with towels, so there's not a LOT of time saved. Also, consider that on a finished, well-maintained vehicle, only the horizontal panels need machine attention, if at all.
If doing it by hand is "chasing your tail", then chase, and in good conscience and extreme confidence in your endeavor. There's nothing wrong with 'slow' polishing; this isn't a race. The biggest benefit of doing it by hand is that you can see the changes as they happen. The only way you can see the results of your work with a buffer is to lift the buffer off the surface you're working on, and see what 'damage' or 'progress' you've made underneath the pad... and you can only do that well and clearly after you've turned off the machine buffer and toweled out the buffer-caused swirl marks so the area is cleaned of whatever polish or abrasive cream you applied.
If you decide to go the dual-action buffer route, buy a pad for each abrasive/polish you use. Each different grade of abrasive/polish should have it's own pad. The reason is, one doesn't want to mix 'grits' on a single pad; you won't get the full benefit of 'stepping down' in grades of polish that way.
Also... Strand Rider said, "I have had good results with claybar for baked on crud, but it is not instant."
What he said! Claybar works well, too, for future reference... and "instant" isn't a term that's viable with 'Claybar'.

With all that said, I'm glad the marks came out and your paint wasn't etched. Some people end up sanding with 1500 grit to remove bird dropping etchings and then have to polish that out. That's a whole nother can of worms but it's easily doable with the right tools and a little confidence.
07-10-2014, 01:10 PM
#19
Safety Car
I'm no detail expert but I would agree with ET on the Zaino. I have the same car as you (EB C5Z) and my car is no garage queen (was my DD for 3 years in NJ and has been ungaraged), but I have been very happy with the results of Zaino.
I primarily use the Z5 and Z8 for EB.
Plenty of advice on using their products. If you are switching to them from NXT, you are going to want to wash the car with Dawn and I'd recommend a clay bar. Then start applying the appropriate Z products.
http://www.zainostore.com/
I primarily use the Z5 and Z8 for EB.
Plenty of advice on using their products. If you are switching to them from NXT, you are going to want to wash the car with Dawn and I'd recommend a clay bar. Then start applying the appropriate Z products.
http://www.zainostore.com/
07-10-2014, 01:26 PM
#20
Burning Brakes


Have you watched this video series? It was really helpful to me and I just did my wife's entire Navy Blue Vert using this procedure. Navy Blue is not forgiving as you can see the flaws very easily. It at least made me understand the process of paint correction and gave me the basic ideas of what i should have on hand.
https://www.youtube.com/watch?v=KP-eAddv2sk
https://www.youtube.com/watch?v=KP-eAddv2sk
I have a black Lexus, the paint is very soft, but using the right pads and letting the DA do the work have lead to great results.
I am going to detail my new to me NBM vert this weekend provided the weather cooperates and it is not to hot. I will post pics when done.