
Operation Ugly Wires
 04-30-2014, 12:40 AM
#1
Drifting

Thread Starter

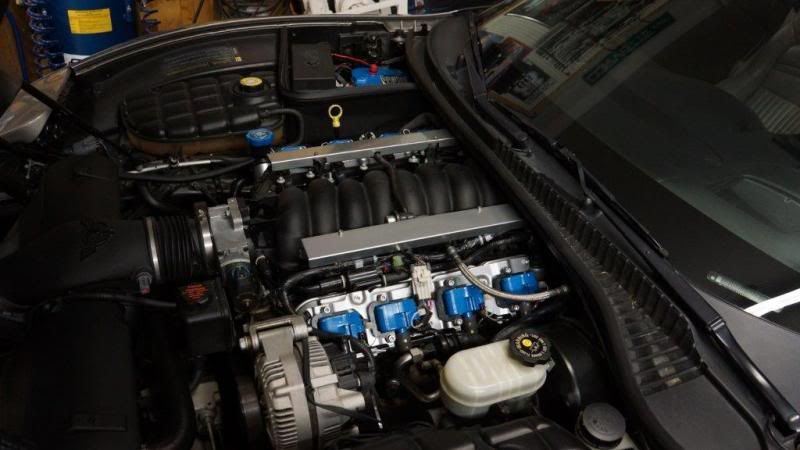
So I have been pondering getting rid of the star wars plastic and cleaning up the spaghetti bowl of wires that plague the LSX Motors and clean the valve covers and motor while I was at it. Well today was the day I decided to start my mini project. I just got done pulling Coil packs, and started stripping the harness sheathing about a hr ago. I will be wrapping the wires with braided sleeve and using tiny zip ties about every 4" to keep it neat and clean looking. I will also be scuffing my coil pack brackets and repainting them along with cleaning up the wires for them as well. Then I will finish up by giving a halfway decent valve cover polish without removing them. I also Polished my crankcase relief combination catch can earlier today.
I will periodically update as I get time to work on it, I plan on finishing this up pretty soon though...
Previous Pics...


Day 1... 75% Teardown and polished Catch can, The harness wrap is a pain in the a$$, That's 90% of the battle lol..


I will periodically update as I get time to work on it, I plan on finishing this up pretty soon though...
Previous Pics...


Day 1... 75% Teardown and polished Catch can, The harness wrap is a pain in the a$$, That's 90% of the battle lol..


Last edited by Breze84; 04-30-2014 at 12:58 AM.


 04-30-2014, 08:15 AM
#3
Melting Slicks

Member Since: Oct 2007
Location: Holland Landing Ontario
Posts: 2,724
Likes: 0
Received 1 Like
on
1 Post
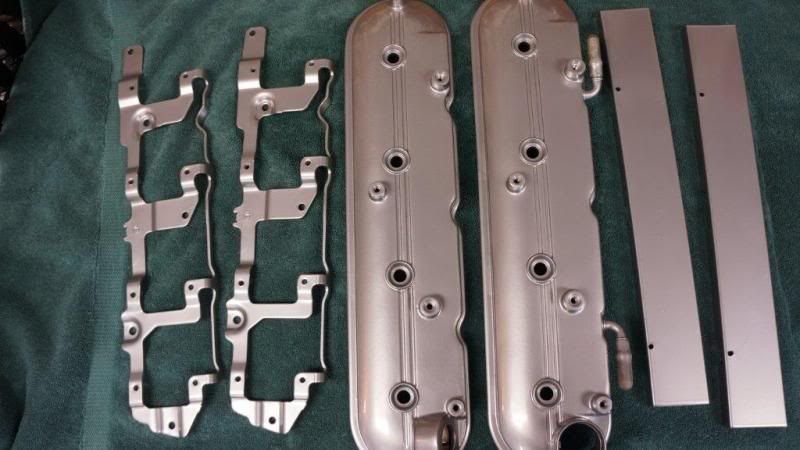
I really like where you're headed with this project. I did some similar mods to mine last year. I got my valve covers and coil brackets powder coated along with some small fuel rail covers I made. Also painted the coils and some other accents in Ford blue engine paint. I look forward to the next pics.

 04-30-2014, 10:55 AM
#4
Administrator


Member Since: Mar 2001
Location: In a parallel universe. Currently own 2014 Stingray Coupe.
Posts: 343,365
Received 19,407 Likes
on
14,033 Posts
C7 of the Year - Modified Finalist 2021
MO Events Coordinator
St. Jude Co-Organizer
St. Jude Donor '03-'04-'05-'06-'07-'08-'09-'10-'11-'12-'13-'14-'15-'16-'17-'18-'19-
'20-'21-'22-'23-'24
NCM Sinkhole Donor
CI 5, 8 & 11 Veteran


Looking good so far. Subscribing to this to see further progress.
04-30-2014, 08:42 PM
#5
Drifting
Thread Starter
Day 2... Didn't do much today really, I just stripped the coil packs down from the brackets and decided to remove my Valve covers because I have decided to do something a little different... What I plan on doing different now is I am going to paint me Coil pack brackets red and wrap the coil pack harness only with red tape so it blends in. I am also going to scuff my valve covers and paint them with VHT 350 degree Wrinkle Red. I just ordered everything so I should have it this week


Last edited by Breze84; 04-30-2014 at 08:50 PM.
04-30-2014, 08:47 PM
#6
Drifting
Thread Starter
 LS3 will be nice...
I really like where you're headed with this project. I did some similar mods to mine last year. I got my valve covers and coil brackets powder coated along with some small fuel rail covers I made. Also painted the coils and some other accents in Ford blue engine paint. I look forward to the next pics.
Thanks, The good pics will be coming soon
Last edited by Breze84; 04-30-2014 at 08:50 PM.
05-03-2014, 01:34 AM
#7
Drifting
Thread Starter
Day 3... sanded my valve covers starting off with scotch brite then I used a dremel with a fine wire wheel, I then finished it off with scotch brite again. The casting on the oem LS7 valve covers sucks and there is a lot of casting marks and pits... oh well, I may go back and really sand those spots down. I then blasted them down with some brake cleaner and cleaned them in the wash tub with dawn and dried them for paint. I then scuffed up the bracket a bit with scotch brite and rubbed it down with some reducer then shot it with some high temp red. The coil pack I just taped up the connector and plugged the plug hole with a cap, rubbed it down with some reducer only and shot it with some high temp black. I just did 1 bracket and 1 coil pack to make sure it came out the way I wanted it. I am letting it cure to see the results before I do the others.


Last edited by Breze84; 05-03-2014 at 01:47 AM.
05-04-2014, 06:18 PM
#9
Drifting
Thread Starter
DAY 4...Well yesterday I decided to pull my TB off because I wasn't happy with the oxidized gray aluminum look. Today I worked on everything from 7:45am-2:30pm. I got a lot done. I sanded and polished my TB which took a couple hrs, I block sanded my valve covers to get rid of any casting imperfections because I decided to just do them high temp gloss red instead of the wrinkle red. I also sanded and painted my other coil pack bracket and painted 3 more coil packs. I still have 4 more coil packs to paint and then I will high temp clear everything. Here are some pics...
First 10 mins of TB Sanding and Polishing


Here is the finished product. I ended up using my die grinder with a thin wire wheel, Then I went back with some scotch brite and finished up with some 4 ought steel wool. I used some never dull to bring out a shine.


First 10 mins of TB Sanding and Polishing


Here is the finished product. I ended up using my die grinder with a thin wire wheel, Then I went back with some scotch brite and finished up with some 4 ought steel wool. I used some never dull to bring out a shine.


 05-04-2014, 06:28 PM
#10
Drifting
Thread Starter
Here is me prepping a coil pack for paint, No scuffing, Just tapped up the connector and plugged the hole. I use a paint brush with reducer, It makes it easier to get in all the nooks then I blow it down with air and wipe it.

Here is the driver side valve cover prepped, tapped and getting sprayed


Here is the passenger side, Same gig as above


Here are both Valve covers done and drying


Here is the driver side valve cover prepped, tapped and getting sprayed


Here is the passenger side, Same gig as above


Here are both Valve covers done and drying


Last edited by Breze84; 05-04-2014 at 06:35 PM.


 05-05-2014, 08:56 AM
#17
Race Director

Member Since: Mar 2006
Location: Everywhere and Nowhere at all
Posts: 15,357
Received 1,679 Likes
on
1,135 Posts

#watching..... Very nice!
05-05-2014, 11:07 AM
#19
Race Director
