
My Mod Thread. CAUTION: Mod Bender Inside
 02-25-2014, 02:38 PM
#1
Starting with a stock C5 I performed all of the modifications in this thread. I did the interior, sound deadening, audio system, and supercharger in my garage. I sourced the headers, clutch, cam, valve train, and methanol kit through Joe@CPR in Mesa AZ.
The interior is mostly complete. I may make a few more minor changes. Performance upgrades are complete for the time being while I decide if I want to push the car past 600whp. I purchased HPTuners Pro and am currently learning to tune. The next round of upgrades will focus on the exterior: CF Hood, Rear bumpers, wide body, ground effects, and lights.
I've learned quite a bit along the way and documented progress in order to share lessons learned and hopefully give other enthusiasts ideas for their own builds.
Performance - 595whp/536tq
- A&A V3 Si supercharger (3.48" pulley)
- Kenne Bell Boost-a-Pump
- 60# Siemens injectors
- CPR/Ed Curtis custom cam
- Brian Tooley dual valve springs, chromoly pushrods
- Brian Tooley rocker arm trunion upgrade
- C5R timing chain
- Alkycontrol meth kit 100% meth
- McLeod RXT clutch and billet steel flywheel and remote bleeder
- 2bar MAP sensor/SD tune
- Kooks 1 7/8" headers/x-pipe
- GHL Bullets - 2014 USA built version
- AEM Failsafe wideband and fuel pressure gauges
- MGW short throw shifter
- Drilled/slotted rotors
- Stoptech Street Performance pads
- Stainless steel brake lines
Audio
- Kenwood DNX690HD, Kenwood x700/5 Amp
- Arc Audio XDI front and rear speakers
- Stealth sub box - Arc Audio XDI 10
- Double Din bezel mod
Interior
- Light Oak Ultimats
- Redline steering wheel cover, extra padding, thumb rests
- Redline shift boot and e-brake boot
- Delrin shift ****
- White LEDs for driver/passenger switches, DIC/HUD switches
- Damplifier, mass loaded vinyl, closed cell foam, extruded butyl rope
- Full cabin heat shield layer
- Blendmount and mirror tap for Beltronics radar detector
- Stealth02's custom phone mount
Exterior/Cosmetic
- TSW Nurburgrings 18/19 gunmetal machined face
- Hankook Ventus 285/35x19 rear, 245/40x18 front
- Front bumper re-spray
- 35% tint
Misc
- Compliance Parts shift skip eliminator
- Compliance Parts LMC5
- Strong Arm 4066 convertible trunk lift supports
- ARP crank bolt 234-2503
Shortlist/Wishlist
- Heads
- Forged internals
- ZR1 sway bars
- Ground effects, molded rear bumper, wide body rear quarters
- SLC v3 headlights

Before/After Pics
Before
Day after I got her home.

Bone stock interior.

After
MGW Short Throw Shifter

Damplifier, Heat Shield, Mass Loaded Vinyl

Soundsystem from Double D

Homemade Amp Cover. (Be gentle, I've never built one before)

Window Tint

GHL Catback Exhaust

Paint Correction (thanks for sharing your process Choreo) including a front bumper re-spray to take out some curb rash.

Drilled/slotted rotors, street performance pads, painted calipers, steel braided brake lines.

Gunmetal Mirror Finish Nurburgrings 18/19s and Hankook Ventus

Modified Bezel from Dennis. Leather Wheel Cover + Foam + Thumbs and e-brake/shift boot from Redline. Delrin Shift **** and White LEDS for window switches/traction control. Llloyd Mats. Blendmount and mirror tap for Radar Detector.

A&A v3SI Supercharger, 6 rib 3.48" pulley, Kenne Bell Boost-a-pump, Alkycontrol Meth kit, A&A MAF delete charge pipe.

AEM Wideband Failsafe and Fuel Pressure Gauges.

The interior is mostly complete. I may make a few more minor changes. Performance upgrades are complete for the time being while I decide if I want to push the car past 600whp. I purchased HPTuners Pro and am currently learning to tune. The next round of upgrades will focus on the exterior: CF Hood, Rear bumpers, wide body, ground effects, and lights.
I've learned quite a bit along the way and documented progress in order to share lessons learned and hopefully give other enthusiasts ideas for their own builds.
Performance - 595whp/536tq
- A&A V3 Si supercharger (3.48" pulley)
- Kenne Bell Boost-a-Pump
- 60# Siemens injectors
- CPR/Ed Curtis custom cam
- Brian Tooley dual valve springs, chromoly pushrods
- Brian Tooley rocker arm trunion upgrade
- C5R timing chain
- Alkycontrol meth kit 100% meth
- McLeod RXT clutch and billet steel flywheel and remote bleeder
- 2bar MAP sensor/SD tune
- Kooks 1 7/8" headers/x-pipe
- GHL Bullets - 2014 USA built version
- AEM Failsafe wideband and fuel pressure gauges
- MGW short throw shifter
- Drilled/slotted rotors
- Stoptech Street Performance pads
- Stainless steel brake lines
Audio
- Kenwood DNX690HD, Kenwood x700/5 Amp
- Arc Audio XDI front and rear speakers
- Stealth sub box - Arc Audio XDI 10
- Double Din bezel mod
Interior
- Light Oak Ultimats
- Redline steering wheel cover, extra padding, thumb rests
- Redline shift boot and e-brake boot
- Delrin shift ****
- White LEDs for driver/passenger switches, DIC/HUD switches
- Damplifier, mass loaded vinyl, closed cell foam, extruded butyl rope
- Full cabin heat shield layer
- Blendmount and mirror tap for Beltronics radar detector
- Stealth02's custom phone mount
Exterior/Cosmetic
- TSW Nurburgrings 18/19 gunmetal machined face
- Hankook Ventus 285/35x19 rear, 245/40x18 front
- Front bumper re-spray
- 35% tint
Misc
- Compliance Parts shift skip eliminator
- Compliance Parts LMC5
- Strong Arm 4066 convertible trunk lift supports
- ARP crank bolt 234-2503
Shortlist/Wishlist
- Heads
- Forged internals
- ZR1 sway bars
- Ground effects, molded rear bumper, wide body rear quarters
- SLC v3 headlights
Before/After Pics
Before
Day after I got her home.
Bone stock interior.
After
MGW Short Throw Shifter
Damplifier, Heat Shield, Mass Loaded Vinyl
Soundsystem from Double D
Homemade Amp Cover. (Be gentle, I've never built one before)
Window Tint
GHL Catback Exhaust
Paint Correction (thanks for sharing your process Choreo) including a front bumper re-spray to take out some curb rash.
Drilled/slotted rotors, street performance pads, painted calipers, steel braided brake lines.
Gunmetal Mirror Finish Nurburgrings 18/19s and Hankook Ventus
Modified Bezel from Dennis. Leather Wheel Cover + Foam + Thumbs and e-brake/shift boot from Redline. Delrin Shift **** and White LEDS for window switches/traction control. Llloyd Mats. Blendmount and mirror tap for Radar Detector.
A&A v3SI Supercharger, 6 rib 3.48" pulley, Kenne Bell Boost-a-pump, Alkycontrol Meth kit, A&A MAF delete charge pipe.
AEM Wideband Failsafe and Fuel Pressure Gauges.
Last edited by jmxp69; 09-02-2014 at 06:20 PM.
 02-25-2014, 04:19 PM
#2
FedEx guy stopped by today 

Still waiting for the Head Unit, but I've got the AMP, AMP Install Kit, Speaker Adapter Plates, F/R Speakers, Sub Box/Sub, Harness, Antenna Adapter, Mounting Brackets, RCA Cables, Speaker Wire

Fronts with crossovers and tweeters. The top case of the crossover box pops off for mounting.

Kenwood Excelon 700/5. Phone is a Droid Razr Maxx for size comparison purposes.

HPF/LPF/Sub Boost/Pre-Out Voltages and RCA in.

Power, Remote Power, Ground, and speaker out.

Stealth sub box with sub pre-installed. Need to find out if he wired the Dual Coil in series. FYI It's not ported.


Final barrier material arrived today. I picked up some black vinyl to cover the amp box and ordered some light oak colored piping.
The bottom layer is Damplifier CLD from Second Skin. The piece on the left is pre-cut insulation from Dennis. The center piece is Luxury Liner MLV (Mass Loaded Vinyl) and the right piece is Overkill CCF (Closed Cell Foam) both from Second Skin. CLD will cover about 25-30% of the interior panels as well as the inside of the outer door skin. Insulation lays on top of that followed by MLV just about everywhere and CCF where there is possible friction noise. I won't be using CCF under carpet on horizontal surfaces. It'll mainly go between body parts and trim panels. This MLV is incredibly heavy and dense. I suspect that's why it's such an effective sound absorber. None of the other materials weigh anywhere near as much as the MLV. Guess I'll have to add that CAI, Cam, Headers, and Tune to make up for the extra weight.

Here's the black vinyl for the amp box. I sent the wife to a fabric store for this. Light Oak piping will be here Friday.

Blendmount and Mirrortap arrived today. Finally no more damn suction cups on the glass.

Time to get over to Home Depot for some MDF
Got started on the amp rack today. 3/4" MDF will be liquid nailed to the cargo floor behind the waterfall. I'm leaving about 3/4" between the back of the mounting board and the bulkhead as a channel for routing wires in and out.

There will only be three sides holding up the beauty panel. I used the 2nd long side in the back to help keep everything square for assembly. The sides are 3/4" redwood for rigidity.

One of my favorite tools: Kreg pocket hole jig.

Couple of quick pocket hole screws and I have a frame.

Base, Frame, and Beauty panel are cut to size.

Time to center the amp and transfer to the beauty panel.

I clamped hardwood down as a jig. I can't cut a straight line to save my life.

Beauty panel is cut. I had to make another run at this because the initial cutout was too close to the amp. So I shaved another 1/4" off each side.

Ta'Da

This is where it goes in the car. I've actually been thinking about mounting the tweeters on those side panels. Wonder how that would sound???

Yep, clears the glass. Only a floppy piece of fabric from the top touches the box. Yay.

Time to round the corners with the router.

3/8" Roundover router bit.

A little light sanding to blend the corners for the beauty plate and the side rails.

Ready for covering.

Laid out the vinyl and cut on top a clean piece of cardboard.

Sprayed contact adhesive on the back of the vinyl...

…and the MDF.

Started on the top side with the two side panels then just wrapped around the edges.

Looks good. On to the base.

Just cut a strip to wrap around the face of the base. Tops and bottoms don't matter too much because the top will mesh against the beauty plate and the bottom is going to get some other treatment I haven't decided on yet.

I painted the base so the wood color doesn't show through. Used gloss black followed by 0000 steel wool, then 1000/1200/1500 grit wet. It looks much better in person but it's just a little detail because 99% of it will be covered. It'll only show if I have the beauty cover off for some reason.

All done. I have some Light Oak vinyl piping on the way. That will get laid in the seam between the beauty panel and base. Then I'll clamp and screw the whole thing together from the inside using L brackets. Just waiting on piping.

I'd also like to get some Corvette Emblems for those side panels but not @ $60 each. Stickers are out too. Any ideas?
Barriers and Sound System Install
Everything is here, so it’s time to start taking the interior apart.

You can find automotive interior tool kits all over the place. I think I got mine on Amazon for not too much money. I strongly encourage using tools like this instead of screwdrivers/pliers. They’re plastic safe and don’t damage the part you’re removing or the pain.

Seats and console removed

My interior tool kit comes in handy again. This can be pried up with fingers.

Carpet out.

Interior toolkit comes in handy again. Remove these beauty covers behind the door handle.

I followed a guide that said to just pull on the bottom of the door card. This is what happens if you do it wrong. So….I went back to using my toolkit to pry the pins out. Fortunately I bought spare door pins so I had a replacement handy.

A little epoxy fixed it right up.

You couldn’t tell it broke

Interior is stripped. Time to get to work. By the way, it took just about 1 hour to take the entire interior out.

Butyl Rope I got from Don.

The rubber seal on the left of this pic has to come off. It uses a butyl adhesive so don’t worry, it just sticks right back on when you’re done. Just get your fingers between the butyl and the door and work your way around pulling it from the door.

Lay the rope down between the door support tubes and the outer skin. I left it standing up on the right above the support to show where you lay it down.

This is a crappy pic, but I included it to show you need to leave gaps between pieces of rope to allow any moisture to escape. If you look at the close to center above the support, you’ll see a gap between ends of the rope.

CLD Install
You DO NOT need to lay CLD down over the entire surface of the car. See sounddeadenershowdown.com for guidance. Basically I tried to cover about 25-30% of each panel. These are pieces I laid down on the outer door skin.

More down at the bottom of the door. Again, not going for complete coverage.

Another piece behind the speaker. Makes sense to do this because speaker back pressure hits in this area.

Passenger footwell and tunnel. I’m probably closer to 50% coverage here, but I think this area is responsible for quite a bit of the resonance noise in the cabin. Same on other side.

Behind passenger seat. This is a ridiculously noisy panel. It rattles quite a bit without dampening. Adding panels here made a very noticeable difference.

Notice the top left of the pic: I laid strips of CLD in the grooves. Then two big strips on the downslope and a large strip in the bottom of the well. Sub goes here so I wanted to firm this up.

Back bulkhead. Another area that benefited noticeably with CLD

A few more pieces round out the cargo area. Make sure to put some on the wheel well.

Heat Barrier
Time for heat protection. This does nothing for sound deadening. It’s strictly a temperature control measure. It’s very light weight too, so well worth the time to cover the whole cabin.
This stuff is pretty easy to put in. I got the kit from Dennis, but I believe it’s a Vettemods kit. It is cut perfectly. I was surprised at the quality of this kit. It has every piece you need to cover the inside and the cuts are very accurate. I had a few little trims to make, but nothing worth note.

Lay the material in first. Don’t tape ANYTHING until every piece is ‘roughed in’.

View from passenger side. Make sure to pull electrical connections through for each layer. You don’t want to pull all this stuff up because you buried a wire.

With every part laid down, you can now start to tape. I tried to cover all the seams. Once you start connecting major panels the whole thing firms up and stays put. You do not have to tape it to the car in more than a few spots.

All done. I enjoyed this part of the project. It was very easy and I’m sure will make a tremendous difference during the hot Arizona summer.

MLV Time
MLV is Mass Loaded Vinyl. It’s purpose is to stop airborne noise. CLD is used to stop resonant noise. They are very different issues and require different solutions. MLV is very heavy compared to the other barriers. Don recommence making a bubble, but frankly I don’t think that’s possible in the Vette. I was concerned after laying this down some parts wouldn’t fit and my concerns turned out to be accurate so I had to remove a couple of pieces just to get the interior parts to come together.
FYI: MLV only bends in one direction. So you have to think about your strategy before you start cutting and laying pieces down.
Shown here is the drivers floorboard. I used the floor mat as a template and it turned out to be a great idea. the MLV fit perfectly. I laid the mat down on the MLV and traced around it with my box knife while extending the straight edge of the mat to the end of the MLV to make a nice long single piece. This goes from behind the pedals all the way to the rear seat bolts. Of course you have to cut holes for the front seat bolts.

To make the piece for behind the seats, I just flipped the mat over and used it as a template again. This was a brainstorm and worked perfectly. Again, extend the cuts upward after the curve for the tunnel.

Here is the back piece laid in.

Just use your knife and trim around curves. It’s easy to do while inside the car—no need to remove the MLV for trimming.

Here’s what I mean about using the floor mats as a template and what I mean about extending the cuts. You can see after the curve, this passenger side pice is trimmed well beyond the end of the mat.

The passenger MLV goes from the passenger floorboard electronics cover all the way to the rear bulked in one piece. Again, cut around electronics and seat bolt holes and don’t forget to pull wires through each layer.

Sound Install
I want to meet the guy who designed these rivets and that support plate. It’s the toughest little piece of metal in the world. It ate a sawzall and a hacksaw. It wouldn’t withstand a cutting disc on my dremel though!

Opa! Head unit works.

Yes, it’s a mess. I found this the most convenient spot to sit while working on the wiring though. I was actually pretty comfy.

Speaker adapter plates from Stealth (Thanks Stealth!). These are awesome plates, very sturdy. Crossover, speaker and tweeter installed.

Here’s the back. I clamped the excess wire to prevent rattles and cut the screw tips off.

Amp fuse installed and connected to battery. During all this I managed to drain my battery. I KNOW I didn’t disconnect ground. Anyway, I used it as an excuse to go get an Optima. Once I have a battery drain I never trust it again. My own fault, but hey, I got a much nicer replacement with top mounts

Test fit of sub box. Needed to make sure it would go in ok with all these layers. Also, more MLV laid down in the cargo area. I didn’t glue this stuff down but I don’t think it’s going anywhere. You can also see the amp base and amp wired up for testing.

Fits like a glove. It’s tight, but a little encouragement and she settled right in.

More MLV in the cubbies. I have the feeling these are just echo chambers for noise.

I made lots of room around the amp so the beauty cover can slide in and not sit too high.

Speakers mounted to the driver door….

…and passenger door. If I did this again, I’d swap the locations of the tweeter and crossover to put the tweeter closer to the speaker grill. I may revisit that someday.

Time to mount the amp rack base. I drilled 4 holes 1.5” in from each edge and, centered the board, and used the pencil to mark where the bolts would be mounted on the floor. Also notice I removed all the barrier material. I want this amp rack sitting as low as possible to avoid contact with the ragtop. This is also one of the few areas I taped MLV down. Didn’t want those panels sliding into the large cubby.

Bolts JB Welded to the floor.

While the JB Weld was still moveable, I set the board over each post to make sure they were in the correct position. I propped the board up with the pencils to make sure it didn’t bond to the JB Weld underneath.

Re-assembly
This is a great time to really clean the carpet. I vacuumed and scrubbed with upholstery cleaner. Those carpets haven’t been this clean since the day it left the showroom. I guarantee it.

Ahhh, Fresh and clean. Use a work table. By this point in the project my back and knees were about shot.

Back carpet laid in with a few holes made for the bolts and a few slits for the wires.

Seats tucked in along with all the trip pieces. That head unit looks great doesn’t it? Looking forward to getting my bezel back from Dennis. It’s going to be 4 weeks!

Amp looking great! I still need to tidy up the wires with some clamps I bought to screw them to the board.

Same thing over here. I’ll clamp that stuff down later.

Cover fits just as planned. I haven’t figured out yet how I’ll attach it, but that’s a trivial issues at this point. Still don’t have my light oak piping yet either.

Amp Cover v2.0
I wasn't happy with the piping. I was going to use it to hide the seam between the top and bottom pieces of the cover. Unfortunately while stapling the piping down, it gets sideways and looks wavy. So....I scrapped the first cover and made another one. I used a rabbit bit on the router to create a shelf for the vinyl and staples while providing a more flush fit between the top and bottom. It's still not perfect and I may take yet another run at this and just paint the darn thing. It could just be me and my OCD though.
RCA cables tied and clamped to the mounting board...

...ditto for power and ground.

v2.0 of the cover. Notice the rounded internal corners. Yeah, I learned the first time 90 degree cuts don't wrap well. I managed to hide it, but I knew it was there and it pissed me off.

Fits a little better than the previous one too.

Ok, off to next project.

She’s back together and sounds fantastic.

There’s no question in my mind about the improvement in sound characteristics in the cabin. I can still hear those damn run flats and it’s never going to be a BMW but the cabin experience is just night and day. And yes, the sound system is all that. Far superior to the stock Bose experience top up or down. Going down the freeway at 75 and the sound is crystal clear. Nav and Bluetooth are nice bonuses too.
Stay tuned. I have the catbacks in-hand. I would have installed them today if I could have tracked down an exhaust flange gasket. So I’ll have to wait till next weekend. I’m sure my back thanks me for the delay.
Still waiting for the Head Unit, but I've got the AMP, AMP Install Kit, Speaker Adapter Plates, F/R Speakers, Sub Box/Sub, Harness, Antenna Adapter, Mounting Brackets, RCA Cables, Speaker Wire
Fronts with crossovers and tweeters. The top case of the crossover box pops off for mounting.
Kenwood Excelon 700/5. Phone is a Droid Razr Maxx for size comparison purposes.
HPF/LPF/Sub Boost/Pre-Out Voltages and RCA in.
Power, Remote Power, Ground, and speaker out.
Stealth sub box with sub pre-installed. Need to find out if he wired the Dual Coil in series. FYI It's not ported.
Final barrier material arrived today. I picked up some black vinyl to cover the amp box and ordered some light oak colored piping.
The bottom layer is Damplifier CLD from Second Skin. The piece on the left is pre-cut insulation from Dennis. The center piece is Luxury Liner MLV (Mass Loaded Vinyl) and the right piece is Overkill CCF (Closed Cell Foam) both from Second Skin. CLD will cover about 25-30% of the interior panels as well as the inside of the outer door skin. Insulation lays on top of that followed by MLV just about everywhere and CCF where there is possible friction noise. I won't be using CCF under carpet on horizontal surfaces. It'll mainly go between body parts and trim panels. This MLV is incredibly heavy and dense. I suspect that's why it's such an effective sound absorber. None of the other materials weigh anywhere near as much as the MLV. Guess I'll have to add that CAI, Cam, Headers, and Tune to make up for the extra weight.
Here's the black vinyl for the amp box. I sent the wife to a fabric store for this. Light Oak piping will be here Friday.
Blendmount and Mirrortap arrived today. Finally no more damn suction cups on the glass.
Time to get over to Home Depot for some MDF
Got started on the amp rack today. 3/4" MDF will be liquid nailed to the cargo floor behind the waterfall. I'm leaving about 3/4" between the back of the mounting board and the bulkhead as a channel for routing wires in and out.
There will only be three sides holding up the beauty panel. I used the 2nd long side in the back to help keep everything square for assembly. The sides are 3/4" redwood for rigidity.
One of my favorite tools: Kreg pocket hole jig.
Couple of quick pocket hole screws and I have a frame.
Base, Frame, and Beauty panel are cut to size.
Time to center the amp and transfer to the beauty panel.
I clamped hardwood down as a jig. I can't cut a straight line to save my life.
Beauty panel is cut. I had to make another run at this because the initial cutout was too close to the amp. So I shaved another 1/4" off each side.
Ta'Da
This is where it goes in the car. I've actually been thinking about mounting the tweeters on those side panels. Wonder how that would sound???
Yep, clears the glass. Only a floppy piece of fabric from the top touches the box. Yay.
Time to round the corners with the router.
3/8" Roundover router bit.
A little light sanding to blend the corners for the beauty plate and the side rails.
Ready for covering.
Laid out the vinyl and cut on top a clean piece of cardboard.
Sprayed contact adhesive on the back of the vinyl...
…and the MDF.
Started on the top side with the two side panels then just wrapped around the edges.
Looks good. On to the base.
Just cut a strip to wrap around the face of the base. Tops and bottoms don't matter too much because the top will mesh against the beauty plate and the bottom is going to get some other treatment I haven't decided on yet.
I painted the base so the wood color doesn't show through. Used gloss black followed by 0000 steel wool, then 1000/1200/1500 grit wet. It looks much better in person but it's just a little detail because 99% of it will be covered. It'll only show if I have the beauty cover off for some reason.
All done. I have some Light Oak vinyl piping on the way. That will get laid in the seam between the beauty panel and base. Then I'll clamp and screw the whole thing together from the inside using L brackets. Just waiting on piping.
I'd also like to get some Corvette Emblems for those side panels but not @ $60 each. Stickers are out too. Any ideas?
Barriers and Sound System Install
Everything is here, so it’s time to start taking the interior apart.
You can find automotive interior tool kits all over the place. I think I got mine on Amazon for not too much money. I strongly encourage using tools like this instead of screwdrivers/pliers. They’re plastic safe and don’t damage the part you’re removing or the pain.
Seats and console removed
My interior tool kit comes in handy again. This can be pried up with fingers.
Carpet out.
Interior toolkit comes in handy again. Remove these beauty covers behind the door handle.
I followed a guide that said to just pull on the bottom of the door card. This is what happens if you do it wrong. So….I went back to using my toolkit to pry the pins out. Fortunately I bought spare door pins so I had a replacement handy.
A little epoxy fixed it right up.
You couldn’t tell it broke
Interior is stripped. Time to get to work. By the way, it took just about 1 hour to take the entire interior out.
Butyl Rope I got from Don.
The rubber seal on the left of this pic has to come off. It uses a butyl adhesive so don’t worry, it just sticks right back on when you’re done. Just get your fingers between the butyl and the door and work your way around pulling it from the door.
Lay the rope down between the door support tubes and the outer skin. I left it standing up on the right above the support to show where you lay it down.
This is a crappy pic, but I included it to show you need to leave gaps between pieces of rope to allow any moisture to escape. If you look at the close to center above the support, you’ll see a gap between ends of the rope.
CLD Install
You DO NOT need to lay CLD down over the entire surface of the car. See sounddeadenershowdown.com for guidance. Basically I tried to cover about 25-30% of each panel. These are pieces I laid down on the outer door skin.
More down at the bottom of the door. Again, not going for complete coverage.
Another piece behind the speaker. Makes sense to do this because speaker back pressure hits in this area.
Passenger footwell and tunnel. I’m probably closer to 50% coverage here, but I think this area is responsible for quite a bit of the resonance noise in the cabin. Same on other side.
Behind passenger seat. This is a ridiculously noisy panel. It rattles quite a bit without dampening. Adding panels here made a very noticeable difference.
Notice the top left of the pic: I laid strips of CLD in the grooves. Then two big strips on the downslope and a large strip in the bottom of the well. Sub goes here so I wanted to firm this up.
Back bulkhead. Another area that benefited noticeably with CLD
A few more pieces round out the cargo area. Make sure to put some on the wheel well.
Heat Barrier
Time for heat protection. This does nothing for sound deadening. It’s strictly a temperature control measure. It’s very light weight too, so well worth the time to cover the whole cabin.
This stuff is pretty easy to put in. I got the kit from Dennis, but I believe it’s a Vettemods kit. It is cut perfectly. I was surprised at the quality of this kit. It has every piece you need to cover the inside and the cuts are very accurate. I had a few little trims to make, but nothing worth note.
Lay the material in first. Don’t tape ANYTHING until every piece is ‘roughed in’.
View from passenger side. Make sure to pull electrical connections through for each layer. You don’t want to pull all this stuff up because you buried a wire.
With every part laid down, you can now start to tape. I tried to cover all the seams. Once you start connecting major panels the whole thing firms up and stays put. You do not have to tape it to the car in more than a few spots.
All done. I enjoyed this part of the project. It was very easy and I’m sure will make a tremendous difference during the hot Arizona summer.
MLV Time
MLV is Mass Loaded Vinyl. It’s purpose is to stop airborne noise. CLD is used to stop resonant noise. They are very different issues and require different solutions. MLV is very heavy compared to the other barriers. Don recommence making a bubble, but frankly I don’t think that’s possible in the Vette. I was concerned after laying this down some parts wouldn’t fit and my concerns turned out to be accurate so I had to remove a couple of pieces just to get the interior parts to come together.
FYI: MLV only bends in one direction. So you have to think about your strategy before you start cutting and laying pieces down.
Shown here is the drivers floorboard. I used the floor mat as a template and it turned out to be a great idea. the MLV fit perfectly. I laid the mat down on the MLV and traced around it with my box knife while extending the straight edge of the mat to the end of the MLV to make a nice long single piece. This goes from behind the pedals all the way to the rear seat bolts. Of course you have to cut holes for the front seat bolts.
To make the piece for behind the seats, I just flipped the mat over and used it as a template again. This was a brainstorm and worked perfectly. Again, extend the cuts upward after the curve for the tunnel.
Here is the back piece laid in.
Just use your knife and trim around curves. It’s easy to do while inside the car—no need to remove the MLV for trimming.
Here’s what I mean about using the floor mats as a template and what I mean about extending the cuts. You can see after the curve, this passenger side pice is trimmed well beyond the end of the mat.
The passenger MLV goes from the passenger floorboard electronics cover all the way to the rear bulked in one piece. Again, cut around electronics and seat bolt holes and don’t forget to pull wires through each layer.
Sound Install
I want to meet the guy who designed these rivets and that support plate. It’s the toughest little piece of metal in the world. It ate a sawzall and a hacksaw. It wouldn’t withstand a cutting disc on my dremel though!
Opa! Head unit works.
Yes, it’s a mess. I found this the most convenient spot to sit while working on the wiring though. I was actually pretty comfy.
Speaker adapter plates from Stealth (Thanks Stealth!). These are awesome plates, very sturdy. Crossover, speaker and tweeter installed.
Here’s the back. I clamped the excess wire to prevent rattles and cut the screw tips off.
Amp fuse installed and connected to battery. During all this I managed to drain my battery. I KNOW I didn’t disconnect ground. Anyway, I used it as an excuse to go get an Optima. Once I have a battery drain I never trust it again. My own fault, but hey, I got a much nicer replacement with top mounts
Test fit of sub box. Needed to make sure it would go in ok with all these layers. Also, more MLV laid down in the cargo area. I didn’t glue this stuff down but I don’t think it’s going anywhere. You can also see the amp base and amp wired up for testing.
Fits like a glove. It’s tight, but a little encouragement and she settled right in.
More MLV in the cubbies. I have the feeling these are just echo chambers for noise.
I made lots of room around the amp so the beauty cover can slide in and not sit too high.
Speakers mounted to the driver door….
…and passenger door. If I did this again, I’d swap the locations of the tweeter and crossover to put the tweeter closer to the speaker grill. I may revisit that someday.
Time to mount the amp rack base. I drilled 4 holes 1.5” in from each edge and, centered the board, and used the pencil to mark where the bolts would be mounted on the floor. Also notice I removed all the barrier material. I want this amp rack sitting as low as possible to avoid contact with the ragtop. This is also one of the few areas I taped MLV down. Didn’t want those panels sliding into the large cubby.
Bolts JB Welded to the floor.
While the JB Weld was still moveable, I set the board over each post to make sure they were in the correct position. I propped the board up with the pencils to make sure it didn’t bond to the JB Weld underneath.
Re-assembly
This is a great time to really clean the carpet. I vacuumed and scrubbed with upholstery cleaner. Those carpets haven’t been this clean since the day it left the showroom. I guarantee it.
Ahhh, Fresh and clean. Use a work table. By this point in the project my back and knees were about shot.
Back carpet laid in with a few holes made for the bolts and a few slits for the wires.
Seats tucked in along with all the trip pieces. That head unit looks great doesn’t it? Looking forward to getting my bezel back from Dennis. It’s going to be 4 weeks!
Amp looking great! I still need to tidy up the wires with some clamps I bought to screw them to the board.
Same thing over here. I’ll clamp that stuff down later.
Cover fits just as planned. I haven’t figured out yet how I’ll attach it, but that’s a trivial issues at this point. Still don’t have my light oak piping yet either.
Amp Cover v2.0
I wasn't happy with the piping. I was going to use it to hide the seam between the top and bottom pieces of the cover. Unfortunately while stapling the piping down, it gets sideways and looks wavy. So....I scrapped the first cover and made another one. I used a rabbit bit on the router to create a shelf for the vinyl and staples while providing a more flush fit between the top and bottom. It's still not perfect and I may take yet another run at this and just paint the darn thing. It could just be me and my OCD though.
RCA cables tied and clamped to the mounting board...
...ditto for power and ground.
v2.0 of the cover. Notice the rounded internal corners. Yeah, I learned the first time 90 degree cuts don't wrap well. I managed to hide it, but I knew it was there and it pissed me off.
Fits a little better than the previous one too.
Ok, off to next project.
She’s back together and sounds fantastic.
There’s no question in my mind about the improvement in sound characteristics in the cabin. I can still hear those damn run flats and it’s never going to be a BMW but the cabin experience is just night and day. And yes, the sound system is all that. Far superior to the stock Bose experience top up or down. Going down the freeway at 75 and the sound is crystal clear. Nav and Bluetooth are nice bonuses too.
Stay tuned. I have the catbacks in-hand. I would have installed them today if I could have tracked down an exhaust flange gasket. So I’ll have to wait till next weekend. I’m sure my back thanks me for the delay.
Last edited by jmxp69; 06-17-2014 at 01:57 AM.
02-25-2014, 04:28 PM
#3
MGW Short Throw Shifter
MGW Short Throw Shifter, and Southern Car Parts Driver/Passenger/HUD/DIC White LEDS came today.
I'm impressed with the MGW packaging and completeness of the kit. Looking forward to getting this bad boy in there.

Time to say goodbye to the stock interior forever. The bezel will be shipped off to Dennis tomorrow and I'll be starting the sound system install this Saturday so no point in putting anything back together after I get started.

Console is out. That was easy.

Stock shifter compared to MGW. Words can't express the quality difference between these two parts. The stock shifter/housing is stamped metal with a plastic cup on the shifter ball. The MGW is just better engineered and uses much higher quality materials. I hit the linkage shaft with 0000 stainless wool just to clean it up and make sure it was nice and smooth for the MGW bushings.

MGW is nice enough to include a small sheet of Dynamat for the torque tube...

...and some foam for heat insulation. It's a little fiddly getting it in there, but the Youtube MGW install video explains it well.

Lower box installed.

Apparently MGW has had a lot of complaints about excess noise coming from the tunnel/console area after installing their shifter. The MGW install video does a great job showing the proper way to cut the rubber base so it fits properly around the MGW. This is the way it is supposed to look.

This is what it looks like installed. It's obvious to me there will be no additional noise over stock when cut properly.

I took it for a test drive and the shifter box slipped a little because I suddenly had a helluva time getting it back into first. When I removed the rubber base it was obvious the lower box bolts weren't tight enough because I could move the box by hand. I just re-centered it and torqued it down a little tighter--problem solved.
All-in this upgrade probably took about an hour. I took my time and just enjoyed tinkering on my car. I am flat blown away with this one. The shifter is soooooooo much better. Yes, it's a little more firm, but the gates are far more positive than the stock unit. Redline short leather boot with tan stitching is in the mail along with a black delrin ****. They'll round out the install.
Window Switch LEDs
It took be about 10 minutes to swap the LEDS in on the driver/passenger switches. They match the color of the dash gauges really well. Here's a pic. Easy, cheap, and nice update.

These are incredibly handy little tools. I have a set with various angles. Great for removing little trim tidbits like the ambient air temp sensor cover.

LLoyd Mats
LLoyd Mats came today. Love em!


Redline Shift Boots
Redline shift boots are black with sierra (tan) stitching. The shift boot is -1" from stock. Delrin ball is from Product Innovations. Unfortunately the shift boot will have to wait for my bezel to come back from Dennis. The e-brake boot and **** will go on after the upcoming sound deadening/stereo install this weekend. I may get a white grease pencil and fill-in the shift pattern. The picture doesn't show it, but the pattern is engraved on the top.

Window Tint - Shane's Tint Glendale
35% all around - Arizona legal max tint for sides. At night these will probably almost appear black from the outside. I've done 20% before and didn't like how much it obstructed night vision especially while turning. So I get the benefit of being legal and safe! Shane at Shane's Tint and Clear Bra handles all Vettes. He did a great job.

GHL Catbacks
Installed the GHL Bullets tonight. Another pretty easy job. I know there have been lots of documented issues with GHL lately. When I found out they are headquartered in Scottsdale, I gave Jeff my number and we arranged for me to see the pipes before ordering. We met up and he showed me the latest incarnation of the Bullets. He acknowledged what a disaster it was to outsource manufacturing of his pipes along with the damage it did to his brand. Since then, he's relocated manufacturing back to the US and has some experienced manufacturers building to his spec. He also started from scratch with his jig with an actual C5 test platform.
I can tell you from my experience with this latest revision, GHL should come back with a vengeance. The pipes fit perfectly. The tips look great, the flanges married right up to the H-pipe, the welds were clearly done by a professional with lots of experience. I couldn't be happier with the quality of this setup.
On to the sound: Startup from cold and idling you're greeted with the nice low rumble you've heard on so many Youtube clips. Driving out of the neighborhood with low throttle will not disturb your neighbors. Once you get on the throttle--boom! Nice (but not obnoxious) tones out back. I tried a range of speeds and RPM combos to see if I could get them to drone. 45/55/65/70 and nothing, just a nice mellow rumble. Nothing unusual to report on deceleration either. Same mellow rumble.
Downside: They're probably not as loud as I thought they'd be sitting in the car. I want to get someone to drive away and drive-by for me to see what it sounds like outside.
Overall, I'm perfectly happy with the fit/finish and just excellent tone qualities of the GHL Bullets. I hope Jeff continues to put out a quality update for those of you who are interested in options other than Corsa/Borla.
You know what this means! It's time

Those damn gaskets are hard to find and FAR too expensive. I bit the bullet and got new ones although I've heard from several folks they've reused old ones. My luck doesn't work that way. Had I taken it apart without new replacements, they would have dropped in pieces. I also got a loaner chain cutter from AutoZone.

Drop the sway bar and start unbolting. I wanted to make sure I could get the bolts off the flange before cutting the pipe. No problem. On the passenger side I cut the pipe first. Highly recommend cutting before unbolting, it makes the cut go much faster. You can cut just about anywhere aft of the axle. I just found a spot on each side that gave me room to operate the chain cutter.

I pulled the passenger side over-axle pipe out from the front and I re-installed the GHL piece from the front.

Here are the pieces ready for install. Unfortunately it got dark by the time I was done so camera pics were pretty bad. I'll try to get a final shot in daylight tomorrow.

Redline Leather Wheel Cover
I ordered a leather wheel wrap from Redline on Tuesday. Unfortunately they have about a week lead time on shipping covers so I won't have pics of that install for a while yet. I decided to get the donor wheel ready though. I found a local spares guy who sold me a wheel for $50. I figured this was a safer option than taking mine apart and cutting into it since I've never done a stitched cover with added foam and thumb rests. Now I can get it right on the donor wheel before taking my wheel out. By the way, I'll be putting my original wheel up for sale for $50 when I'm done. I searched around and they tend to go for ~$100-$145. So I'm just going to pay it forward.
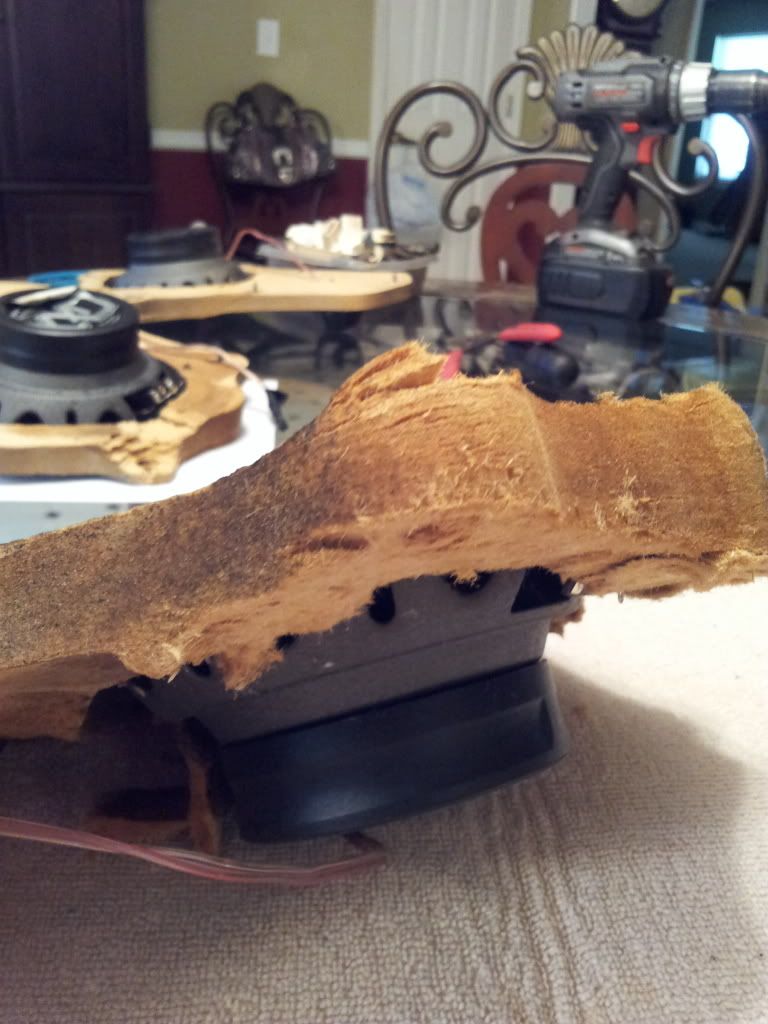
Ok, here we go. Donor wheel, so I feel brave FYI: The plastic bucket on the back easily pops off. My bucket is in better shape than this one, so I'll use mine when I have my original wheel off.

It's pretty easy to remove the old vinyl. GM didn't use much glue. It was good to see how much they used for when I add my Redline cover. Just get a good sharp blade and start cutting the stitching along the circumference of the wheel.

After I got started, I realized it was easier to cut the stitches at the spokes first. It doesn't much matter though. Just gotta go all the way around.

Here it is with all the stitching cut and with the cover peeled back from the wheel. I fiddled around trying to remove the cover whole for about 30 seconds and got tired of that so I just cut it perpendicular to the wheel and peeled it off.

I haven't confirmed it yet, but I'm sure the padding under the cover is supposed to stay on. I'll know instantly when my cover/additional padding arrives. It looks to be a pretty significant undertaking to remove it so I left it alone.
That's all I've got for now. I'll get more pics up when the new cover arrives.
Brake Install
Decided with the new wheels on order, I'd go ahead and take a swing at the brakes. I upgraded to Stainless Steel brakelines from the auction site. Stoptech Steet Performance Pads and Brakemotive Drilled/Slotted rotors. It was a pretty uneventful install with one exception. After I connected the caliper side of the SS brakelines and connected the Motive power bleeder, brake fluid started pissing out of the SS line like a russian race horse. Turns out--in my zeal to git 'er done, I neglected to tighten the SS line connection to the banjo fitting. Anyway, two sets of copper washers and half a bottle of brake fluid later I figured it out.
Fedex and UPS guys were busy yesterday and today.

The single biggest hassle to this point is releasing the brake caliper mounting bracket bolts. They're torqued to 125ft/lbs., so have a breaker bar handy.

Stainless line connected. I altered this procedure on the passenger side. I fixed the line to the caliper and mounted everything back up before disconnecting the hard line. With the caliper mounted and the SS line attached, the hardline connection took just a minute and made bleeding a very short affair.

Had to paint 'em. I sanded the Corvette letters off with a dremel.

New rotors on, mounting bracket painted. Just about ready to put it all back together. Quick wipe down of the rotors with brake cleaner, some copper grease on the back of the pads, quick piston reset with a piston spreader and it all went back together nicely.

Done.

MGW Short Throw Shifter, and Southern Car Parts Driver/Passenger/HUD/DIC White LEDS came today.
I'm impressed with the MGW packaging and completeness of the kit. Looking forward to getting this bad boy in there.
Time to say goodbye to the stock interior forever. The bezel will be shipped off to Dennis tomorrow and I'll be starting the sound system install this Saturday so no point in putting anything back together after I get started.
Console is out. That was easy.
Stock shifter compared to MGW. Words can't express the quality difference between these two parts. The stock shifter/housing is stamped metal with a plastic cup on the shifter ball. The MGW is just better engineered and uses much higher quality materials. I hit the linkage shaft with 0000 stainless wool just to clean it up and make sure it was nice and smooth for the MGW bushings.
MGW is nice enough to include a small sheet of Dynamat for the torque tube...
...and some foam for heat insulation. It's a little fiddly getting it in there, but the Youtube MGW install video explains it well.
Lower box installed.
Apparently MGW has had a lot of complaints about excess noise coming from the tunnel/console area after installing their shifter. The MGW install video does a great job showing the proper way to cut the rubber base so it fits properly around the MGW. This is the way it is supposed to look.
This is what it looks like installed. It's obvious to me there will be no additional noise over stock when cut properly.
I took it for a test drive and the shifter box slipped a little because I suddenly had a helluva time getting it back into first. When I removed the rubber base it was obvious the lower box bolts weren't tight enough because I could move the box by hand. I just re-centered it and torqued it down a little tighter--problem solved.
All-in this upgrade probably took about an hour. I took my time and just enjoyed tinkering on my car. I am flat blown away with this one. The shifter is soooooooo much better. Yes, it's a little more firm, but the gates are far more positive than the stock unit. Redline short leather boot with tan stitching is in the mail along with a black delrin ****. They'll round out the install.
Window Switch LEDs
It took be about 10 minutes to swap the LEDS in on the driver/passenger switches. They match the color of the dash gauges really well. Here's a pic. Easy, cheap, and nice update.
These are incredibly handy little tools. I have a set with various angles. Great for removing little trim tidbits like the ambient air temp sensor cover.
LLoyd Mats
LLoyd Mats came today. Love em!
Redline Shift Boots
Redline shift boots are black with sierra (tan) stitching. The shift boot is -1" from stock. Delrin ball is from Product Innovations. Unfortunately the shift boot will have to wait for my bezel to come back from Dennis. The e-brake boot and **** will go on after the upcoming sound deadening/stereo install this weekend. I may get a white grease pencil and fill-in the shift pattern. The picture doesn't show it, but the pattern is engraved on the top.
Window Tint - Shane's Tint Glendale
35% all around - Arizona legal max tint for sides. At night these will probably almost appear black from the outside. I've done 20% before and didn't like how much it obstructed night vision especially while turning. So I get the benefit of being legal and safe! Shane at Shane's Tint and Clear Bra handles all Vettes. He did a great job.
GHL Catbacks
Installed the GHL Bullets tonight. Another pretty easy job. I know there have been lots of documented issues with GHL lately. When I found out they are headquartered in Scottsdale, I gave Jeff my number and we arranged for me to see the pipes before ordering. We met up and he showed me the latest incarnation of the Bullets. He acknowledged what a disaster it was to outsource manufacturing of his pipes along with the damage it did to his brand. Since then, he's relocated manufacturing back to the US and has some experienced manufacturers building to his spec. He also started from scratch with his jig with an actual C5 test platform.
I can tell you from my experience with this latest revision, GHL should come back with a vengeance. The pipes fit perfectly. The tips look great, the flanges married right up to the H-pipe, the welds were clearly done by a professional with lots of experience. I couldn't be happier with the quality of this setup.
On to the sound: Startup from cold and idling you're greeted with the nice low rumble you've heard on so many Youtube clips. Driving out of the neighborhood with low throttle will not disturb your neighbors. Once you get on the throttle--boom! Nice (but not obnoxious) tones out back. I tried a range of speeds and RPM combos to see if I could get them to drone. 45/55/65/70 and nothing, just a nice mellow rumble. Nothing unusual to report on deceleration either. Same mellow rumble.
Downside: They're probably not as loud as I thought they'd be sitting in the car. I want to get someone to drive away and drive-by for me to see what it sounds like outside.
Overall, I'm perfectly happy with the fit/finish and just excellent tone qualities of the GHL Bullets. I hope Jeff continues to put out a quality update for those of you who are interested in options other than Corsa/Borla.
You know what this means! It's time
Those damn gaskets are hard to find and FAR too expensive. I bit the bullet and got new ones although I've heard from several folks they've reused old ones. My luck doesn't work that way. Had I taken it apart without new replacements, they would have dropped in pieces. I also got a loaner chain cutter from AutoZone.
Drop the sway bar and start unbolting. I wanted to make sure I could get the bolts off the flange before cutting the pipe. No problem. On the passenger side I cut the pipe first. Highly recommend cutting before unbolting, it makes the cut go much faster. You can cut just about anywhere aft of the axle. I just found a spot on each side that gave me room to operate the chain cutter.
I pulled the passenger side over-axle pipe out from the front and I re-installed the GHL piece from the front.
Here are the pieces ready for install. Unfortunately it got dark by the time I was done so camera pics were pretty bad. I'll try to get a final shot in daylight tomorrow.
Redline Leather Wheel Cover
I ordered a leather wheel wrap from Redline on Tuesday. Unfortunately they have about a week lead time on shipping covers so I won't have pics of that install for a while yet. I decided to get the donor wheel ready though. I found a local spares guy who sold me a wheel for $50. I figured this was a safer option than taking mine apart and cutting into it since I've never done a stitched cover with added foam and thumb rests. Now I can get it right on the donor wheel before taking my wheel out. By the way, I'll be putting my original wheel up for sale for $50 when I'm done. I searched around and they tend to go for ~$100-$145. So I'm just going to pay it forward.
Ok, here we go. Donor wheel, so I feel brave
FYI: The plastic bucket on the back easily pops off. My bucket is in better shape than this one, so I'll use mine when I have my original wheel off.It's pretty easy to remove the old vinyl. GM didn't use much glue. It was good to see how much they used for when I add my Redline cover. Just get a good sharp blade and start cutting the stitching along the circumference of the wheel.
After I got started, I realized it was easier to cut the stitches at the spokes first. It doesn't much matter though. Just gotta go all the way around.
Here it is with all the stitching cut and with the cover peeled back from the wheel. I fiddled around trying to remove the cover whole for about 30 seconds and got tired of that so I just cut it perpendicular to the wheel and peeled it off.
I haven't confirmed it yet, but I'm sure the padding under the cover is supposed to stay on. I'll know instantly when my cover/additional padding arrives. It looks to be a pretty significant undertaking to remove it so I left it alone.
That's all I've got for now. I'll get more pics up when the new cover arrives.
Brake Install
Decided with the new wheels on order, I'd go ahead and take a swing at the brakes. I upgraded to Stainless Steel brakelines from the auction site. Stoptech Steet Performance Pads and Brakemotive Drilled/Slotted rotors. It was a pretty uneventful install with one exception. After I connected the caliper side of the SS brakelines and connected the Motive power bleeder, brake fluid started pissing out of the SS line like a russian race horse. Turns out--in my zeal to git 'er done, I neglected to tighten the SS line connection to the banjo fitting. Anyway, two sets of copper washers and half a bottle of brake fluid later I figured it out.
Fedex and UPS guys were busy yesterday and today.
The single biggest hassle to this point is releasing the brake caliper mounting bracket bolts. They're torqued to 125ft/lbs., so have a breaker bar handy.
Stainless line connected. I altered this procedure on the passenger side. I fixed the line to the caliper and mounted everything back up before disconnecting the hard line. With the caliper mounted and the SS line attached, the hardline connection took just a minute and made bleeding a very short affair.
Had to paint 'em. I sanded the Corvette letters off with a dremel.
New rotors on, mounting bracket painted. Just about ready to put it all back together. Quick wipe down of the rotors with brake cleaner, some copper grease on the back of the pads, quick piston reset with a piston spreader and it all went back together nicely.
Done.
Last edited by jmxp69; 04-13-2014 at 12:51 AM.
02-25-2014, 09:40 PM
#4
Administrator


Member Since: Mar 2001
Location: In a parallel universe. Currently own 2014 Stingray Coupe.
Posts: 342,705
Received 19,228 Likes
on
13,933 Posts
C7 of the Year - Modified Finalist 2021
MO Events Coordinator
St. Jude Co-Organizer
St. Jude Donor '03-'04-'05-'06-'07-'08-'09-'10-'11-'12-'13-'14-'15-'16-'17-'18-'19-
'20-'21-'22-'23-'24
NCM Sinkhole Donor
CI 5, 8 & 11 Veteran


Nice bunch of mods you have ordered and also planned. If you want a recommendation of the catback exhaust - go with the Corsa. You won't be sorry. 
 I like this guy already! We all know the feeling of a mod bender - LOL!!!
02-25-2014, 10:48 PM
I like this guy already! We all know the feeling of a mod bender - LOL!!!
02-25-2014, 10:48 PM
#6


More here: http://forums.corvetteforum.com/c5-g...5-is-home.html
02-25-2014, 10:53 PM
#7
Melting Slicks

I am also a vert guy. I generally do not like the looks of verts with the top up nearly as much as top down however the light oak top on black verts is exceptional. Nice choice!!!
02-25-2014, 10:57 PM
#8
Always wanted a black and tan car and until now I've never been able to get it just right. Black on Black, Black on CAMEL (close but no cigar), Black on Silver, Silver on Black. This is it though, it is flat out my favorite color combo. I think it's a very classy look.
I'm sure you have some pics of yours handy??????
I'm sure you have some pics of yours handy??????
02-25-2014, 10:57 PM
#9
Melting Slicks
I'm going to try and hook up with one of the local events and listen to different systems before I decide...I think. Who knows, may get impatient and go on another bender Thanks! And since you asked: More here: http://forums.corvetteforum.com/c5-g...5-is-home.html


 02-26-2014, 07:43 AM
#13
Racer

Member Since: Nov 2011
Location: Stafford Va
Posts: 428
Likes: 0
Received 0 Likes
on
0 Posts
Nice color combination on the vert....mods galore, oh how fun....agree with Corsa, go with the extremes, x-pipe and headers...that gives performance and sound and no drone. Enjoy....
02-26-2014, 08:45 AM
#14
Le Mans Master


Member Since: Jun 2007
Location: Eastern Corn-Nation
Posts: 6,779
Received 3,866 Likes
on
1,672 Posts
2015 C5 of the Year Winner

Just get it home and already ordered some goodies. Very cool. If you need any help with it just let me know.  I don't have either exhaust so I can't tell which ones are better.
I don't have either exhaust so I can't tell which ones are better.
02-26-2014, 09:28 AM
#15
Melting Slicks
Always wanted a black and tan car and until now I've never been able to get it just right. Black on Black, Black on CAMEL (close but no cigar), Black on Silver, Silver on Black. This is it though, it is flat out my favorite color combo. I think it's a very classy look.
I'm sure you have some pics of yours handy??????
I'm sure you have some pics of yours handy??????
 02-27-2014, 03:32 PM
#17
Melting Slicks
02-28-2014, 01:46 PM
#18
Most of the sound system stuff showed up today. Waiting on head unit (ships next week) and CLD kit from Double D. I'll have lots of stuff showing up during the week next week. So it's startling to look like a Saturday afternoon teardown [excited].
02-28-2014, 06:46 PM
#19
Drifting

Hope your mods go well. If you need some better speaker adapters let me know. I have an extra set of poly plastic adapters I made that will last forever. Dennis sells some nice stuff but the mdf board adapters don't do well if any moisture gets to them. Had to swap out the ones on my 02 coupe and vert. Just let me know. I'll take 20 plus shipping if you want them. Here's a couple pics.

Last edited by Stealth02; 02-28-2014 at 06:59 PM.