
My 2003 Z06 Build
 11-01-2013, 02:03 PM
#41
Melting Slicks

Thread Starter
Found this yesterday....
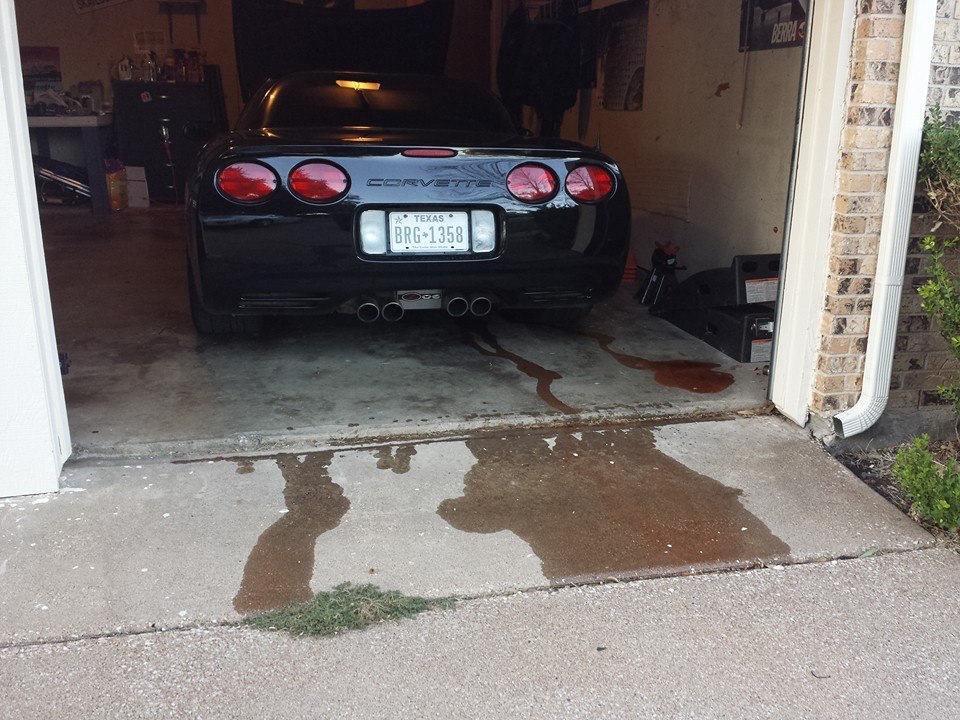
After further inspection I'm pretty sure it's the water pump. If anyone else is curious, I recorded this video to help find the leak.
So I picked up a new waterpump from autozone for ~$180. Noticed it had paper gaskets, so I got the proper ones from the dealership for $20. I'll be replacing the pump today and while I have it all apart, I'm going to go ahead and change my belt as well since that's showing some wear. I'll post up pictures of the process so you guys can see how it's done. It's relatively simple. Only pain is having to drain all the radiator fluid. Fortunately for me my car decided to do that step for me
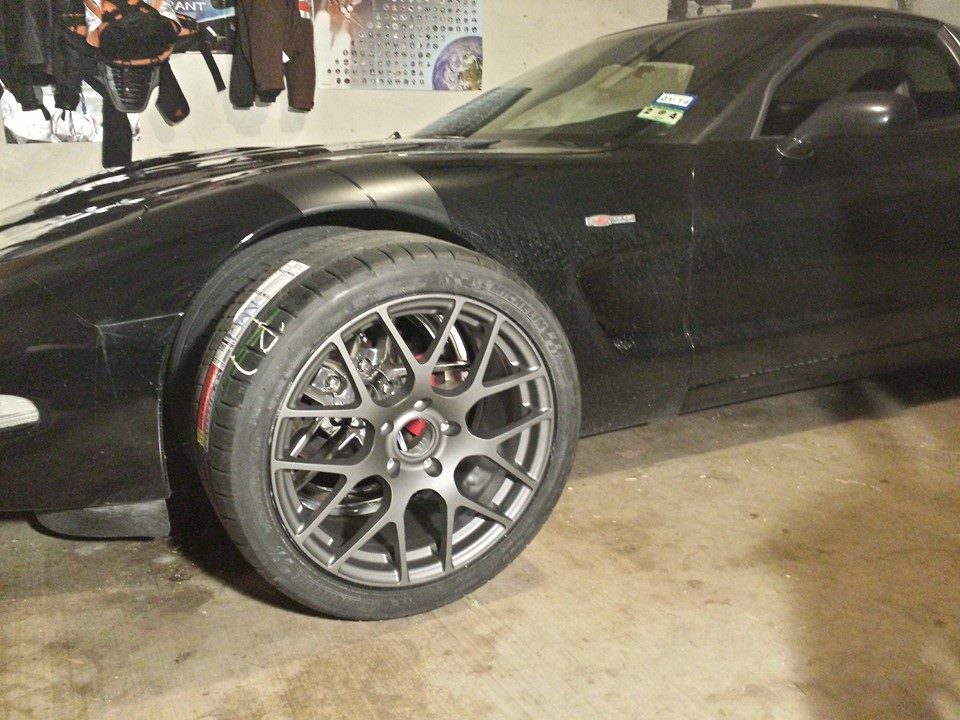
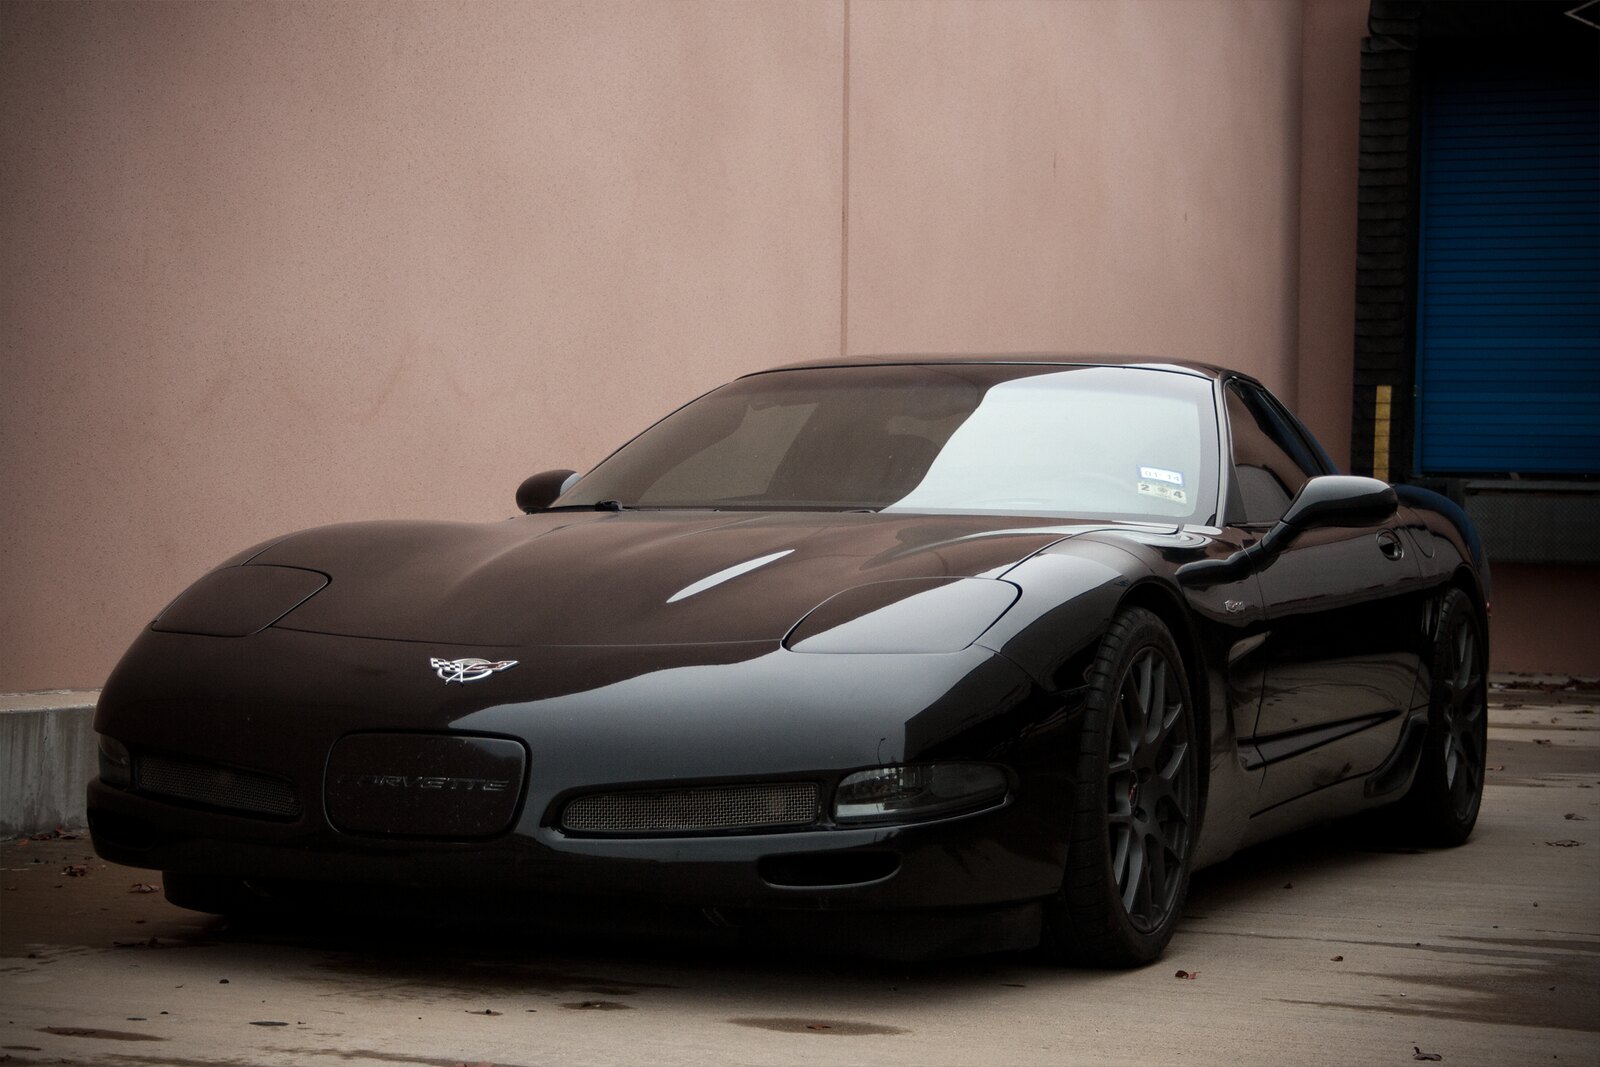
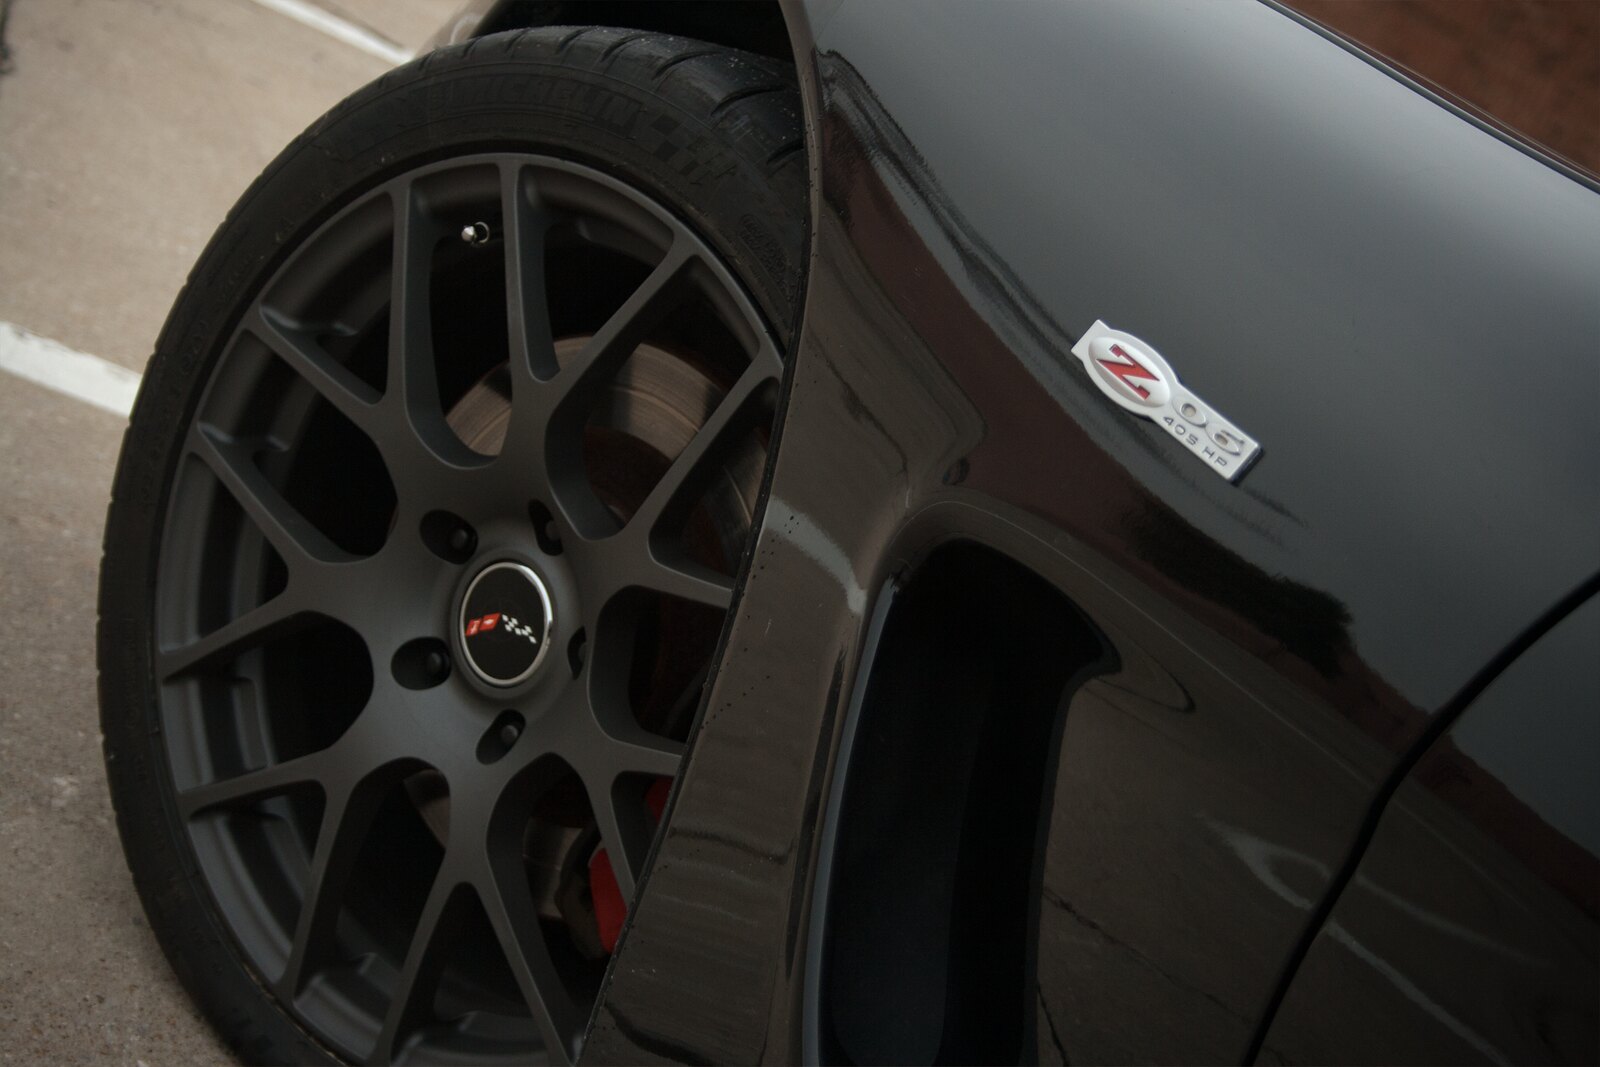
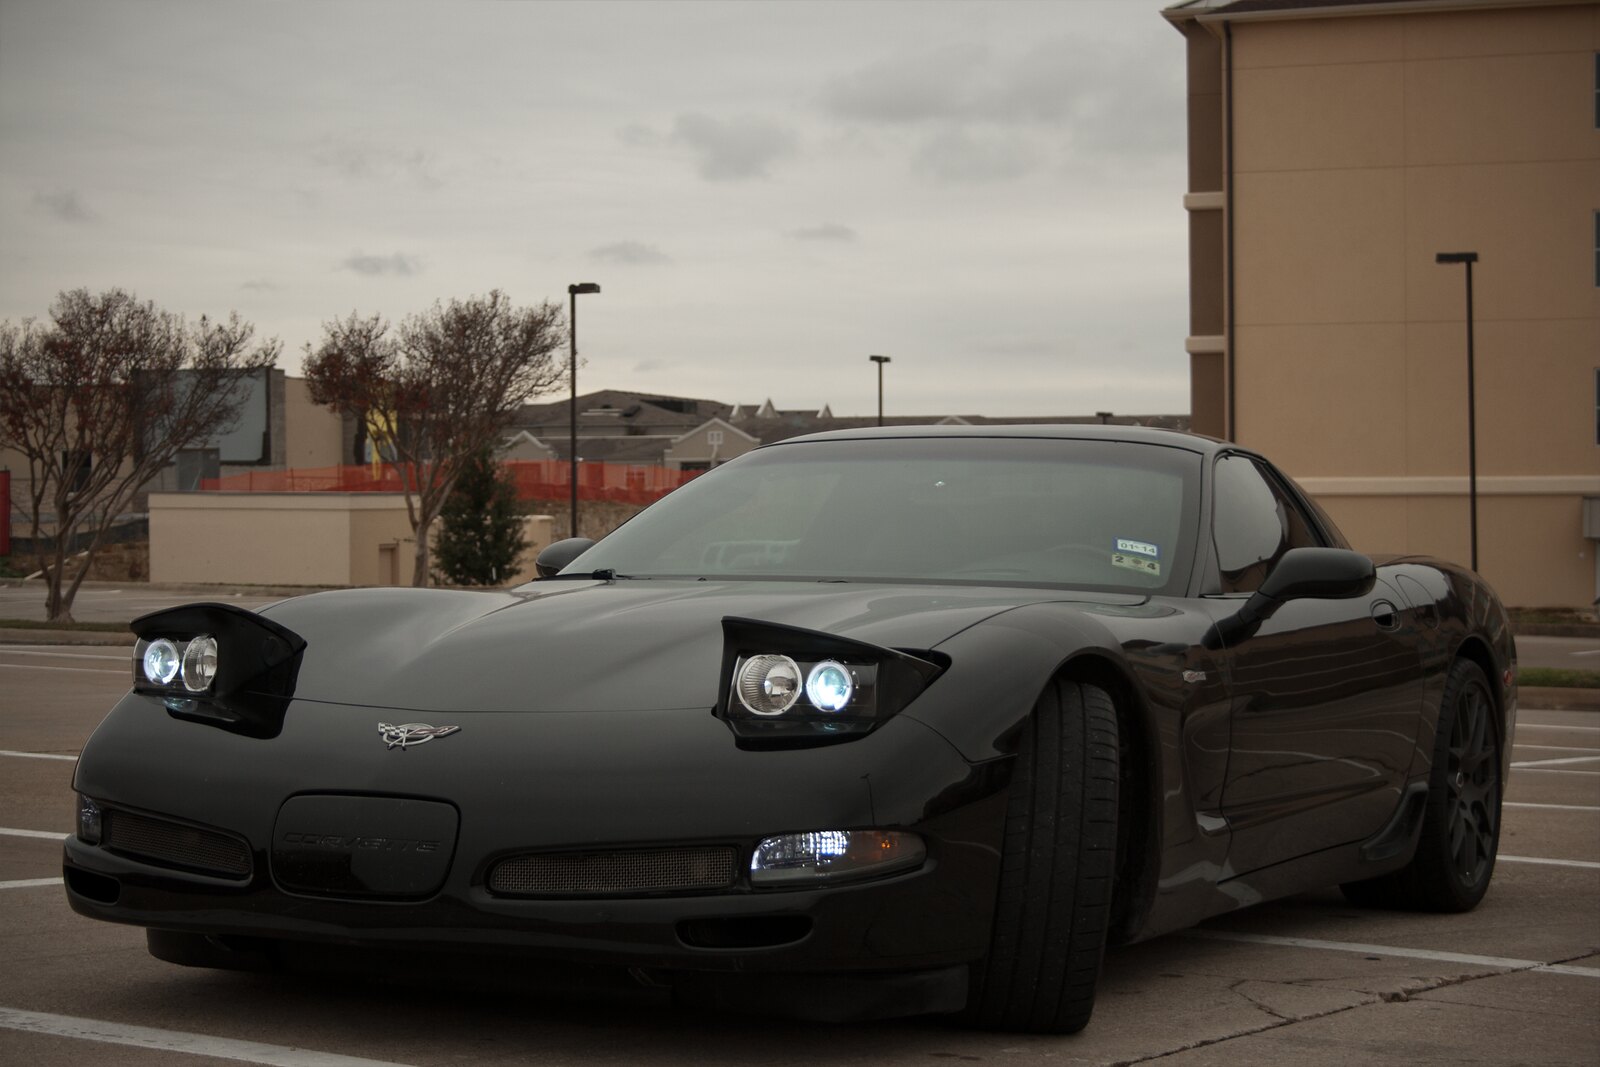
On a brighter note, I ordered a set of TSW Nurburgrings and wrapped them with Michelin Pilot Super Sports. I switched to 18" fronts and 19" rears. Rear tire is also now 305. They should hopefully be here sometime in the next two weeks. I also ordered tinted front corner lenses. I was curious about how the car would look like with them, so I thought I'd give it a try. Between the wheels, tires, lenses and now new water pump and belt, I think I've pretty much destroyed my mod budget.
After further inspection I'm pretty sure it's the water pump. If anyone else is curious, I recorded this video to help find the leak.
So I picked up a new waterpump from autozone for ~$180. Noticed it had paper gaskets, so I got the proper ones from the dealership for $20. I'll be replacing the pump today and while I have it all apart, I'm going to go ahead and change my belt as well since that's showing some wear. I'll post up pictures of the process so you guys can see how it's done. It's relatively simple. Only pain is having to drain all the radiator fluid. Fortunately for me my car decided to do that step for me
On a brighter note, I ordered a set of TSW Nurburgrings and wrapped them with Michelin Pilot Super Sports. I switched to 18" fronts and 19" rears. Rear tire is also now 305. They should hopefully be here sometime in the next two weeks. I also ordered tinted front corner lenses. I was curious about how the car would look like with them, so I thought I'd give it a try. Between the wheels, tires, lenses and now new water pump and belt, I think I've pretty much destroyed my mod budget.

 11-01-2013, 02:49 PM
#43
Drifting


I love the stock Z06 wheels. I had some on my C4. One of the best OE wheel ever.
11-01-2013, 03:09 PM
#44
Melting Slicks
Thread Starter
I loved the stock wheels as well but I was frustrated by the tire choices.
11-01-2013, 03:19 PM
#45
Melting Slicks
Awesome lookin car!
Thanks
I started out just like you did, in a couple of more years your gonna look back and think when does it end
Thanks
I started out just like you did, in a couple of more years your gonna look back and think when does it end
11-01-2013, 04:09 PM
#46
Drifting
11-03-2013, 03:14 PM
#47
Melting Slicks
Thread Starter
So I got the water pump replaced. I was going to create a detailed post about how to do it, but I found this post and it honestly contains almost everything you need to know.
http://www.digitalcorvettes.com/foru...d.php?t=129941
Junkman2008 covers everything you need to do and he does it in an easy step by step fashion. There were a couple gotchas that I'd like to mention.
First off, there will still be fluid inside your water pump. As you take the hoses off your water pump, I would try and have something to catch the fluid or you will spend a lot of time cleaning things up.
I would 100% without a doubt recommend getting a hose clamp tool like he recommends. It was a cheap little tool from Autozone and it made the job a lot easier. With the amount of hoses we have on our cars and hose clamps, this tool was a no-brainer.
While the pump is out, I recommend checking your belt. I ended up deciding to replace mine. Found it at Autozone for $30.
When you purchase the new water pump, make sure you get new GM gaskets from the dealer. The gaskets that come with the new pump are all paper and you don't want that.
I did take some small pictures along the way that I'll share.
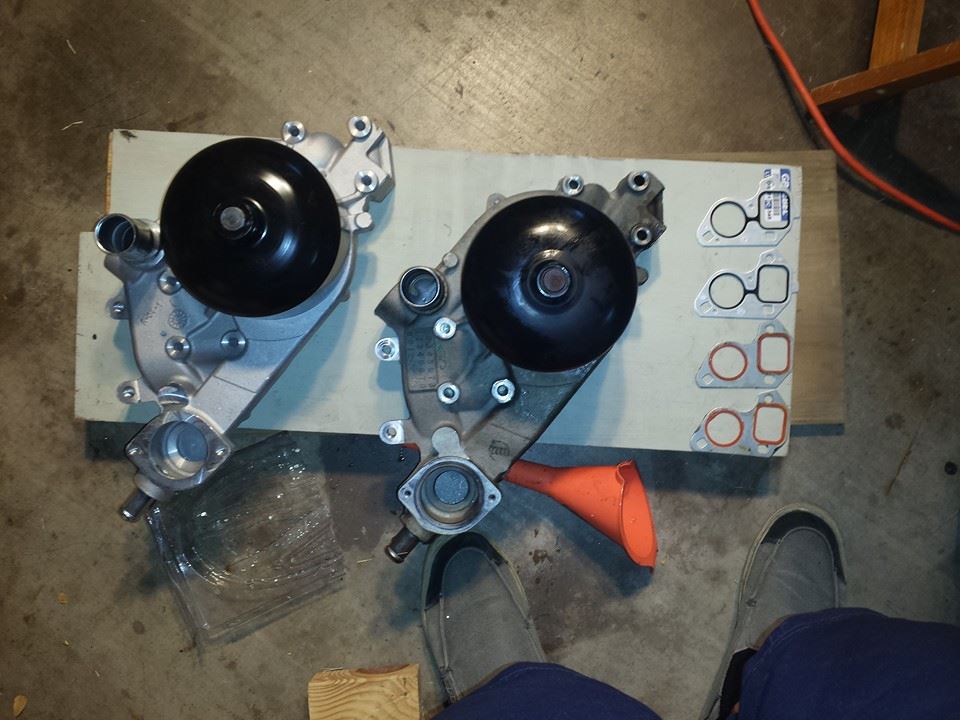
Old vs New. Note that the new gaskets (black rubber) are the ones purchased from the dealer. I did not use the paper gaskets that came with the new pump.
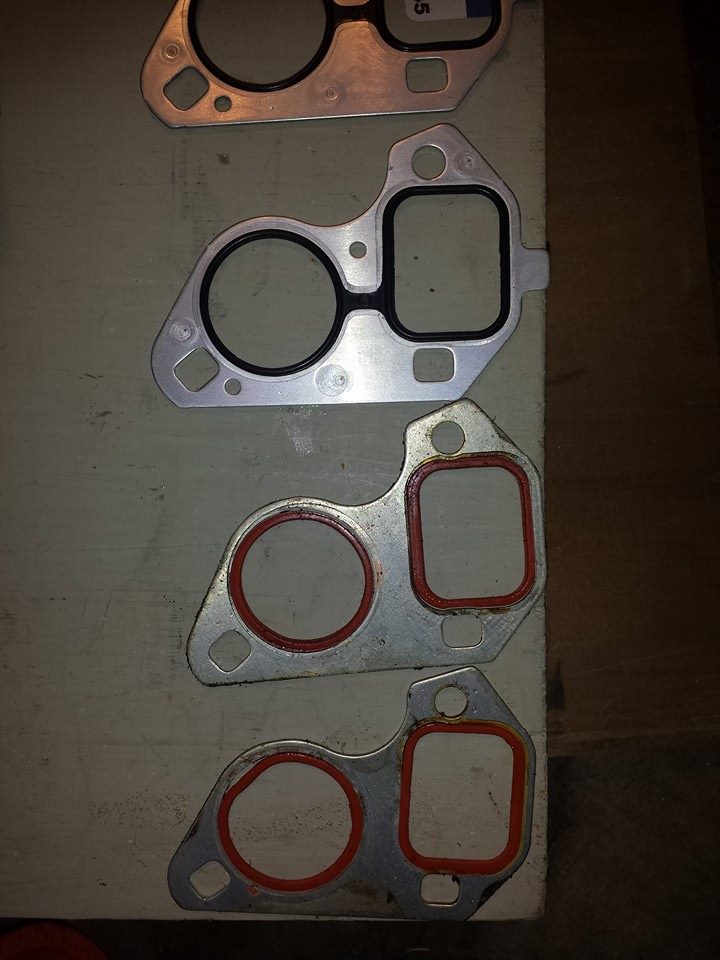
Check out how bad my old gaskets were. In all honesty I think the main issue here is my gaskets and not my water pump. Since I took everything apart already and it's not uncommon for them to go, I decided to just install the new one.
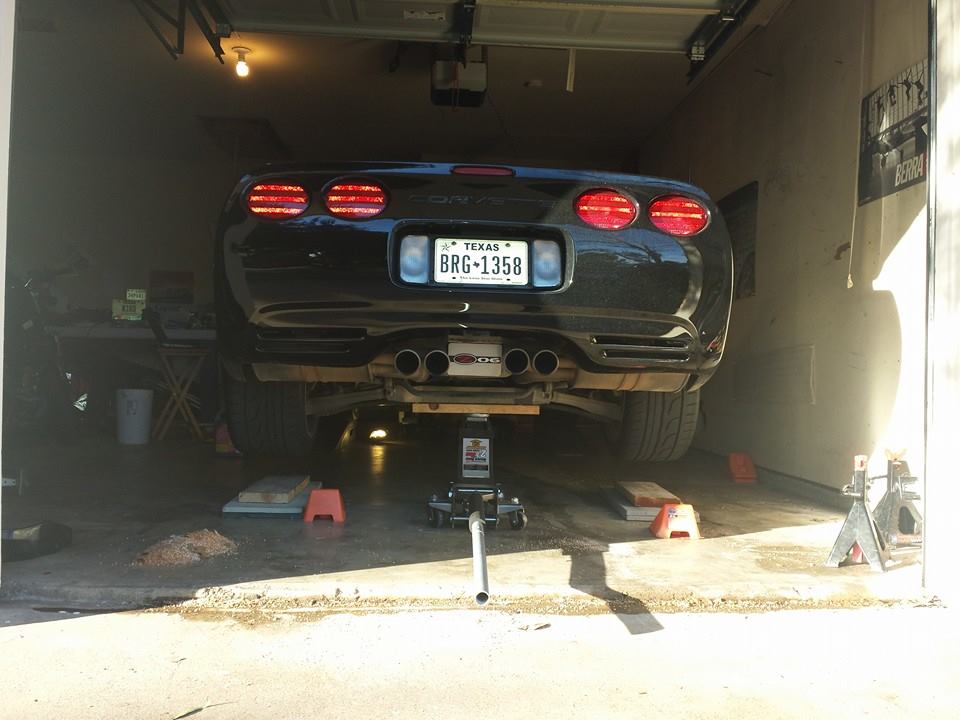
Temporarily lifted the rear of the car because I also drained the radiator fluid while I was at it. I did this because I noticed a tiny little drip from my radiator drain plug. I went to O'Reillys and they have a drain plug that is $7. You can find it here. Best part about this new drain plug is that I don't need any kind of special tool to take it off. If you're draining your fluid, I suggest switching to this regardless of whether or not your old one leaks. It's much more convenient.
So I've ran the car a little bit today and it looks like my leaks are all gone. I'm still waiting on my TSW Nurburgrings to come in this week. I also purchased a set of tinted front corners that arrived on Friday. I'll wait till the wheels get here to put them on. Lastly, my fog light ballast isn't right. I asked the vendor for a replacement and they told me I have to send them the old one in first. I asked if they can send me the new one first so I don't have to take the car apart twice, but they said I'd have to call and make a deposit first. It seems like a lot of hassle for a $40 part. Not much I can do I guess.
Besides that, the car is running great. I have an idea for a new HUD that I'm pretty sure I can create.. I'm hoping for a prototype within the next few months. It'd be neat to have more customization options for the HUD and be able to display more information (such as nav info, G sensor etc.).
http://www.digitalcorvettes.com/foru...d.php?t=129941
Junkman2008 covers everything you need to do and he does it in an easy step by step fashion. There were a couple gotchas that I'd like to mention.
First off, there will still be fluid inside your water pump. As you take the hoses off your water pump, I would try and have something to catch the fluid or you will spend a lot of time cleaning things up.
I would 100% without a doubt recommend getting a hose clamp tool like he recommends. It was a cheap little tool from Autozone and it made the job a lot easier. With the amount of hoses we have on our cars and hose clamps, this tool was a no-brainer.
While the pump is out, I recommend checking your belt. I ended up deciding to replace mine. Found it at Autozone for $30.
When you purchase the new water pump, make sure you get new GM gaskets from the dealer. The gaskets that come with the new pump are all paper and you don't want that.
I did take some small pictures along the way that I'll share.
Old vs New. Note that the new gaskets (black rubber) are the ones purchased from the dealer. I did not use the paper gaskets that came with the new pump.
Check out how bad my old gaskets were. In all honesty I think the main issue here is my gaskets and not my water pump. Since I took everything apart already and it's not uncommon for them to go, I decided to just install the new one.
Temporarily lifted the rear of the car because I also drained the radiator fluid while I was at it. I did this because I noticed a tiny little drip from my radiator drain plug. I went to O'Reillys and they have a drain plug that is $7. You can find it here. Best part about this new drain plug is that I don't need any kind of special tool to take it off. If you're draining your fluid, I suggest switching to this regardless of whether or not your old one leaks. It's much more convenient.
So I've ran the car a little bit today and it looks like my leaks are all gone. I'm still waiting on my TSW Nurburgrings to come in this week. I also purchased a set of tinted front corners that arrived on Friday. I'll wait till the wheels get here to put them on. Lastly, my fog light ballast isn't right. I asked the vendor for a replacement and they told me I have to send them the old one in first. I asked if they can send me the new one first so I don't have to take the car apart twice, but they said I'd have to call and make a deposit first. It seems like a lot of hassle for a $40 part. Not much I can do I guess.
Besides that, the car is running great. I have an idea for a new HUD that I'm pretty sure I can create.. I'm hoping for a prototype within the next few months. It'd be neat to have more customization options for the HUD and be able to display more information (such as nav info, G sensor etc.).

 11-09-2013, 03:28 AM
#50
Melting Slicks
Thread Starter
So I put a new set of 18/19 TSW Nurburgrings on my vette this weekend. I love the wheels and the look, but I hate the giant silver TSW center caps for two reasons.
A) I don't like advertising for other companies on my car.
B) It's silver, the wheels are gunmetal.. come on!
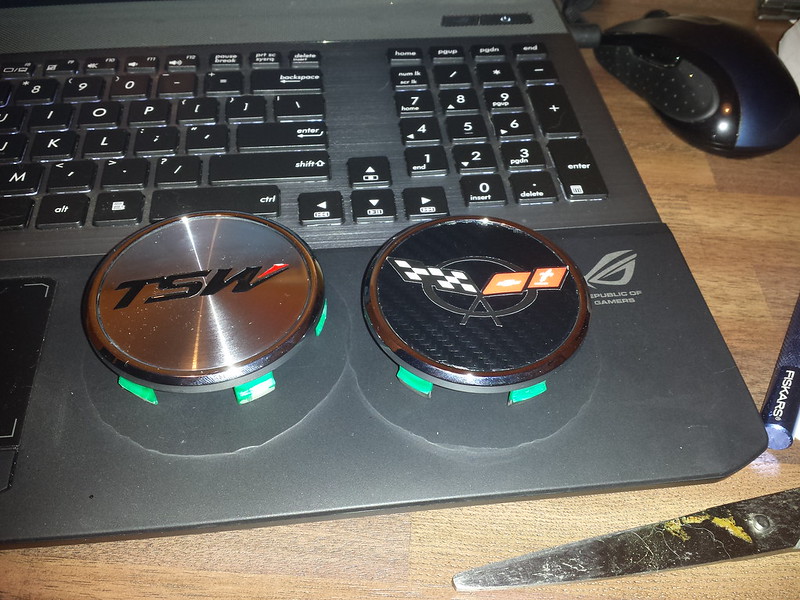
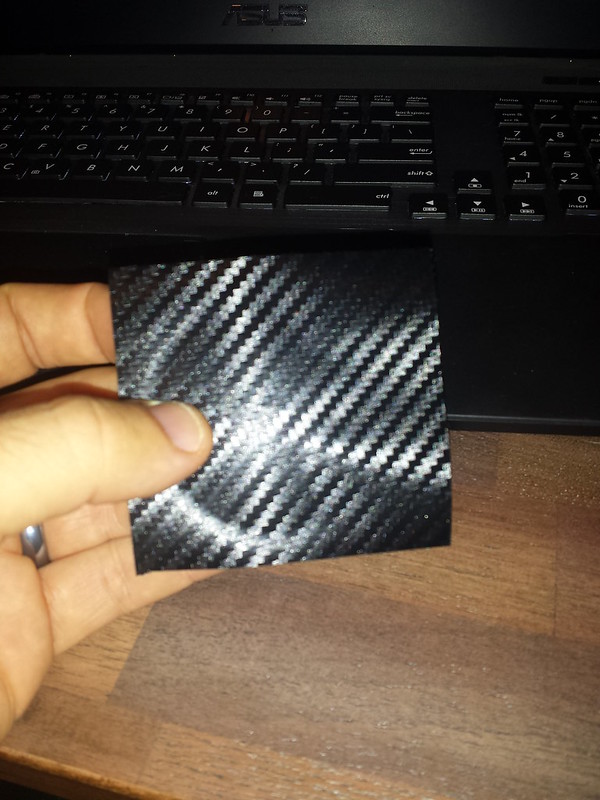
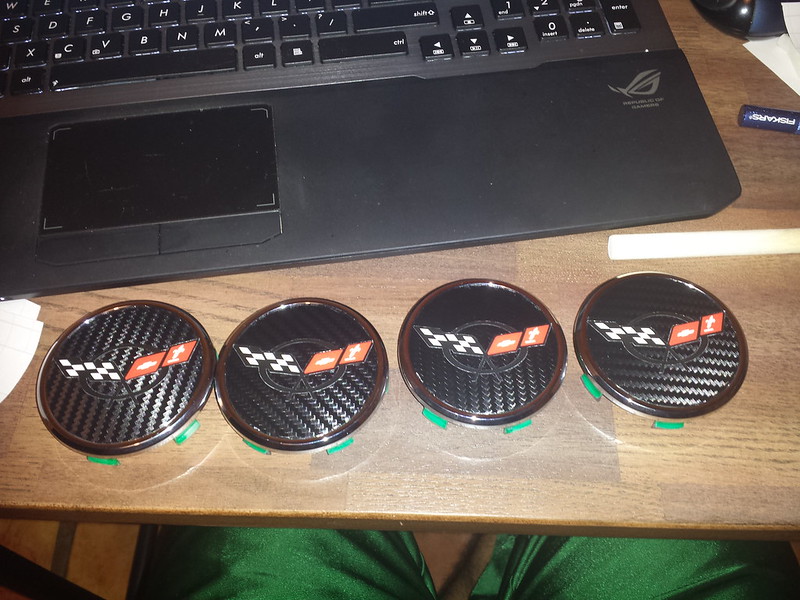
So until I can find a more permanent solution, I decided to try and make my own center caps. I purchased a 5 foot roll of Carbon Fiber vinyl from ebay and happened to have 6 tiny little Corvette logo stickers. I also happened to keep my camera next to me incase anyone else was interested.
For starters, here's a quick before and after.
Step 1
Cut out your piece of vinyl. I forget the actual measurements, but it should be pretty easy to measure. You want enough vinyl to just slightly go over the edge of the entire cap but not enough that it's going to get in the way.
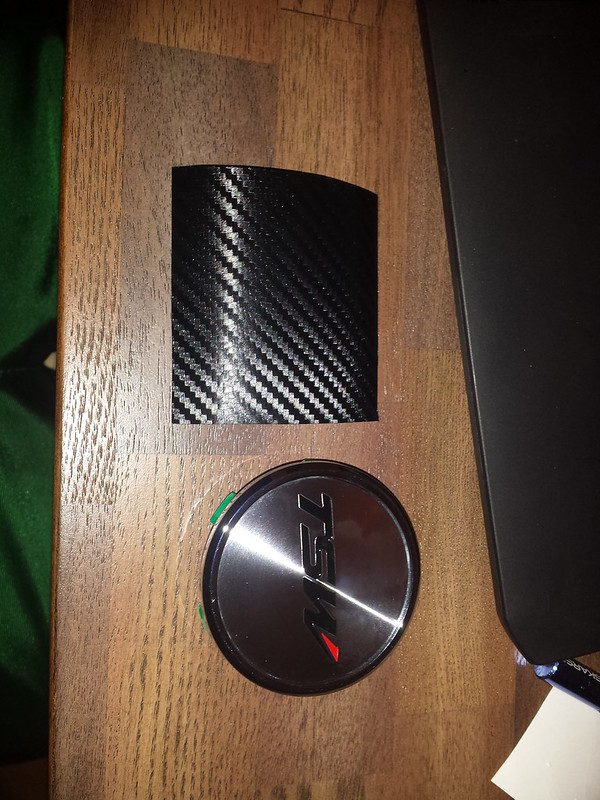
Step 2
Take the backing off your vinyl and lay it face down on your table. Make sure there is no dust in the area.
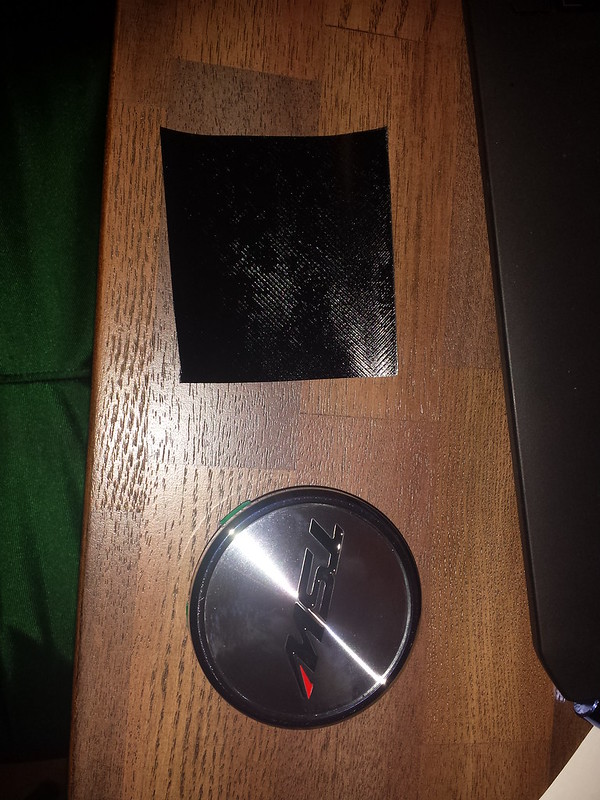
Step 3
Clean the front of your center cap and apply it straight down onto the vinyl. IMPORTANT Only let the center part touch for now. What's most important in this step is making sure the cap is centered.
Step 4
Now that we have the vinyl attached, we want to massage it from the center -> out. Work any air pockets you have on there out. There shouldn't be much (if any) due to how small it is. Keep massaging until the edges of the center are clear.
Step 5
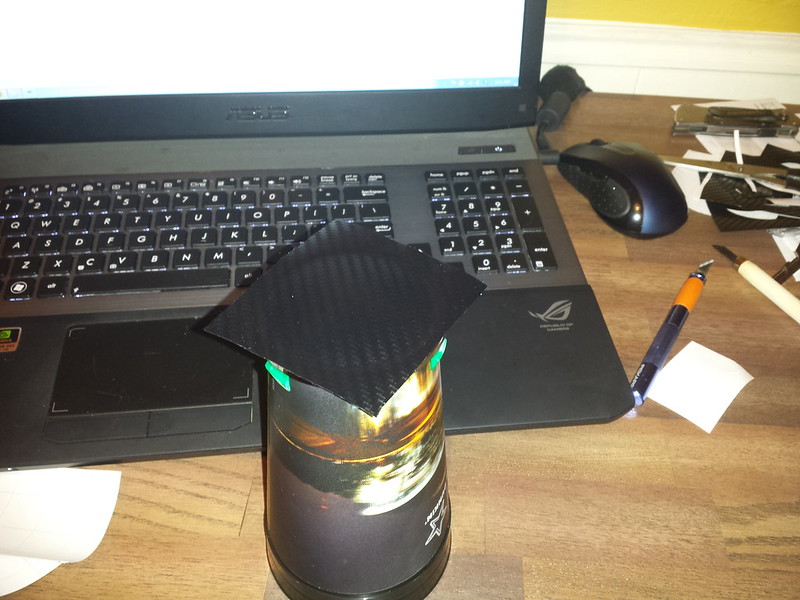
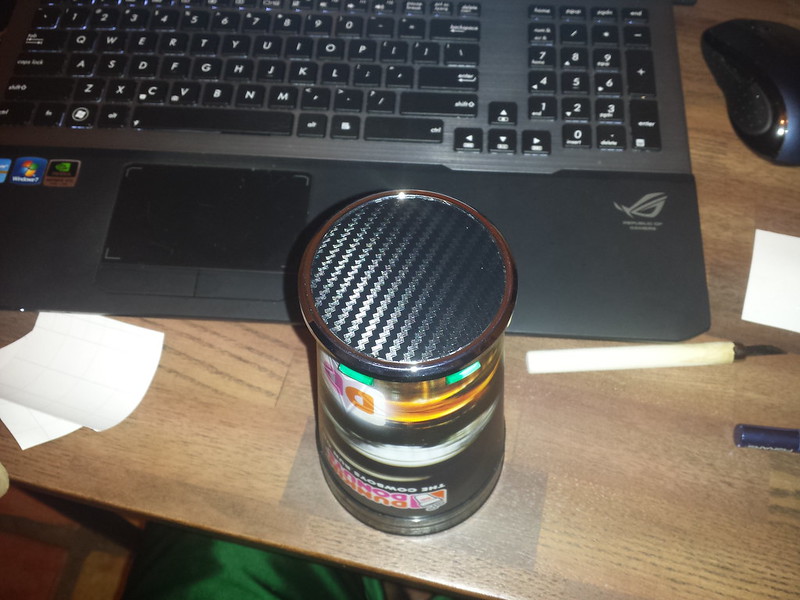
Place your center cap onto something that will support it from the center. You don't want it resting on the tabs for the next part. Since I single handedly support the Dunkin Donuts near my work, I apparently qualified for a free cup. That free cup just so happens to have a base that fits my center cap perfectly. If you can't find anything to support your center cap, I suggest your local Dunkin Donuts
Step 6
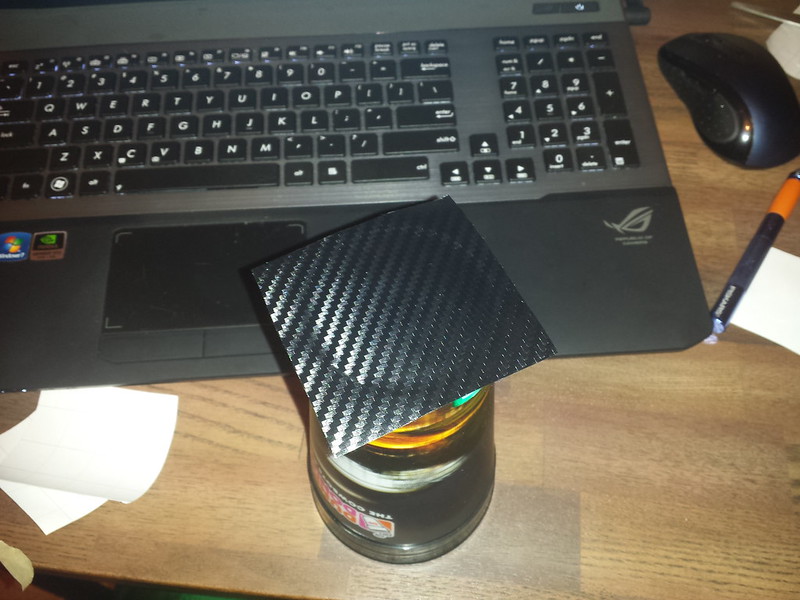
With your fingernail, score the edges of the inside of the center cap. We will be leaving the ring silver (or at least I chose to) and not covering it. Take as much time as you need for steps 5 and 6 because you want to make sure that vinyl is on there and you have a nice clear edge for you to cut.
Step 7
Time to cut! I tried many different cutting devices and what I found to work best is a hobby carving knife. I also had a tiny razor that I would use (the kind attached to a pen looking device) but I found that I had a hard time getting a fine cut due to how long the razor was. The carving knife had a very tiny cutting area so I could really focus.
Take your time here. When you're cutting, use just the tip (that's what she said) and not the entire blade. Go very slow and if you get stuck on a part, move on and go back to it later. Be prepared to mess this up a few times and have to go back to step 1. That's ok. I went through 4 different pieces before I finally got my first center cap. What's most important is that you don't slip and cut across the silver ring. Again, take. your. time. :]
What also helped me here was to score the edge with my fingernail before I cut that area. Find a technique that works for you and go with it.

Step 8
Woohoo! Hardest part is done! Peel away the excess vinyl and admire your work.
Step 9
Lay down the Corvette sticker where you want it and apply it. I found it easier to cut the excess paper around the sticker before I laid it down.
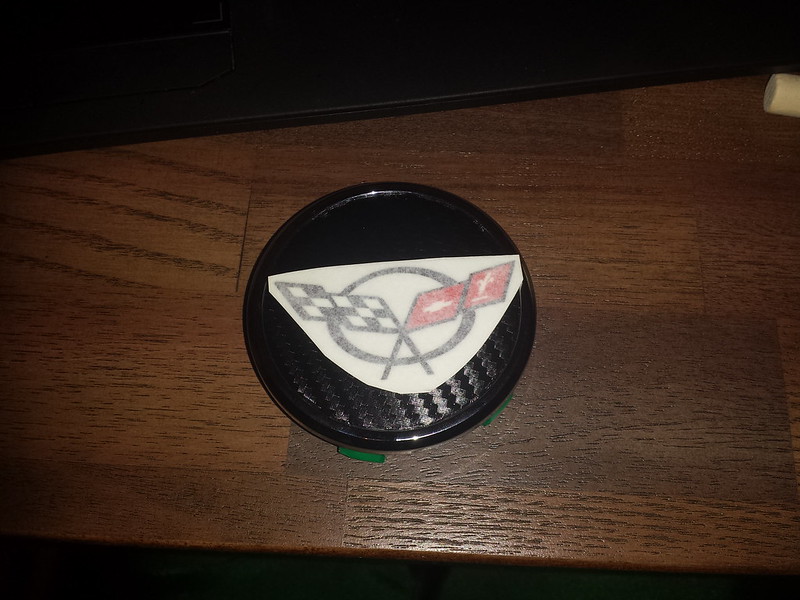
Step 10
Enjoy :]
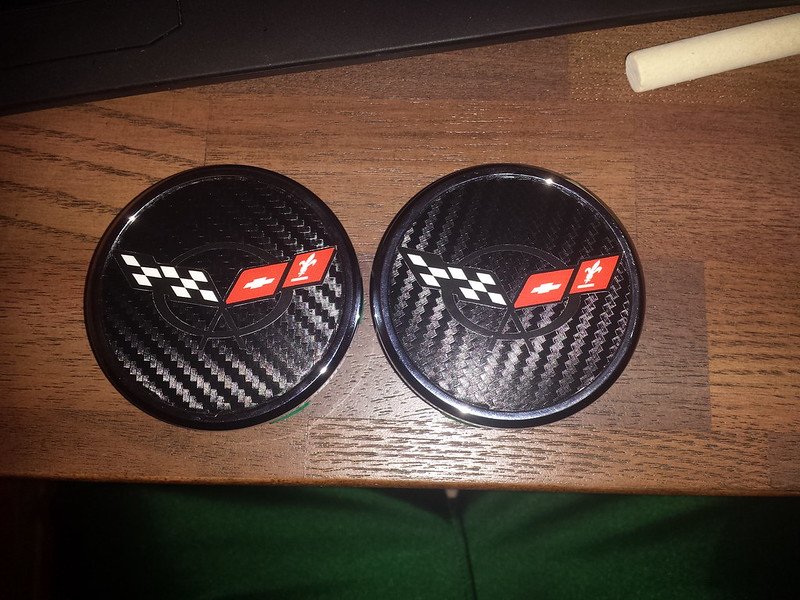
They're definitely not perfect, but they're better than the giant TSW logos. Tomorrow I'll give them a couple coats of clearcoat to add some protection before I apply them.
Good luck!
A) I don't like advertising for other companies on my car.
B) It's silver, the wheels are gunmetal.. come on!
So until I can find a more permanent solution, I decided to try and make my own center caps. I purchased a 5 foot roll of Carbon Fiber vinyl from ebay and happened to have 6 tiny little Corvette logo stickers. I also happened to keep my camera next to me incase anyone else was interested.
For starters, here's a quick before and after.
Step 1
Cut out your piece of vinyl. I forget the actual measurements, but it should be pretty easy to measure. You want enough vinyl to just slightly go over the edge of the entire cap but not enough that it's going to get in the way.
Step 2
Take the backing off your vinyl and lay it face down on your table. Make sure there is no dust in the area.
Step 3
Clean the front of your center cap and apply it straight down onto the vinyl. IMPORTANT Only let the center part touch for now. What's most important in this step is making sure the cap is centered.
Step 4
Now that we have the vinyl attached, we want to massage it from the center -> out. Work any air pockets you have on there out. There shouldn't be much (if any) due to how small it is. Keep massaging until the edges of the center are clear.
Step 5
Place your center cap onto something that will support it from the center. You don't want it resting on the tabs for the next part. Since I single handedly support the Dunkin Donuts near my work, I apparently qualified for a free cup. That free cup just so happens to have a base that fits my center cap perfectly. If you can't find anything to support your center cap, I suggest your local Dunkin Donuts
Step 6
With your fingernail, score the edges of the inside of the center cap. We will be leaving the ring silver (or at least I chose to) and not covering it. Take as much time as you need for steps 5 and 6 because you want to make sure that vinyl is on there and you have a nice clear edge for you to cut.
Step 7
Time to cut! I tried many different cutting devices and what I found to work best is a hobby carving knife. I also had a tiny razor that I would use (the kind attached to a pen looking device) but I found that I had a hard time getting a fine cut due to how long the razor was. The carving knife had a very tiny cutting area so I could really focus.
Take your time here. When you're cutting, use just the tip (that's what she said) and not the entire blade. Go very slow and if you get stuck on a part, move on and go back to it later. Be prepared to mess this up a few times and have to go back to step 1. That's ok. I went through 4 different pieces before I finally got my first center cap. What's most important is that you don't slip and cut across the silver ring. Again, take. your. time. :]
What also helped me here was to score the edge with my fingernail before I cut that area. Find a technique that works for you and go with it.
Step 8
Woohoo! Hardest part is done! Peel away the excess vinyl and admire your work.
Step 9
Lay down the Corvette sticker where you want it and apply it. I found it easier to cut the excess paper around the sticker before I laid it down.
Step 10
Enjoy :]
They're definitely not perfect, but they're better than the giant TSW logos. Tomorrow I'll give them a couple coats of clearcoat to add some protection before I apply them.
Good luck!
11-09-2013, 11:40 PM
#51
Melting Slicks
Thread Starter
Gave them a good clear coat. Once dried I put them on the car.

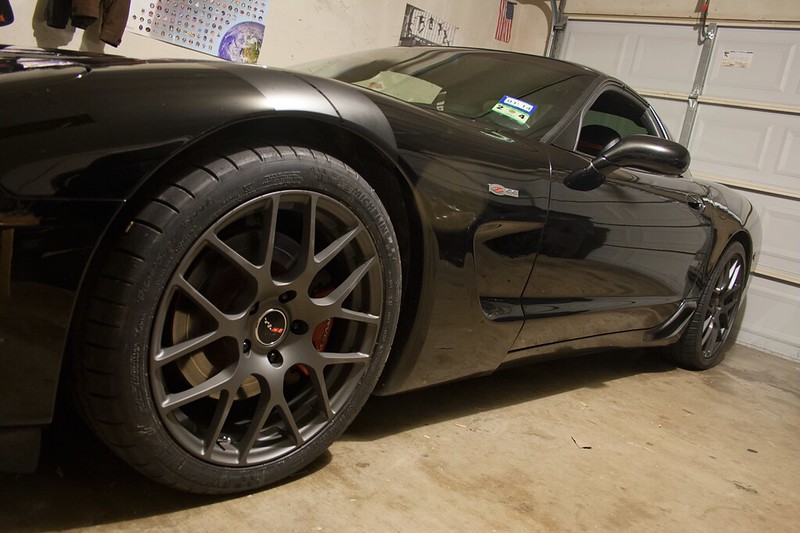
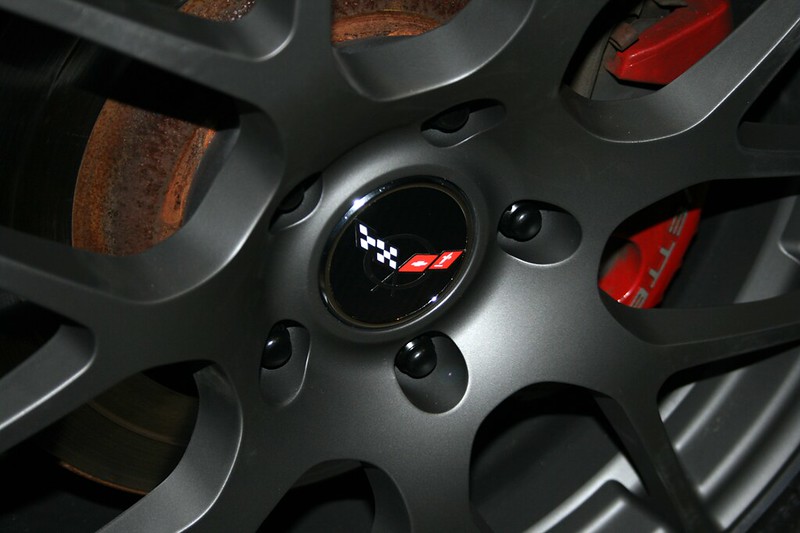
Really happy with how they came out. Much better than the stock TSWs.
Really happy with how they came out. Much better than the stock TSWs.
 11-10-2013, 11:19 PM
#53
Melting Slicks
Thread Starter
I wanted to take a good set of pictures today but didn't have the opportunity. I did end up with a good cell phone picture.
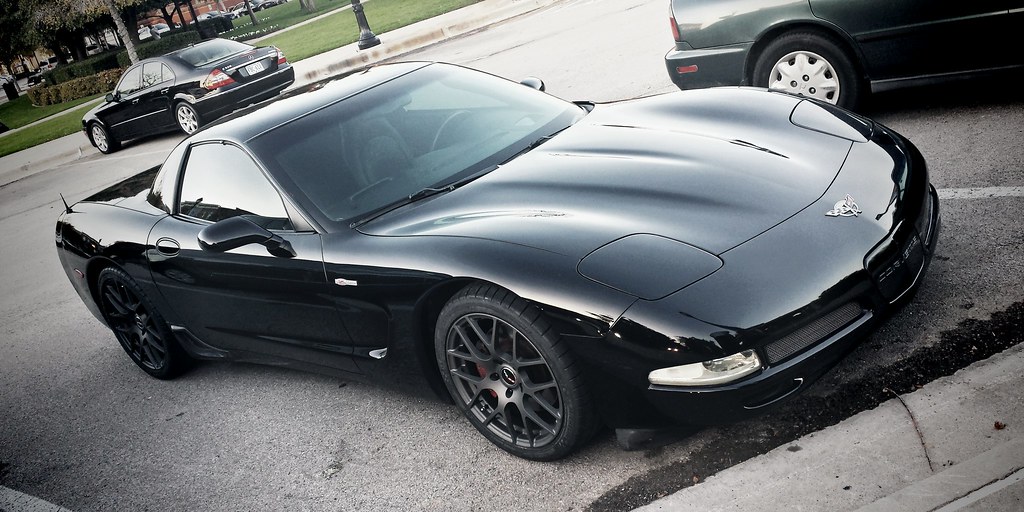
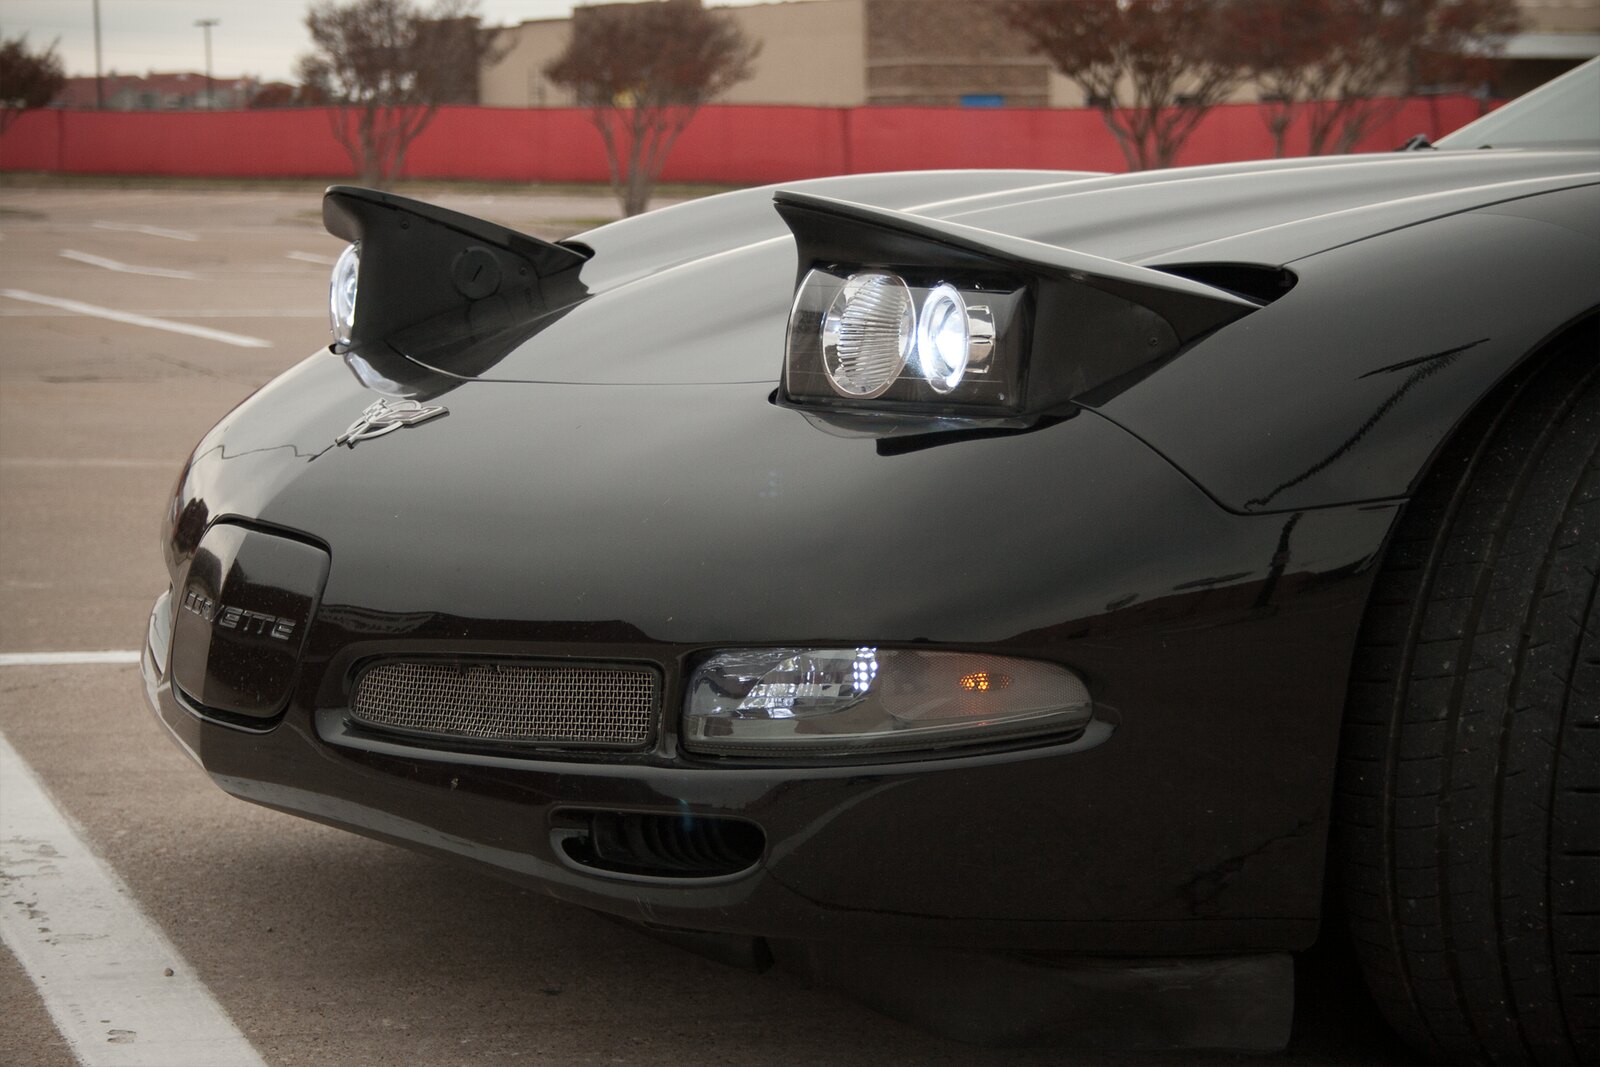
I'm planning on putting on the tinted corners this week to see if I like them. I really like the clear look but I think it's too much with the current wheels.

I'm planning on putting on the tinted corners this week to see if I like them. I really like the clear look but I think it's too much with the current wheels.
11-24-2013, 05:10 PM
#54
Melting Slicks
Thread Starter
So I received my swaybar bushings last week. I was visiting family all weekend so I couldn't install them, but I got in today and thought I'd give it a shot. It seemed like a pretty simple process. I took some pictures along the way just incase anyone was interested. Overall I'd say it was a 30-45 minute job if that. I think it took more time to get my ramps set up and get my car on the ramp than it did to replace everything.
Start by lifting the car up in the front. I just drove mine up onto ramps.
Look underneath and find the two brackets that hold the swaybar up. Here's the drivers side:
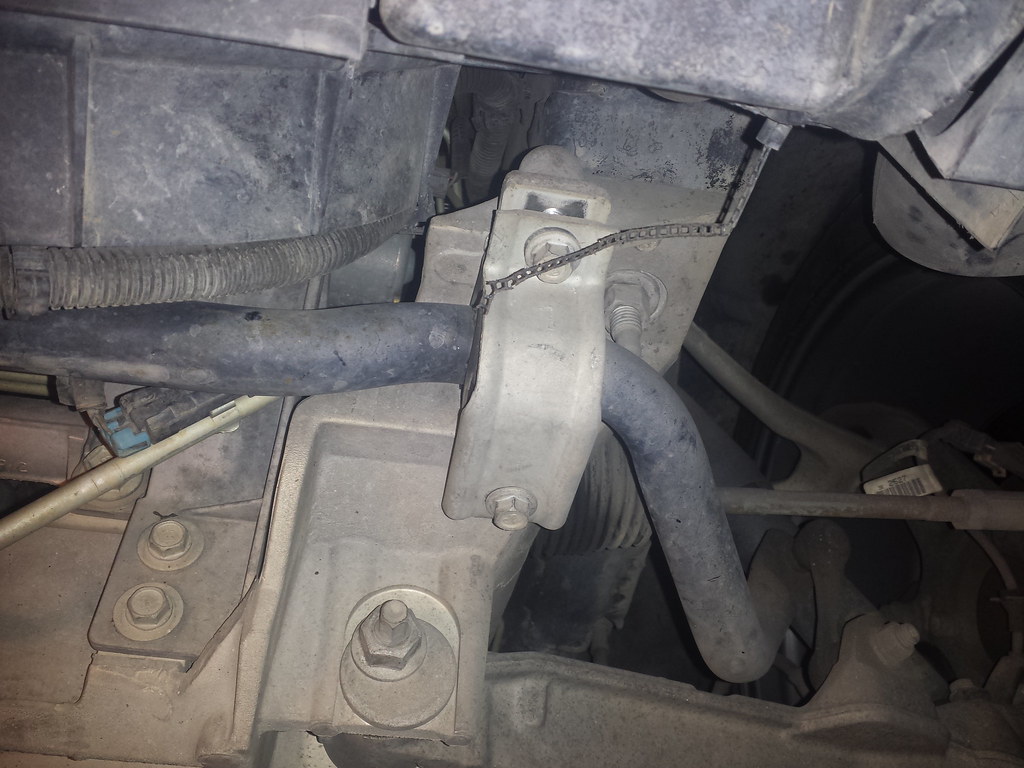
and the passenger side:
To remove those brackets, undo the 13mm bolts. I made sure to organize my bolts so that I could put them back into the same hole they came out of.
Once removed your swaybar will drop a little bit so be prepared to catch it.
Now all you have to do is take the old bushings off by bending/flexing them off. Make sure to grease up your new bushing before putting it back on.
Torque specs for the front bolts are 43lb/ft.
Now it's time for the rear. You don't have to lift it up but I did just to make it easier. Make sure to chock your front wheels if you do this.
The rear follows the same procedure. Here's a picture of one of mine with the bottom bolt out.
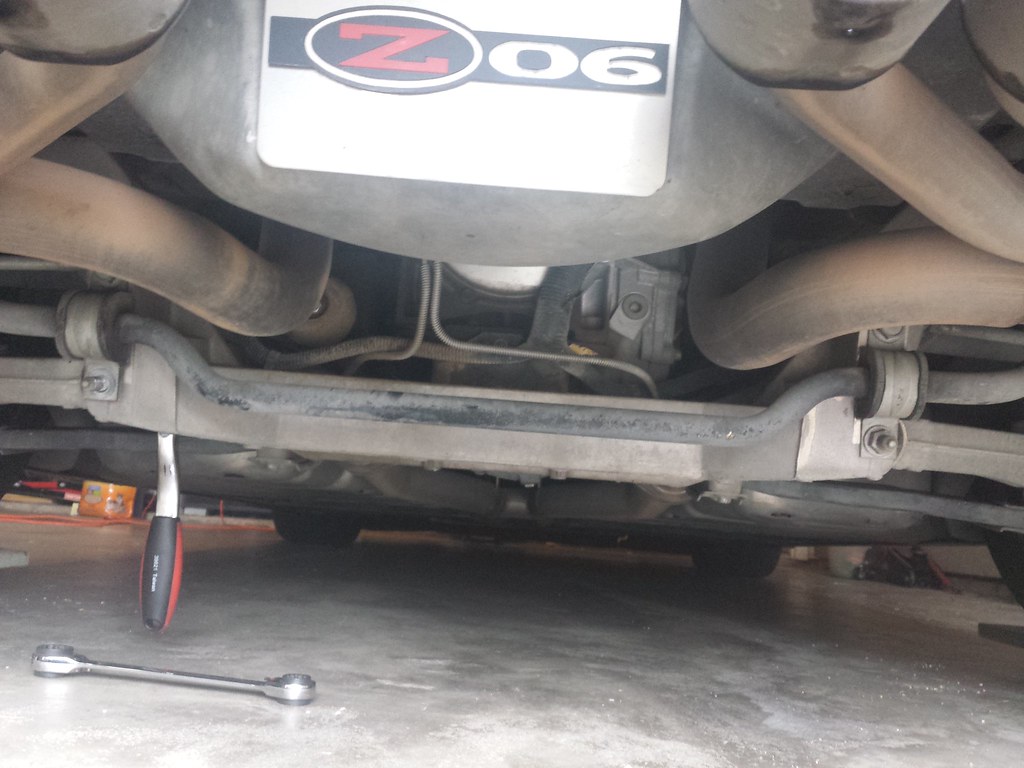
The only tricky part about the rear is that you need a 15mm wrench to hold the bolt in place while removing the nut. The nut is 18mm. I believe the top bolt is 15mm. Torque specs for the rear bolts are 49 ft/lb for the upper and 70 ft/lb for the lower.
After I got it installed, I went for a little ride and surprisingly my squeaks went away! We'll see if this is a permanent thing or not. I drove through an area that constantly makes my car squeak and groan and I didn't hear a single peep out of her.
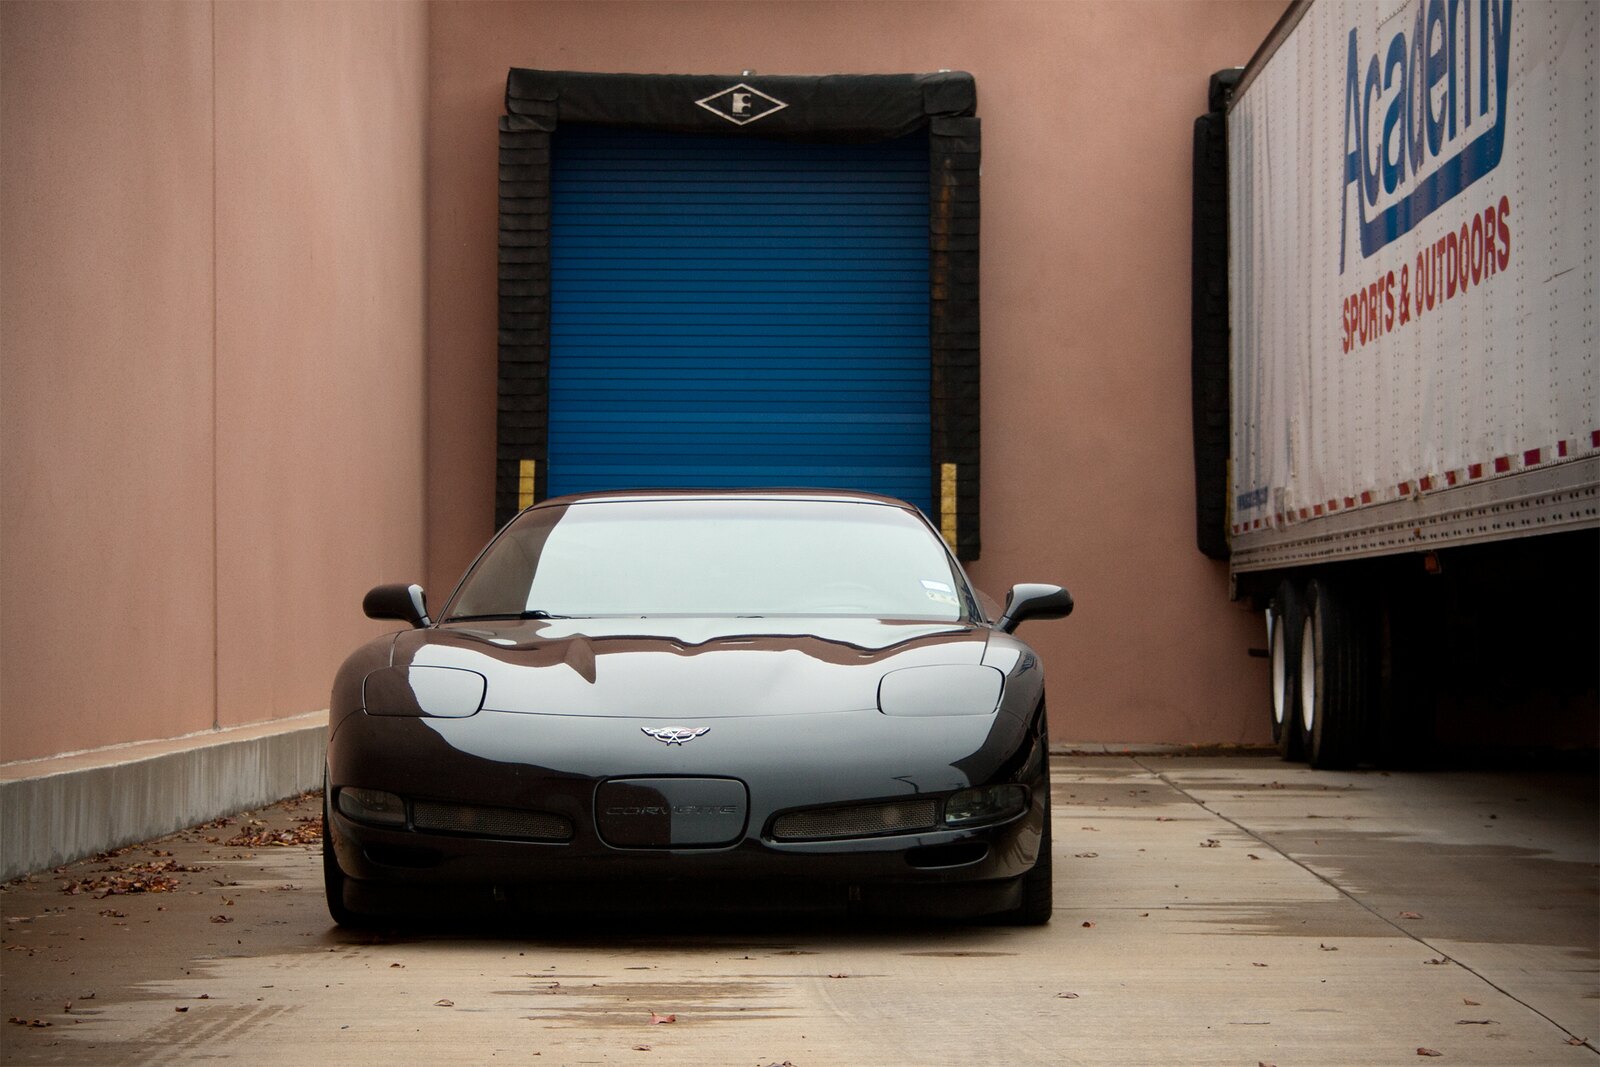
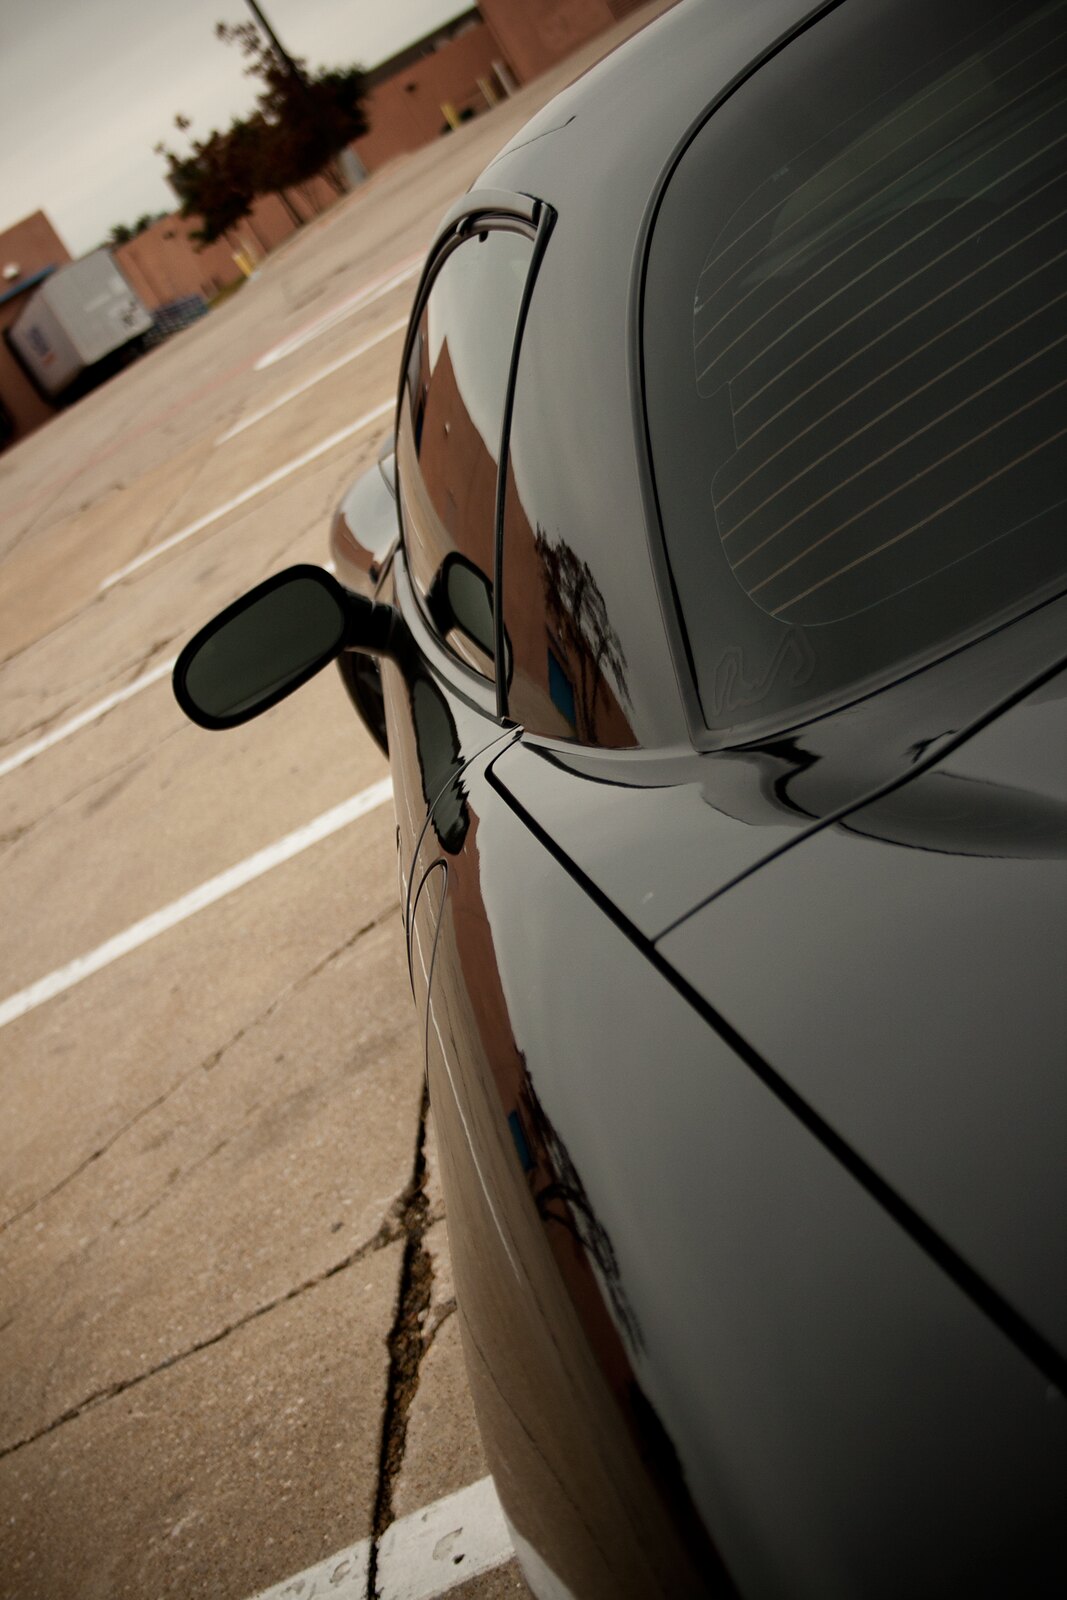
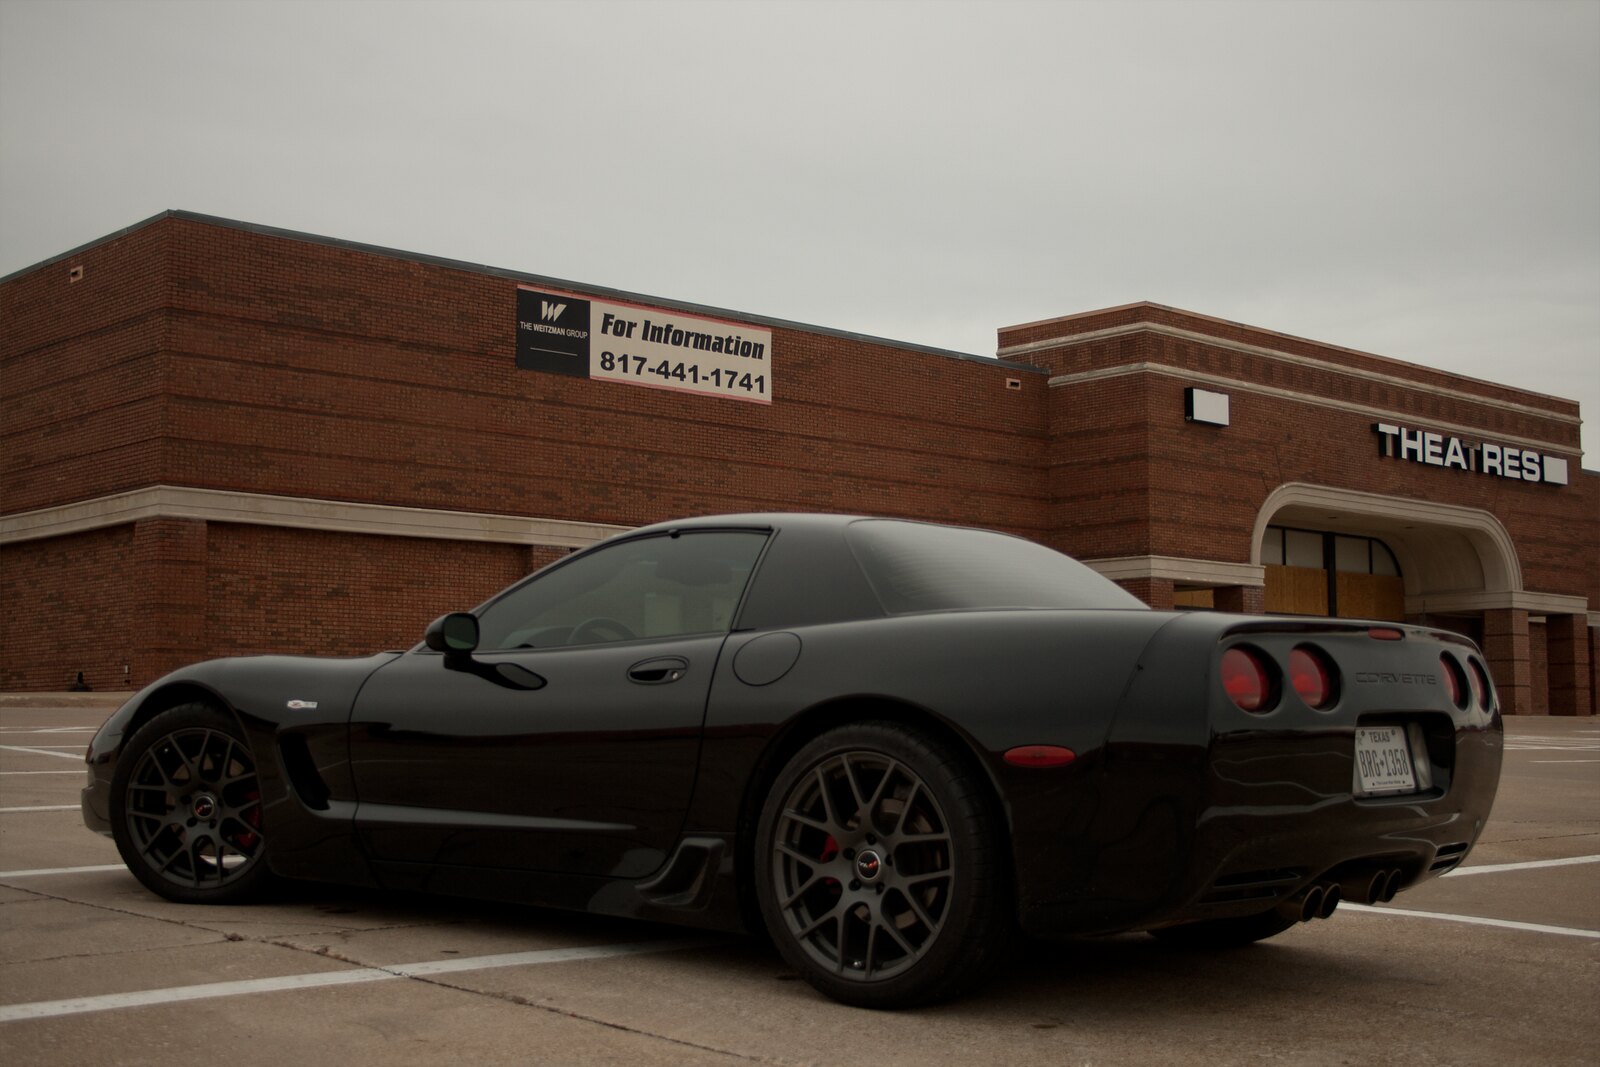
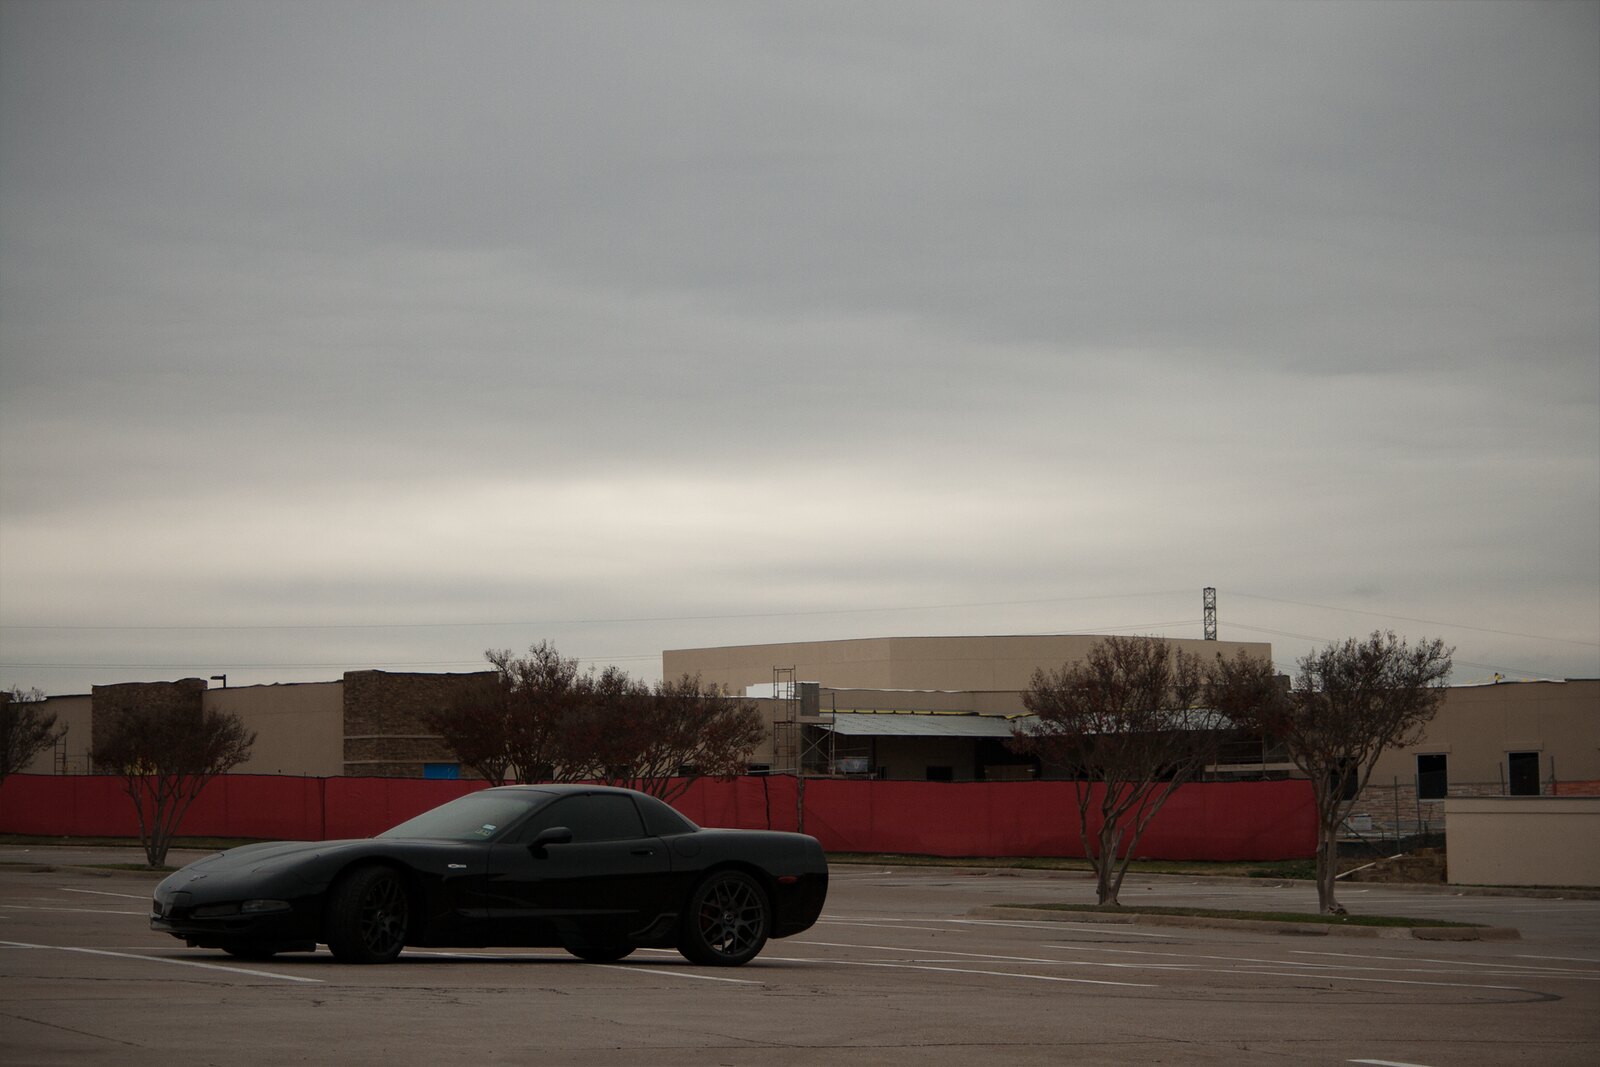
While I was out, I decided to take some new pictures of the wheels/tinted corners. I'm really happy with how it all came out. I think I'm pretty much done with the exterior mods. The lines of the car are great on their own.

Start by lifting the car up in the front. I just drove mine up onto ramps.
Look underneath and find the two brackets that hold the swaybar up. Here's the drivers side:
and the passenger side:
To remove those brackets, undo the 13mm bolts. I made sure to organize my bolts so that I could put them back into the same hole they came out of.
Once removed your swaybar will drop a little bit so be prepared to catch it.
Now all you have to do is take the old bushings off by bending/flexing them off. Make sure to grease up your new bushing before putting it back on.
Torque specs for the front bolts are 43lb/ft.
Now it's time for the rear. You don't have to lift it up but I did just to make it easier. Make sure to chock your front wheels if you do this.
The rear follows the same procedure. Here's a picture of one of mine with the bottom bolt out.
The only tricky part about the rear is that you need a 15mm wrench to hold the bolt in place while removing the nut. The nut is 18mm. I believe the top bolt is 15mm. Torque specs for the rear bolts are 49 ft/lb for the upper and 70 ft/lb for the lower.
After I got it installed, I went for a little ride and surprisingly my squeaks went away! We'll see if this is a permanent thing or not. I drove through an area that constantly makes my car squeak and groan and I didn't hear a single peep out of her.
While I was out, I decided to take some new pictures of the wheels/tinted corners. I'm really happy with how it all came out. I think I'm pretty much done with the exterior mods. The lines of the car are great on their own.
12-11-2013, 08:14 PM
#55
Melting Slicks
Thread Starter
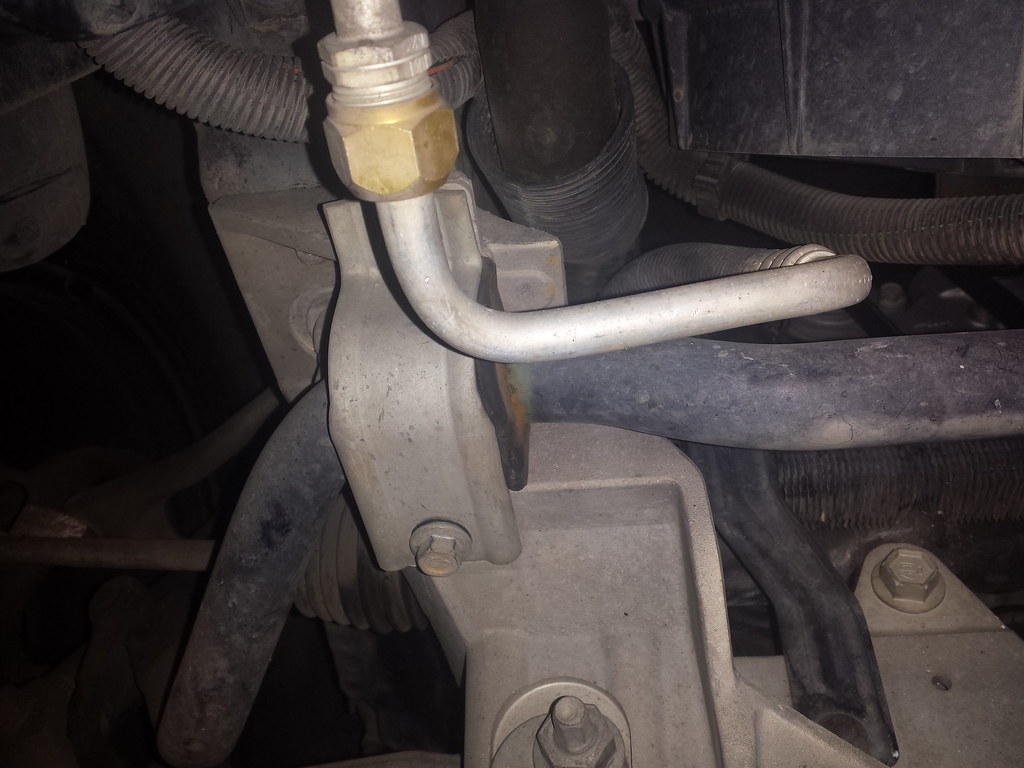
Hmm.. anyone know what part that is? And maybe what that part next to it is?
Last edited by dangerz; 12-11-2013 at 08:23 PM.
12-14-2013, 04:51 PM
#56
Melting Slicks
Thread Starter
So despite the crappy weather, I went to our local Cars and Coffee event. There weren't many people there but I was joined by a friend's c5z and a c7 :]
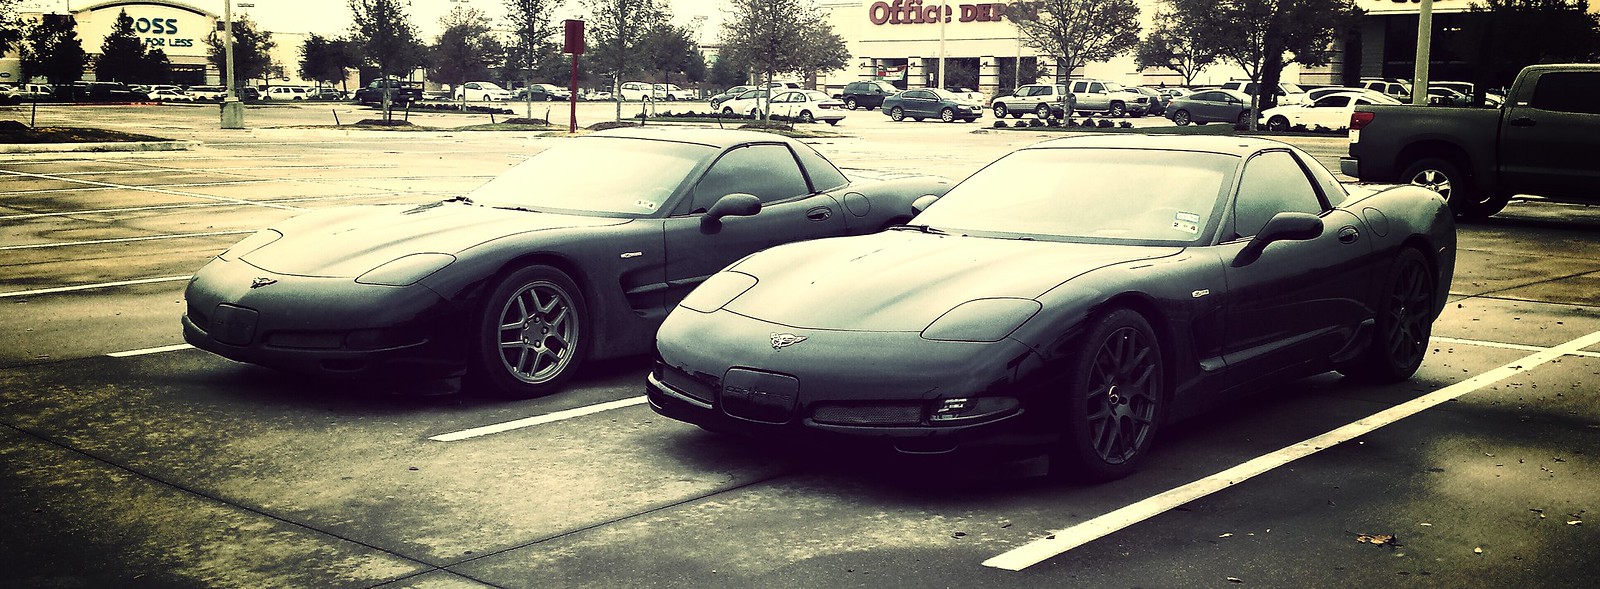
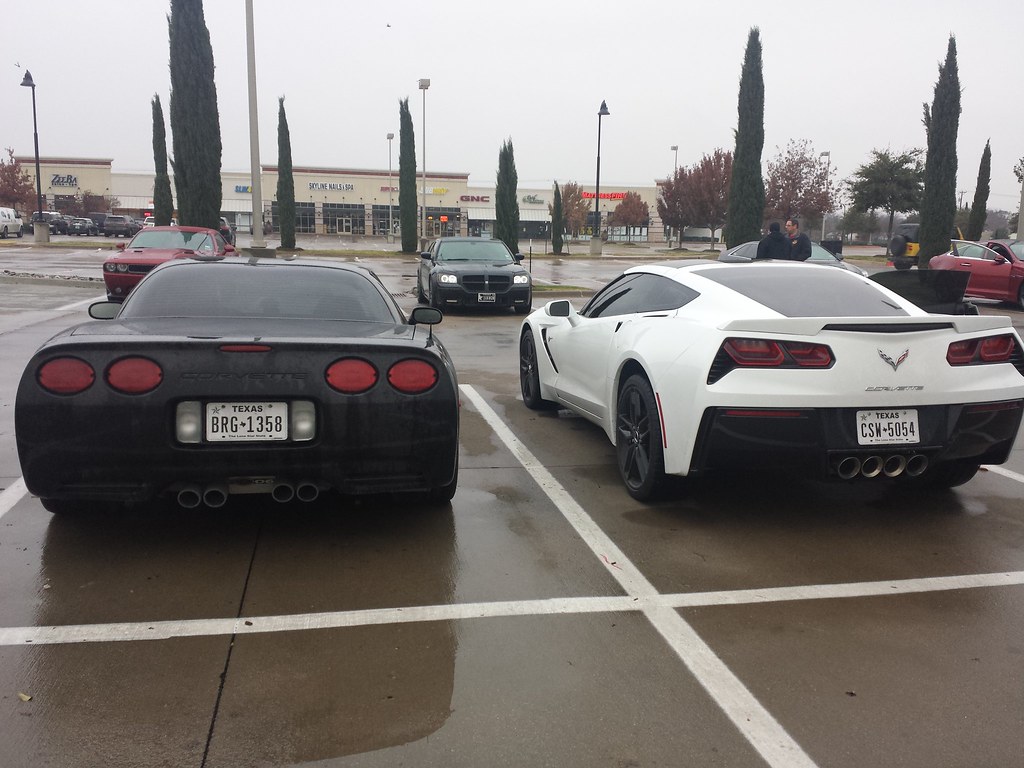
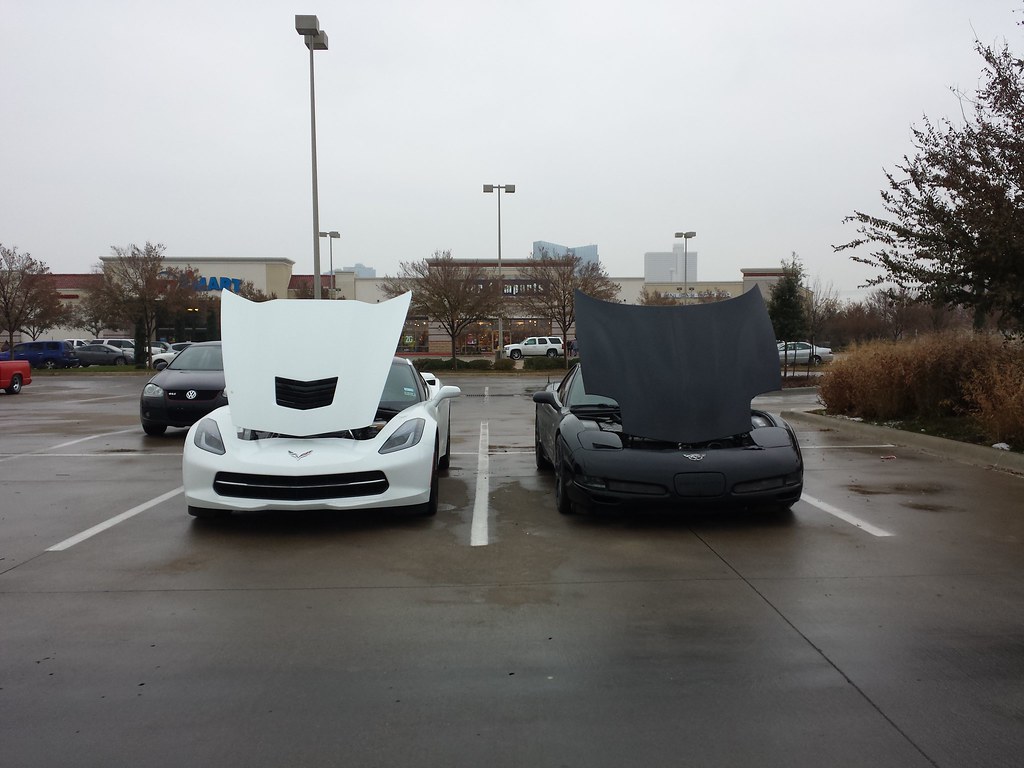
I'm loving the c7 more and more each day. White is definitely my favorite color for this car.
Now onto some real fun stuff...
HUD Update!
So I really love this project. I love the hardware aspect. I love the software aspect. I love the framework I've built. I think it's going to be seriously awesome when finished. I'm even adding bluetooth support to the HUD so I can adjust options and update the software from my phone. I also have micro-sd card support so I can store images on there and use them as boot up screens. All in all it's going to be awesome and I can't wait to road-test it.
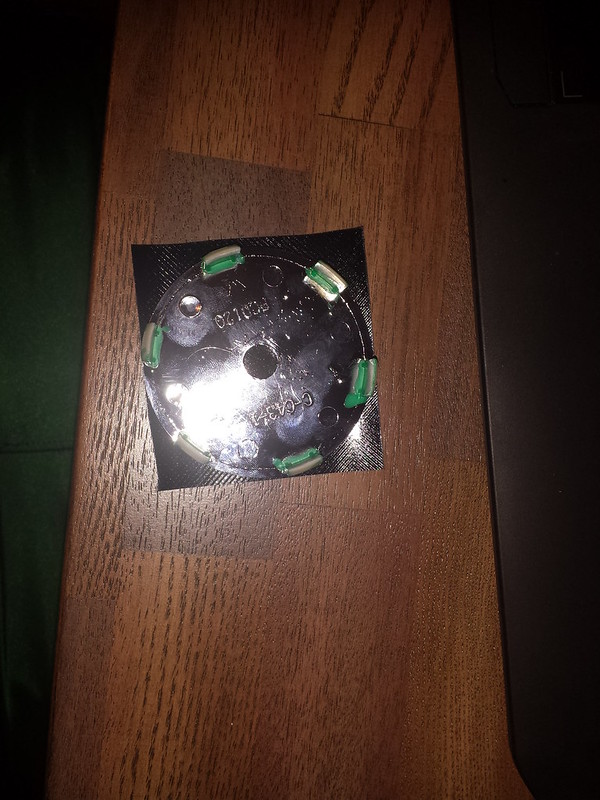
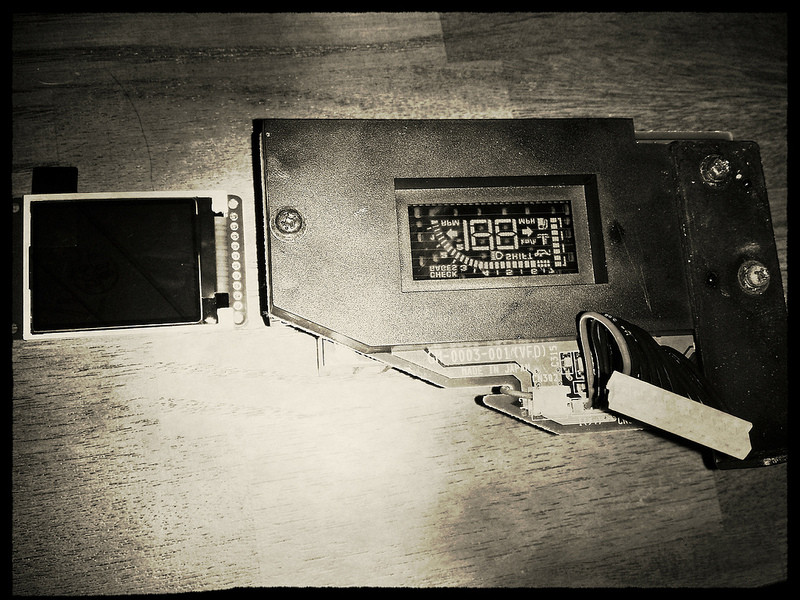
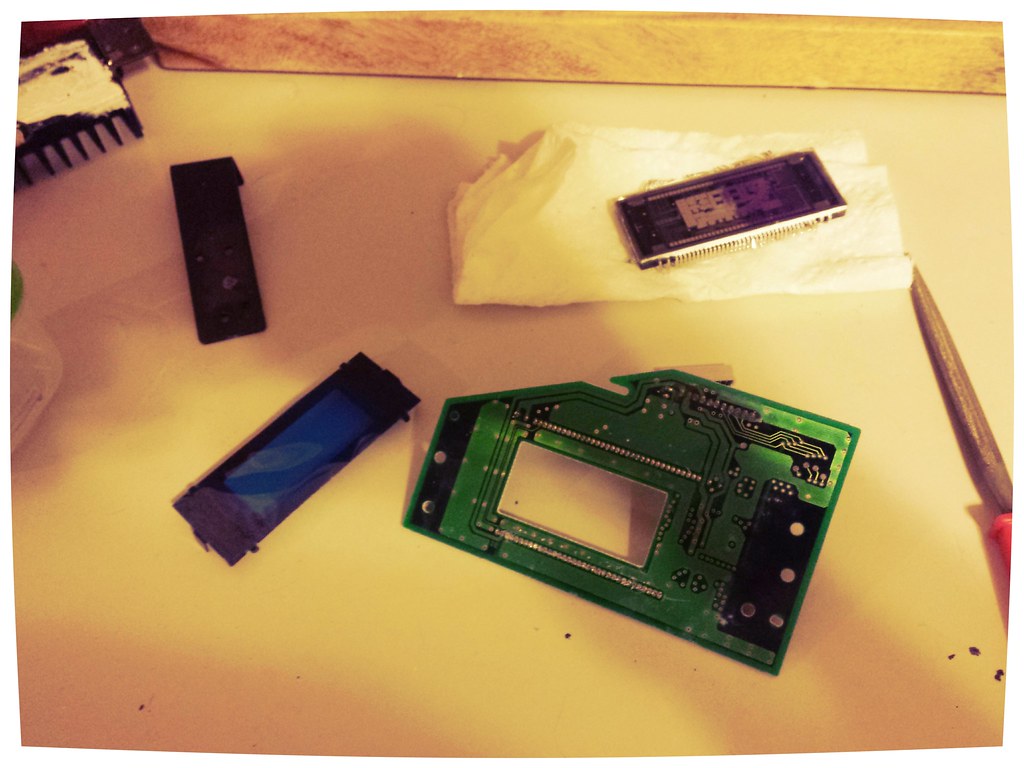
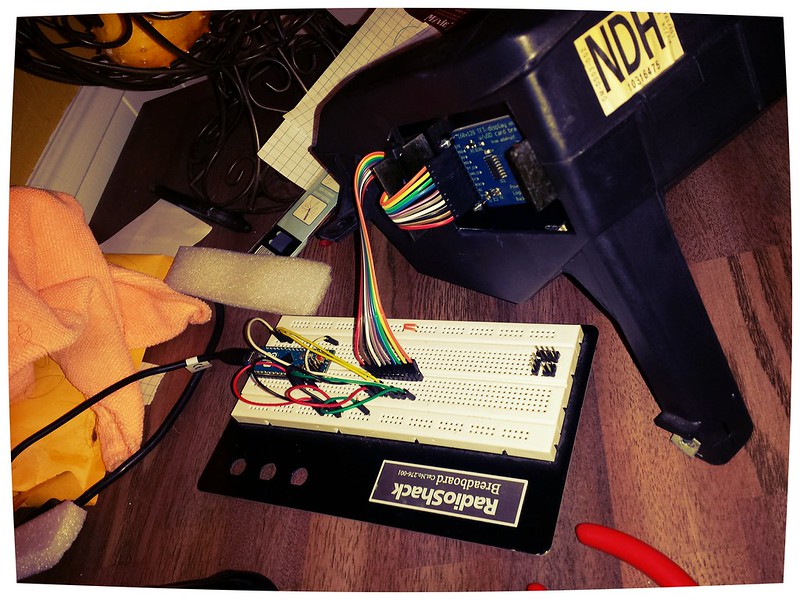
So let's start with where I am. Last week I got a used GM HUD and took it apart. After examining the whole thing I've come to realize that there is only 1 piece that I really need to replace and that is the circuit board for the display (that's the picture in the post you see above). The entire rest of the unit can stay exactly as-is. Once I knew that, it was time to get to work. I started with the software part. I wanted to get something started before I tried to mount my HUD into the GM HUD. This is my little setup.
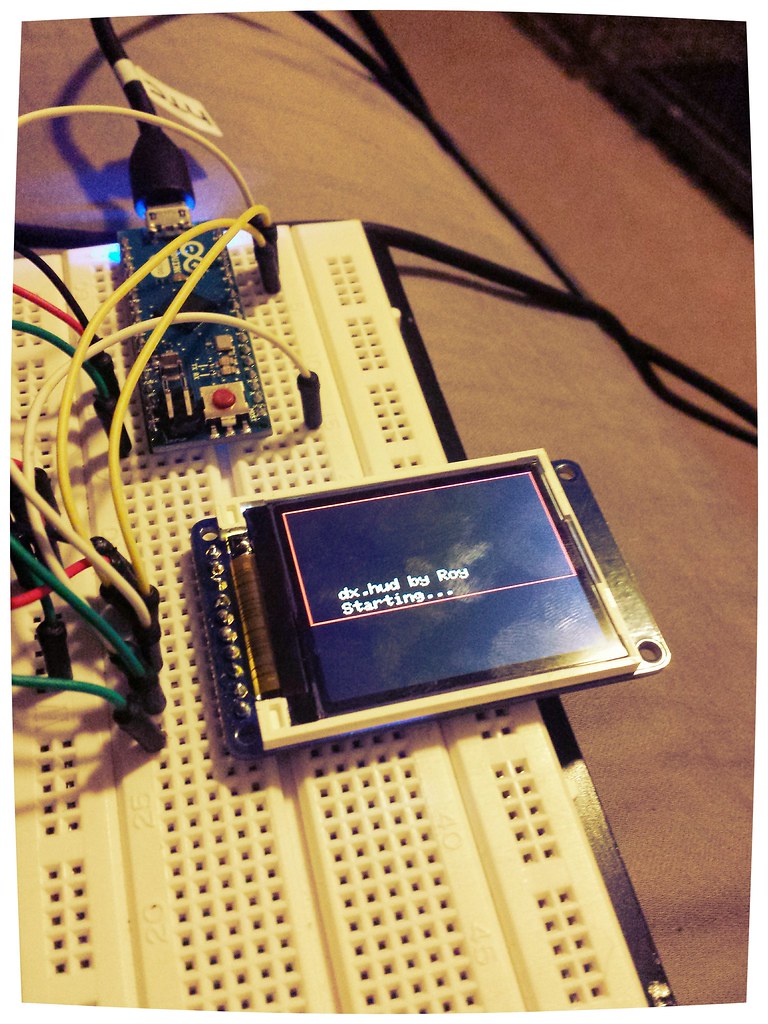
I'm using an Arduino to control the screen. I only have 32KB of space to work with. I can upgrade to a 256KB unit in the future but I want to see if I can make the core fit in 32KB first. What you can't see in this picture is the micro-sd port on the other side. The red box you see on the screen is actually the usable HUD area. It looks tiny, right? That was one of the most surprising things about the GM HUD. The actual HUD screen is very tiny.
Once I had that running well enough, I wanted to see if I could get it mounted in the GM HUD. Time to fabricate :]
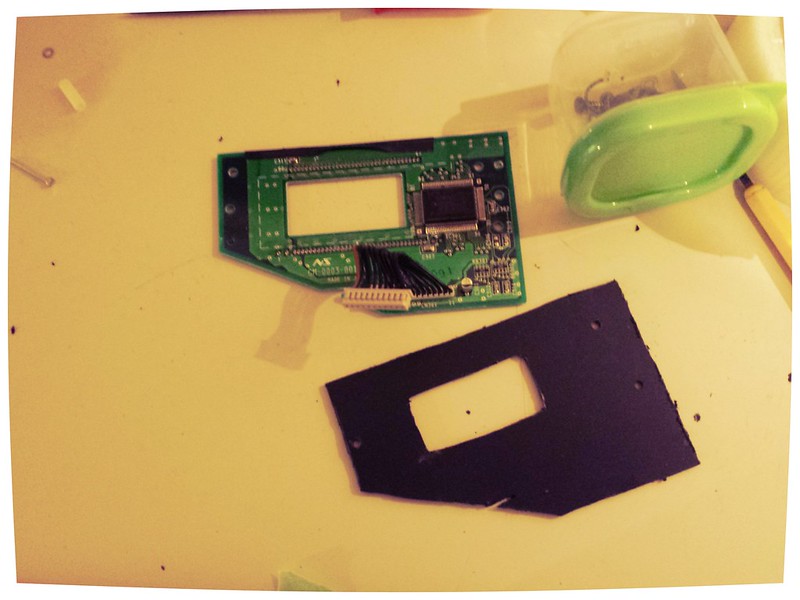
Remember that the piece I wanted to replace is the green one in the post above this. I started by taking it all apart so I can re-use some pieces.
Next came the shape cutting. It's not perfect but it'll do for now. For the final piece I'll have this 3d-printed.
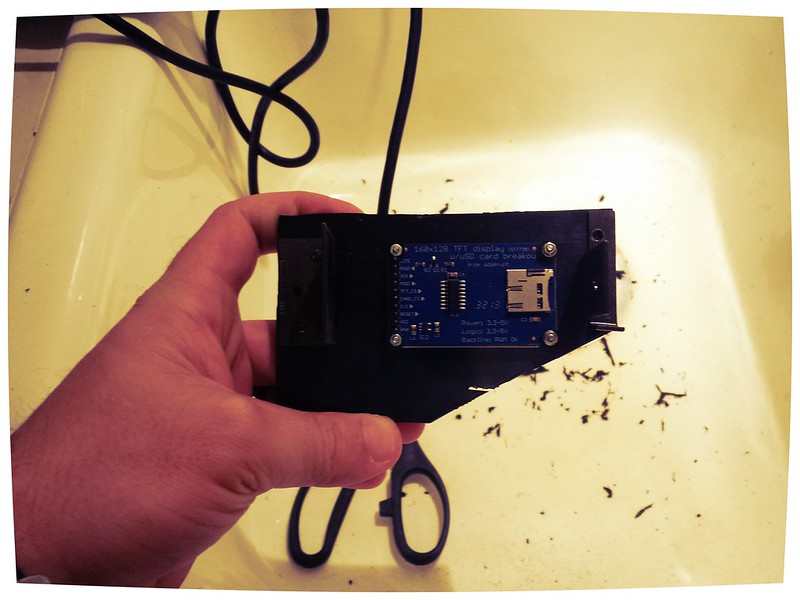
Once I got that fixed up, mounting the screen was easy. You can see the micro-sd card in the 2nd picture.
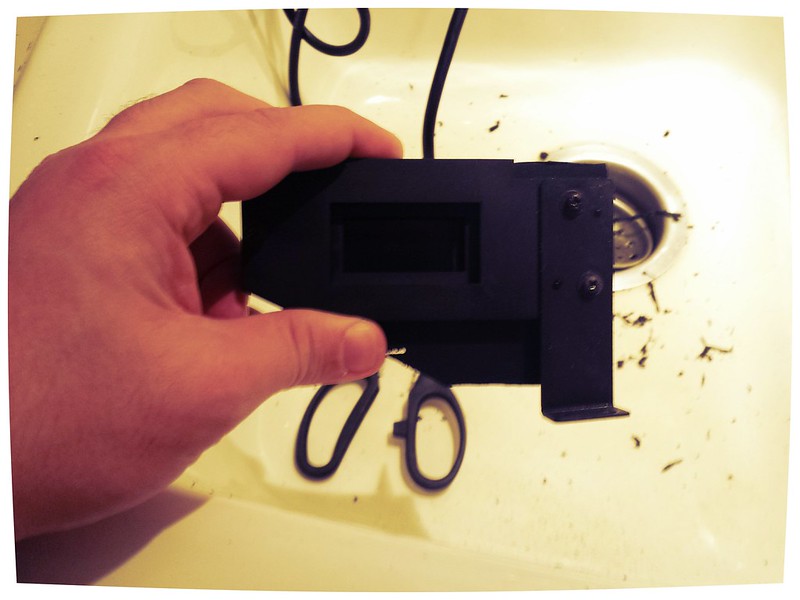
Once that was done, we connect everything.
.... and voila!
This will definitely be tweaked before the final version but at least I can now test and play with everything while it's sitting inside an actual HUD unit. The picture is surprisingly clear through all that glass.
Next step is going to be continuing the software development aspect. Flipping the image left->right will be a pretty simple task. From there I'll start to actually build screens. I'm also going to need to take my dash apart at some point so I can sniff the serial line that feeds into the HUD. I'm crossing my fingers and hoping that it's something I can use to read/request data from the computer. If not I am going to have to run a line down to the ODB II port. If anyone happens to know any software people inside GM that might've worked on the HUD, feel free to send me their contact info :]
I'm loving the c7 more and more each day. White is definitely my favorite color for this car.
Now onto some real fun stuff...
HUD Update!
So I really love this project. I love the hardware aspect. I love the software aspect. I love the framework I've built. I think it's going to be seriously awesome when finished. I'm even adding bluetooth support to the HUD so I can adjust options and update the software from my phone. I also have micro-sd card support so I can store images on there and use them as boot up screens. All in all it's going to be awesome and I can't wait to road-test it.
So let's start with where I am. Last week I got a used GM HUD and took it apart. After examining the whole thing I've come to realize that there is only 1 piece that I really need to replace and that is the circuit board for the display (that's the picture in the post you see above). The entire rest of the unit can stay exactly as-is. Once I knew that, it was time to get to work. I started with the software part. I wanted to get something started before I tried to mount my HUD into the GM HUD. This is my little setup.
I'm using an Arduino to control the screen. I only have 32KB of space to work with. I can upgrade to a 256KB unit in the future but I want to see if I can make the core fit in 32KB first. What you can't see in this picture is the micro-sd port on the other side. The red box you see on the screen is actually the usable HUD area. It looks tiny, right? That was one of the most surprising things about the GM HUD. The actual HUD screen is very tiny.
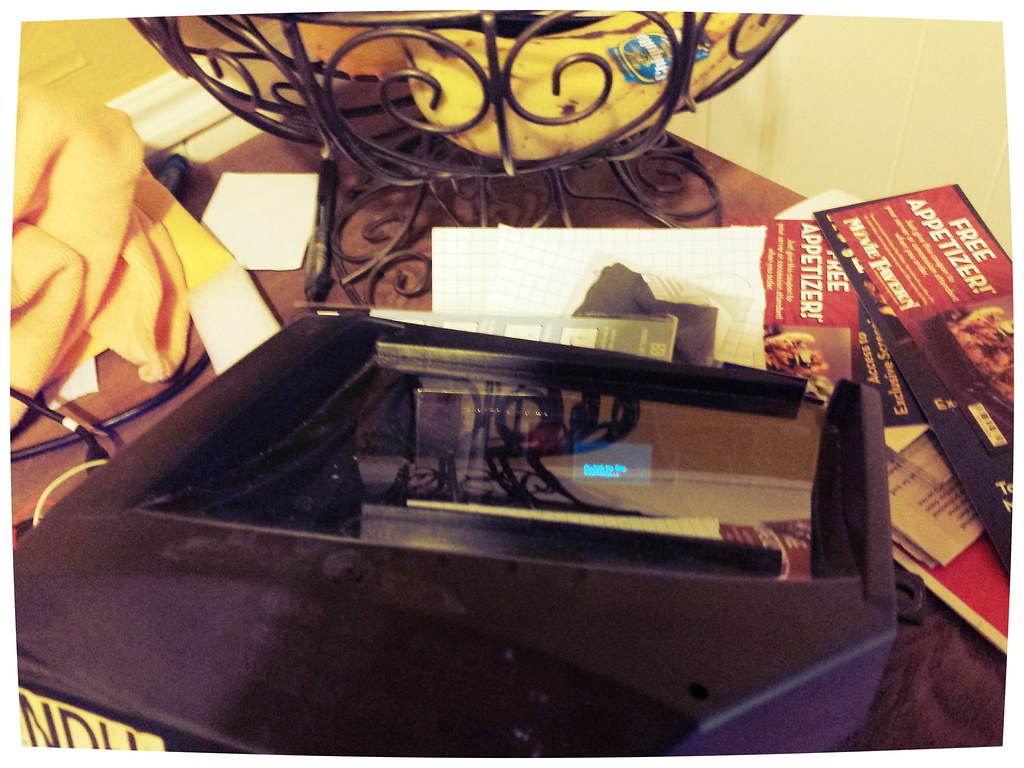
Once I had that running well enough, I wanted to see if I could get it mounted in the GM HUD. Time to fabricate :]
Remember that the piece I wanted to replace is the green one in the post above this. I started by taking it all apart so I can re-use some pieces.
Next came the shape cutting. It's not perfect but it'll do for now. For the final piece I'll have this 3d-printed.
Once I got that fixed up, mounting the screen was easy. You can see the micro-sd card in the 2nd picture.
Once that was done, we connect everything.
.... and voila!
This will definitely be tweaked before the final version but at least I can now test and play with everything while it's sitting inside an actual HUD unit. The picture is surprisingly clear through all that glass.
Next step is going to be continuing the software development aspect. Flipping the image left->right will be a pretty simple task. From there I'll start to actually build screens. I'm also going to need to take my dash apart at some point so I can sniff the serial line that feeds into the HUD. I'm crossing my fingers and hoping that it's something I can use to read/request data from the computer. If not I am going to have to run a line down to the ODB II port. If anyone happens to know any software people inside GM that might've worked on the HUD, feel free to send me their contact info :]

 12-16-2013, 05:54 PM
#58
Melting Slicks
Thread Starter
Oh this will have more than just color. This will have color, multiple pages (track mode, street mode, etc.), bluetooth song (show what song is playing) and bluetooth nav support.
I made some good progress last night which you can read about here: http://dangerz.blogspot.com/ I'm only going to update this thread when I have major updates to show off. More technical oriented updates will stay on my little blog.
I made some good progress last night which you can read about here: http://dangerz.blogspot.com/ I'm only going to update this thread when I have major updates to show off. More technical oriented updates will stay on my little blog.
12-17-2013, 09:40 AM
#60
Safety Car

Member Since: Jul 2012
Location: Houston Texas
Posts: 4,543
Received 277 Likes
on
85 Posts
C5 COTM Coordinator

Oh this will have more than just color. This will have color, multiple pages (track mode, street mode, etc.), bluetooth song (show what song is playing) and bluetooth nav support.
I made some good progress last night which you can read about here: http://dangerz.blogspot.com/ I'm only going to update this thread when I have major updates to show off. More technical oriented updates will stay on my little blog.
I made some good progress last night which you can read about here: http://dangerz.blogspot.com/ I'm only going to update this thread when I have major updates to show off. More technical oriented updates will stay on my little blog.