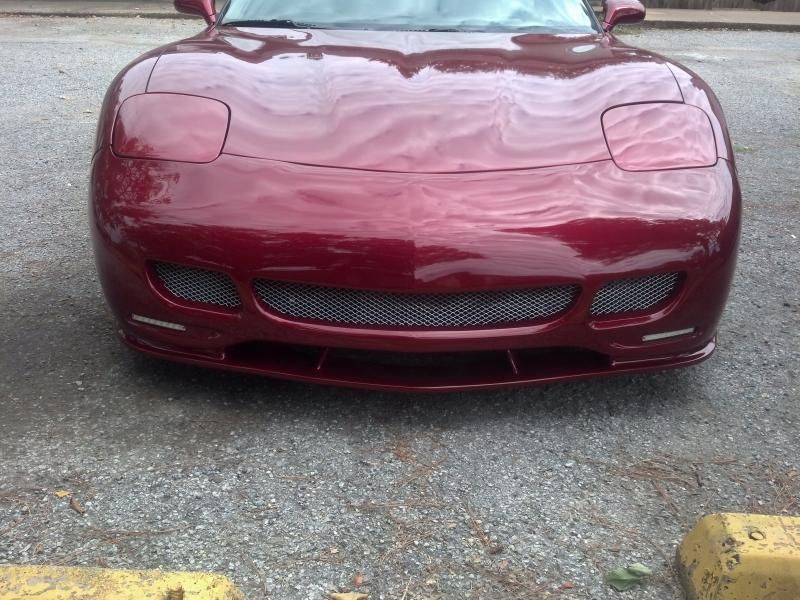
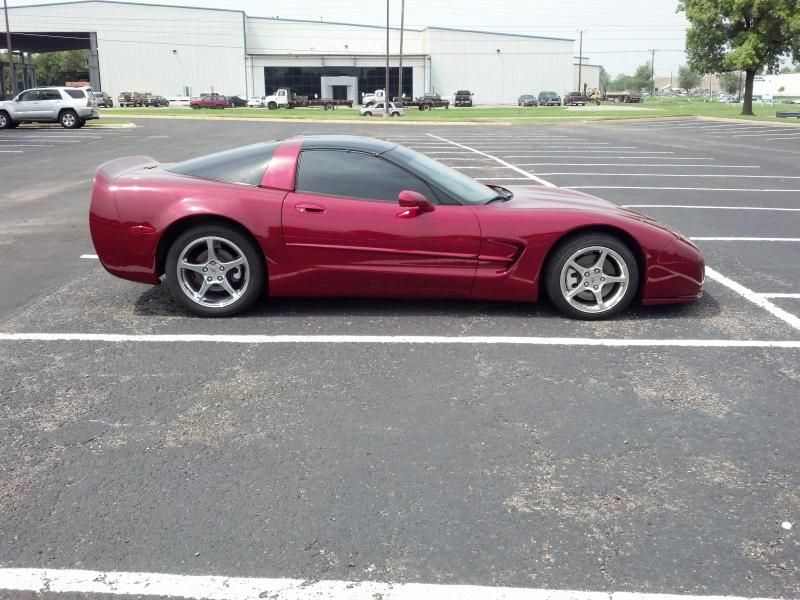
*Official* Urethane TS2 Bumper Group Buy!!
#301
Former Vendor
Thread Starter
#302
ISIS SUCKS FAT CHOAD
Awesome!!! What do you guys have for rear bumpers? I'm not sure who makes it but I've seen a few vetts with a rear bumper and spoiler combo that curves up just slightly and I really like it.
#303
Former Vendor
Thread Starter
#304
Melting Slicks


Member Since: Nov 2004
Location: Lake Oswego, Near Portland Oregon
Posts: 2,275
Likes: 0
Received 5 Likes
on
5 Posts

Jennifer
EDIT
http://corvettecreationz.com/store/i...&product_id=86
Then click on the center photo thumbnail in the upper row...the silver vert.
This view shows the contour of the upper spoiler lip edge better.... Yeah, I would like one of these too...
Last edited by FiberglassFan; 08-18-2013 at 01:49 AM.
#306
Former Vendor
Thread Starter
#307
Melting Slicks


Member Since: Nov 2004
Location: Lake Oswego, Near Portland Oregon
Posts: 2,275
Likes: 0
Received 5 Likes
on
5 Posts

We had a beautiful day in NW Oregon, free of the opressive humidity that plagued us in recent days, reminding me of growing up in Minnesota and Ohio. I took advantage of the day to get my turn signals fitted to the TS2.
Here is what you get from the guy on eBay....the link is earlier in this thead.


I modified them by installing 'trailer plug' connectors so that it would be easy to plug them in and out in the coming install procedure,
I had mentioned some rough edges on the bumper...this is a detail of how mine looks...no big deal, a little skim of bondo and some block sanding and it will be slick!
What you dont really see is how smooth the countors of the pumber really are...no waves and warpes to deal with. The urethane is thick and has good self support. Dressing the edges is nothing compared to the issues I have seen in the past on other aftermarket body parts with waves and ruffles molded into the contours...this TS2 is real nice in that regard!

Here is how the lamp will not fit into the stock hole.

I started out with a die grider and a small diamter bit to open up the hole a bit, first removing the ends that were WAY to small...don't worry about the scrapes that you see on the flange, that is the bottom flange that is about to go away...

It took a bit of test fitting over and over, to make sure I did not remove too much, nor too little. I removed all the flanges all around except for the top edge with the air tool and some round and flat files, followed by sandpaper.

Here we see the lamp from behind, and how the mounting bracket will fit onto the remaining flange of the bumber.
I did some wet sanding too all over the bumper but I was loosing light and could not take any more photos. With the lamps now mountable, I feel almost ready to start the on-car fitment. I still have to get the lamp mounting finalized and whatever holes will be needed drilled and ready, then its on to fitment of the TS2 on the car!
Hey, Not a bad day for an old girl in her 60s...!
Here is what you get from the guy on eBay....the link is earlier in this thead.


I modified them by installing 'trailer plug' connectors so that it would be easy to plug them in and out in the coming install procedure,
I had mentioned some rough edges on the bumper...this is a detail of how mine looks...no big deal, a little skim of bondo and some block sanding and it will be slick!
What you dont really see is how smooth the countors of the pumber really are...no waves and warpes to deal with. The urethane is thick and has good self support. Dressing the edges is nothing compared to the issues I have seen in the past on other aftermarket body parts with waves and ruffles molded into the contours...this TS2 is real nice in that regard!

Here is how the lamp will not fit into the stock hole.

I started out with a die grider and a small diamter bit to open up the hole a bit, first removing the ends that were WAY to small...don't worry about the scrapes that you see on the flange, that is the bottom flange that is about to go away...

It took a bit of test fitting over and over, to make sure I did not remove too much, nor too little. I removed all the flanges all around except for the top edge with the air tool and some round and flat files, followed by sandpaper.

Here we see the lamp from behind, and how the mounting bracket will fit onto the remaining flange of the bumber.
I did some wet sanding too all over the bumper but I was loosing light and could not take any more photos. With the lamps now mountable, I feel almost ready to start the on-car fitment. I still have to get the lamp mounting finalized and whatever holes will be needed drilled and ready, then its on to fitment of the TS2 on the car!
Hey, Not a bad day for an old girl in her 60s...!

Last edited by FiberglassFan; 08-19-2013 at 12:33 AM.
#308
Melting Slicks


Member Since: Nov 2004
Location: Lake Oswego, Near Portland Oregon
Posts: 2,275
Likes: 0
Received 5 Likes
on
5 Posts


Here you can see one of the test fitting steps...placing the lamp in the hole as I enlarge it, to visualise where to remove more material.
Here we are getting pretty close...note the rough edges of the hole I have made, ....they do not stay that way! I used a combination of body file and small radius rasp-file to dress the edges smoother, and then finished off with finer and finer grades of sandpaper. I ran out of light before I could get some good shots of the outside...I got the shot from inside in the previous post, and then had to break for dinner,,,So, some photos of the outside will have to wait for another day.

Fitting the first lamp hole took about an hour and 45 minutes. I went slow and figured my way as I went...the second one only took about 40 minutes. By then I know I would remove all the flanging except the upper, so I just hit that hard right off, and commenced to shape the ends. Knowing what you are going to, compared to figuring out what you have to do to make things work, saves a LOT of time!
I'm getting excited about this project now!...Making progress is always good for additional ambition! My goal is to get the bumpre cover totally fitted and shaped to prefection in the coming weeks... Remember, I also plan to convert the ducting to the radiatior for front air feed, and I have to open holes in the mesh for the fog lights too....Gona be an interesting project!
Last edited by FiberglassFan; 08-19-2013 at 12:29 AM.
#309
Former Vendor
Thread Starter
Awesome work Jennifer, I'm sure a lot of guys will appreciate the time you've put into it, you're still very young, don't kid yourself 
Believe it or not those lights were sent to them when making the mold. In a way though, I'm glad that they are tight as opposed to loose otherwise it would be much harder to fill instead of opening up. Not to mention, these lights were what we chose, but really any running light can be used.
Keep up the good work

#310
Melting Slicks


Member Since: Nov 2004
Location: Lake Oswego, Near Portland Oregon
Posts: 2,275
Likes: 0
Received 5 Likes
on
5 Posts

Awesome work Jennifer, I'm sure a lot of guys will appreciate the time you've put into it, you're still very young, don't kid yourself 
Believe it or not those lights were sent to them when making the mold. In a way though, I'm glad that they are tight as opposed to loose otherwise it would be much harder to fill instead of opening up. Not to mention, these lights were what we chose, but really any running light can be used.
Keep up the good work

Believe it or not those lights were sent to them when making the mold. In a way though, I'm glad that they are tight as opposed to loose otherwise it would be much harder to fill instead of opening up. Not to mention, these lights were what we chose, but really any running light can be used.
Keep up the good work

Making a hole bigger is easy compared to making it smaller, especially with urethane. Steel is easy to weld, fiberglass is just some resin and glass filler, but with urethane, its an issue! There is a 2 part urethane adhesive/putty that can be used for the purpose to either glue parts back together, or to build up around a hole, but the kit starts at $100!! I'm real happy just making a smaller hole a little larger.


I like these lamps...they light up really nice. the bi-color takes them from a highly visible crisp white running light to a warm amber turn. They are easy to mount too....We may be ordering another set to custom mount into my husbands Jeep Wagoneer...all the plastic on the turn signals and side markers is failing at nearly 40 years of age, and with LED technology where its at today, its a no-brainer!


