When you click on links to various merchants on this site and make a purchase, this can result in this site earning a commission. Affiliate programs and affiliations include, but are not limited to, the eBay Partner Network.
Just so the guy's before me will get another notification... I did the front license plate mod on my C5 Z06 with function.
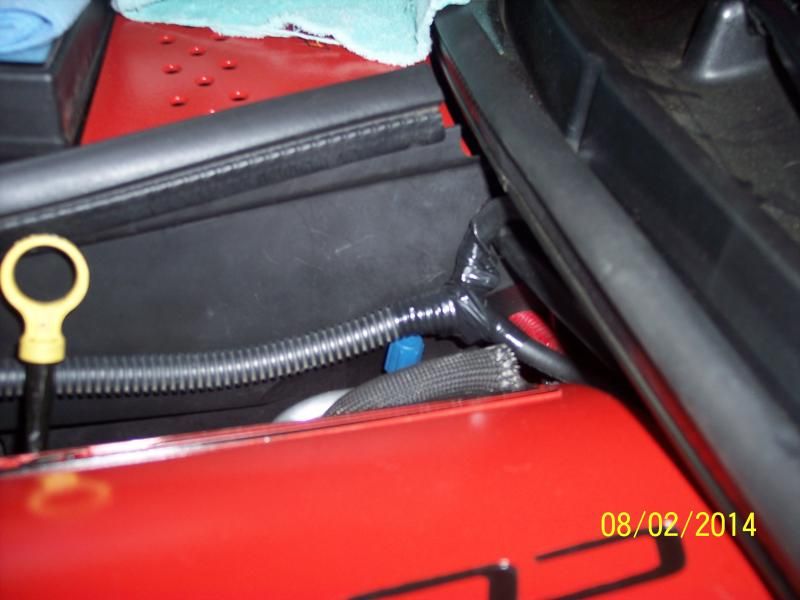
Completed look with T304 stainless steel mesh pic# 2
I'm diggin this. I had to cut mine out anyway for easier access when I mounted my front splitter. Where did you get the stainless steel mesh from may I ask? The black edge is just door guard edge from the auto store I assume?
I'm diggin this. I had to cut mine out anyway for easier access when I mounted my front splitter. Where did you get the stainless steel mesh from may I ask? The black edge is just door guard edge from the auto store I assume?
Yes sir you would be correct on the door guard edge.
The T304 stainless steel mesh I ordered from here:
It is part# 85385T29 in 12X12 $23.62 plus tax.
It seems to match exactly what GM has used on our C5 Z06 bumpers.
Cleaned up the shroud and painted, $5 for acrylic paint and brush.
Aluminum "exhaust enhancer" plate, $8 ace hardware 12x6 aluminum sheat, m3 double sided tape and leftover plastidip paint print out whatever you like for a template. (c7r Jake for mine)
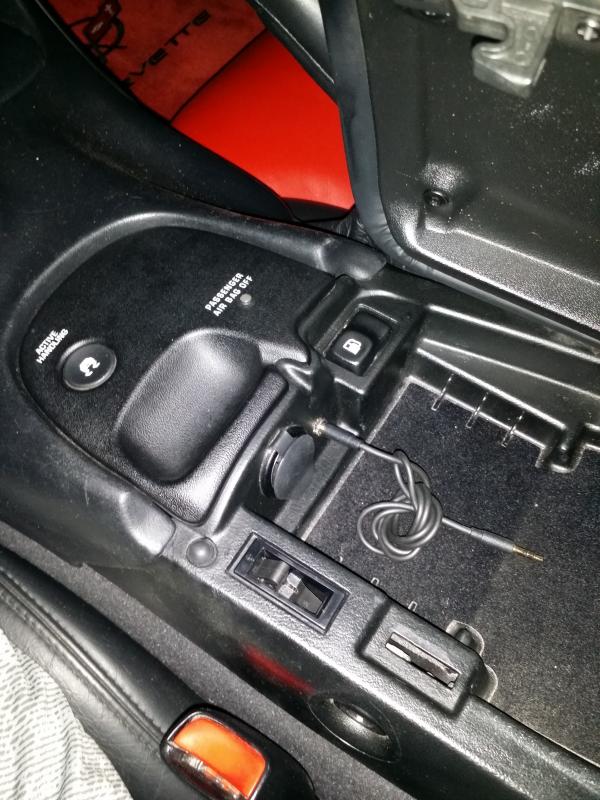
And I finally got around to cutting and soldering my stock harness to install an audio jack routed to the center counsel. $3 at radio shack for the 1/8th inch unit. Also i can comfirm that the #1 and #3 wires work for an 02 z06. (cd must be in the deck though)
Heres a link to the writeup http://ls1tech.com/forums/stereo-ele...t-adapter.html
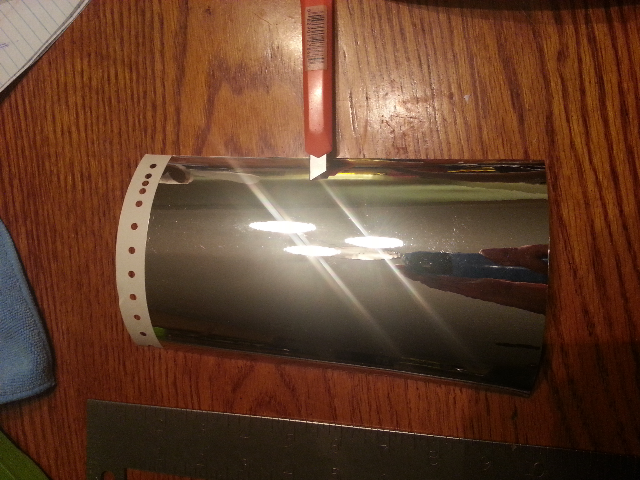
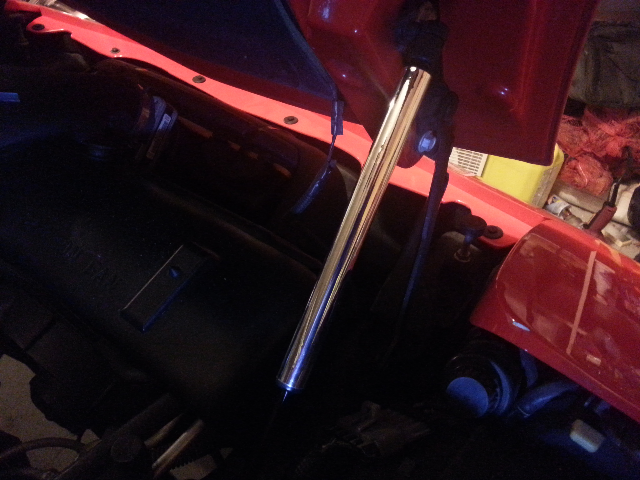
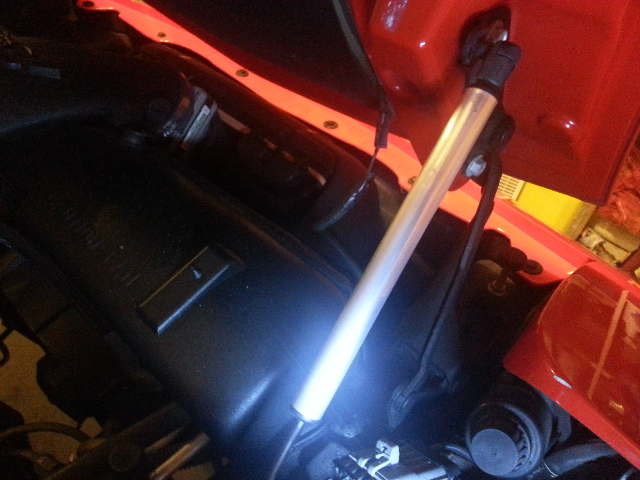
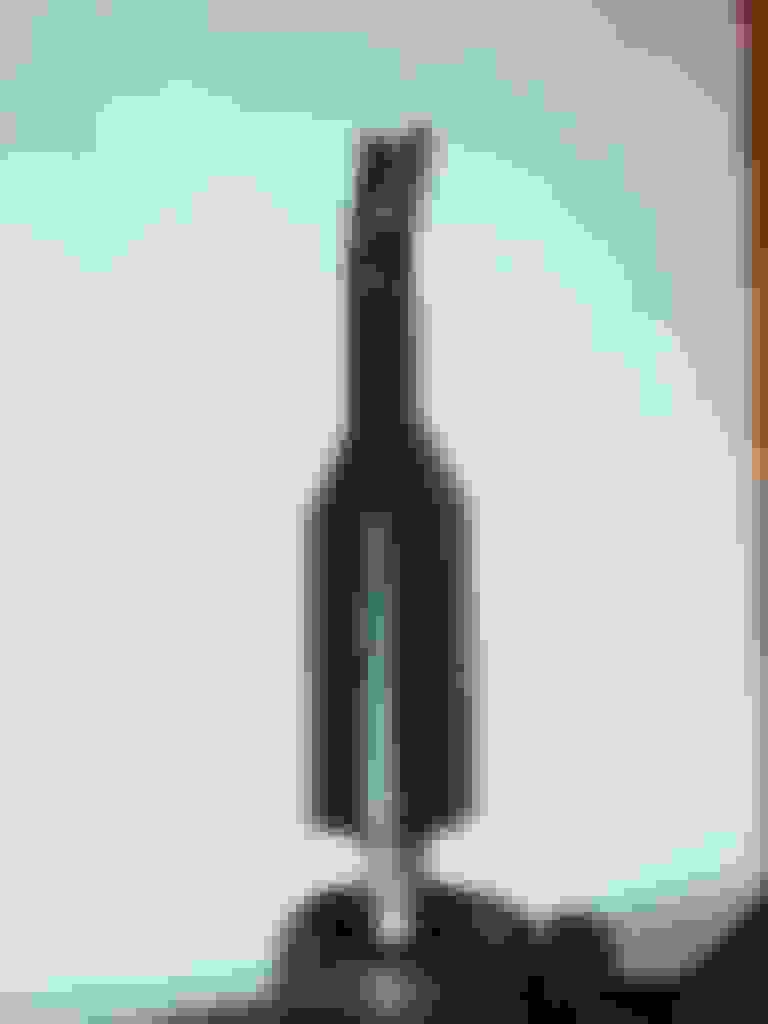
I wanted to change the look of my hood support shocks and the chrome ones are ridiculously priced and I really am not very hot on chrome. Soooo wrapped mine with some chrome vinyl. I cut the chrome vinyl 7.5" long 2.5" wide I wrapped it around the shock/strut and viola chrome look hood supports. Like I said earlier I'm not hot on chrome though so I took some 3000 grit wet dry sand paper and wet sanded the chrome vinyl a bit the finished product looks very similar to a billet aluminum. More of the look I was after.
Chrome vinyl
Clean the strut then place the vinyl on and wrap it around
Done (sort of) chrome look hood supports
I prefer this look after a little wet sand with some 3000grit wet dry sand paper
had 2 brackets on the Harley to hold phone and gps....took of one of the kuryakyn parts and made bracket....had to pull console and wiggle alot but looks great!!!
the personalized piece at top wasnt cheap but the painted hoodliner and sticker total cost $45. Learn from my mistake...when applying sticker use spray adhesive!!!
The Corsa catback that came with my car was too quiet so I drilled a 1/2" hole
in steps 1/8, 1/4, 1/2 through the case into the tailpipe then capped it.
Sounds great and no drone.
This can be done to any muffler.
May go with a 3/4" hole later.
Last edited by StrangelovesM6Vert; 08-24-2014 at 04:39 PM.
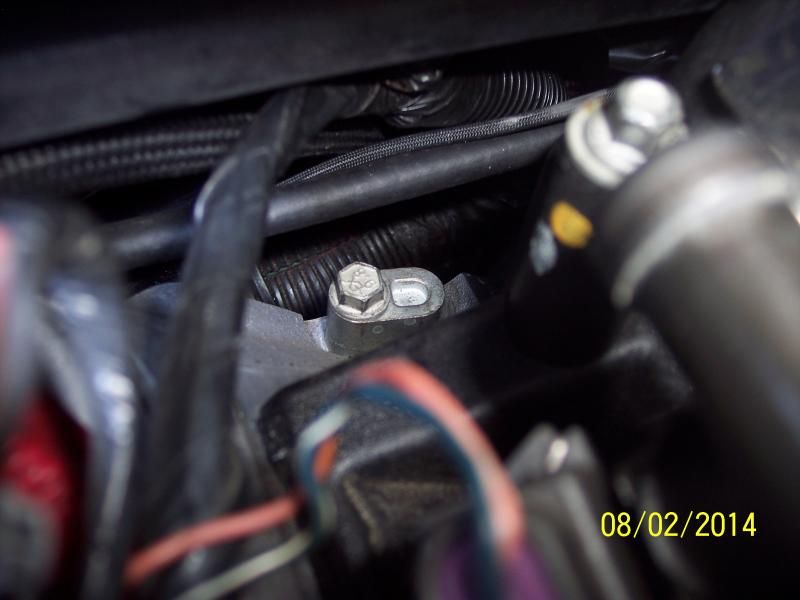
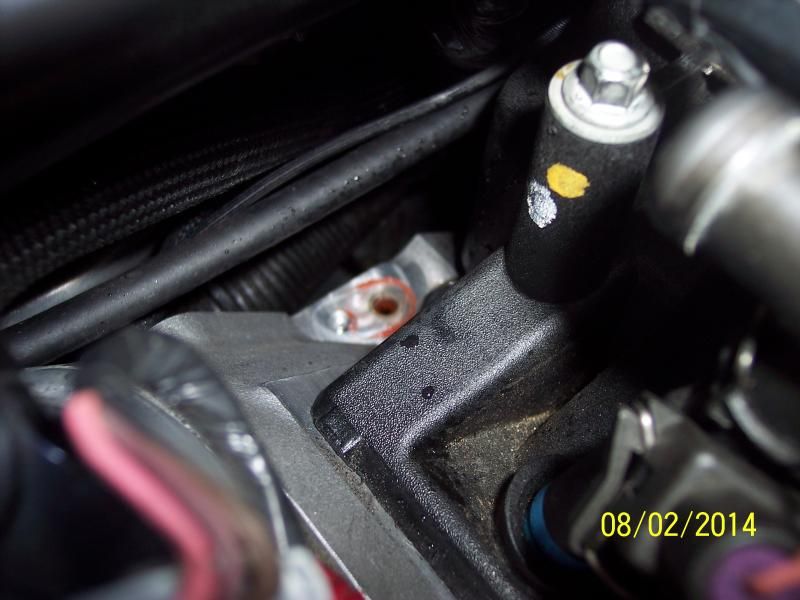
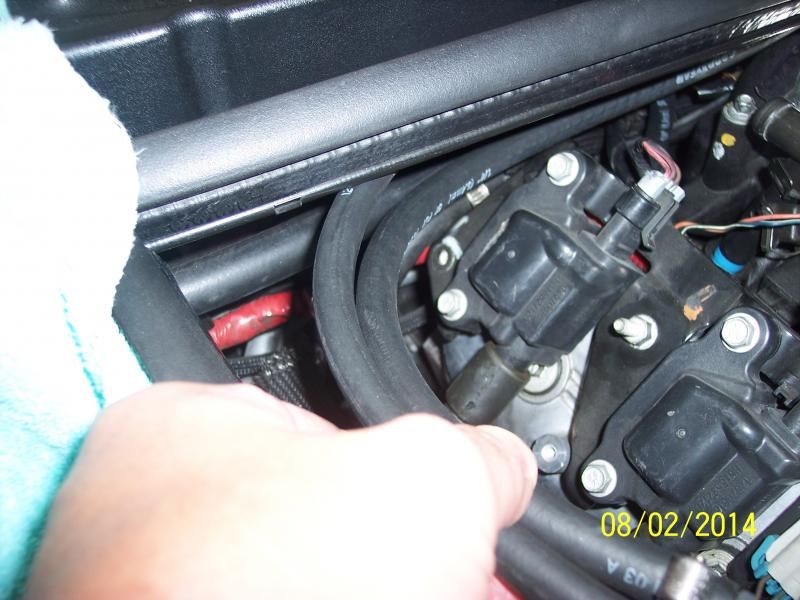
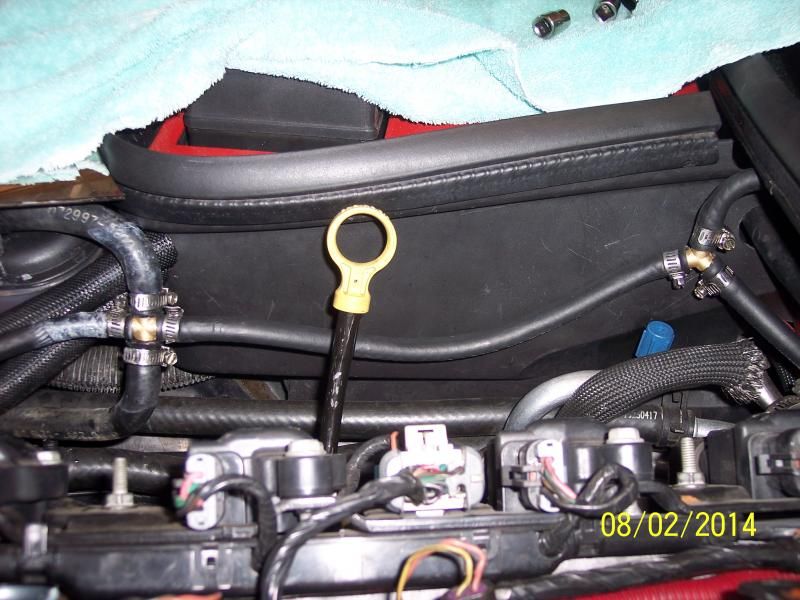
You have air trapped in the block - it needs to be burped and you just can't get it all out since we have the rear plugs in the back of the heads - well you can do this!
(2 ea.) http://cgi.ebay.com/ws/eBayISAPI.dll?ViewItem&item=360869686162&ssPageName=ADME:L:OC:US:3160(1 ea.) http://cgi.ebay.com/ws/eBayISAPI.dll?ViewItem&item=370990740222&ssPageName=ADME:L:OC:US:3160(1 ea.) http://cgi.ebay.com/ws/eBayISAPI.dll?ViewItem&item=371002092316&ssPageName=ADME:L:OC:US:3160(1 ea.) Approx 5' of 1/4 fuel line
(9 ea.) Hose clamps
(1) Roll electrical Tape (choice of your color)
3' feet convoluted tubing
Remember that I had already bypassed the front cross over tube from going to the radiator and re-routed it to go into the return of the expansion tank -
Now! I am doing the same thing with the rear ports, which have plugs -
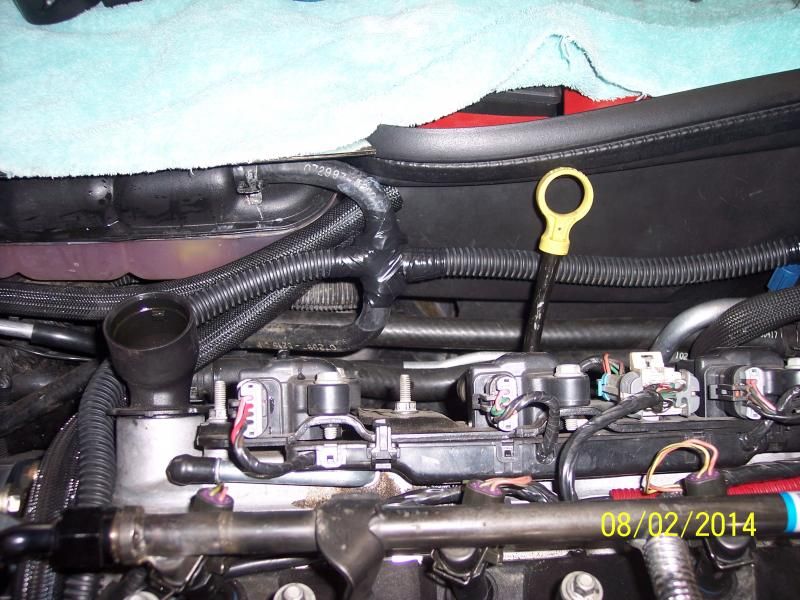
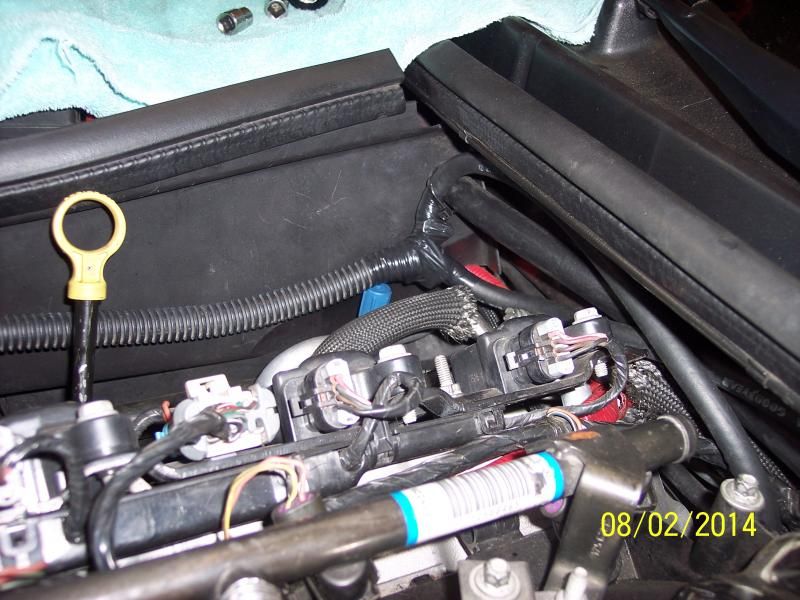
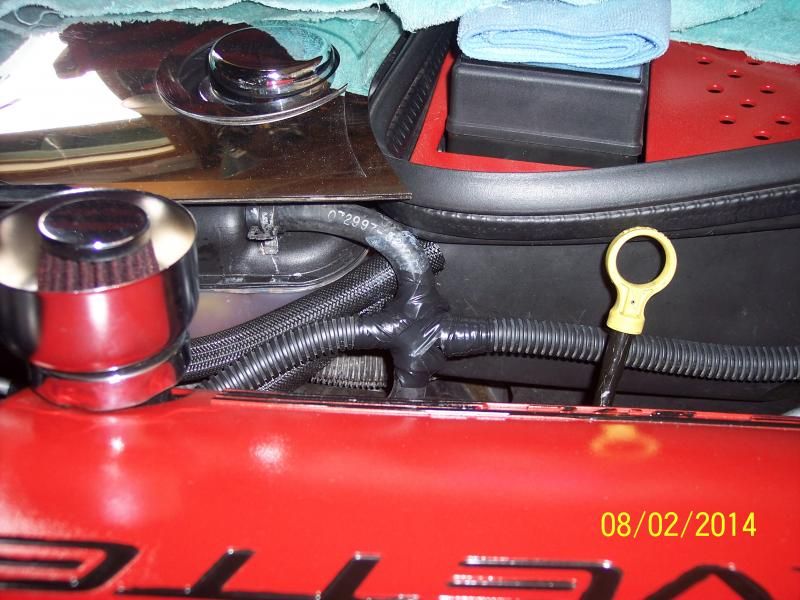
All the pictures are pretty much self explanitory but I will add some comments, here goes:
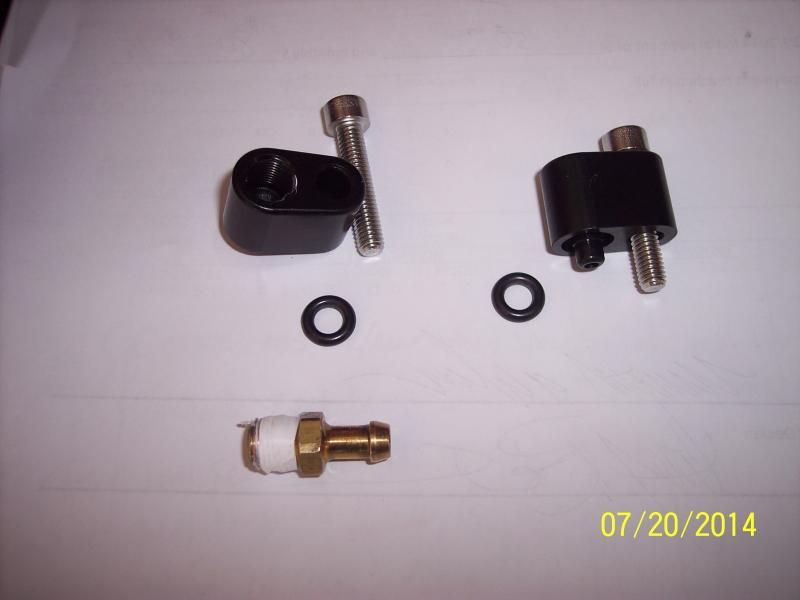
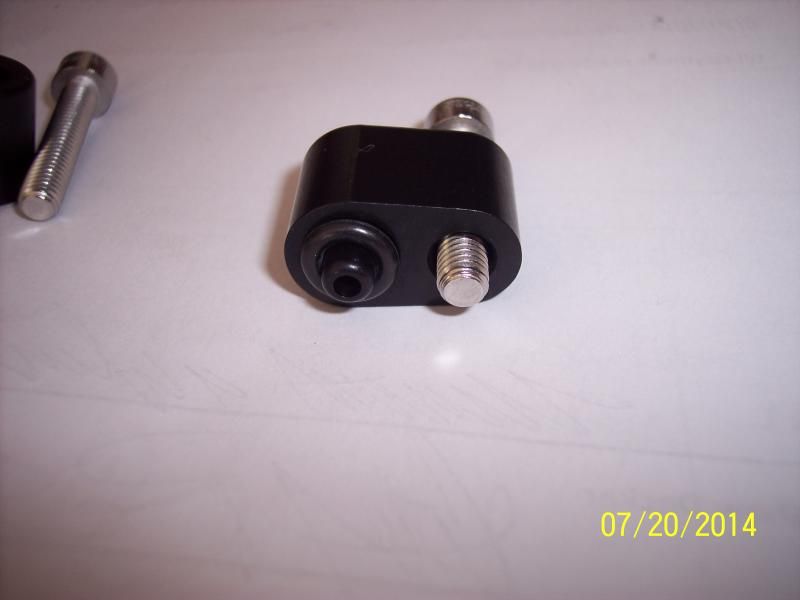
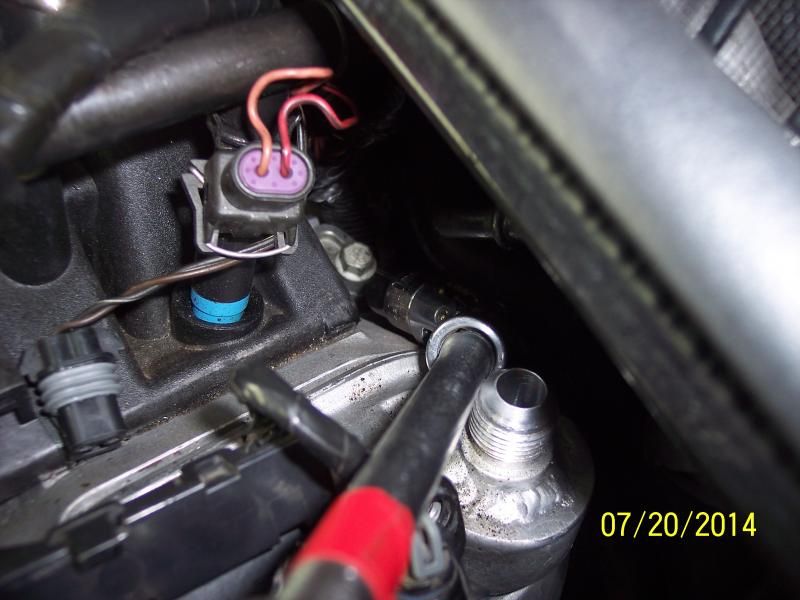
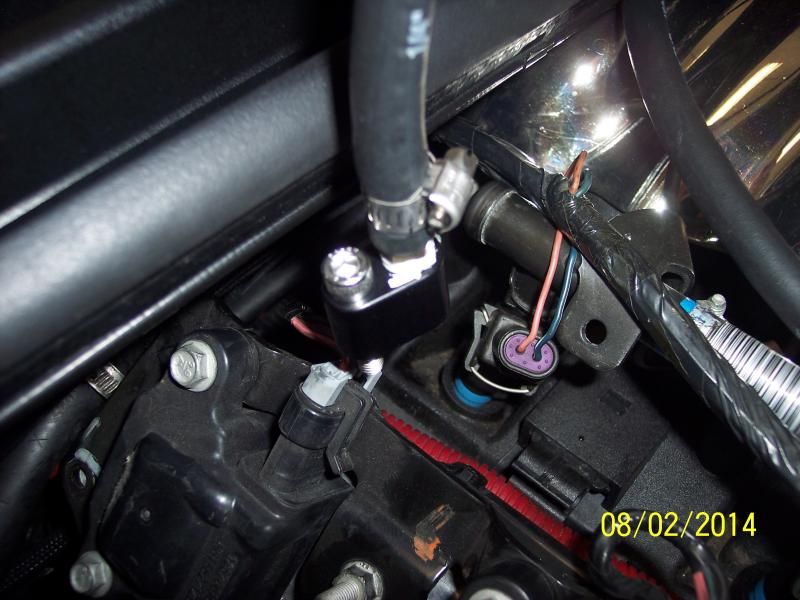
Install the 1/8NPT x 1/4" Nipple in the water fitting block:
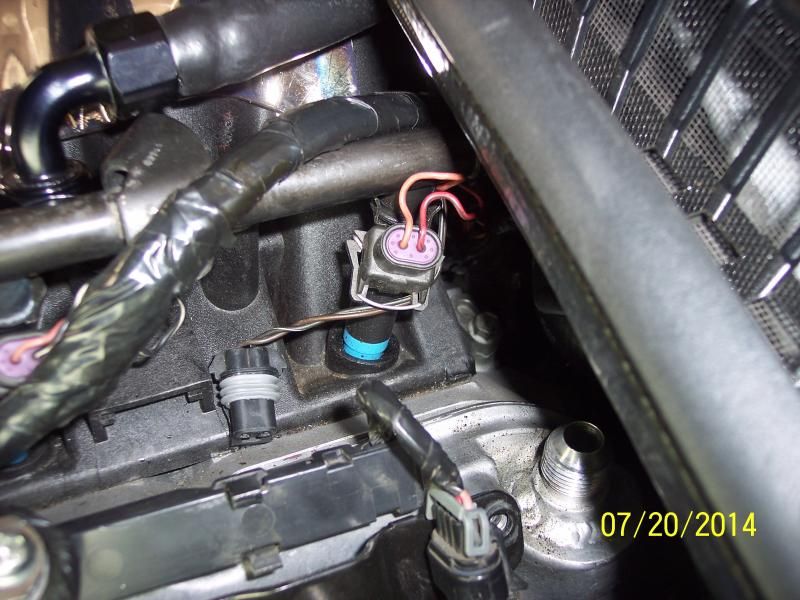
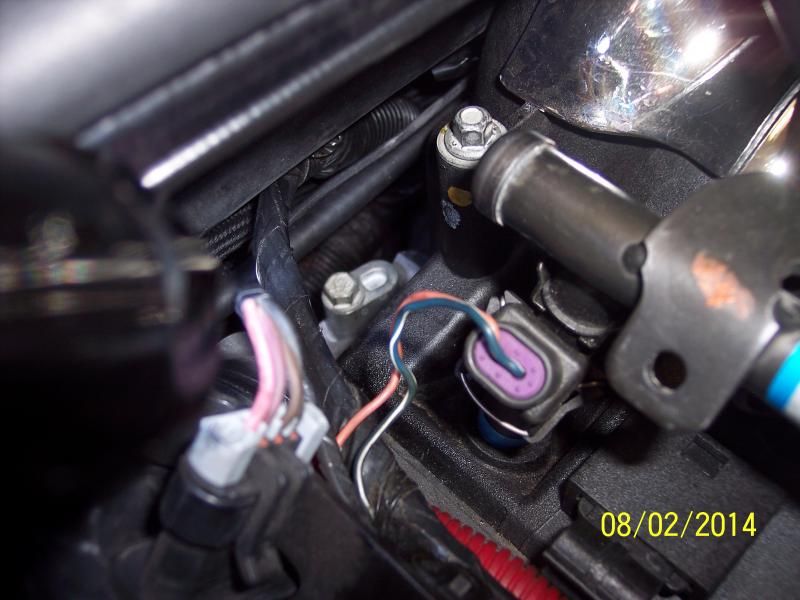
Pull a few things out of the way, you can even pull the coil packs to make it even simpler, but just pull up the harnesses over the rail and you will be good:
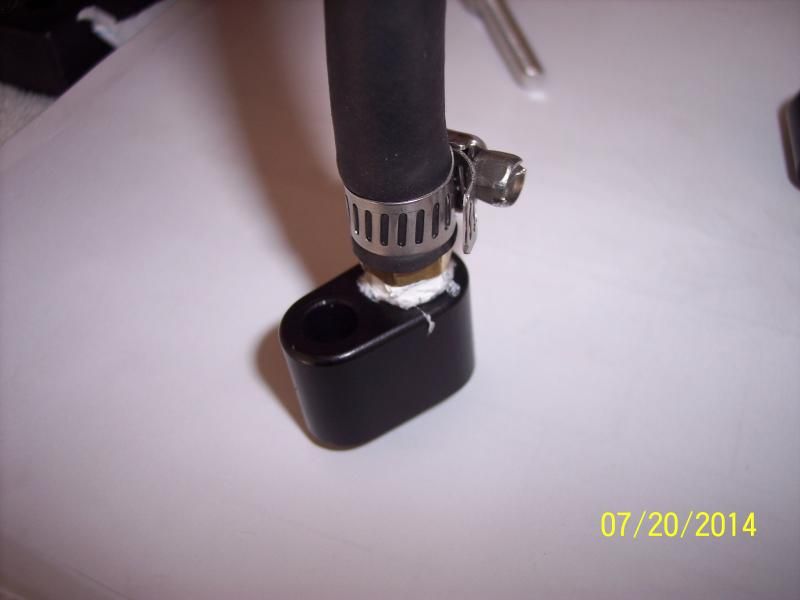
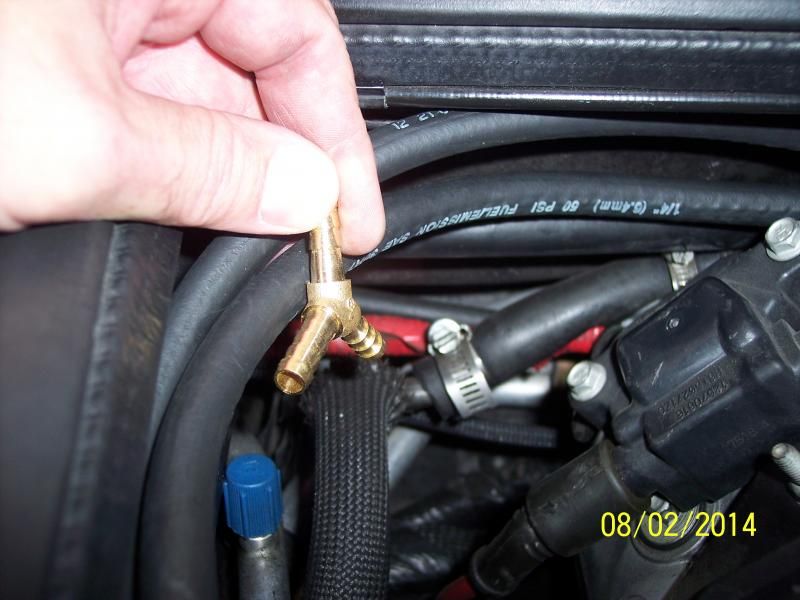
Install the hose on the nipple and make sure the o-ring stays on the bottom, you can use a little silicone grease to help keep it in place, I did not have to but you can:
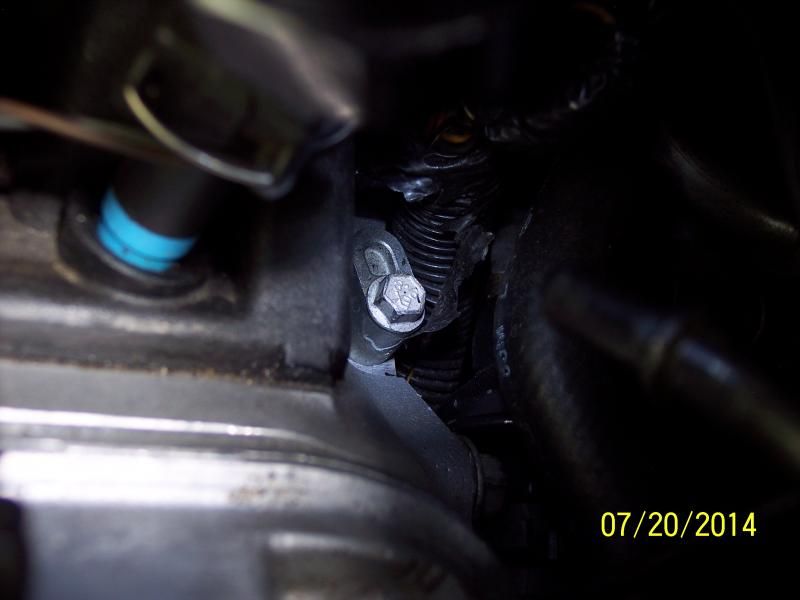
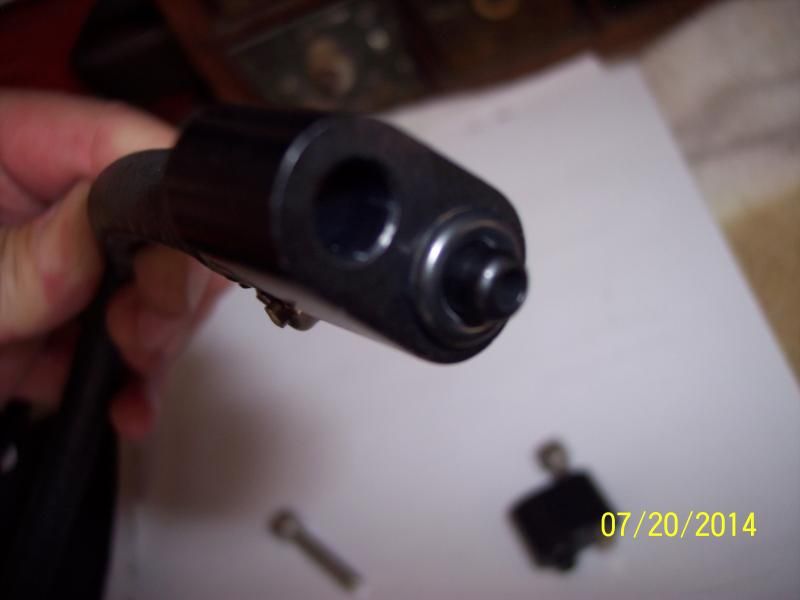
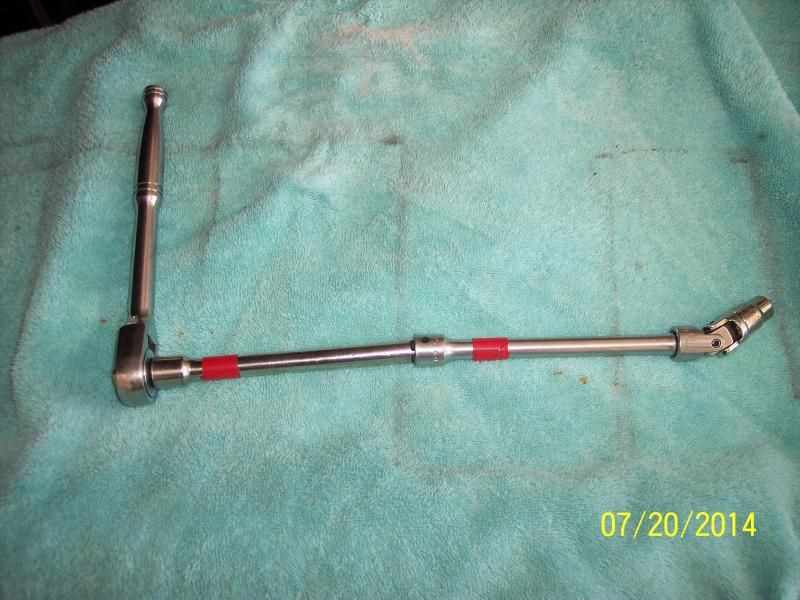
Use a 10mm socket with a couple of extensions and a swivel and ratchet:
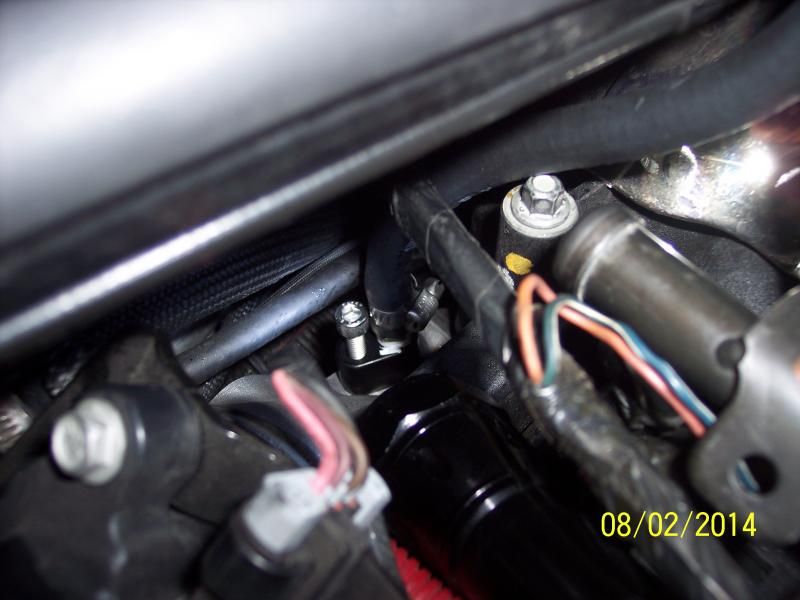
Removed the rear block, also good to take some compressed air and blow all that off in the back:
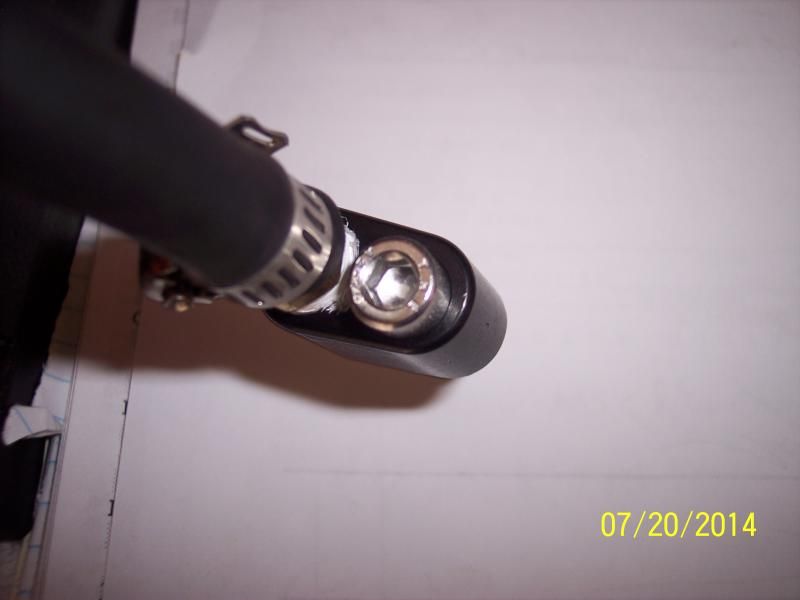
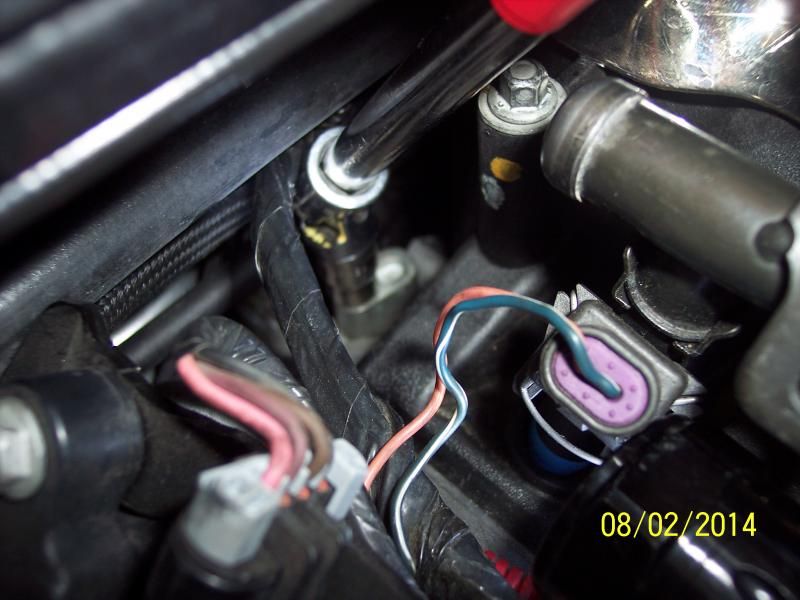
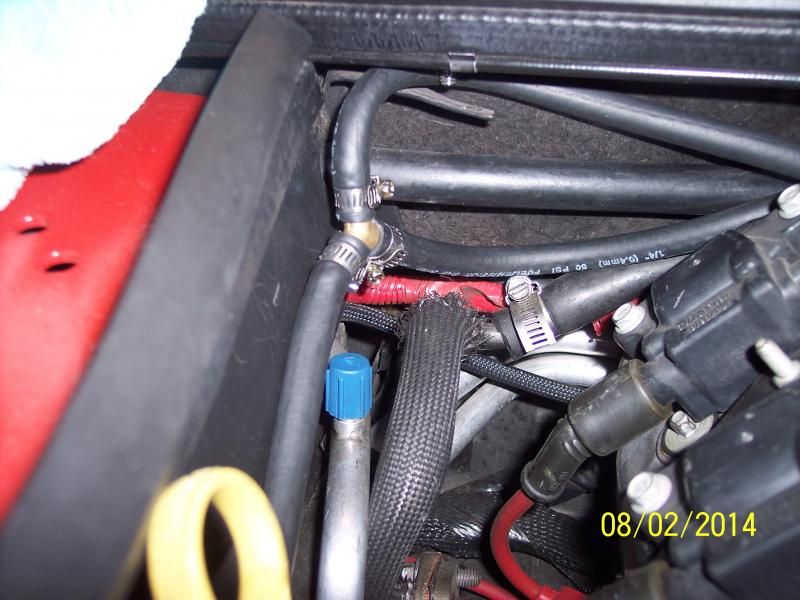
Now install the new set-up, having the sose already connected allows you to handle it and hold it during installation - NOTE: the way the clamp is so as not to interfer with the allen bolt head -
Tools: Extensions, 5mm allen socket head, ratchet and swivel -
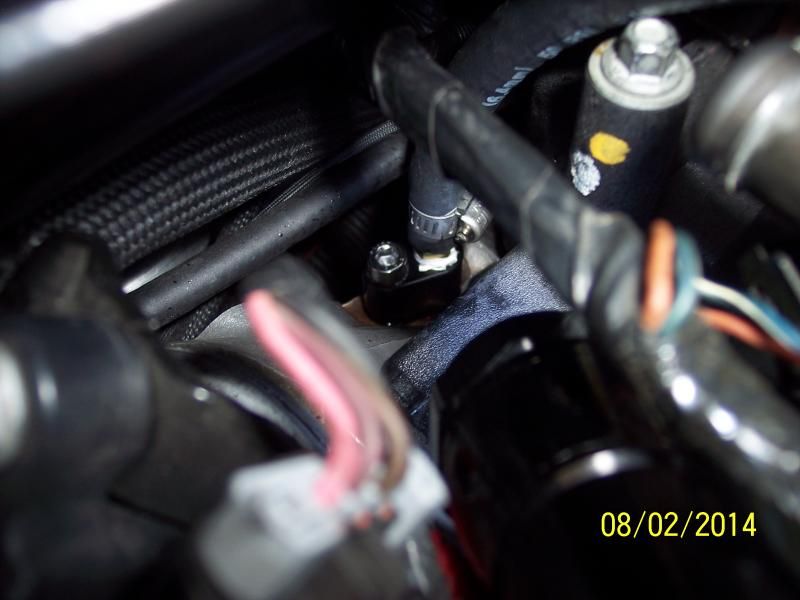
Once done and installed, run the 1/4" line behind the manifold and over towards the battery compartment!
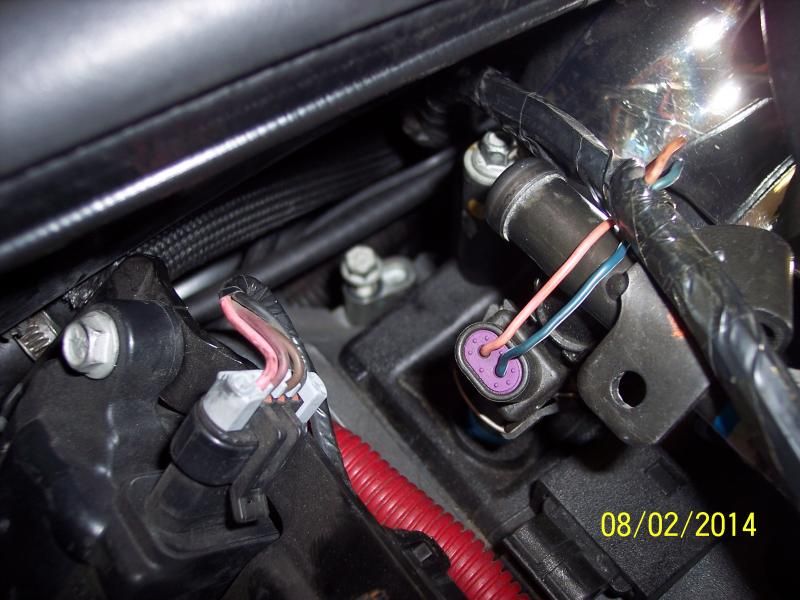
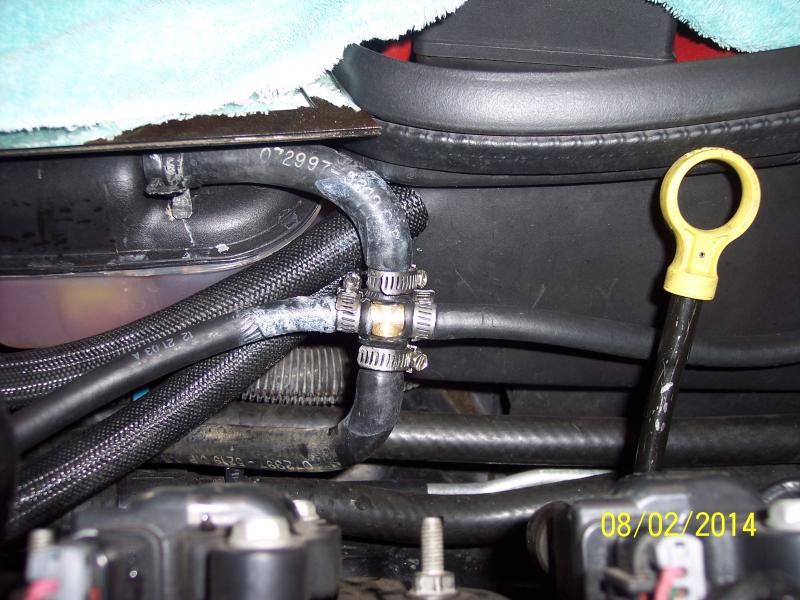
Now here is the passenger side, repeat the same steps for this side as you did for the drivers side - I am going to put all the pics in a row as I performed the steps:
Now run this piece over towards the battery compartment as well!
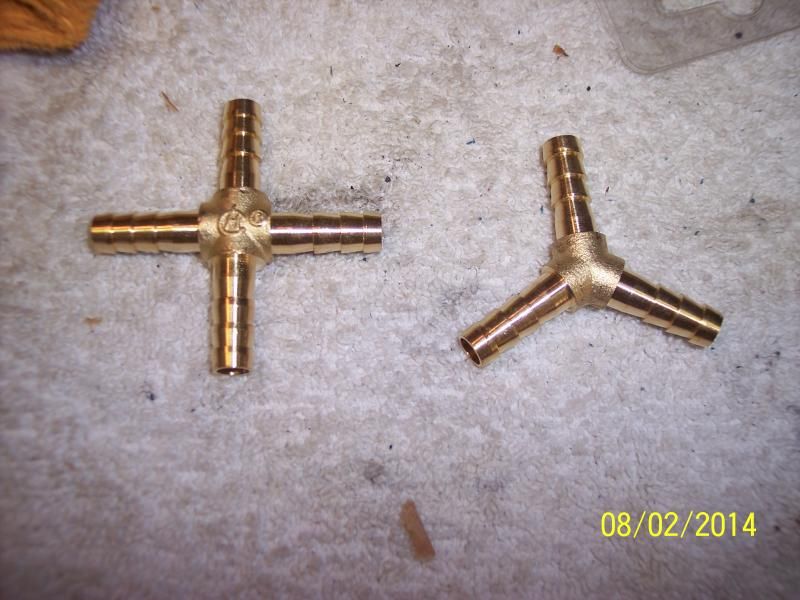
Get your Y Fitting:
Add a straight piece to reach to the return line going to the Expansion tank:
Once all done, it will look like this - and again remember I had taken my front one and re-routed it to the expansion tank return line and capped off the radiator side - hence the one to the left in the picture:
A little cleaned up here, I am not fully satisfied with how this looks, but it is okay for now:
This will allow all the air in front and back of the motor to be bled out and burped fully so you DO NOT have that overheating problem - believe me this will help and it is very inexpensive too!
There is also this off of the GM Trucks that was brought to my attention by another member: Turbotuner20V
GM part #12605716
I run a hose to a Y up front where I tie in the other forward facing steam vent
I bought a short shift kit (TPS427) a while back, but ran into a real mess trying to get the old **** off. Problem was that key had been well and truly hammered in by the tech who pulled things apart to deal with clutch judder. Suffice to say, I had to cut the **** off and here's what I found...
The old unit was tossed in a corner of the garage for a while, and then I then decided to try to make a low cost short shift conversion. Bought a 9/16 18tpi US special fine die - around $10 IIRC from Amazon, cut the wrecked slotted part of the shift lever off, then used the die to cut the thread down to the noise insulator. Just for grins I also tore the whole unit apart, drilled out the rivets, etc., and rebuilt it. Got rid of some slop by a gentle sanding of the cover plate, and buttoned it up using 3/16 bolts and self locking nuts.
Finally swapped it onto the car the other day - I find I actually prefer it to the TPS427, which is a modded C6 unit, because being on the short side, I found the **** ended up a bit too far back for me due to the crank in the C6 lever. I topped it off with the Hurst black cue ball **** I got with the TPS unit, screwed down as far as it would go. Used Teflon tape to "lock it" in place. I could have popped the stitching on the top of the shift boot, and opened the hole a bit more to allow the **** to screw down another 1/4" or so, but it is OK asis. Also, used black leather dye (from the grocery store shoe polish section) to deal with scuffs in the leather of the shift boot.
Total cost? Buying a cue ball shift **** would be $30-40, the die was $10+ and a couple bucks for the leather dye. I had cutting oil already, plus usual workshop stuff. You could actually do this whole thing on the car - just pull the standard **** (hopefully easier than mine!), remove the shift boot (it squeezes in), put rags down to catch the debris, extend the thread down and cut the shift lever to suit your choice of ****.
Last edited by jackthelad; 10-03-2014 at 03:00 PM.
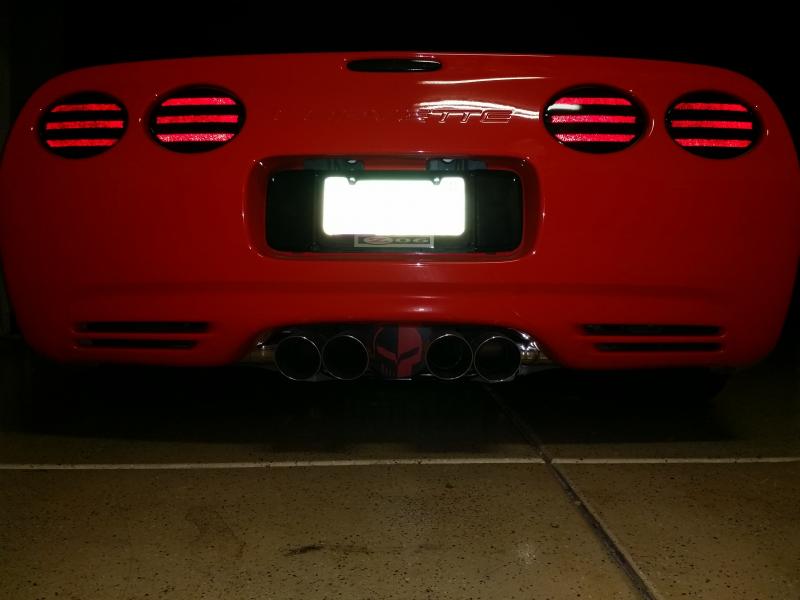
'This is what everyone is doing, its very cheap and simple to do, I just put a different twist on it, hope you like it, One piece of 7" x 5' plexiglass painted black on the rear so it stays shiny, one yellow bad *** sticker and two pieces of 3M 20 lb doubleback tape and a good cleaning of the surface to put it on and Whalla....It says, ""Bad Boys Have Bad Toys"" Enjoy !!! P.S. Thinking about taking off the words and just having the bowtie logo...what do you think???
Last edited by CorvetteBob52; 10-07-2014 at 02:18 AM.
Reason: needed to add how i did it
'This is what everyone is doing, its very cheap and simple to do, I just put a different twist on it, hope you like it, One piece of 7" x 5' plexiglass painted black on the rear so it stays shiny, one yellow bad *** sticker and two pieces of 3M 20 lb doubleback tape and a good cleaning of the surface to put it on and Whalla....It says, ""Bad Boys Have Bad Toys"" Enjoy !!! P.S. Thinking about taking off the words and just having the bowtie logo...what do you think???
Oh, It now has an Amber L.E.D. Light strip that I spliced into my liscense plate light then tucked it in behind the rear bumper to light it up at night, It does look really cool at night with my mellenium yellow paint
Now added Amber lighting to the side coves and under the front facia
Last edited by CorvetteBob52; 02-16-2015 at 07:48 PM.
Reason: adding some detail to it
Cleaned up the shroud and painted, $5 for acrylic paint and brush. Attachment 47820920
Aluminum "exhaust enhancer" plate, $8 ace hardware 12x6 aluminum sheat, m3 double sided tape and leftover plastidip paint print out whatever you like for a template. (c7r Jake for mine) Attachment 47820922
And I finally got around to cutting and soldering my stock harness to install an audio jack routed to the center counsel. $3 at radio shack for the 1/8th inch unit. Also i can comfirm that the #1 and #3 wires work for an 02 z06. (cd must be in the deck though)
Heres a link to the writeup http://ls1tech.com/forums/stereo-ele...t-adapter.html Attachment 47820921
Hot Damn! I'm so glad to have found this thread! Thanks to all you guys who have shared and posted your "how-to's" and "where I got these from" bits because this is really what makes it fun to work on your car doing the little things that make it extra special. This is such a cool thread and a great forum.
My $92.00 Borla straight pipe look a like exhaust. It took longer to drive to my friends muffler shop than it did to cut out all that factory exhaust and rebuild it. Two 4.5 inch tips from oreillys and about 4 ft of exhaust from shop cut bend weld presto borla straight kit really deep tone no drone at 60 mph but when you get in it it wakes up.
I've started to try doing some modes on my ride and here are a few pics of what I've started on. First are my engine covers. I'm painting them cobalt blue metallic then putting the red color back in the corvette lettering. I may try painting the "5.7 L" in silver but haven't decided yet. I plan to clear coat them with a gloss once I have them the way I want. Also, I bought some black gutter screen from Lowe's that I think looks perfect and I don't have to paint it or plastidip it or even powder coat it since it's already coated for the outdoor elements. I plan to fit this in all the areas that screens look good in as well as using it underneath for a radiator screen. There are many, many more things to do but this is where I'm starting. Many thanks to all those that have posted their mods here!
Looks good, how did u prep and paint covers? I did the home depot screen mod as well.
Thanks! I used brake cleaner on a rag and wiped it down really good to be sure I didn't have any oil residue anywhere. Let it dry (doesn't take long at all) and then got to painting it. I used Rustoleum 7251 Cobalt Blue Metallic rattle can paint and did several coats. The finish looks pretty good but I will also be doing several coats of gloss clear after I get the lettering done just right. I'm thinking about doing the "5.7L and lines in silver if I can keep my hands steady....

 08-19-2014, 03:39 PM