
Gas Door Plunger Repair
 11-13-2010, 10:52 PM
#1
Pro

Thread Starter

First – STOP if you are offended by a Vette with dirt on it!! If you have a Garage Queen you may require medical attention if you continue – this is the repair of a daily driver…..
You have been advised!!!
About a month ago when I stopped for gas I hit the gas door release the door popped open and I filled up. When I pushed the door closed, it would not latch. I finally had to push the plunger forward with the emergency release cable to keep the door shut.
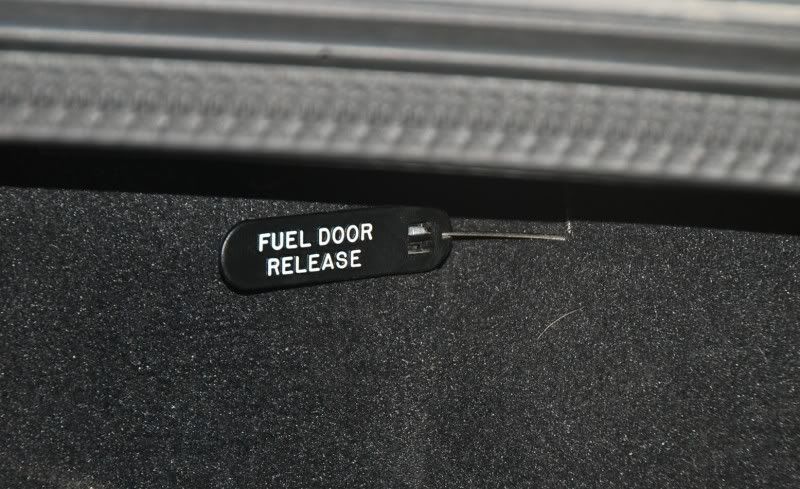
When I got home later I researched this on the Forum and learned that the spring on the plunger was the likely cause if the solenoid was working (which it was). Time was a problem and I knew that the Dealership would bend me over so I suffered for a while with the pain of getting gas and and using the cable to push the plunger forward to keep the door shut. Thursday I was just about to the point of giving up because it had become VERY difficult to get the cable and plunger pushed forward to keep the door shut. This weekend I was free and the weather was nice.
I tore into it after reading that the factory spring would rust and break and some of the Forum Members had made the repair with a ball point pen spring. The plunger is located under the inner fender well.
Honestly the removal and the reinstallation of the inner well wheel was the hardest part. The inner wheel well is held in place by a half a dozen screws which are easy to locate.
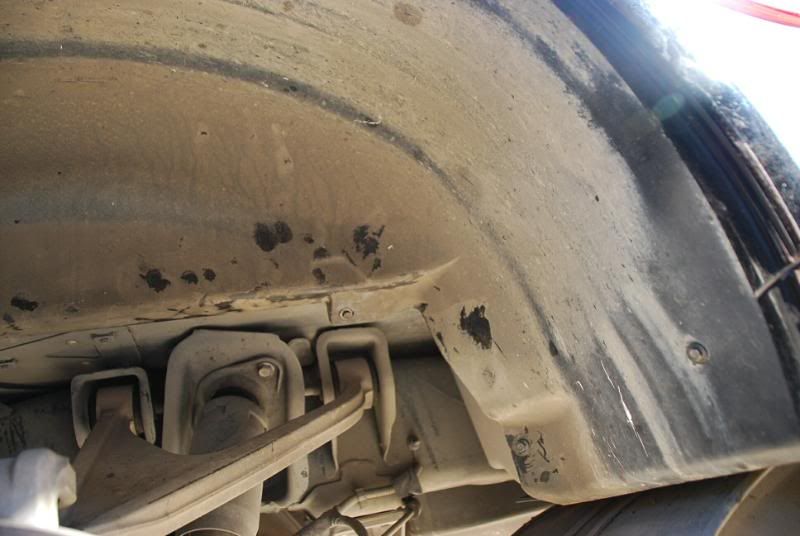
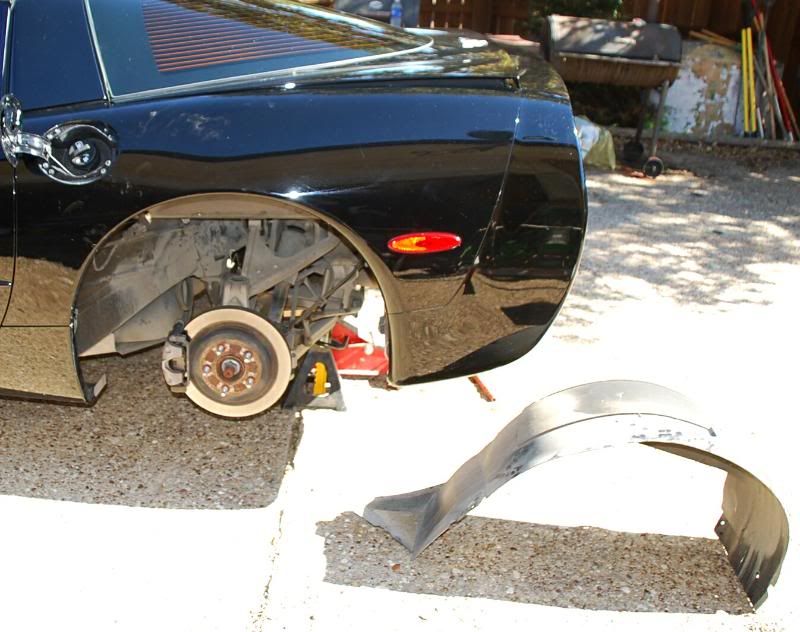
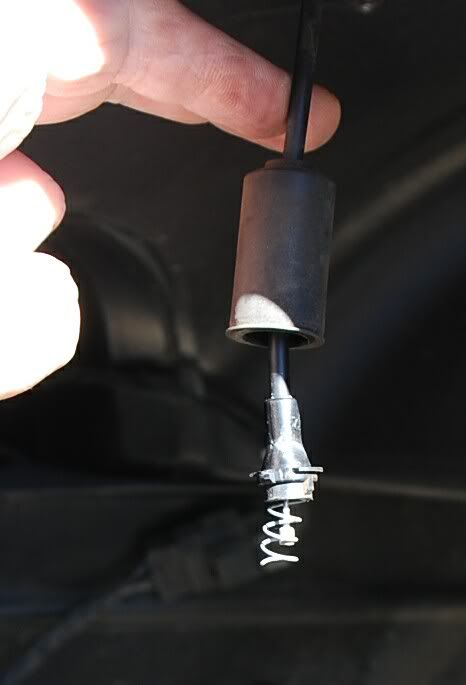
Once removed, man handle the wheel well out and you will see the cable and the plunger housing on the side on the fuel inlet.
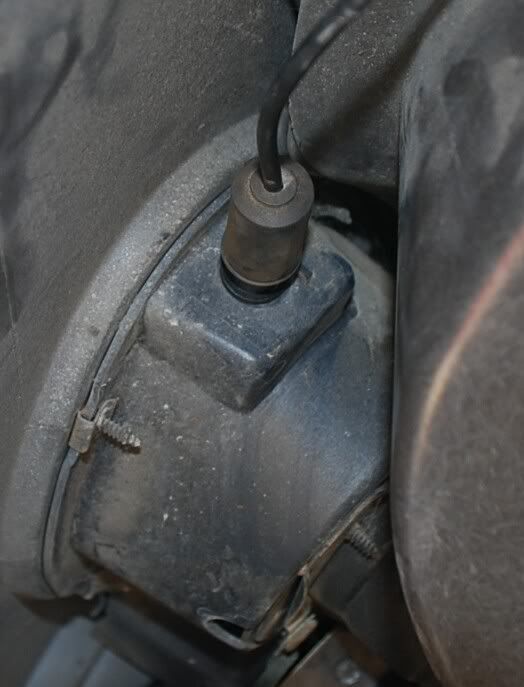
Pulling back the rubber cover will let you see the plunger housing.
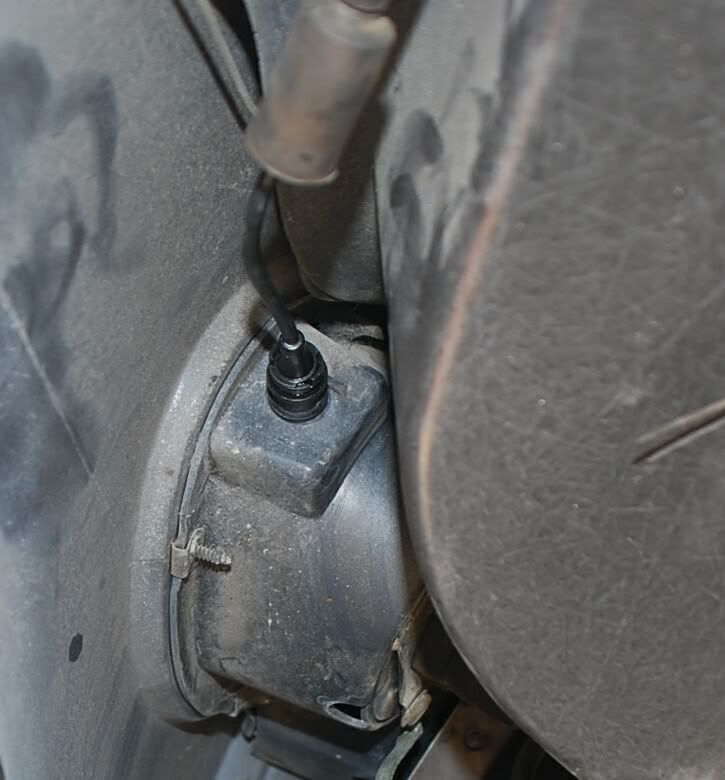
Next remove the nut inside the fuel receptacle holding the plunger housing in place.
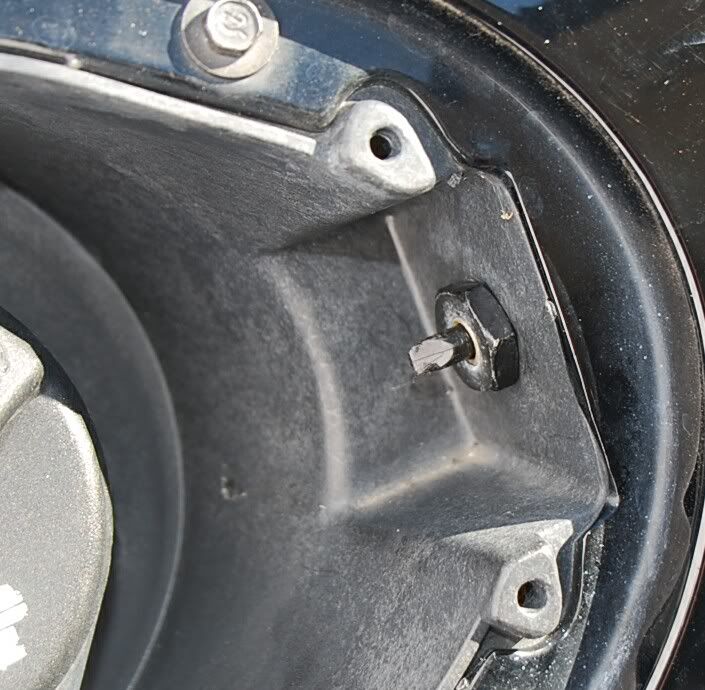
You can then push the plunger housing out.
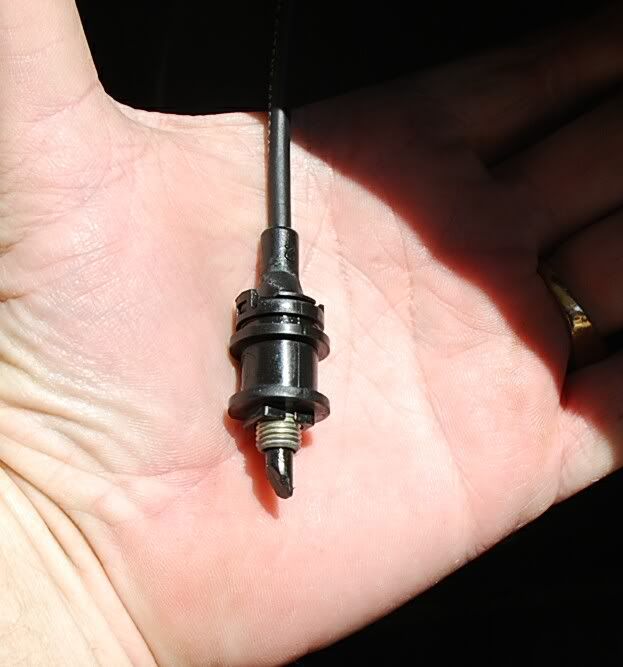
The housing is snapped together like you see on some electrical connectors. Carefully separate the housing and the you will see the cable, plunger and spring.
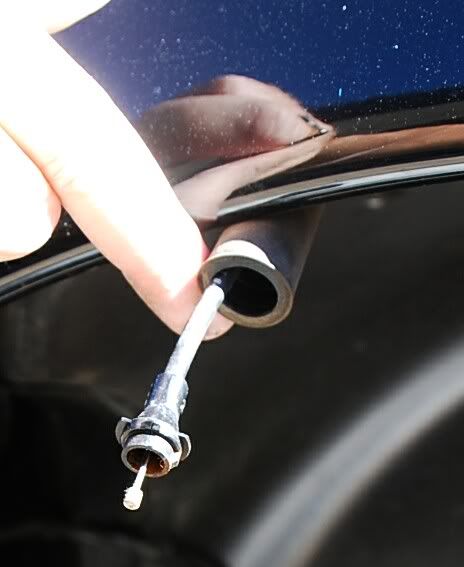
This is the housing separated and the cable remaining. The plunger attaches to the cable much like you see on some throttle cable setups.
And this is what I found...
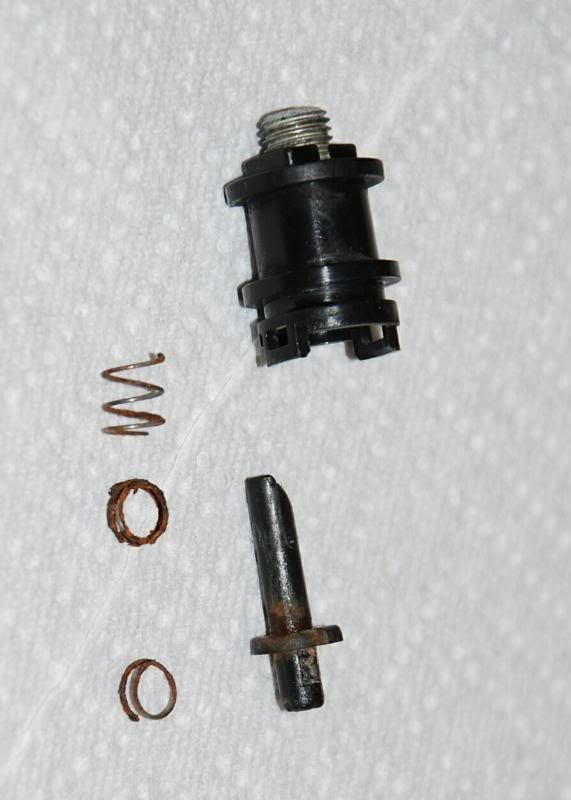
At this point make sure you clean the plunger housing well. Mine had pieces of spring and rust and dirt inside of it. I used water and paper towel.
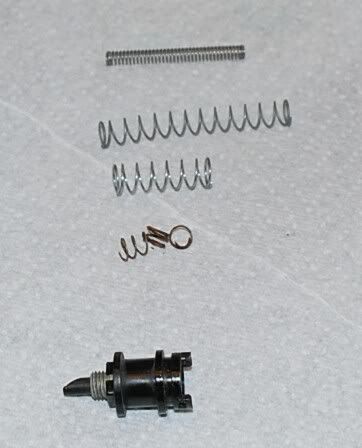
The spring was in pieces and a new compression spring was needed. I tried a ball point pen spring but the ID was to small to fit over the plunger base. I tried for a few minutes to enlarge it but did not like the results. SO I headed to Ace Hardware where they have many of the repair item you many need for your Vette. They have everything... including compression springs...
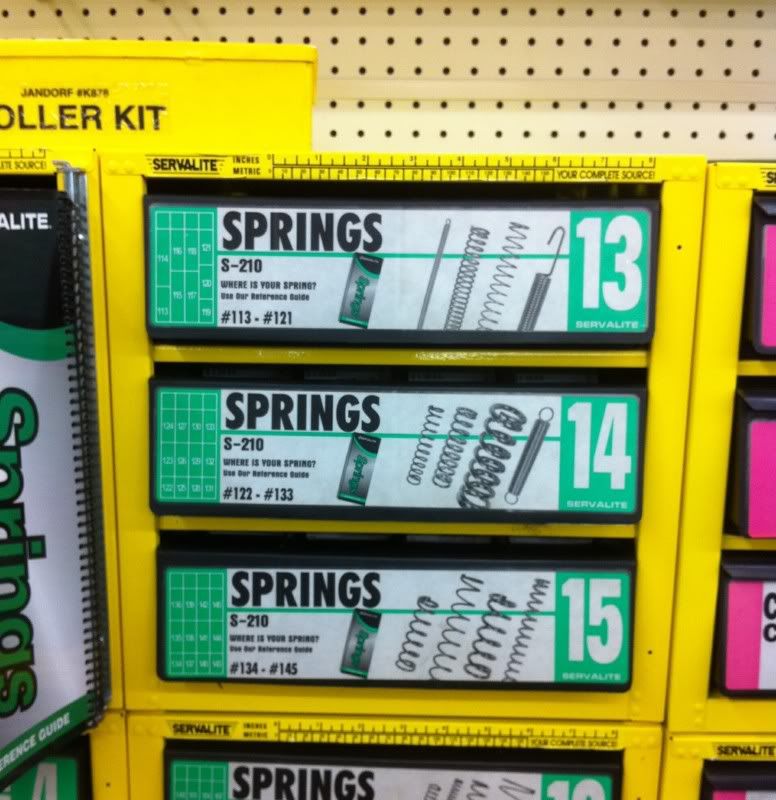
After going through the selection I found one that had the correct ID and OD to fit over the plunger and in the plunger housing. One concern I had was the way the housing was assembled. With it “snapping” together I did not want a large spring load that would keep a lot of pressure in the housing but enough to keep the plunger fully pushed out.
I settled on the 3rd one down but had to trim the length a little to lower the compression pressure.
I fitted the spring, reattached the plunger, put the plunger housing back together. I sprayed the inside of the housing with WD40 to insure it was well lubed. The plunger and housing only goes together one way so look at it carefully and don't force anything.
Then reversed the process to reassemble.

Hope this helps someone! I know that the many DIY threads have helped me in the past!
You have been advised!!!
About a month ago when I stopped for gas I hit the gas door release the door popped open and I filled up. When I pushed the door closed, it would not latch. I finally had to push the plunger forward with the emergency release cable to keep the door shut.
When I got home later I researched this on the Forum and learned that the spring on the plunger was the likely cause if the solenoid was working (which it was). Time was a problem and I knew that the Dealership would bend me over so I suffered for a while with the pain of getting gas and and using the cable to push the plunger forward to keep the door shut. Thursday I was just about to the point of giving up because it had become VERY difficult to get the cable and plunger pushed forward to keep the door shut. This weekend I was free and the weather was nice.
I tore into it after reading that the factory spring would rust and break and some of the Forum Members had made the repair with a ball point pen spring. The plunger is located under the inner fender well.
Honestly the removal and the reinstallation of the inner well wheel was the hardest part. The inner wheel well is held in place by a half a dozen screws which are easy to locate.
Once removed, man handle the wheel well out and you will see the cable and the plunger housing on the side on the fuel inlet.
Pulling back the rubber cover will let you see the plunger housing.
Next remove the nut inside the fuel receptacle holding the plunger housing in place.
You can then push the plunger housing out.
The housing is snapped together like you see on some electrical connectors. Carefully separate the housing and the you will see the cable, plunger and spring.
This is the housing separated and the cable remaining. The plunger attaches to the cable much like you see on some throttle cable setups.
And this is what I found...
At this point make sure you clean the plunger housing well. Mine had pieces of spring and rust and dirt inside of it. I used water and paper towel.
The spring was in pieces and a new compression spring was needed. I tried a ball point pen spring but the ID was to small to fit over the plunger base. I tried for a few minutes to enlarge it but did not like the results. SO I headed to Ace Hardware where they have many of the repair item you many need for your Vette. They have everything... including compression springs...
After going through the selection I found one that had the correct ID and OD to fit over the plunger and in the plunger housing. One concern I had was the way the housing was assembled. With it “snapping” together I did not want a large spring load that would keep a lot of pressure in the housing but enough to keep the plunger fully pushed out.
I settled on the 3rd one down but had to trim the length a little to lower the compression pressure.
I fitted the spring, reattached the plunger, put the plunger housing back together. I sprayed the inside of the housing with WD40 to insure it was well lubed. The plunger and housing only goes together one way so look at it carefully and don't force anything.
Then reversed the process to reassemble.
Hope this helps someone! I know that the many DIY threads have helped me in the past!
 11-13-2010, 11:36 PM
#2
Administrator


Member Since: Mar 2001
Location: In a parallel universe. Currently own 2014 Stingray Coupe.
Posts: 343,032
Received 19,309 Likes
on
13,980 Posts
C7 of the Year - Modified Finalist 2021
MO Events Coordinator
St. Jude Co-Organizer
St. Jude Donor '03-'04-'05-'06-'07-'08-'09-'10-'11-'12-'13-'14-'15-'16-'17-'18-'19-
'20-'21-'22-'23-'24
NCM Sinkhole Donor
CI 5, 8 & 11 Veteran


Great information. Thanks for taking the time to document what you did and then post it up for us.
11-13-2010, 11:41 PM
#3
Team Owner


Member Since: May 2001
Location: Virginia
Posts: 24,998
Received 1,227 Likes
on
874 Posts
St. Jude Donor '11
First – STOP if you are offended by a Vette with dirt on it!! If you have a Garage Queen you may require medical attention if you continue – this is the repair of a daily driver…..
You have been advised!!!
About a month ago when I stopped for gas I hit the gas door release the door popped open and I filled up. When I pushed the door closed, it would not latch. I finally had to push the plunger forward with the emergency release cable to keep the door shut.
When I got home later I researched this on the Forum and learned that the spring on the plunger was the likely cause if the solenoid was working (which it was). Time was a problem and I knew that the Dealership would bend me over so I suffered for a while with the pain of getting gas and and using the cable to push the plunger forward to keep the door shut. Thursday I was just about to the point of giving up because it had become VERY difficult to get the cable and plunger pushed forward to keep the door shut. This weekend I was free and the weather was nice.
I tore into it after reading that the factory spring would rust and break and some of the Forum Members had made the repair with a ball point pen spring. The plunger is located under the inner fender well.
Honestly the removal and the reinstallation of the inner well wheel was the hardest part. The inner wheel well is held in place by a half a dozen screws which are easy to locate.
Once removed, man handle the wheel well out and you will see the cable and the plunger housing on the side on the fuel inlet.
Pulling back the rubber cover will let you see the plunger housing.
Next remove the nut inside the fuel receptacle holding the plunger housing in place.
You can then push the plunger housing out.
The housing is snapped together like you see on some electrical connectors. Carefully separate the housing and the you will see the cable, plunger and spring.
This is the housing separated and the cable remaining. The plunger attaches to the cable much like you see on some throttle cable setups.
And this is what I found...
At this point make sure you clean the plunger housing well. Mine had pieces of spring and rust and dirt inside of it. I used water and paper towel.
The spring was in pieces and a new compression spring was needed. I tried a ball point pen spring but the ID was to small to fit over the plunger base. I tried for a few minutes to enlarge it but did not like the results. SO I headed to Ace Hardware where they have many of the repair item you many need for your Vette. They have everything... including compression springs...
After going through the selection I found one that had the correct ID and OD to fit over the plunger and in the plunger housing. One concern I had was the way the housing was assembled. With it “snapping” together I did not want a large spring load that would keep a lot of pressure in the housing but enough to keep the plunger fully pushed out.
I settled on the 3rd one down but had to trim the length a little to lower the compression pressure.
I fitted the spring, reattached the plunger, put the plunger housing back together. I sprayed the inside of the housing with WD40 to insure it was well lubed. The plunger and housing only goes together one way so look at it carefully and don't force anything.
Then reversed the process to reassemble.
Hope this helps someone! I know that the many DIY threads have helped me in the past!
 ...now do us clean freaks a favor and wash your inner wheel wells before we
  all over the place
 11-14-2010, 06:04 AM
#4
Le Mans Master

Member Since: Jul 2009
Location: Los Angeles California
Posts: 9,526
Likes: 0
Received 10 Likes
on
10 Posts
Excellent right up. I need to do this soon. I know my spring is OK but there's definitely dirt in it. I'll change the spring anyway while I'm in it. I've had this problem for the past 2-3 months, but because I hardly drive the car, I've only filled up (maybe) 5 times. I pull the manual release cord just a little and it snaps the plunger right back to where it should.


 11-14-2010, 11:10 AM
#7
Pro
Thread Starter
OK...
 your right!
The even worse part is I have mods stacked up in the garage and just have not found time to do them... cold air system, HUD kt, a 3.42 rear diff.
So many thing to do and so little time.... BUT in 13 months my friends I am RETIRED!!!! Nothing but time!


 11-14-2010, 06:50 PM
#10
Pro
 11-14-2010, 09:32 PM
#11
Team Owner
Member Since: May 2001
Location: Virginia
Posts: 24,998
Received 1,227 Likes
on
874 Posts
St. Jude Donor '11
yes ....yes I did...I wanted everyone to see the great pics on the DIY again...but thanks for your comment 
I have never seen more clear pics posted anywhere...
oh btw...just for you schindler...her they are again
I have never seen more clear pics posted anywhere...
oh btw...just for you schindler...her they are again
Last edited by Yello95; 11-14-2010 at 09:38 PM.
 01-24-2011, 11:15 PM
#17
Heel & Toe

Member Since: Dec 2010
Posts: 18
Likes: 0
Received 0 Likes
on
0 Posts
Logan, thanks for the article. I will file it for sure but as you are aware, I was looking for the manual release and still can't find it. And after I retired I am so busy I wonder how I ever had time to work.
01-24-2011, 11:41 PM
#18
Team Owner
Member Since: Mar 2004
Location: Oklahoma City OK
Posts: 58,260
Received 1,675 Likes
on
1,298 Posts
C6 of Year Finalist (appearance mods) 2019