
Never realized there were so many cheap DIY mods, show us some more.
 04-25-2010, 08:34 AM
#1
Melting Slicks

Thread Starter
Member Since: Jul 2006
Location: Rutherfordton NC
Posts: 2,084
Likes: 0
Received 12 Likes
on
12 Posts
St. Jude Donor '10

I was goofing off this morning and just happened across the DIY mod for the flush mounted taillights. Then I found the front license plate screen intake mod............
I have never seen either one of these. I am thinking about the flush taillight thing, I hate the dust that gathers in the taillight openings.
Now.............. what are some other mods that you guy are doing or have seen for less than $100 and without ordering those crazy vendor kits..............
lets see em!!
 04-25-2010, 08:51 AM
#2
Team Owner


Paint your own Fuel Rail Covers instaed of buying aftermarket ones
Thanks,Matt
Thanks,Matt
04-25-2010, 09:01 AM
#3
Race Director

-Paint your hood liner with Testors Paint Pens
-Install your own hood seal made with weatherstripping from Lowes
-Install your own tail light seals with weatherstripping from Lowes
- Install Stainless Steel covers over the black plastic panel plugs that hold the hood liner in place. they are sink hole covers from the plumbing aisle at Lowes.
-Paint your calipers with Rustoleum paint
04-25-2010, 10:00 AM
#4
Melting Slicks
Member Since: Feb 2004
Location: ATL
Posts: 3,195
Likes: 0
Received 2 Likes
on
2 Posts
St. Jude Donor '05-'06-'07-'08-'09-'10
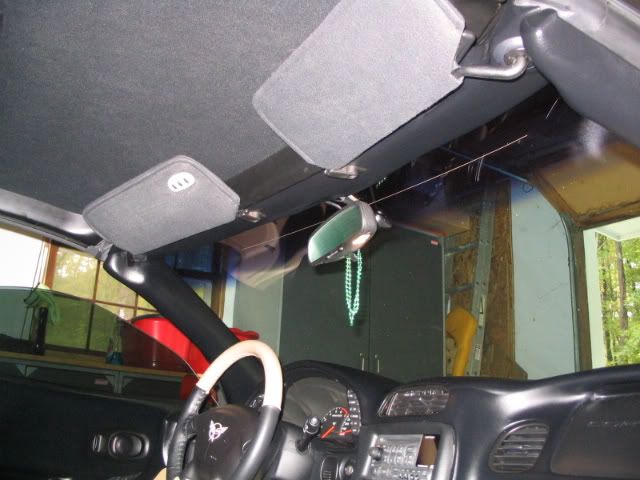
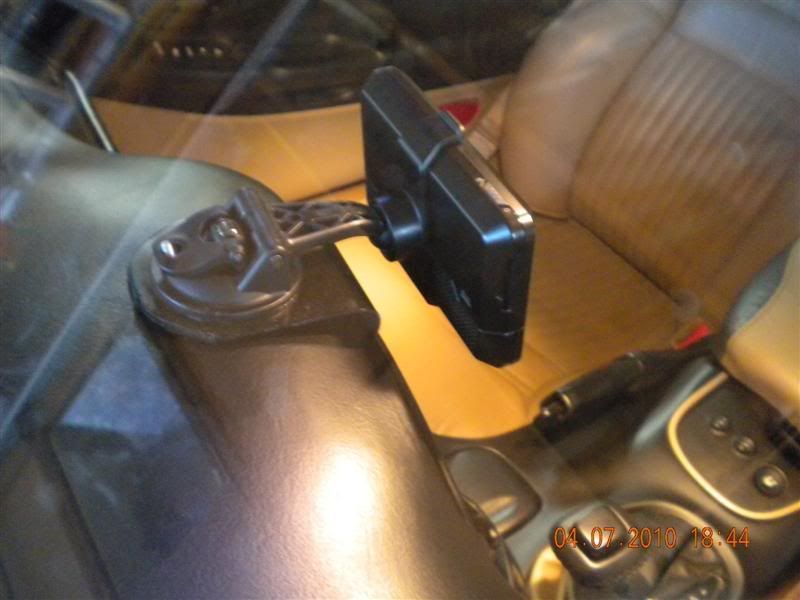
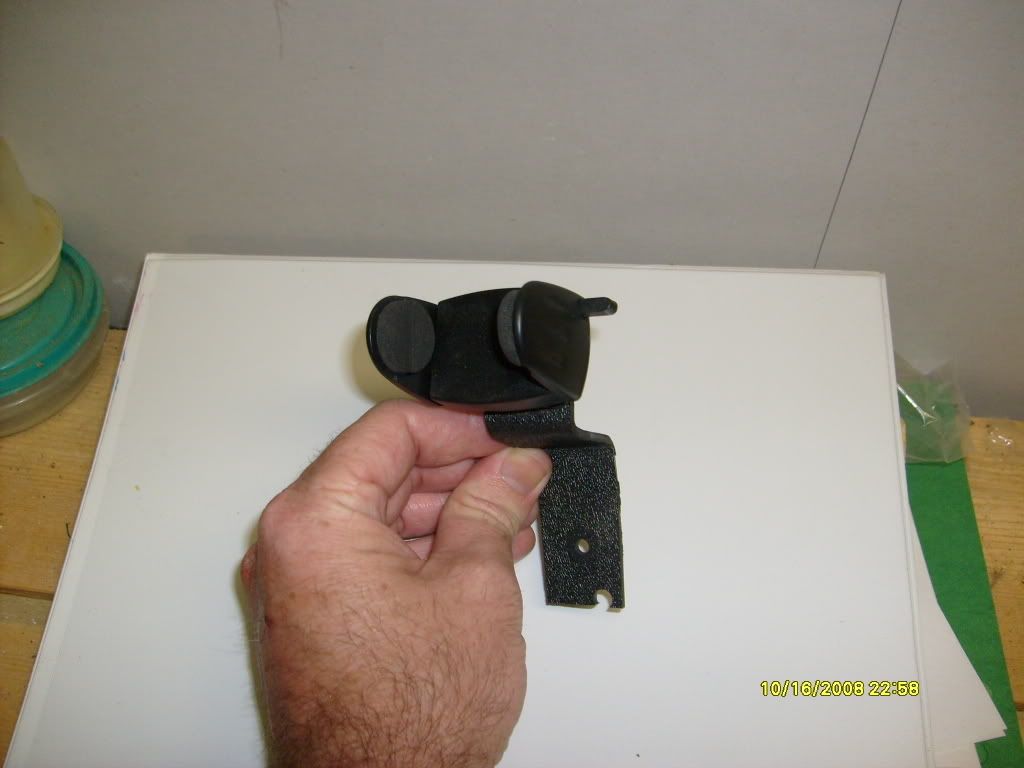
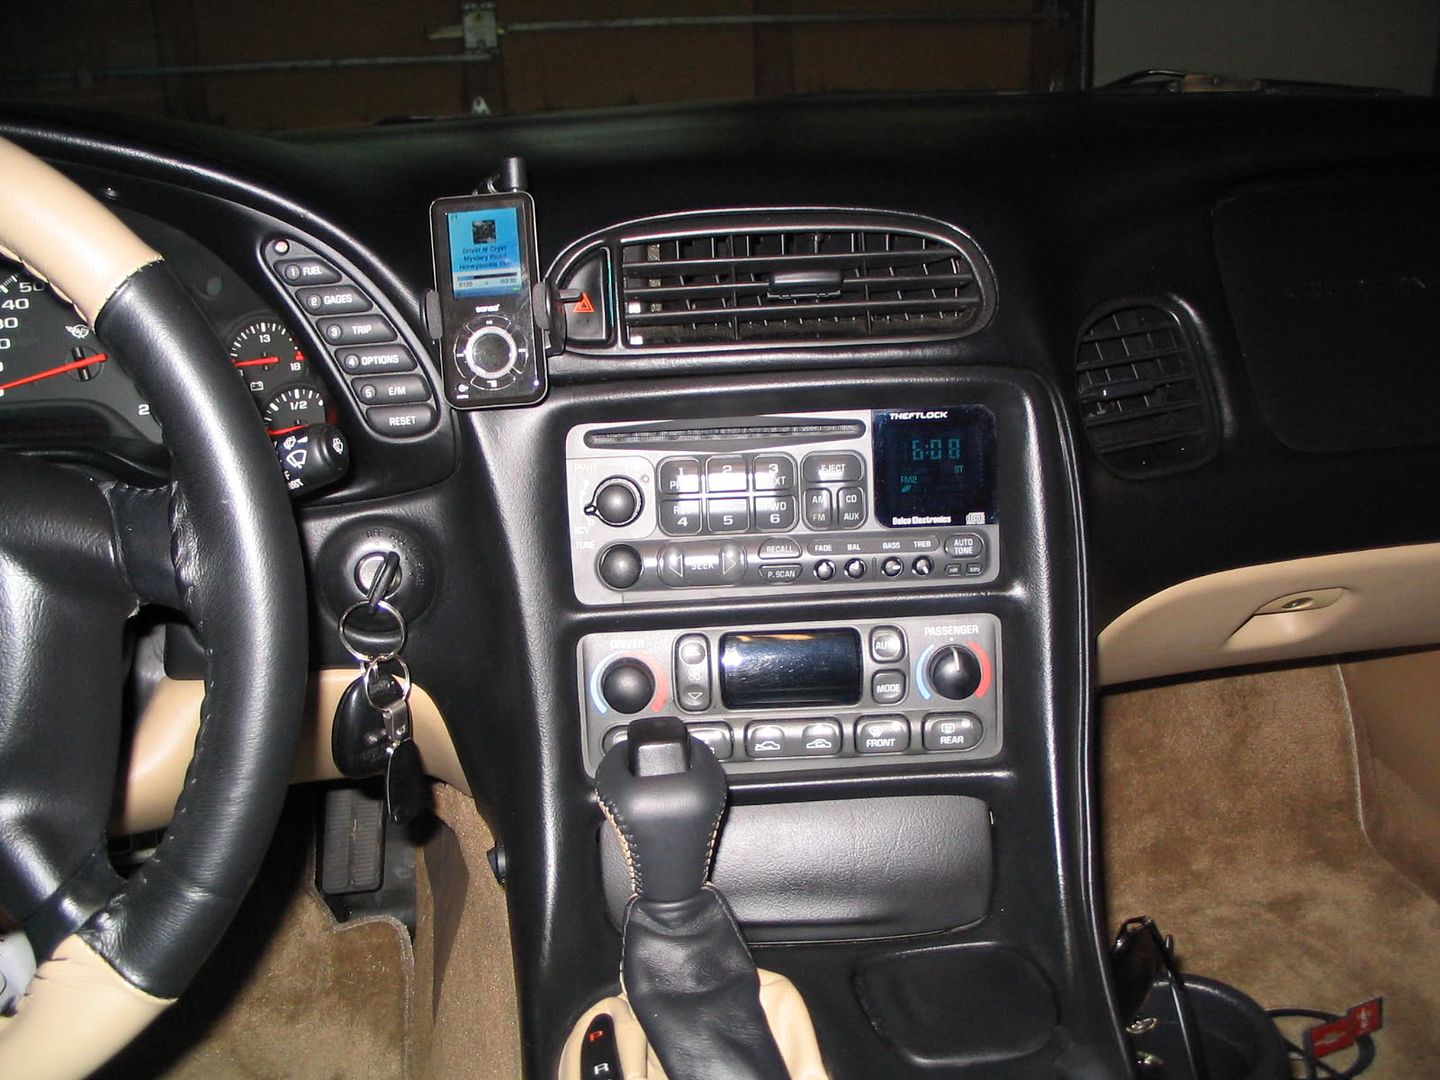
- Install your own Homelink.
- Make your own GPS mount.
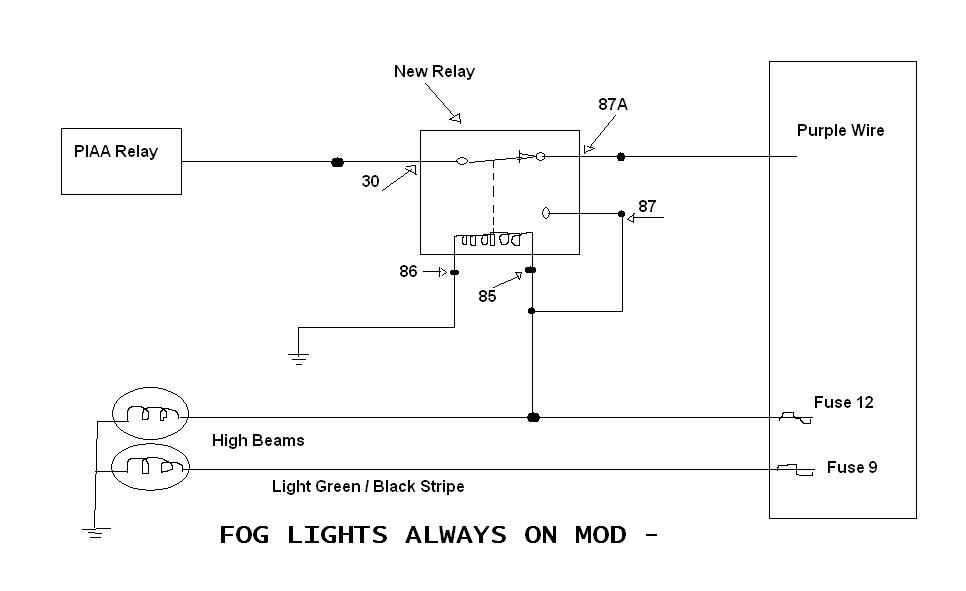
- Have your "fog" lights stay on when your high beams are on.
-----> Great if you have HID or PIAA fogs.
- Detail it yourself.
- Inexpensive neons (if you're into that).
- Paint your gauge bezels. (I did a kit instead).
- Insulate your tunnel with "Reflectix" from HD / Lowes.
- Insulate your cabin floor using "Frost King" from HD / Lowes.
- Make a mount for your MP3 player or similar.
- Make your own GPS mount.
- Have your "fog" lights stay on when your high beams are on.
-----> Great if you have HID or PIAA fogs.
- Detail it yourself.
- Inexpensive neons (if you're into that).
- Paint your gauge bezels. (I did a kit instead).
- Insulate your tunnel with "Reflectix" from HD / Lowes.
- Insulate your cabin floor using "Frost King" from HD / Lowes.
- Make a mount for your MP3 player or similar.


 04-25-2010, 03:02 PM
#8
Racer

Member Since: Apr 2009
Location: CA
Posts: 258
Likes: 0
Received 0 Likes
on
0 Posts
Do you seriously have the cove setup as a turn signal? I've been trying to figure out a way to put turn signals in the side mirrors, but something like this may work out just as well...
 04-25-2010, 05:06 PM
#11
Le Mans Master

Member Since: May 2006
Location: DuBois PA
Posts: 5,987
Likes: 0
Received 18 Likes
on
16 Posts
St. Jude Donor '11-'12-'13-'14-'15
 04-25-2010, 05:18 PM
#12
Burning Brakes


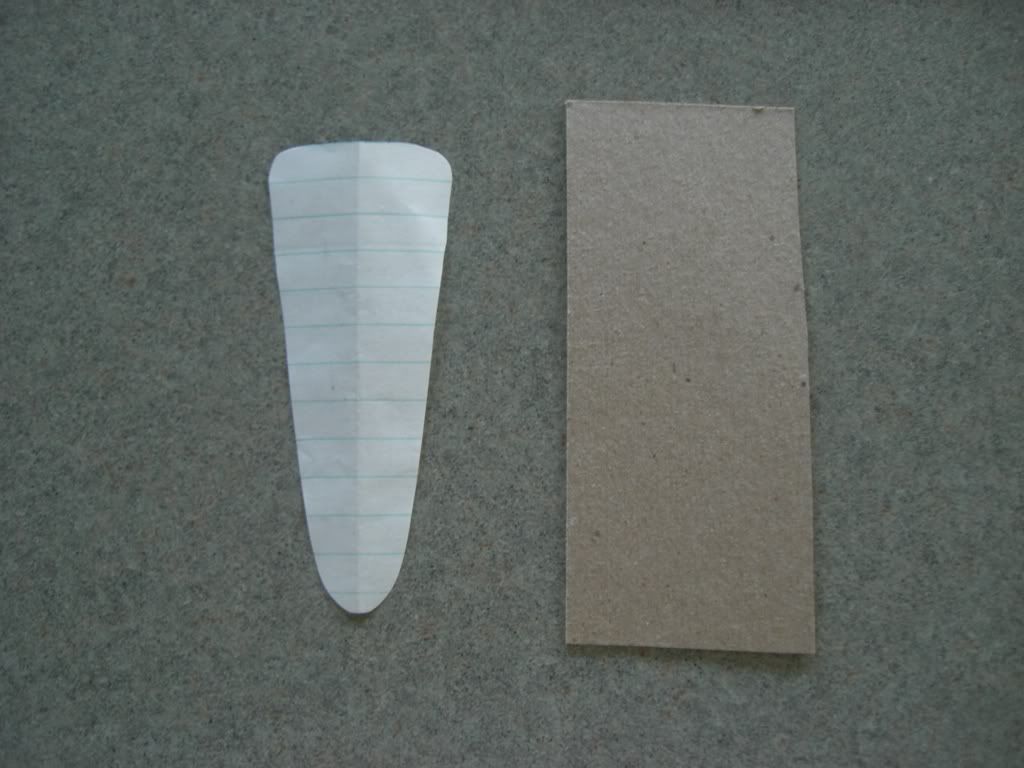
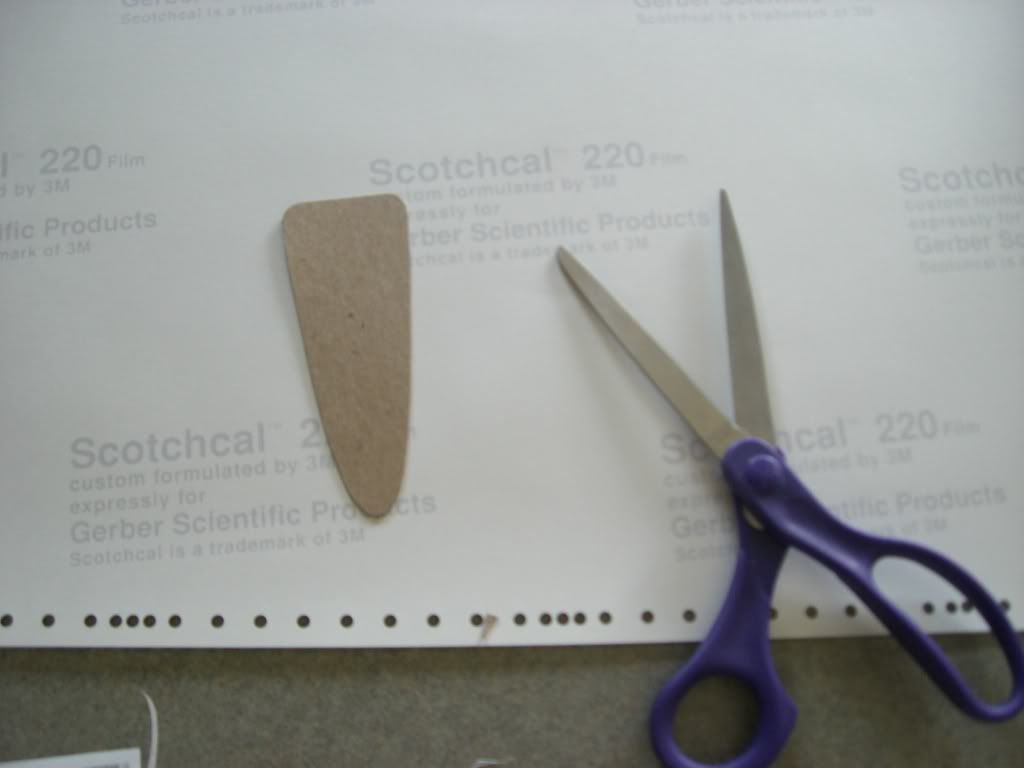
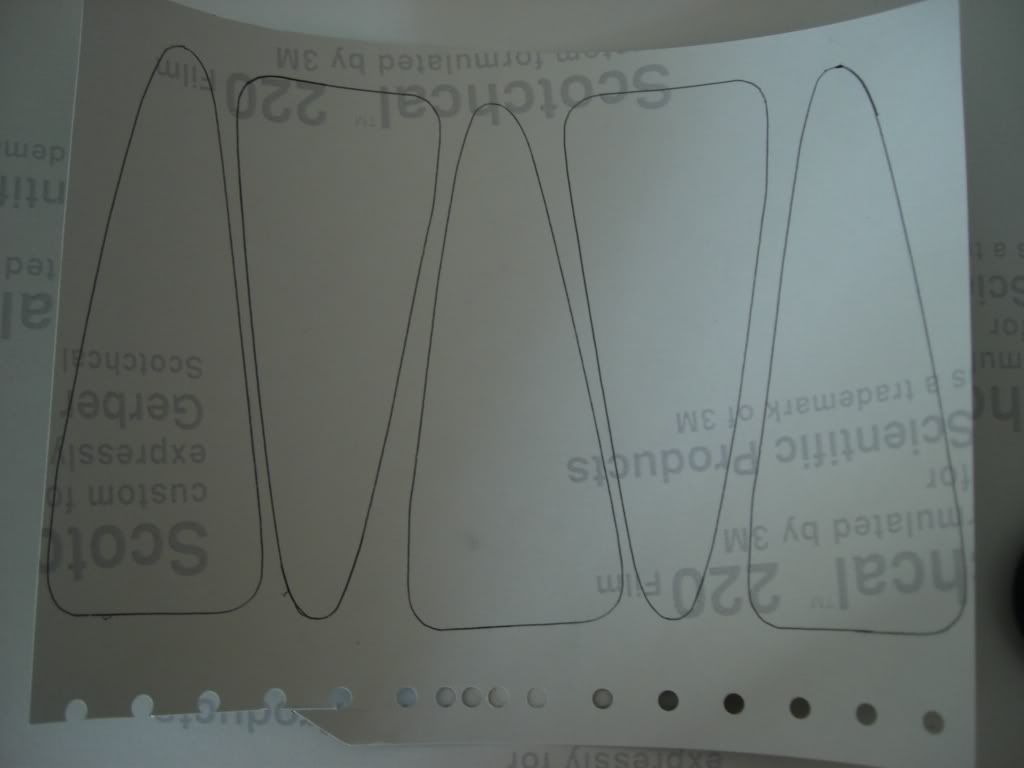
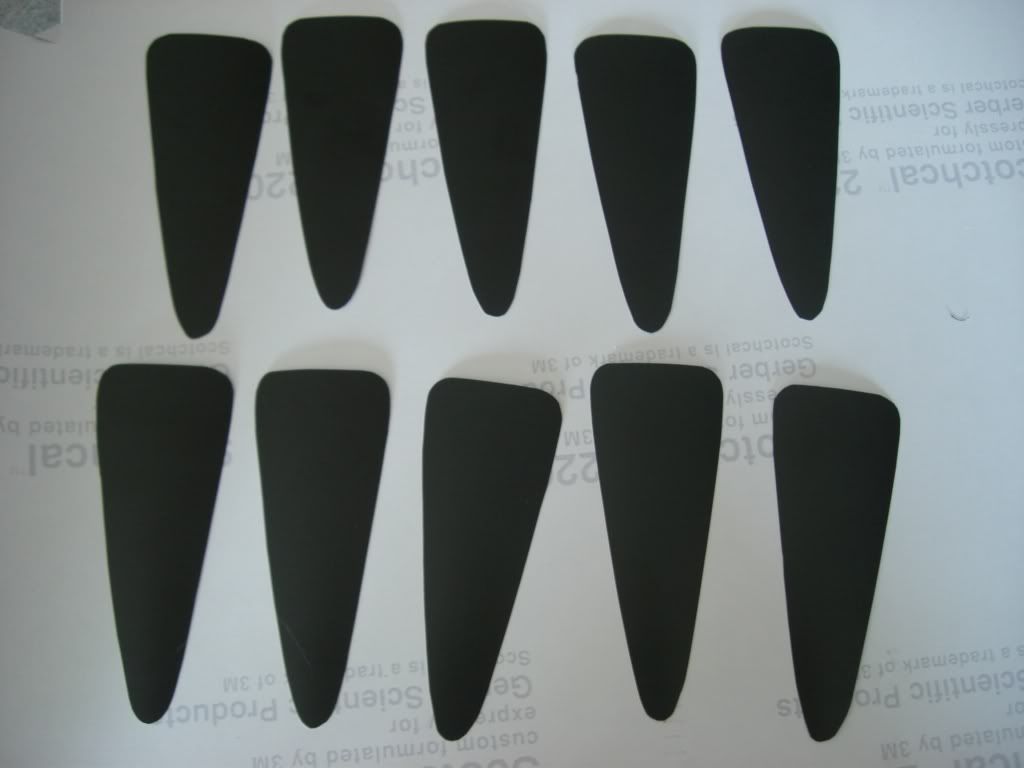
Foam board and vinyl.

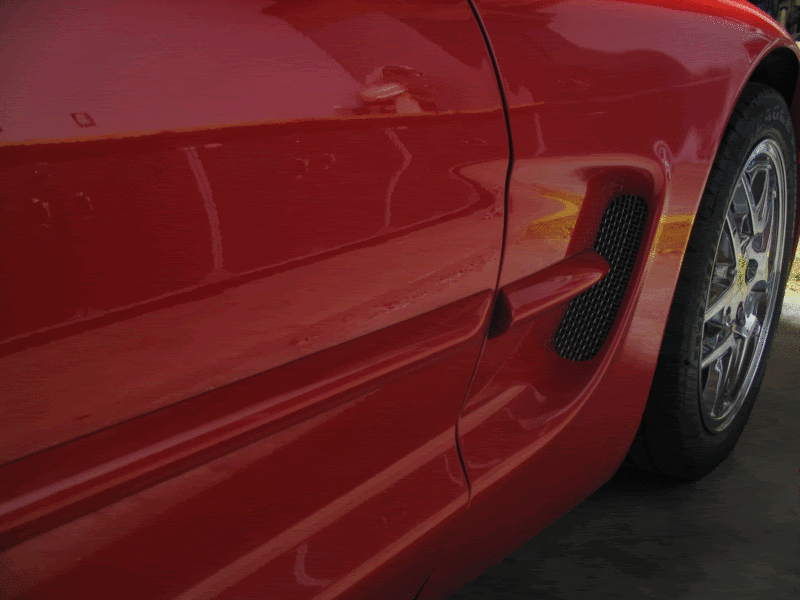
 What is this? Is it more than just an expanded intake opening (looks good BTW)??
  04-25-2010, 07:56 PM
#15
Melting Slicks
04-25-2010, 09:42 PM
#16
Drifting

04-25-2010, 10:00 PM
#17
Administrator

Member Since: Mar 2001
Location: In a parallel universe. Currently own 2014 Stingray Coupe.
Posts: 343,487
Received 19,451 Likes
on
14,054 Posts
C7 of the Year - Modified Finalist 2021
MO Events Coordinator
St. Jude Co-Organizer
St. Jude Donor '03-'04-'05-'06-'07-'08-'09-'10-'11-'12-'13-'14-'15-'16-'17-'18-'19-
'20-'21-'22-'23-'24
NCM Sinkhole Donor
CI 5, 8 & 11 Veteran


There was a DIY on here about doing the blackout of taillights yourself. Here was the process:
1. Go to your local hobby shop and ask for Testor's #RC294 Window Tint spray ($4.95). It's in the model paint section. One can is more than enough for this project.
2. Go home and take the lenses out of your car.
3. Clean them well with denatured alcohol, then do it again.
4. Get a hair dryer (yes, like your wife uses on her hair)
5. Lay the lenses out, and plan on doing ONE AT A TIME.
6. Take the first lense, lay it on your work surface and use the hair dryer (on LOW heat) to slightly warm the lense. (this is important to help prevents runs in the paint)
7. Spray the lense with a VERY light spray first coat. This product goes on very thin, so don't use very much. Keep the can at least 12 inches away and use a wide sweeping motion. It gets darker as it dries.
8. After the first coat, use the hair dryer on LOW to gently dry the paint. It takes about two or three minutes.
I used two coats, and it came out about right for me, but one good coat may do. If you use a second coat, follow the same procedure.
04-25-2010, 11:57 PM
#20
Racer
Member Since: Jun 2007
Location: Bristow VA
Posts: 395
Likes: 0
Received 0 Likes
on
0 Posts
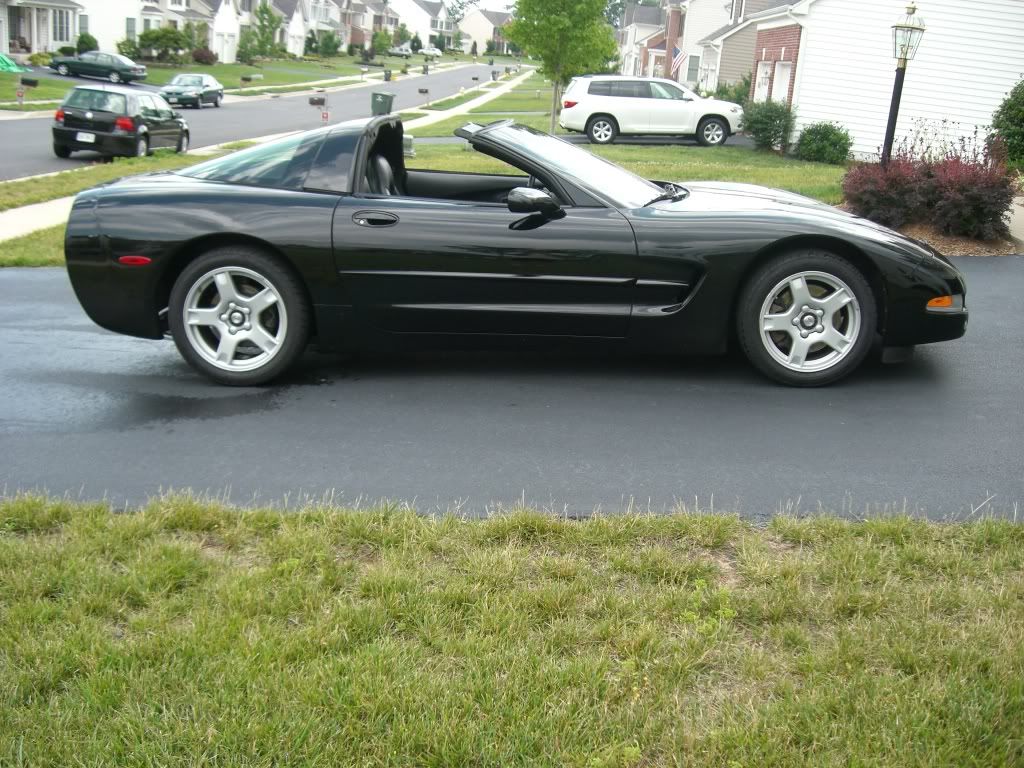
Here is what I did to my wagon wheels. I went to a local graphics store and got a scrap vynl strip for cheap. These are sold as a set for like $30. I hate my wheels. 
I had money to get wheels or a supercharger... I go faster now, but have stickers on my wheels. Compromise sucks.
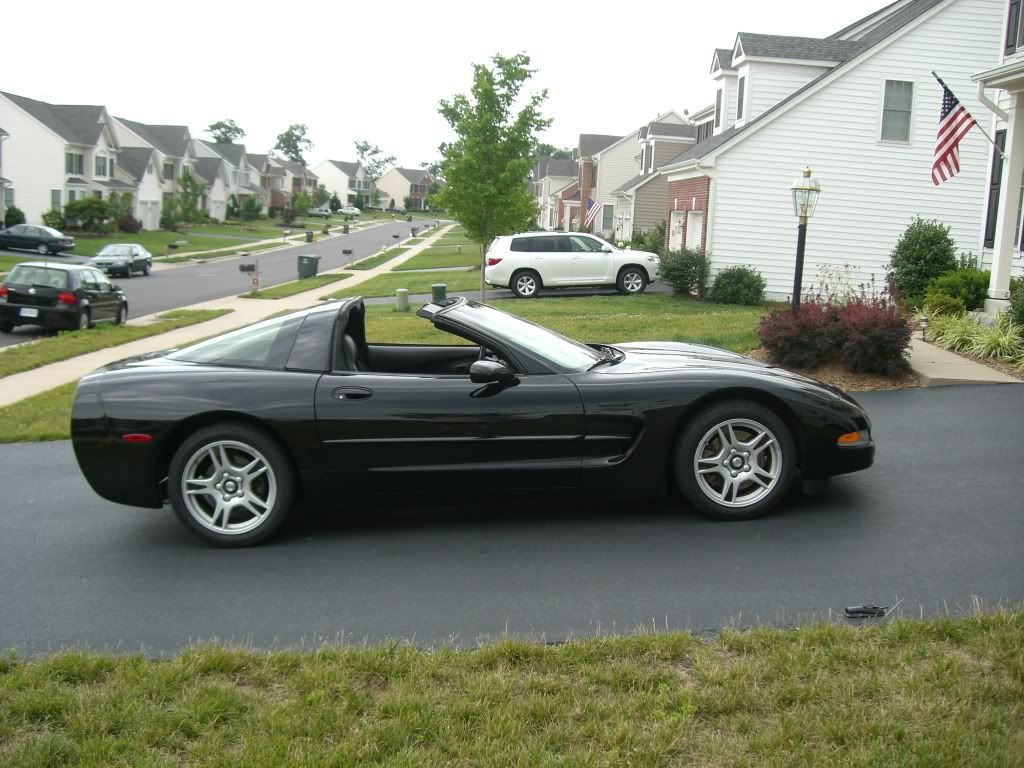

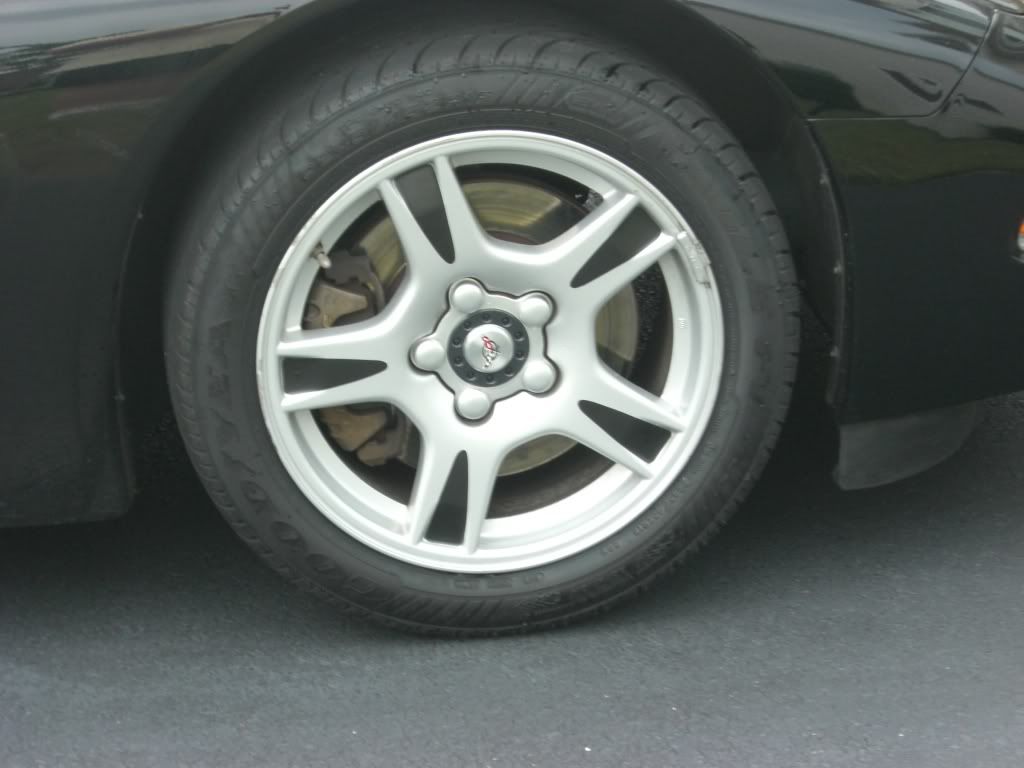
I had money to get wheels or a supercharger... I go faster now, but have stickers on my wheels. Compromise sucks.