American HydroCarbon Goodies
 10-23-2009, 07:22 PM
#1
Instructor

Thread Starter

Member Since: Aug 2008
Location: Wallingford Ct
Posts: 137
Likes: 0
Received 0 Likes
on
0 Posts
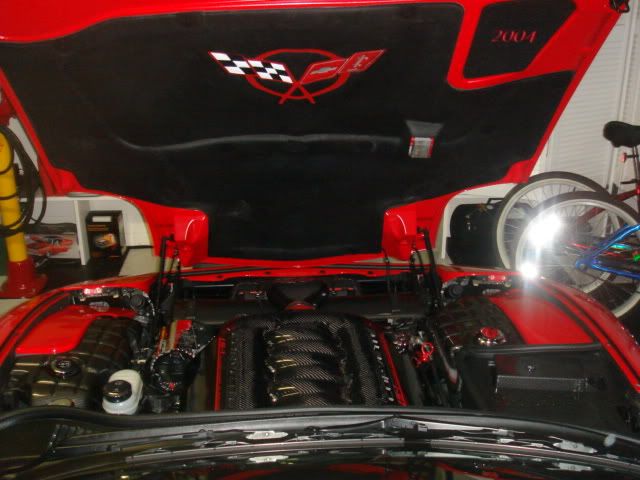
My photography is not great and certainly does not do any justice to Pat's parts. The first picture is the cowl in black HydroCarbon, and the rest of the pictures are the cowl, wiper arms, and fuel rail covers. The quality is unreal and this stuff looks amazing!


 10-23-2009, 07:23 PM
#2
Administrator


Member Since: Mar 2001
Location: In a parallel universe. Currently own 2014 Stingray Coupe.
Posts: 343,004
Received 19,303 Likes
on
13,975 Posts
C7 of the Year - Modified Finalist 2021
MO Events Coordinator
St. Jude Co-Organizer
St. Jude Donor '03-'04-'05-'06-'07-'08-'09-'10-'11-'12-'13-'14-'15-'16-'17-'18-'19-
'20-'21-'22-'23-'24
NCM Sinkhole Donor
CI 5, 8 & 11 Veteran


Those pieces do look very, very good. 


 10-24-2009, 01:47 AM
#9
Le Mans Master


 10-24-2009, 06:47 AM
#11
Le Mans Master
Looks great!
10-24-2009, 09:15 AM
#12
Melting Slicks

Oh your hooked now! I have many of Pat's pats in my engine bay. You need the hydrocarbon coolant and washer tanks. Pat is also redoing my brake booster cover to mach my other parts. I do so want the cowl cover but my wife has said enough........... for now. After installing his stuff I won my first award at a car show last weekend at "Vettes on the Avenue" in Melbourne, Fl.
Last edited by craig04c5; 10-24-2009 at 09:33 AM.
10-24-2009, 09:31 AM
#13
Instructor
Thread Starter
Member Since: Aug 2008
Location: Wallingford Ct
Posts: 137
Likes: 0
Received 0 Likes
on
0 Posts
Ive gotten a few PM's about the installation of these parts. I'm not an expert by any means but here's what I did. Wipers and cowl first, then fuel rails.
1)Remove wiper caps and nuts. If you have a battery terminal puller its very easy. If not, lift the arm up and wiggle up and down. It takes a lot of wiggle! If this dosent work fill the cavity with PB Blaster and let it soak. Some members have put the nut back on and given it a tap with a soft hammer. Just go easy, you dont want to wreck anything!
2) Once the wiper arms are off remove I believe about 5 to 6 plastic fasteners along the front of the cowl. A small screwdriver to lift the head of the fasteners and pull them out. At this point its a matter of lifting the cowl up and pulling twards the engine side.
3) Once removed, I cleaned the area to remove any dirt and started the reverse proceedure. Its nice to have another pair of hand here but not absolutely necessary. You dont want to scratch your car or Pat's work.
4) Once the new cowl is back in place you may have to work it down so to speak along the windshield side to get the rubber gasket on the cowl to sit nicely along the windshield. You can reuse the plastic fasteners or I got some new ones from Autozone. Some of the holes in the cowl are elongated to permit some movement to get it aligned. If your an-l like me I went to the hardware store and got some black plastic washers to install first to make a finished look.
5) Next I gave it a clean with quick detailer and admired the installation and Pat's work. This stuff has a very deep gloss automotive finish that is very durable. Even though, you dont want to scrach anything so use a couple of micro fiber towels duing the installation.
If it looks like a lot of work its not, it just take a lot to write it down. The install is actually quite easy and Pat's work looks amazing! I'll write the fuel rail install later. Hope this helps.