
When Air Comes Out of All AC Vents - A How To Fix Write Up with Pics!
 07-13-2008, 10:04 PM
#1
Team Owner


Thread Starter
I had air coming out of all vents on the Ac or Heat.
It was suggested that it is the vacumm supply line coming from the back of the manifold that is the culprit - Because Battery Acid Leaks on it and it burns through.
Well this is what happened or perhaps just it was rubbing and rubbed through thus allowing "NO" vacumm to get to the HVAC Vacumm manifold. (It did not have any Acid residue on it at all).
This vacumm line is "HARD" plastic and not easy to locate WHY? because it is within the wire loom going down to the area behind the passenger front wheel that goes to the PCM.
To Begin:
I had to jack up the front end of the Vette and turn the wheel all the way to the left, so I could remove the panel to access the area by the PCM and Vacumm junction One Way Check Valve.
You "WILL" need to take all the 7mm nuts off the panel (The ones underneath too) AND the last one for the fender on the bottom furthest toward the rear of the Vette right next to the door! This is because you will need to pull a little on the fender panel there to help see and work on the vacumm junction.
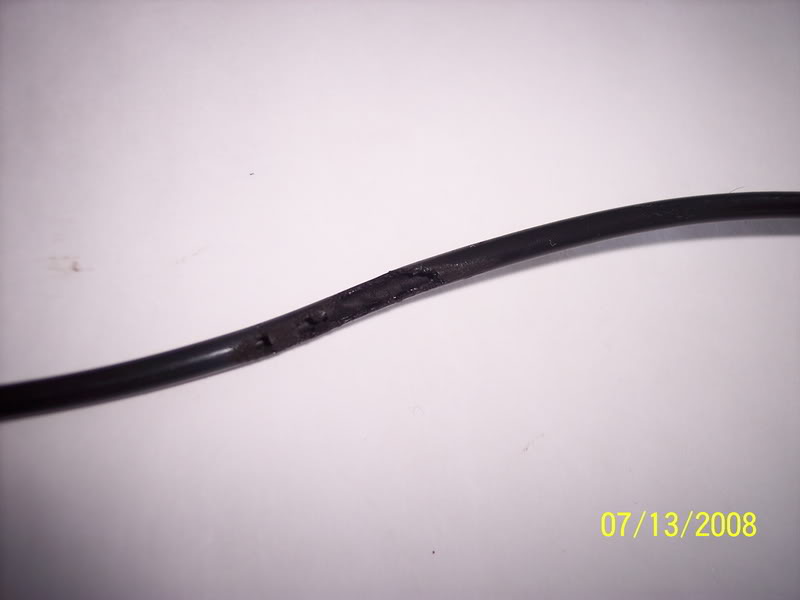
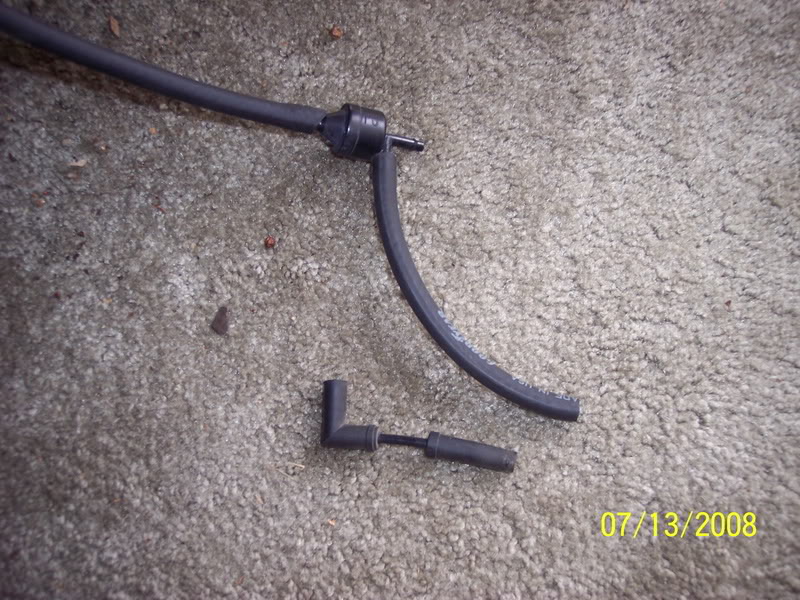
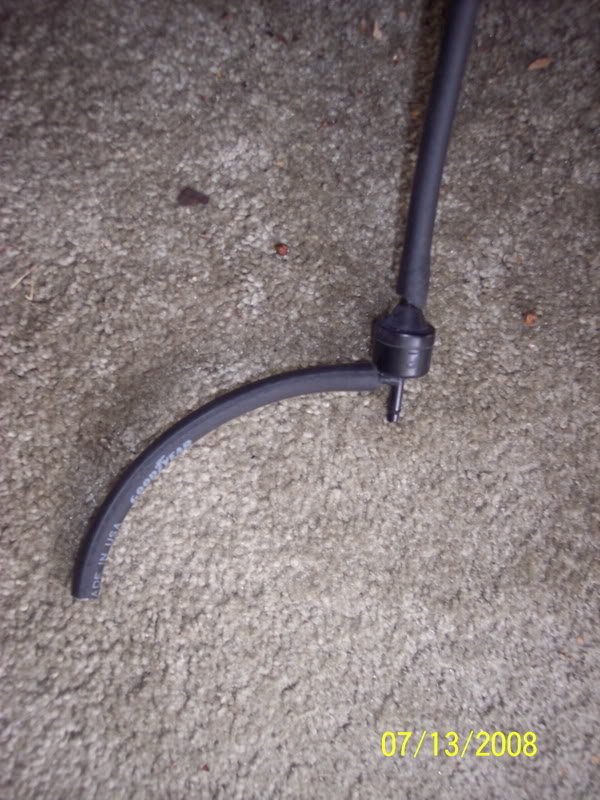
Here is the culprit fully pulled out: I tested it by capping the end after I removed it from the back of the manifold, it held "NO" vacumm at all- I mean I could blow through it and inhale through the line even though it was capped off on one end!

Damaged area:
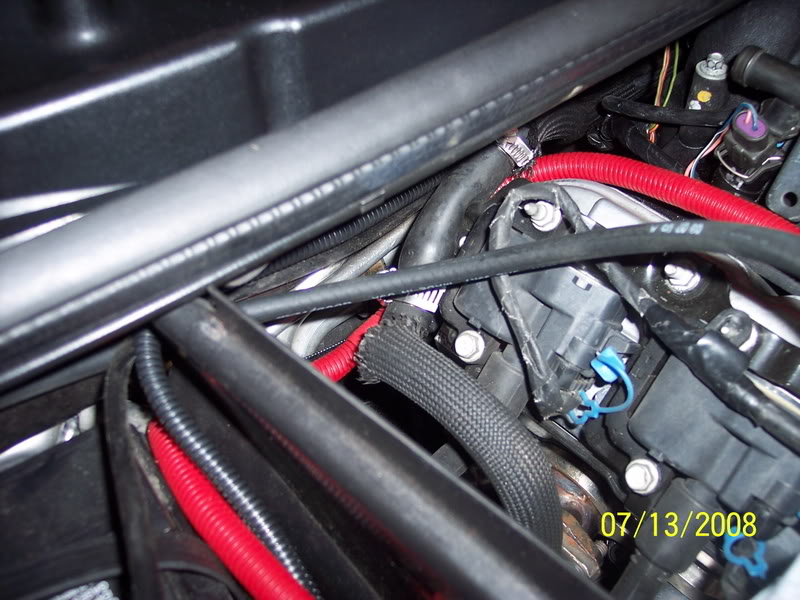
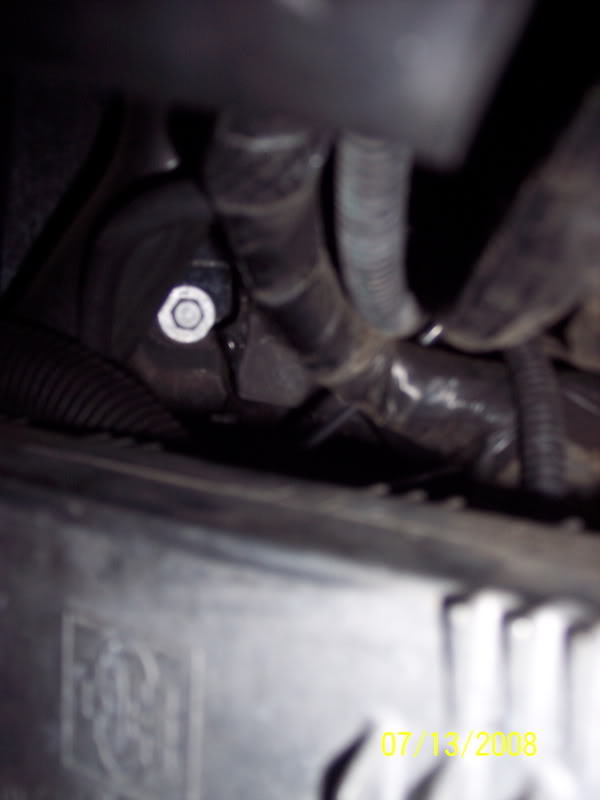
It is not hard to get your hand behind the manifold with the Valve cover/coil covers off , plus make sure you unclip the MAP sensor it makes it a little easier too get your hand on the vacumm line- I pulled the rubber end of the line off the fitting in the back (there are only two fittings on the back for vacumm) One for the Brake BOOSTER and one for the HVAC Unit
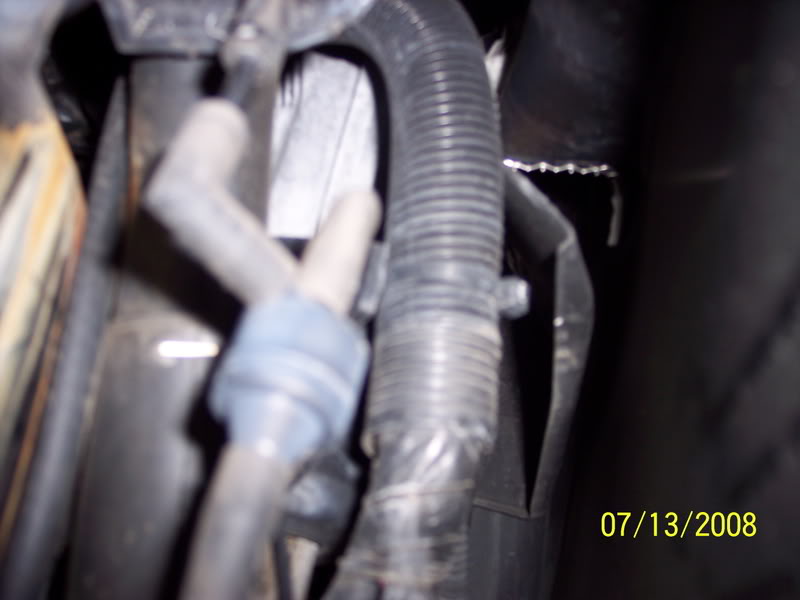
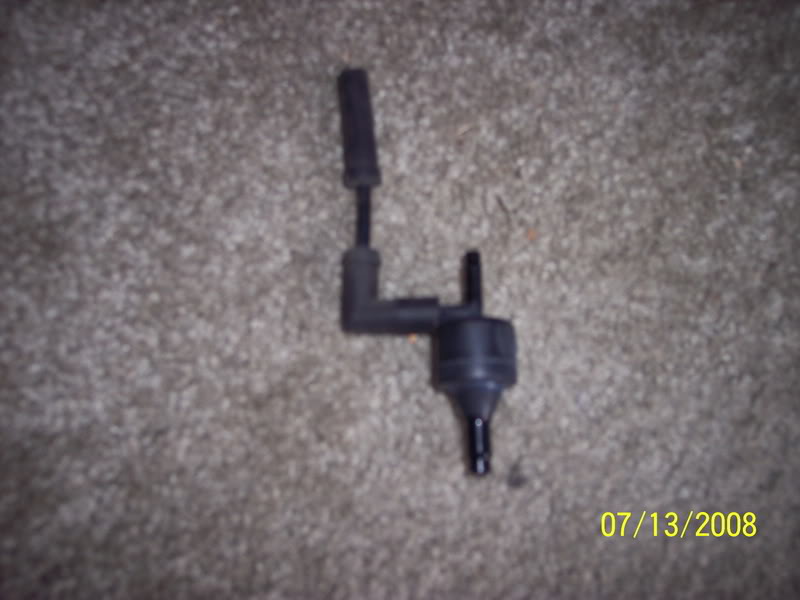
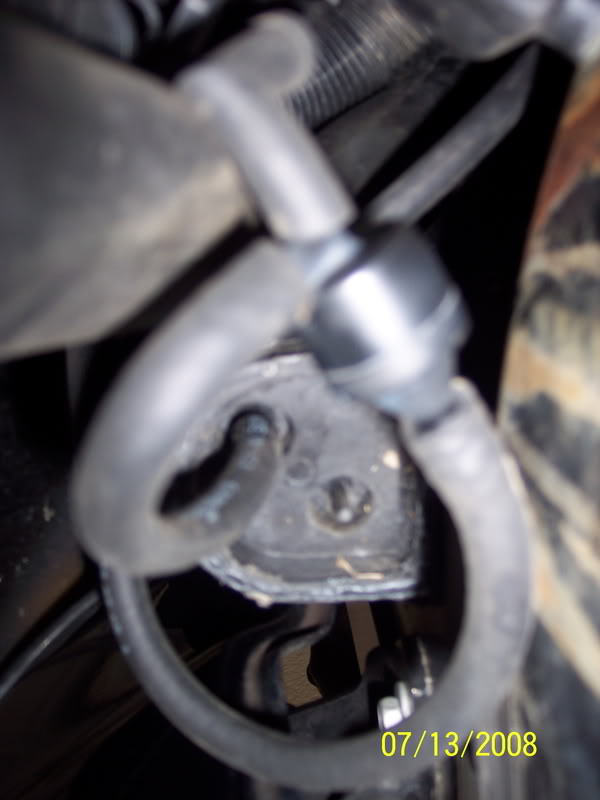
After it was all traced out and I found the end in the fender well - It ran into a oneway check valve: (Pic) The line on the bottom comes from the manifold and the other two - One goes to the canister right above and the other goes into the Vette's Cabin to the HVAC vacumm block.
With it pulled off:
The bottom goes to the manifold (vacumm supply) the one off the side goes to the Canister above and the one in the middle (top) goes into the cabin area.
Next I re-routed the new vacumm line to the unit using 3/16" fuel/vacumm line: Plugged it into the Manifold and routed it behind the battery down to the canister area-

All tucked in:
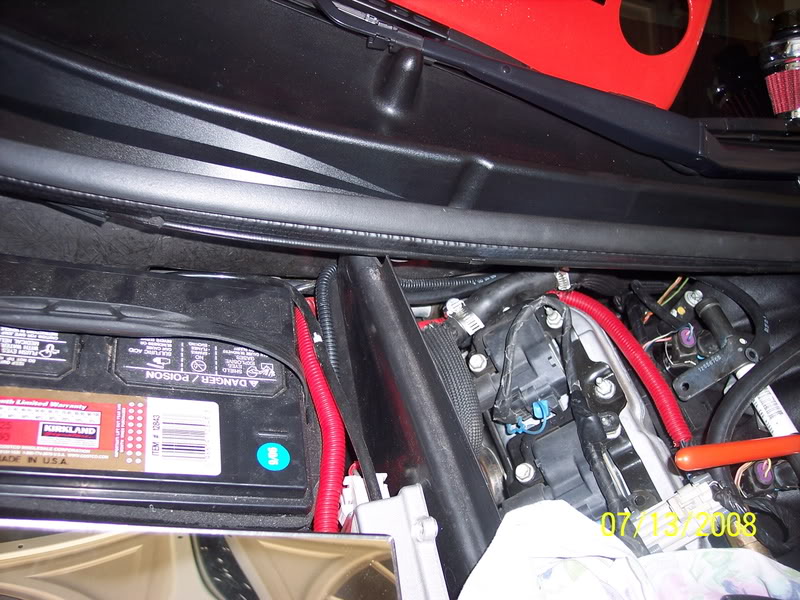
Remember to re-plug in the MAP sensor
Next I went to the fender area and tested "ALL" the lines off the One-Way Vacumm Check Valve (Using my mighty Vac): Tested to 20 PSI, the only one that did not hold was the direct line to the manifold:

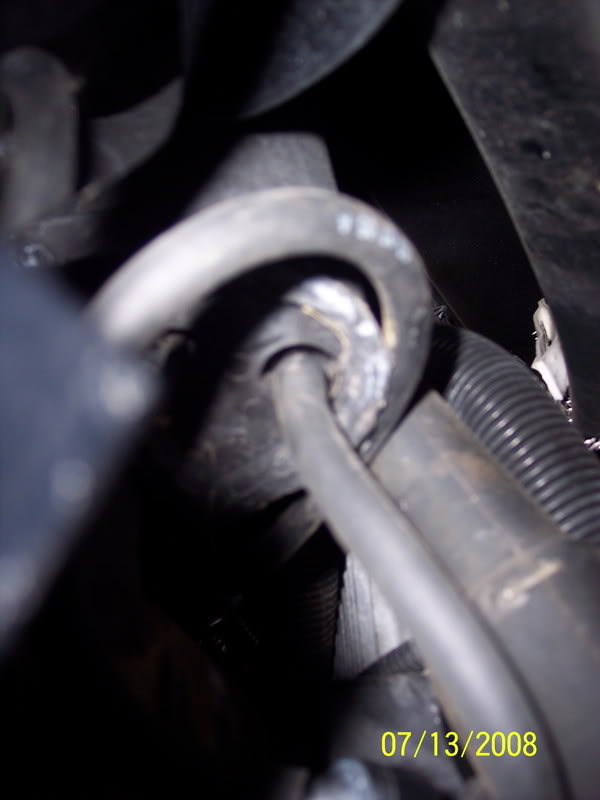
I went ahead and replaced the small 90* vacumm line to the canister for a just in case since it was easy enough(You never know) :
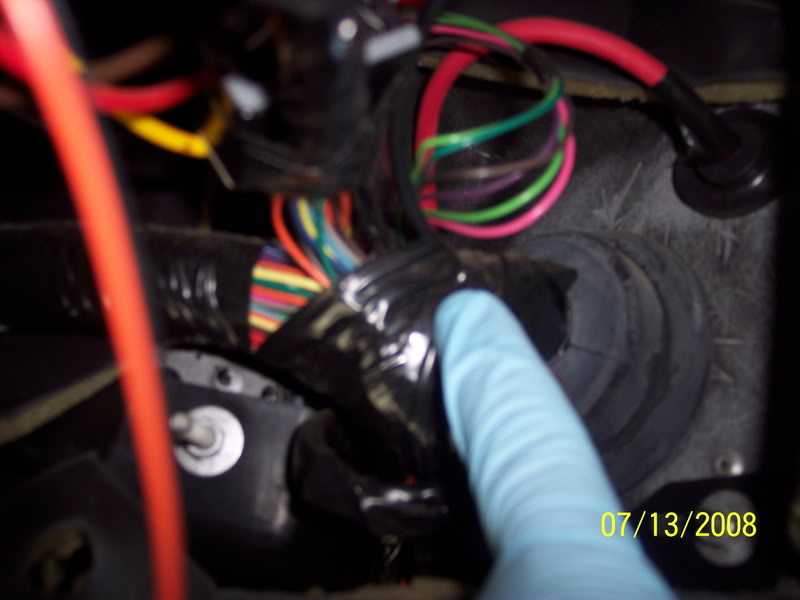
Now After that was done I went into the Vette and removed the floor mat, the panel covering the BCM (Computer) and the upper kick panel - now make sure you pop the foot well light out of the upper panel so you can remove the whole thing and have a free open area to work (YEAH! Like there is a lot of room anyway - all twisted on my back crunched in that little area- Stinking crazy! )
Here is a shot of the line coming into the cabin area from the fender:
They are kinda hard to see but they are the two (One from the manifold and one from the check valve to the cabin) there in the back ground right above the PCM:
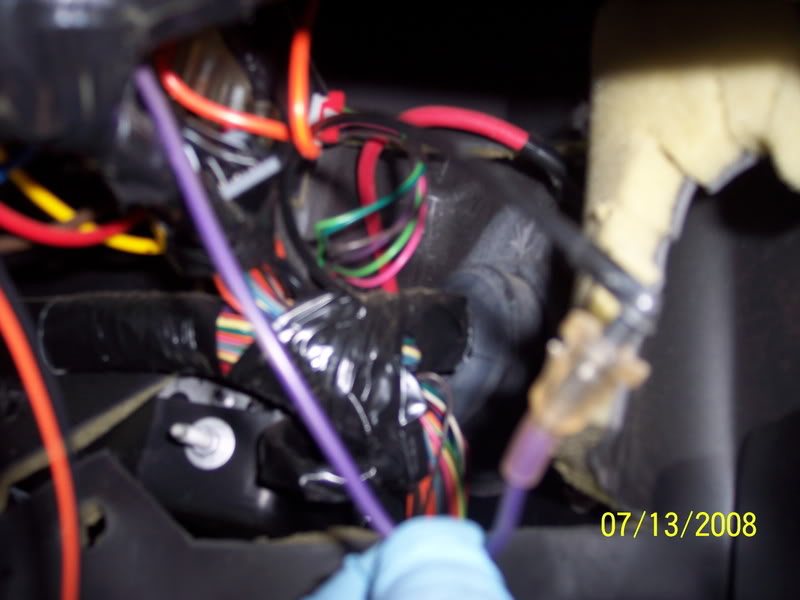
Now I tested the line from the fender to the cabin, here is a shot inside the Vette - The Black plastic line from the One-Way Check Valve couples into a "PURPLE" Line : As seen in pics
Black plastic supply line: Seen at finger point
Pulled down a little to see the coupler: Black into Purple
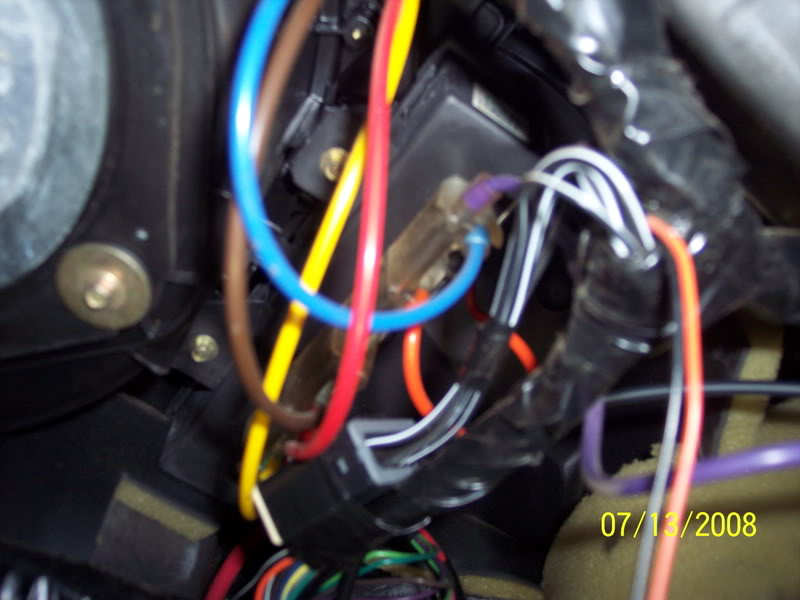
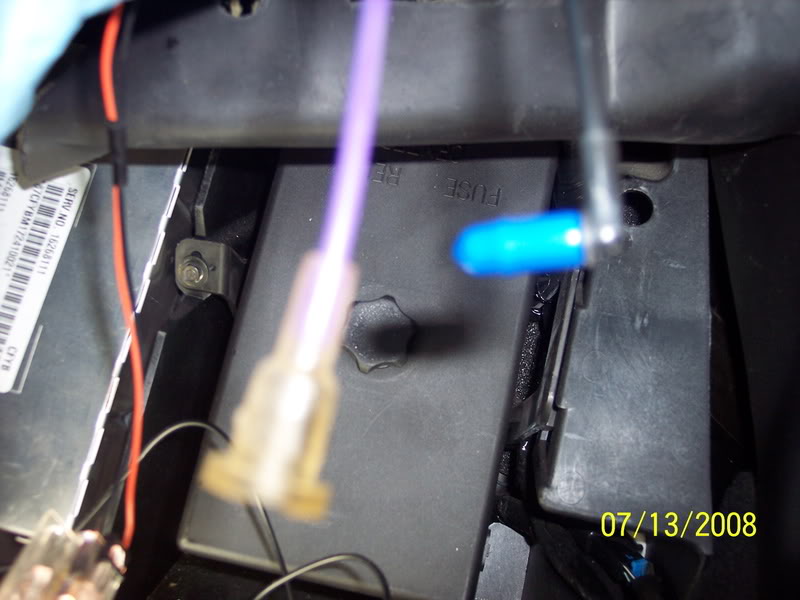
A few pics of all the pretty colored vacumm lines from the vacumm block: (And to think I was getting no vacumm to this bad boy )
)

Next I pulled the Black to Purple Couple apart for testing and capped it off: Held very good at 20 PSI of vacuum for a sustained period of time:
I also tested the vacumm block and it held too
I was glad the supply line was good because I did not want to punch a hole in the firewall to install a 3/16" vacumm line, So I was able to use the factory one.
Since it was good at this point I buttoned up the inside and put it all back together - even the floor mat - no really I did!
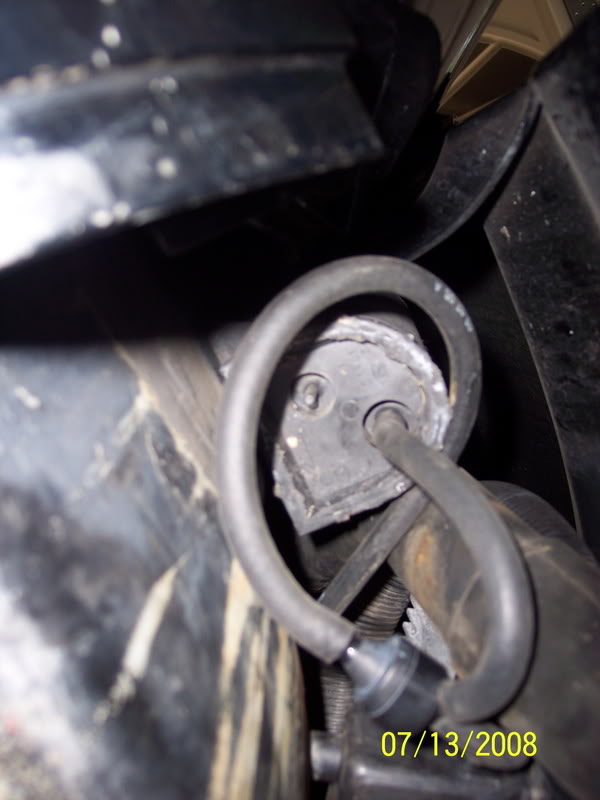
Now back outside to the fender area where I re-assembled the One-Way Check Valve: Here are a few pics installed
At this point you can put everything back to factory - the fender screw and the panel screws and snug them all down - Lower the Vette back on the ground and make sure nothing was left off and no extra parts!
AGAIN: Make sure you clipped the MAP sensor wire back in - because you needed to pull it off for easy access to the vacumm fitting on the back of the manifold - You did put it back on right!
Well now it is time for the test:
Fire up - Turn on AC - Try different Modes - ALL WORKS GREAT - It's a cold party in here
DAMN this is awesome I can actually feel it on my face (Well after all the dust blast hit me in the face)
Now for the test drive - got to take my daughter to the bowling alley -OKAY let's go ! (I'll just test it out Right?)
Dude! I used to have to put it on FULL blast because it would come out of all the vents and now I had it on the third bar and had to actually turn it down to the first on the way back!
It's fixed - SWEEEEEEEEEEEEEET!
I hope all can benefit by this and if anyone ever has any questions feel free to call me 661-406-7516 (Cell also listed in my sig )
Sorry if it is a long post - But I'm happy and now I can drive a 639 RWHP Vette freezing inside when it is 112* outside all the way to the sunset!
Thanks,Matt
It was suggested that it is the vacumm supply line coming from the back of the manifold that is the culprit - Because Battery Acid Leaks on it and it burns through.
Well this is what happened or perhaps just it was rubbing and rubbed through thus allowing "NO" vacumm to get to the HVAC Vacumm manifold. (It did not have any Acid residue on it at all).
This vacumm line is "HARD" plastic and not easy to locate WHY? because it is within the wire loom going down to the area behind the passenger front wheel that goes to the PCM.
To Begin:
I had to jack up the front end of the Vette and turn the wheel all the way to the left, so I could remove the panel to access the area by the PCM and Vacumm junction One Way Check Valve.
You "WILL" need to take all the 7mm nuts off the panel (The ones underneath too) AND the last one for the fender on the bottom furthest toward the rear of the Vette right next to the door!
This is because you will need to pull a little on the fender panel there to help see and work on the vacumm junction. Here is the culprit fully pulled out: I tested it by capping the end after I removed it from the back of the manifold, it held "NO" vacumm at all- I mean I could blow through it and inhale through the line even though it was capped off on one end!
Damaged area:
It is not hard to get your hand behind the manifold with the Valve cover/coil covers off , plus make sure you unclip the MAP sensor it makes it a little easier too get your hand on the vacumm line- I pulled the rubber end of the line off the fitting in the back (there are only two fittings on the back for vacumm) One for the Brake BOOSTER and one for the HVAC Unit
After it was all traced out and I found the end in the fender well - It ran into a oneway check valve: (Pic) The line on the bottom comes from the manifold and the other two - One goes to the canister right above and the other goes into the Vette's Cabin to the HVAC vacumm block.
With it pulled off:
The bottom goes to the manifold (vacumm supply) the one off the side goes to the Canister above and the one in the middle (top) goes into the cabin area.
Next I re-routed the new vacumm line to the unit using 3/16" fuel/vacumm line: Plugged it into the Manifold and routed it behind the battery down to the canister area-
All tucked in:
Remember to re-plug in the MAP sensor
Next I went to the fender area and tested "ALL" the lines off the One-Way Vacumm Check Valve (Using my mighty Vac): Tested to 20 PSI, the only one that did not hold was the direct line to the manifold:
I went ahead and replaced the small 90* vacumm line to the canister for a just in case since it was easy enough(You never know) :
Now After that was done I went into the Vette and removed the floor mat, the panel covering the BCM (Computer) and the upper kick panel - now make sure you pop the foot well light out of the upper panel so you can remove the whole thing and have a free open area to work (YEAH! Like there is a lot of room anyway - all twisted on my back crunched in that little area- Stinking crazy! )
Here is a shot of the line coming into the cabin area from the fender:
They are kinda hard to see but they are the two (One from the manifold and one from the check valve to the cabin) there in the back ground right above the PCM:
Now I tested the line from the fender to the cabin, here is a shot inside the Vette - The Black plastic line from the One-Way Check Valve couples into a "PURPLE" Line : As seen in pics
Black plastic supply line: Seen at finger point
Pulled down a little to see the coupler: Black into Purple
A few pics of all the pretty colored vacumm lines from the vacumm block: (And to think I was getting no vacumm to this bad boy
)Next I pulled the Black to Purple Couple apart for testing and capped it off: Held very good at 20 PSI of vacuum for a sustained period of time:
I also tested the vacumm block and it held too
I was glad the supply line was good because I did not want to punch a hole in the firewall to install a 3/16" vacumm line, So I was able to use the factory one.
Since it was good at this point I buttoned up the inside and put it all back together - even the floor mat - no really I did!
Now back outside to the fender area where I re-assembled the One-Way Check Valve: Here are a few pics installed
At this point you can put everything back to factory - the fender screw and the panel screws and snug them all down - Lower the Vette back on the ground and make sure nothing was left off and no extra parts!
AGAIN: Make sure you clipped the MAP sensor wire back in - because you needed to pull it off for easy access to the vacumm fitting on the back of the manifold - You did put it back on right!
Well now it is time for the test:
Fire up - Turn on AC - Try different Modes - ALL WORKS GREAT - It's a cold party in here
DAMN this is awesome I can actually feel it on my face (Well after all the dust blast hit me in the face)
Now for the test drive - got to take my daughter to the bowling alley -OKAY let's go ! (I'll just test it out Right?)
Dude! I used to have to put it on FULL blast because it would come out of all the vents and now I had it on the third bar and had to actually turn it down to the first on the way back!
It's fixed - SWEEEEEEEEEEEEEET!
I hope all can benefit by this and if anyone ever has any questions feel free to call me 661-406-7516 (Cell also listed in my sig )
Sorry if it is a long post - But I'm happy and now I can drive a 639 RWHP Vette freezing inside when it is 112* outside
all the way to the sunset!Thanks,Matt

The following 8 users liked this post by madmatt9471:
barkingowl (07-21-2018),
bookyoh (06-25-2022),
epimetheus-lee (06-29-2021),
HotRod Junkie (11-16-2020),
jpbikes (04-17-2022),
and 3 others liked this post.
07-13-2008, 10:42 PM
#3
Drifting

Thanks for the great post and pic's. This same thing happened to a buddy of mines car Saturday. I'll make sure he reads this post.
Thanks again....
Thanks again....
07-13-2008, 11:05 PM
#4
Administrator


Member Since: Mar 2001
Location: In a parallel universe. Currently own 2014 Stingray Coupe.
Posts: 342,681
Received 19,219 Likes
on
13,929 Posts
C7 of the Year - Modified Finalist 2021
MO Events Coordinator
St. Jude Co-Organizer
St. Jude Donor '03-'04-'05-'06-'07-'08-'09-'10-'11-'12-'13-'14-'15-'16-'17-'18-'19-
'20-'21-'22-'23-'24
NCM Sinkhole Donor
CI 5, 8 & 11 Veteran


Very informative write-up. Thanks.
07-13-2008, 11:11 PM
#5
Le Mans Master


Member Since: May 2007
Location: hagerstown md
Posts: 5,383
Likes: 0
Received 4 Likes
on
4 Posts
St. Jude Donor '08-'09
This must be a common thing this week. I just re-done my vacuum lines on Wednesday. Did a write up, although not NEAR as deatailed as yours. Great job! 
One thing though......you must have the smallest hands on earth to get behind the intake and have room to do the work too. I wear a cadet medium large glove, and could only get my hand back there to feel around, get the MAF connection off, and that's it. Had to unbolt the intake, to pull it forward, to have room to work.
One thing though......you must have the smallest hands on earth to get behind the intake and have room to do the work too. I wear a cadet medium large glove, and could only get my hand back there to feel around, get the MAF connection off, and that's it. Had to unbolt the intake, to pull it forward, to have room to work.


 07-19-2008, 10:40 PM
#12
Team Owner
Thread Starter
This must be a common thing this week. I just re-done my vacuum lines on Wednesday. Did a write up, although not NEAR as deatailed as yours. Great job!
One thing though......you must have the smallest hands on earth to get behind the intake and have room to do the work too. I wear a cadet medium large glove, and could only get my hand back there to feel around, get the MAF connection off, and that's it. Had to unbolt the intake, to pull it forward, to have room to work.
One thing though......you must have the smallest hands on earth to get behind the intake and have room to do the work too. I wear a cadet medium large glove, and could only get my hand back there to feel around, get the MAF connection off, and that's it. Had to unbolt the intake, to pull it forward, to have room to work.
I do have small wrists but hands not so small

It can be done
Thanks,Matt
07-19-2008, 10:41 PM
#13
Team Owner
Thread Starter
Thanks for shooting me your phone number so I could call to explain!
Enjoy the ride

Thanks,Matt
04-09-2011, 08:12 PM
#16
Burning Brakes


My 2002 ZO6's AC air flow was flowing out all my vents -confounding me , and having me think my refrigerant was low or worse.
Found his post along with other posts by Bill Curly - and was able to fix my AC airflow problem at no cost other mangled hands from squeezing them behind the manifold to gett to the vacumm nipples
Ran a new vacumm line from behind the manifold down to the vacumm tree under the battery tray. Cranked her up and MUCHO Cold Air (out of appropriate vents).
Feel like I got real intimate with my Z06 - had the coil pack off the passenger side and the valve cover too. Minor day surgery - but all easy and Matt was super helpful in talking me thru the operation.
Now I feel brazen enough to tackle replacing the valve springs ( preventatively).
Thanks Matt and Bill and the Corvette Forum community
04-09-2011, 08:44 PM
#17
Team Owner
Thread Starter
My 2002 ZO6's AC air flow was flowing out all my vents -confounding me , and having me think my refrigerant was low or worse.
Found his post along with other posts by Bill Curly - and was able to fix my AC airflow problem at no cost other mangled hands from squeezing them behind the manifold to gett to the vacumm nipples
Ran a new vacumm line from behind the manifold down to the vacumm tree under the battery tray. Cranked her up and MUCHO Cold Air (out of appropriate vents).
Feel like I got real intimate with my Z06 - had the coil pack off the passenger side and the valve cover too. Minor day surgery - but all easy and Matt was super helpful in talking me thru the operation.
Now I feel brazen enough to tackle replacing the valve springs ( preventatively).
Thanks Matt and Bill and the Corvette Forum community
Found his post along with other posts by Bill Curly - and was able to fix my AC airflow problem at no cost other mangled hands from squeezing them behind the manifold to gett to the vacumm nipples
Ran a new vacumm line from behind the manifold down to the vacumm tree under the battery tray. Cranked her up and MUCHO Cold Air (out of appropriate vents).
Feel like I got real intimate with my Z06 - had the coil pack off the passenger side and the valve cover too. Minor day surgery - but all easy and Matt was super helpful in talking me thru the operation.
Now I feel brazen enough to tackle replacing the valve springs ( preventatively).
Thanks Matt and Bill and the Corvette Forum community
I am glad you got it fixed enjoy the up and coming summer!
Thanks,Matt
04-09-2011, 11:09 PM
#18
Team Owner

Member Since: Jan 2007
Location: cookeville tennessee
Posts: 28,846
Received 1,762 Likes
on
1,529 Posts


