
How do I relocate radiator to fit Procharger kit?
 04-18-2014, 12:32 AM
#1
Instructor

Thread Starter
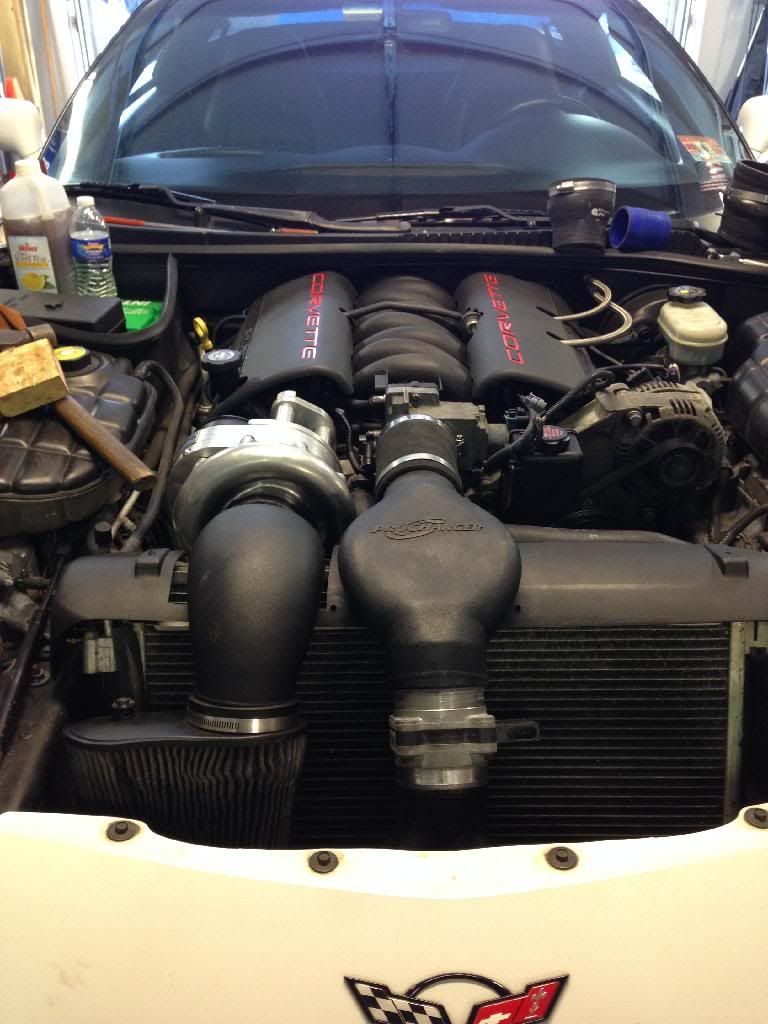
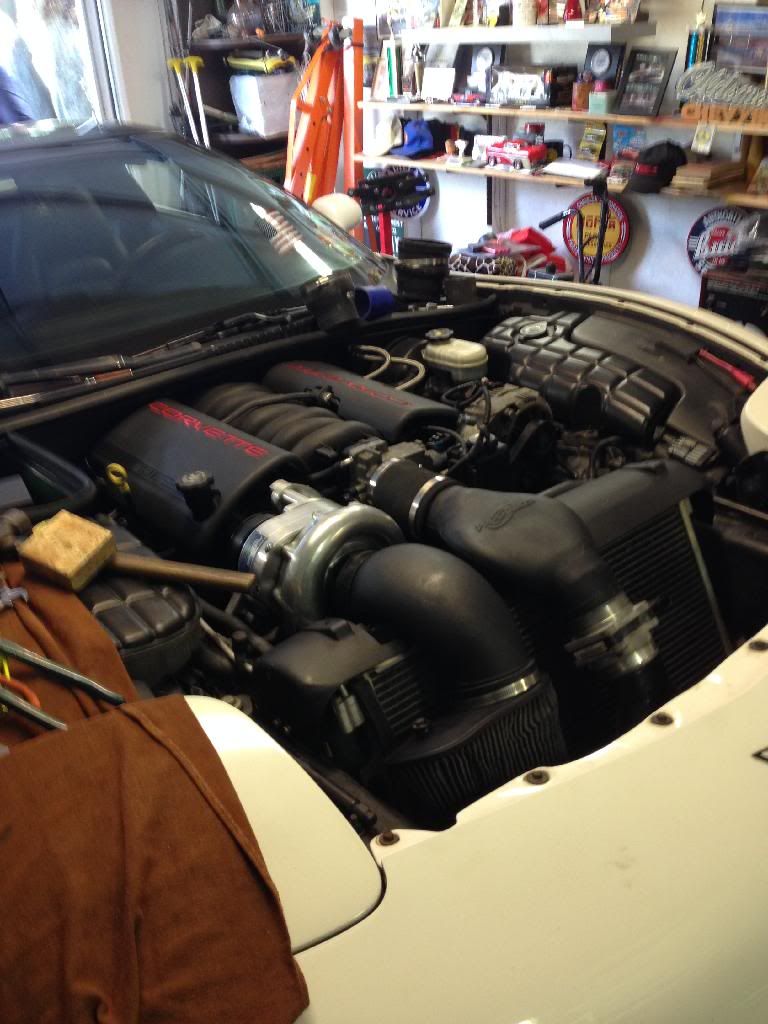
I've looked everywhere. I have read some guys cut and re-weld the brackets farther forward or lower, but I don't have a welder or ability. Is there a way to do it with no cutting? I've seen mention of "L" brackets. Anyone have any pics of this? I don't want to have to cut and weld. I have a P1SC1 kit and I'm becoming overly frustrated with the fact that it hits the radiator. I bought my kit used so it doesn't have anything to relocate it. I believe it originally came with the Procharger fan assembly, but I don't have that either. Any help would be greatly appreciated. Especially pics!
 04-18-2014, 12:31 PM
#2
Team Owner


Member Since: Jan 2007
Location: cookeville tennessee
Posts: 28,846
Received 1,762 Likes
on
1,529 Posts

I've looked everywhere. I have read some guys cut and re-weld the brackets farther forward or lower, but I don't have a welder or ability. Is there a way to do it with no cutting? I've seen mention of "L" brackets. Anyone have any pics of this? I don't want to have to cut and weld. I have a P1SC1 kit and I'm becoming overly frustrated with the fact that it hits the radiator. I bought my kit used so it doesn't have anything to relocate it. I believe it originally came with the Procharger fan assembly, but I don't have that either. Any help would be greatly appreciated. Especially pics!
Are you can pull your stock one out simple to do and have a welding shop do it for you. If you do the work will cost much of nothing to have it done..
04-19-2014, 12:12 AM
#3
Instructor
Thread Starter
Yeah. I just didn't have a welder. I went out and got aluminum spacers to drop the actual radiator support. I dropped it 1" in the back and about 1/2 in the front. Worked out pretty well. Seems like it did the trick!
04-21-2014, 05:08 PM
#4
Team Owner
Member Since: Jan 2007
Location: cookeville tennessee
Posts: 28,846
Received 1,762 Likes
on
1,529 Posts
 04-22-2014, 12:15 AM
#5
Instructor
Thread Starter
Still had to chop the hell out of the radiator. Even after it was dropped 1", had to cut up a bunch of things to make it fit. But it's mostly together. Procharger certainly made a great "bolt on" kit! 


 04-22-2014, 11:34 AM
#7
Melting Slicks


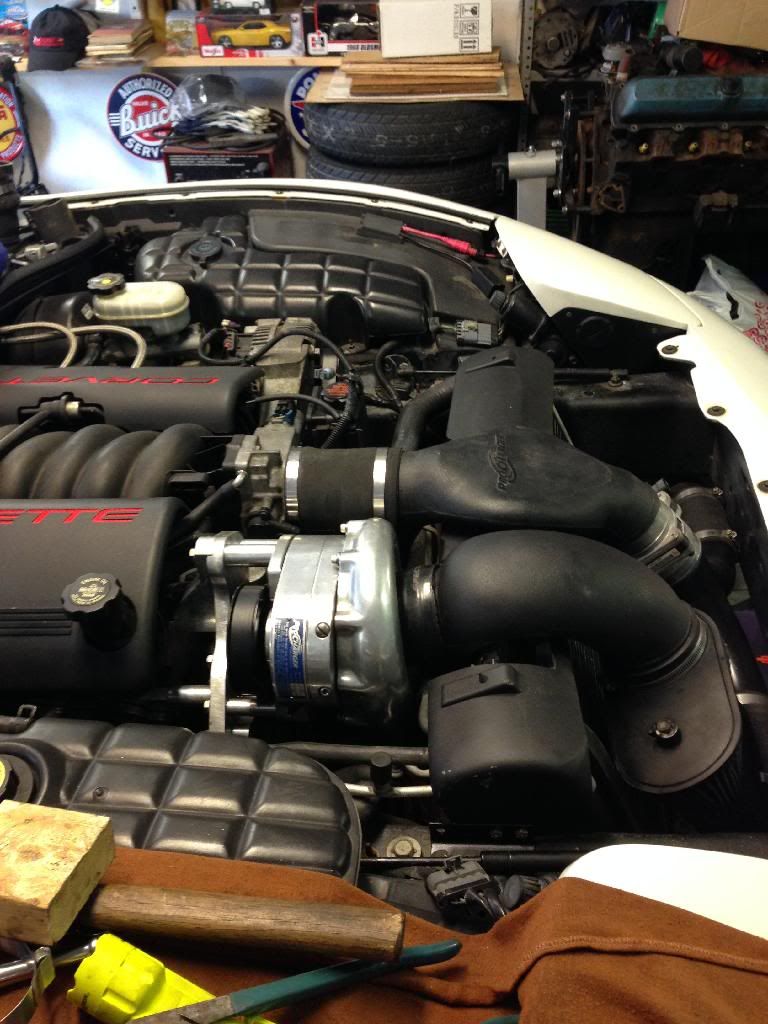
The original procharger kit with that fan intake was junk. Mine was also used and contained parts from original kit and "stage 2" with an A&A bracket. Mixed kits can be fun...A&A and ECS do a great job on the new kits
The big things you are missing are the radiator cover and cradle. My tuner modified some of the charge pipes and made new pipes from Y section after twin intercoolers into TB with LS3 style maf and also section from blower to filter (no more kinks) I also went with a tial Q bov.

The big things you are missing are the radiator cover and cradle. My tuner modified some of the charge pipes and made new pipes from Y section after twin intercoolers into TB with LS3 style maf and also section from blower to filter (no more kinks) I also went with a tial Q bov.
 04-22-2014, 03:12 PM
#8
Instructor
Thread Starter
The original procharger kit with that fan intake was junk. Mine was also used and contained parts from original kit and "stage 2" with an A&A bracket. Mixed kits can be fun...A&A and ECS do a great job on the new kits
The big things you are missing are the radiator cover and cradle. My tuner modified some of the charge pipes and made new pipes from Y section after twin intercoolers into TB with LS3 style maf and also section from blower to filter (no more kinks) I also went with a tial Q bov.
The big things you are missing are the radiator cover and cradle. My tuner modified some of the charge pipes and made new pipes from Y section after twin intercoolers into TB with LS3 style maf and also section from blower to filter (no more kinks) I also went with a tial Q bov.
I am using the stock shroud and all as of now. That pic was just for reference. I really would love to get the charge pipe you have in the center. I hate the Procharger "air bridge." That is a much cleaner, smoother look. But I am scared that the hood won't close. I dropped the radiator 1" because I don't want to spend $400 for the cradle haha. I want it to be clean however. So maybe that's what I'll have to do. But for now I just want this thing finished haha. It's been a long time coming. I'll eventually straighten out the kinks and do what you did along the way.
04-22-2014, 03:57 PM
#9
Melting Slicks
Very clean set up!
I am using the stock shroud and all as of now. That pic was just for reference. I really would love to get the charge pipe you have in the center. I hate the Procharger "air bridge." That is a much cleaner, smoother look. But I am scared that the hood won't close. I dropped the radiator 1" because I don't want to spend $400 for the cradle haha. I want it to be clean however. So maybe that's what I'll have to do. But for now I just want this thing finished haha. It's been a long time coming. I'll eventually straighten out the kinks and do what you did along the way.
I am using the stock shroud and all as of now. That pic was just for reference. I really would love to get the charge pipe you have in the center. I hate the Procharger "air bridge." That is a much cleaner, smoother look. But I am scared that the hood won't close. I dropped the radiator 1" because I don't want to spend $400 for the cradle haha. I want it to be clean however. So maybe that's what I'll have to do. But for now I just want this thing finished haha. It's been a long time coming. I'll eventually straighten out the kinks and do what you did along the way.
I have the HO (original) and stage 2 manuals as well if you need them.
-Pete
Last edited by PEETYZ; 04-22-2014 at 04:09 PM.
04-22-2014, 07:35 PM
#10
Instructor
Thread Starter
I really appreciate it. Mine came with the original manual. I was kind of shocked to find some parts of the stage II kit like you said lol. What kind of power did yours out down? I have a 4.25 pulley. Not sure how much boost that'll put out but I can't wait to get it tuned and see some numbers.