
Finally got it started today . .
 07-29-2014, 09:50 AM
#101
Team Owner


Thread Starter


 Once you start cleaning stuff under the car, there's no turning back.
 That's exactly what I would have said - unfortunately, I had to pony up for this one. I think it'll be worth it though. I already had the triple-pod A-pillar full with boost and fuel gauges and the shift light so the bezel seemed the next obvious choice. Dual WB gauges go there.
 I decided I needed to move someof these other things along while I'm working on the meth system on the side - getting sidetracked with that. How's the fuel system troubleshooting coming?
 07-29-2014, 09:59 AM
#102
Race Director


It's been ruff I have one trick left if not I will have to break down and take it to my buddies shop. I'm sure I won't here the end of it when the issue is found and it's something simple .
.
07-29-2014, 11:54 AM
#103
Le Mans Master


Just curious - reading the description of the Quaife differential, at first blush it seems to be a better design over more conventional limited-slip differentials, and makes me wonder why more manufacturers don't use it, especially on their more performance-oriented cars. Perhaps an overly rhetorical question, but can anyone provide some insight?
07-29-2014, 11:56 PM
#104
Team Owner
Thread Starter
Price, most likely. There are high end cars that do use Quaife but at some price-point it probably is not as cost-effective as an LSD. RPM only offers them standard on the Stage 4 diff - it's optional on the other levels.
Last edited by Patches; 07-30-2014 at 01:50 AM.


 08-03-2014, 04:49 PM
#109
Team Owner
Thread Starter
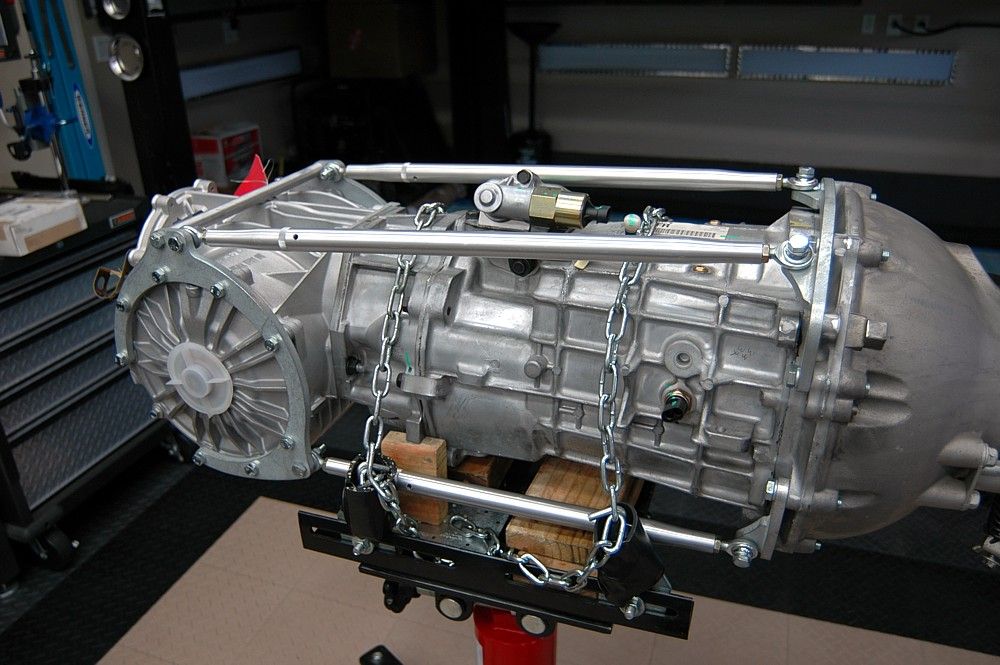
Thought about it and decided to get all the other two tension rods on and adjusted while it's in a neutral, "net-zero" condition with no mounting loads on the assembly. I propped it up on wood pieces and finished installation of the ECS tranny brace. I also swapped in the Hinson engine mounts along with the additional heat shielding. I used the stock heat wraps as well to create a double heat protection setup. Spent a little time on some CAD work to do another set of custom fittings that I need for the intake. Slowly but surely . . .


08-03-2014, 07:32 PM
#110
Tech Contributor
Ed
I think you would have an easier time telling us what is still stock on your car.
It would be a short list....
Looking great !
Toque
I think you would have an easier time telling us what is still stock on your car.
It would be a short list....
Looking great !
Toque
09-01-2014, 10:39 PM
#111
Team Owner
Thread Starter
Got a lot done this Labor Day weekend. I buttoned up most of the wiring for the fuel system and got the Hobbs switch manifold setup squared away.
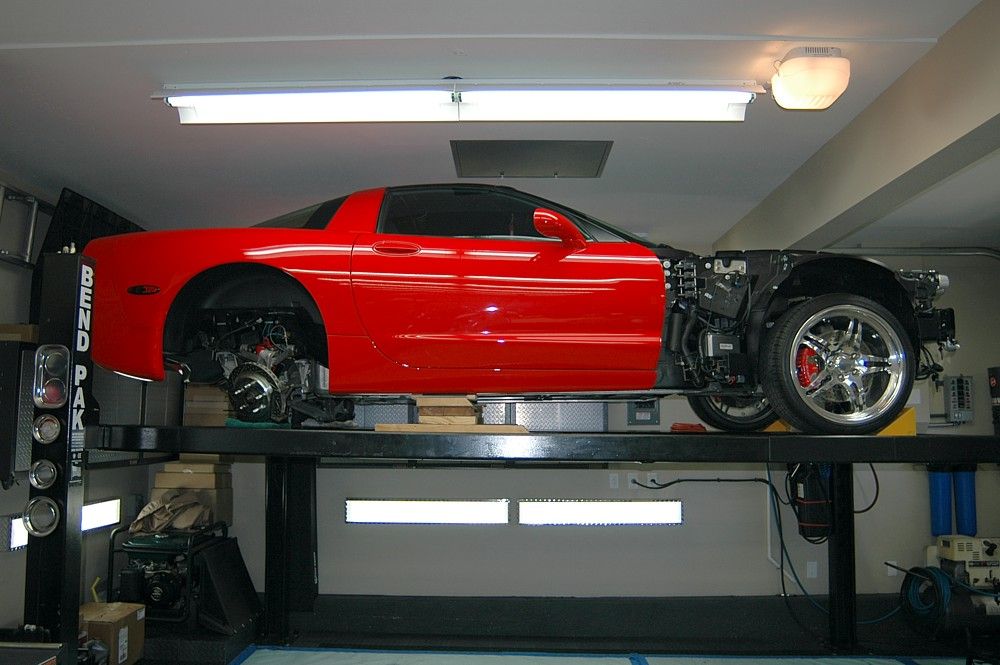
That was my cue to get the tt/tranny/diff and rear crossmember back in. I've done several of these in the past and this was definitely the most challenging. I think the fact that I have done so many mods combined and lost the engine to tt alignment is what made it take so long for me to get the tt on this time. Plus, the triple-disc Mantic clutch felt a little trickier to get the alignment right but, ultimately, it went in. Then my cool neighbor, Brett helped me lift the crossmember (with the suspension and brakes still attached) onto the tranny jack and then helped me manuever it onto the lift in place, ready to mount. I have normally done this alone in the past but there was no manuevering room behind the lift with the crossmember sitting there so I had no leverage to lift it back onto the runners myself. He was a lifesaver.
Anyway, drivetrain is back in although I still need to pop the coilovers in next weekend and then I can concentrate on the engine bay. Stuff is definitely tighter with all the additions - extra fuel lines in the tunnel, the Pfadt mount, the aux. fuel system and the ECS tranny brace. It was a challenge getting everything lined up and torqued but it's all in.
Here are a few pics:
Finally has a rear end again - been several months. Been tripping over that rear crossmember too long!
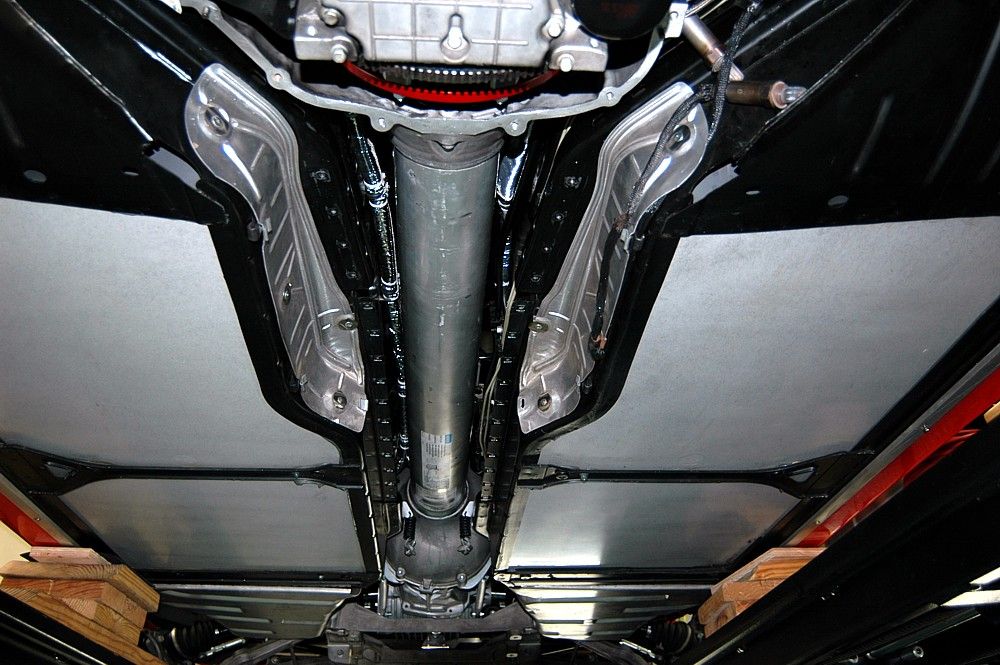
Beefed up drivetrain with triple-disk Mantic, CF drive shaft, poly coupler up front and solid in back, and stage 4 Quaife diff. You can see the new aux. supply and return fuel lines at the top corners of the tunnel. I wrapped them in high-temp heat insulation and will be adding an additional layer to the tunnel plate as well.
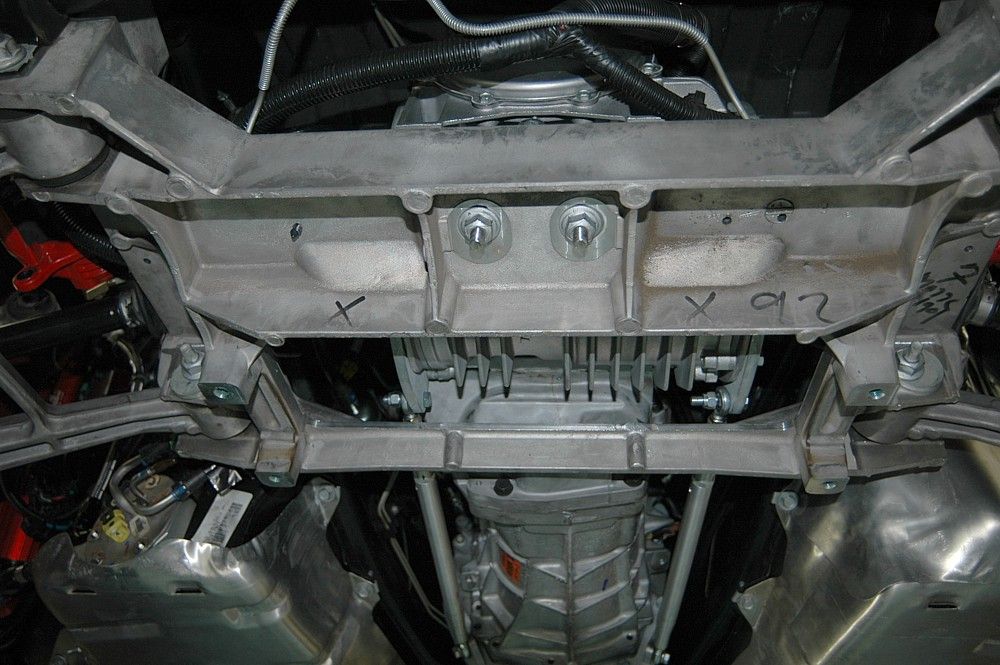
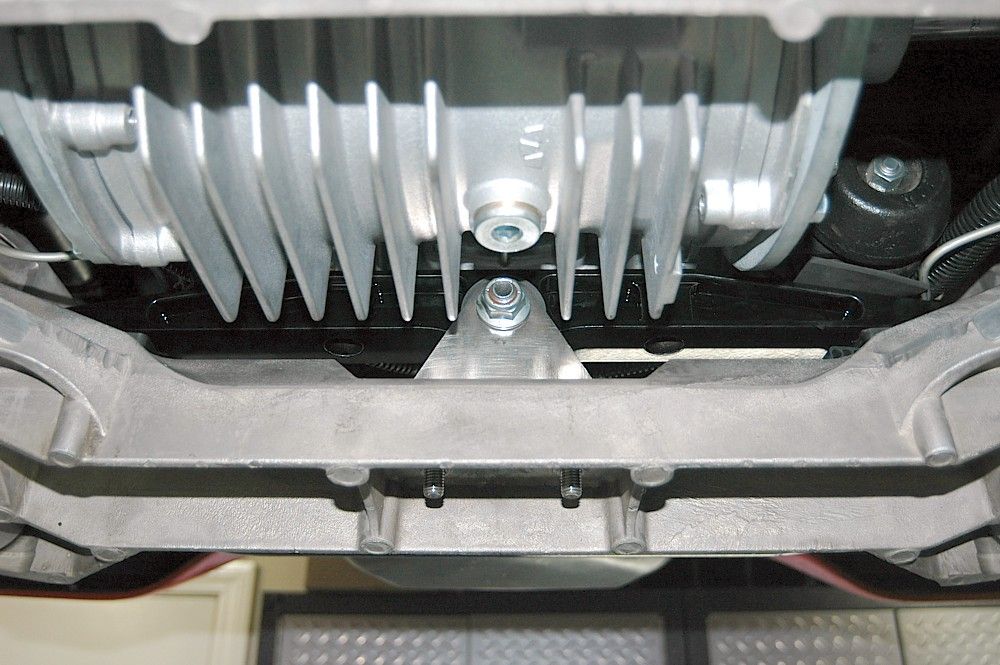
Powder coated Pfadt mount

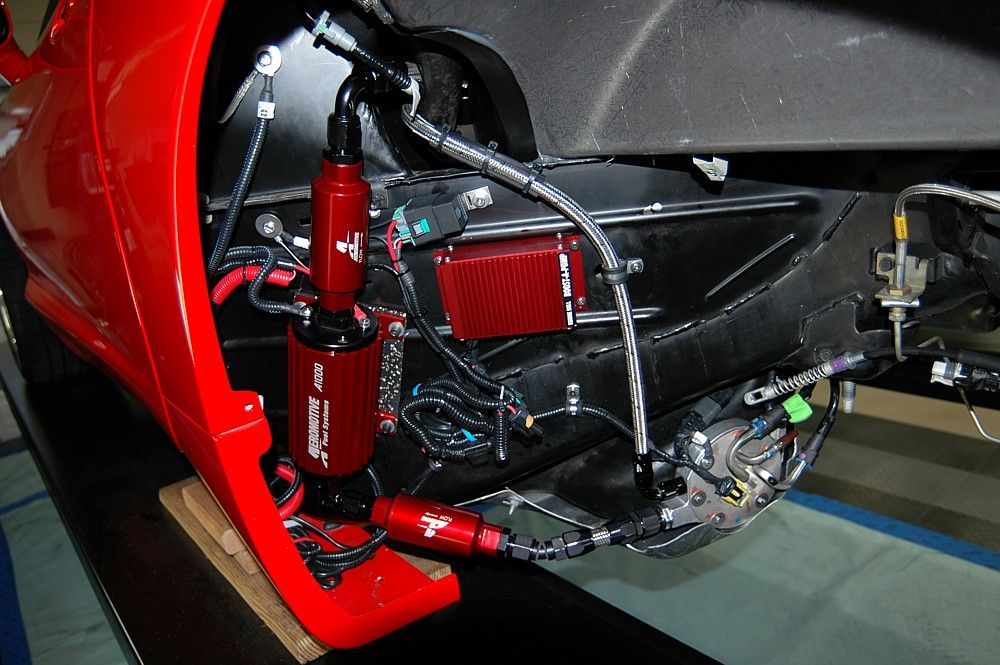
Wired fuel setup. Aux. fuel and KB BAP wired with PnP harnesses and hooked to Hobbs switches up front.
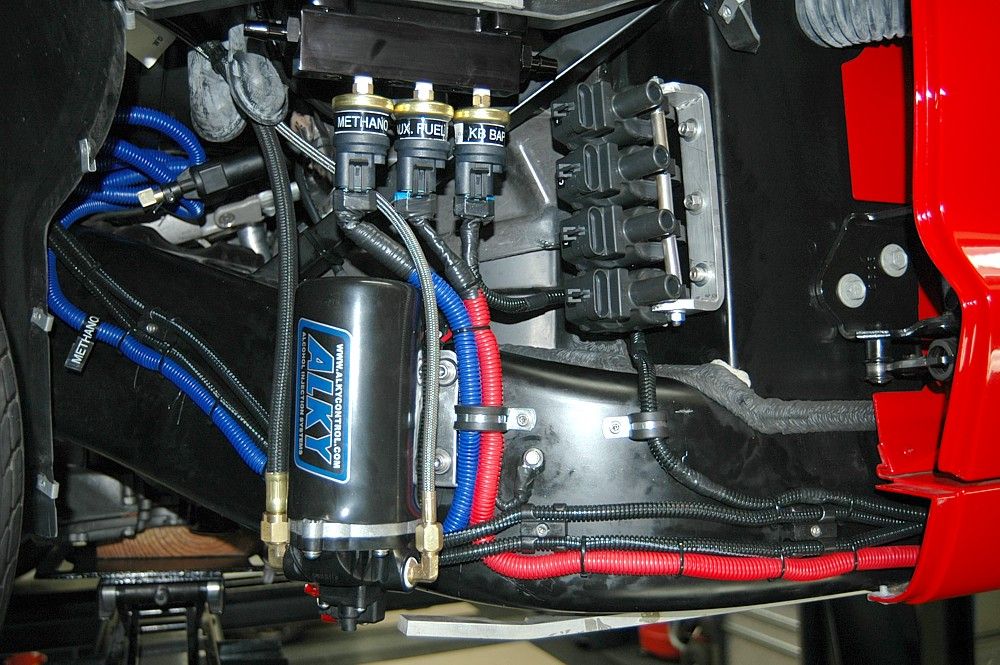
Meth pump, coils and the Hobbs switchs on the vacuum block that will feed all the boost pressure switches/sources.
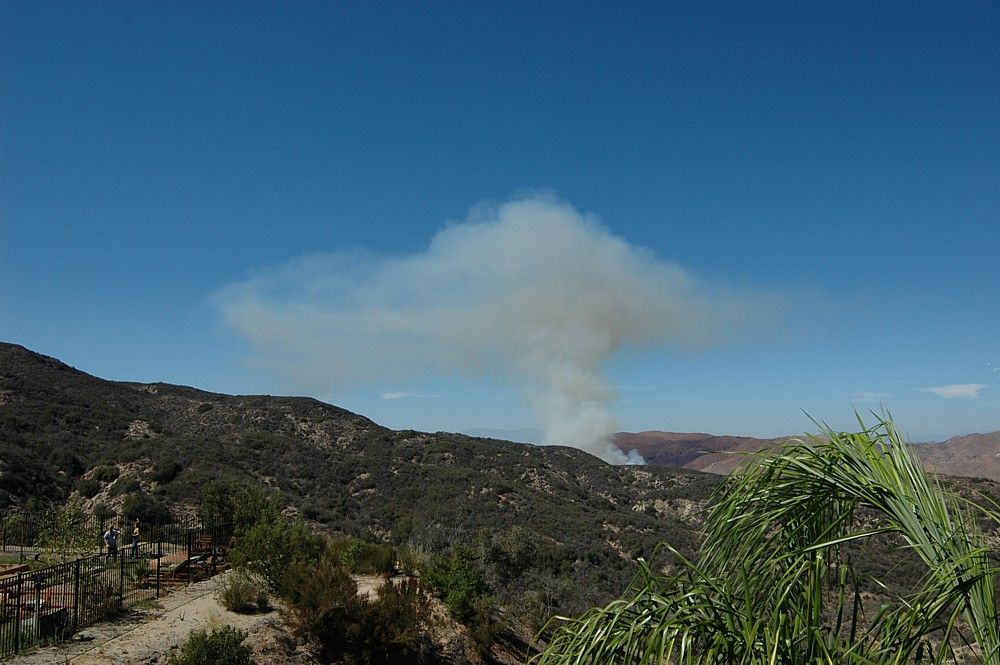
In the middle of all this today, a truck towing a trailer crashed on I15 near our house and started a brush fire, burning 25 acres. The fire service had it out within a couple of hours, thank goodness. This was the view from my deck just after the fire started.
That was my cue to get the tt/tranny/diff and rear crossmember back in. I've done several of these in the past and this was definitely the most challenging. I think the fact that I have done so many mods combined and lost the engine to tt alignment is what made it take so long for me to get the tt on this time. Plus, the triple-disc Mantic clutch felt a little trickier to get the alignment right but, ultimately, it went in. Then my cool neighbor, Brett helped me lift the crossmember (with the suspension and brakes still attached) onto the tranny jack and then helped me manuever it onto the lift in place, ready to mount. I have normally done this alone in the past but there was no manuevering room behind the lift with the crossmember sitting there so I had no leverage to lift it back onto the runners myself. He was a lifesaver.
Anyway, drivetrain is back in although I still need to pop the coilovers in next weekend and then I can concentrate on the engine bay. Stuff is definitely tighter with all the additions - extra fuel lines in the tunnel, the Pfadt mount, the aux. fuel system and the ECS tranny brace. It was a challenge getting everything lined up and torqued but it's all in.
Here are a few pics:
Finally has a rear end again - been several months. Been tripping over that rear crossmember too long!
Beefed up drivetrain with triple-disk Mantic, CF drive shaft, poly coupler up front and solid in back, and stage 4 Quaife diff. You can see the new aux. supply and return fuel lines at the top corners of the tunnel. I wrapped them in high-temp heat insulation and will be adding an additional layer to the tunnel plate as well.
Powder coated Pfadt mount
Wired fuel setup. Aux. fuel and KB BAP wired with PnP harnesses and hooked to Hobbs switches up front.
Meth pump, coils and the Hobbs switchs on the vacuum block that will feed all the boost pressure switches/sources.
In the middle of all this today, a truck towing a trailer crashed on I15 near our house and started a brush fire, burning 25 acres. The fire service had it out within a couple of hours, thank goodness. This was the view from my deck just after the fire started.


 09-14-2014, 06:08 PM
#114
Team Owner
Thread Starter
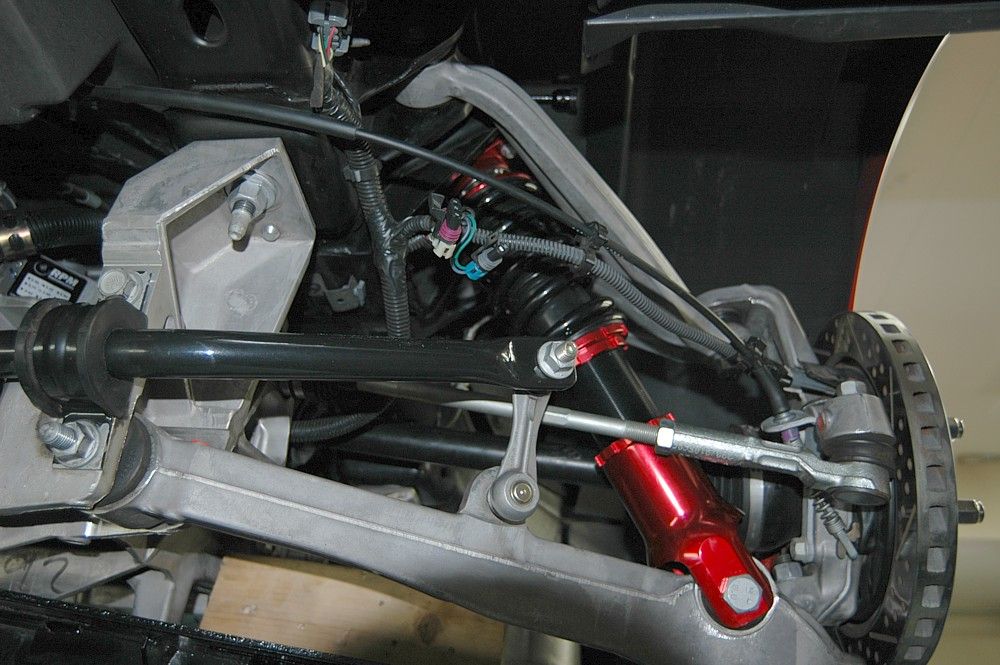
So, it took me two weekends to get the LG GT2 coilovers in due to a defective front mount thread - the threads on the main mounting stud were not fully formed (unfortunately, I didn't realize until I had bunged up the mount trying to tighten the nut down ). I got the rears in last weekend and then I ordered an extra set of front mounts from LG and waited for them to install this weekend. While waiting for those, I tried the other upper mount on my bench and the nut screwed on quite normally with no unusual resistance at all but I didn't trust that particular set so I waited for the new set to arrive. I received the two replacements I bought from Bobby at LG on Friday and, upon inspection and in comparison to the first, original set of mounts, these had good, fully-formed threads so I installed them today.
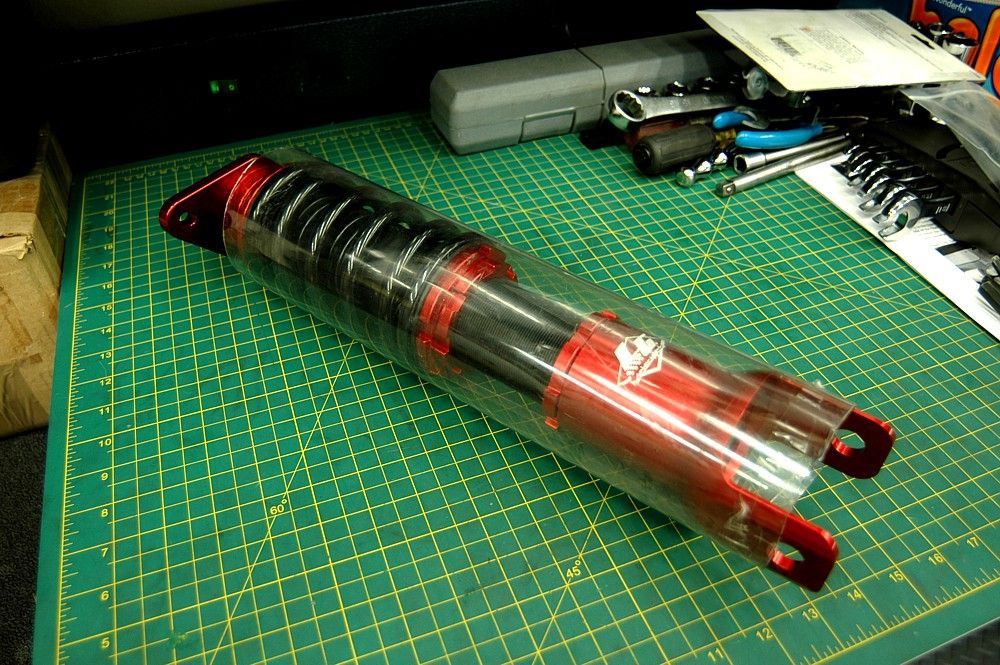
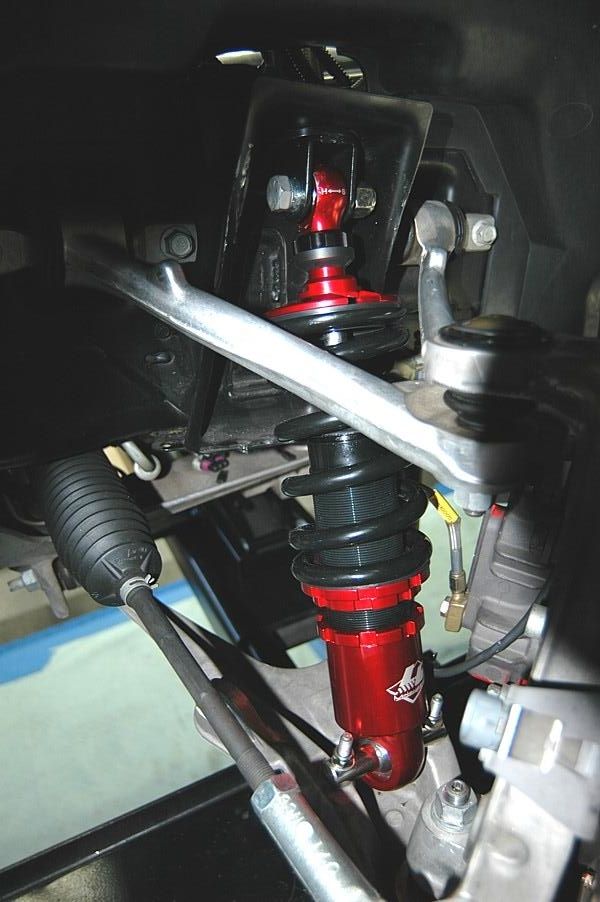
Rears

I used a clear shipping tube split lengthwise to protect the rear coilovers from getting scratched up while I was wrestling them in. It just popped off when the coilover was in. The fronts didn't need this since the clearance installing them was better.
Fronts

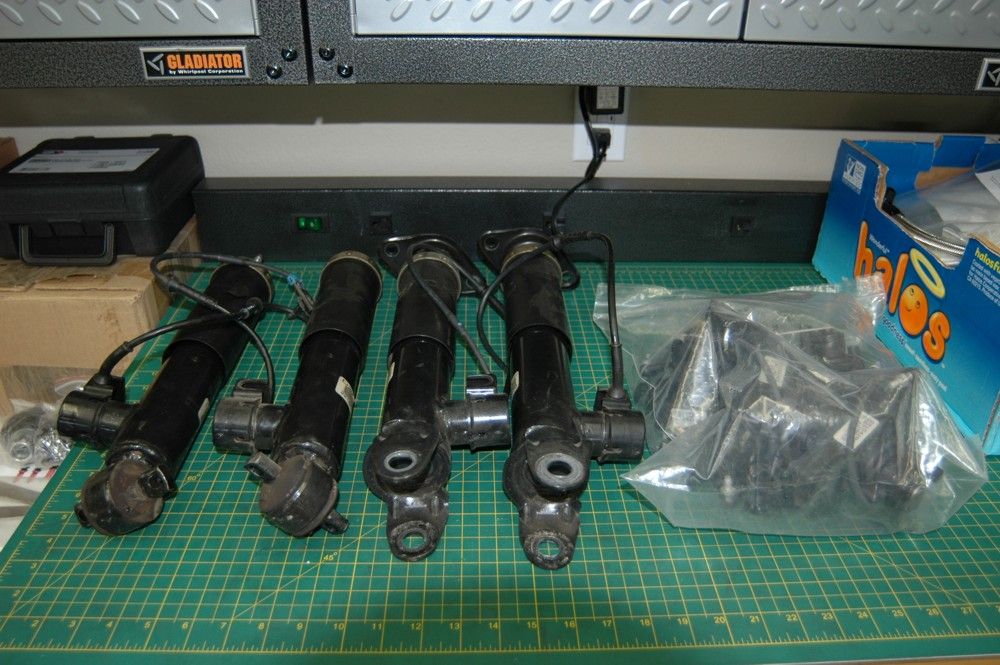
F45 is gone (have to delete from the BCM with my Tech 2 still)
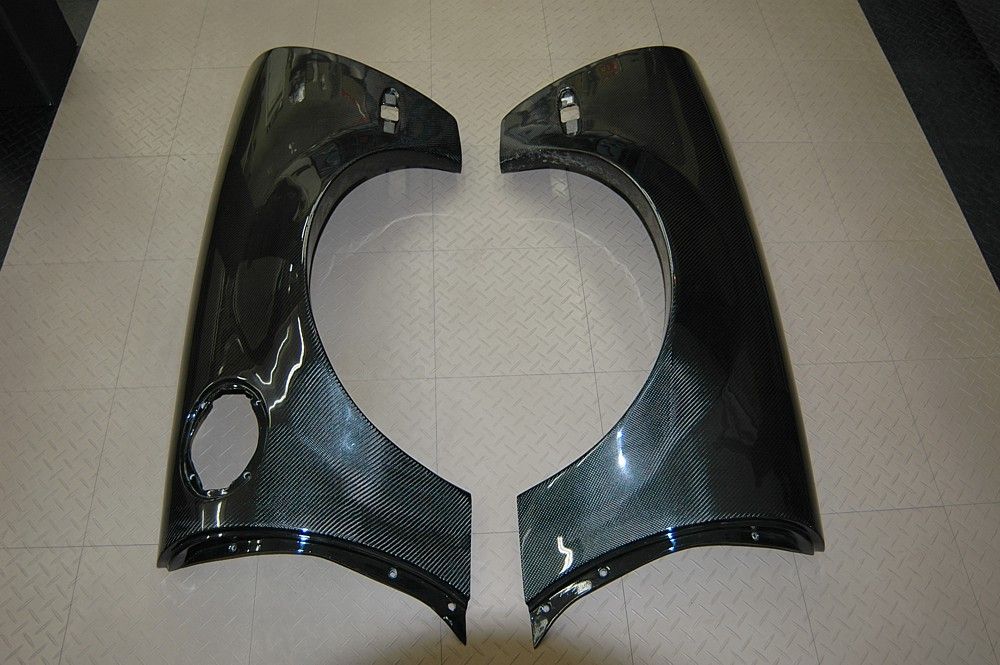
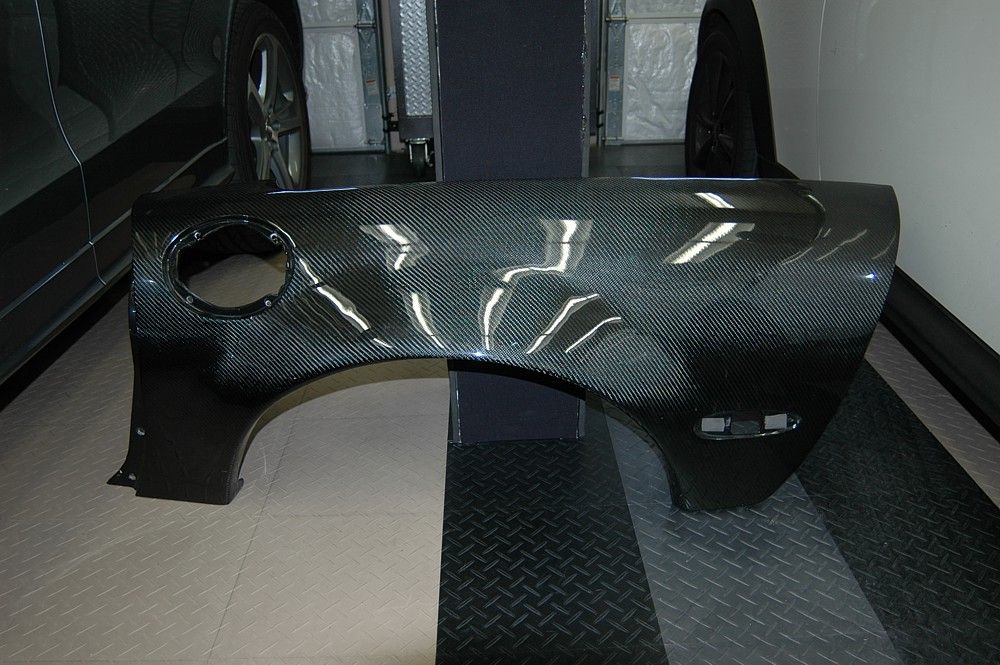
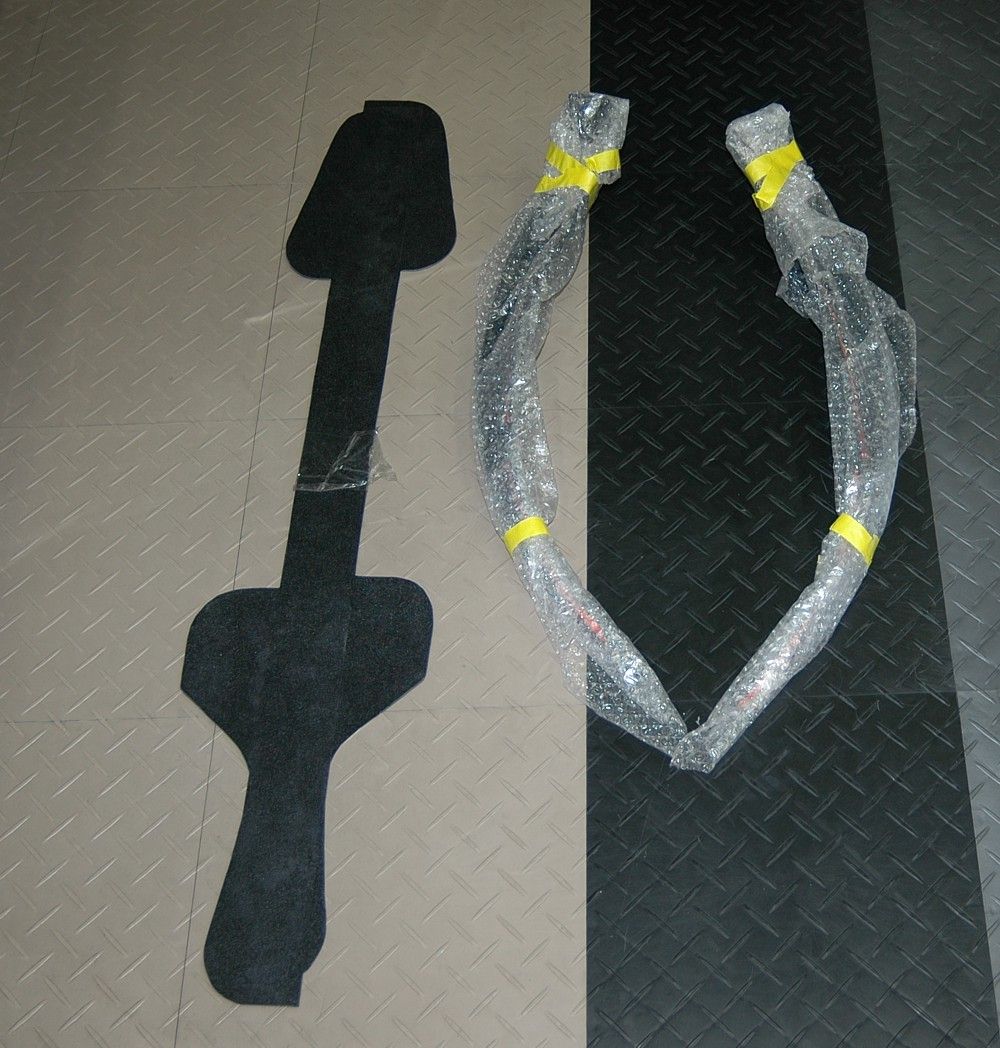
Anyway, I had to drive almost 300 miles round trip yesterday to Oxnard to pick up the Carbon Creationz flares I bought from a member here for a great price. It took me 7 hours with all the LA traffic. Other than being a bit dirty and having a few minor scratches, they're in great shape. No gouges, cracks or screwed-up installation issues. The PO never painted them so I can can see how deep the CF sits in the resin and there don't appear to be any problems with texture showing anywhere on them due to improperly-cured resin. In fact, the resin looks very deep - deeper than I thought it would - as well as very hard, smooth and shiny. The PO also told me they were only on his car a few months and didn't get much road time and they look like that - the insides are clean with no dust so they didn't see much driving around.
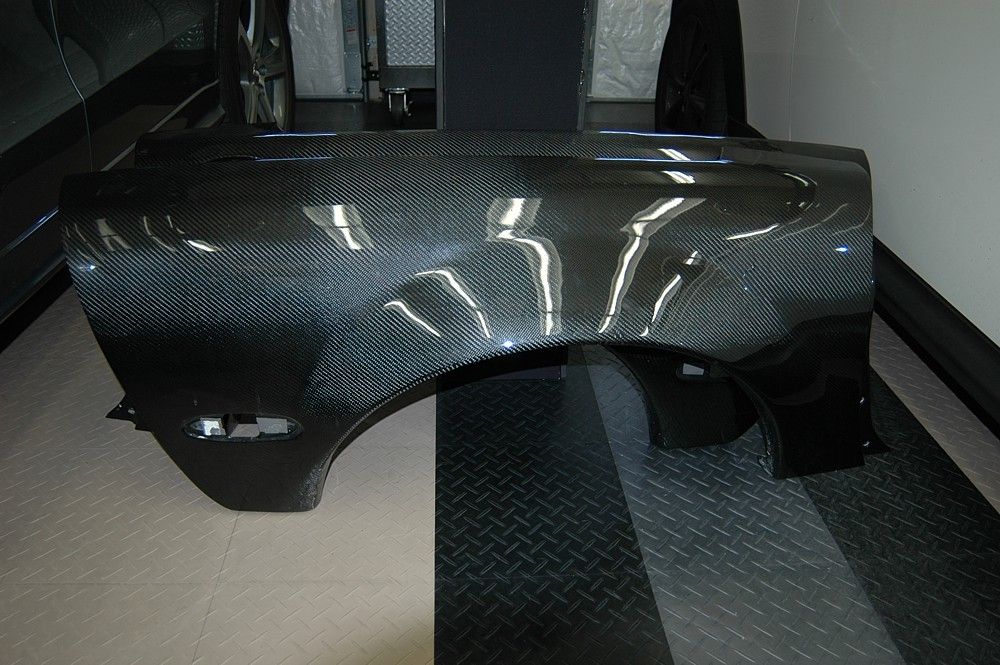
Couldn't help myself - trying to figure out which flares to go with so I bought a set of each and will test-mount one on each side to compare. The wife is already preferring the L5's - go figure. She always goes for the more aggressive option - gotta' love that in a woman!
Scratches are superficial and can't be felt at all - they're from rubbing during original shipment.
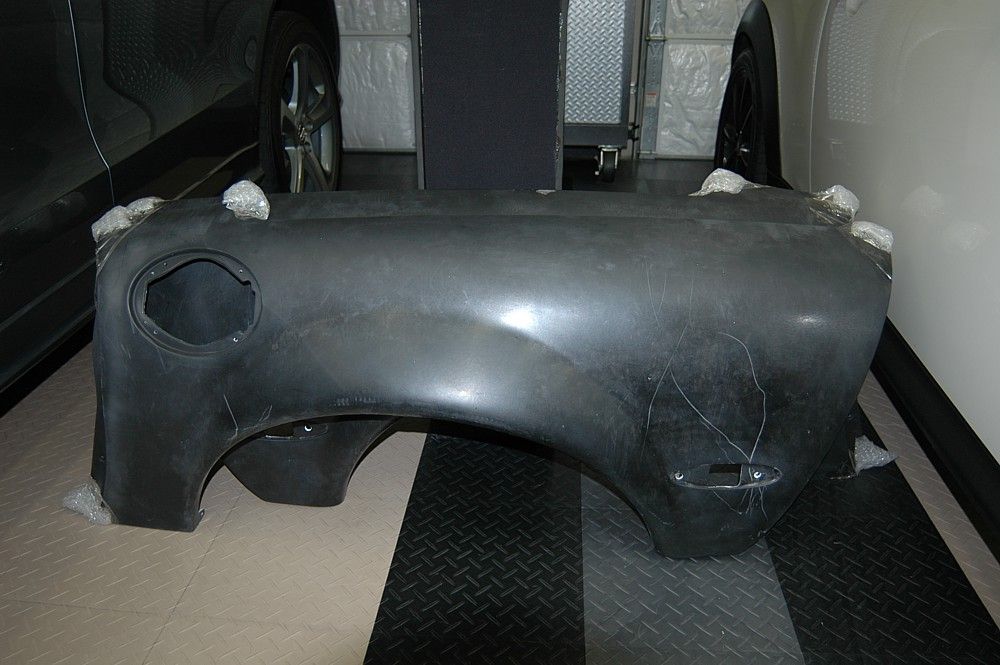

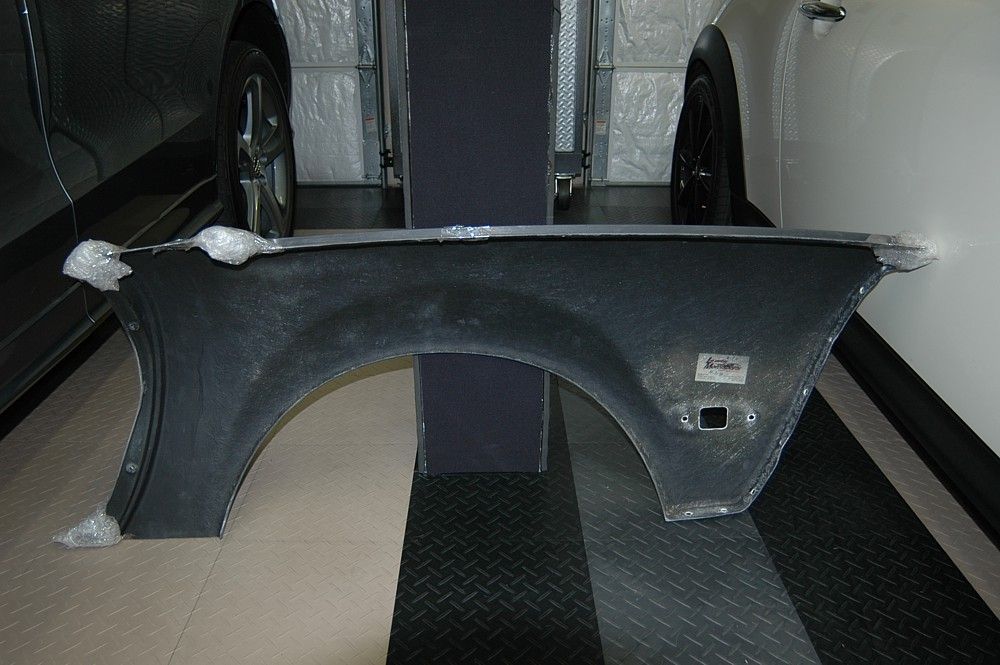
I was relieved to see how nicely these were built with all the bad-mouthing of L5 quality here lately in a few threads. Of course, these were made in 2012 so may not represent what LM is putting out currently. The seller had these laying around for a couple of years so I was lucky to have snagged them.
Got these for a great price too and they came with fender well extensions and stone guards.
Crap - now I need to buy new wheels/tires and sell my current 505a's.
). I got the rears in last weekend and then I ordered an extra set of front mounts from LG and waited for them to install this weekend. While waiting for those, I tried the other upper mount on my bench and the nut screwed on quite normally with no unusual resistance at all but I didn't trust that particular set so I waited for the new set to arrive. I received the two replacements I bought from Bobby at LG on Friday and, upon inspection and in comparison to the first, original set of mounts, these had good, fully-formed threads so I installed them today.Rears
I used a clear shipping tube split lengthwise to protect the rear coilovers from getting scratched up while I was wrestling them in. It just popped off when the coilover was in. The fronts didn't need this since the clearance installing them was better.
Fronts
F45 is gone (have to delete from the BCM with my Tech 2 still)
Anyway, I had to drive almost 300 miles round trip yesterday to Oxnard to pick up the Carbon Creationz flares I bought from a member here for a great price.
It took me 7 hours with all the LA traffic. Other than being a bit dirty and having a few minor scratches, they're in great shape. No gouges, cracks or screwed-up installation issues. The PO never painted them so I can can see how deep the CF sits in the resin and there don't appear to be any problems with texture showing anywhere on them due to improperly-cured resin. In fact, the resin looks very deep - deeper than I thought it would - as well as very hard, smooth and shiny. The PO also told me they were only on his car a few months and didn't get much road time and they look like that - the insides are clean with no dust so they didn't see much driving around.Couldn't help myself - trying to figure out which flares to go with so I bought a set of each and will test-mount one on each side to compare. The wife is already preferring the L5's - go figure. She always goes for the more aggressive option - gotta' love that in a woman!
Scratches are superficial and can't be felt at all - they're from rubbing during original shipment.
I was relieved to see how nicely these were built with all the bad-mouthing of L5 quality here lately in a few threads. Of course, these were made in 2012 so may not represent what LM is putting out currently. The seller had these laying around for a couple of years so I was lucky to have snagged them.
Got these for a great price too and they came with fender well extensions and stone guards.
Crap - now I need to buy new wheels/tires and sell my current 505a's.
Last edited by Patches; 10-01-2014 at 12:19 AM.

 09-15-2014, 10:47 PM
#119
Team Owner
Thread Starter
Thanks guys - trying to pick up the pace but the little problems can bring everything temporarily to a halt sometimes. Got the 8-rib upgrade and modified flip drive on their way to me this week so should finally be able to start on the engine bay setup soon.
