Brake Booster


 08-31-2010, 01:25 PM
#4
Racer

Member Since: Jan 2007
Location: Chapin South Carolina
Posts: 322
Likes: 0
Received 0 Likes
on
0 Posts
Same here. Technically it is VERY easy. But getting the two bolts off, which is above the steering column on the inside of the car is a pain. Take the seat out which is easy and have patience. It goes on a lot fast than it came off. I think it took me 3 hours with 2 hours of it on those 2 bolts, but you might have better luck and be done in 45 minutes...
08-31-2010, 02:23 PM
#5
Suckin' gas, haulin' ass.


Member Since: Apr 2010
Location: Newport News Virginia
Posts: 1,100
Likes: 0
Received 8 Likes
on
7 Posts
I did the same on my 89. Had to remove the drivers seat and lay on the floorboard to get those 2 nuts off and back on. Be warned though, some aftermarket replacement brake boosters are unpainted metal and will rust very fast. I cleaned the new one I picked up and painted it black (body color). I noticed that there was something in the metal that repelled the paint, so I just kept cleaning. It's not perfect, but it's not rusty.
09-01-2010, 12:02 PM
#6
Melting Slicks

I did the same on my 89. Had to remove the drivers seat and lay on the floorboard to get those 2 nuts off and back on. Be warned though, some aftermarket replacement brake boosters are unpainted metal and will rust very fast. I cleaned the new one I picked up and painted it black (body color). I noticed that there was something in the metal that repelled the paint, so I just kept cleaning. It's not perfect, but it's not rusty.
I will be doing the brake booster job soon, as soon as the weather cools down that is.
09-01-2010, 03:48 PM
#7
Melting Slicks

Quick suggestion, when I did mine the biggest problem was dropping the nuts when I was trying to put it back together. Put a little dab of grease in the socket you are using and it will hold the nut in while you get it started.
09-01-2010, 07:09 PM
#8


I found it easier to hold the nut with a long extension magnet. Then turn the nut by finger to get it started.
09-01-2010, 08:36 PM
#9
I taped the damn nut on the socket...worked pretty well..biggest prob was wrestling the damn booster out of the car....several beers later and it was done..and so was I.......
09-01-2010, 08:50 PM
#10
One problem I had was adjusting the screw on the pushrod. I wasn't able to get anything to hold the pushrod still while still having room to put a socket on the screw to back it out some. Right now, the screw on the pushrod is adjusted to short.
09-01-2010, 10:52 PM
#11
Melting Slicks
If you are talking about the pushrod that goes into the master cyl I had that same problem till I put some vice grips on it and pulled it to the front of the car. Put another set of vice grips on the rod and then adjusted the screw out (it was all the way in when I got the booster). Hope that helps.
09-01-2010, 11:20 PM
#12
If you are talking about the pushrod that goes into the master cyl I had that same problem till I put some vice grips on it and pulled it to the front of the car. Put another set of vice grips on the rod and then adjusted the screw out (it was all the way in when I got the booster). Hope that helps.
09-02-2010, 12:01 AM
#13
Melting Slicks
I didn't put that much pressure on the vice grips. And what I grabbed onto was the nut. Just pulled stright out. Since I am rather short I haven't tried pushing on the break pedal and seeing if that will push the rod out, but if you have someone that can help you that might be an alternative way of getting the rod out. And when I did this I was alone and really didn't think of using the break till later.
It took a couple of trys to get it right. If you adjust it too far out then you have break drag all the time.
It took a couple of trys to get it right. If you adjust it too far out then you have break drag all the time.
 09-02-2010, 12:34 AM
#15
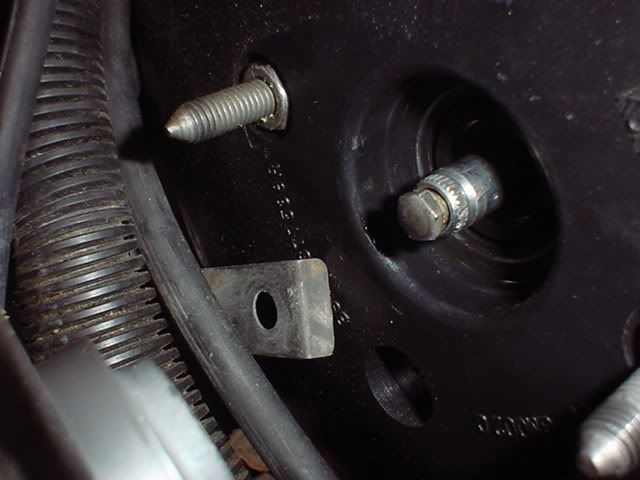
Yes, that is what I'm talking about. You have the pushrod, and a screw at the end. Though the pushrod in your pic sticks out alot further than on mine. That is a good idea to try with the car running to press the brake pedal and put something like a brick to keep the brake pedal pushed. Shut car off then pull the master and see what that did.
I had read of putting a blob of something like white lithium grease on the screw. Then tighten and remove the master to see how close the screw is to the master.

I had read of putting a blob of something like white lithium grease on the screw. Then tighten and remove the master to see how close the screw is to the master.
09-02-2010, 12:44 AM
#16
Melting Slicks
I'm not sure the car has to be running. If you just push on the pedal when it is off the brakes will engage. When I finally figured out that pushing on the pedal was the way to go I just got a broom and pushed and then wedged it in using the window to hold it in place.
09-02-2010, 01:09 AM
#17
Melting Slicks
When I adjusted mine, I put the left front on a jackstand so I could spin the wheel and see if there was any drag. It took a couple of tries to get it right. I did finally beak down and get some help with the pedal.
Good luck.
Good luck.
09-02-2010, 01:15 AM
#18
Thanks. I remember last time I was doing some checks. The front wheels turned easier with the engine running for some reason.
09-02-2010, 07:44 AM
#19
Team Owner

Member Since: Oct 2000
Location: Fort Knox, KY
Posts: 96,443
Likes: 0
Received 8 Likes
on
8 Posts
Cruise-In IV Veteran
Cruise-In VI Veteran
Cruise-In VII Veteran
Cruise-In VIII Veteran

The front wheels turned easier with the engine running for some reason.
That's because the running engine powers the PS pump.
That's because the running engine powers the PS pump.
09-02-2010, 04:05 PM
#20
I mean the wheels spin easier with the engine running. I had the front jacked a while back and was checking some things and noticed the wheels didn't spin too freely. Later I had the car running and noticed the wheels would spin freely.