LT-4 Suspension Rebuild "LOTS of Pictures"
 06-09-2008, 06:27 PM
#21
Le Mans Master


 06-09-2008, 06:48 PM
#23
Drifting

Thread Starter
I'm thinking it is designed more for track use than daily, and probably needs all the other peices of the suspension puzzle to make it worth that type of investment (ie, 30mm+ sway bars, special spring or coil overs, ect..). Nice pieces but I'm not ready to move up to that level of suspension at this point!
ENS-3-18122G HYPERFLEX KIT 84-95 CORVETTE A Shipped on 05/15/08 $179.95
Through Summit
R/Noland
ENS-3-18122G HYPERFLEX KIT 84-95 CORVETTE A Shipped on 05/15/08 $179.95
Through Summit
R/Noland
 06-09-2008, 06:58 PM
#25
Drifting
Thread Starter
 06-09-2008, 08:50 PM
#27
Le Mans Master
Member Since: Aug 2004
Location: Metairie Louisiana
Posts: 5,141
Likes: 0
Received 4 Likes
on
4 Posts

http://www.duplicolor.com/products/engine.html
 06-09-2008, 09:28 PM
#28
Tech Contributor
Raise one side of the car higher than the other. Pull the spring out via the high side. By doing so, you don't need to jack it up to any silly or (if you don't have proper jackstands) dangerous heights

Looking good
 06-09-2008, 09:46 PM
#29
Drifting
Thread Starter
Thanks, I'll keep going here as long as they let me!
Thanks for the info, I have the wire wheel, just need to get the paint!
I agree and if I hadn't had to already drop the tranny to pull the motor I would have taken that route. But given where I was with this build and how much work I wanted to do, it was a no-brainer and I had it high enough to easily take the spring out! Thanks for the vote!
Noland
Try Duplicolor Hi temp Cast coat colors. Autozone sells it. A wire brush on the end of a drill can get close to the same results though.
http://www.duplicolor.com/products/engine.html
http://www.duplicolor.com/products/engine.html
I agree and if I hadn't had to already drop the tranny to pull the motor I would have taken that route. But given where I was with this build and how much work I wanted to do, it was a no-brainer and I had it high enough to easily take the spring out! Thanks for the vote!
Noland
06-09-2008, 09:53 PM
#30
Burning Brakes

(Sigh) If only we had more mechanics that treated our cars as well as we do....Don't get me wrong - they are out there, just far and few.
Jonathan
06-10-2008, 07:31 AM
#31
Drifting

Check your lower ball joints before you press them in. I have been reading a lot about Oversize ball joints. It seems MOOG are the only ones you don't hear complaints about.?
06-10-2008, 10:18 AM
#32
Le Mans Master
Member Since: Aug 2004
Location: Metairie Louisiana
Posts: 5,141
Likes: 0
Received 4 Likes
on
4 Posts
Yea the wire wheel would be a great way to prep the wells for any sort of coating. I think the one used in the pic I posted is a rubber undercoating available in a spray-can at most autoparts stores. I think it gives it a texture and quality unlike a regular paint. To me, the rubber just looks more up to wear and tear from road debris as it is used underneath the car and not as much is painted underneath there (at least on mine). Just my 2 cents.
(Sigh) If only we had more mechanics that treated our cars as well as we do....Don't get me wrong - they are out there, just far and few.
Jonathan
(Sigh) If only we had more mechanics that treated our cars as well as we do....Don't get me wrong - they are out there, just far and few.
Jonathan
06-14-2008, 08:44 AM
#33
Drifting
Thread Starter
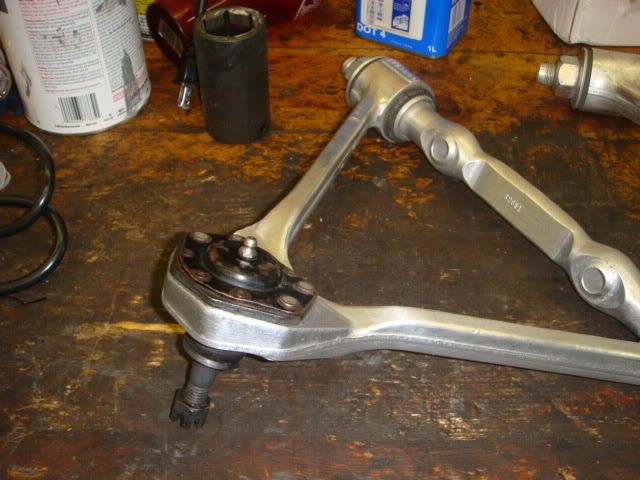
With help from Rob (BlueWasp), we went to tackle the removal and replacement of the front A-arm upper and lower balljoints and bushings. When Rob informed me that we probably wouldn't get through both sets during the night, I thought he was crazy. LITTLE did I know how Crazy I was. I thought that there was no WAY, with all well setup shop that he has in his house, that it take long to pop the old out and drop in the new. Needless to say, this job is ALOT harder than I would have ever imagined. Either way, here it goes!
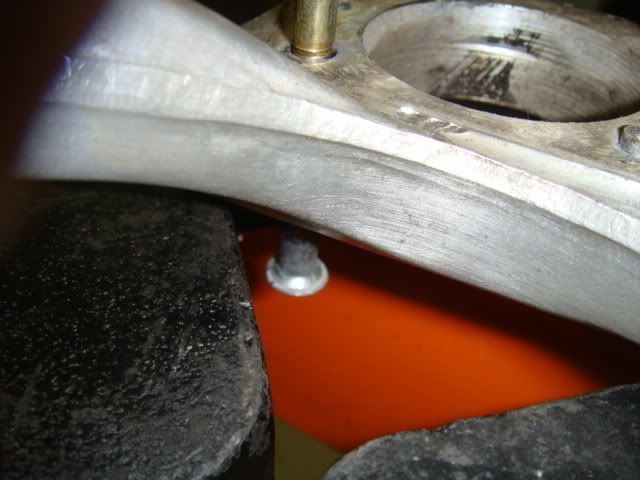
Here's the Upper A-arm before we started the removal of the upper balljoint.
This was followed by the grinding off of the rivet heads.
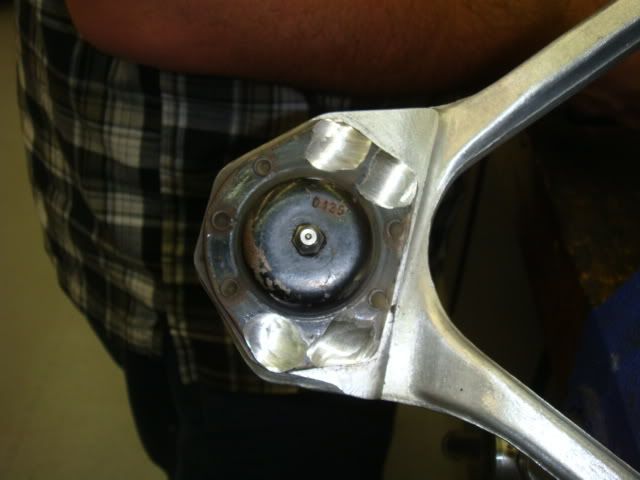
Next came a center punch mark and the drilling of holes in the center of the rivets down ~ 1/8".
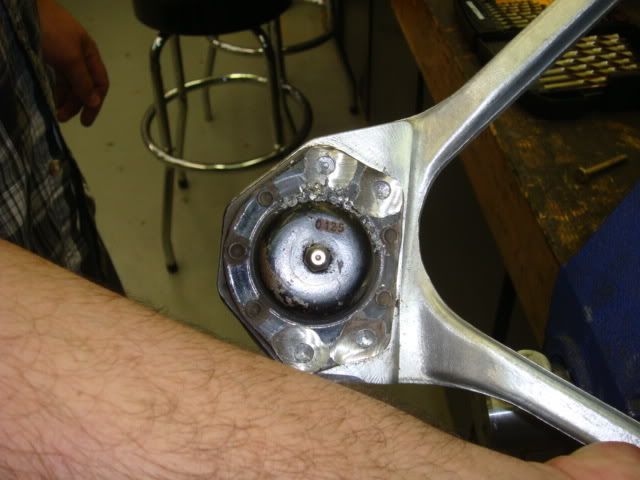
After that step was completed, a air hammer was used in the rivit holes to knock the ball joint rivets loose from the top and unseated the rivets in the A-arm. We then took a screw and pressed the rivets out from the top of the A-arm.
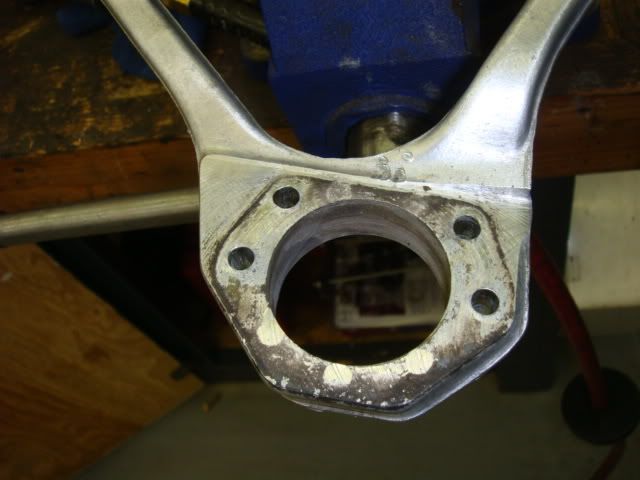
And this is the completed piece.
I'll post the bushings and lowers later!
Noland
Here's the Upper A-arm before we started the removal of the upper balljoint.
This was followed by the grinding off of the rivet heads.
Next came a center punch mark and the drilling of holes in the center of the rivets down ~ 1/8".
After that step was completed, a air hammer was used in the rivit holes to knock the ball joint rivets loose from the top and unseated the rivets in the A-arm. We then took a screw and pressed the rivets out from the top of the A-arm.
And this is the completed piece.
I'll post the bushings and lowers later!
Noland
 06-14-2008, 10:38 AM
#35
Burning Brakes
Nice work! Looks like your friend has the same 20 ton Harbor Freight Press I bought to replace all my transmission bushings! How did it work for pressing out the balljoints?
Jonathan
Jonathan
06-14-2008, 11:10 AM
#36
Drifting
Thread Starter
Thanks and I'll keep it going as long as I can!
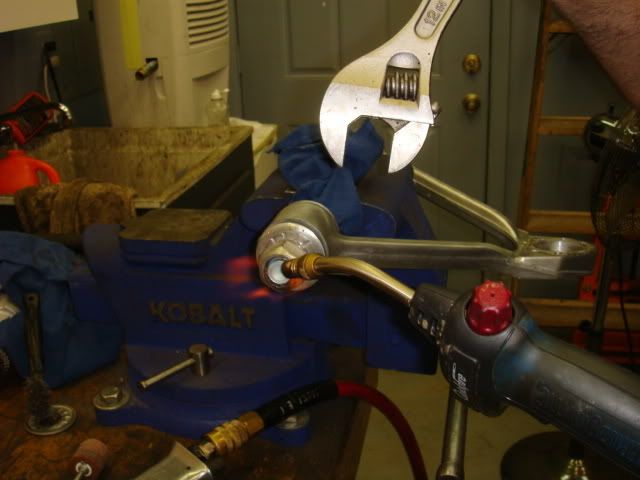
Next came the nut removal..........The thing that shocked me was what it took to get these off. I had tried eariler to remove these with hand tools at home, then I figured it may require air. Neither assumption was right because it requires heat....and LOTS of it! Not only do you have to heat up the nut in order to remove it with a wrench, then you have to clean off all of the dark red glue-gunk which can only be done when it's hot and bubbling.
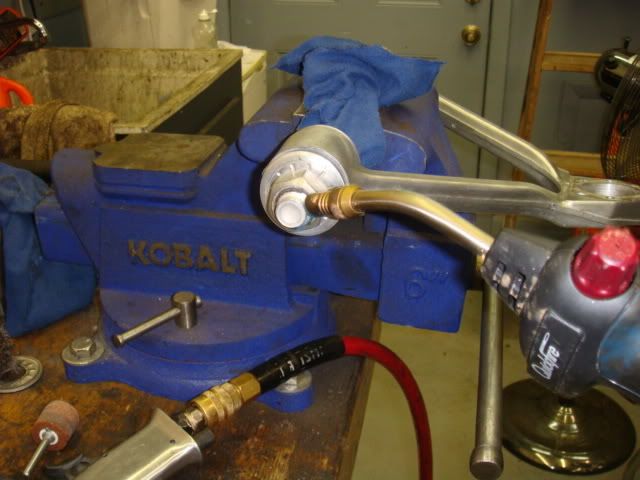
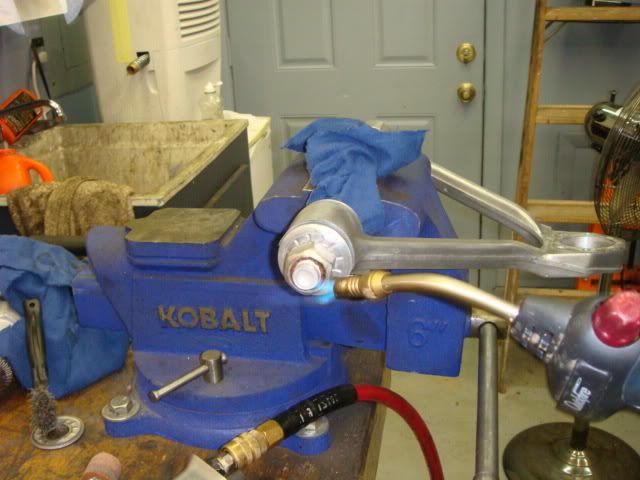
Once the dark red glue-gunk is hot and bubbles form on the outter edge of the nut, a nice size wrench can be then used to remove the nut.
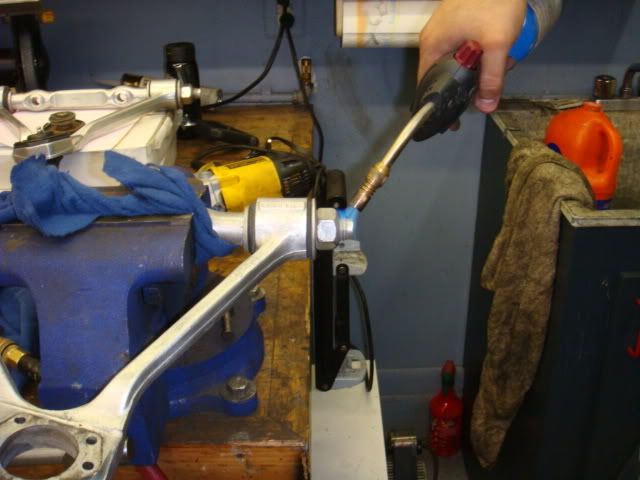
Here's Rob in action
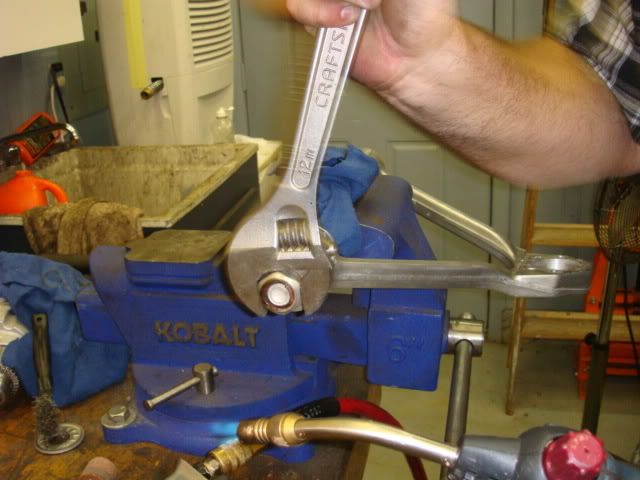
After the nuts have been removed, I used the vice and more heat to clean up the excess dark red glue-gunk off of the threads of the nuts.
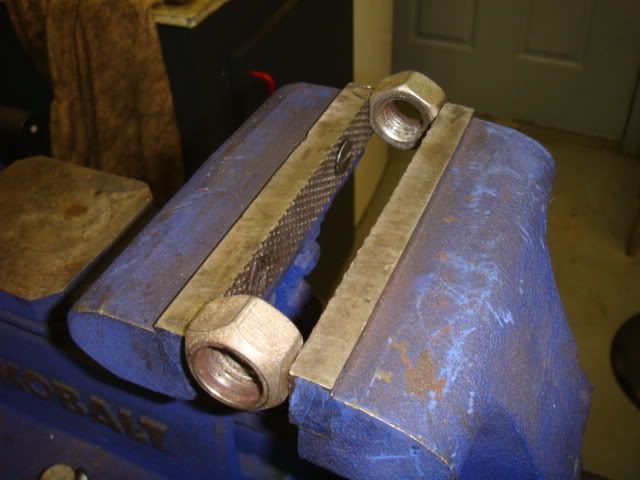
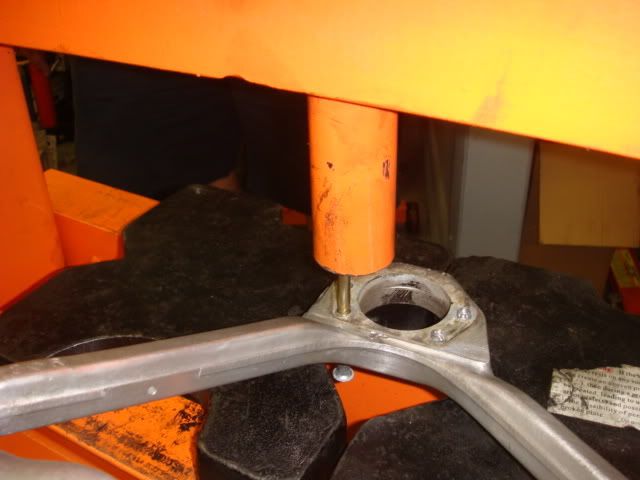
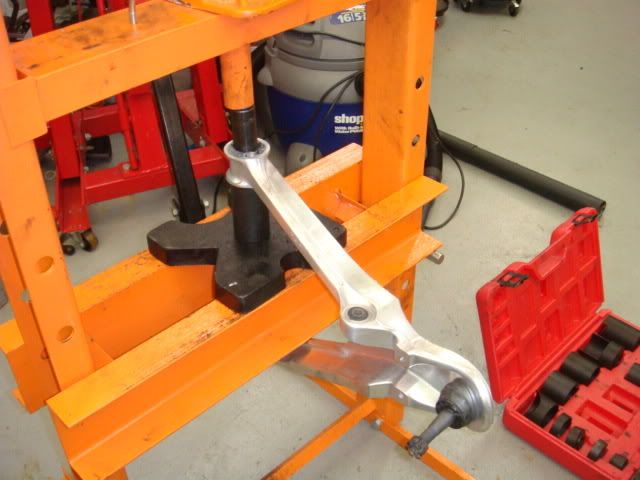
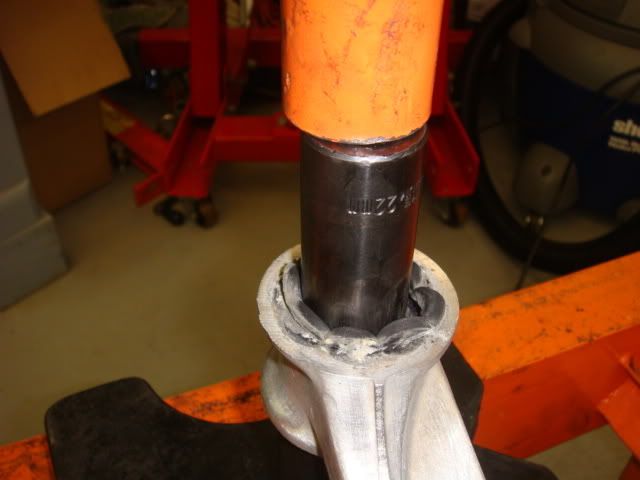
We used the press to remove the bushings from the upper A-arms one side at at time. Just be careful not to use a press that's smaller than the hole in the A-arm. Rob used a socket and it pressed through like butter.
Next came the nut removal..........The thing that shocked me was what it took to get these off. I had tried eariler to remove these with hand tools at home, then I figured it may require air. Neither assumption was right because it requires heat....and LOTS of it! Not only do you have to heat up the nut in order to remove it with a wrench, then you have to clean off all of the dark red glue-gunk which can only be done when it's hot and bubbling.
Once the dark red glue-gunk is hot and bubbles form on the outter edge of the nut, a nice size wrench can be then used to remove the nut.
Here's Rob in action
After the nuts have been removed, I used the vice and more heat to clean up the excess dark red glue-gunk off of the threads of the nuts.
We used the press to remove the bushings from the upper A-arms one side at at time. Just be careful not to use a press that's smaller than the hole in the A-arm. Rob used a socket and it pressed through like butter.
06-14-2008, 11:39 AM
#37
Drifting
Thread Starter
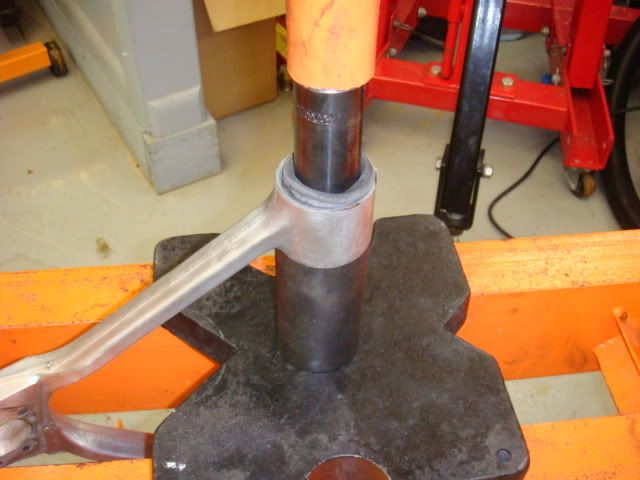
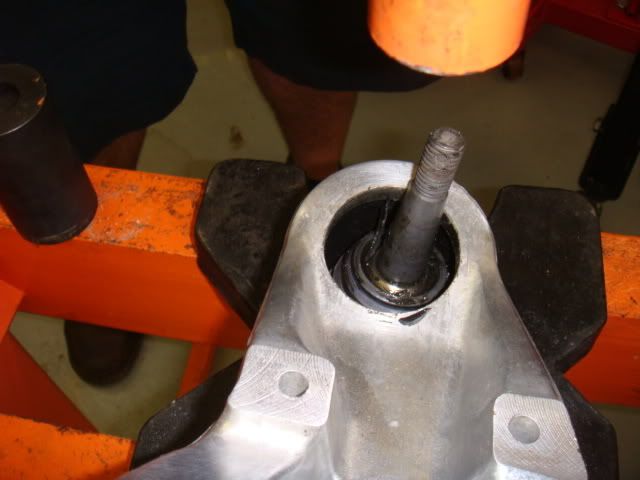
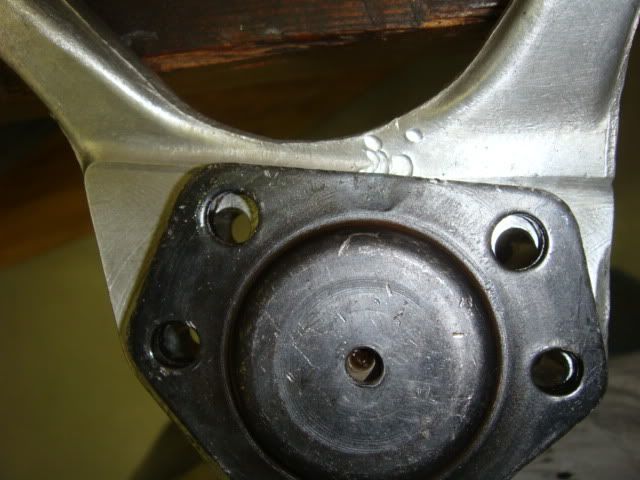
Getting the lower balljoints out was much easier than the uppers. This is the stock lower balljoint and notice the small metal tab on the bottom of the joint. It needed to be removed with a grinder in order to get the press fitting to fit over the outside diameter of the balljoint for removal.
Here's a shot right after I VERY CAREFULLY grinded away the tab without damaging any of the Aluminum A-arm.
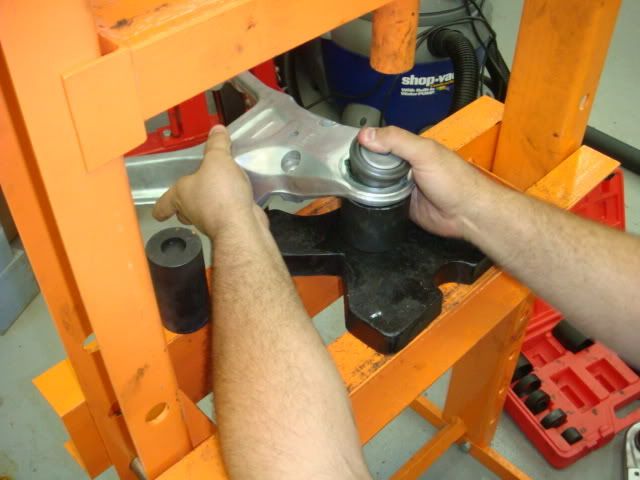
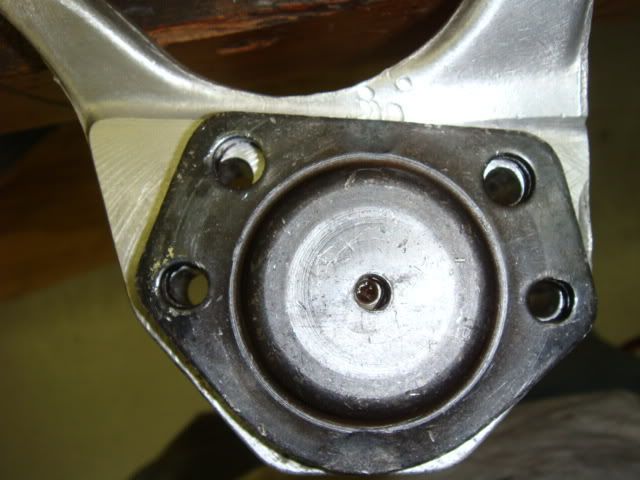
Once that was done, the rest was a walk in the park. Just setup the press, use a fitting that fits over the outer rim of the ball joint and press from the top down.
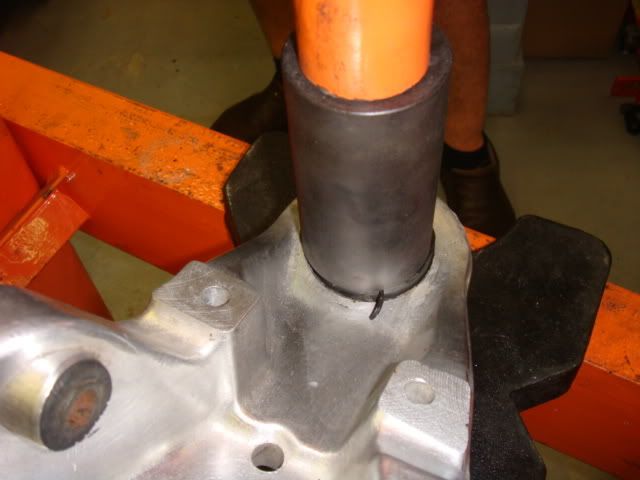
Once it was out, minor clean up and a nice coat of grease put us to a place where we could install the new balljoints. Here's the setup as we started the install.
And this is where we stopped
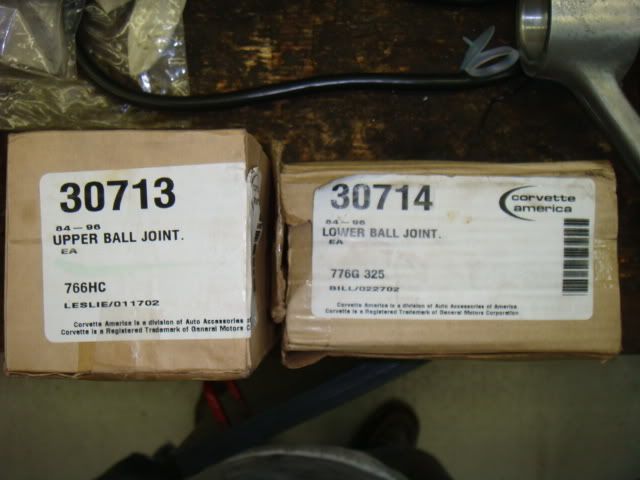
I have now realized that my experiance with the Corvette America Balljoints are just like other's on here that have seen these oversize bodies. SO, Now I have to figure out what I'm going to do, but the words MOOG seem to be sticking in my mind right now. I REALLY Wanted to save a little dough on this, but I'm just not willing to deal with anymore crappy part setbacks like this again! SO, LET ME STATE THIS, PLEASE AVOID THESE!
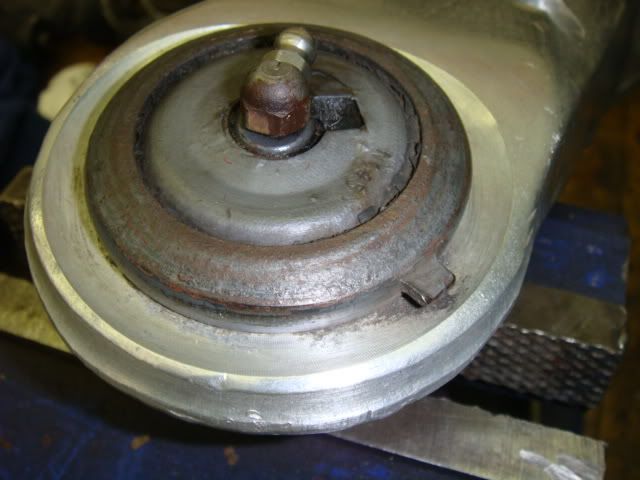
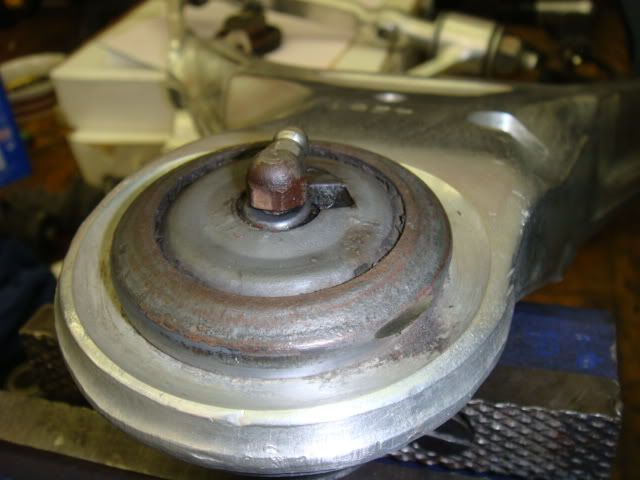
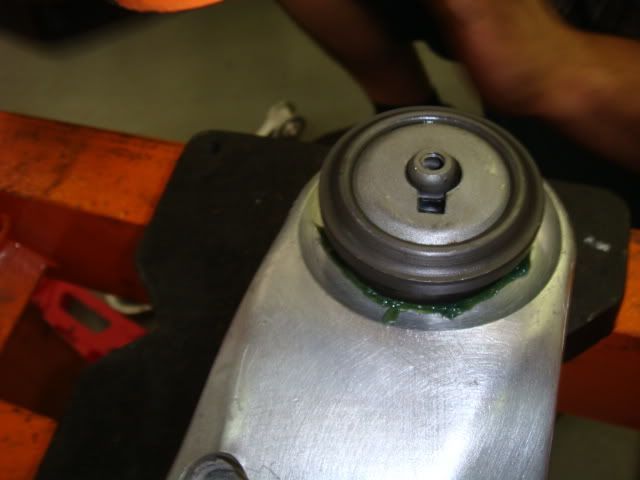
Oh yeah, and it's NOT Just their Lower Balljoints.............Let me show you what the Uppers looked like when I went to install them.
So I tried a different angle
SO, As you can see, these crappy balljoints just did NOT work in my setup........Maybe your results will vary but I'm calling them today and getting them straight AND My money back for this crap! NOW, since I was stuck and could not make anymore headway with the balljoints, I moved on to the bushings and pressed them out of the lower A-arms.
Well, that's where I'm at right now and I'll update more when I get it! Enjoy and a HUGE thanks to Rob (BlueWasp) for helping me out!
Noland
Here's a shot right after I VERY CAREFULLY grinded away the tab without damaging any of the Aluminum A-arm.
Once that was done, the rest was a walk in the park. Just setup the press, use a fitting that fits over the outer rim of the ball joint and press from the top down.
Once it was out, minor clean up and a nice coat of grease put us to a place where we could install the new balljoints. Here's the setup as we started the install.
And this is where we stopped
I have now realized that my experiance with the Corvette America Balljoints are just like other's on here that have seen these oversize bodies. SO, Now I have to figure out what I'm going to do, but the words MOOG seem to be sticking in my mind right now. I REALLY Wanted to save a little dough on this, but I'm just not willing to deal with anymore crappy part setbacks like this again! SO, LET ME STATE THIS, PLEASE AVOID THESE!
Oh yeah, and it's NOT Just their Lower Balljoints.............Let me show you what the Uppers looked like when I went to install them.
So I tried a different angle
SO, As you can see, these crappy balljoints just did NOT work in my setup........Maybe your results will vary but I'm calling them today and getting them straight AND My money back for this crap! NOW, since I was stuck and could not make anymore headway with the balljoints, I moved on to the bushings and pressed them out of the lower A-arms.
Well, that's where I'm at right now and I'll update more when I get it! Enjoy and a HUGE thanks to Rob (BlueWasp) for helping me out!
Noland

 Nice informative posts and good pics.