'96 HVAC Vent Control Problem
#62
Have owned my 1996 LT4 since it was new. Do not drive it often.
My 96's air conditioner started what has been mentioned years ago. I have not tackled the problem yet because the system will put air out of the dash vents after a few minutes and will continue moving air through the dash vents for hours on a long road trip and starts with air conditioning coming from the floor and defroster vents.
Have enjoyed reading how everyone fixed their air conditioning problem.
#63
Drifting


i did everything everyone could ever offer on not just this thread but many others. i decided to bypass the center connector from the hvac and run the colored tubes through with 7/64 vacuum tube all the way connected with the colored tubes that used to be on the green silicon connector. i cut the colored tubes from the green silicon connector. many people did it this method and so did i. i finally finished this project and it took me from 11am till 8pm with breaks and store runs.
in the end. it is a total disappointment and im very very very pissed off with what had just happened.
the whole thing acts up the same. i even let it run for 15 minutes and still no front facing ac, just defroster and legs.
i decided to give up on it. i honestly dont think there is any way my 95 will ever have an ac again. but thank you to all that have helped.
#64
Advanced


i did everything everyone could ever offer on not just this thread but many others. i decided to bypass the center connector from the hvac and run the colored tubes through with 7/64 vacuum tube all the way connected with the colored tubes that used to be on the green silicon connector. i cut the colored tubes from the green silicon connector. many people did it this method and so did i. i finally finished this project and it took me from 11am till 8pm with breaks and store runs.
in the end. it is a total disappointment and im very very very pissed off with what had just happened.
the whole thing acts up the same. i even let it run for 15 minutes and still no front facing ac, just defroster and legs.
i decided to give up on it. i honestly dont think there is any way my 95 will ever have an ac again. but thank you to all that have helped.
in the end. it is a total disappointment and im very very very pissed off with what had just happened.
the whole thing acts up the same. i even let it run for 15 minutes and still no front facing ac, just defroster and legs.
i decided to give up on it. i honestly dont think there is any way my 95 will ever have an ac again. but thank you to all that have helped.
I'm going through a cleanup of my '96 LT4's HVAC system presently for electrical intermittentcies but all the vents and outlets functioned correctly beforehand. Other needed maintenance on my 'Vette that affected my cruise control had me verifying the integrity of the vacuum reservoir and associated plumbing so I was 100% sure there would be proper vacuum to operate the HVAC doors also.
If your cruise control is non-functional then that's a clue as to the issue you're having with your heating and AC system. Starting at the intake manifold fittings trace the tubing path and confirm vacuum is present in all proper locations.
#65
Drifting


I'm not sure exactly which hose is which on the car. But taking off both fuel rail covers, all the hoses are in good condition and none are ripped or unconnected. I did change the vacuum check valve but that was the only thing that was actually broken plastic. Other than that it's all good down there.
#66
Advanced


I'm not sure exactly which hose is which on the car. But taking off both fuel rail covers, all the hoses are in good condition and none are ripped or unconnected. I did change the vacuum check valve but that was the only thing that was actually broken plastic. Other than that it's all good down there.
Last edited by Clock-work; 05-30-2018 at 10:40 PM.
#67
Drifting


Is the cruise control working? I'm assuming cruise was pretty much standard on most 'Vettes and if yours is equipped there's an excellent place to check for system vacuum. The cruise servo has two hoses connected to nipples on its side. There's a larger and smaller hose. The smaller one has the vacuum that's used for the HVAC system. It also connects to the spherical vacuum reservoir that's present (in my '96 anyway) in front of the left tire in the bodywork. A very thin nylon tube of maybe 4mm diameter runs around connecting all the key vacuum system parts together and lives in the wiring harness that passes by the left wheel area. It also snakes its way across the firewall for a short run to the right-hand side of the engine. You'll see it if you poke around a little. The end of this nylon tube plugs into a rubber fitting that is connected to a vacuum nipple on the passenger side of the intake manifold. I'm pretty sure your '95 and my '96 LT4 are similar in how the vacuum system componentry is situated. Next time you fire it up check for a strong vacuum at the cruise servo. Check both hoses if uncertain but one should be sucking correctly.
Last edited by Jaime-Corvette; 06-01-2018 at 05:04 PM.
#68
Drifting


This is batee.com reply back to me on the controller:
Hi, Jaime:
I received your HVAC programmer and had a chance to check it out.
It appears to be functioning as it should. All solenoids can be driven by the programmer, and all solenoids are flowing vacuum as they should.
It appears that you have done the bypass on the soft factory nipples of the programmer, so that's not the issue. Have you checked vacuum going to the programmer? It should be at least 20inHg. Next: Can you bypass the programmer and provide vacuum to each of the four control doors of the air mix module? I'm wondering if maybe one of the doors is stuck and just not opening when the programmer commands it to open?
I'll get this packaged up and in the mail back to you ASAP.
Thank you,
Bryan Thompson
batee.com Corvette Parts and Repair
sales@batee.com
(573) 578-9590
So what ima do when I get the controller back is check to see if cruise control works just to see if the vacuum lines are working. Im going try to take a look at the doors too. Before I do that ima tru finding that hose ClockWork was talking about and make sure everything is good.
#69
Intermediate


Hey Corvette Forum -
Cliff Harris pointed me to this thread. Thanks to all who posted their experiences and advice. I bought my 96 Base Coupe from Wathen1955 last March. He took great care of it and told me about the slow action of the A/C programmer/controller. I decided to tackle the repair this weekend and felt well prepared.
My experience was good, although I have a new appreciation for the term "Corvette Yoga". The complete project took me about 5 hours, including prep work like removing the driver's seat and roof and the dash under cover.
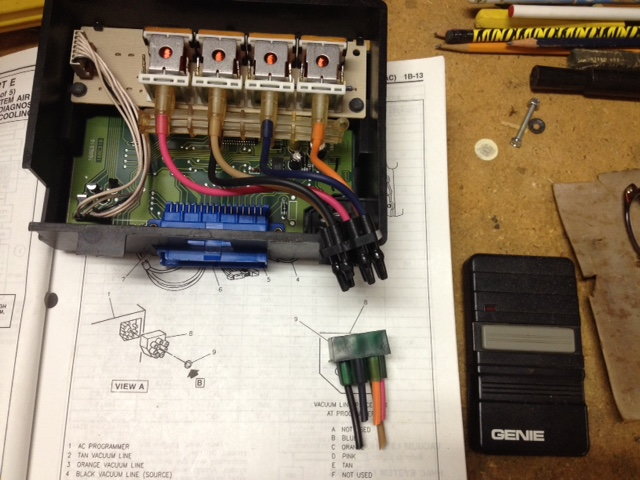
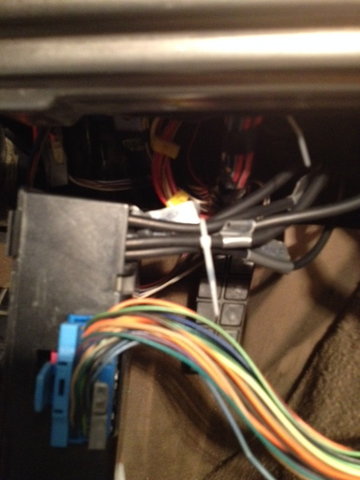
Removing the A/C controller module was a challenge. The one 7mm screw that holds it in is easy to remove. The limiting factor was the shortness of the colored vacuum lines from the module to the servos. Don't bother trying to unplug the electrical - it has plenty of slack and will allow the module to drop all the way to the floor. After re-reading this thread, I decided just to clip the colored vacuum lines as close to the plug as I could. Since the plug is the problem anyway, vacuum lines can be easily spliced.
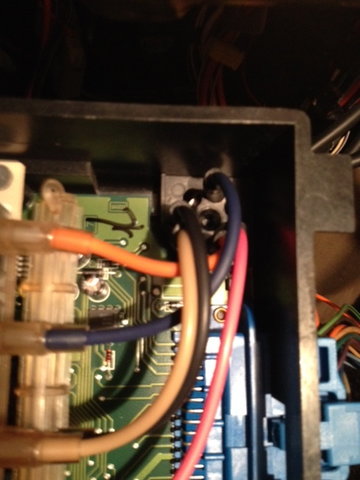
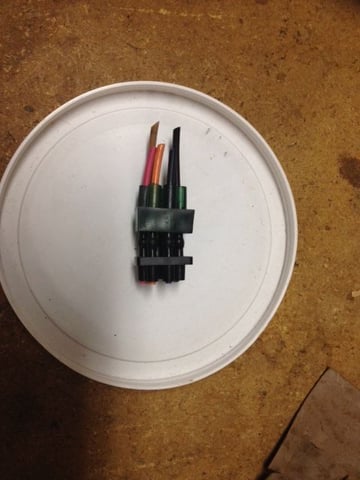
Once I cut the colored vacuum lines, the module dropped out readily. Getting the module on the bench, pulling the push-on nut, the problem was immediately obvious. The #4 nipple - vacuum source - was so poorly manufactured, there was basically no hole there. I trimmed about 1mm off the nipple, then another, then cut down to the bulge where it seals against the plug. It was almost completely closed up.
I just decided to bypass the whole connection assembly and use 5/32" rubber vacuum line. The colored nylon lines push into the rubber pretty snugly. Just spritz on some soapy water and insert a 1/4" or so.
I bought 6' of rubber line for about $2. I cut 12" sections and marked the line with tape for each color. Install the lines on the servo feeds and vacuum source under the dash first. That involves some "yoga". I held the servo feeds with a pair of flat pliers and twisted the rubber onto the colored nylon about 1/4".
In the module, remove the nipple array at the corner, cut the colored lines at the round array, and drill out 5 of the holes to 1/4". Then inside the car just feed each line into a hole in the module box and connect to the corresponding color inside the module. Then just reinstall the box above the accelerator.
My AC controller works flawlessly! It will respond to any change command in 2-3 seconds.
Thanks again for all your experience. This was the most difficult car repair I've attempted in 30 years, and it went really well. [ATTACH]Attachment 47866409[/ATTACH]


Hope this can be useful also:
I took mine apart also saw the issue w/rubber tips. Then I remembered my hobby fuel cars use brass fuel line tubes, so I went to the hobby store and bought 3" tubes and inserted tubes
right thru the rubber connectors by warming bras tubes w/heat gun , and inserting them with needle nose pliers right thru the middle of existing rubber tips in each connecteor, the reconnected and bolted back and that is the final time this ugly monster reared it's head.!!! hope this helps anyone needing a quick fix!
Jack
Last edited by raid007; 10-31-2018 at 05:38 AM. Reason: adding link
#71
Intermediate


Hi,
Glad to help, in my case I went to a local hobby shop that sells radio controlled gas planes and cars. The tubes the have vary in sizes but not by much because the are used primarily for connecting the fuel tanks to the silicone gas hoses on remote control gas powered hobby cars/planes.
I would take the part with you to the hobby place so they can sell you the exact diameter tube that fits in the old part, thru the existing rubber tips that are damaged; if you fix one, fix all is my advice so you never have to repeat again.
Jack
#73
Wow - glad to see these posts are still relative and helping with the HVAC controller issues on the ‘96. I sold my ‘96 to my brother who is still caring for it and the AC still works great. I’ve moved up to a ‘06 C6 convertible. Probably will never be without a Vette!!!
#76
Intermediate


However just in case you ever have any broken hard plastic vacuum hoses, should they crack or leak from deterioration, please not the brass tubes are no the proper fix. Instead order your self a 10' 3mm silicone vacuum hose ( any color, i prefer black) to patch and join any cracked,hard leaking vacuum tubes by simply using an exacto-knife or similar sharp blade to separate the damaged tubes and rejoin them using the silicone hose to either end, then use marine grade (self sealing adhesive inside tube) heat shrink tubes over the silicone hose and a hair dryer to shrink and seal your repair and you should never have that issue or the same leak again as it is air tight repair. I have used this method on this type of repair and neverhad an issue. Hope this helps!!!
Tx,
Jack
#77
Intermediate


1/6 mm brass tubes fit inside the rubber tubes, unobstructed air-flow as the brass does not flex even more vacuum air as they are hollow, but rigid.
Have patience, look thru eBay for the brass tubes they come in pre-cut or 12 inch lengths and I also ordered a micro-tube cutter brand name preferable in lieu of cheap Chinese knock-offs due to the better, sharper high carbon round blades.
Have patience, look thru eBay for the brass tubes they come in pre-cut or 12 inch lengths and I also ordered a micro-tube cutter brand name preferable in lieu of cheap Chinese knock-offs due to the better, sharper high carbon round blades.


