Fixed my Climate Control Module today, with PICS
 09-07-2012, 06:24 PM
#1
Instructor

Thread Starter
Member Since: Jul 2012
Location: PA
Posts: 185
Likes: 0
Received 0 Likes
on
0 Posts
Last month I took the Climate Control Module apart and cleaned up the contacts between the two circuit boards, and added a thin layer of solder to each strip, re-assembled, and reinstalled. This held up for a few weeks, until the flashing display and non-responsive button issue came back. A firm palm strike on the passenger side of the unit would solve the problem, however the Blue temp button stopped working all together. This is how I fixed the issue.
First I took the unit apart and then disassembled the display box. I had to cut several plastic "melted dots" I guess you could call them with a razor blade.
The rubber button had slid off of where in should be located on the circuit board.
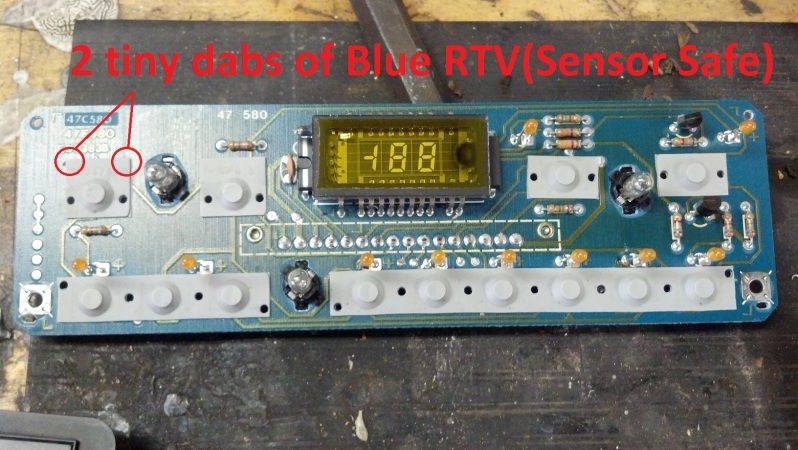
So I applied two very small dabs of Sensor Safe Blue RTV under the top corners of the rubber button. All the holes are where the melted dots poked through and melted over to hold the faceplate together.
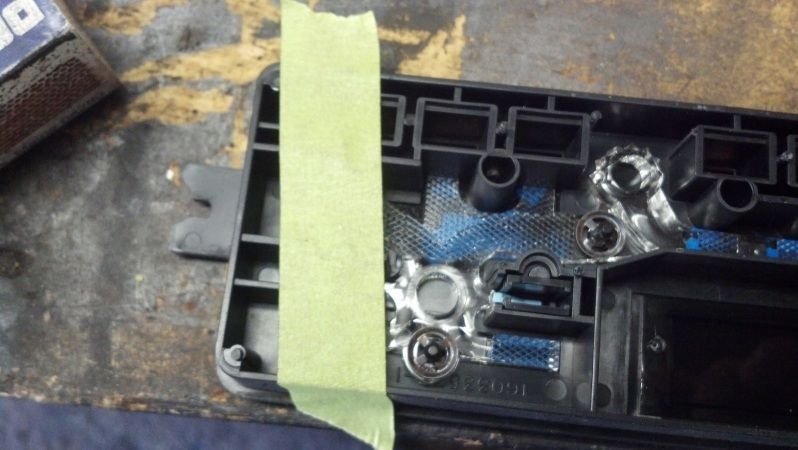
Then I cut the head off a zip tie, and combined with a dab of JB Weld, I filled in the gap in the back of the plastic button.(I have no idea why I took a picture with tape over it, so use your imagination, look at the hot button next to it and imagine a zip tie head in there.) I did this to make a larger surface to contact the rubber button.
Then I just reassembled the face plate and wrapped it very tightly with black electric tape(no picture of this, again, imagine)
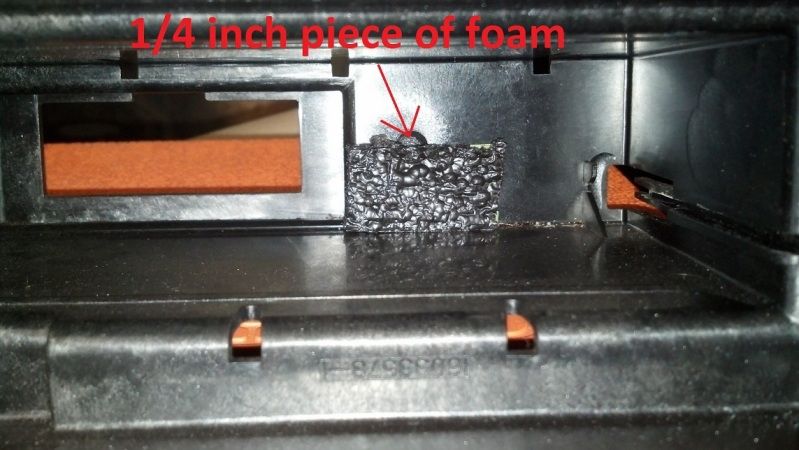
Then, before I put the unit back together, i taped a 1/4 inch think piece of foam and taped it in the back of the housing, to be sure there was a snug fit and the two circuit boards don't vibrate apart(again)
Now everything works like a charm. Finally I have A/C again!(the temp was stuck on 90 because I had the heat on full blast in the morning, thats when the Cold button decided to crap out.)
First I took the unit apart and then disassembled the display box. I had to cut several plastic "melted dots" I guess you could call them with a razor blade.
The rubber button had slid off of where in should be located on the circuit board.
So I applied two very small dabs of Sensor Safe Blue RTV under the top corners of the rubber button. All the holes are where the melted dots poked through and melted over to hold the faceplate together.
Then I cut the head off a zip tie, and combined with a dab of JB Weld, I filled in the gap in the back of the plastic button.(I have no idea why I took a picture with tape over it, so use your imagination, look at the hot button next to it and imagine a zip tie head in there.) I did this to make a larger surface to contact the rubber button.
Then I just reassembled the face plate and wrapped it very tightly with black electric tape(no picture of this, again, imagine)
Then, before I put the unit back together, i taped a 1/4 inch think piece of foam and taped it in the back of the housing, to be sure there was a snug fit and the two circuit boards don't vibrate apart(again)
Now everything works like a charm. Finally I have A/C again!(the temp was stuck on 90 because I had the heat on full blast in the morning, thats when the Cold button decided to crap out.)


 09-08-2012, 03:22 PM
#5
Instructor
Thread Starter
Member Since: Jul 2012
Location: PA
Posts: 185
Likes: 0
Received 0 Likes
on
0 Posts