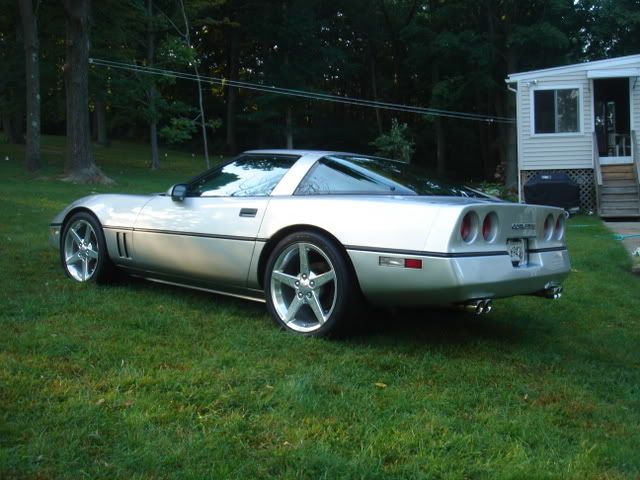
Lowered my vette - how I did it.
 09-27-2008, 01:32 AM
#1
Melting Slicks

Thread Starter

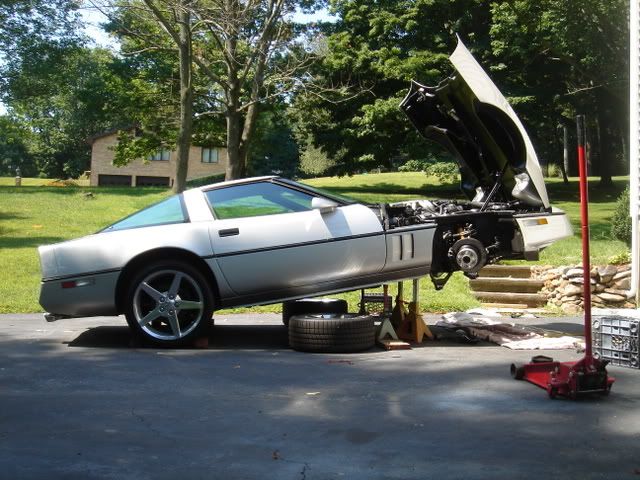
Below is a good instructional on how to lower the front and rear.
http://webpages.charter.net/khasting.../lowering.html
The rear was easy and took 1 hour. The front was not to bad just took a lot of time, probably 6 hours.
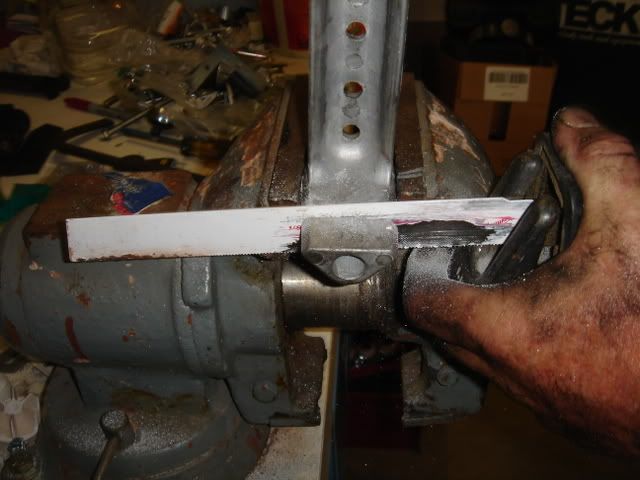
Now the thing is your moving the spring closer to the car, which makes the car sit lower. There is several ways to do that. Some people use the mid america shim. 2-part epoxy it on. Others just cut the entire rubber off letting it sit super slammed. Some remove the aluminum shim in conjunction with that. Others leave it. Basically it seems like you can do any thing to get your custom height.
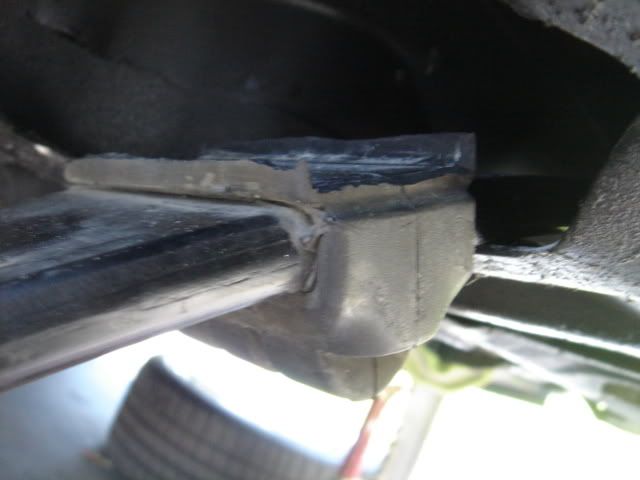
I was not a fan of this epoxy garabage. What I did was jack the car up, get every thing apart and figure it out.
I removed the top part of the busing leaving a channel in the original rubber. This was how I got rid of the need to have to epoxy, and I think this is stronger, better and neater.
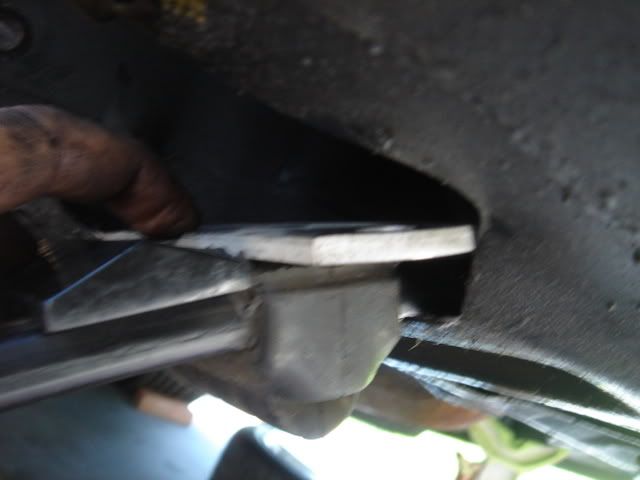
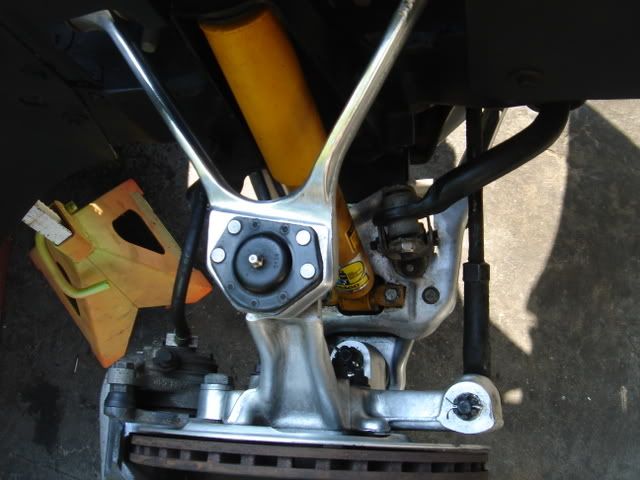
I opted to re used the spacer which now sits in my channel perfectly. In this pic you can see that it would be a comparable height to the mid america shim (with out the spacer). I think that by keeping the spacer and using the original rubber it probably have a more secure set up.
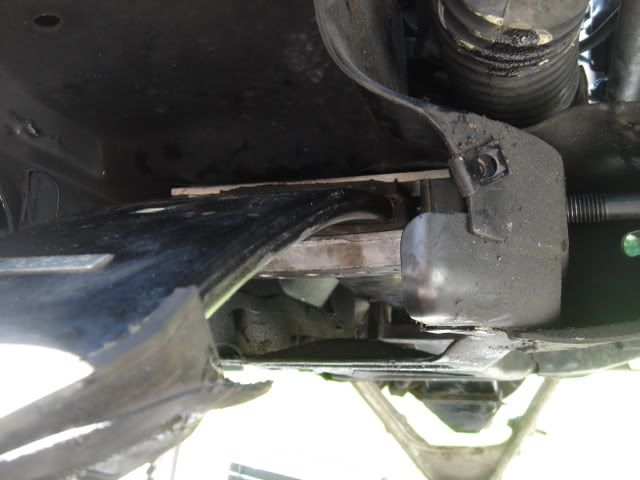
Here you can see how it sits together.
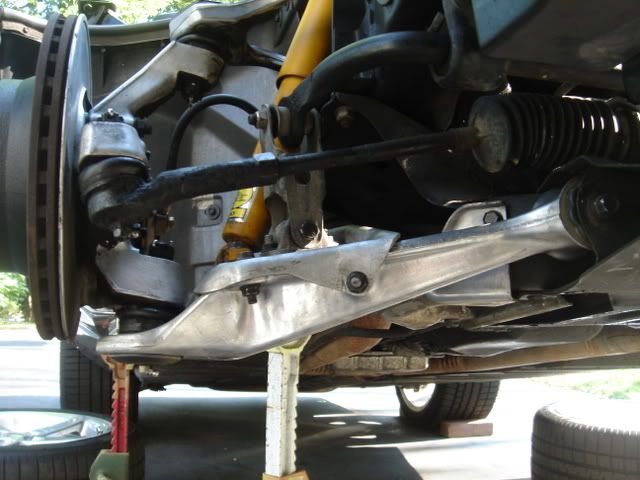
I think if you have 84-87 you need to used the upgraded brakets which you will have to trim to match your custom height, and keep every thing tight.
After that shine every thing up and put it back together.
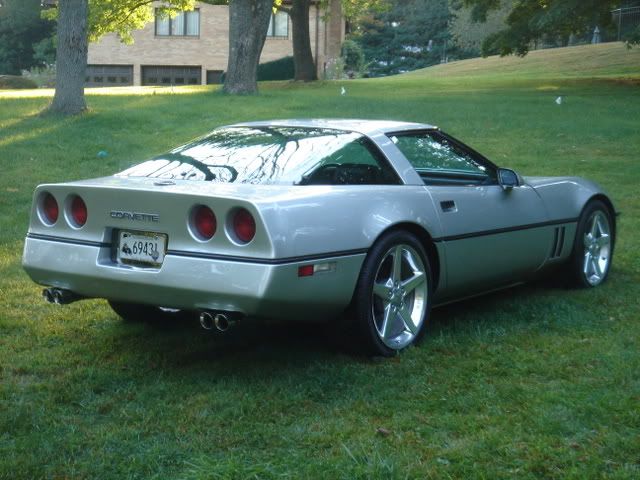
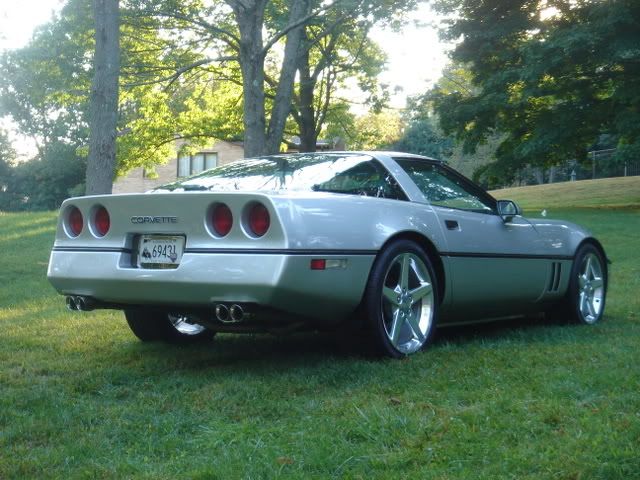
Heights In my opinion -my experience and research.
Stock - Do nothing.
Classy low - Cut rubber down and use metal shim (like I did)
The SLAM - Cut rubber down and just use it as a cushion
THE AS LOW AS IT CAN GO- Cut all rubber off and use nothing. Seems nuts to me but some people have sworn by it.
http://webpages.charter.net/khasting.../lowering.html
The rear was easy and took 1 hour. The front was not to bad just took a lot of time, probably 6 hours.
Now the thing is your moving the spring closer to the car, which makes the car sit lower. There is several ways to do that. Some people use the mid america shim. 2-part epoxy it on. Others just cut the entire rubber off letting it sit super slammed. Some remove the aluminum shim in conjunction with that. Others leave it. Basically it seems like you can do any thing to get your custom height.
I was not a fan of this epoxy garabage. What I did was jack the car up, get every thing apart and figure it out.
I removed the top part of the busing leaving a channel in the original rubber. This was how I got rid of the need to have to epoxy, and I think this is stronger, better and neater.
I opted to re used the spacer which now sits in my channel perfectly. In this pic you can see that it would be a comparable height to the mid america shim (with out the spacer). I think that by keeping the spacer and using the original rubber it probably have a more secure set up.
Here you can see how it sits together.
I think if you have 84-87 you need to used the upgraded brakets which you will have to trim to match your custom height, and keep every thing tight.
After that shine every thing up and put it back together.
Heights In my opinion -my experience and research.
Stock - Do nothing.
Classy low - Cut rubber down and use metal shim (like I did)
The SLAM - Cut rubber down and just use it as a cushion
THE AS LOW AS IT CAN GO- Cut all rubber off and use nothing. Seems nuts to me but some people have sworn by it.

The following users liked this post:
iSterling (12-03-2018)
 09-27-2008, 08:33 AM
#3
Drifting

Member Since: Aug 2004
Location: 2010 C6 Grand Sport Convertible
Posts: 1,321
Likes: 0
Received 4 Likes
on
4 Posts

Nice write-up Danny. I was considering lowering my Lt1 also, but I'm gonna wait until I slap some Zr1 rims and new rubber on her and see where we stand. I replaced the rear spring on the pace car with my boy a few years ago. It was perty easy and had to use the 10" bolts to readjust the height to where I liked it. I really like that floor jack of yours. That's a no-nonsense piece of equiptment.
Mike
Mike
09-27-2008, 09:14 AM
#5
Melting Slicks
Looks great! Im going to need to take mine apart because something isnt right... It doesnt look any lower...  But I never took fender measurements soooo..... I have nothing to go by! Def looks killer now though!
JT
But I never took fender measurements soooo..... I have nothing to go by! Def looks killer now though!JT

 09-27-2008, 02:30 PM
#11
Team Owner


Member Since: May 2000
Location: Plantation Florida USAF(Retired) 1966-1990
Posts: 47,901
Received 4,505 Likes
on
3,590 Posts
U.S. Air Force
St. Jude Donor '05-'06-'07-'08-'09-'10-'11-'12-'13-'14-'15-'16-'17-'18-'19-'20-'21-'22-'23-'24
NCM Sinkhole Donor


 Your effort pays off, looks good!
 09-27-2008, 06:55 PM
#15
Instructor

Lookin good! I lowered mine recently too. I shaved down the rubber on the spring mount and left just enough for some cushion and it wasnt low enough for me so i shaved a lil over half of the rubber where the spring meets the a arm and took the spacers out. Now it sits just right in the front but i need to order the 12" bolts for the rear. Gotta love tuckin' tire with no rub... 


 09-28-2008, 02:49 AM
#19
Melting Slicks
Thread Starter
Thanks every one. I hope the write up helps in the archives.
I have stocks c6 z51 c6 wheels 18/19
With that being said I think my method - Cut rubber down and use metal shim (like I did) works best.
Any smaller rim 17's or 18's and I would probably just - Cut rubber down and just use it as a cushion with no shim
Pacer I like the chrome saw blades !
I have stocks c6 z51 c6 wheels 18/19
With that being said I think my method - Cut rubber down and use metal shim (like I did) works best.
Any smaller rim 17's or 18's and I would probably just - Cut rubber down and just use it as a cushion with no shim
Pacer I like the chrome saw blades !

