Ever done a Bubba repair to your C4?? I did today [lotsa pics]


 11-14-2011, 08:16 PM
#42
Safety Car

My IPC just fragged there as well. The mounting bolt was fixed with JB weld long ago by a PO so now I will have to fix both. I was thinking of maybe using a fender washer to do the light switch but Friz's patch for his switch will help out on the IPC mounting bolt as well. I guess 27 years on the plastics is pretty good but I wish they coulda done some aluminum main structure. Might help with all the squeaks and rattles too.
 Kudos to the dog! Thanks for posting your solution.
Kudos to the dog! Thanks for posting your solution.
11-14-2011, 09:42 PM
#43
Drifting

I epoxied a drilled poker chip to my dash to repair the same crack. It's
staying together so far (2 years) and is not visible. Your fix is better.
staying together so far (2 years) and is not visible. Your fix is better.
11-14-2011, 10:44 PM
#44
Le Mans Master

 11-18-2011, 04:08 AM
#45
Race Director

I like the fix.
Back in the early '90s I was driving on the washboard dirt road that used to go to Carlsbad Raceway (San Diego, CA area) -- gone now. I heard a pop and my dash started squeaking. It squeaked for years until I took it apart and found the area around the mounting bolt broken out.
About 10 years ago I put a .062" thick piece of sheet aluminum in there, very similar to Frizlefrak's. Been good ever since.

I've got more aluminum on the tabs that hold the dash pad in place. JB Weld. I found it won't hold unless you rough up the plastic with sandpaper and drill some holes in the aluminum.
Back in the early '90s I was driving on the washboard dirt road that used to go to Carlsbad Raceway (San Diego, CA area) -- gone now. I heard a pop and my dash started squeaking. It squeaked for years until I took it apart and found the area around the mounting bolt broken out.
About 10 years ago I put a .062" thick piece of sheet aluminum in there, very similar to Frizlefrak's. Been good ever since.
I've got more aluminum on the tabs that hold the dash pad in place. JB Weld. I found it won't hold unless you rough up the plastic with sandpaper and drill some holes in the aluminum.
Last edited by Cliff Harris; 10-24-2013 at 11:20 AM. Reason: Added picture.
11-18-2011, 09:01 AM
#46
Melting Slicks


A couple Bubba repairs:
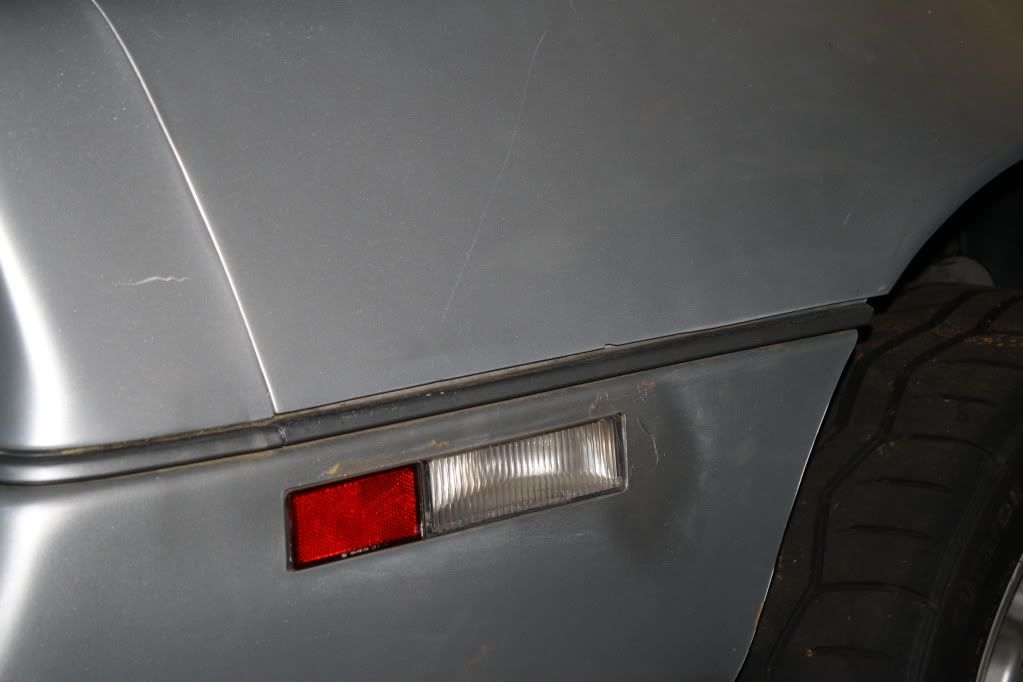
The rear bumper wraps around to the rear wheels and bolts up to the quarter panel. The flange on the quarter panel that the bumper bolts too lost its bond so the bumper/belt line alignment was off.
Suburbaneck engineering to the rescue..
Before:

Testing the bracket design
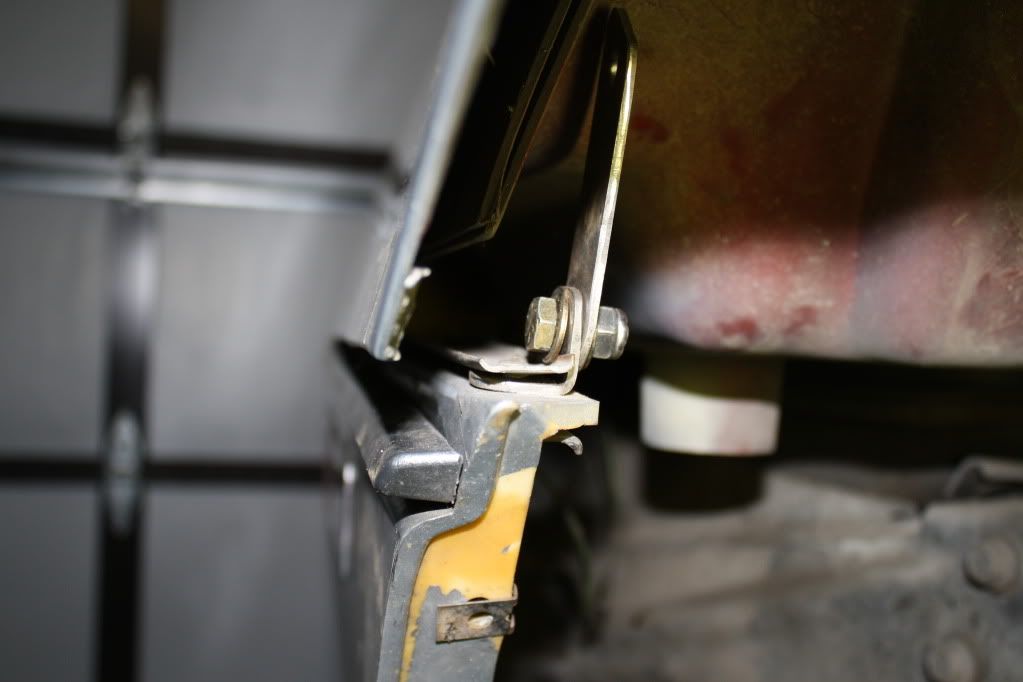
Bracket uses existing stud and is bolted to a very convenient flange. elongated top bolt hole for adjust-ability, lower bolt allows for the proper angle.
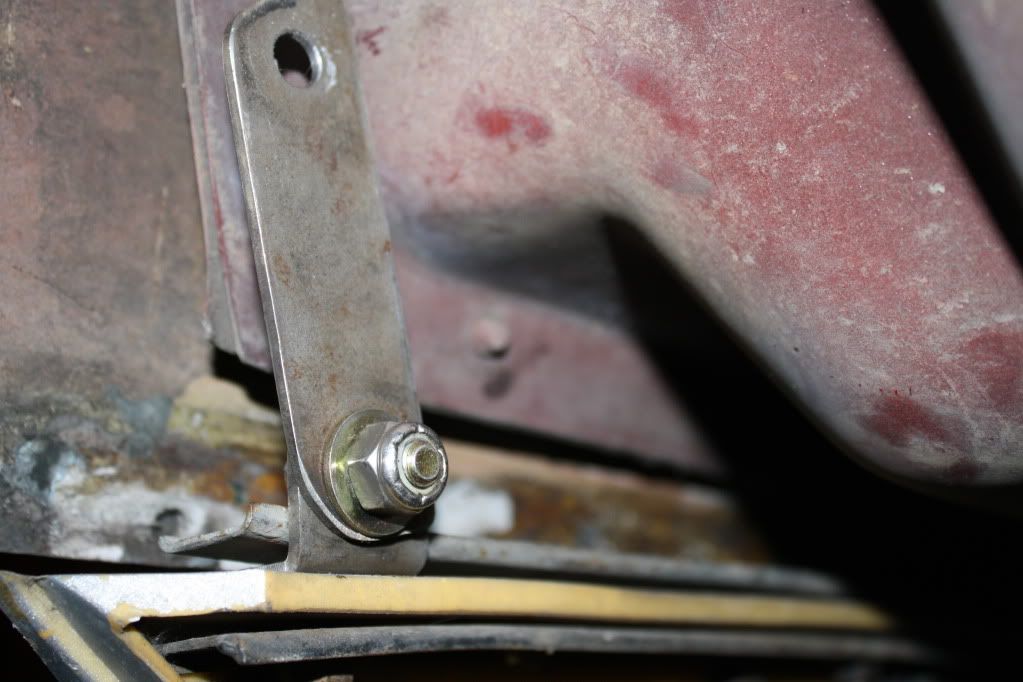
After (now I can start working on permanent fixes to some paint issues)
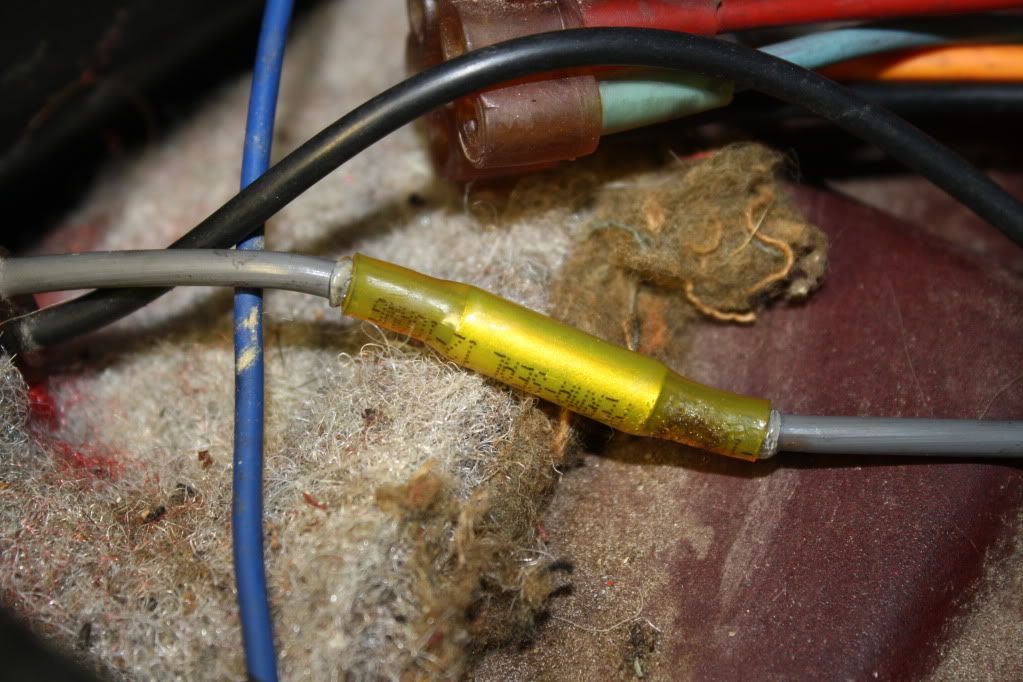
Also as part of the AC install I found a nice little mouse behind the AC chomped through a tiny hard vacuum line. There is no connector to repair this and a new line would require running a new vac line out to the heater core flow control. I tried a little trick...seems the vacuum line is same size as a yellow heat shrink connector. The shrink and the glue sealed it up. It was a delicate operation trying no the melt the vacuum line.
The rear bumper wraps around to the rear wheels and bolts up to the quarter panel. The flange on the quarter panel that the bumper bolts too lost its bond so the bumper/belt line alignment was off.
Suburbaneck engineering to the rescue..
Before:
Testing the bracket design
Bracket uses existing stud and is bolted to a very convenient flange. elongated top bolt hole for adjust-ability, lower bolt allows for the proper angle.
After (now I can start working on permanent fixes to some paint issues)
Also as part of the AC install I found a nice little mouse behind the AC chomped through a tiny hard vacuum line. There is no connector to repair this and a new line would require running a new vac line out to the heater core flow control. I tried a little trick...seems the vacuum line is same size as a yellow heat shrink connector. The shrink and the glue sealed it up. It was a delicate operation trying no the melt the vacuum line.
03-22-2014, 04:10 PM
#47
8th Gear

All I know is, I'm glad you posted this, because the same thing happened to me, and then I found this thread. Now I have a "repaired" dash. One less thing to worry about.
 03-22-2014, 09:07 PM
#50
Banned Loser

Member Since: Aug 2009
Location: They say you learn from your mistakes, I must be a genius
Posts: 52,808
Received 248 Likes
on
114 Posts
2017 Corvette of the Year
2016 C4 of Year Finalist
Creator of the "Original" whining and crying thread
St. Jude Donor '14-'15-'16-'17


 03-22-2014, 09:57 PM
#52
Melting Slicks

That's not Bubba; that's damn smart. Now, I would probably have used something with no other holes, and painted it flat black- but I am a little weird. I actually care what things look like even if they will never be seen.
03-23-2014, 11:05 AM
#53
Drifting
The OP mentioned the original behind the bezels plastic frame which goes across the entire firewall. My dash pad split and raised up 1.5" cracking the radio bezel support screw hole and leaving a gap above the passenger side crash pad. It looks terrible. I went to a Corvette junk yard and they said $150. Being outside for years in AZ sun I doubt they can remove it without breaking it. My plan is the replace the dash pad and pray the gap closes enough to hide the broken plastic frame. I might have to epoxy the broken hole with a new piece but that sounds like it won't hold. First thing is get a nice dash pad.
03-23-2014, 12:04 PM
#54

A thread from the dead...........
was a great post though........
The early C4 dashes......you gotta love em...........even the backside of them ..........brittle plastic
I wonder how many engineers it took to think that through.....let's see.....plastic dash/brackets......heat/cold over the years......on a sports car that costs $30M (back in the 80's that was some cash) with tight suspension systems for handling....
no problem....it will be fine.....