Switching to a single plane intake!


 02-21-2014, 03:38 PM
#42
Instructor

Thread Starter
Member Since: Apr 2005
Location: G�teborg
Posts: 228
Likes: 0
Received 0 Likes
on
0 Posts

Not much progress; only minor things done.
Started polishing the elbow
Fabricating a throttle wire bracket
Will go to the US tomorrow and pick up alot of the missing parts for the build so hopefully I will make some real progress soon
Started polishing the elbow
Fabricating a throttle wire bracket
Will go to the US tomorrow and pick up alot of the missing parts for the build so hopefully I will make some real progress soon
Last edited by bogor; 02-21-2014 at 03:49 PM.
03-31-2014, 01:14 PM
#43
Instructor
Thread Starter
Member Since: Apr 2005
Location: G�teborg
Posts: 228
Likes: 0
Received 0 Likes
on
0 Posts
If anyone is looking for a cheap single plane EFI intake manifold, the motown (Proram) kan be now be had for less than $180:
http://www.ebay.com/itm/World-Products-061040FI-SBC-305-350-Chevy-Motown-EFI-Aluminum-Intake-Manifold-/161246853903?pt=Motors_Car_Truck_Parts_Accessories&hash=item258b0fbb0f
http://www.ebay.com/itm/World-Products-061040FI-SBC-305-350-Chevy-Motown-EFI-Aluminum-Intake-Manifold-/161246853903?pt=Motors_Car_Truck_Parts_Accessories&hash=item258b0fbb0f


 04-20-2014, 03:04 PM
#45
Instructor
Thread Starter
Member Since: Apr 2005
Location: G�teborg
Posts: 228
Likes: 0
Received 0 Likes
on
0 Posts
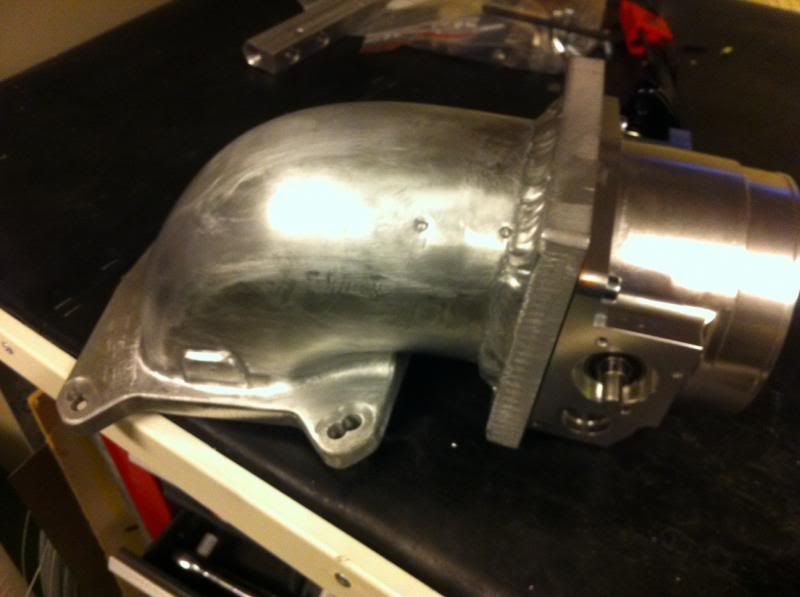
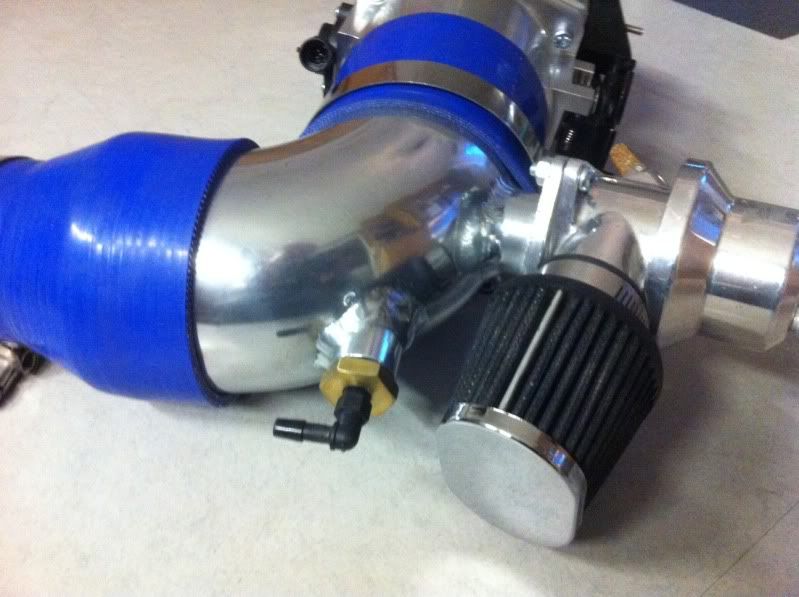
Finally got the 90 degree pipe welded so I mocked up the intake. The 90 degree bend started its life as a 4� U-bend from CX racing. I also added a flange for the new blow off valve (also from CX racing) as well as a holder for the water injection nozzle. The throttle cable bracket is now moved to the other side so it works with the TB mounted up side down.
The bad news is that it seems like the bend hits the hood at the engine compartment light-prob need to make some cuts to the inner reinforcement of the hood to clear the pipe.
The bad news is that it seems like the bend hits the hood at the engine compartment light-prob need to make some cuts to the inner reinforcement of the hood to clear the pipe.
 04-27-2014, 05:42 PM
#46
Instructor
Thread Starter
Member Since: Apr 2005
Location: G�teborg
Posts: 228
Likes: 0
Received 0 Likes
on
0 Posts
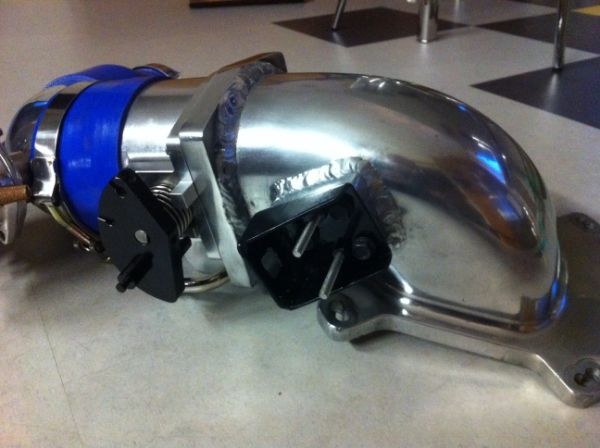
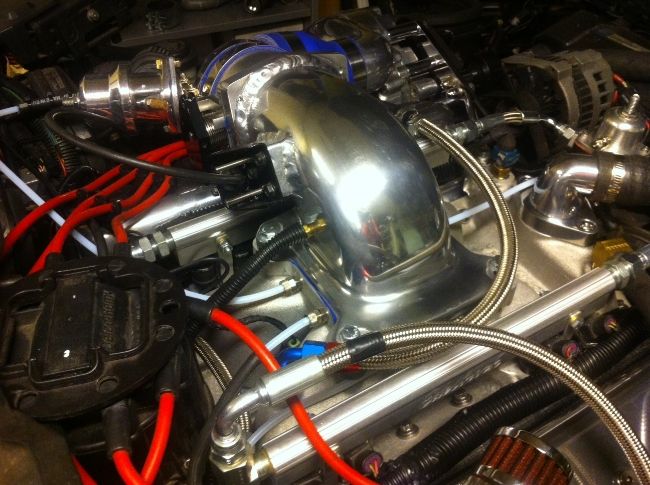
Has polished the whole setup now. I removed the "Edelbrock" text as well as grinded away the throttle wire bracked attachment.
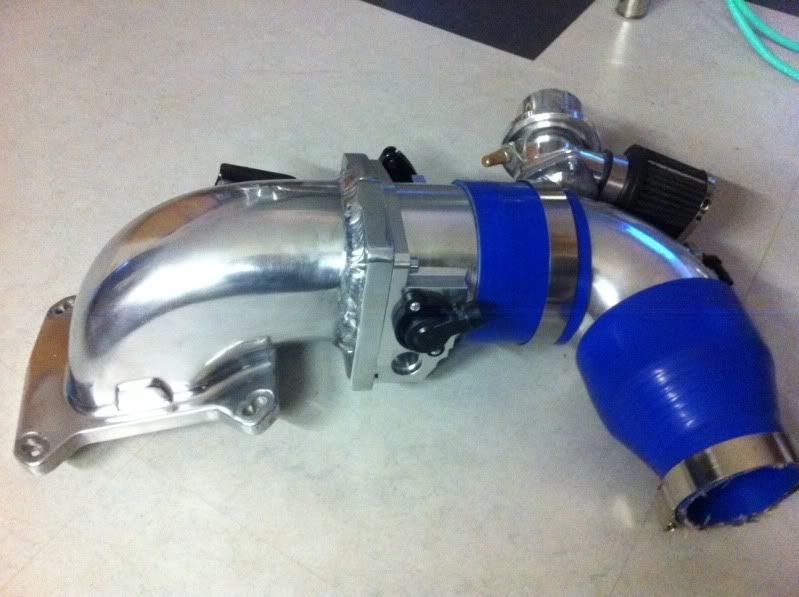
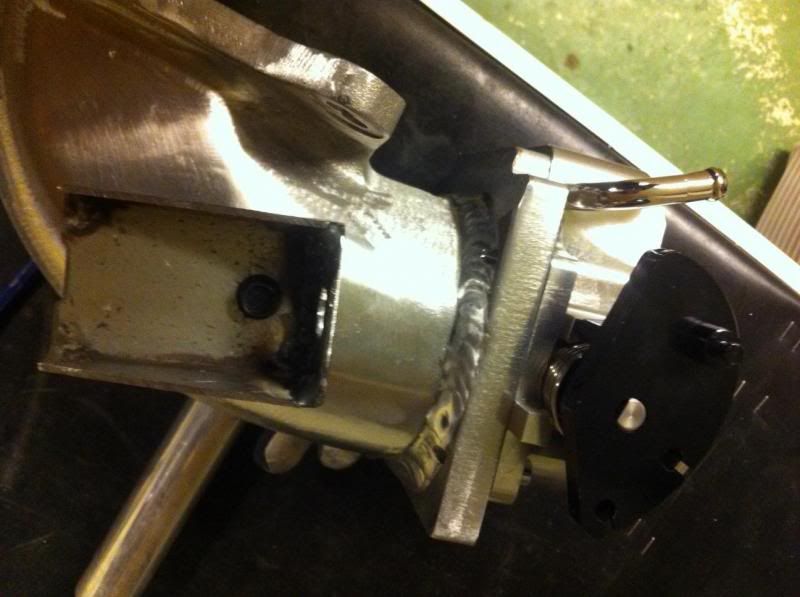
A shot from the front shows the brass water injection nozzle holder
The new throttle wire bracket-had to make it from scratch. Its bolted to a welded on piece of aluminum.
Has started to grind on the intake manifold but still some hours of work to go before anything to show.

A shot from the front shows the brass water injection nozzle holder

The new throttle wire bracket-had to make it from scratch. Its bolted to a welded on piece of aluminum.

Has started to grind on the intake manifold but still some hours of work to go before anything to show.
05-06-2014, 03:54 PM
#47
Instructor
Thread Starter
Member Since: Apr 2005
Location: G�teborg
Posts: 228
Likes: 0
Received 0 Likes
on
0 Posts
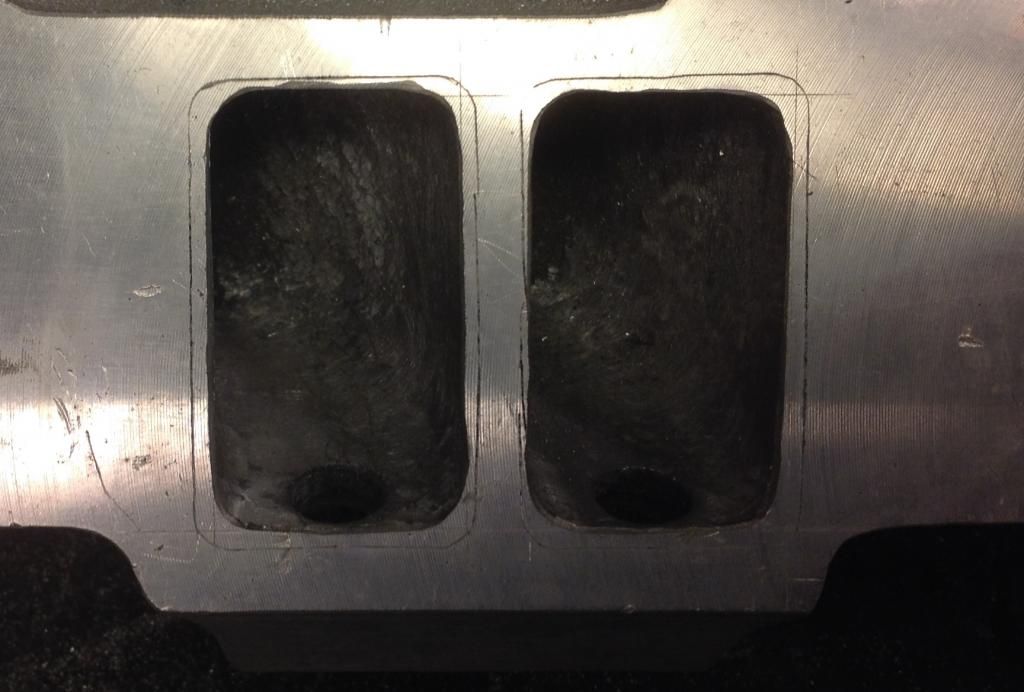
Now I have done some porting of the intake. Not very pretty but hopefully the crappy surface finish wont matter that much. Anyway, the CSA at the push rod pinch of the head is 2.08 sq in and the exit of the runner is now between 2.23 and 2.32 sq in. I have scribed the outline of a 1206 gasket so its prettys much material left to carve out if I ever get the urge...
Just in case I got myself a Motown/Proram intake since it was a sale going on.
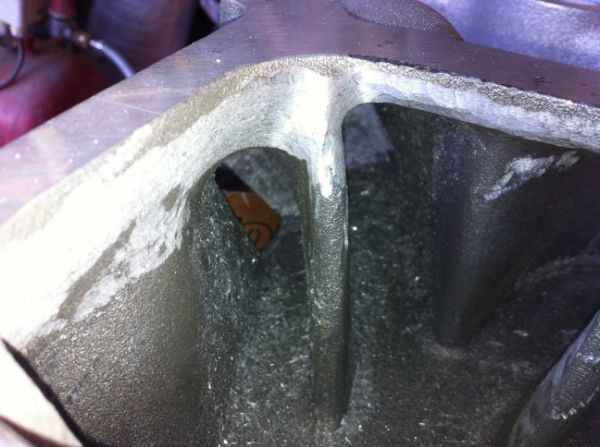
Also grinded some in the plenum. Focused the grinding on the shorter runners that were about 20% less in CSA than the longer ones. Most material was removed in the first 1.5 inch on the roof.
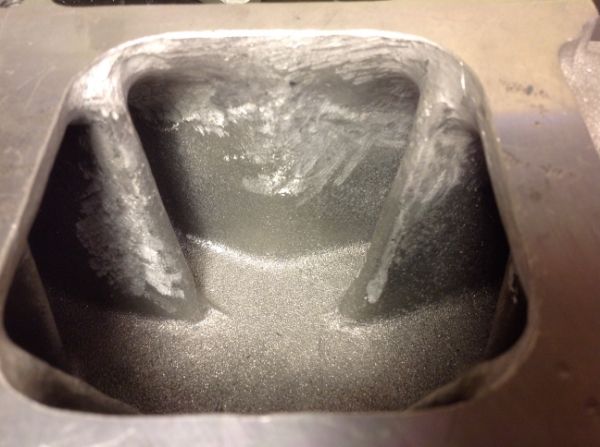
The longer runner are just cleaned up (removed casting flash).
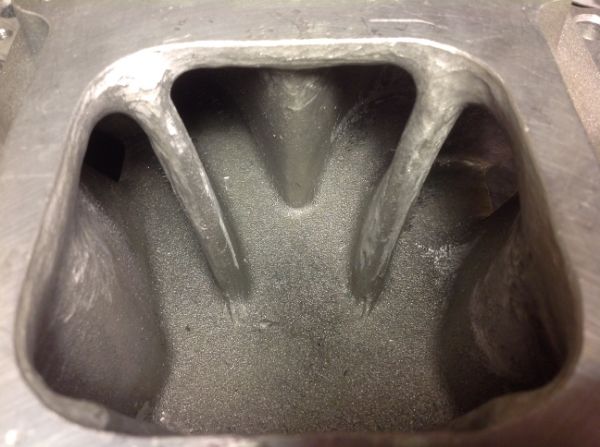
This pic was taken when I just have started to grind on the inner runners. Its pretty easy to see the difference in runner height.

Just in case I got myself a Motown/Proram intake since it was a sale going on.
Also grinded some in the plenum. Focused the grinding on the shorter runners that were about 20% less in CSA than the longer ones. Most material was removed in the first 1.5 inch on the roof.

The longer runner are just cleaned up (removed casting flash).

This pic was taken when I just have started to grind on the inner runners. Its pretty easy to see the difference in runner height.

Last edited by bogor; 05-07-2014 at 12:22 PM.
05-09-2014, 05:00 PM
#48
Instructor
Thread Starter
Member Since: Apr 2005
Location: G�teborg
Posts: 228
Likes: 0
Received 0 Likes
on
0 Posts
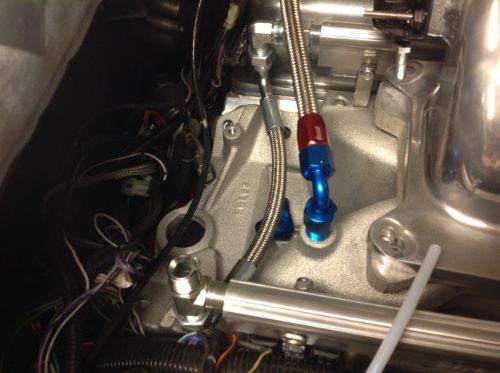
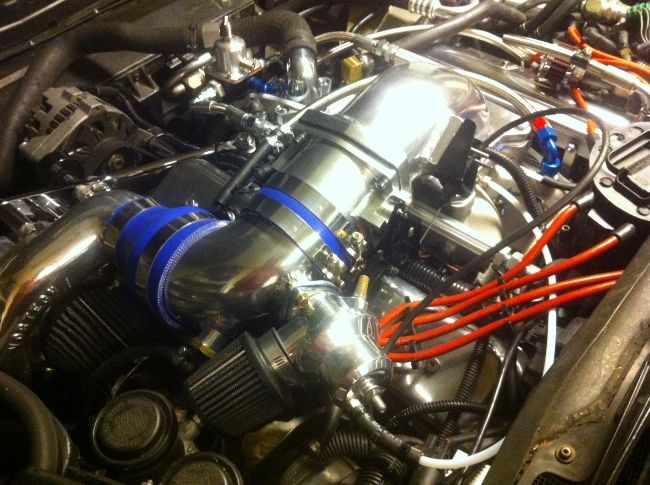
Tried to find good quality fuel lines and aluminum connections here but the prices were steep to say the least. Ended up at an industrial hose supplier that put together high pressure fittings and PTFE (E85 resistant) hoses. Bulky couplings and heavy (steel) and will prob never leak! I might change to lighter and prettier Earl�s stuff later on but for now, these will do. Used equivavlent to AN8 on the feed side and AN6 on the return side. I have a Weldon 2040 FPR, prob overkill but I didnt want to skimp on quality on this. I previously used cheap plastic vacuum hose, this does not stand the heat in a C4 engine compartment! Has sourced some DuPont Tefzel high quality hose I will use on all vacuum hoses. This is the white line that is attached to the FPR. I have used this before and it has no problem taking the heat.
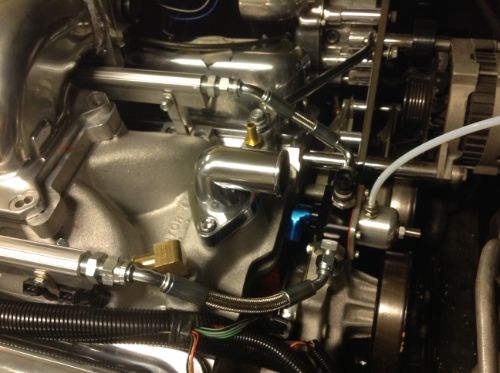
When using steel braided PTFE hose its important the hose is grounded to avoid risk for static discharges. Hopefully they are grounded via the couplings but if not I might have to use ground wires.
Its has been very time consuming to find all the coupling, fittings and hoses required but I�m getting alot closer now.

When using steel braided PTFE hose its important the hose is grounded to avoid risk for static discharges. Hopefully they are grounded via the couplings but if not I might have to use ground wires.

Its has been very time consuming to find all the coupling, fittings and hoses required but I�m getting alot closer now.
Last edited by bogor; 05-09-2014 at 05:19 PM.
 06-05-2014, 05:32 AM
#51
Instructor
Thread Starter
Member Since: Apr 2005
Location: G�teborg
Posts: 228
Likes: 0
Received 0 Likes
on
0 Posts
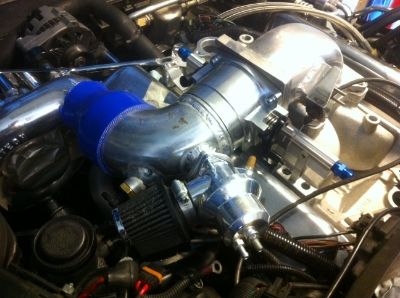
Almost there now! Need to hook up fuel feed and fuel return line, fab a bracket holding the pressure regulator,change oil and filter before first start-up.

 06-05-2014, 09:14 AM
#53
Instructor
Thread Starter
Member Since: Apr 2005
Location: G�teborg
Posts: 228
Likes: 0
Received 0 Likes
on
0 Posts
06-09-2014, 08:42 AM
#54
Instructor
Thread Starter
Member Since: Apr 2005
Location: G�teborg
Posts: 228
Likes: 0
Received 0 Likes
on
0 Posts
Fixed the last �to-do�s� and started yesterday. No fuel leaks and limited oil leaks (some drops on the ground but I guess that�s inevitable). Non-existing idle and very rough running in the beginning but this was expected since I used the same fuel map as for the SR intake. After some tweaking, the idle stabilized and it was also possible to take it out on the street for a short drive. I really love the Autronic EFI system and how quickly a tune that allows the car to run acceptable is created. No WOT yet -only cruising so I could not really say anything about change in engine behaviour other than it feels like the engine runs somewhat smoother than the older set-up did. Only remaining issue is no power to the brakes-seems like I hooked up the vacuum tube at the wrong place (prob an easy fix). The new Vortech blow off valve is a lot louder than the old plastic Bosch unit (a high pitch �scream� when releasing the throttle). To be continued�
 06-10-2014, 06:48 AM
#58
Instructor
Thread Starter
Member Since: Apr 2005
Location: G�teborg
Posts: 228
Likes: 0
Received 0 Likes
on
0 Posts
The SMC is now surpassed by a new generation (SM3/SM4) but still works very good; 8 ch sequential injection and very easy to get running.
Its not a plugnPlay installation and it took some time to get it running. Its combined with an Innovative LC1 WB and I�m also running a J&S Safeguard knock control and the OEM EFI in parallell (controlling fans, idle motor etc) -alot of wiring and sensors...
06-10-2014, 09:16 AM
#59
Melting Slicks

Autronic is an Aussie company (www.autronic.com) that offers very good standalone EFI systems. Installed an SMC system some years ago in the car and its been working flawless ever since.
The SMC is now surpassed by a new generation (SM3/SM4) but still works very good; 8 ch sequential injection and very easy to get running.
Its not a plugnPlay installation and it took some time to get it running. Its combined with an Innovative LC1 WB and I�m also running a J&S Safeguard knock control and the OEM EFI in parallell (controlling fans, idle motor etc) -alot of wiring and sensors...
there doesnt seem to very much information on the website, but a google search shows the systems being quite expensive, even second hand ?
When I upgrade my computer Im leaning towards the dynamic efi ebl .
06-14-2014, 02:02 PM
#60
Instructor
Thread Starter
Member Since: Apr 2005
Location: G�teborg
Posts: 228
Likes: 0
Received 0 Likes
on
0 Posts
Have been driving the car on a few occasions now and there are some issues that needs to adressed before taking it to the dyno:
-the elbow slightly touches the hood on three places. Probably sufficient with some light grinding on the elbow to clear. The second issue is more tricky:
After driving about 20 minutes, the engine leans out to the extreme, AFR 18-20-almost like a diesel... Until this happens, the car is running fine with normal AFR.
This is not a WOT thing but happens at idle and cruising. I have checked fuel pressure with and without the vacuum hose attached and the pressure is rock steady at around 40psi. No excessive coolant nor intake air temperature either.
After waiting about 20 minutes, the symptons go away until the car heats up again.
Measured temperature on fuel hoses, rails and regulator and it varies between 120 and 140F. Does not look very extreme to me.
im alwYs running with the fuel cap slightly open since I have deleted the coal canister hence no pressure in the tank.
Im running an in-tank walbro 340 and and inline smaller walbro (dont recall the exact name but the setup was designed and supplied by Greg at Blowerworks).
Was a year or maybe two since I replaced the fuel filter but since the car is running perfect around 20 minutes I cannot see the filter to be the issue.
The engine is in"open loop" so the lambda sensor only measure the oxygen and has no influence on the air/fuel ratio.
Could it be faulty injectors??
-the elbow slightly touches the hood on three places. Probably sufficient with some light grinding on the elbow to clear. The second issue is more tricky:
After driving about 20 minutes, the engine leans out to the extreme, AFR 18-20-almost like a diesel...
Until this happens, the car is running fine with normal AFR.This is not a WOT thing but happens at idle and cruising. I have checked fuel pressure with and without the vacuum hose attached and the pressure is rock steady at around 40psi. No excessive coolant nor intake air temperature either.
After waiting about 20 minutes, the symptons go away until the car heats up again.
Measured temperature on fuel hoses, rails and regulator and it varies between 120 and 140F. Does not look very extreme to me.
im alwYs running with the fuel cap slightly open since I have deleted the coal canister hence no pressure in the tank.
Im running an in-tank walbro 340 and and inline smaller walbro (dont recall the exact name but the setup was designed and supplied by Greg at Blowerworks).
Was a year or maybe two since I replaced the fuel filter but since the car is running perfect around 20 minutes I cannot see the filter to be the issue.
The engine is in"open loop" so the lambda sensor only measure the oxygen and has no influence on the air/fuel ratio.
Could it be faulty injectors??
Last edited by bogor; 06-14-2014 at 02:09 PM.