C3 Tech/Performance V8 Technical Info, Internal Engine, External Engine, Basic Tech and Maintenance for the C3 Corvette
Sponsored by:
Sponsored by:

Upholstery job

Thread Tools
 
Search this Thread
 
Old 12-12-2023, 05:44 PM
  #1  
CubeBrick
Instructor
Thread Starter
 
CubeBrick's Avatar
 
Member Since: Feb 2023
Location: Croatia
Posts: 195
Received 261 Likes on 80 Posts
Default Upholstery job

Hi,

I have a ‘79. Vette L82 on the other side of the globe what is very important when it comes to shipping costs. So for me to change the seat covers door panels and carpet I’m looking at the total price of over 4000 USD.

I’ve decided not to go that route because materials here in Croatia are pretty available and somewhat cheap. I’ll keep this post live as I go on and update with pictures every step of the way in case someone needs it later on.

I have a doeskin interior which I hate as a color and I decided to go all black.


So after I’ve purchased high quality vinyl and carpets it was time to learn sewing.

I’ve pillaged my mothers place and with that good woman’s blessing took hers 40 year old Yugoslav sewing monster back to my place. Tried it for a sew or two and decided that I’ll concentrate my way through.


Took the seats out of the car and started stripping them from the foam (or what was left of it).


I’ve cut all the old vinyl and leather pieces on the seams and was left with pretty good stencils for markup of the new material. I’ve cut all of it with enough material to allow for minor errors and trimming later when I’m sure I’ve done it right.


The following 3 users liked this post by CubeBrick:
interpon (12-13-2023), stevedinino (12-12-2023), ZIOGEO (12-14-2023)

Popular Reply

12-12-2023, 05:57 PM
CubeBrick
Instructor
Thread Starter
 
CubeBrick's Avatar
 
Member Since: Feb 2023
Location: Croatia
Posts: 195
Received 261 Likes on 80 Posts
Default

It’s foam time… currently rebuilding it with hope that by tomorrow I’ll have my first one fully mounted.


Stay tuned…

Old 12-12-2023, 05:55 PM
  #2  
CubeBrick
Instructor
Thread Starter
 
CubeBrick's Avatar
 
Member Since: Feb 2023
Location: Croatia
Posts: 195
Received 261 Likes on 80 Posts
Default

This is how one piece will look like on the old foam.


Foam hey… I’ll need that too I guess… for at least the next two reasons. To renew and fill out the cracks in the old one and to be able to produce the same effect on the seats. So after a quick run to the local store I’ve came back with 30kg type foam, 5mm and 10mm thick.

After copying the seams and puting the first few pieces together I saw a glimpse of what it’ll become.


And my concentration was awesome ‘cause… look at that french sew, I’m very happy.


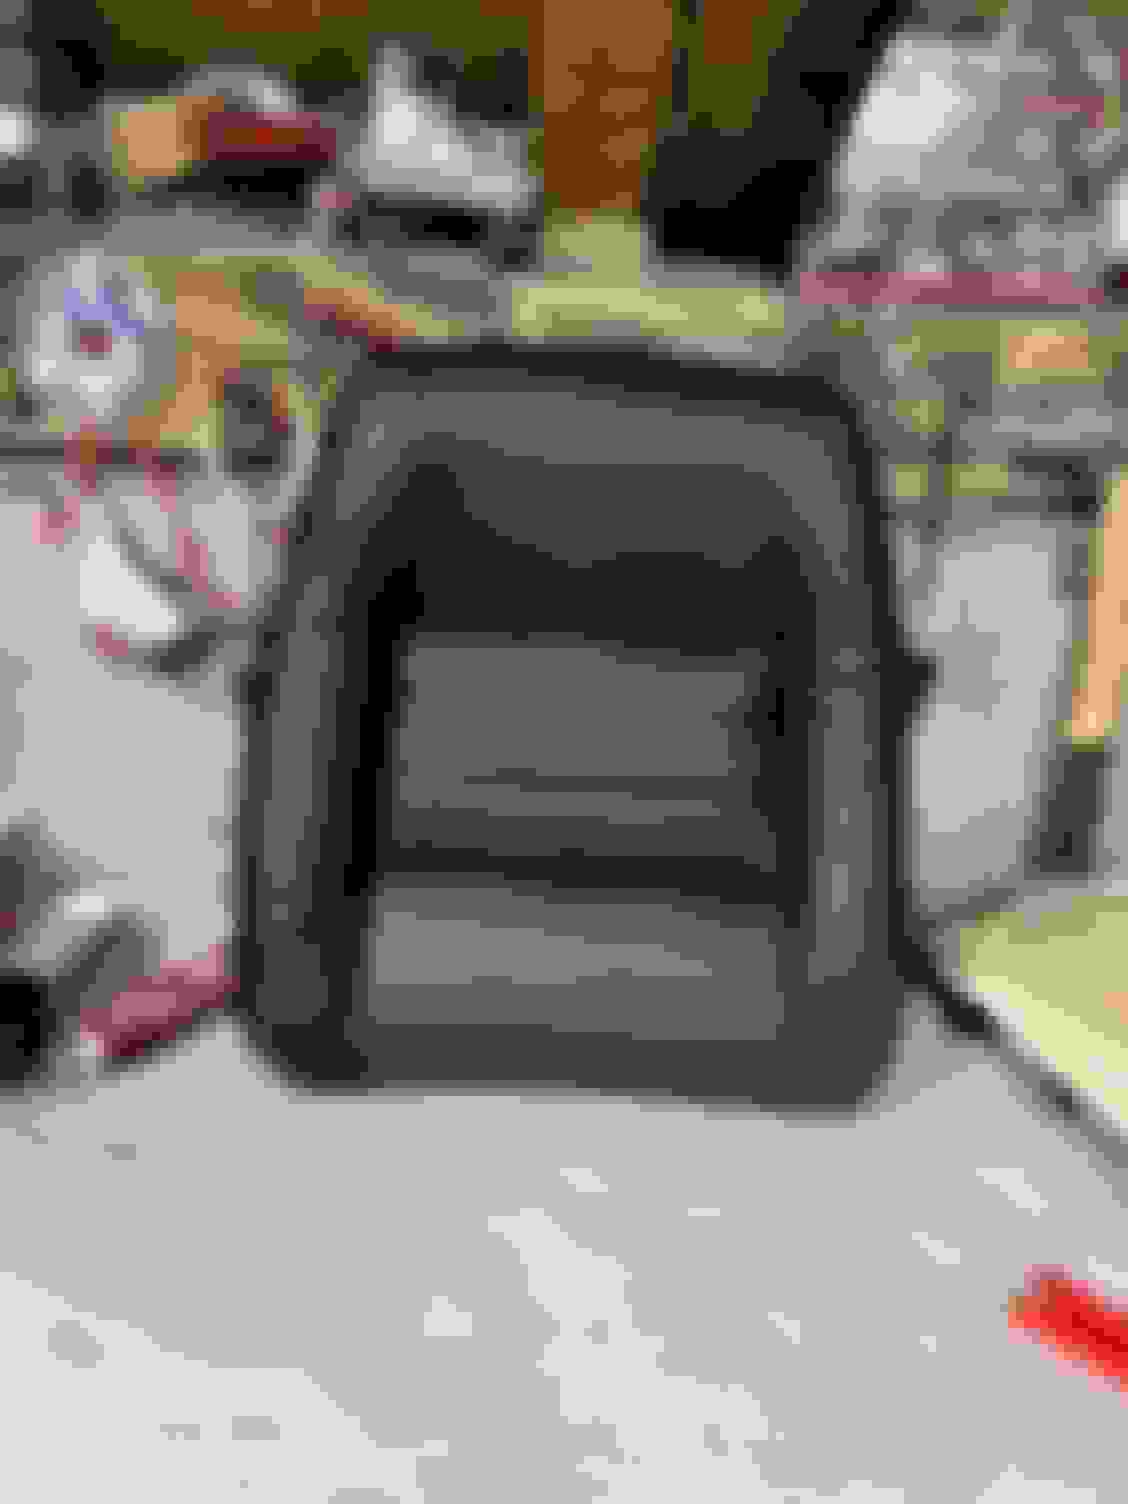
and the first one is done, just hangin’ off the chair.


Last edited by CubeBrick; 12-13-2023 at 03:20 AM.
The following 6 users liked this post by CubeBrick:
4-vettes (12-16-2023), 71BHG4SP (12-13-2023), Fred Catcott (02-10-2024), leadfoot4 (12-14-2023), russde (01-13-2024), stevedinino (12-12-2023) and 1 others liked this post. (Show less...)
Old 12-12-2023, 05:57 PM
  #3  
CubeBrick
Instructor
Thread Starter
 
CubeBrick's Avatar
 
Member Since: Feb 2023
Location: Croatia
Posts: 195
Received 261 Likes on 80 Posts
Default

It’s foam time… currently rebuilding it with hope that by tomorrow I’ll have my first one fully mounted.


Stay tuned…

The following 11 users liked this post by CubeBrick:
71BHG4SP (12-13-2023), BarrelCurve (02-19-2024), Barry's70LT1 (12-24-2023), interpon (12-13-2023), leigh1322 (12-12-2023), OldCarBum (12-14-2023), Peterbuilt (12-12-2023), ratflinger (12-12-2023), speedreed8 (12-12-2023), Stormin_Normin (12-12-2023), ZIOGEO (12-14-2023) and 6 others liked this post. (Show less...)
Old 12-12-2023, 08:52 PM
  #4  
ratflinger
NCM Grand Opening Veteran
Support Corvetteforum!
 
ratflinger's Avatar
 
Member Since: Sep 2005
Location: South of giving a damn
Posts: 20,909
Received 358 Likes on 250 Posts
St. Jude Donor '11, '17

Default

Damn, you are doing good work. I congratulate you on your ingenuity. The seats are coming along nicely and you should be rightly proud of the finished seats.
Old 12-12-2023, 09:27 PM
  #5  
stevedinino
Racer
 
stevedinino's Avatar
 
Member Since: Jan 2017
Location: Rock Hill South Carolina
Posts: 257
Received 113 Likes on 75 Posts
Default

Your concentration was indeed awesome! They look quite professional. Congratulations.
Old 12-12-2023, 10:06 PM
  #6  
stingrayiii67
Racer
 
stingrayiii67's Avatar
 
Member Since: Sep 2010
Location: Las Vegas Nv
Posts: 364
Received 216 Likes on 141 Posts

Default

Nice!
Old 12-13-2023, 10:08 AM
  #7  
CubeBrick
Instructor
Thread Starter
 
CubeBrick's Avatar
 
Member Since: Feb 2023
Location: Croatia
Posts: 195
Received 261 Likes on 80 Posts
Default

Last midnight job…

Internal mosaic painted by my 4 year old daughter. I thought it is a fun story to leave it inside.


Sewn in the slot ribbon for the holding wire


Here is the rebuilt foam. Added denser and thicker 1cm foam for upper and lower back (blue) and thinner 5mm for the sides to cover the repairs underneath (white).


And here is the pulling and stretching and hog-ringing and wasting sleep time last night


Especially pulling. It’s normal it wrinkles and doesn’t want to imediately form to new foam. Little bit of hairdryer heat helps a lot.


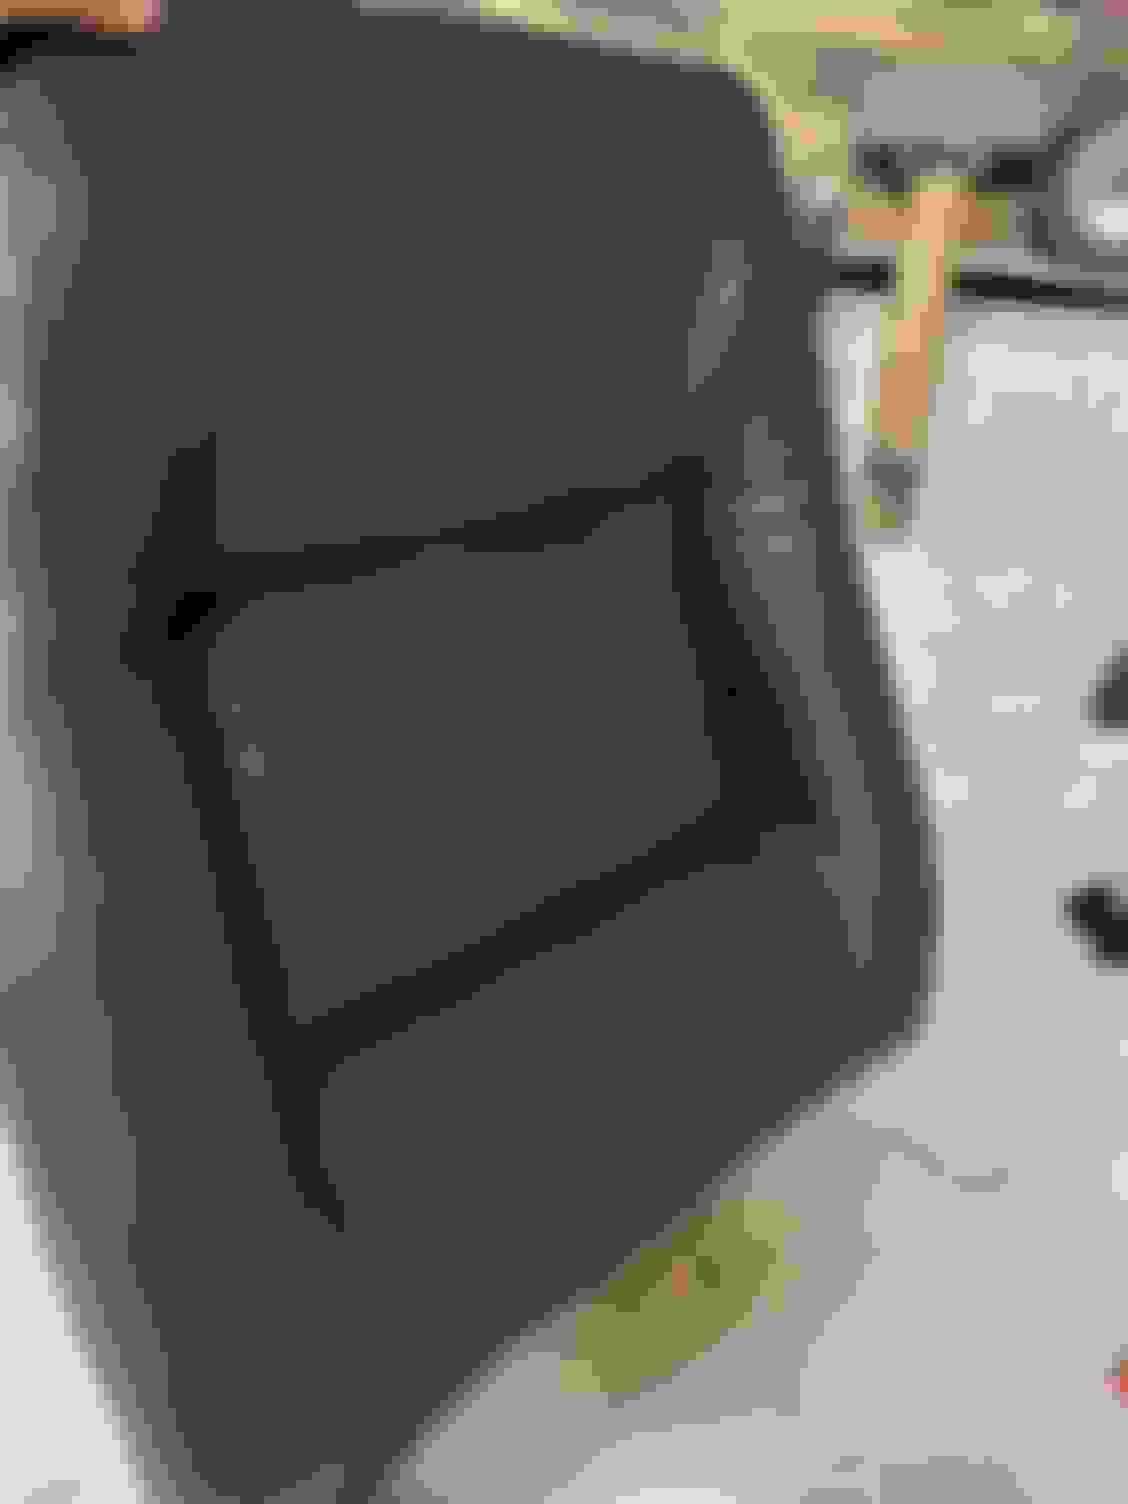
… and final product is here


It fits. Just need to heat it a bit more to alow wrinkles to settle.


Last edited by CubeBrick; 12-13-2023 at 09:17 PM.
The following 9 users liked this post by CubeBrick:
4-vettes (12-16-2023), augiedoggy (02-18-2024), BarrelCurve (12-23-2023), C6-CYa (01-02-2024), Greg (12-14-2023), leigh1322 (12-13-2023), stevedinino (12-13-2023), Tranz Zam (01-16-2024), ZIOGEO (12-13-2023) and 4 others liked this post. (Show less...)
Old 12-13-2023, 01:02 PM
  #8  
ukjohn
Racer
 
ukjohn's Avatar
 
Member Since: Oct 2018
Posts: 355
Received 75 Likes on 60 Posts
Default

You might find this thread useful when it comes to covering your door panels.
https://www.corvetteforum.com/forums...els-cheap.html
Old 12-13-2023, 02:03 PM
  #9  
CubeBrick
Instructor
Thread Starter
 
CubeBrick's Avatar
 
Member Since: Feb 2023
Location: Croatia
Posts: 195
Received 261 Likes on 80 Posts
Default

Originally Posted by ukjohn
You might find this thread useful when it comes to covering your door panels.
https://www.corvetteforum.com/forums...els-cheap.html
Awesome, thanks
Old 12-13-2023, 03:08 PM
  #10  
kanvasman
Melting Slicks
 
kanvasman's Avatar
 
Member Since: Dec 2012
Location: Summerville SC
Posts: 2,607
Received 802 Likes on 550 Posts

Default

Outstanding work. I know because I used to do this kind of stuff for a living. You have mastered the French seam. Truly impressive was your foam work. I was going to suggest using a steamer to fluff up the old foam, but you did a great job with the new stuff. If you end up with some bumps along the seams, sometimes the seam underneath flips over so you might just have to slip your hand inside and flip the seam so that it all lays in the same direction. But that doesn't seem ( sorry I couldn't resist) to be a problem. Now imagine, in 20 years when the next owner of your car pulls the upholstery apart and sees your daughter's mosaic. And wants to know if it came from the factory that way. What does it mean? Very nice work indeed. Keep the before pictures to show off your work.
Old 12-13-2023, 09:26 PM
  #11  
CubeBrick
Instructor
Thread Starter
 
CubeBrick's Avatar
 
Member Since: Feb 2023
Location: Croatia
Posts: 195
Received 261 Likes on 80 Posts
Default

Originally Posted by kanvasman
Outstanding work. I know because I used to do this kind of stuff for a living. You have mastered the French seam. Truly impressive was your foam work. I was going to suggest using a steamer to fluff up the old foam, but you did a great job with the new stuff. If you end up with some bumps along the seams, sometimes the seam underneath flips over so you might just have to slip your hand inside and flip the seam so that it all lays in the same direction. But that doesn't seem ( sorry I couldn't resist) to be a problem. Now imagine, in 20 years when the next owner of your car pulls the upholstery apart and sees your daughter's mosaic. And wants to know if it came from the factory that way. What does it mean? Very nice work indeed. Keep the before pictures to show off your work.
That sir are some kind words, thanks for the support. For someone who never touched a needle before, let alone a sewing machine that means a lot.

Second, that is a great advice with the seam bumps, that was the case in some places as a result of pulling in all directions, I’ve corrected it after the photos were taken.

Regarding steamer, I’ve tried but I wasn’t really happy with the results and I was affraid it would deflate again somewhere down the line. I don’t have the experience with longevity of such repair. In my mind the new foam made more sense.
Old 12-13-2023, 10:03 PM
  #12  
ddawson
Le Mans Master
 
ddawson's Avatar
 
Member Since: Mar 2001
Location: Lincoln, CA
Posts: 5,657
Received 600 Likes on 486 Posts

Default

Nice job
Old 12-14-2023, 08:19 AM
  #13  
Capt. Shark
Team Owner
 
Capt. Shark's Avatar
 
Member Since: Jan 2006
Location: Into the Mystic And yet, despite the look on my face, you're still talking TN
Posts: 35,816
Received 155 Likes on 108 Posts
St. Jude Donor '09-'10-'11-'12-'13-'14-'15-'16-'17-‘18-'19-'20-'21-'22-'23


Default

impressive
Old 12-14-2023, 08:45 AM
  #14  
Sigforty
Le Mans Master
 
Sigforty's Avatar
 
Member Since: Apr 2001
Location: Was New Orleans but swam to Baton Rouge LA
Posts: 5,928
Received 275 Likes on 232 Posts
Cruise-In IX Veteran

Default

Nice work!
Old 12-14-2023, 11:32 AM
  #15  
leadfoot4
Team Owner
 
leadfoot4's Avatar
 
Member Since: May 2001
Location: Western NY
Posts: 82,849
Received 1,344 Likes on 1,095 Posts

Default

Originally Posted by Sigforty
Nice work!
Old 12-14-2023, 11:50 AM
  #16  
OldCarBum
Race Director
 
OldCarBum's Avatar
 
Member Since: Mar 2016
Location: Napa California
Posts: 10,465
Received 4,729 Likes on 2,951 Posts
Default

Beautifully done!
Amazing work!
Old 12-15-2023, 05:33 PM
  #17  
CubeBrick
Instructor
Thread Starter
 
CubeBrick's Avatar
 
Member Since: Feb 2023
Location: Croatia
Posts: 195
Received 261 Likes on 80 Posts
Default

A little update from today. Painted the shell satin black (between glossy and matte) and mounted the upper part.


And here are both upper parts thrown in the same shell just to glimpse over the final look.


Tomorrow I will be starting on the bottoms.

Stay tuned…
The following 3 users liked this post by CubeBrick:
OldCarBum (12-16-2023), Stormin_Normin (12-21-2023), Tranz Zam (01-16-2024)

Get notified of new replies

To Upholstery job

Old 12-15-2023, 06:07 PM
  #18  
kanvasman
Melting Slicks
 
kanvasman's Avatar
 
Member Since: Dec 2012
Location: Summerville SC
Posts: 2,607
Received 802 Likes on 550 Posts

Default

Old 12-15-2023, 07:56 PM
  #19  
Stormin_Normin
Racer
 
Stormin_Normin's Avatar
 
Member Since: Jun 2021
Posts: 380
Received 177 Likes on 122 Posts
Default

Very nice, and to think I struggled with a pre made kit.
The following 2 users liked this post by Stormin_Normin:
augiedoggy (02-18-2024), OldCarBum (12-16-2023)
Old 12-17-2023, 07:01 AM
  #20  
CubeBrick
Instructor
Thread Starter
 
CubeBrick's Avatar
 
Member Since: Feb 2023
Location: Croatia
Posts: 195
Received 261 Likes on 80 Posts
Default

and we have no bottom twins


Last edited by CubeBrick; 12-20-2023 at 01:12 AM.
The following 3 users liked this post by CubeBrick:
BarrelCurve (02-19-2024), kanvasman (12-17-2023), OldCarBum (12-17-2023)


Quick Reply: Upholstery job


All times are GMT -4. The time now is 08:55 PM.