When you click on links to various merchants on this site and make a purchase, this can result in this site earning a commission. Affiliate programs and affiliations include, but are not limited to, the eBay Partner Network.
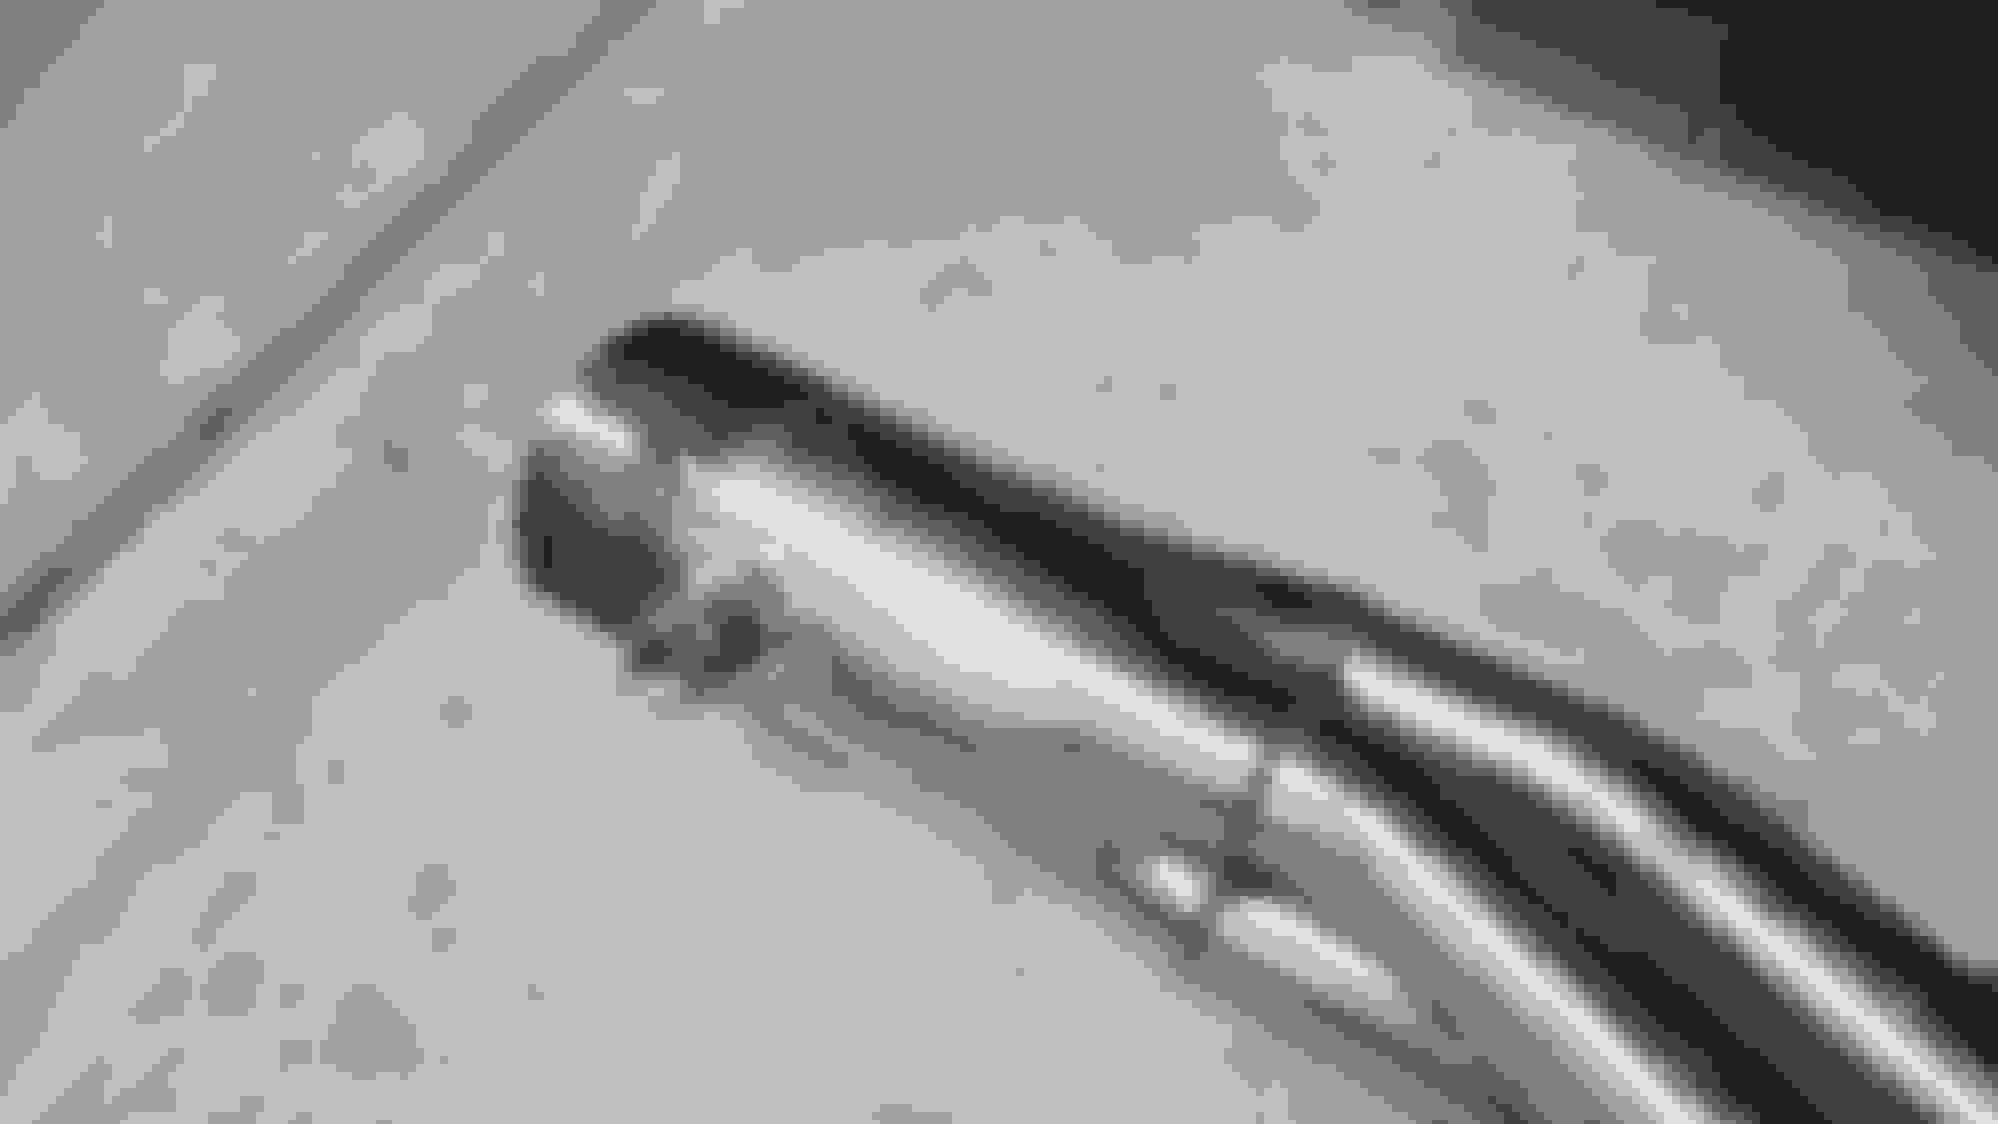
Here's the new C5 master cylinder installed. I also added a "centering bushing" to take up some of the dimensional slack between the bore of the hydraboost and the O.D. of the new C5 MC. Fits like a glove.
Notice the bushing. It's made out of a industrial grade nylon custom printed via a 3D printer.
Here is a matrix for various ATI ProCharger setups. Some of these parts may be superceded or obsoleted. This just for information / reference. It may point folks in the right direction on their own individual project needs.
For reference:
Here are some pulley arrangement pictures as requested. I also added these to the main thread for reference there.
Here's alternator / water pump / crank pulley arrangement. Notice they all have the ATI ProCharger pulleys on them. This will allow those accessories to work with the V-belt SC crank pulley.
Here is the P/S pulley with the crank pulley down below. The P/S pump has to be shifted to align correctly. I talk about this in the main thread.
Also, just got done designing / fabricating a spreader bar modification for the supercharger application.
Here's the rough configuration:
Here are the brackets finished and painted. I'll install this soon. This should clear all of the supercharger and engine components - and stiffen those shock towers.
Our builds are almost in lockstep, I'm actually doing the same thing at the moment, since the SC belt runs right where the bar is suppose to be...
Hahahah... We have some differences - but not much. Awesome. Hopefully we will have a good blueprint on how to pull this off for other users.
The biggest difference I've noticed in terms of SC selection though: I didn't have to modify my hood to get the procharger to fit. The vortech seems to have an extra "hump" where the pulley mounts - the procharger has a more compact profile. That seems to be the difference. Folks who have the vortech are asking me how I fit it under the stock hood without cutting something. They are different slightly in design. It's sort of like "pick your poison"...
Here's the new spreader bar mounting brackets. They are in place, and I had to notch out a little bit of room on the driver's side to allow some decent clearance for the P/S pump. I removed the supercharger unit to allow some engine work space. I'm getting pretty quick at that, basically disconnect the piping and three bolts - and the whole assembly comes out. I'll leave it for a while until I get some of my other project work around the engine done.
This is a driver's side to passenger side view. Notice the tight fit for the P/S pump / reservoir.
Here's another view. You can see the bracket relocator block on the front of the driver's side head here. Enjoy this view, once the supercharger is back in, I won't be able to access most of this stuff, let alone see it...
I'll install the rod ends and rod soon, and post some new pictures.
Thanks. Hafnium has some unique applications. It has some unique properties as well. It is used in the nuclear industry (power) too. It can be a interesting sidebar conversation...
Thanks. Hafnium has some unique applications. It has some unique properties as well. It is used in the nuclear industry (power) too. It can be a interesting sidebar conversation...
We created hafnium oxide used as a high K film dielectric to insulate the gate structure of the transistors in our DRAM products. We have since moved on to better films as hafnium oxide has poor thermal stability.
I'll leave it at that as I don't want to hijack your thread.
We created hafnium oxide used as a high K film dielectric to insulate the gate structure of the transistors in our DRAM products. We have since moved on to better films as hafnium oxide has poor thermal stability.
I'll leave it at that as I don't want to hijack your thread.
Here's the finished spreader bar customized for the supercharger project. Notice it will clear all of the accessories and hopefully lock down those shock towers.
I modified my original timing curves - based upon some recommendations from others. The "fast burn" aluminum heads such as AFR and others, seem to respond better (with the low boost applications) pulling more timing out quicker. Lars has a good write up on his supercharged C3 on this with actual testing. So, until I get into that phase of testing, I'm going to start with taking out about 3 degrees per pound of boost (after an initial boost level of about .75 to 1 pound of boost). This will max out on my setup by taking out about 13 degrees of timing. Attached are the curves I will use, note that everything pressure related (the bottom curve) is in psia.
The SC project is still underway. I've had to break off from it for a while to work on the Tremec T-56 Magnum install. So I've been working on that. Also, I decided to go with EFI on my Vette as well. I've already modified my fuel delivery system to incorporate this change. It wasn't difficult since I had already converted to the in the tank fuel pump and regulator. I just had to change the spring and re-route the fuel lines a little. I'll get some pictures up soon.
Here's an interesting picture of a O2 sensor in a 4" diameter sidepipe! You don't see that every day. I welded in an O2 bung just back from the collector of the side mount headers. It will be on the inside of the car, so not really something you can see unless under the car. This was part of my conversion to EFI. More to come...
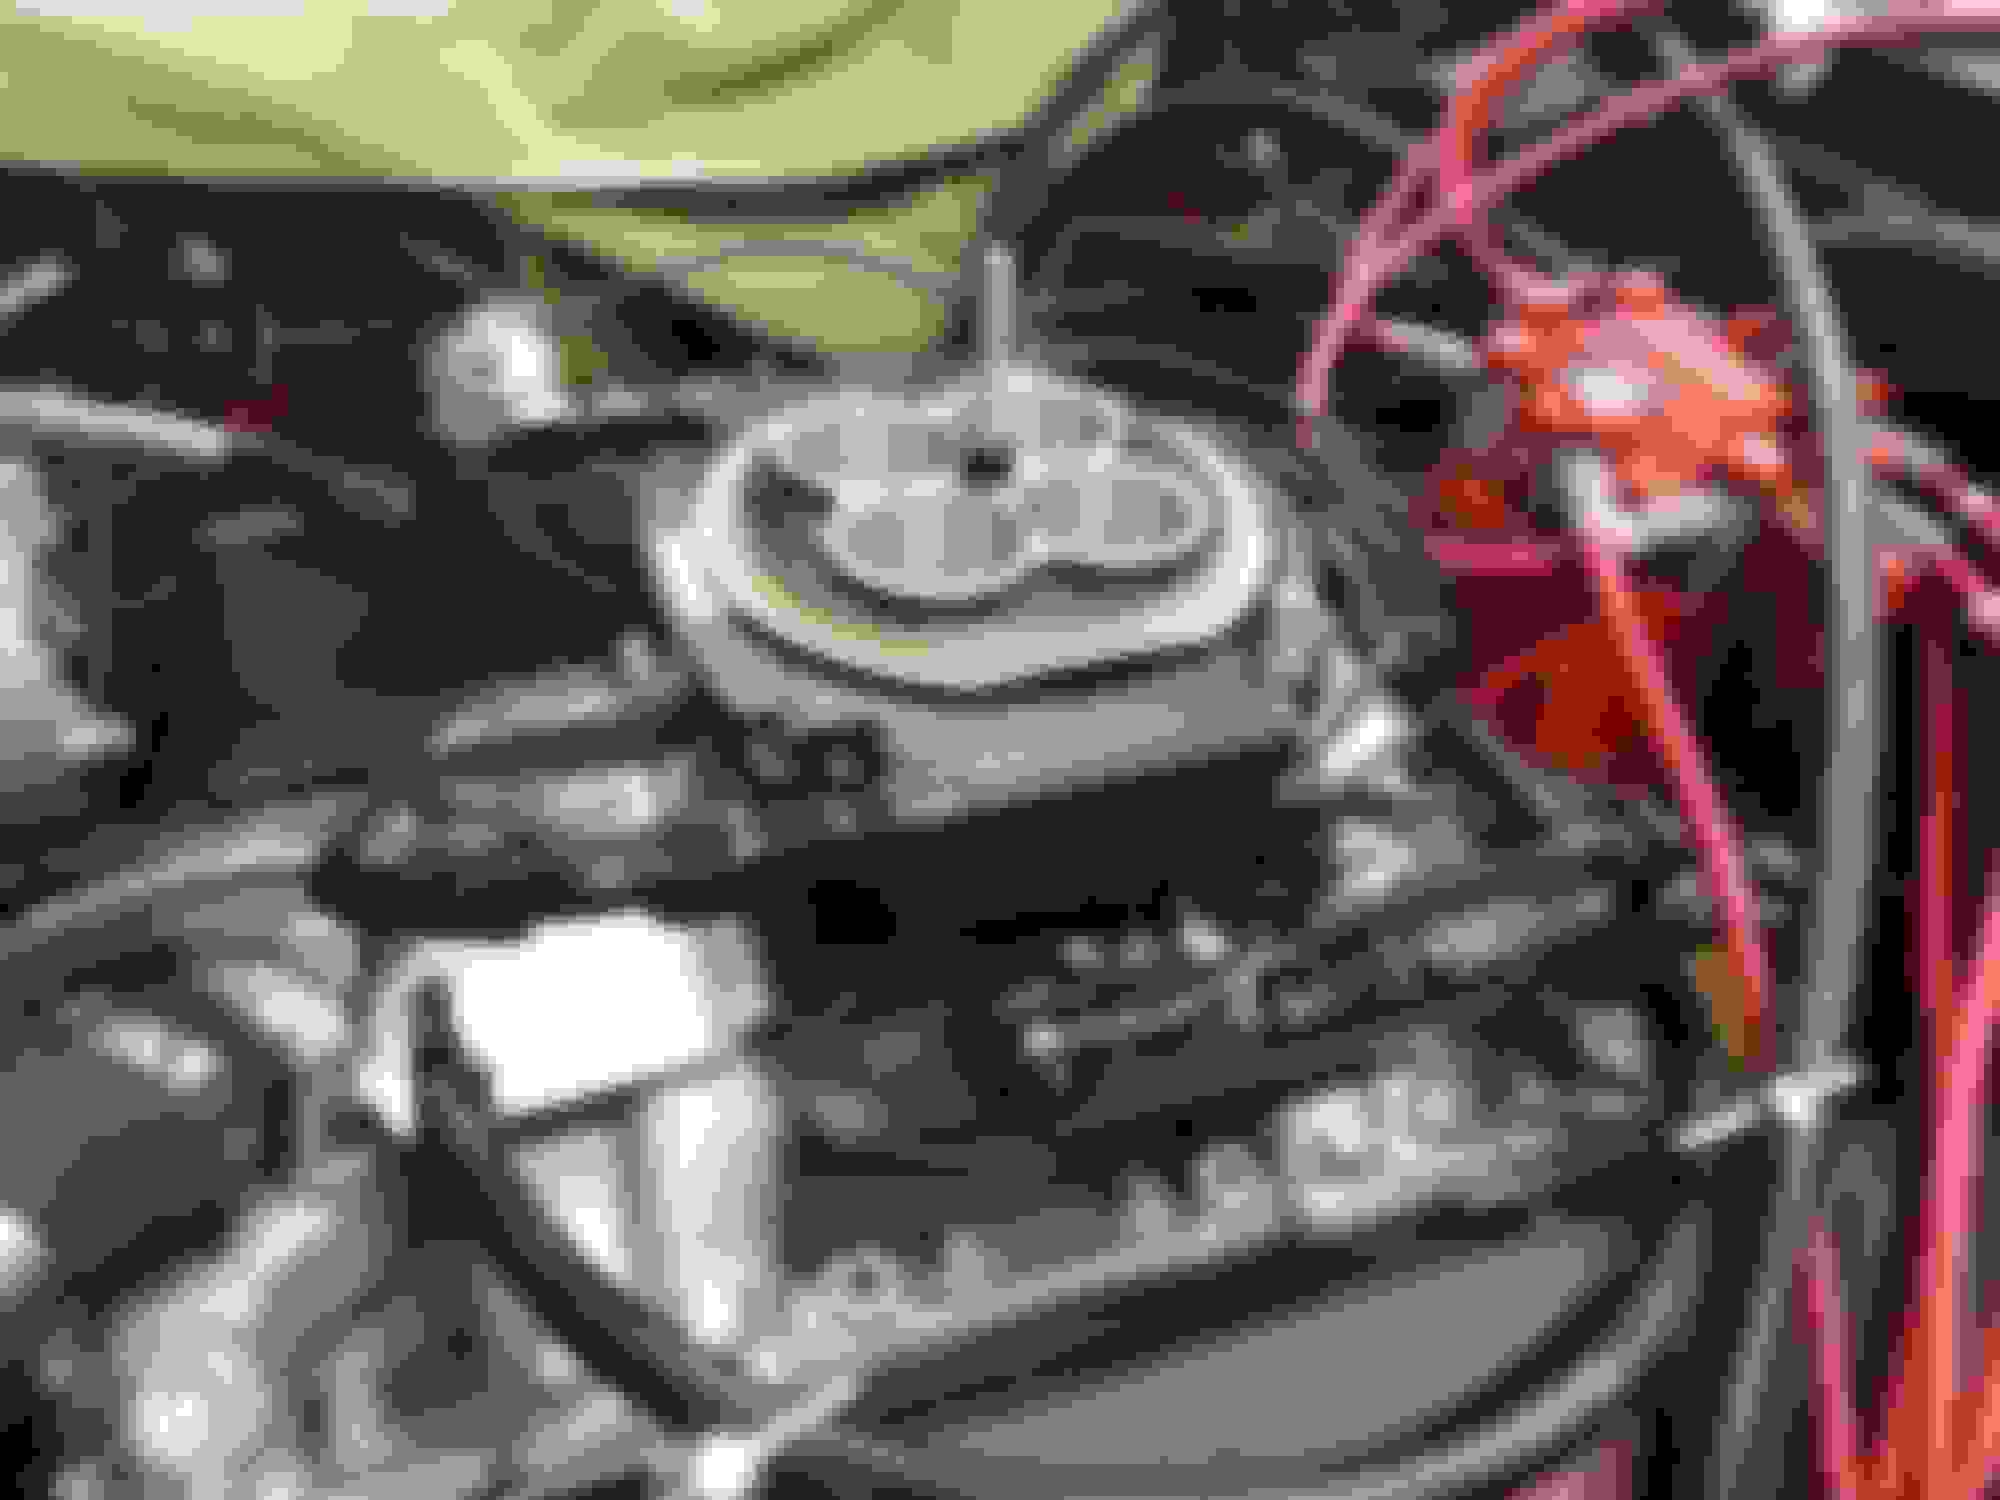
Here is the new EFI throttle body. I have the fuel lines and regulator set up for this new equipment, and this should allow easier tuning than the carb set up. The unit can do many things including timing control, transmission control, obviously fuel control etc... I'm going to opt to keep my timing controlled by the MSD system, but if that ever dies, I'll probably let the EFI unit do it. I will have to re-route the SC plumbing again, since some of the intake snorkel dimensions changed from the carburetor set up. The EFI unit allows you to "richen" up the fuel as boost comes on as well as other features. All in all, these units have gotten better and better over the years, as well as the cost coming down. When I first started this project, most of the EFI options were cost prohibitive for me since the project itself was going to be expensive for the whole thing. When I re-evaluated the need, the prices had come down significantly. Enough where I could pull the trigger.

 06-18-2019, 03:08 PM