When you click on links to various merchants on this site and make a purchase, this can result in this site earning a commission. Affiliate programs and affiliations include, but are not limited to, the eBay Partner Network.
Would this compressor work? I can rent it from Autozone for free. The threaded shaft is 12" long. I only need to use the one claw which is all this tool has. I don't need to use that large flat piece.
All the spring compressors, safety chains, and threaded devices is kind of dumb and a serious time waster. We change springs at the track between heat races.. With a big hammer and air guns it probably isn't an hour to R&R both front springs and throw on a new set of brake pads. ON a stock kind of setup
The shock is the safety device. ( you have to install it anyway... Right?)
I did a write up on this years ago. Maybe try and find it. Shorter springs are even easier. With the spring in the lower a-arm pocket raise up the lower a-arm until you can install the shock. Bolt the shock on the bottom and a few threads on the top. Put your spindle on with a few threads when you are in position with the spring starting to compress. TQ your ball joints and install cotter pins.
Coat the ball joint tapered shafts with a light coat of grease or spray silicone, so they come apart easier next time.
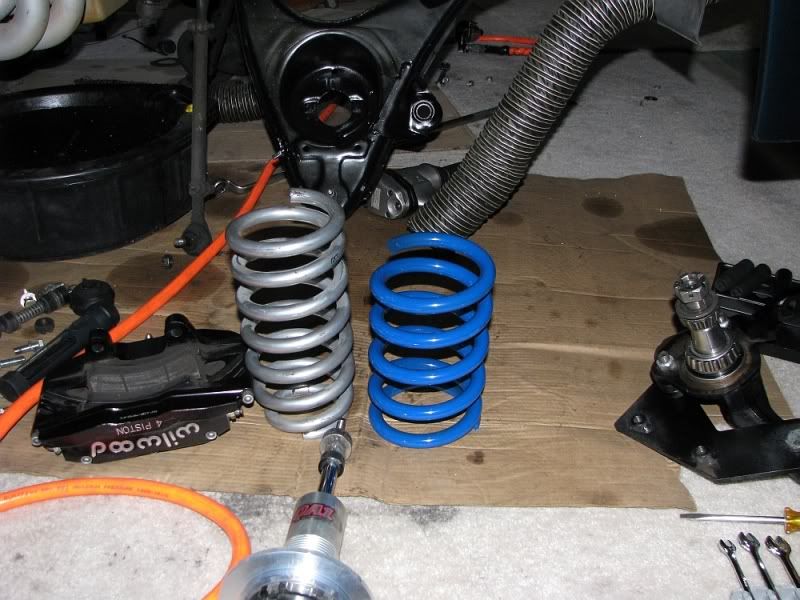
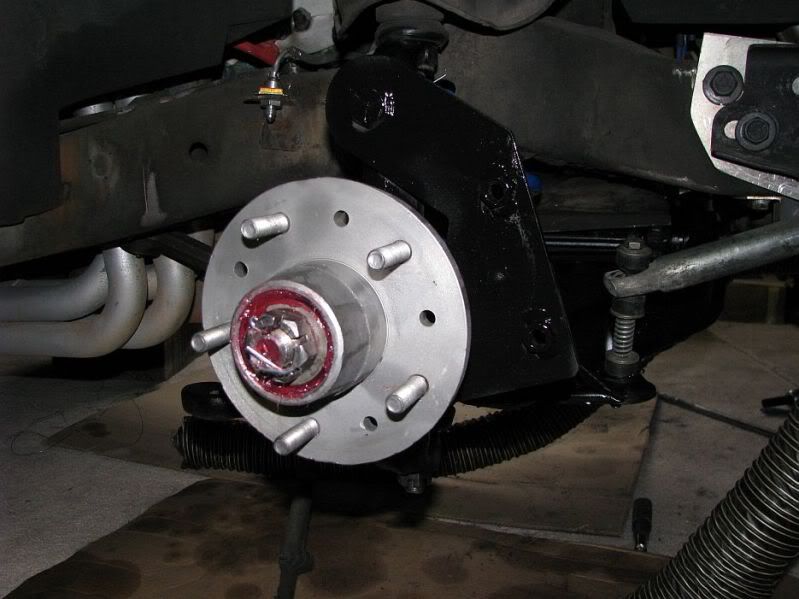
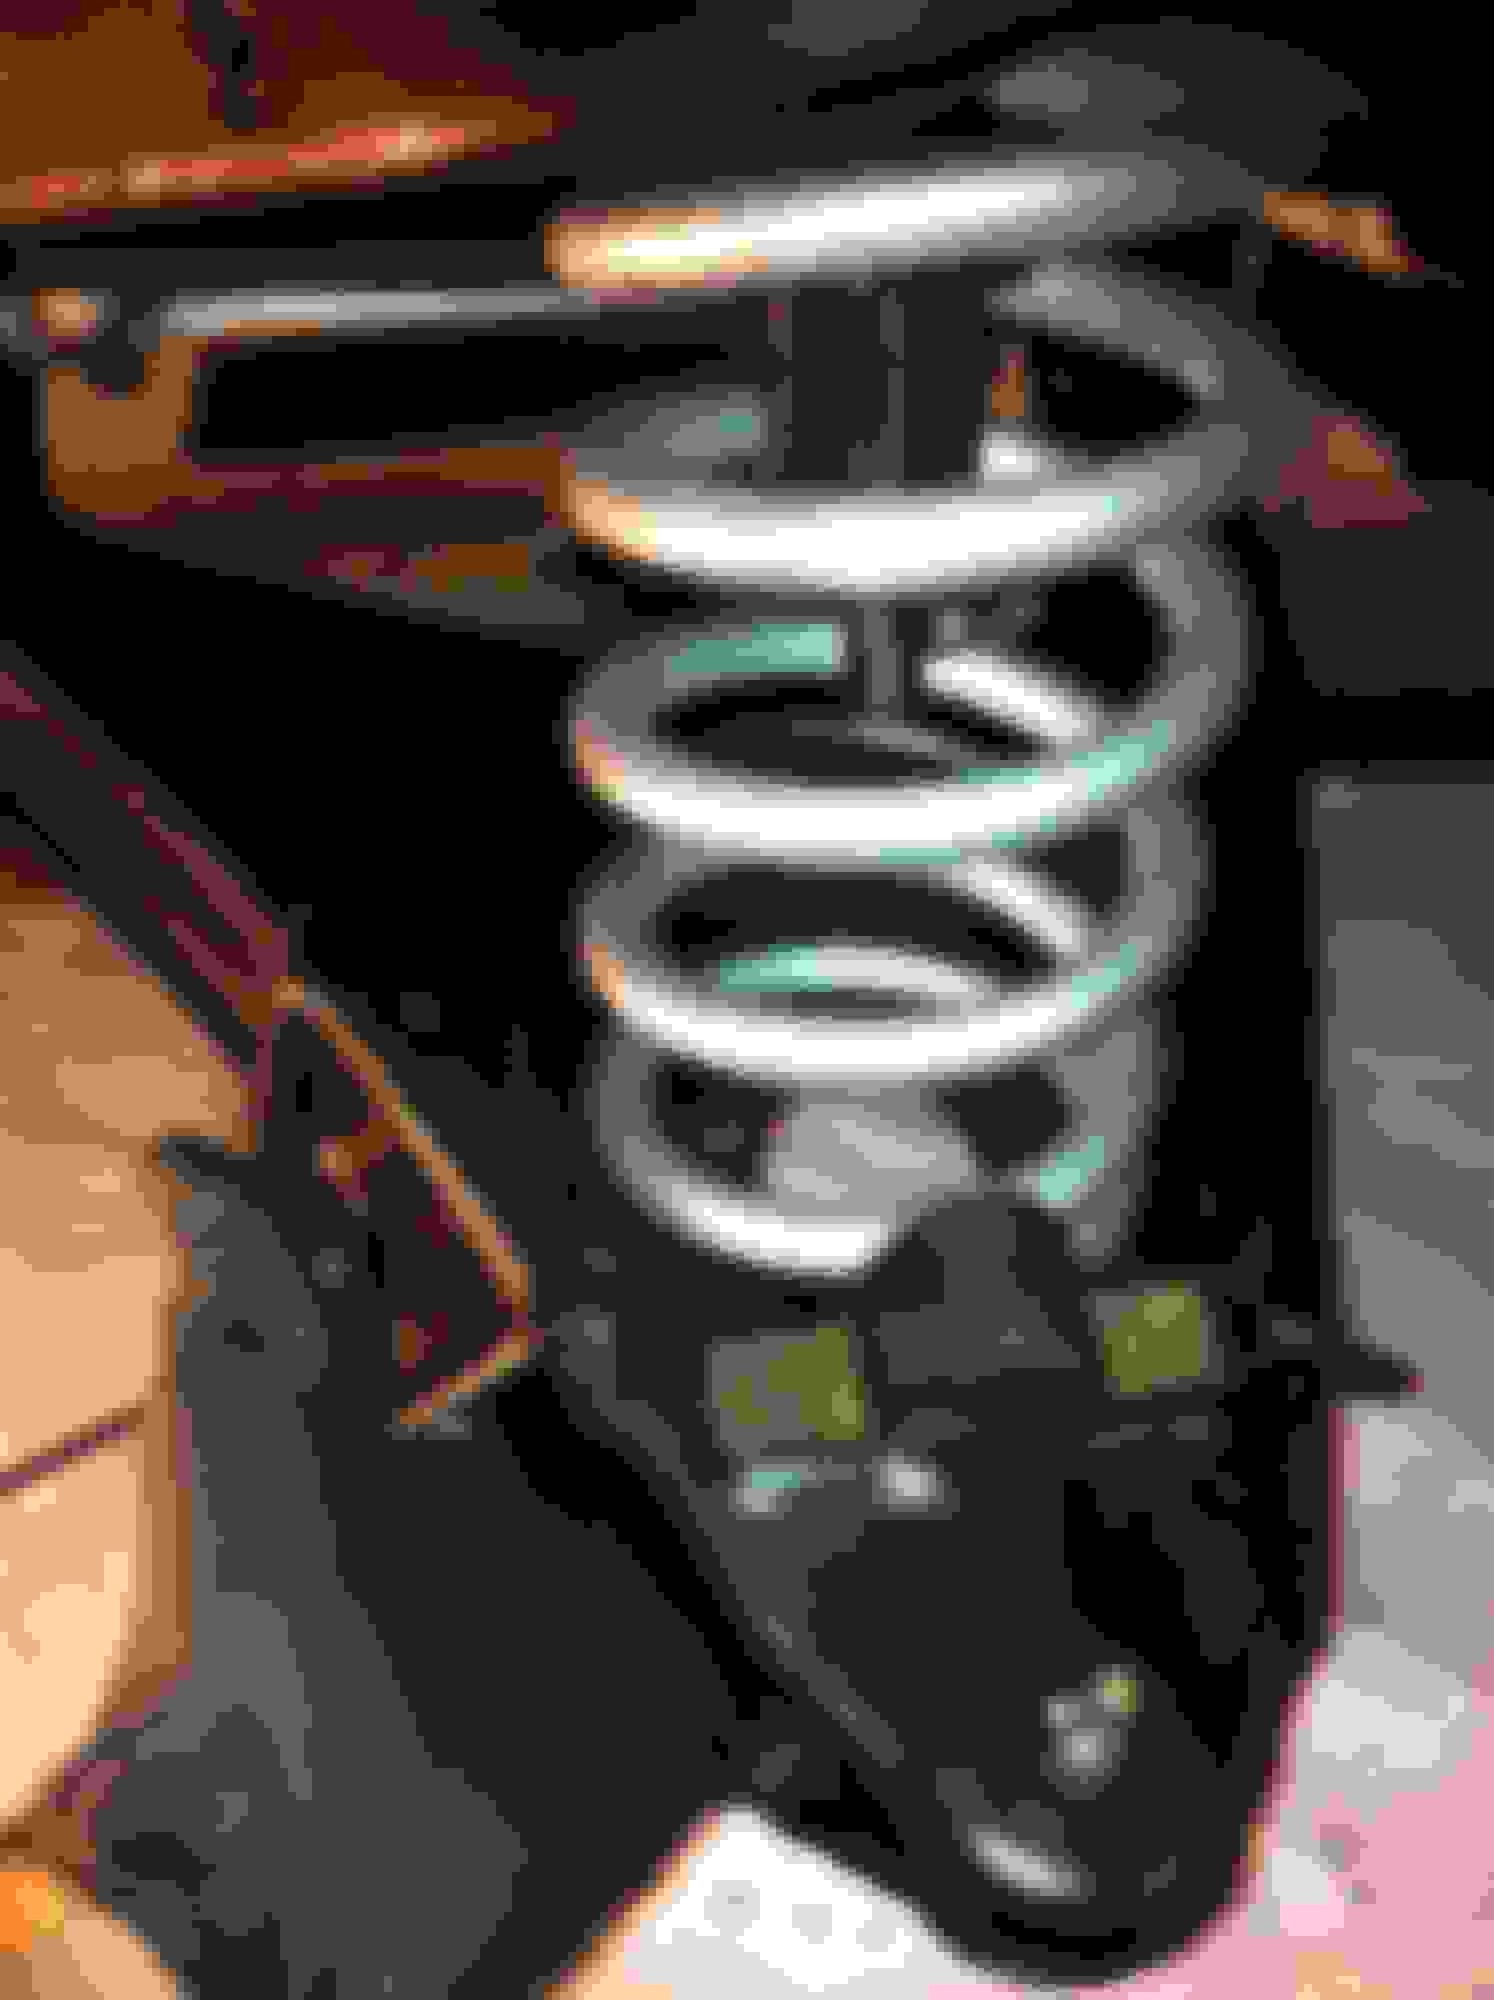
This is my QA-1 setup, but while I had it apart i media blasted the hubs and installed new wheel bearings
All the spring compressors, safety chains, and threaded devices is kind of dumb and a serious time waster. We change springs at the track between heat races.. With a big hammer and air guns it probably isn't an hour to R&R both front springs and throw on a new set of brake pads. ON a stock kind of setup
The shock is the safety device. ( you have to install it anyway... Right?)
Coat the ball joint tapered shafts with a light coat of grease or spray silicone, so they come apart easier next time.
I did a write up on this years ago. Maybe try and find it. Shorter springs are even easier. With the spring in the lower a-arm pocket raise up the lower a-arm until you can install the shock. Bolt the shock on the bottom and a few threads on the top. Put your spindle on with a few threads when you are in position with the spring starting to compress. TQ your ball joints and install cotter pins.
This is my QA-1 setup, but while I had it apart i media blasted the hubs and installed new wheel bearings
I have a totally stock set up. Above you mention:::
I did a write up on this years ago. Maybe try and find it. Shorter springs are even easier. With the spring in the lower a-arm pocket raise up the lower a-arm until you can install the shock. Bolt the shock on the bottom and a few threads on the top. Put your spindle on with a few threads when you are in position with the spring starting to compress. TQ your ball joints and install cotter pins.
Using this method... how do you get the top of the spring into the correct position? Mine is completely out of position. I don't want to wail on it with a large hammer. Its a brand new coil spring.
Hi jg,
That's what I use (the part on the left) with a bit longer bolt (rod) so the part on the left (don't know what to call it) can extend down further into the spring when it starts to pull.
Since your spring is shorter to begin with, THAT bolt may well work.
If you look at my pic the piece with the hooks is in the third coil from the bottom.I put dt on the hooks to help from damaging the finish on the spring.
As others have mentioned put grease between the washers to help them to not want to bite into each other but spin instead.
Again, good luck.
Regards,
Alan
I just haven't ever had any success trying to pull the spring down into the lower a-arm… I've always resorted to pulling it up into the pocket. I STILL sit back and smile when both spindle nuts are in place!
I hope you are wrong about that. The Moog springs I bought are part # 5758 and they are supposed to be stock ride height. I will say that they are MUCH shorter than the stock springs I removed. I called them about that and they said its because the bar diameter is larger than stock. All the pictures I have seen online with these coil springs look pretty much like a stock ride height.
I am sorry to say that I am not based on the number of people I have read about that have replaced theirs.....
The MOOG springs are shorter overall out of the box but lbs./in is higher overall.....even though the spring is shorter...it does not compress as much from the weight of the vehicle.....
I read a good number of threads not only here but on other sights and the consensus was that the MOOG's make the car sit higher.
My 69' had a receipt in it from 1994 (Yes 94'!) that said that MOOG springs were installed......and it was nose high stock...about 1 1/2" too high......I could not stand the look so out came a coil.....
I can tell you that the car actually handled a lot better sitting lower. It was noticeable...
I know this is not what you want to hear....but it is what I know.
Using this method... how do you get the top of the spring into the correct position? Mine is completely out of position. I don't want to wail on it with a large hammer. Its a brand new coil spring.
Oh NO you use the big hammer to break the tapered ball joints out. Some springs are not cut right to match up. So I only get the bottom correct. You might like mentioned have to cut the coil to get the correct ride height.
You're working too hard.
I use a standard GM spring compressor.
Use only the threaded rod, washers, and just one hook.
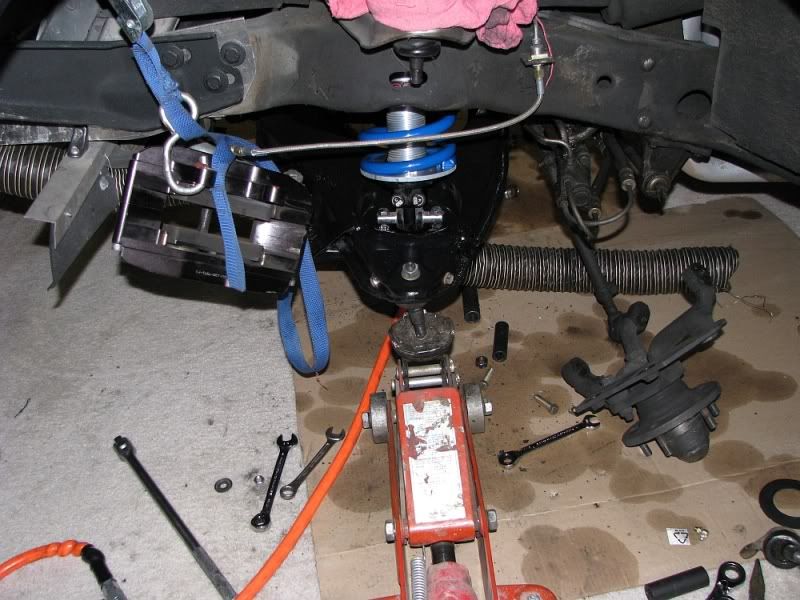
Drop the threaded rod through the washers & down the shock tower and place the single hook midway down the spring facing toward the A-arm/engine and rotated so the lower end is roughly orientated for the index hole in the lower A-arm. Crank down on the top bolt to compress the spring. During compression this causes the spring to arc toward the lower A-arm pocket. Once the bottom of the spring is high enough you can swing the lower arm into position with your hand with no trouble at all. Place a jack under the A-arm and install your steering knuckle.
I'm fighting this as well. I think I screwed myself by using my Kwiklift lift hard to jack up the lower arm. This is what I did today with success. Used my spring compressor from top down to hold spring in place at the top. Greased the bottom of the spring I wired the jaws to the coil hoping they wouldn't slip off again. Cranked it up took a pry bar and prayed it over at the bottom while lifting with a bottle jack. First time it went in a jaw slipped off and the top slid over second time it fell right in. The top hole to see it you have to raise upper control arm it's hard to see with the spring in there. Try running your hand around up there you'll feel a hump
I start with the spring in place up top, and as you start to jack up the bottom, and get some tension on the spring you can pry it over into the lower pocket, and it will stay in the pocket up top also because of the tension.
It is a lot easier to do it with the engine in it because of the weight required to compress the spring.
All the spring compressors, safety chains, and threaded devices is kind of dumb and a serious time waster. We change springs at the track between heat races.. With a big hammer and air guns it probably isn't an hour to R&R both front springs and throw on a new set of brake pads. ON a stock kind of setup
The shock is the safety device. ( you have to install it anyway... Right?)
I did a write up on this years ago. Maybe try and find it. Shorter springs are even easier. With the spring in the lower a-arm pocket raise up the lower a-arm until you can install the shock. Bolt the shock on the bottom and a few threads on the top. Put your spindle on with a few threads when you are in position with the spring starting to compress. TQ your ball joints and install cotter pins.
Coat the ball joint tapered shafts with a light coat of grease or spray silicone, so they come apart easier next time.
This is my QA-1 setup, but while I had it apart i media blasted the hubs and installed new wheel bearings
That's all fine and dandy but try doing that with no motor or transmission's weight to help compress the springs
You're working too hard.
I use a standard GM spring compressor.
Use only the threaded rod, washers, and just one hook.
Drop the threaded rod through the washers & down the shock tower and place the single hook midway down the spring facing toward the A-arm/engine and rotated so the lower end is roughly orientated for the index hole in the lower A-arm. Crank down on the top bolt to compress the spring. During compression this causes the spring to arc toward the lower A-arm pocket. Once the bottom of the spring is high enough you can swing the lower arm into position with your hand with no trouble at all. Place a jack under the A-arm and install your steering knuckle.
I`ve done it this way too. Not just on Corvettes either....
I can rent a coil spring compressor like that one at Autozone I think. The threaded shaft length is 11.25". Is that long enough? All the ones I found online to buy state approx. 12" length for the shaft. I did a rough measurement of mine coil spring and shock tower and it appeared that around 13" to 15" would be the length required.
That's all fine and dandy but try doing that with no motor or transmission's weight to help compress the springs
I would take care of the motor and tranny before i worried about springs. Very early in my vetting career I tried a couple of kinds of threaded spring compressors and I determined really fast that the floor jack and keeping the shock in place as a safety device was the best and quickest way to go. Air hammer with a fork for the steering ball joints and I have this in my tool box.
I would take care of the motor and tranny before i worried about springs. Very early in my vetting career I tried a couple of kinds of threaded spring compressors and I determined really fast that the floor jack and keeping the shock in place as a safety device was the best and quickest way to go. Air hammer with a fork for the steering ball joints and I have this in my tool box.
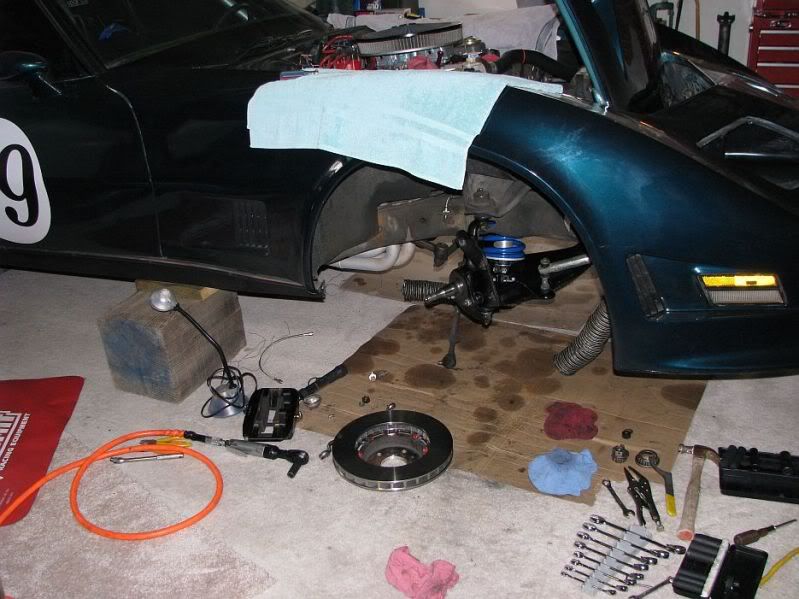
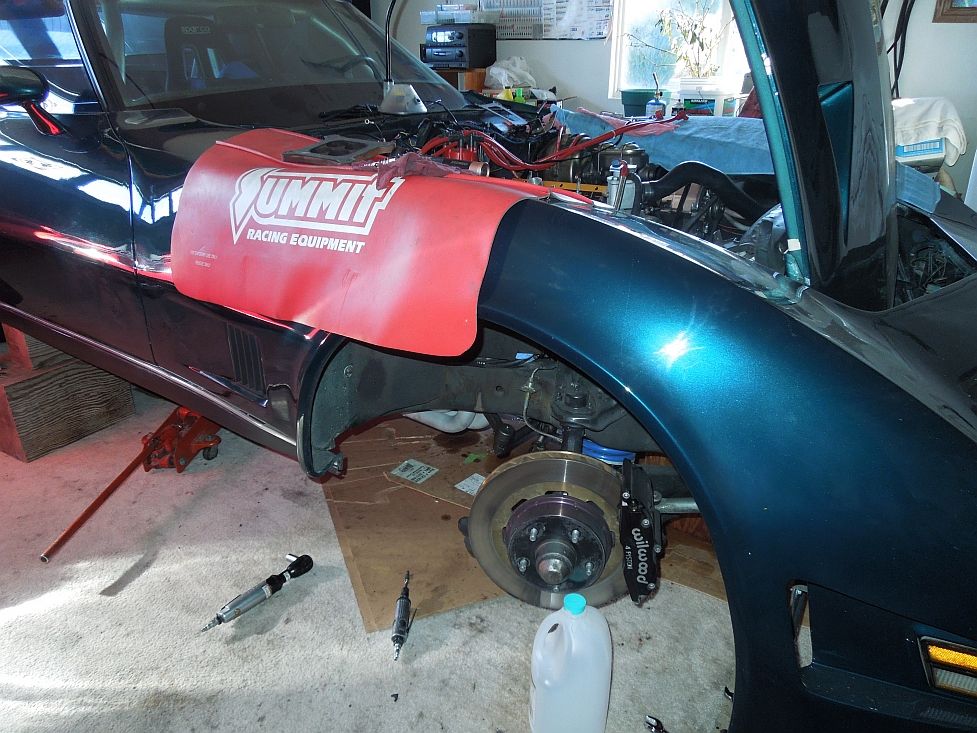
It looks like you are doing a nice restoration! I did a body off on my 61 with a powder coated frame and a painless wiring kit. About two years from when we winched on to a car hauler from behind a barn where I had seen it sitting for 12 - 15 years. I finally stopped in and ask him about the Vette sitting with some other dead farm equipment. It even had a bullet hole in the front windshield.
It looks like you are doing a nice restoration! I did a body off on my 61 with a powder coated frame and a painless wiring kit. About two years from when we winched on to a car hauler from behind a barn where I had seen it sitting for 12 - 15 years. I finally stopped in and ask him about the Vette sitting with some other dead farm equipment. It even had a bullet hole in the front windshield.
Thanks a lot. I am doing the best I can. I was a motorhead back in the 70's and 80's but got into Harley's for about 20 years and got out of cars. In December I had a very unexpected heart attack (the widow maker) that permanently damaged my heart so I sold the bikes and bought the vette. I don't have a lot of stamina to work on it but I put in as much effort as I can. That's why I am asking so many questions. I don't have the energy to do things twice so I am trying to do them once and once correctly! The car was a driver when I bought it but I have always wanted a stingray body with a 4spd, headers and side pipes. I want the car to look like an 80's street rod so even though its going to be clean its not going to be that clean. I am more into the structural part of the car... suspension, steering and powertrain. The body is a 20 footer. Because its yellow it screams attention. Its also a 4spd which I was surprised to find out is not that common. This is my first vette. I have wanted one since I was 10 years old which was 44 years ago! Anyway.. thanks.. and thanks for the help.
I start with the spring in place up top, and as you start to jack up the bottom, and get some tension on the spring you can pry it over into the lower pocket, and it will stay in the pocket up top also because of the tension.
It is a lot easier to do it with the engine in it because of the weight required to compress the spring.
I am sorry to say that I am not based on the number of people I have read about that have replaced theirs.....
The MOOG springs are shorter overall out of the box but lbs./in is higher overall.....even though the spring is shorter...it does not compress as much from the weight of the vehicle.....
I read a good number of threads not only here but on other sights and the consensus was that the MOOG's make the car sit higher.
My 69' had a receipt in it from 1994 (Yes 94'!) that said that MOOG springs were installed......and it was nose high stock...about 1 1/2" too high......I could not stand the look so out came a coil.....
I can tell you that the car actually handled a lot better sitting lower. It was noticeable...
I know this is not what you want to hear....but it is what I know.
Jebby
Yes, Jebbysan is correct.
My own personal experience on my '76 this summer - Pulled the stock springs and cut off a coil to lower the car. Still didn't care for the look so ordered a pair of the MOOG springs from local parts store for like $60 and had the next day. Wow, much shorter than stock so this should sit much nicer. Then I measured the wire diameter and seeing the difference, was now not so sure how it would sit. Installed the springs and the car sat a good 2 inches higher than with the stock springs! I have taken a lot of weight off the front of my Vette, but didn't think it was that much.
Pulled the springs back out again and cut off one full coil and re-installed. Car sits perfect and handles much better than before. Installed longer bolts in the rear to level out the car. Looks great.
I did use a safety chain when installing the springs, but no compressor. Doing just what you started out doing, I would raise the lower arm until the spring was going up into the frame opening and put some pressure on it. Took a 4ft long 2x4 and put against the spring right under the frame rail. A good smack on the 2x4 with a small sledge and the spring moved over. A little more tension on the jack and another smack and the spring moved right over into its' pocket. Did it this way all 3 times and worked perfect every time. Where you contact the spring with the 2x4 ends up inside the frame rail, so you don't even see any mark that might have been made.
Your installation was much like mine......but my Bull Ox buddy Dave smacked the spring in with his hand!
And yes.....the slightly increased spring rate of it being cut and the lowered ride height made a VERY nice handler out of a Big Block Air Car.......255/60/15 tires all around and Bilsteins made for a rip in the twisties.....
If I were to do it again....I would cut a coil from the Moogs right out of the box.....
I have a 76' coming this weekend for some work...and it sits like a truck due to new Moog springs.......the owner is fine with it...but, well, you know!
The control arms should be connected to the spindal with he spring in its pocket. When you compress the spring your final connection is lower control arm to frame. That is how we did it at the dealership for years. The manual shows this procedure. That is how the factory did it except the frame was upside down. All Chevrolet with control arms are done this way.

 11-16-2015, 01:31 PM