
72 Vert Lite RestoMod Project
 07-08-2014, 11:08 AM
#41
Pro

Thread Starter
 Holy cow! Thankfully I have no need to deal with that. I'm putting offsets on the car so the old arms can keep their damn bolt.
 07-09-2014, 03:00 PM
#42
Intermediate

Great thread, thanks for all the photos on your progress. I assume from what I can see that you have one of those lifts where you drive on to it then jack up the rear end? I have been wanting to buy a lift and not sure if to invest the money in one of these, want a two poster but I can't put it in my garage right now since I'm renting. How much did you lift cost and who did you buy it from?
07-10-2014, 09:23 AM
#43
Pro
Thread Starter
Great thread, thanks for all the photos on your progress. I assume from what I can see that you have one of those lifts where you drive on to it then jack up the rear end? I have been wanting to buy a lift and not sure if to invest the money in one of these, want a two poster but I can't put it in my garage right now since I'm renting. How much did you lift cost and who did you buy it from?
You may also find them on Craigs list.
07-25-2014, 02:09 PM
#48
Pro
Thread Starter
Slowed a bit as I was on vacation last week and busy as hell this week. I'm at that point of cleaning the under side of the car, grinding frame, wire brushing the TA pockets and buying parts. I will snap a few shots of the frame etc. this weekend.
I also have to rivet new studs in place to run the positive battery cable correctly so I'm collecting the tools and parts for that job. What a PITA this +cable is.
I also have to rivet new studs in place to run the positive battery cable correctly so I'm collecting the tools and parts for that job. What a PITA this +cable is.
07-25-2014, 05:01 PM
#49
Pro

Slowed a bit as I was on vacation last week and busy as hell this week. I'm at that point of cleaning the under side of the car, grinding frame, wire brushing the TA pockets and buying parts. I will snap a few shots of the frame etc. this weekend.
I also have to rivet new studs in place to run the positive battery cable correctly so I'm collecting the tools and parts for that job. What a PITA this +cable is.
I also have to rivet new studs in place to run the positive battery cable correctly so I'm collecting the tools and parts for that job. What a PITA this +cable is.


 07-26-2014, 03:35 PM
#50
Pro
Thread Starter
May as well pull it and clean it up some. Well, I always did want side pipes so while I'm this far. It never stops. I have to get this thing back together in the next few weeks before the little lady kills me. Hopefully UPS delivers my last gasket today to get it all back together. I need to replace the front suspension bushings. I don't know if it is easier now or with the motor back in to use the weight to remove A-arms and springs.
Yep, right there with you. Ain't it fun... My motor will come out at some point but gotta get the rearend done first and work my way forward.

 [/QUOTE]
Yep, right there with you. Ain't it fun...
My motor will come out at some point but gotta get the rearend done first and work my way forward. [/QUOTE]
07-26-2014, 03:46 PM
#51
Pro
Thread Starter
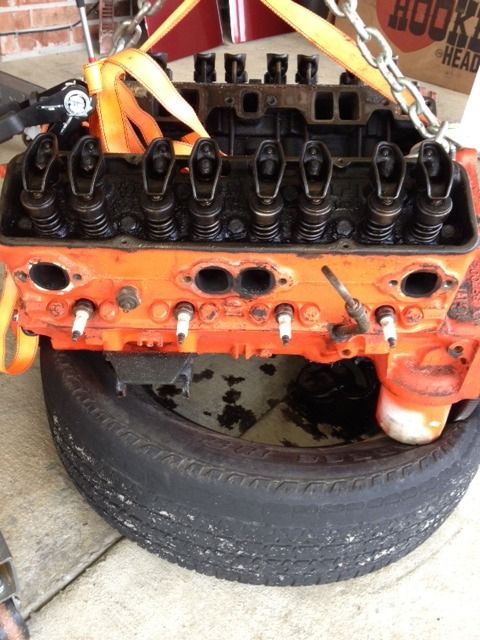
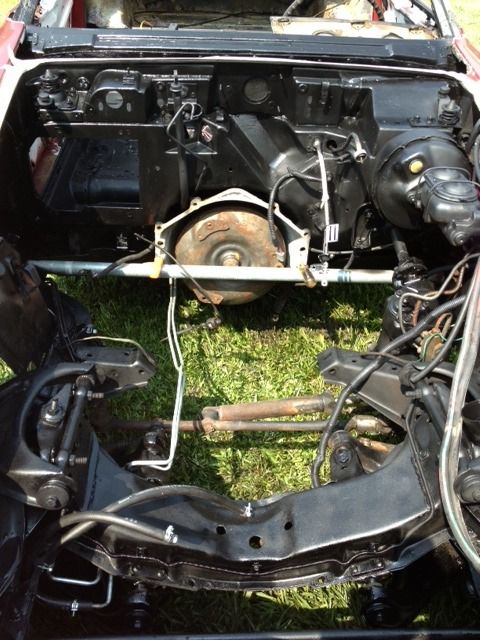
Ok, today was spent cleaning up the frame now that everything is out of the way. I wire wheeled it first to knock all the shale off and the used a grinding disc on my die to smooth things out a little but not all the way to the bare metal (I'm using rust ecapsulator so no need).
Before I left for the Keys a few weeks ago I sent my diff to Vtech Corvette for a rebuild. Good thing I did, Gary called yesterday and it turns out it needed it. Bumped the gears to 3.36 for a little more performance, which will work nicely with the 6 speed that will eventually go in.
The next job will be a dirty one as I will be cleaning the underside forward of the diff, which is nice and greasy. Lot of shop towels and grease remover not to mention numerous showers for me. Once that's complete I will be rerunning a new battery cable, replacing various seat mounts etc. and then we should be able to start bolting new goodies on to the back side of the car.
07-26-2014, 03:55 PM
#52
Pro
Thread Starter
Now the big decision I've been struggling with is should I go with VanSteel or Shark Bight coil over over set up. I think I've decided to go with VanSteel after reviewing numerous posts although I do like the look of the Shark Bight. See...still waffling. Feel free to weigh in on this.
I'm also having the shaft and halfs redone at a local place. I'm anxious to get all this together to see how it looks. Hopefully by the end of August.
I'm also having the shaft and halfs redone at a local place. I'm anxious to get all this together to see how it looks. Hopefully by the end of August.
07-26-2014, 04:42 PM
#53
Pro
Keep up the good work brother. I'm using you to keep me motivated on my project. I pulled the motor and am ready to drop back in then off to suspension. Can't wait to see what you go with suspension wise.
 07-29-2014, 11:30 AM
#54
Pro
Thread Starter
Now I just need to get the bearing assemblies out of the TAs to send down to them for rebuild and insert into their offset TAs.
08-01-2014, 04:06 PM
#55
Pro
Thread Starter
Well, getting those bearing assemblies out of the TAs was almost as hard as getting the TAs off the car. I had to use a cutting wheel on two of the bolts cuz the nuts suck and stripped. Lots of BFH also although I think I screwed up one side by popping the spindle a couple of times...I seem to always learn the hard way. I think that one is ruined but we'll see what VS says when they get them next week.
I picked up my reconditioned drive shaft and halfs this week and man they turned out nice. Brand new sealed Us, balanced and painted for $250. Not sure about the color but will wait to see what the diff looks like. Plan on ordering parts next week and also spoke to Gary at Vtech and the diff is on its way back now.
I also took the opportunity to clean and paint some more of the brackets for the diff and strut rods. Decided to keep the diff cross member bushings because they seemed to be in good shape.
08-03-2014, 09:42 AM
#56
Pro
Thread Starter
Yesterday I decided to tackle the job I've been avoiding but could no longer. The battery cable in this car was not correct simply because the studs that are used to attach the cable to the drive tube were all broken off. I had to remove the old rivets and replace with new stud plates. Not an easy project but having the rear and drive shaft out makes it tolerable. I also had to partially remove the interior to access the old stud plates and rivet the new ones in. A lot of work just to replace a battery cable.
In addition to the battery cable the battery box was a disaster. There was more grease and crap in there than on the underside of the car. I gave it a good cleaning and discovered the reason for the mess. The pos battery cable grommet was missing and allowing all that garbage to shoot in through the open hole.
In addition to the battery cable the battery box was a disaster. There was more grease and crap in there than on the underside of the car. I gave it a good cleaning and discovered the reason for the mess. The pos battery cable grommet was missing and allowing all that garbage to shoot in through the open hole.
08-03-2014, 11:23 AM
#57
Le Mans Master

Member Since: Oct 2002
Location: You are here to build strength, not demonstrate it
Posts: 9,738
Likes: 0
Received 0 Likes
on
0 Posts
St. Jude Donor '08


I also want to tackle this job on mine.
wanna get rid of the 'clunk in the trunk' before it strands me somewhere
08-03-2014, 11:06 PM
#58


 08-11-2014, 03:47 PM
#59
Pro
Thread Starter
Received the rebuilt 3.36 differential the other day and it looks good as well as being mechanically correct now. Greg at Vtech was great explaining things in detail etc..
I also finished cleaning and painting the frame up to the middle cross member and got the interior put back together to include the new brake handle and cable. The grommet for the PBrake cable held me up for a few days but Dr Rebuild came through. Next step is to put the pumpkin back in the car and wait for the Vansteel suspension to arrive.
I also finished cleaning and painting the frame up to the middle cross member and got the interior put back together to include the new brake handle and cable. The grommet for the PBrake cable held me up for a few days but Dr Rebuild came through. Next step is to put the pumpkin back in the car and wait for the Vansteel suspension to arrive.

