
Modifying Stock Guages to Electric
 04-22-2014, 08:17 PM
#1
Cruising

Thread Starter

Member Since: Apr 2014
Posts: 11
Likes: 0
Received 0 Likes
on
0 Posts
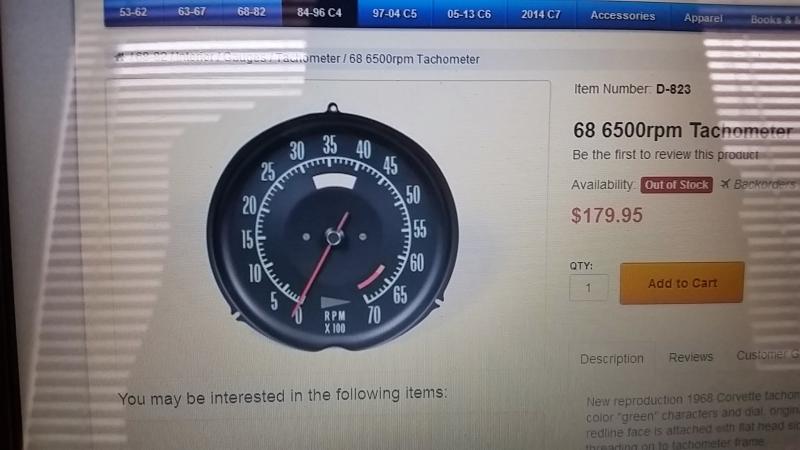
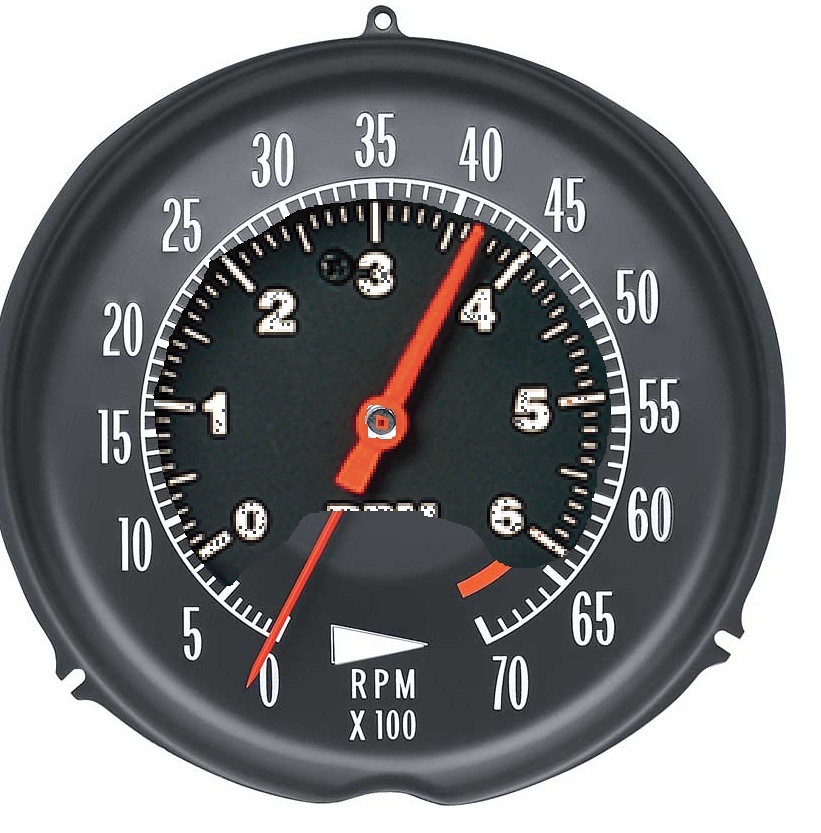
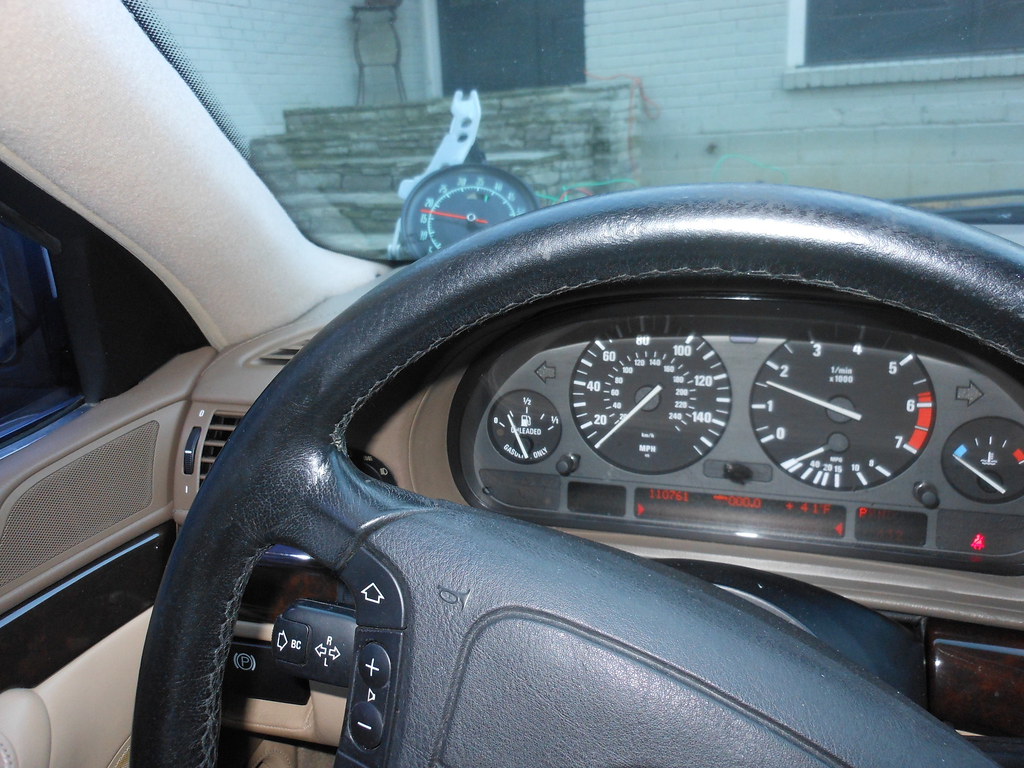
I'm new here, so I'm a little excited I've got something to contribute. I'm in the middle of my LS3 swap in my '69 and have finally decided to keep the stock guages and put an electronic backing on them. As an example I'll use my tachometer:
I know the corvette tachometer goes from 0-7000 RPM. Only problem is the corvette tachometer goes farther around the guage than any other aftermarket 7K tach out there. Measuring with a protractor tells me the guage sweep is 305 deg. 7K RPM over 305 deg is 22.95 RPMs per degree of needle movement. I looked at a few of the cheaper 7K guages and the closest one comes in at 25.64 RPM per degree. It was a VDO 7K guage and was the one with the farthest sweep. I started looking at some of the broader 5K and 6K guages and came across summit PN ATM-2306 (an autogage mini 6K tach) coming in at 22.47 deg per RPM. This is what I'm going to go with. For reference, if the motor is actually spinning at 6K and you put these guts in the 'vette tach face it would read 6128 RPM. That's close enough for me with a stock LS3, and I'm not a racer. I'll do the same process for the speedo and other gages as well. It'll work great for the clock. If you wanted to add a trans temp in the place of the clock I've seen some silk screeners that can do a pretty good job as well. If you go to some high end award/trophy shops there is a new process out that is similar to silk screening they use for text plates instead of engraving. It's capable of producing textures as well so you can go after the matte look of the stock gages. If I end up going this route for the clock I'll let you know how it goes. Since a photo is worth 1,000 words:
Step 1, pull up a pic of the gauge you want to copy.
Step 2, put paper on screen and mark the 0 and high end mark. You also have to mark the center where the needle rotates. The more accurate you are the more accurate your gage will be.
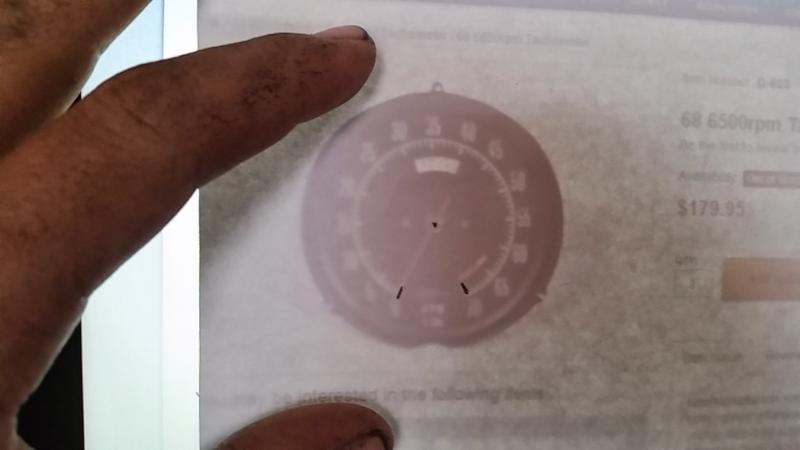
Step 3, use a straight edge and pull the lines out.
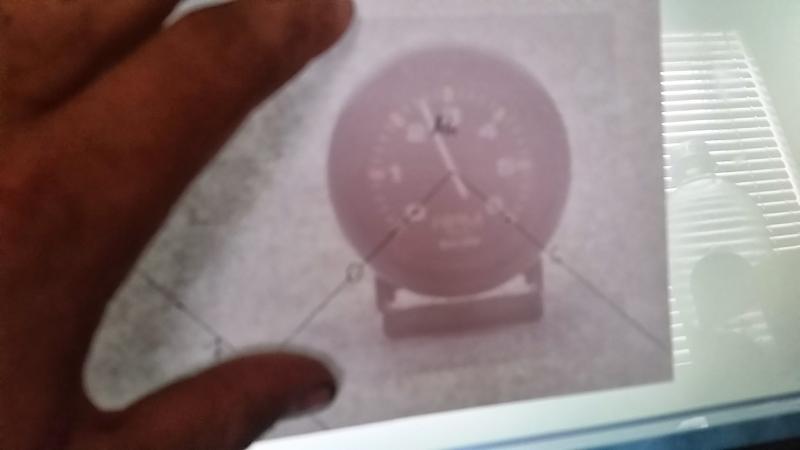
Step 4, do this for the donor gage.
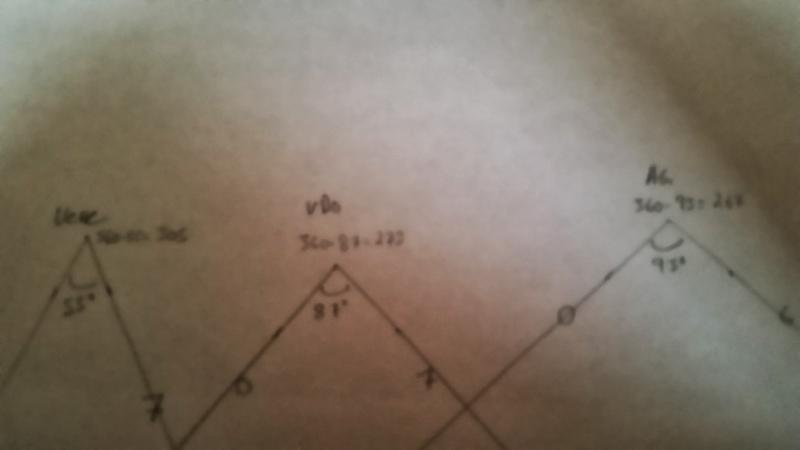
Step 5, pull up a protractor and measure all the angles.

Step 6, do the math. Hopefully this spreadsheet helps.

Now all you have to do is mount the new guts on the old gauge and push the needle on. Remember you need to have power to all the gauges when you're putting the needle on so they'll be at true zero, or 13.8V, or full, or whatever it is.
I know the corvette tachometer goes from 0-7000 RPM. Only problem is the corvette tachometer goes farther around the guage than any other aftermarket 7K tach out there. Measuring with a protractor tells me the guage sweep is 305 deg. 7K RPM over 305 deg is 22.95 RPMs per degree of needle movement. I looked at a few of the cheaper 7K guages and the closest one comes in at 25.64 RPM per degree. It was a VDO 7K guage and was the one with the farthest sweep. I started looking at some of the broader 5K and 6K guages and came across summit PN ATM-2306 (an autogage mini 6K tach) coming in at 22.47 deg per RPM. This is what I'm going to go with. For reference, if the motor is actually spinning at 6K and you put these guts in the 'vette tach face it would read 6128 RPM. That's close enough for me with a stock LS3, and I'm not a racer. I'll do the same process for the speedo and other gages as well. It'll work great for the clock. If you wanted to add a trans temp in the place of the clock I've seen some silk screeners that can do a pretty good job as well. If you go to some high end award/trophy shops there is a new process out that is similar to silk screening they use for text plates instead of engraving. It's capable of producing textures as well so you can go after the matte look of the stock gages. If I end up going this route for the clock I'll let you know how it goes. Since a photo is worth 1,000 words:
Step 1, pull up a pic of the gauge you want to copy.
Step 2, put paper on screen and mark the 0 and high end mark. You also have to mark the center where the needle rotates. The more accurate you are the more accurate your gage will be.
Step 3, use a straight edge and pull the lines out.
Step 4, do this for the donor gage.
Step 5, pull up a protractor and measure all the angles.
Step 6, do the math. Hopefully this spreadsheet helps.
Now all you have to do is mount the new guts on the old gauge and push the needle on. Remember you need to have power to all the gauges when you're putting the needle on so they'll be at true zero, or 13.8V, or full, or whatever it is.

 04-26-2014, 07:05 AM
#3
Melting Slicks

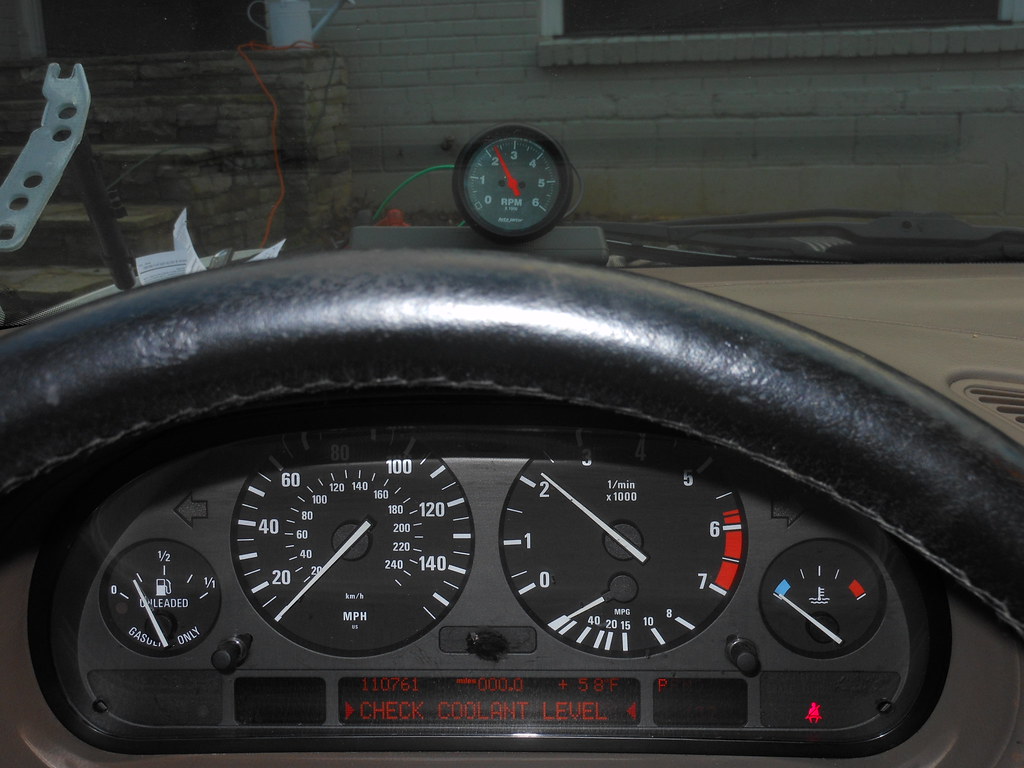
Later corvettes have electric gauges. My 76 tach goes to 7000 rpm similar to yours. You could probably just transfer the face directly onto a later tachometer.


 04-26-2014, 11:37 AM
#5
Le Mans Master

Member Since: May 2003
Location: Fernandina Beach FL
Posts: 8,476
Received 3,218 Likes
on
1,730 Posts
2023 Restomod of the Year finalist
2020 C3 of the Year Winner - Modified

Nice work-
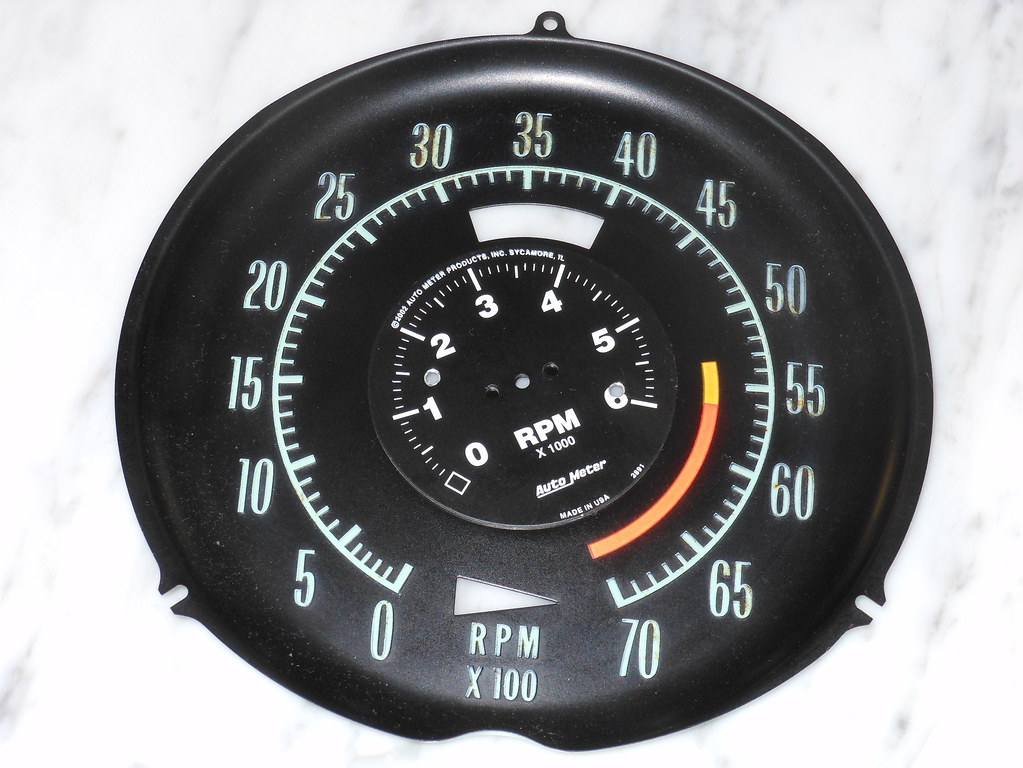
I did like Gary-overlayed the factory faceplate.
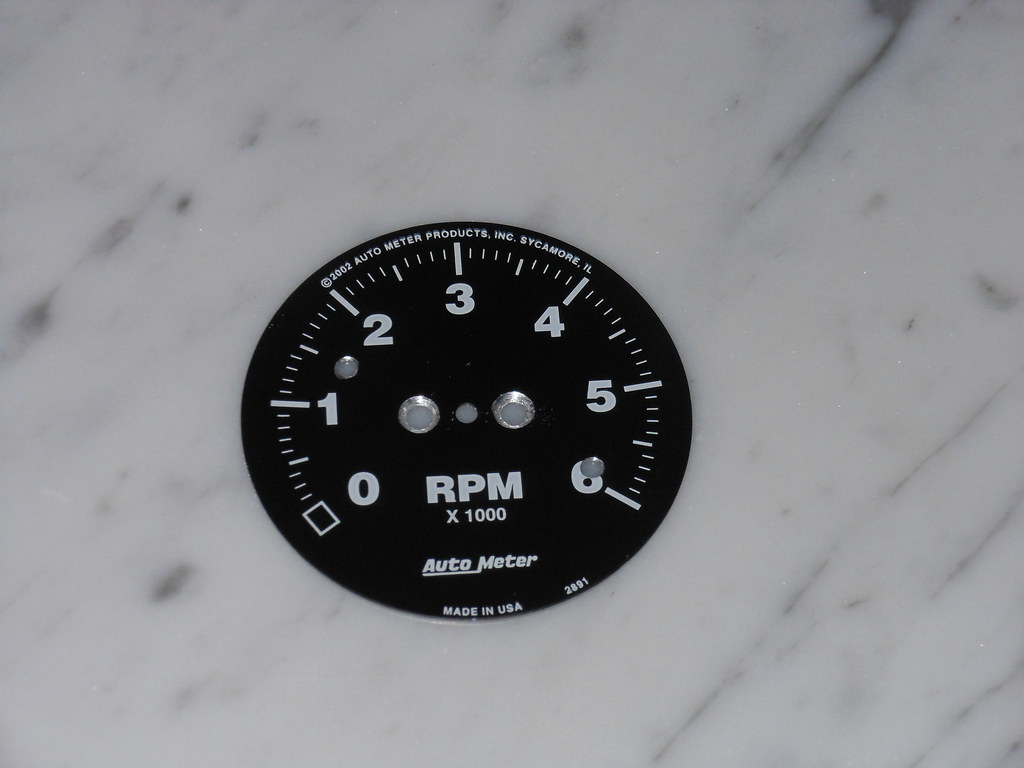
Originally was going to use a newer OEM tach but I needed a 6cylinder hook up. Autometer 2891 -less than $100.
I just put a picture to scale over the tach- to see how close it was before I bought it. Then just lined up the new face w. the old - and its pretty accurate till you start running over 5K-but I'm not planning on doing that a lot- and the plus side over 5K it reads generous....
 tachmod by richardhayes454, on Flickr
 DSCN0830 by richardhayes454, on Flickr
 DSCN0847 by richardhayes454, on Flickr
 DSCN0843 by richardhayes454, on Flickr
 DSCN0856 by richardhayes454, on Flickr
I did like Gary-overlayed the factory faceplate.
Originally was going to use a newer OEM tach but I needed a 6cylinder hook up. Autometer 2891 -less than $100.
I just put a picture to scale over the tach- to see how close it was before I bought it. Then just lined up the new face w. the old - and its pretty accurate till you start running over 5K-but I'm not planning on doing that a lot- and the plus side over 5K it reads generous....
tachmod by richardhayes454, on FlickrDSCN0830 by richardhayes454, on FlickrDSCN0847 by richardhayes454, on FlickrDSCN0843 by richardhayes454, on FlickrDSCN0856 by richardhayes454, on Flickr