
'79 C3 Speedhut Gauge Installation
 02-15-2014, 01:45 AM
#1
Burning Brakes

Thread Starter

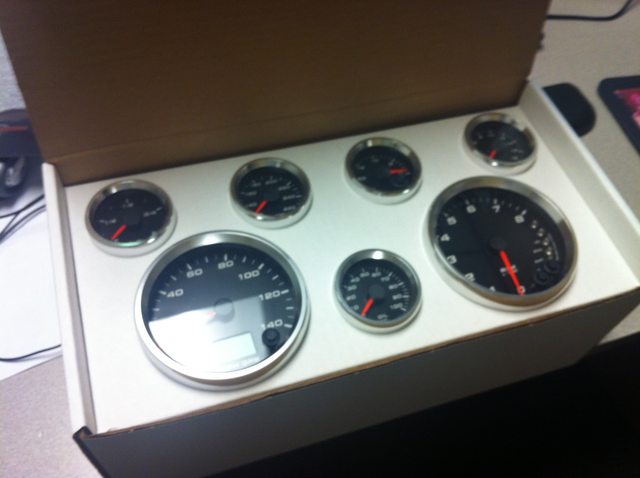
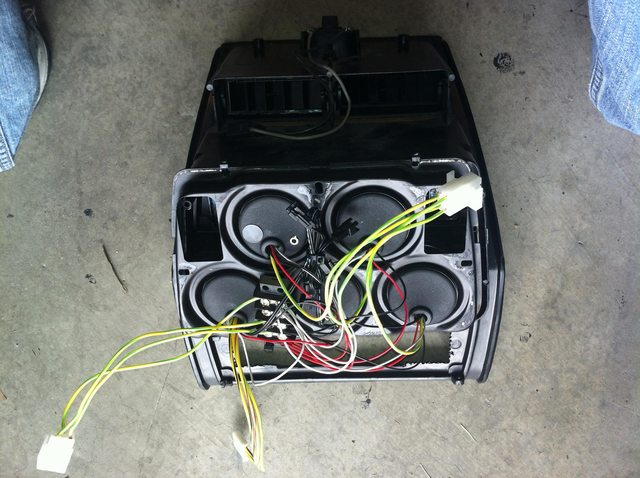
I bought a new set of gauges from speedhut, nice looking gauges!
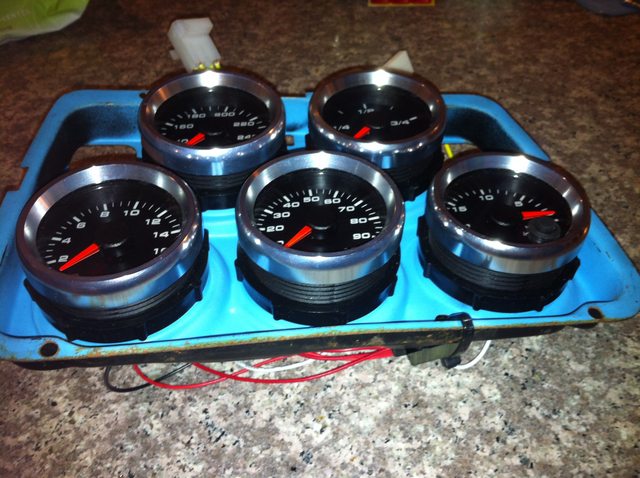
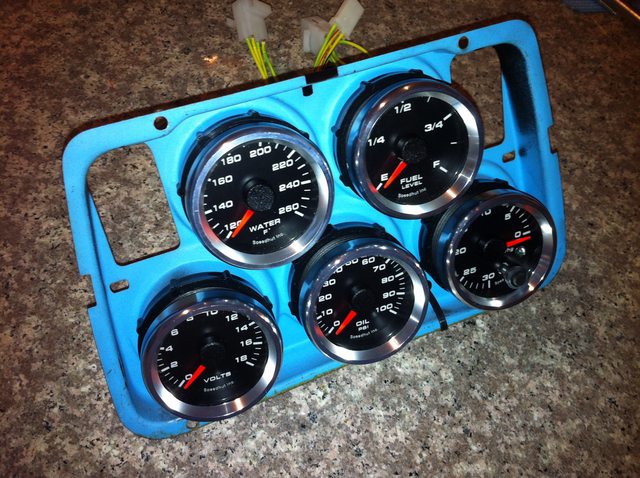
I started contemplating how I can install these small gauges into my original panel...I originally just planned to carve out the holes and mount them directly into the panel, but when I took it apart I noticed that I could screw the gauges themselves into the original backing plate.
I was hoping to get lucky, but not so much, it doesn't line up with the original screw positions, I'm going to have to offset it a bit and drill new holes for the mounting screws. If this doesn't work out maybe I'll carve out the original panel or make a new panel. Even if I get it to line up, I foresee creating a new panel in the future.
Here is tonight's work, we'll see what I end up with tomorrow after I try to line everything up a little better.
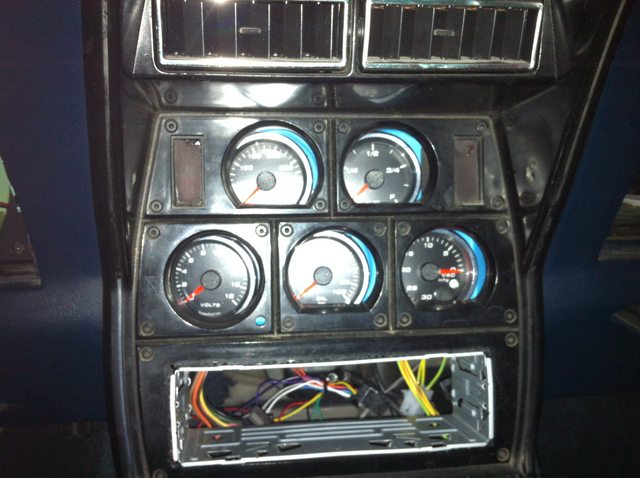
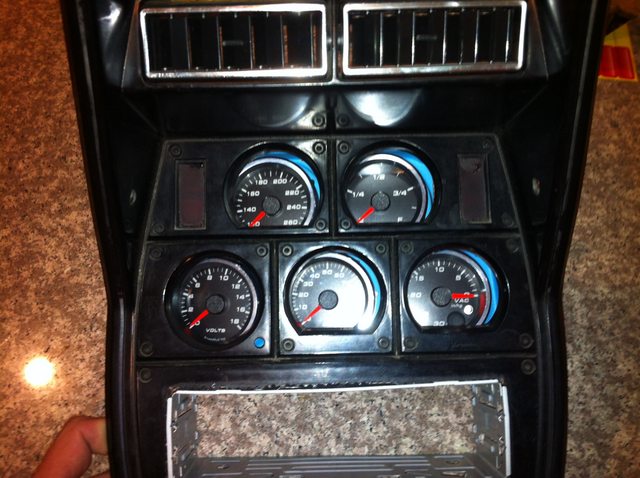

I have some plexiglass, a jigsaw, some hole saws, and some plastic paint and will try to create a new panel for the speedometer and tach tomorrow. I have some LEDs from Jeg's that I'm going to use for the turn signals, high beam, and brake light.
I'll update this thread as I make progress. Comments, suggestions, and criticism is welcome.
I started contemplating how I can install these small gauges into my original panel...I originally just planned to carve out the holes and mount them directly into the panel, but when I took it apart I noticed that I could screw the gauges themselves into the original backing plate.
I was hoping to get lucky, but not so much, it doesn't line up with the original screw positions, I'm going to have to offset it a bit and drill new holes for the mounting screws. If this doesn't work out maybe I'll carve out the original panel or make a new panel. Even if I get it to line up, I foresee creating a new panel in the future.
Here is tonight's work, we'll see what I end up with tomorrow after I try to line everything up a little better.
I have some plexiglass, a jigsaw, some hole saws, and some plastic paint and will try to create a new panel for the speedometer and tach tomorrow. I have some LEDs from Jeg's that I'm going to use for the turn signals, high beam, and brake light.
I'll update this thread as I make progress. Comments, suggestions, and criticism is welcome.
 02-15-2014, 05:53 AM
#2
Melting Slicks

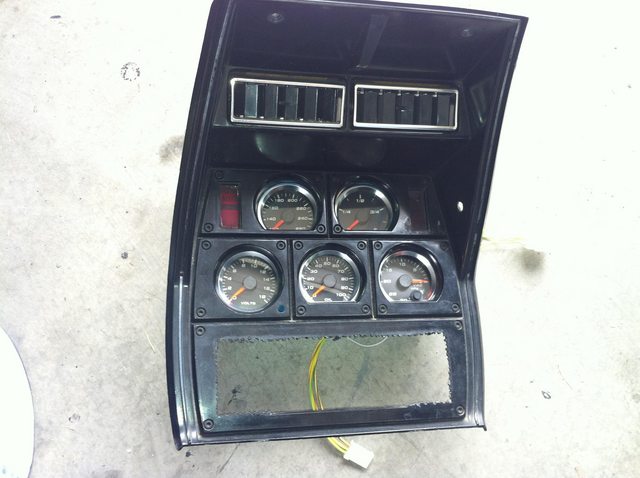
Those are nice looking indeed. Really compliment the dash upgrade without jumping out at you . Did you try to insert them from the front, that's probably where you need to cut up the holes. It might be a lot simpler that way. I have a project like this on my to do list, way way down on the list. I will watch your progress. I 'm thinking on picking up a used back panel(so I can still use the idiot lights and gutting the rest of itso I can re-wire etc.)Thanks.
 02-15-2014, 12:11 PM
#3
Burning Brakes
Thread Starter
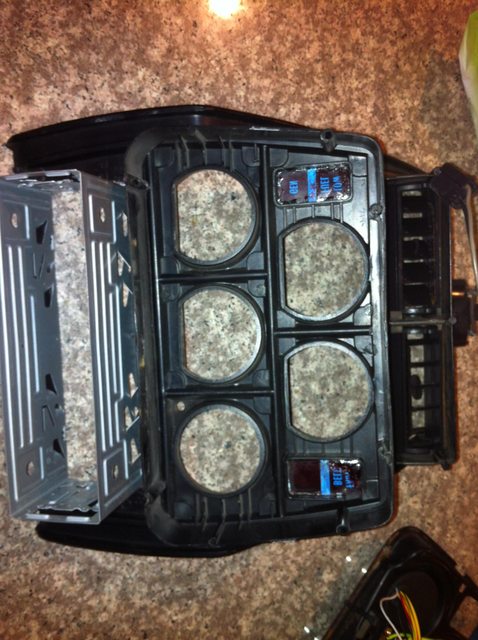
Inserting from the front is what I tried first. Surprisingly, even the hole that is already round for the clock was just a little too small for the gauges to fit in.
02-15-2014, 06:38 PM
#4
Burning Brakes
Thread Starter
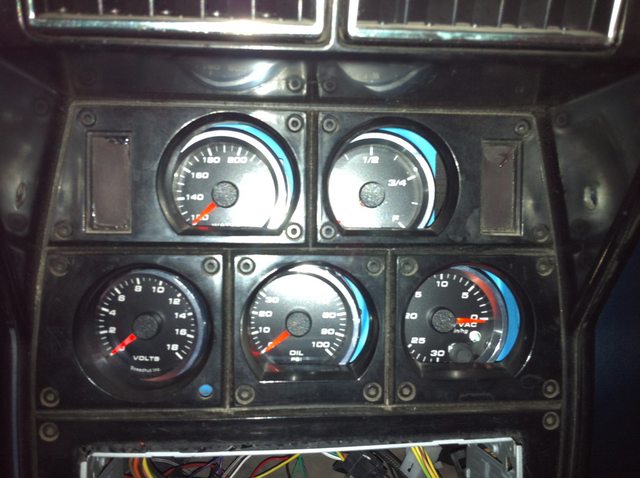
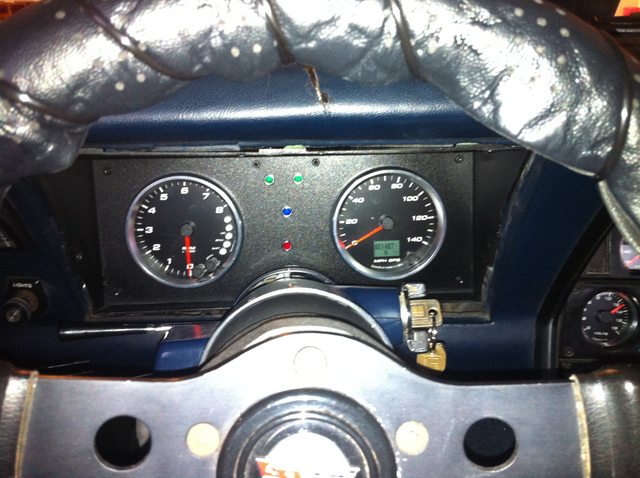
I just drilled some holes and used zip ties to hold it in place, simple as it gets, close enough. If I'm feeling ambitious enough later, I"ll make a new panel. I'm not completely happy with the panel I made for the gauges but it is acceptable for now, here's what I have so far.

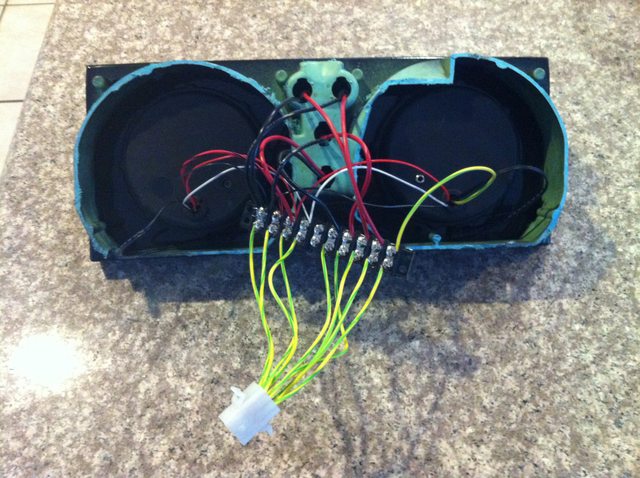
This is my first time making as panel like this, I have some alignment issues and imperfections but it is okay for now. I'll circle back when I've sharpened my skills some more.
This is my first time making as panel like this, I have some alignment issues and imperfections but it is okay for now. I'll circle back when I've sharpened my skills some more.
02-15-2014, 08:25 PM
#5
Burning Brakes
Thread Starter
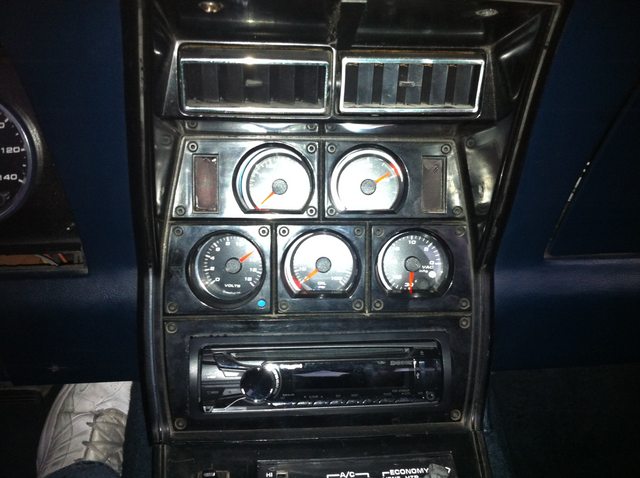
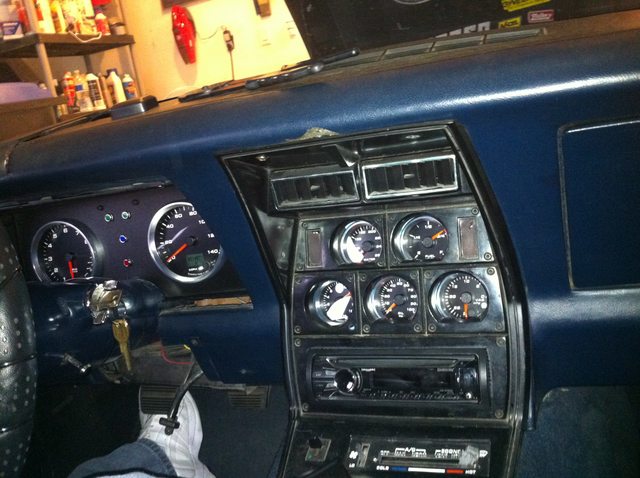
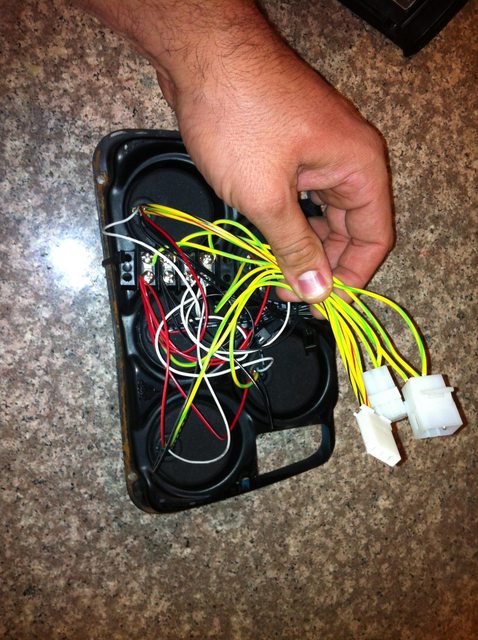
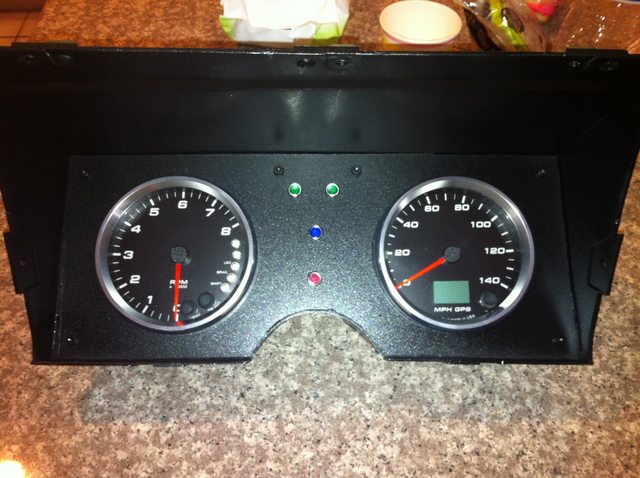
Done for today. Still need to connect the lights through the dimmer controller (right now only the needles light up), swap the temp/oil sensors for what came with the kit (those gauges don't work with the OEM sensors), and connect the controller for the vacuum gauge.
I'm satisfied with how it came out for my first time with the jigsaw and such, but there is much room for improvement.
 02-17-2014, 08:19 PM
#8
Burning Brakes
Thread Starter
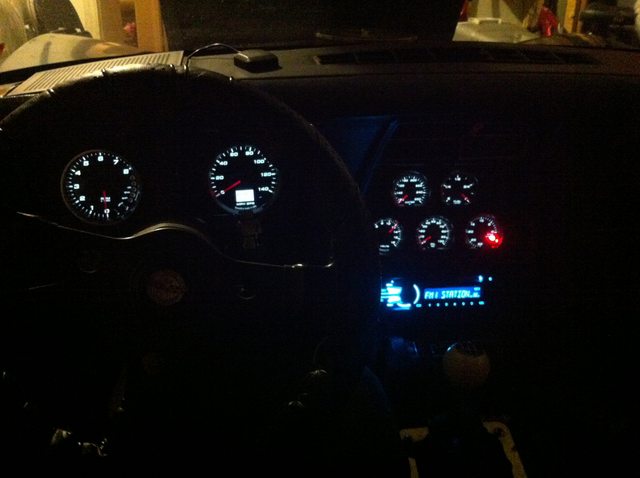
No regrets so far, I like them a lot. My only gripe is that the vacuum gauge needs constant power or it loses its calibration for some reason, so I need to pull the cluster out and switch it from keyed power to fixed power, or remember to give it a few seconds to boot up all the way before firing up the engine.