
zz502 killed my M21 Munci
 02-17-2014, 08:29 AM
#61
Thats not described.
I can only imagine that the inputshaft will stick in the last 1" of the pressure plate, where it has a 2" diameter inside and can be wide angled.
And in this situation I have to put in the alignment tool and mount the clutch?
Sounds very funny...urgs...
I can only imagine that the inputshaft will stick in the last 1" of the pressure plate, where it has a 2" diameter inside and can be wide angled.
And in this situation I have to put in the alignment tool and mount the clutch?
Sounds very funny...urgs...
Last edited by Super6; 02-17-2014 at 08:51 AM.
 02-18-2014, 06:52 PM
#62
Pro

Thread Starter
Member Since: May 2011
Location: Karlsruhe (Germany)
Posts: 708
Likes: 0
Received 32 Likes
on
17 Posts

Thank you, saw your offer too late.
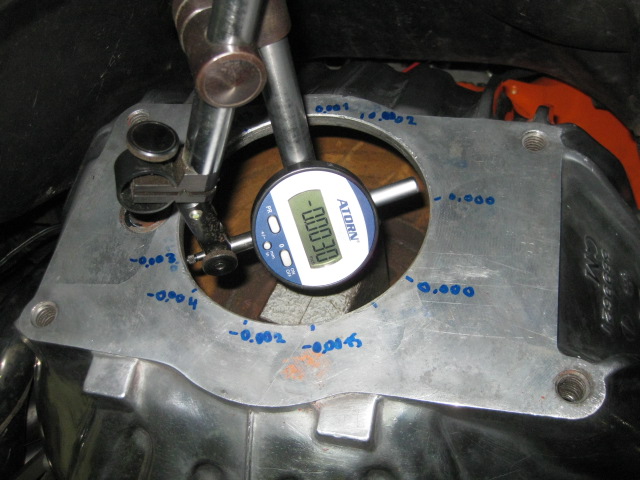
Yesterday I dialed my bellhousing, its within the limits
Tonight I just wanted to prepare everything to tilt the engine.
Removed distributor, sidepipes, fan, and loosened engine mounts.
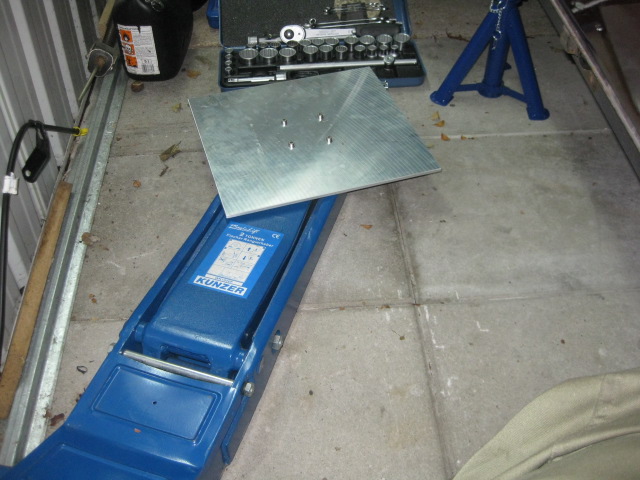
Then I prepared my tranny jack, always good to have a good car jack:
And as it was under the car i thought I could try to put the TKO on it...
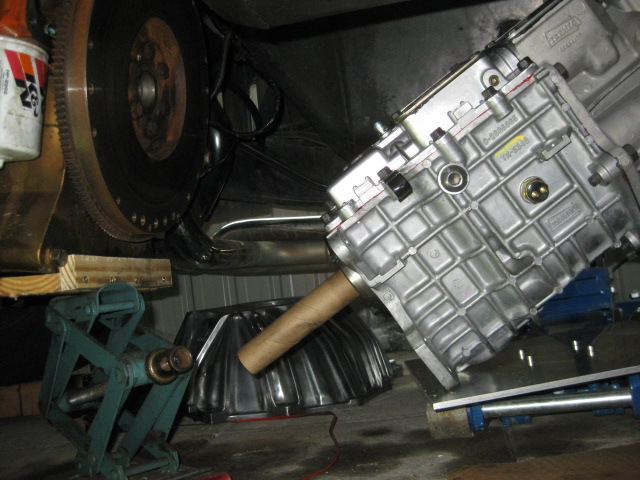
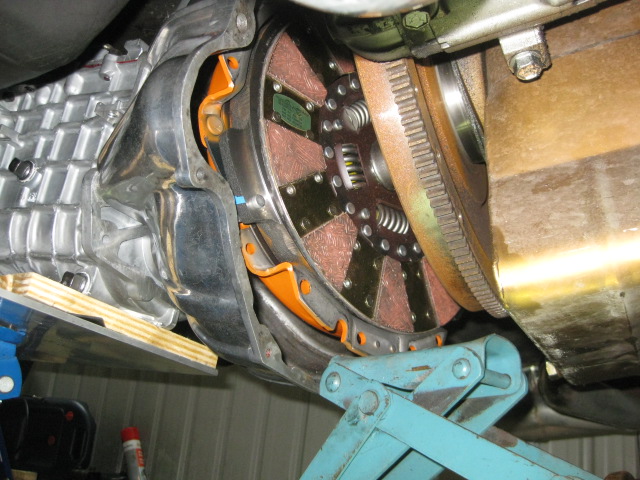
An then I tought I could put the bellhousing on it, and saw how much space was left for the clutch:
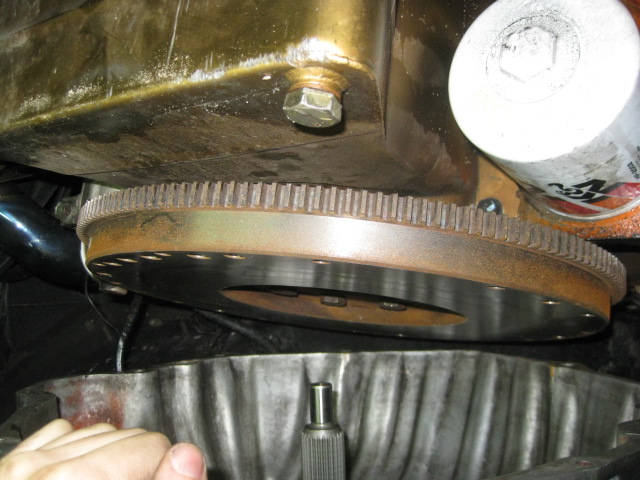
Ok, I had to lift and lower the tranny and the engine several times to get the release bearing and clutch into the bellhousing.
The weights on the centerforce clutch were in the way, would have been easier without them... but it worked within 10 minutes:
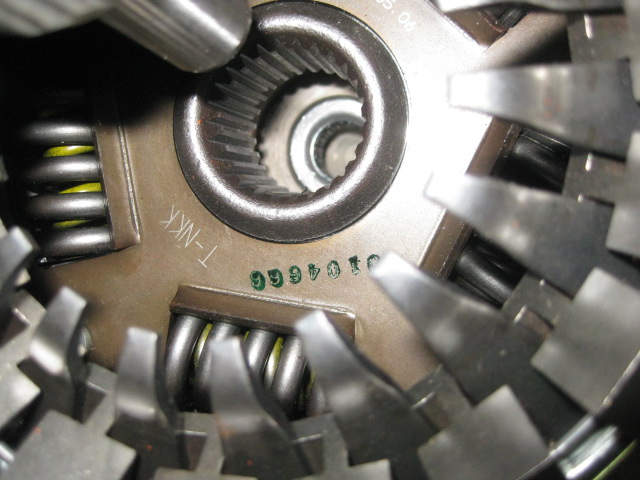
The next challange was to get the alignment tool into the disk. Had to lower the engine and the tranny to maximum and it went right in without any modifications.
So far the worst thing is done:
I have only to move the bellhousing to the engine and then the tranny to the bellhousing.
I didn�t expect that i would be able to do this alone in my garage, but it all went well and without and swearwords
Any recomendations at this step? I�ll continue another day and go to bed now. Im done, everything worked well, but it was hard
Yesterday I dialed my bellhousing, its within the limits
Tonight I just wanted to prepare everything to tilt the engine.
Removed distributor, sidepipes, fan, and loosened engine mounts.
Then I prepared my tranny jack, always good to have a good car jack:
And as it was under the car i thought I could try to put the TKO on it...
An then I tought I could put the bellhousing on it, and saw how much space was left for the clutch:
Ok, I had to lift and lower the tranny and the engine several times to get the release bearing and clutch into the bellhousing.
The weights on the centerforce clutch were in the way, would have been easier without them... but it worked within 10 minutes:
The next challange was to get the alignment tool into the disk. Had to lower the engine and the tranny to maximum and it went right in without any modifications.
So far the worst thing is done:
I have only to move the bellhousing to the engine and then the tranny to the bellhousing.
I didn�t expect that i would be able to do this alone in my garage, but it all went well and without and swearwords
Any recomendations at this step? I�ll continue another day and go to bed now. Im done, everything worked well, but it was hard
02-20-2014, 07:47 AM
#63
Pro
Thread Starter
Member Since: May 2011
Location: Karlsruhe (Germany)
Posts: 708
Likes: 0
Received 32 Likes
on
17 Posts
just saw in another post, that the pressure plate should be clocked to the flywheel.
Is this important? I didn�t see any advise in the documents that came with the clutch.
And i didn�t notice any markings on the clutch or flywheel. (But didn�t have a look for that)
Is this important? I didn�t see any advise in the documents that came with the clutch.
And i didn�t notice any markings on the clutch or flywheel. (But didn�t have a look for that)
02-22-2014, 01:44 PM
#64
Pro
Thread Starter
Member Since: May 2011
Location: Karlsruhe (Germany)
Posts: 708
Likes: 0
Received 32 Likes
on
17 Posts
Continued yesterday and today:
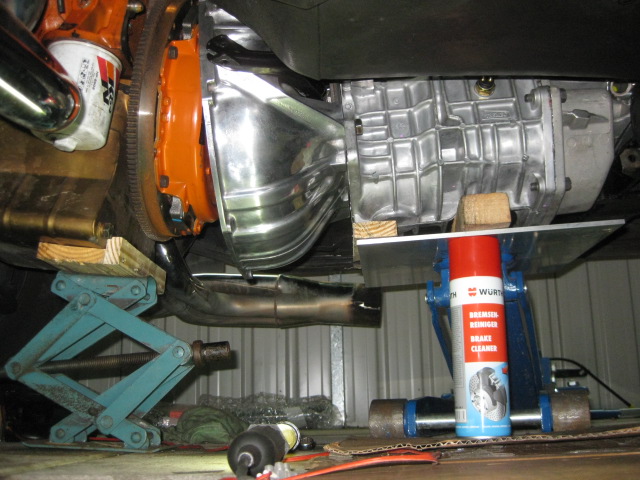
The tranny is in!
There were some little challanges like this allen screw here:
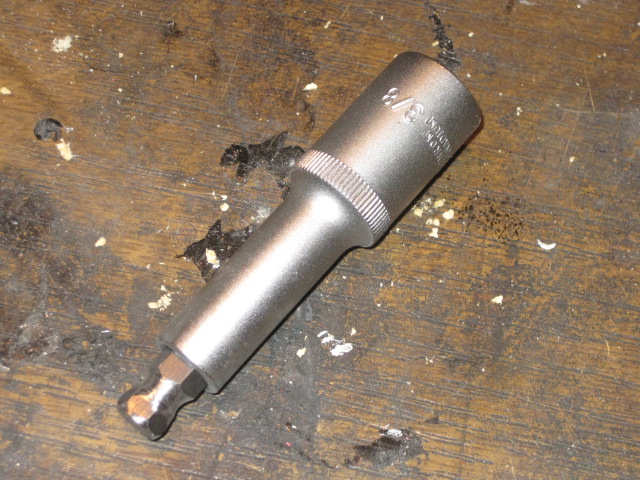
had to make myself a special tool:
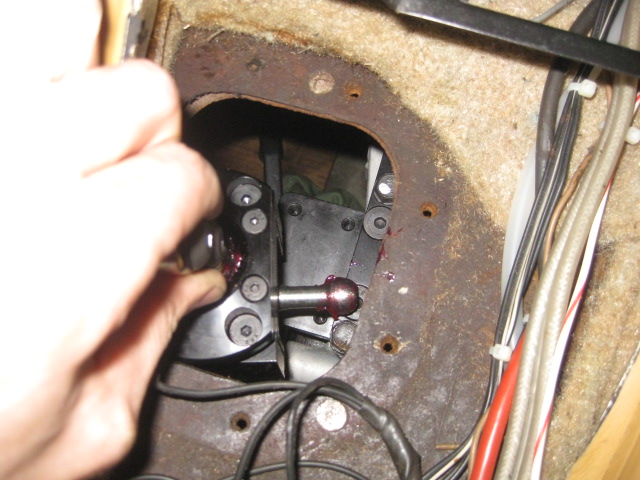
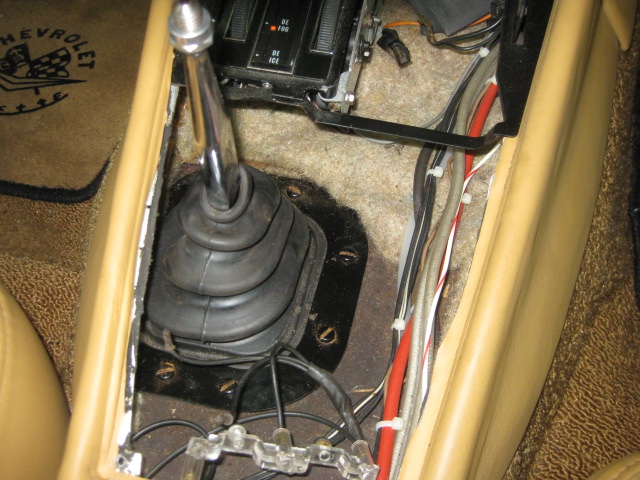
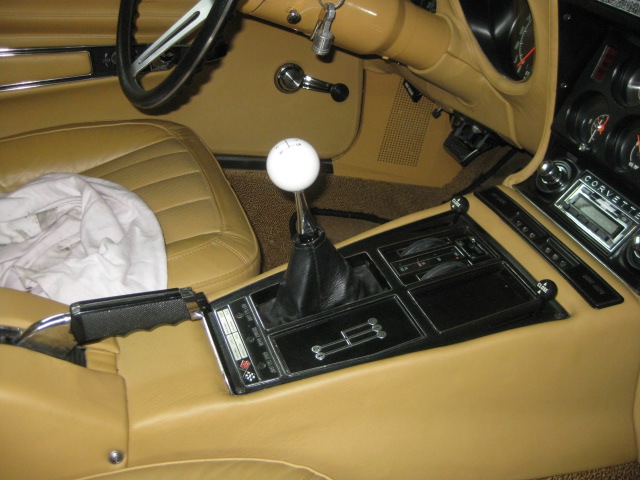
Then put the shifter in. There is pretty much space to do this:
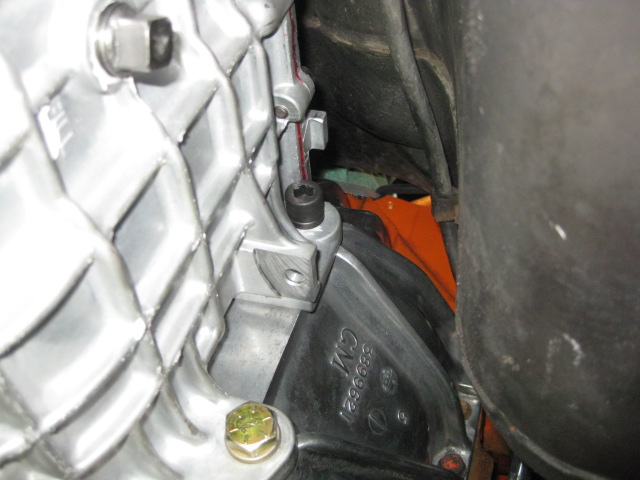
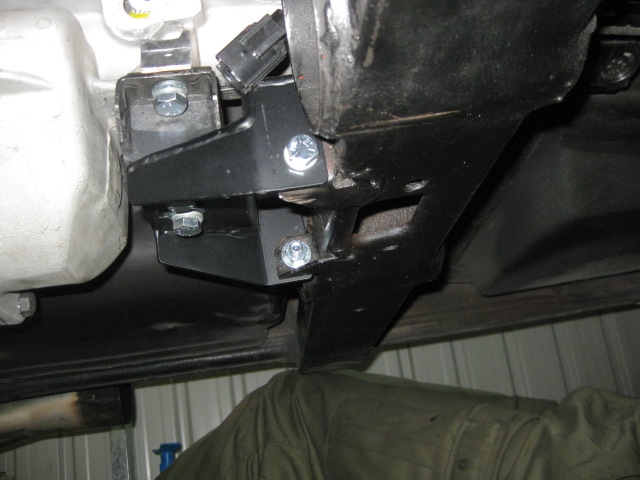
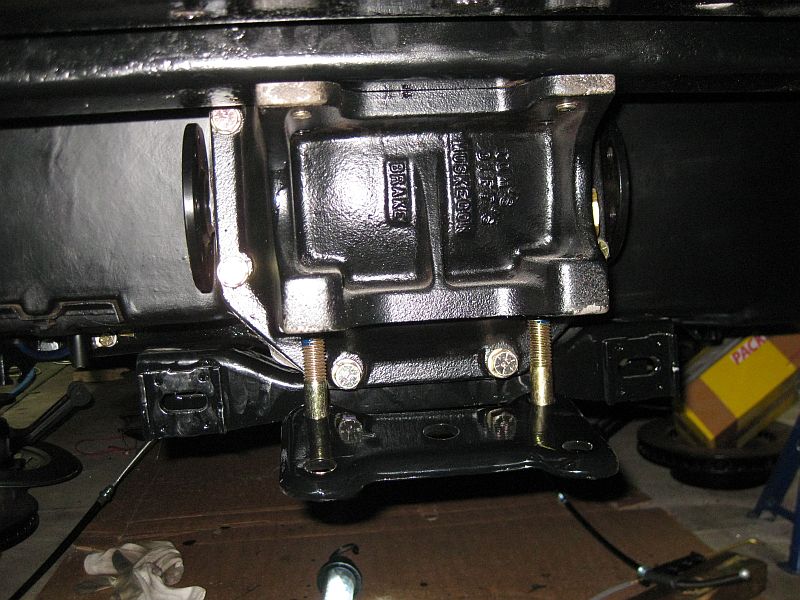
Next step was the mount at the crossmember:
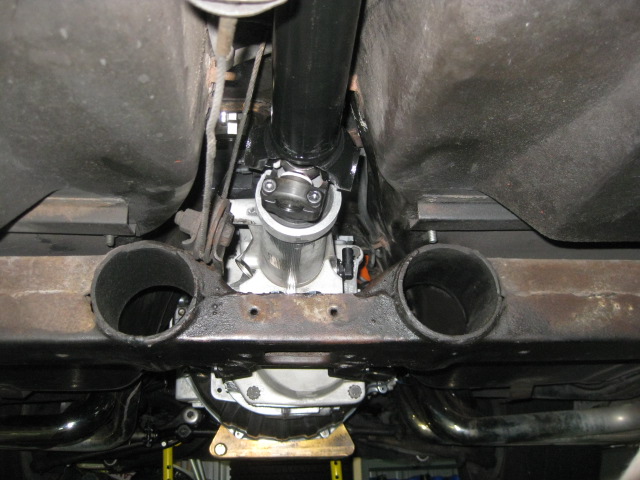
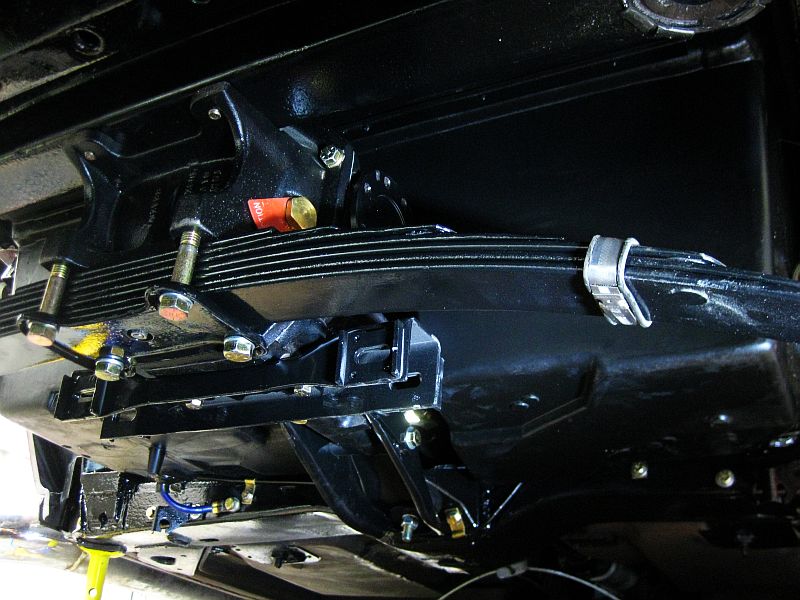
and the drive shaft:

done:
Tested 10mls and everything works fine. Despite the speedometer shows too much speed, maybe they calculated the wrong speedo gear for me. Hoping Hurst will send me the right one
It shifts good, similar but softer than the old Munci with the Hurst-shifter on it. Definitly better than the original C3 Munci shifter (I would always upgrade that one with a Hurst).
The tranny is in!
There were some little challanges like this allen screw here:
had to make myself a special tool:
Then put the shifter in. There is pretty much space to do this:
Next step was the mount at the crossmember:
and the drive shaft:
done:
Tested 10mls and everything works fine. Despite the speedometer shows too much speed, maybe they calculated the wrong speedo gear for me. Hoping Hurst will send me the right one
It shifts good, similar but softer than the old Munci with the Hurst-shifter on it. Definitly better than the original C3 Munci shifter (I would always upgrade that one with a Hurst).
04-14-2014, 11:33 PM
#65
Pro
Thread Starter
Member Since: May 2011
Location: Karlsruhe (Germany)
Posts: 708
Likes: 0
Received 32 Likes
on
17 Posts
Hurst sent me another speedo gear for free, and now the speedometer indicates the right speed.
And after the break in, the tranny shifts better. Better than the old Muncie, but it feels a bit boring. Shifting the Muncie with the Hurst shifter felt like a thing for real men
Anyway, here is the latest video from me:
And after the break in, the tranny shifts better. Better than the old Muncie, but it feels a bit boring. Shifting the Muncie with the Hurst shifter felt like a thing for real men
Anyway, here is the latest video from me:
04-15-2014, 04:56 PM
#66
Hurst sent me another speedo gear for free, and now the speedometer indicates the right speed.
And after the break in, the tranny shifts better. Better than the old Muncie, but it feels a bit boring. Shifting the Muncie with the Hurst shifter felt like a thing for real men
And after the break in, the tranny shifts better. Better than the old Muncie, but it feels a bit boring. Shifting the Muncie with the Hurst shifter felt like a thing for real men
Great sound! I changed over to Hooker Max-Flows after hearing your Vette.
How many cameras are you working with?
 10-04-2014, 07:32 AM
#69
Drifting

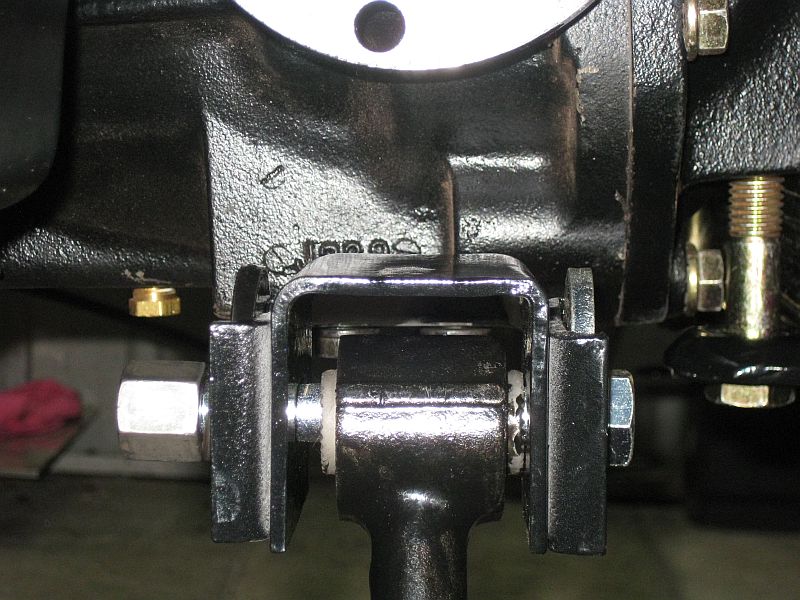
Does that u joint have the grease fitting the corner? Get rid of those or you will be replacing again. While it seems like a good design, it's just a weak spot that yields the exact result you got.
10-04-2014, 10:12 AM
#70
Team Owner


Member Since: Oct 2004
Location: altered state
Posts: 81,242
Received 3,043 Likes
on
2,602 Posts
St. Jude Donor '05

Looks like those needle bearings took a beating 
10-04-2014, 01:16 PM
#71
Tech Contributor
Member Since: Jun 2004
Location: I tend to be leery of any guy who doesn't own a chainsaw or a handgun.
Posts: 18,355
Received 768 Likes
on
550 Posts
I've run greaseable u-joints over the years in my car, and have never broke one. I do admit all my track time is road course use (I don't drag race), but I do run grippy tires.
10-04-2014, 01:40 PM
#72
Pro
Thread Starter
Member Since: May 2011
Location: Karlsruhe (Germany)
Posts: 708
Likes: 0
Received 32 Likes
on
17 Posts
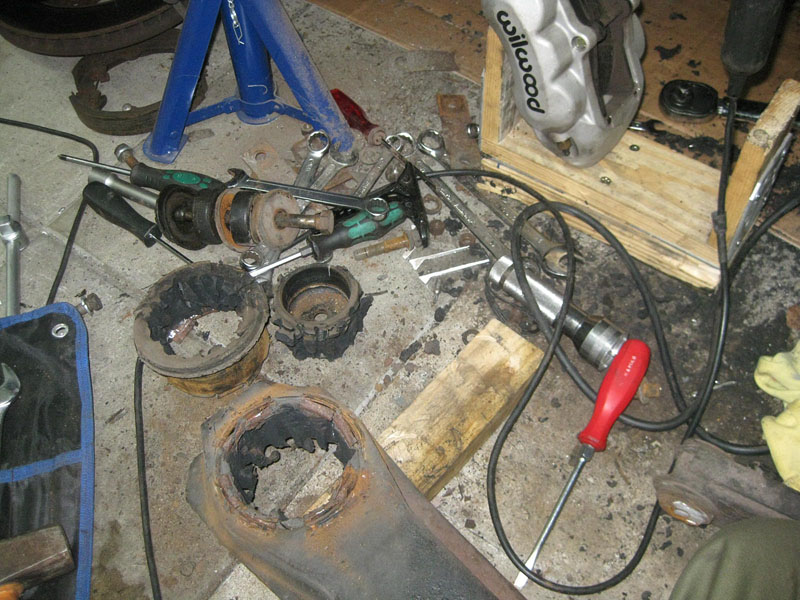
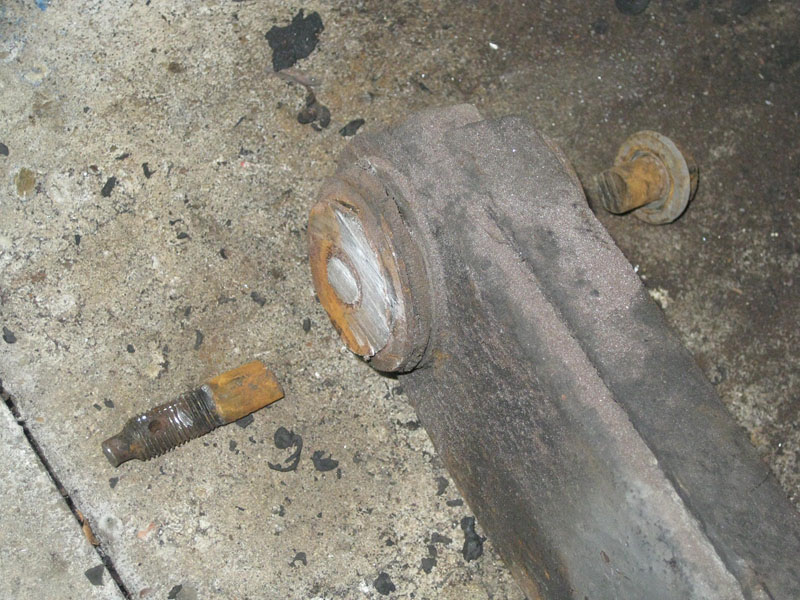
I have cleaned it  I�ll put it on a board in my office where I collect all the parts the engine has destroyed. The joint here was destroyed on a street in town. At least I was able to roll home with 25mph.
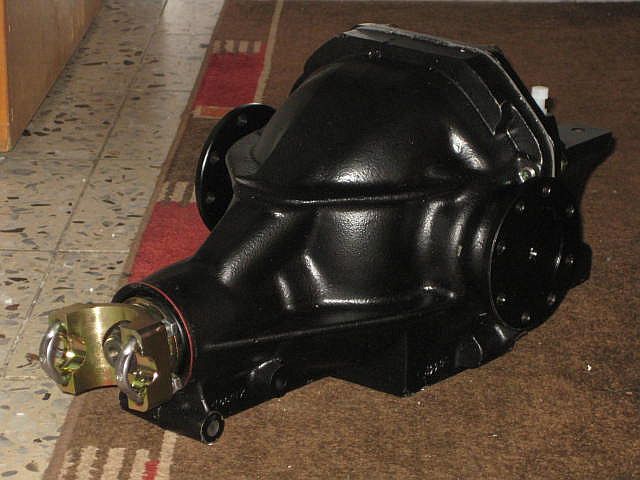
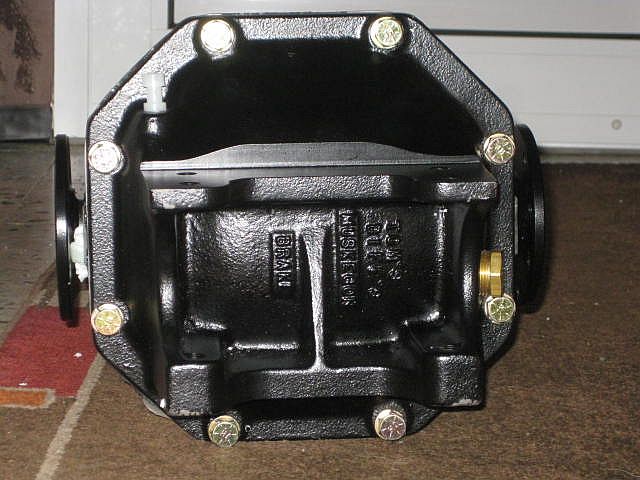
The 1350 Axle kit from Toms Diffs will replace all that stuff in addition with a 12 bolt from Mike.
I�ll put it on a board in my office where I collect all the parts the engine has destroyed. The joint here was destroyed on a street in town. At least I was able to roll home with 25mph.The 1350 Axle kit from Toms Diffs will replace all that stuff in addition with a 12 bolt from Mike.
12-24-2014, 05:28 PM
#73
Pro
Thread Starter
Member Since: May 2011
Location: Karlsruhe (Germany)
Posts: 708
Likes: 0
Received 32 Likes
on
17 Posts
Ordering the 12 bolt + axle kit from Mike was one of my biggest ordering-adventures from USA I ever had. It took maybe 50 PNs and mails, plus some phone calls to exactly explain what I needed (and some for clearifying the delivery issues). Unfortunately I had to wait ~4 months untit all parts arrived here in Germany, but in the end everything went right.
I reveiced from Mike exactly what I wanted and everything seems to fit so far.
I can�t tell how it will run, I first have to put it into the car. At typical job for christmas holidays, isn�t it?
But all this stuff will be sandblasted and powdercoated before reinstalling.
I reveiced from Mike exactly what I wanted and everything seems to fit so far.
I can�t tell how it will run, I first have to put it into the car. At typical job for christmas holidays, isn�t it?
But all this stuff will be sandblasted and powdercoated before reinstalling.
Last edited by zuendler; 12-24-2014 at 05:40 PM.
12-25-2014, 11:07 PM
#74
Burning Brakes


You got some exciting parts there, zuendler. You will be able to take full advantage of your zz502. Looking forward to more updates.
Karlsruhe... I grew up next door in the Haguenau/Strasbourg area.
Karlsruhe... I grew up next door in the Haguenau/Strasbourg area.
 01-08-2015, 05:06 AM
#76
Pro
Thread Starter
Member Since: May 2011
Location: Karlsruhe (Germany)
Posts: 708
Likes: 0
Received 32 Likes
on
17 Posts
Some progress
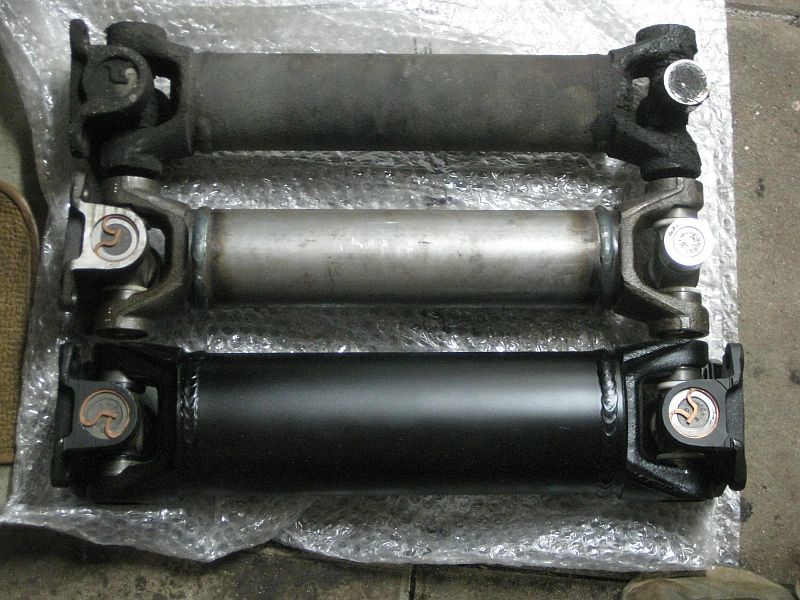
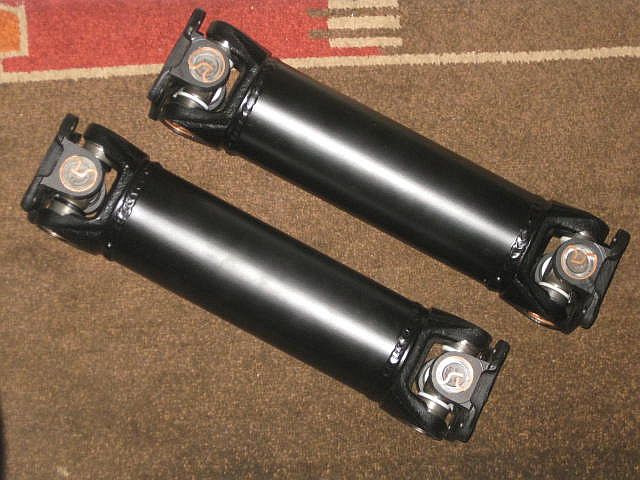
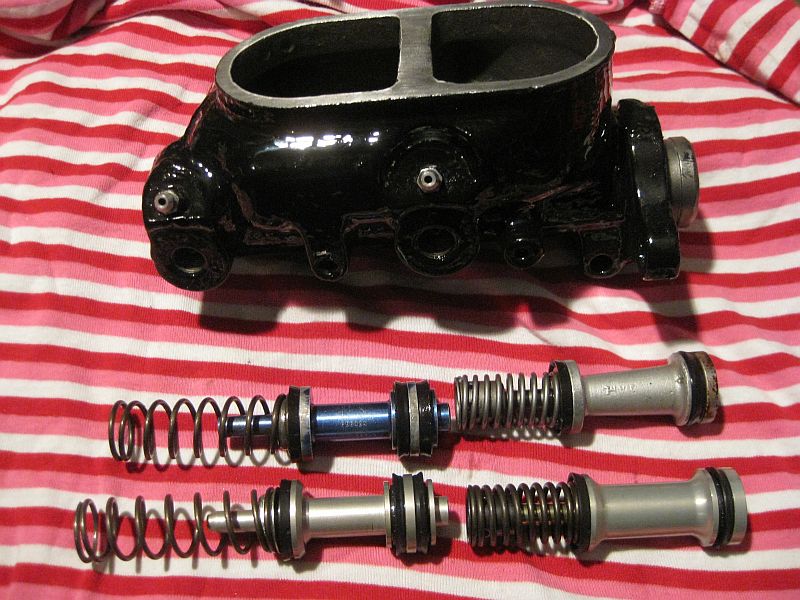
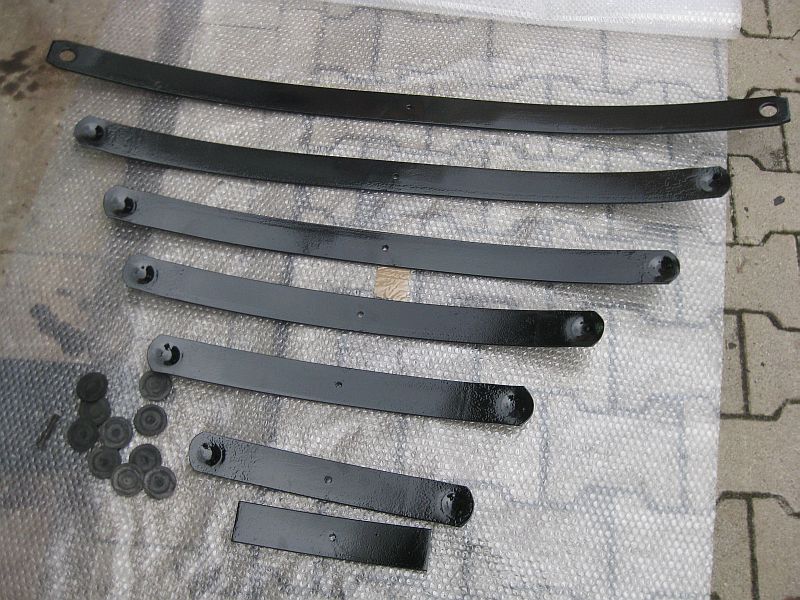
On the upper end the old stock shaft: 4.4kgs
Then a reinforced one (at least it was advertised so): 4.4kgs
On the bottom the new one from Toms Diffs: 6.7kgs
Btw: I weighted the stock diff with 42kgs and the 12 bolt with 45kgs.
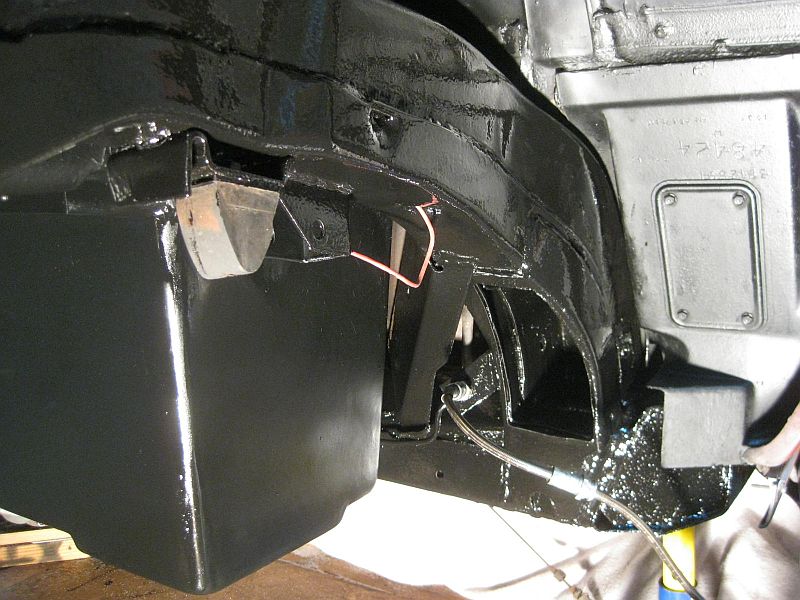
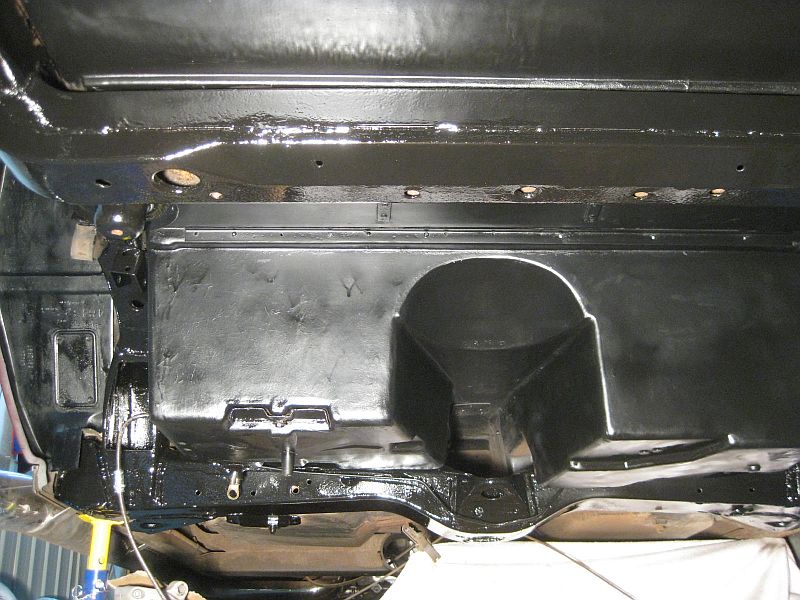
And some other pics from cleaning and painting the frame:

On the upper end the old stock shaft: 4.4kgs
Then a reinforced one (at least it was advertised so): 4.4kgs
On the bottom the new one from Toms Diffs: 6.7kgs
Btw: I weighted the stock diff with 42kgs and the 12 bolt with 45kgs.
And some other pics from cleaning and painting the frame:
01-23-2015, 05:57 AM
#77
Pro
Thread Starter
Member Since: May 2011
Location: Karlsruhe (Germany)
Posts: 708
Likes: 0
Received 32 Likes
on
17 Posts
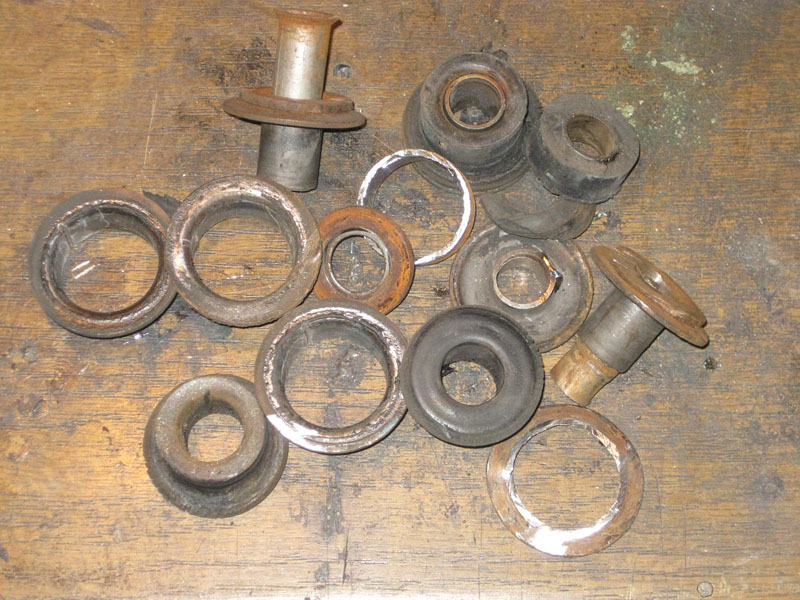
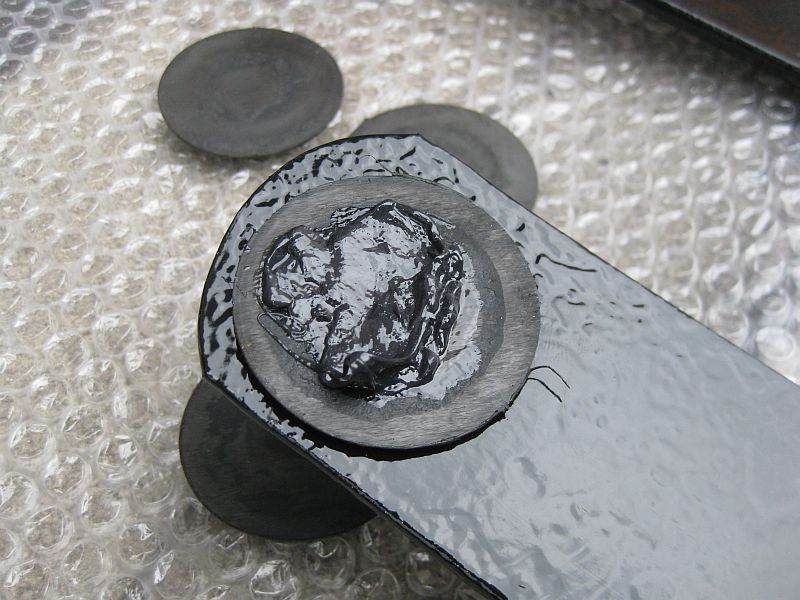
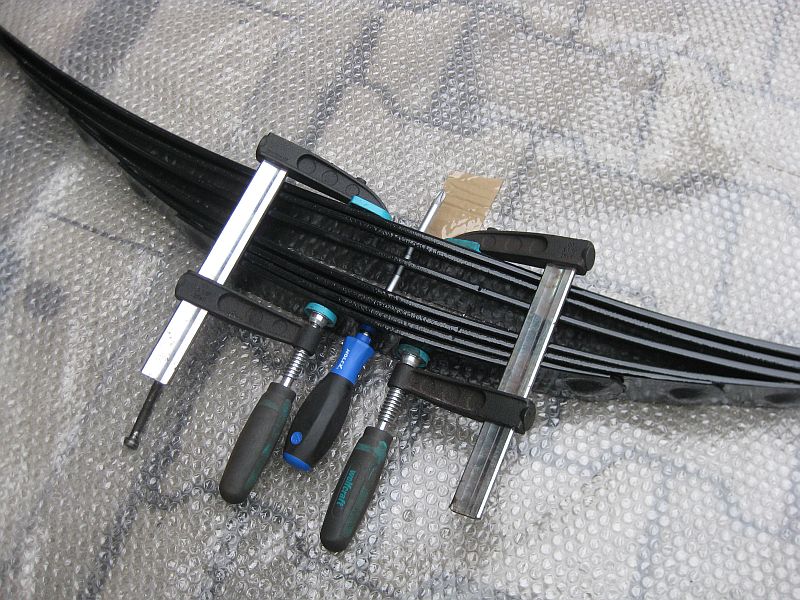
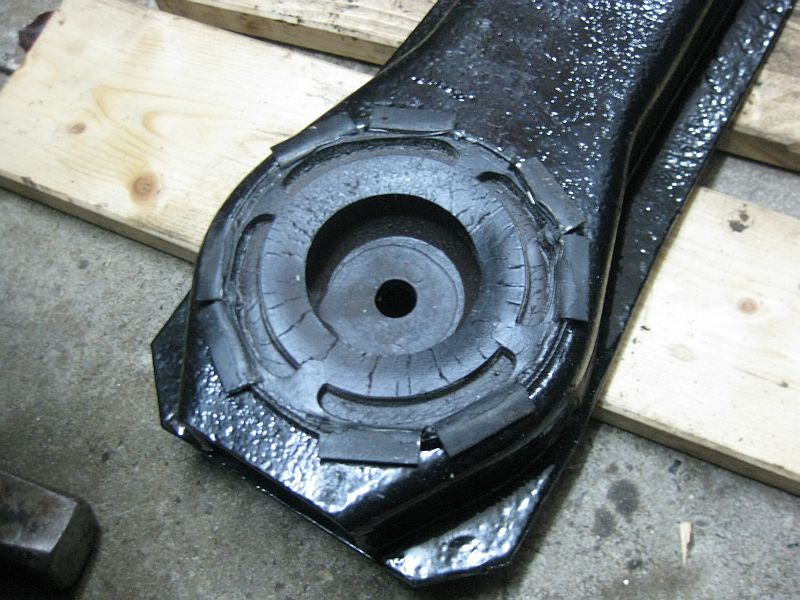
Today I pressed the bushings into the new painted trailing arms.
Then I tried to flare the inner sleeve, but it cracked.
(Maybe I show a picture later)
The sleeve was from Wilcox, but the ones from corvette-america look exactly the same on the photo. So I guess they won�t be any better.
My local vendor got one sleeve from GM, he said the are better. But still only one piece...
But he has stainless steel sleeves from corvette-america, they look to be softer and accept more bending.
Has anyone experience which sleeves work well?
Last edited by zuendler; 01-23-2015 at 06:01 AM.
01-24-2015, 05:24 PM
#78
Pro
Thread Starter
Member Since: May 2011
Location: Karlsruhe (Germany)
Posts: 708
Likes: 0
Received 32 Likes
on
17 Posts
some new pics
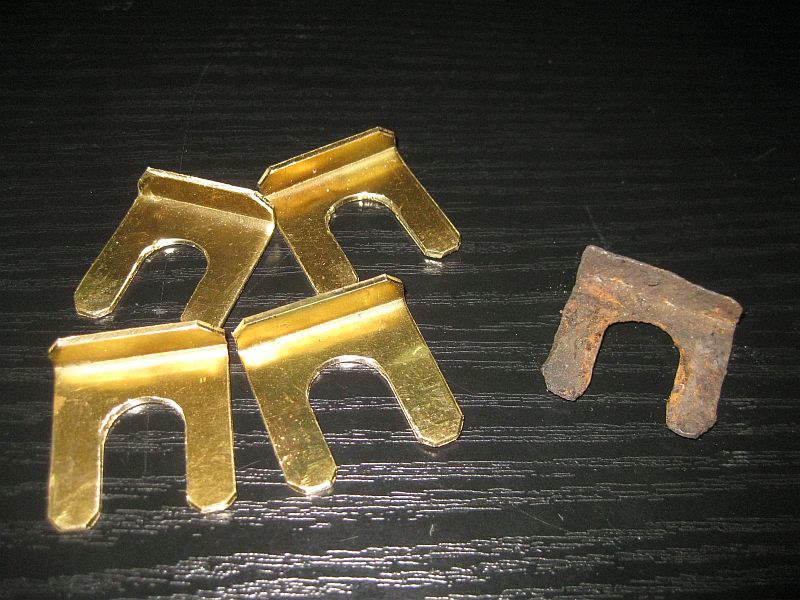


I got this new strud rods from Wilcox:
While the old ones fit tight in the mount, the new ones have way too much travel! Are there spacers missing? There were none in the package. Do I have to make me one myself? Or how should this work?
I got this new strud rods from Wilcox:
While the old ones fit tight in the mount, the new ones have way too much travel!
Are there spacers missing? There were none in the package. Do I have to make me one myself? Or how should this work?
Last edited by zuendler; 01-24-2015 at 07:52 PM.
01-24-2015, 08:11 PM
#79
Le Mans Master


Yes! You are missing 4 strut rod washers. Maybe Wilcox can send them to you by express mail as it would be fast delivery and relatively cheap to ship that way. Link to the part you need order 4:
http://willcoxcorvette.com/product_i...oducts_id=6476
http://willcoxcorvette.com/product_i...oducts_id=6476
01-25-2015, 03:45 AM
#80
Pro
Thread Starter
Member Since: May 2011
Location: Karlsruhe (Germany)
Posts: 708
Likes: 0
Received 32 Likes
on
17 Posts
Thank you.
If this is just a normal washer I will have a look to find them here in Germany. The order @Willcox is 6 monthis ago, I don�t believe they would send me 4 for free to Germany after that time.
If this is just a normal washer I will have a look to find them here in Germany. The order @Willcox is 6 monthis ago, I don�t believe they would send me 4 for free to Germany after that time.