
Borgeson Install
 02-10-2013, 11:59 AM
#1
Instructor

Thread Starter
I finally decided to take the plunge and go with the Borgeson power steering box. I had finally had enough with that leaky control valve.
I did the install without removing the steering column, so it was a little more difficult, but I didn't have to worry about removing and installing the column or messing up the measurements for shortening the column.
Car Info:
1976 with factory power steering and tilt/telescopic wheel
Interference removal:
Placed the front end on jack stands and removed both front wheels.
Removed the alternator
Removed the brake master cylinder and moved it out of the way without disconnecting the brake lines
Old system removal:
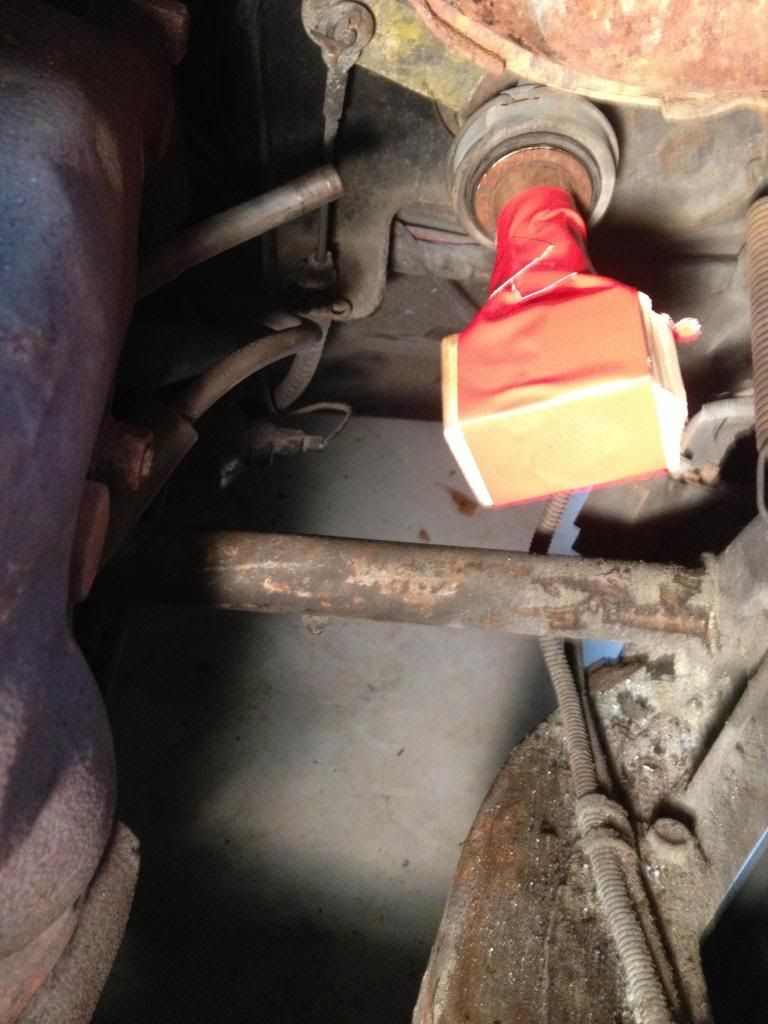
-Removed the hoses from the power steering control valve (7/16" and 5/8") (PSCV)
-Let the fluid drain for a bit. I didn't do this, but it will help you make less of a mess if you rotate the steering wheel back and forth a few times to get more of the fluid out of the cylinder. If you go too fast, it will make a spray and shoot across your garage floor.
-Removed the cotter pin and the crown nut (3/4") connecting the pitman arm to the PSCV.
-Used a ball joint separator to remove the PSCV. Be careful, the valve will come off with some force behind it!
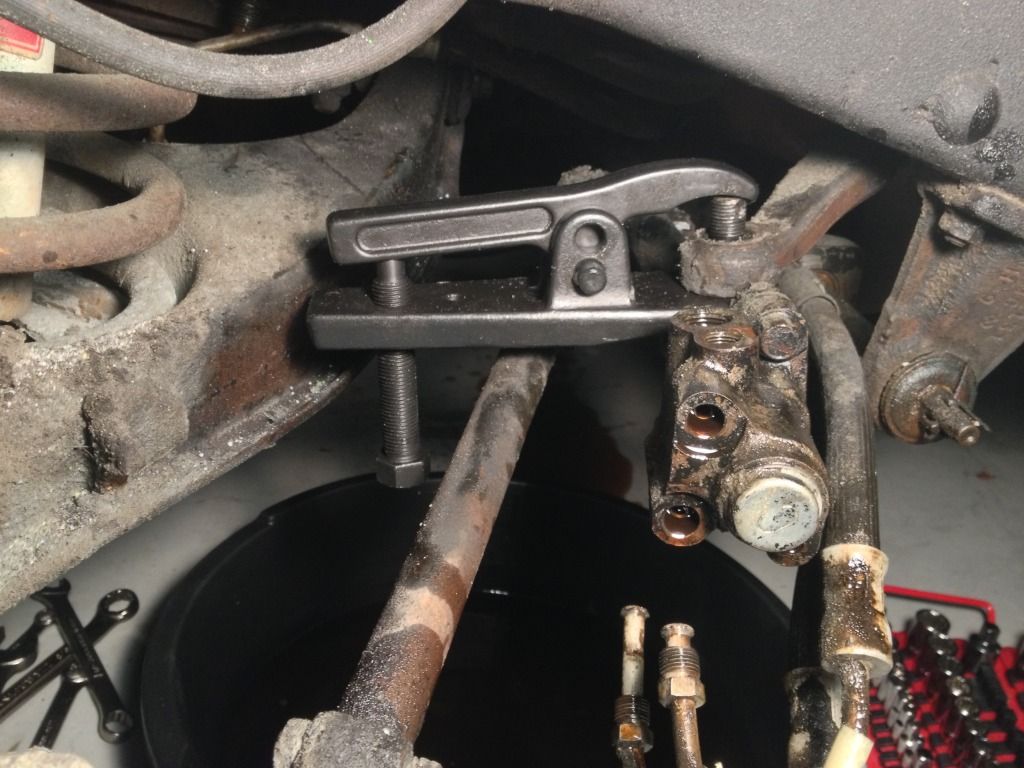
This is the tool I used (17$ from Harbor Freight): http://www.harborfreight.com/3-4-qua...tor-99849.html
-I then took out the bolt holding the PSCV to the steering linkage (9/16") and unscrewed the valve from the linkage.
-Removed hoses form the pump. At this point you may want to remove the pump and clean it up. I had previously repaired my pump, so I left it in.
-Disconnect the steering cylinder hoses (7/16")
-Remove the cotter pin and the crown nut (9/16") from the drivers side bracket. If you're having trouble with the cylinder arm rotating while you are removing the crown nut, there is a flat on the arm just behind the bracket that a 1/2" wrench will fit nicely.
-Push the rod through the bracket. This will make a mess because of the fluid still in the cylinder.
-Remove the cylinder from the steering linkage by removing the cotter pin and the crown nut (3/4"). I used the same ball joint separator that I used for the PSCV.
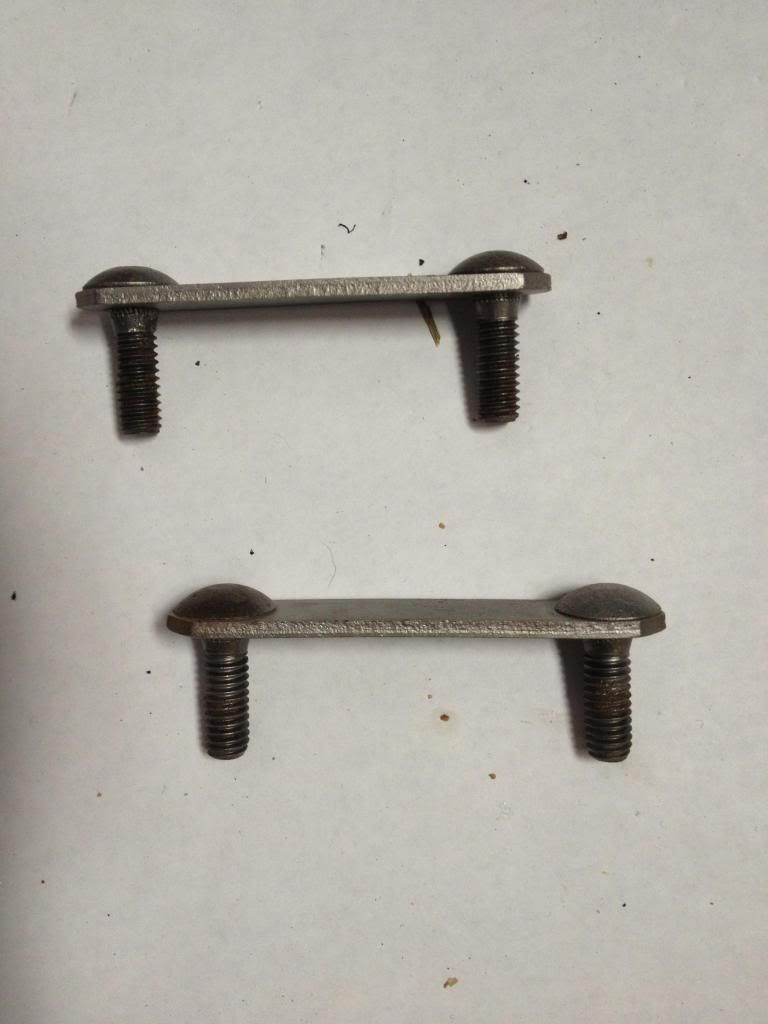
-Remove the drivers side cylinder bracket by taking out the 4 1/2" nuts. The studs are actually these and you can work them out through the frame hole:
-You have a choice for the pitman arm now, You can either take it off while the steering box is bolted to the car (which I would recommend if you don't have an impact wrench and a vise) or you can leave it on and take it off the steering box later. I took mine off later just because I couldn't get enough torque on it to break it loose and my impact wrench wouldn't fit between the nut and the garage floor. The choice is yours. The nut is 1 5/16"
-Remove the old rag joint by loosening the 12-point 7/16" clamp bolts. I had to soak mine in PB Blaster (or your preferred brand of penetrant) for a while to break them loose. The rag joint will not come off due to the fact that you have to room with the steering box and the steering column are pinning it in place, so just loosen it for now.
-Remove the steering box frame bolts. The nuts are 9/16" and the bolt heads have a square part that fits into the frame, so this is a one wrench operation.
-Now you should be able to beat the rag joint off of the steering column.
-Remove the steering box.
-At this point, if you haven't removed the pitman arm, do so now. The nut is 1 5/16"

Borgeson Installation:
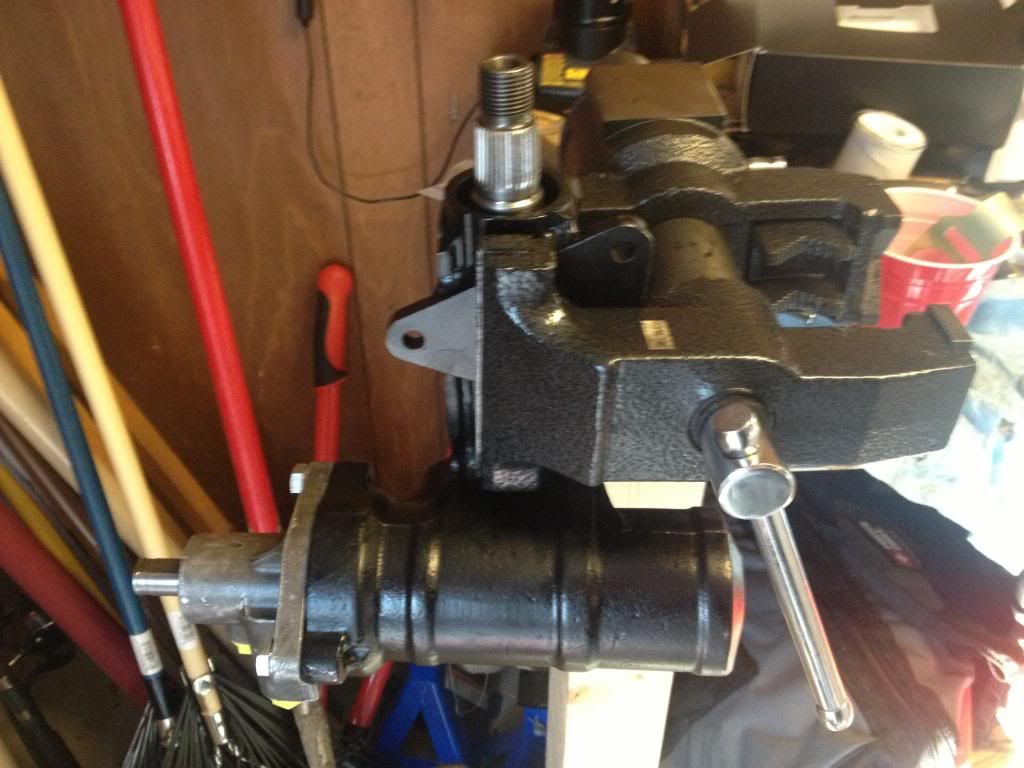
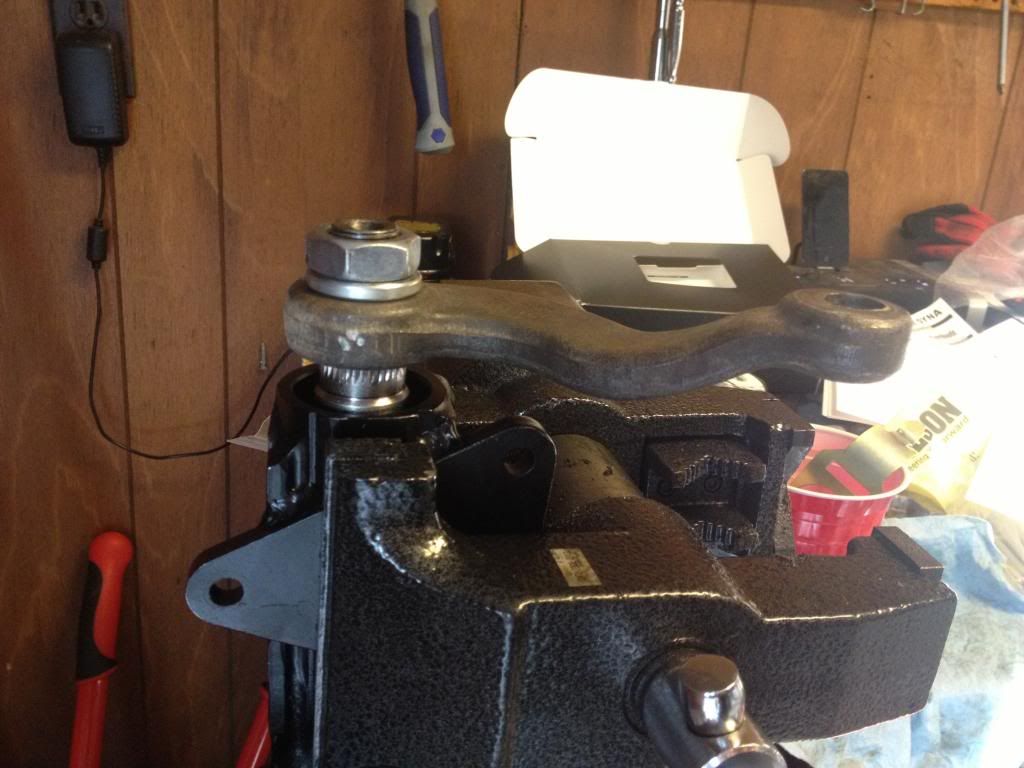
-I used an impact wrench to attach the pitman arm to the new box (1 5/16"):
-I placed the box in the car and took a rough, but conservative measurement of how far I needed to shorten the steering column and scribed a mark on the column.
-I removed the steering box and taped a piece of wood over the end of the column to protect it from the abuse I was about to give it. I would recommend cleaning the portion of the column you intend to collapse.
-It took a lot of effort with a 4lb sledge to get it to start collapsing, but after that initial break-away, I could tap it into position.
-I took Borgeson's rag joint apart and placed the box side on the new box. I bolted the box up and then used the other side of the rag joint to measure how much further I needed to collapse the column.
-Take the box out again.
-Collapse column again.
-Now I needed to figure out exactly which splines to to align to on the column side of the rag joint. If I was a few splines off, it would make the steering wheel crooked.
-I installed the drag link adapter in place of the PSCV and bolted the steering box to the frame and the pitman arm to the drag link adapter, but I didn't cotter pin anything because I knew I'd be taking it off again shortly.
-I ensured the wheels were straight and my steering wheel was straight and I marked where the column end of the rag joint would have to be to mate with the box side of the rag joint to ensure everything was straight.
-Remove steering box.
-I then attempted to attached the column end of the rag joint to the column, but it didn't want to fit. Borgeson's rag joint doesn't have the clamp style that the factory rag joint had:
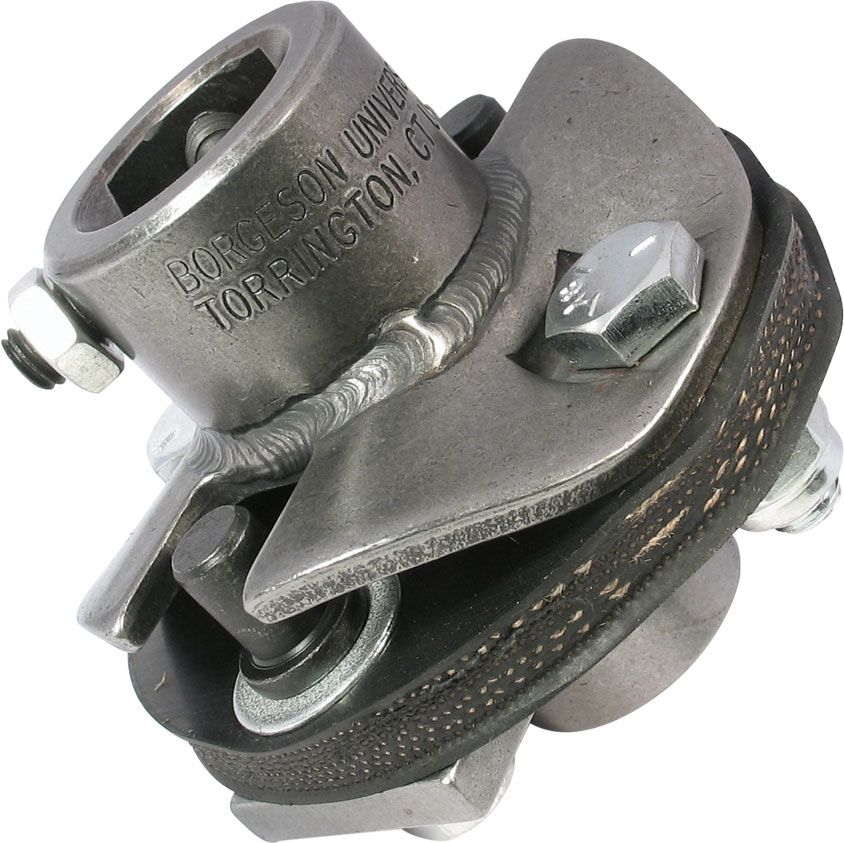
-I ended up using a Dremel to taper the end of the column and I heated up the column end of the rag joint and beat it onto the column. Mechanical agitation. If you intend on beating your rag joint onto the column, remember that the column shaft can collapse now! I put a pair of vise grips on the collapsible part of the column so it wouldn't collapse any more on me:
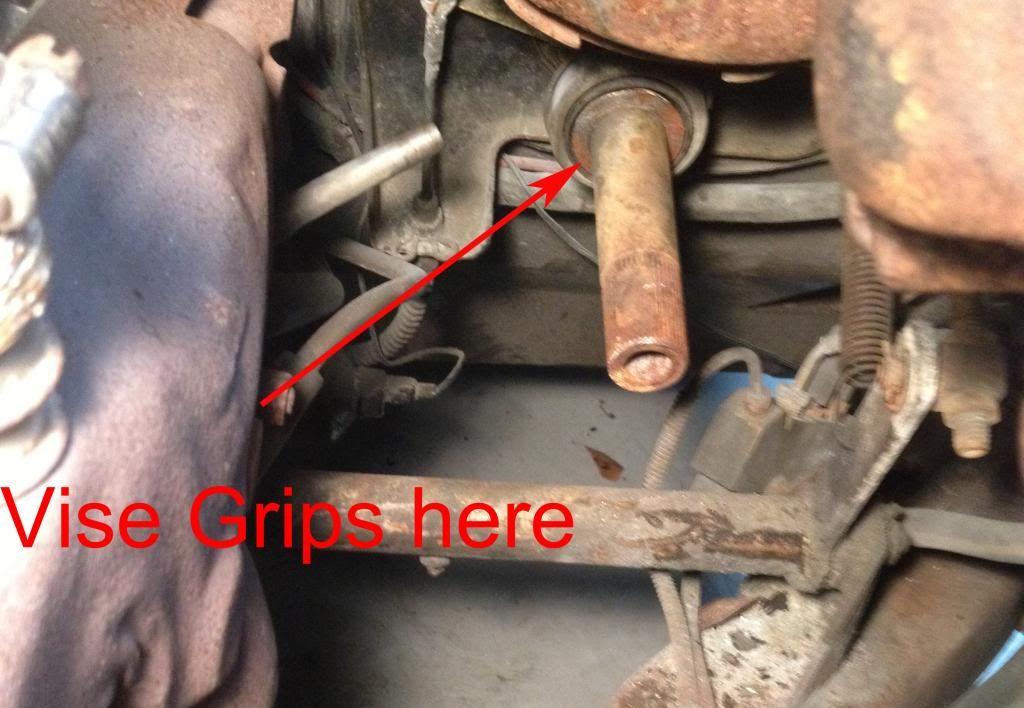
-Borgeson tells you to put a flat in the column for the setscrew to sit in. I decided to drill a small divet where the set screw will go, although with the amount of force it took to get on the column, I doubt that step was necessary.
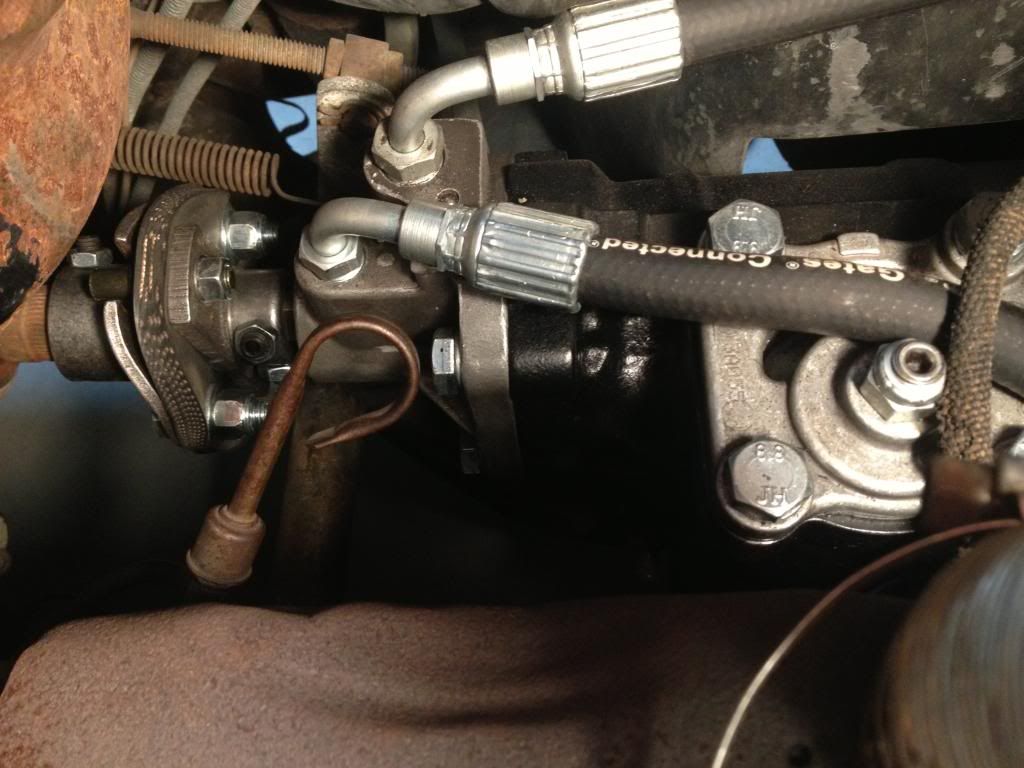
-Once I had the rag joint installed, I put the box back in and hooked everything up. The hoses that Borgeson gave me are pretty stiff and it was difficult to get the routed, but once that was done, I filled the system.
Result:
-I tested the steering with the wheels up. The with the wheels down. Then I took her for a drive.
-I could immediately tell the difference just from backing out of my driveway.
-Overall it had a more sporty feel.
-Turns out, I was about 1, maybe 2 splines off when I attached the column rag joint. I just went and had a shop align the wheels straight and the problem was solved.
I hope this helps anybody trying to do this modification. I thought I had more pictures of the process, but you know how it goes once you get going on a project.
If you have any questions, please feel free to ask!
-Mr. Green.
I did the install without removing the steering column, so it was a little more difficult, but I didn't have to worry about removing and installing the column or messing up the measurements for shortening the column.
Car Info:
1976 with factory power steering and tilt/telescopic wheel
Interference removal:
Placed the front end on jack stands and removed both front wheels.
Removed the alternator
Removed the brake master cylinder and moved it out of the way without disconnecting the brake lines
Old system removal:
-Removed the hoses from the power steering control valve (7/16" and 5/8") (PSCV)
-Let the fluid drain for a bit. I didn't do this, but it will help you make less of a mess if you rotate the steering wheel back and forth a few times to get more of the fluid out of the cylinder. If you go too fast, it will make a spray and shoot across your garage floor.
-Removed the cotter pin and the crown nut (3/4") connecting the pitman arm to the PSCV.
-Used a ball joint separator to remove the PSCV. Be careful, the valve will come off with some force behind it!
This is the tool I used (17$ from Harbor Freight): http://www.harborfreight.com/3-4-qua...tor-99849.html
-I then took out the bolt holding the PSCV to the steering linkage (9/16") and unscrewed the valve from the linkage.
-Removed hoses form the pump. At this point you may want to remove the pump and clean it up. I had previously repaired my pump, so I left it in.
-Disconnect the steering cylinder hoses (7/16")
-Remove the cotter pin and the crown nut (9/16") from the drivers side bracket. If you're having trouble with the cylinder arm rotating while you are removing the crown nut, there is a flat on the arm just behind the bracket that a 1/2" wrench will fit nicely.
-Push the rod through the bracket. This will make a mess because of the fluid still in the cylinder.
-Remove the cylinder from the steering linkage by removing the cotter pin and the crown nut (3/4"). I used the same ball joint separator that I used for the PSCV.
-Remove the drivers side cylinder bracket by taking out the 4 1/2" nuts. The studs are actually these and you can work them out through the frame hole:
-You have a choice for the pitman arm now, You can either take it off while the steering box is bolted to the car (which I would recommend if you don't have an impact wrench and a vise) or you can leave it on and take it off the steering box later. I took mine off later just because I couldn't get enough torque on it to break it loose and my impact wrench wouldn't fit between the nut and the garage floor. The choice is yours. The nut is 1 5/16"
-Remove the old rag joint by loosening the 12-point 7/16" clamp bolts. I had to soak mine in PB Blaster (or your preferred brand of penetrant) for a while to break them loose. The rag joint will not come off due to the fact that you have to room with the steering box and the steering column are pinning it in place, so just loosen it for now.
-Remove the steering box frame bolts. The nuts are 9/16" and the bolt heads have a square part that fits into the frame, so this is a one wrench operation.
-Now you should be able to beat the rag joint off of the steering column.
-Remove the steering box.
-At this point, if you haven't removed the pitman arm, do so now. The nut is 1 5/16"
Borgeson Installation:
-I used an impact wrench to attach the pitman arm to the new box (1 5/16"):
-I placed the box in the car and took a rough, but conservative measurement of how far I needed to shorten the steering column and scribed a mark on the column.
-I removed the steering box and taped a piece of wood over the end of the column to protect it from the abuse I was about to give it. I would recommend cleaning the portion of the column you intend to collapse.
-It took a lot of effort with a 4lb sledge to get it to start collapsing, but after that initial break-away, I could tap it into position.
-I took Borgeson's rag joint apart and placed the box side on the new box. I bolted the box up and then used the other side of the rag joint to measure how much further I needed to collapse the column.
-Take the box out again.
-Collapse column again.
-Now I needed to figure out exactly which splines to to align to on the column side of the rag joint. If I was a few splines off, it would make the steering wheel crooked.
-I installed the drag link adapter in place of the PSCV and bolted the steering box to the frame and the pitman arm to the drag link adapter, but I didn't cotter pin anything because I knew I'd be taking it off again shortly.
-I ensured the wheels were straight and my steering wheel was straight and I marked where the column end of the rag joint would have to be to mate with the box side of the rag joint to ensure everything was straight.
-Remove steering box.
-I then attempted to attached the column end of the rag joint to the column, but it didn't want to fit. Borgeson's rag joint doesn't have the clamp style that the factory rag joint had:
-I ended up using a Dremel to taper the end of the column and I heated up the column end of the rag joint and beat it onto the column. Mechanical agitation. If you intend on beating your rag joint onto the column, remember that the column shaft can collapse now! I put a pair of vise grips on the collapsible part of the column so it wouldn't collapse any more on me:
-Borgeson tells you to put a flat in the column for the setscrew to sit in. I decided to drill a small divet where the set screw will go, although with the amount of force it took to get on the column, I doubt that step was necessary.
-Once I had the rag joint installed, I put the box back in and hooked everything up. The hoses that Borgeson gave me are pretty stiff and it was difficult to get the routed, but once that was done, I filled the system.
Result:
-I tested the steering with the wheels up. The with the wheels down. Then I took her for a drive.
-I could immediately tell the difference just from backing out of my driveway.
-Overall it had a more sporty feel.
-Turns out, I was about 1, maybe 2 splines off when I attached the column rag joint. I just went and had a shop align the wheels straight and the problem was solved.
I hope this helps anybody trying to do this modification. I thought I had more pictures of the process, but you know how it goes once you get going on a project.
If you have any questions, please feel free to ask!
-Mr. Green.

The following 10 users liked this post by Mr.Green:
Auggievf (12-14-2018),
C6Whatever (10-01-2020),
carriljc (12-27-2018),
Classic Muscle (03-21-2021),
Dirk76 (01-04-2016),
and 5 others liked this post.
02-10-2013, 02:51 PM
#2
Melting Slicks


Awesome write-up. Looking forward to doing this in a few months, thanks for the info. Question, how did you get the correct orientation of the pitman arm with the unit in a vice?
02-10-2013, 04:22 PM
#3
Instructor
Thread Starter
This is a picture of the splines on my old steering box. The Borgeson box was machined to match these:

If you notice, there are larger gaps between some of the splines. There are four of these gaps around the thing and your stock pitman arm should match the pattern.
I hope this answers your question.
-Mr. Green

 02-10-2013, 07:27 PM
#5
Team Owner


Nicely documented! People will appreciate that. I will stay with a Gary R. stock blueprinted steering box but for those who want options you have presented an excellent guide.
02-16-2013, 07:40 PM
#7
Advanced
Mr. Green,
Did you have to move your brake lines? I just pulled the steering box out of my 68 today and will start installing the new Borgeson box tomorrow. Great timing on your write up!
Did you have to move your brake lines? I just pulled the steering box out of my 68 today and will start installing the new Borgeson box tomorrow. Great timing on your write up!
02-16-2013, 08:23 PM
#9
Melting Slicks
Sorry Paul, but from what I've read regarding this modification, I don't see a lot of misery. In fact, this looks as close to a re and re as you can get. The only real modification appears to be the collapsing of the steering column, and thanks to the guys on here that have already done it, just following their advice looks very straight forward. Ditto for the rag joint; if you pre fit before collapsing the column, this seems to alleviate the fitment issue.
For me, the misery seems to come every few months when I find more power steering fluid leaking from my steering components after trying all the rebuild kits and advice this forum can offer.
I personally look forward to getting to this in April or May, and never having to look back. I'm glad the blueprinted unit is working for you.......but that still leaves an antiquated set of steering components that to me can be replaced without taking anything away from the true feeling of the car.
Now installing a rack.......that looks like it might involve some misery.
Take care.
Last edited by briankeery; 02-17-2013 at 11:21 AM.
The following users liked this post:
carriljc (12-27-2018)
02-16-2013, 10:38 PM
#10
Le Mans Master

no misery here. mine was a straight forward install. one of the easiest mods i've done so far
02-17-2013, 08:16 AM
#11
02-17-2013, 09:44 AM
#12
Burning Brakes


Nice write up, I did the same mod, the main pain in the *** moments were getting the arm off the steering box and clamping the steering column to stop it collapsing into the car, oh and getting the p/s valve off the steering linkage, it's all heavy duty stuff but the results are worth it
My rubber rag joint failed after 1 year so I replaced it with a solid joint, I'd recommend everyone does the same from the start.
My rubber rag joint failed after 1 year so I replaced it with a solid joint, I'd recommend everyone does the same from the start.
02-17-2013, 02:41 PM
#13
Instructor
Thread Starter
Brake lines are still in their original location. Good luck on your install. Let me know how it goes, or if you have any changes to the instructions I typed up.
02-17-2013, 02:50 PM
#14
Instructor
Thread Starter
Nice write up, I did the same mod, the main pain in the *** moments were getting the arm off the steering box and clamping the steering column to stop it collapsing into the car, oh and getting the p/s valve off the steering linkage, it's all heavy duty stuff but the results are worth it
My rubber rag joint failed after 1 year so I replaced it with a solid joint, I'd recommend everyone does the same from the start.
My rubber rag joint failed after 1 year so I replaced it with a solid joint, I'd recommend everyone does the same from the start.
02-17-2013, 03:54 PM
#15
Burning Brakes
The solid joint gives a tighter connection and is safer.
Item number 014350n from Borgeson 1"-48 x 18mm DD
02-17-2013, 07:04 PM
#16
Ditto, the steering got progressively looser over the course of a weekend and when I checked it was completely ripped, may have been my fault for tightening it too tight/not tight enough but I don't think so.
The solid joint gives a tighter connection and is safer.
Item number 014350n from Borgeson 1"-48 x 18mm DD
The solid joint gives a tighter connection and is safer.
Item number 014350n from Borgeson 1"-48 x 18mm DD
Last edited by GT's 78; 02-17-2013 at 07:10 PM.
02-17-2013, 07:35 PM
#17
Team Owner
I won't. The GM setup properly done is fine with me. I don't have to remove steering columns, bang on them to make parts fit, worry about fit and alignment, and see rag-joints wear out in a year. Then go with a u-joint. And hope for the best. GM engineers knew what they were doing.
02-17-2013, 07:52 PM
#19
Drifting


I'll never understand why someone choses to put down someone elses choice, just because it's not what they used 
I have a Jeep box conversion myself, and it was a very easy install. It removes all the crap that GM put in there, crap that could start leaking or causing problems at any time down the road.
I have a Jeep box conversion myself, and it was a very easy install. It removes all the crap that GM put in there, crap that could start leaking or causing problems at any time down the road.
The following users liked this post:
carriljc (12-27-2018)
02-17-2013, 07:58 PM
#20
Team Owner
I'll never understand why someone choses to put down someone elses choice, just because it's not what they used
I have a Jeep box conversion myself, and it was a very easy install. It removes all the crap that GM put in there, crap that could start leaking or causing problems at any time down the road.
I have a Jeep box conversion myself, and it was a very easy install. It removes all the crap that GM put in there, crap that could start leaking or causing problems at any time down the road.
Last edited by Paul L; 02-17-2013 at 08:03 PM.