
Headlight switch
 07-23-2012, 06:11 AM
#1


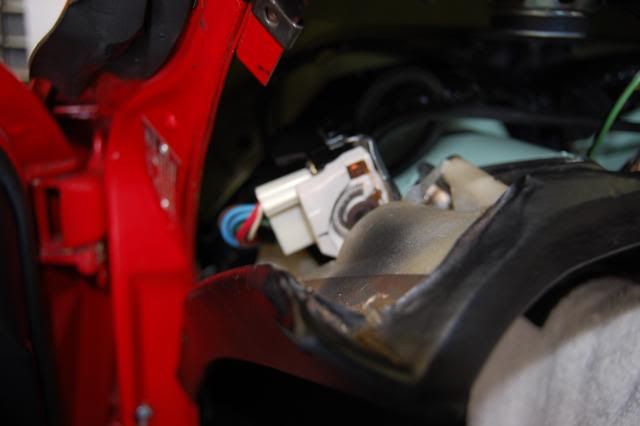
My headlight switch suddenly doesn't want to raise headlamps (I have to use the vacuum relay) and also it has been installed a custom **** that I want to replace. How to access to the switch in a painless mode? Thanks
 07-23-2012, 01:30 PM
#2

assuming you can get your hand up there, press **** release button, pull **** out, unscrew retaining bezel.
07-23-2012, 02:09 PM
#3
Team Owner

Member Since: Sep 2006
Location: Westminster Maryland
Posts: 30,173
Likes: 0
Received 2,878 Likes
on
2,515 Posts

Hi ID,
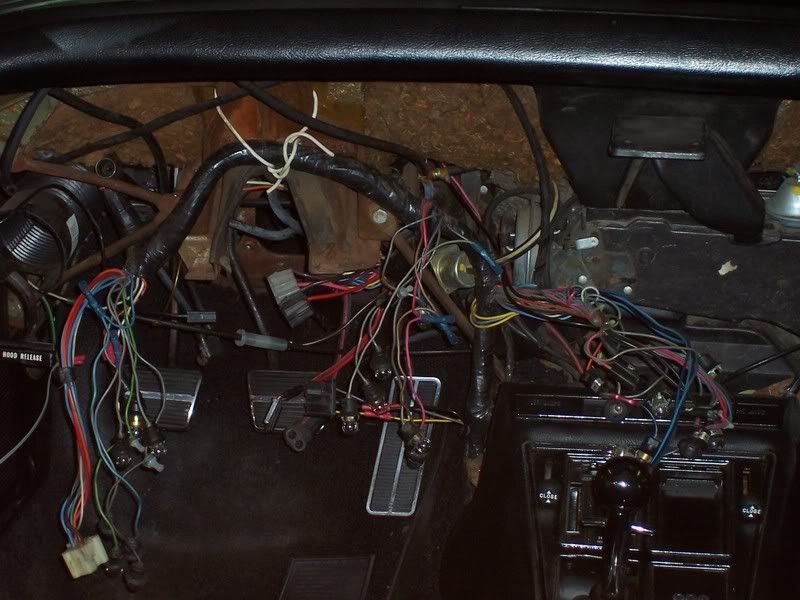
Here's the access to the switch if you drop the steering column, and lower the pad.
Good Access, BUT, not painless.
Regards,
Alan
Here's the access to the switch if you drop the steering column, and lower the pad.
Good Access, BUT, not painless.
Regards,
Alan
07-23-2012, 02:34 PM
#4
Burning Brakes

07-24-2012, 02:31 AM
#6
Burning Brakes
Iron Dog,
I just visited a Hydraulics supplier today and we talked about using a 12 Volt solenoid actuated air valve to eliminate the vacuum hoses that go to and from the head light switch. This air valve will also eliminate the two pilot actuated valves under the hood. The plan is to run a single wire from the hi-beam foot switch to the new air valve which will then apply vacuum to the two head light air cylinders. I'm hoping that this simple solution will work better than the complex stock system. And also reduce the number of places for a vacuum leak to occur.
I'll let you know how it all works out.
John
07-24-2012, 12:13 PM
#7
Iron Dog,
I just visited a Hydraulics supplier today and we talked about using a 12 Volt solenoid actuated air valve to eliminate the vacuum hoses that go to and from the head light switch. This air valve will also eliminate the two pilot actuated valves under the hood. The plan is to run a single wire from the hi-beam foot switch to the new air valve which will then apply vacuum to the two head light air cylinders. I'm hoping that this simple solution will work better than the complex stock system. And also reduce the number of places for a vacuum leak to occur.
I'll let you know how it all works out.
John
I just visited a Hydraulics supplier today and we talked about using a 12 Volt solenoid actuated air valve to eliminate the vacuum hoses that go to and from the head light switch. This air valve will also eliminate the two pilot actuated valves under the hood. The plan is to run a single wire from the hi-beam foot switch to the new air valve which will then apply vacuum to the two head light air cylinders. I'm hoping that this simple solution will work better than the complex stock system. And also reduce the number of places for a vacuum leak to occur.
I'll let you know how it all works out.
John
07-24-2012, 12:30 PM
#8
Iron Dog,
I just visited a Hydraulics supplier today and we talked about using a 12 Volt solenoid actuated air valve to eliminate the vacuum hoses that go to and from the head light switch. This air valve will also eliminate the two pilot actuated valves under the hood. The plan is to run a single wire from the hi-beam foot switch to the new air valve which will then apply vacuum to the two head light air cylinders. I'm hoping that this simple solution will work better than the complex stock system. And also reduce the number of places for a vacuum leak to occur.
I'll let you know how it all works out.
John
I just visited a Hydraulics supplier today and we talked about using a 12 Volt solenoid actuated air valve to eliminate the vacuum hoses that go to and from the head light switch. This air valve will also eliminate the two pilot actuated valves under the hood. The plan is to run a single wire from the hi-beam foot switch to the new air valve which will then apply vacuum to the two head light air cylinders. I'm hoping that this simple solution will work better than the complex stock system. And also reduce the number of places for a vacuum leak to occur.
I'll let you know how it all works out.
John
Given that the stock system worked perfectly for the first 20-30 years of a car's life and owners rarely troubleshoot properly (or at all) now that they're wearing out, I'm not sure I agree with the constant criticism of the OEM set up.
How many people have actually read and followed the sticky on this subject in order to learn how it works- vs. just took a guess at what's wrong and hoped for the best?


 07-24-2012, 02:38 PM
#10
Burning Brakes
Mike,
How will you lower the headlights and select between low beam and high beam? Will you also incorporate a manual override?
The stock electrical power goes from the headlight switch to the hi/lo beam foot switch. I'll tap off the wire before the foot switch and run it to the solenoid which draws about 100mA. When the headlight switch is turned on, the solenoid will energize and the lights will pop up. The foot switch will still control the hi/lo beams. When the lights are turned off, the headlights will shut; just like stock. It would also be easy enough to put a switch somewhere to allow me to manually pop up the headlights.
How many people have actually read and followed the sticky on this subject in order to learn how it works- vs. just took a guess at what's wrong and hoped for the best?
When I got my Vette, the first thing I did was to get the headlights working properly. Dr. Rebuild has a great kit with very good instructions. Since then, I've made a lot of changes and felt that the electric solenoid was a better, simpler choice. Like I said before, it eliminates several sources of potential vacuum leaks. BTW, I also added the Speed Direct "Never Nites" headlight relay system to eliminate the headlight high current having to pass thru the fuse panel and the headlight switch. This mod supplies full voltage to the lights, and is super easy to install.
John
07-24-2012, 02:45 PM
#11
Much easier to learn how the stock system works and just fix it.
07-24-2012, 10:00 PM
#12
Drifting


Yes Sir; Corvette Central sells a Troubleshooting the 1968-1982 Corvette Headlight & Wiper door Vacuum systems, that has 7 pages, of Understanding the System. & complete drawings of all the different years. Pretty easy to fix, once you read the articles. Have a great day. Gene
07-25-2012, 09:23 PM
#14
Burning Brakes
I believe you'll need a second solenoid to direct vacuum to the 'close' side of the actuators and the wiring and switch to go with it.
The solenoid has 5 ports and is a spring return type. When power is removed, it will apply vacuum to the close side and vent the open side.
Adding a switch to act an an override will also feed current to the headlamps with the design you've proposed.
I'm no electrical expert, but I think a diode in the line by the foot switch will prevent current from trying to go in the wrong direction. On the other hand, I haven't owned this car long enough to understand why I might need a manual over ride.
John
07-26-2012, 10:58 AM
#15
Melting Slicks


I have been driving my 68 coupe for 40 years and 112,000 miles and I have not had that much trouble with my headlight system. The headlight switch ,yes, but everything else,no.