
78 LS1-T56 Turbocharged Build
 11-09-2011, 11:35 AM
#1
Instructor

Thread Starter

1978 corvette I picked up when I was living in California. Had been a body off resto. Full VBP racing suspension, rebuilt orignal small block 350 .30 over edelbrock this and that, but still wasnt good enough. So I decided to get some real power and reliability with a turbocharged LS1 and 6-speed.
The motor before being pulled
The motor before being pulled
Last edited by User-C3; 10-24-2012 at 04:54 PM.


 11-10-2011, 08:02 AM
#3
Instructor
Thread Starter
I have swap completed, I thought I could get the pictures to upload straight into this thread but I cant seem to get it to work correctly.
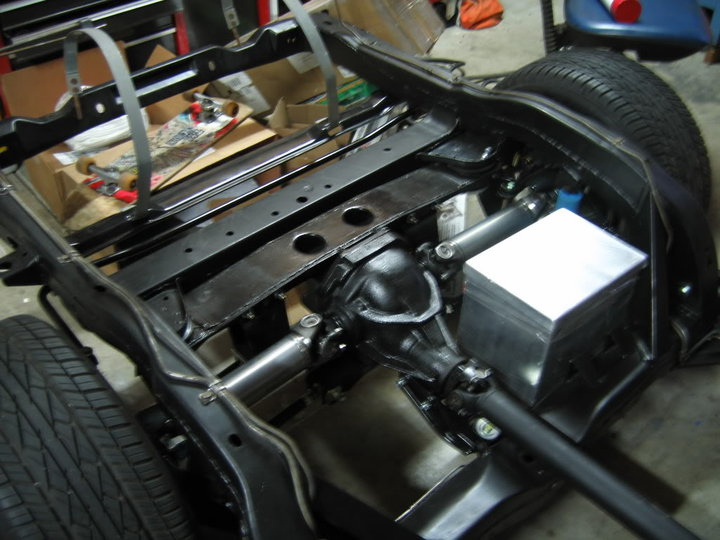
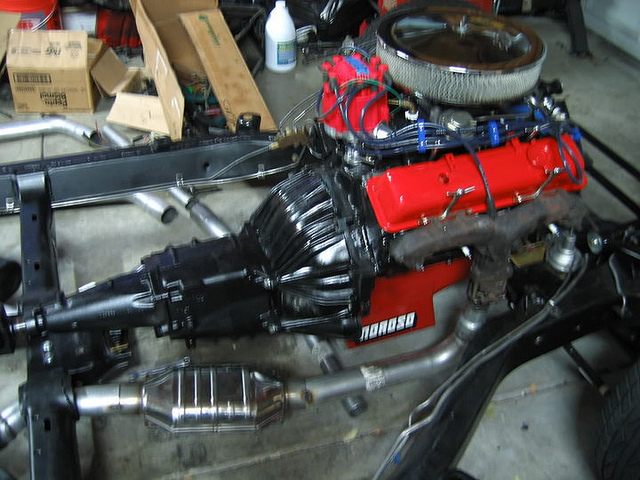
I am running the t-56, the motor is esentially stock at the moment, I upgraded the clutch, modified the oil pan and added a drain port on the oil pan for when I get to the turbocharger setup I am going to be running. When I begin doing the turbo I will do some upgrading to handle the power, but while the engine is still in the car.
I am running the t-56, the motor is esentially stock at the moment, I upgraded the clutch, modified the oil pan and added a drain port on the oil pan for when I get to the turbocharger setup I am going to be running. When I begin doing the turbo I will do some upgrading to handle the power, but while the engine is still in the car.
11-10-2011, 02:45 PM
#5
Instructor
Thread Starter
If you click on one of the flickr links you can access my photo stream. All my photos of the build are in there.
It runs great, I wouldnt have done it any other way. Going from a 4 speed manual to the 6 speed on the freeway is not even a comparison. The power is great, fires right up, and boosted the value 10 fold.
It runs great, I wouldnt have done it any other way. Going from a 4 speed manual to the 6 speed on the freeway is not even a comparison. The power is great, fires right up, and boosted the value 10 fold.
Last edited by User-C3; 06-25-2013 at 08:44 AM.
11-10-2011, 10:38 PM
#6
Burning Brakes

Member Since: Feb 2006
Location: Regina Saskatchewan
Posts: 1,223
Likes: 0
Received 3 Likes
on
3 Posts

If you click on one of the flickr links you can access my photo stream. All my photos of the build are in there.
It runs great, I wouldnt have done it any other way. Going from a 4 speed manual to the 6 speed on the freeway is not even a comparison. The power is great, fires right up, and busted the value 10 fold.
It runs great, I wouldnt have done it any other way. Going from a 4 speed manual to the 6 speed on the freeway is not even a comparison. The power is great, fires right up, and busted the value 10 fold.
 11-11-2011, 08:02 AM
#7
Instructor
Thread Starter
 12-03-2011, 09:35 PM
#9
Melting Slicks


Member Since: Aug 2001
Location: Elkhorn WI
Posts: 2,043
Likes: 0
Received 0 Likes
on
0 Posts
Nice!
What are you thinking of for headlights? I notice in your album, the below:
http://www.flickr.com/photos/6534564...in/photostream
http://www.flickr.com/photos/6534564...in/photostream
So, do tell!
- what are those?
- what are you thinking?
What are you thinking of for headlights? I notice in your album, the below:
http://www.flickr.com/photos/6534564...in/photostream
http://www.flickr.com/photos/6534564...in/photostream
So, do tell!
- what are those?
- what are you thinking?
Last edited by ylose; 12-03-2011 at 09:37 PM.
12-04-2011, 11:59 AM
#10
Instructor
Thread Starter
Nice!
What are you thinking of for headlights? I notice in your album, the below:
http://www.flickr.com/photos/6534564...in/photostream
http://www.flickr.com/photos/6534564...in/photostream
So, do tell!
- what are those?
- what are you thinking?
What are you thinking of for headlights? I notice in your album, the below:
http://www.flickr.com/photos/6534564...in/photostream
http://www.flickr.com/photos/6534564...in/photostream
So, do tell!
- what are those?
- what are you thinking?
The lights are for a Ford escort, I bought them because it was the cheapest way I could get 4 projectors. I took them out of the plastic housing that is specific for the escort. I am planning on smoothing out the pop up lights and installing the projectors in the grill. I will also be modifying the front end, perhaps a custom fiberglass front, I just have not started yet.
Thats so sick man. If you take it to the track/dyno, post some numbers.
Once I instal the turbo I will do a dyno tune, I'm shooting for right under 500hp if I keep the motor stock, if I start upgrading components I will be shooting for about 550-600.
02-09-2012, 11:25 AM
#11
Intermediate

Member Since: Aug 2011
Location: Fayetteville NC
Posts: 32
Likes: 0
Received 0 Likes
on
0 Posts
How much did this setup run you and what would you recommend for someone who has little time to do this on my own. I WILL BE putting a new motor in the next two weeks. I just can't make up my mind.
02-09-2012, 12:50 PM
#12
Instructor
Thread Starter
How much did this setup run you and what would you recommend for someone who has little time to do this on my own. I WILL BE putting a new motor in the next two weeks. I just can't make up my mind.
It all comes down to funding and what you have to work with. I for one wouldnt change for a second the LS1 swap, by far the best thing I could have ever done for this car. Power, reliability, fuel mileage, the list goes on and on...
Hope that helps.
10-24-2012, 11:26 AM
#13
Instructor
Thread Starter
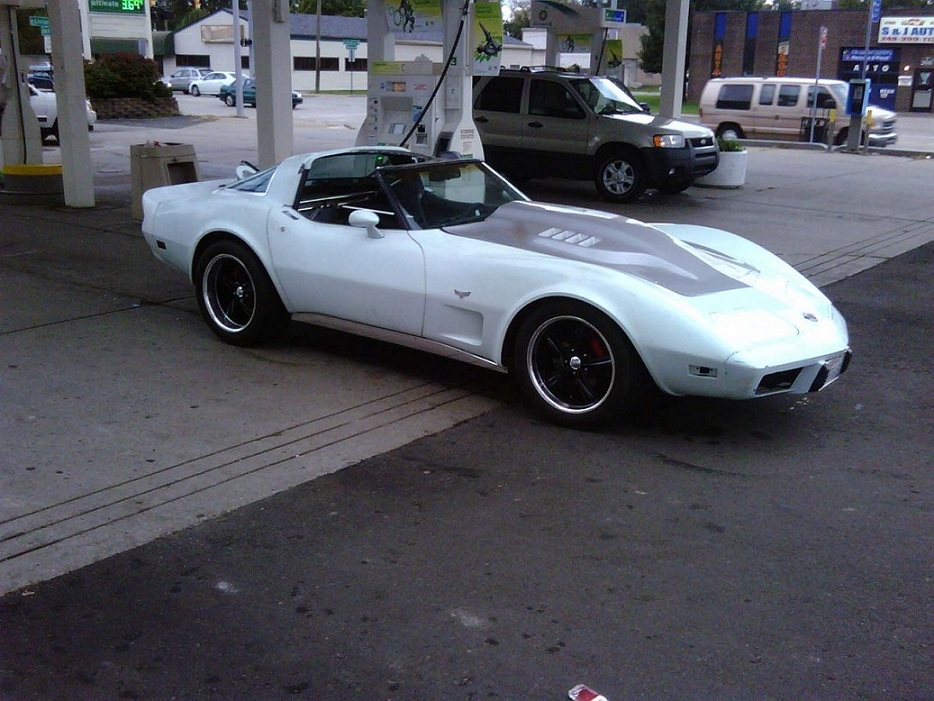
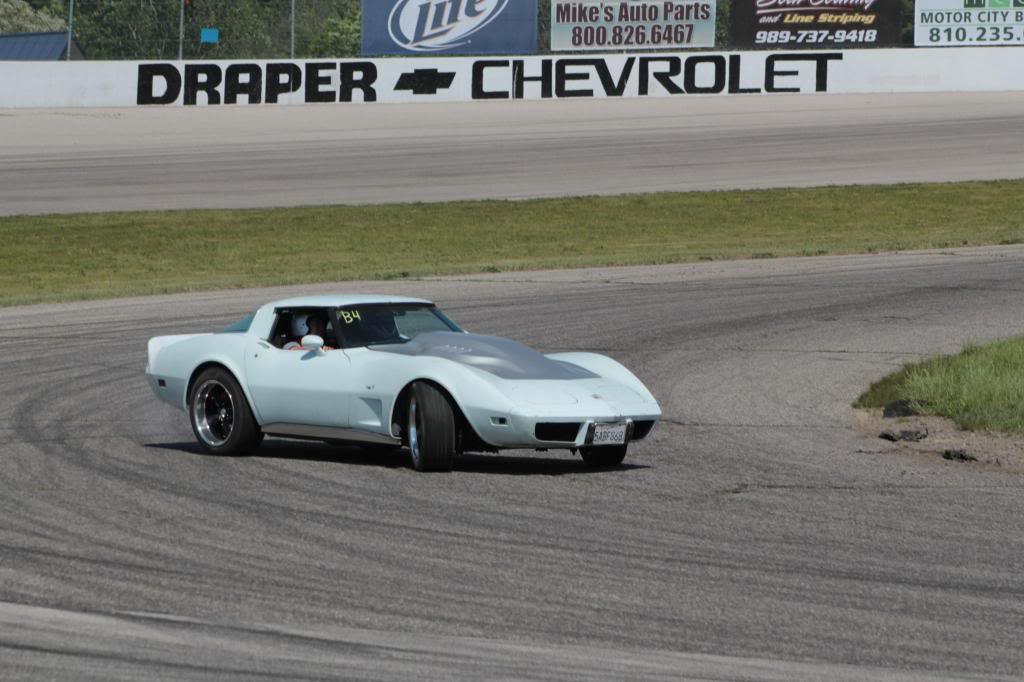
This is a shot of the car the first real test drive I took it on after the motor instal, I still didnt have seats in it yet, but couldnt help myself but to go rip through a few gears.
This is a couple shots from a recent drift event locally.

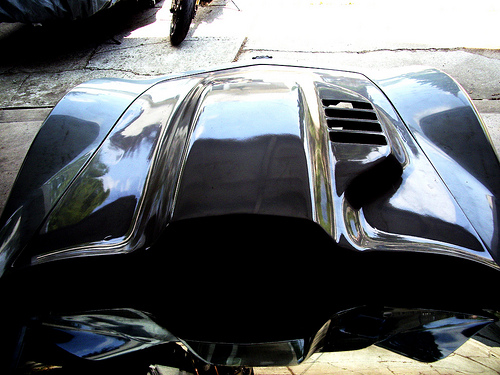
some shots of the high rise hood I just happened to run across on craigslist, I couldnt pass it up because the heat extractor was perfectly placed for the location of my turbo

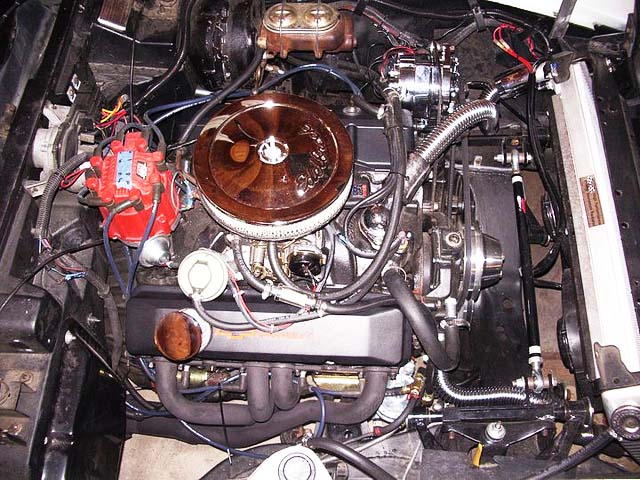
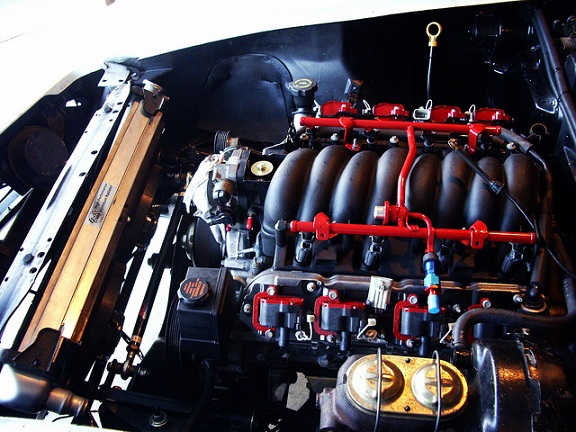
The motor right after install and the way it was looking up intil a couple months ago
I wanted the engine bay as clean as possible, so I ran all the wiring inside the car. This picture was still in the process of working it all out, but it shows where I mounted the ecm and fuse blocks. I still have a bunch of wiring on the harness that I cant clean up until I get my final tune for stand alone. I wanted to do a dino session only one time, so I made the factory harness work keeping the bits needed to run until the turbo is done.
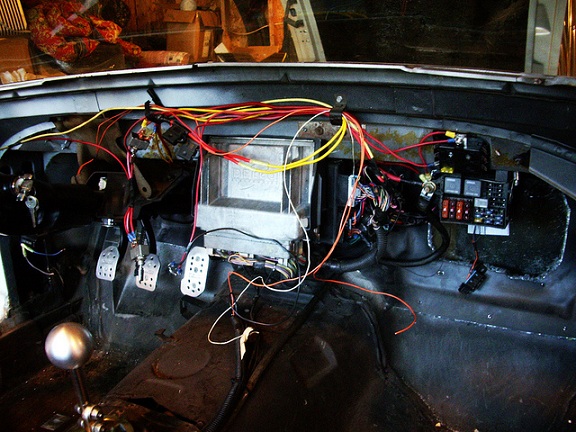
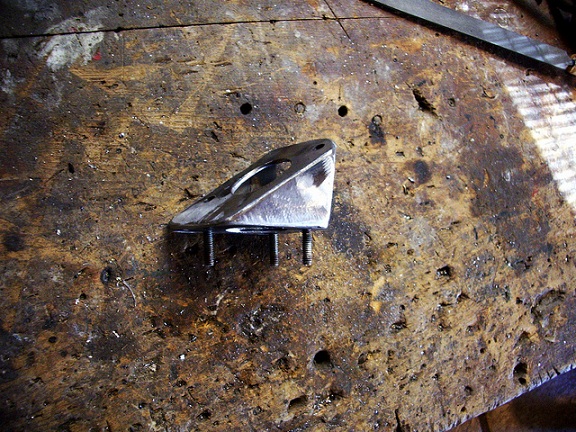
This is the firewall bracket I fabed up for the clutch master cylinder. works great!
This is a couple shots from a recent drift event locally.
some shots of the high rise hood I just happened to run across on craigslist, I couldnt pass it up because the heat extractor was perfectly placed for the location of my turbo
The motor right after install and the way it was looking up intil a couple months ago
I wanted the engine bay as clean as possible, so I ran all the wiring inside the car. This picture was still in the process of working it all out, but it shows where I mounted the ecm and fuse blocks. I still have a bunch of wiring on the harness that I cant clean up until I get my final tune for stand alone. I wanted to do a dino session only one time, so I made the factory harness work keeping the bits needed to run until the turbo is done.
This is the firewall bracket I fabed up for the clutch master cylinder. works great!
Last edited by User-C3; 10-25-2012 at 11:01 AM.
10-24-2012, 11:48 AM
#14
Instructor
Thread Starter
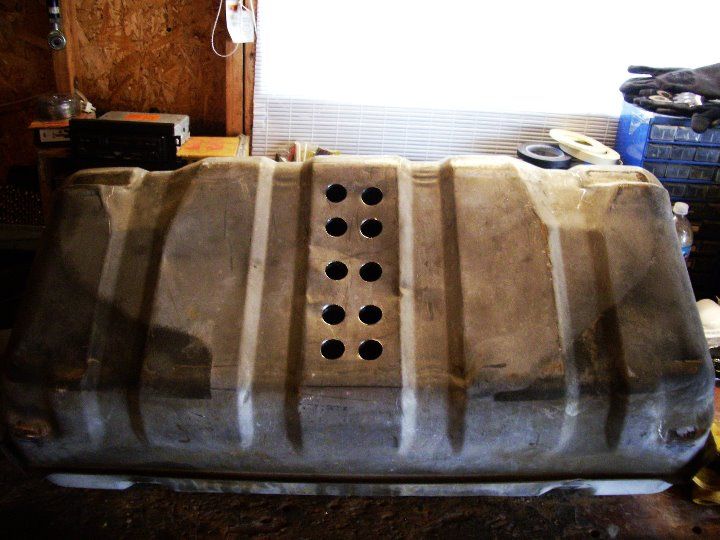
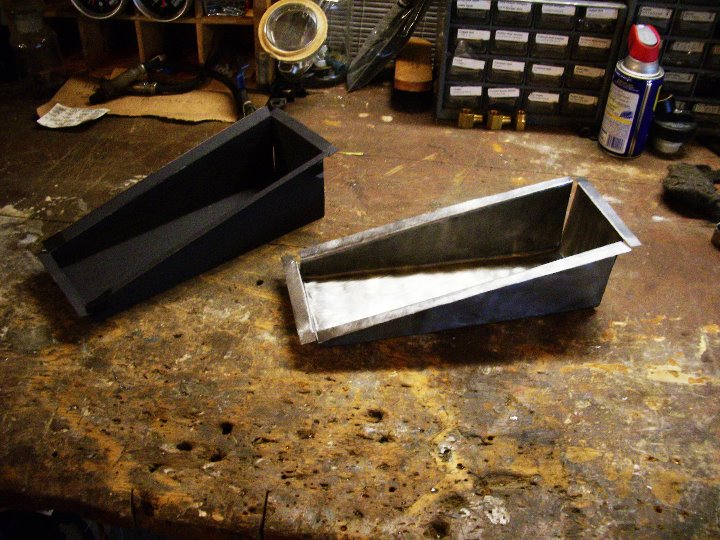
To account for the fuel tank situation I decided to add a sump pan to my stock tank. I didnt want to spend the money on a pre made one so I decided to make one that would fit my tank better and be free, other than the cost of the weldable fitting.
I started my drilling some circle holes in the tank where the sump pan was to be welded. This way the fuel will fall in but will not come out
for than pan I made a template out of cardboard paper and then copied it to some sheet metal and cut it out
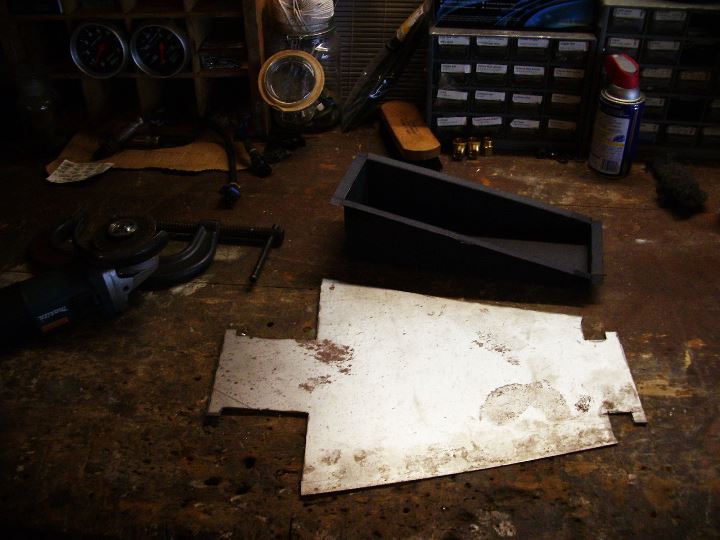
I cleaned up the metal and then used some basic methods to bend it up into shape

welded in the fitting for the AN line and then welded the pan to the tank
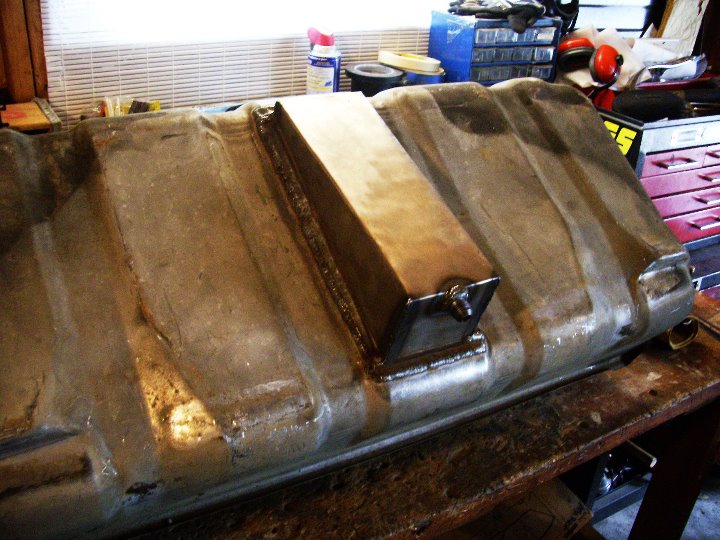
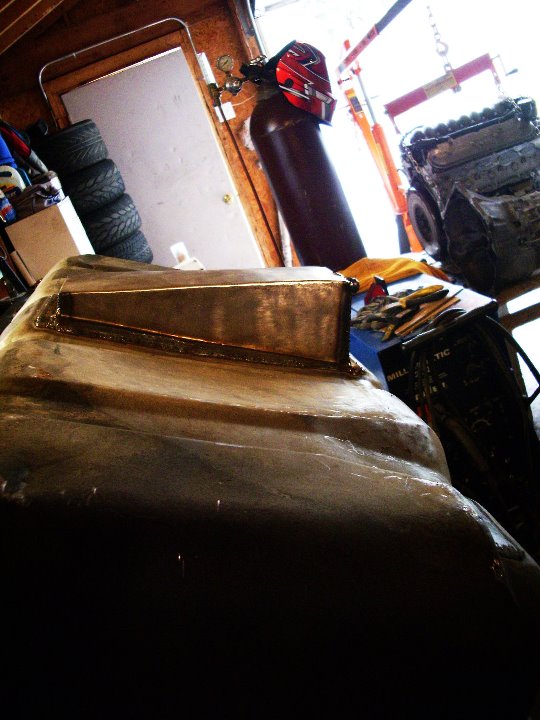
Finally I painted it black and used some tank sealer inside to make sure the metal was protected and wouldnt rust.
I started my drilling some circle holes in the tank where the sump pan was to be welded. This way the fuel will fall in but will not come out
for than pan I made a template out of cardboard paper and then copied it to some sheet metal and cut it out
I cleaned up the metal and then used some basic methods to bend it up into shape
welded in the fitting for the AN line and then welded the pan to the tank
Finally I painted it black and used some tank sealer inside to make sure the metal was protected and wouldnt rust.
Last edited by User-C3; 10-24-2012 at 02:43 PM.
10-24-2012, 12:14 PM
#15
Instructor
Thread Starter
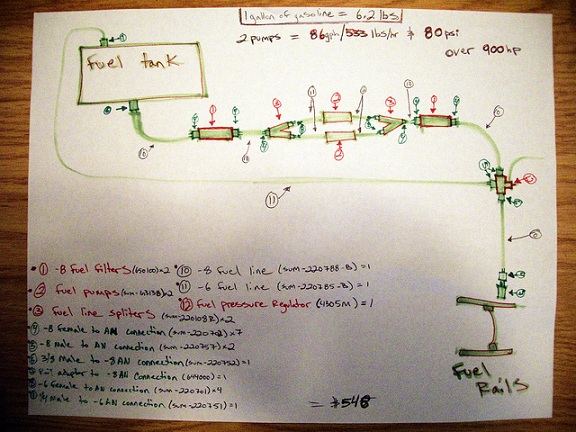
For the fuel system I decided on a -8 feed with a -6 return, I used the mallory boost referenced regulator, 2 Summit pumps on a inline setup. I knew from the start I was going turbocharged so I planned it out as to not have to repurchase or redue areas more than once. I have been running just one pump, but will be using a boost referenced switch for the second pump to kick in under boost.
Also tried to do this whole thing quality, but budget minded as well. Here is what I drew up planning out the fuel.
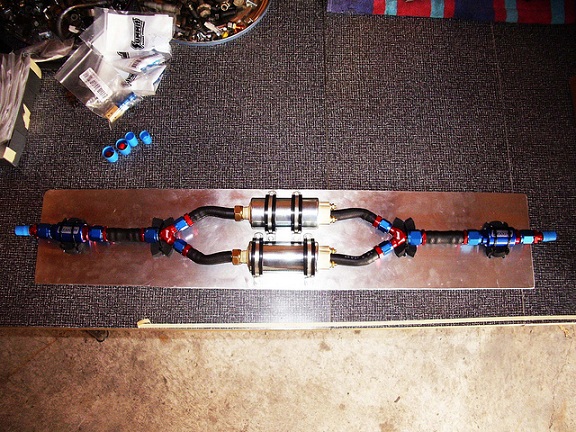
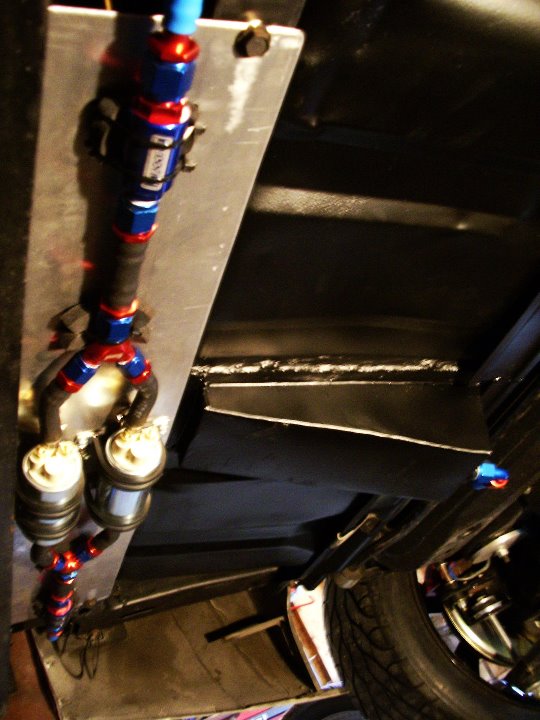
how it sits under the car
Also tried to do this whole thing quality, but budget minded as well. Here is what I drew up planning out the fuel.
how it sits under the car
Last edited by User-C3; 10-24-2012 at 02:42 PM.
10-24-2012, 12:19 PM
#16
Instructor
Thread Starter
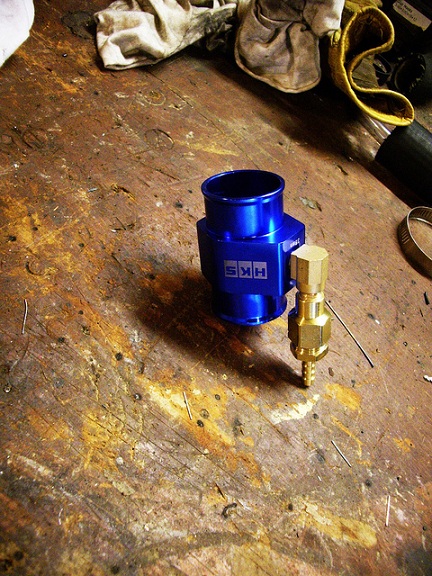
For the steam line I picked up an inline thermostat housing and fitted it with a brass fitting to put in the upper radiator line.
When I pulled the Trans Am apart I kept the inline power steering cooler. I polished it up a bit and it also is in the upper radiator line. I had a local guy pinch me together a new power steering line.
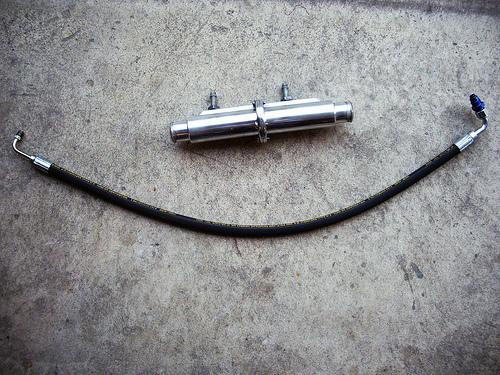
When I pulled the Trans Am apart I kept the inline power steering cooler. I polished it up a bit and it also is in the upper radiator line. I had a local guy pinch me together a new power steering line.
Last edited by User-C3; 10-24-2012 at 02:42 PM.
10-24-2012, 12:25 PM
#17
Instructor
Thread Starter
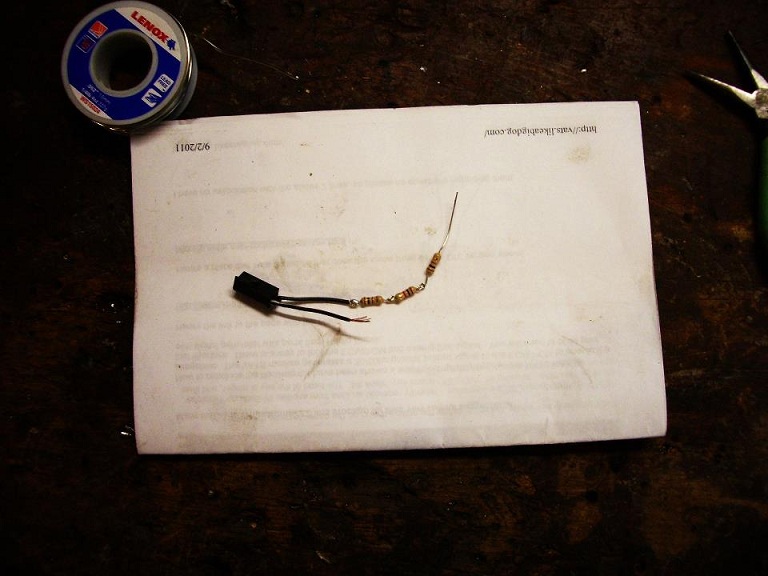
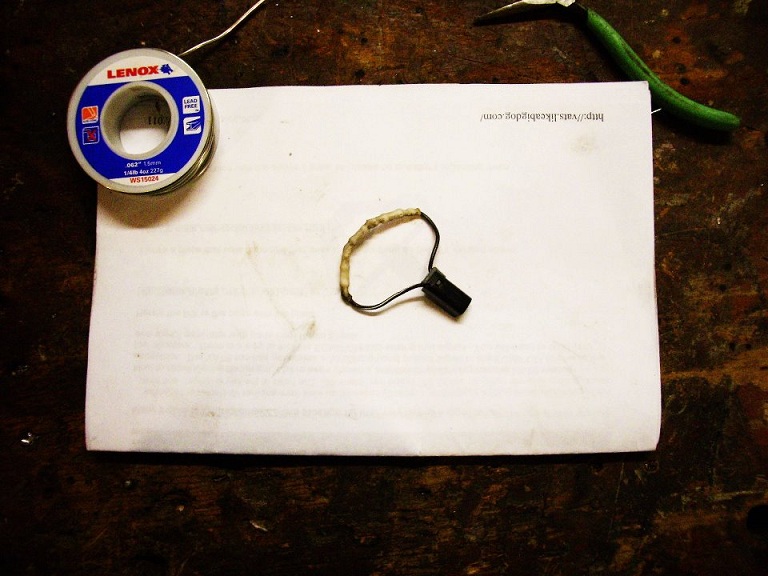
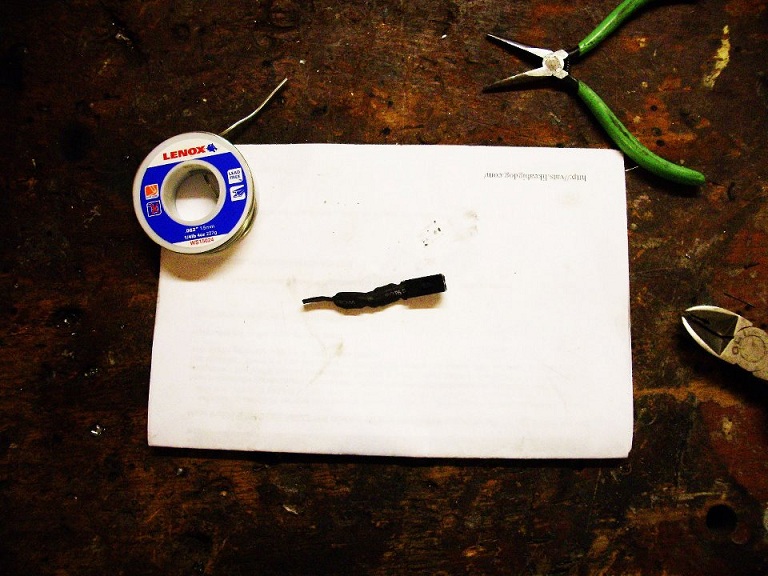
Something that may be pretty helpful to some people was the VATS bypass I worked up. This method would only be good if you have the key with the proper key chip in it.
I used an OHM reader and found out the OHM output of the key chip, picked up some resistors from Radio-sak and ran the correct number of resistors in line to achieve the same output as the key chip. I found the correct wire on the coloumn and followed it into the wiring system. Turned in the resistor pack into a nice little plug and play unit and there you have it.


I used an OHM reader and found out the OHM output of the key chip, picked up some resistors from Radio-sak and ran the correct number of resistors in line to achieve the same output as the key chip. I found the correct wire on the coloumn and followed it into the wiring system. Turned in the resistor pack into a nice little plug and play unit and there you have it.
Last edited by User-C3; 10-24-2012 at 02:42 PM.
10-24-2012, 12:38 PM
#18
Instructor
Thread Starter
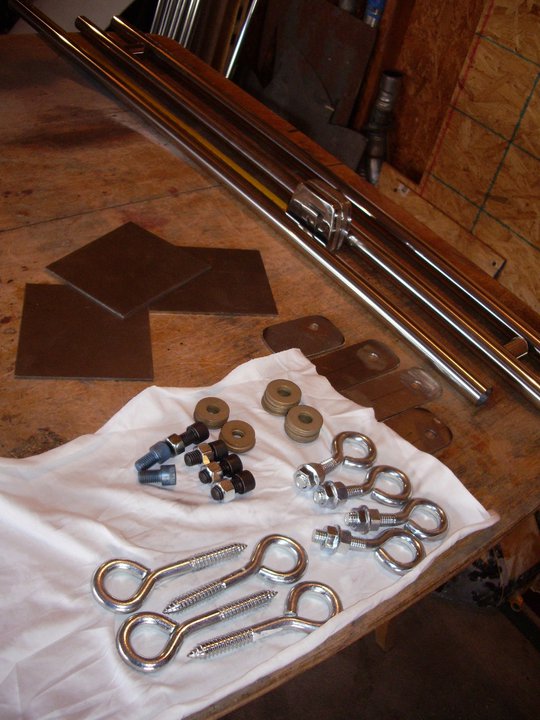
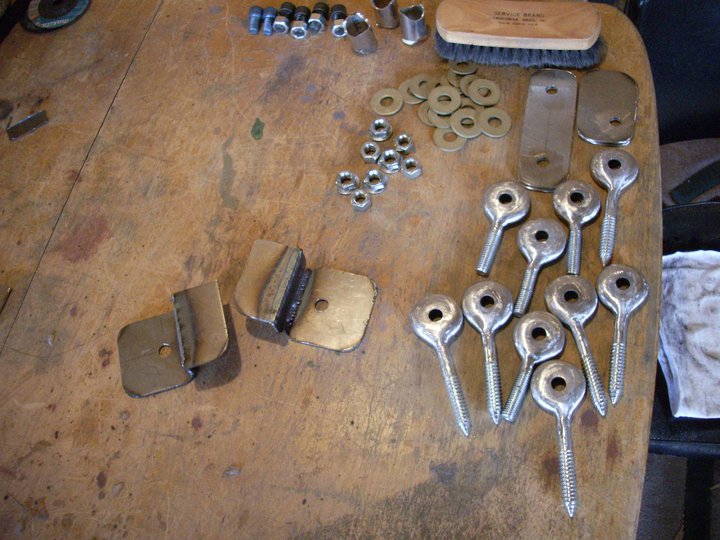
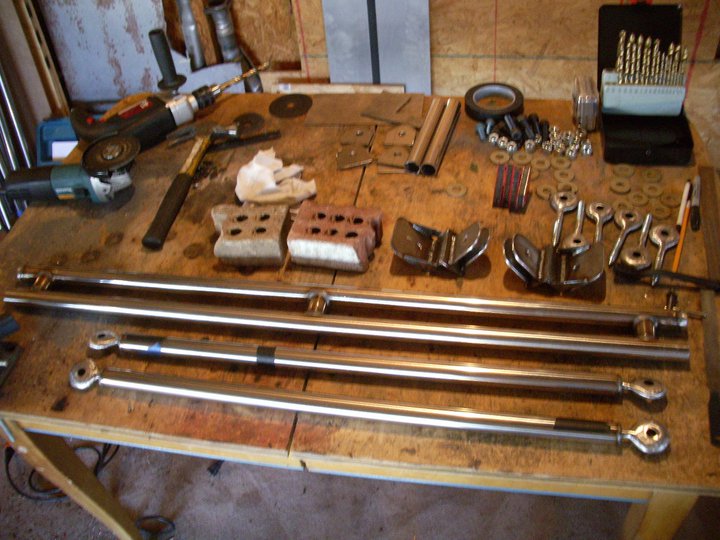
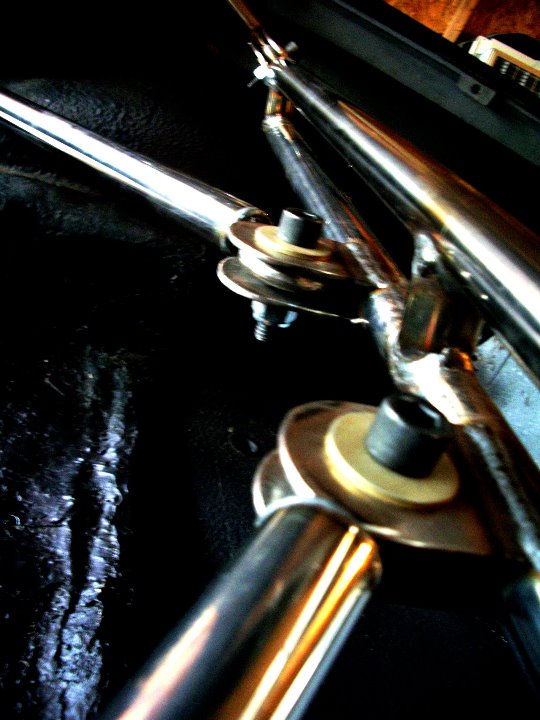
I picked up some decent new racing style seats and some 5 point harnesses so I needed some sort of harness bar setup. I decided I wanted to do a harness bar rear x-brace type of situation and also wanted to do it cheap, and be removable. Local guy sells me these sticks of polished stainless tubing for $5 so I decided that would look really nice, I also wanted to use heim joints for the conections but didnt want to spend the money on them. I found the largest I-bolts I could and some grade 8 washers and in a way created my own type of joint. I wasnt worried too much because once in place they dont move, its simply an ease of instalation and removal and still a bit adjustable. For the mounting locations I chose to use all existing spots as to not have to drill any holes or add anything not allready there. The rear bracket bolts onto the body mount bolt, and then spans up to where the factory seat belts bolt up. The lower braces bolt on the bird cage in some pre existing holes. All said and done the outcome was really good, and it does the job as intended. Still need to do some final repolishing and either paint or polish the mounts.
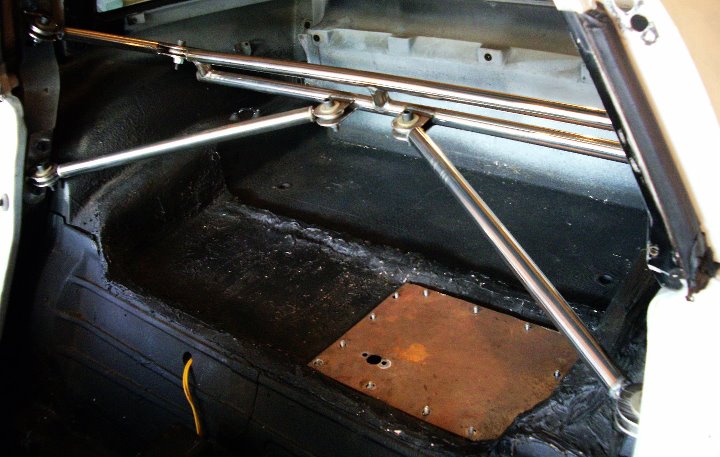
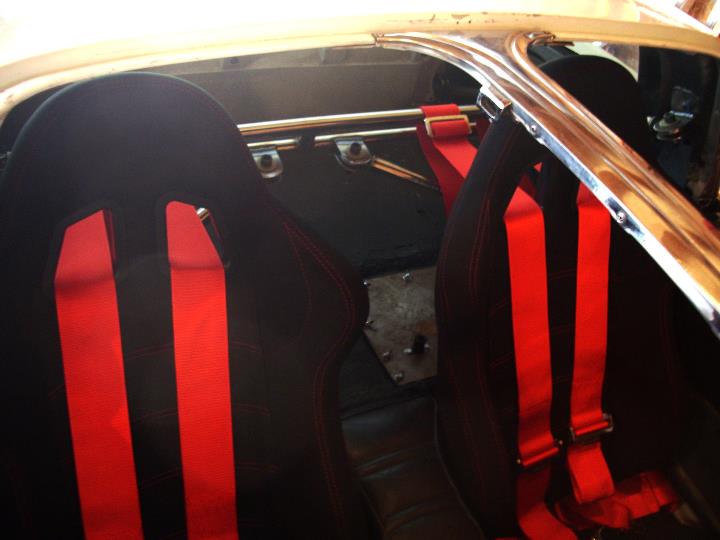
You may have also noticed I dont have the storage bins/ battery bin. I have an alluminum battery box. The metal cover in the rear floor area was pretty nasty, so I cleaned that up, and also relocated the battery cable into the car rather than running under neath the car right next to the drive shaft.

You may have also noticed I dont have the storage bins/ battery bin. I have an alluminum battery box. The metal cover in the rear floor area was pretty nasty, so I cleaned that up, and also relocated the battery cable into the car rather than running under neath the car right next to the drive shaft.
Last edited by User-C3; 10-24-2012 at 02:41 PM.
10-24-2012, 12:57 PM
#19
Instructor
Thread Starter
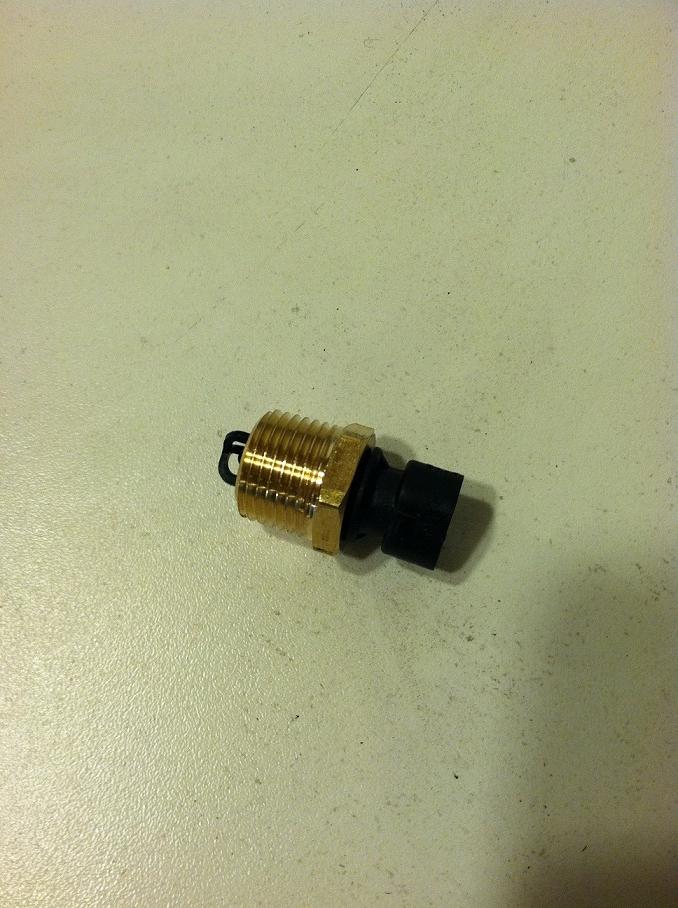
Put together an intake air temp sensor. Used a factory press in one, found a brass fitting close to the size and drilled it out a bit more to fit the sensor. I then used 2 ton epoxy and sealed it in, this way I was able to use it with NA setup and once the turbo is done I can still use it on the charge pipe and not worry about it getting blown out.


Last edited by User-C3; 10-24-2012 at 02:40 PM.
10-24-2012, 01:18 PM
#20
Instructor
Thread Starter
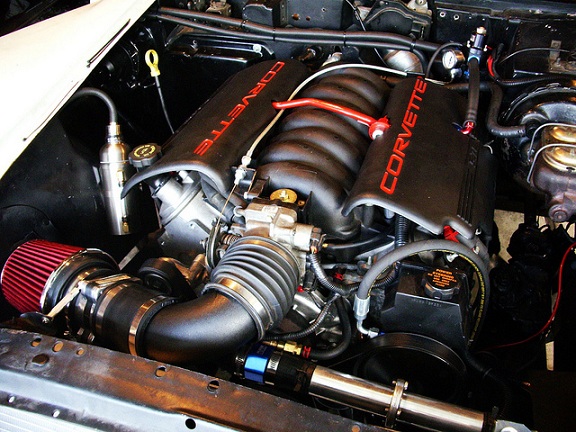
I decided to go with the LS1 Edelbrock pro flow. I didnt use the pro flow fuel rails, because I couldnt justify spending the extra $150. I just had to make my own fuel rail brackets to bolt up to the intake manifold.

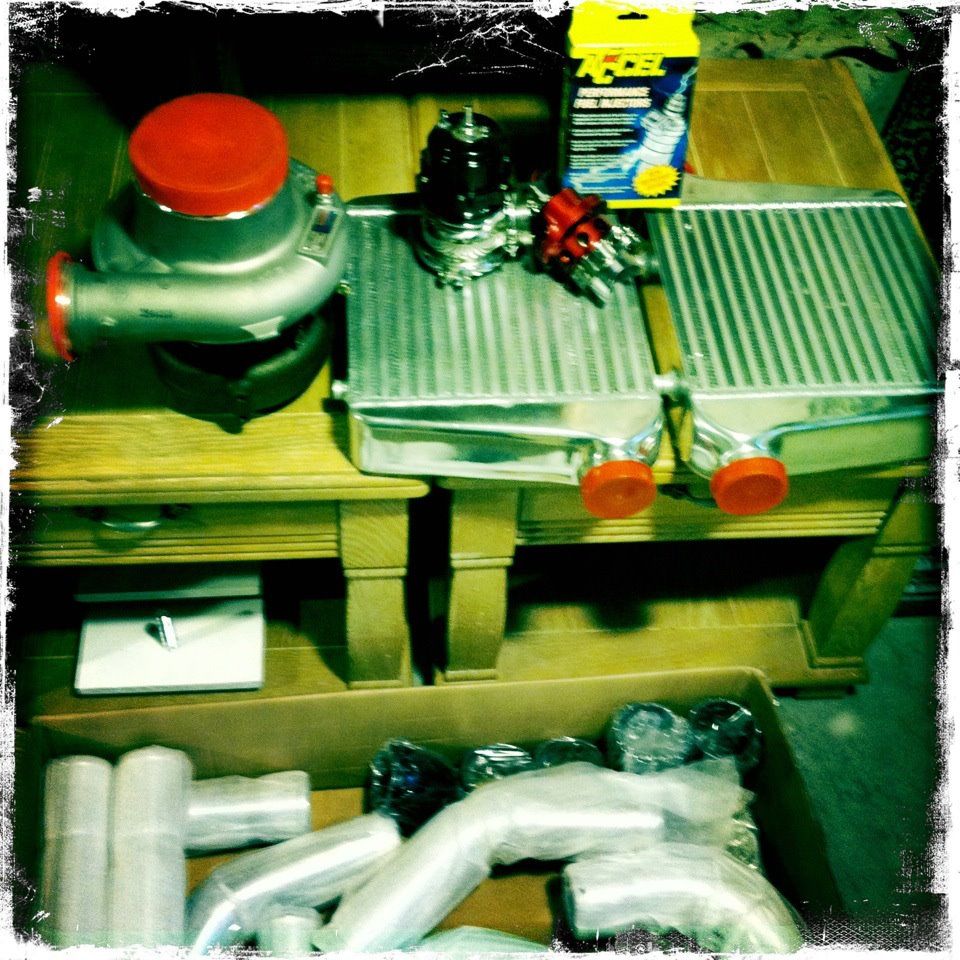
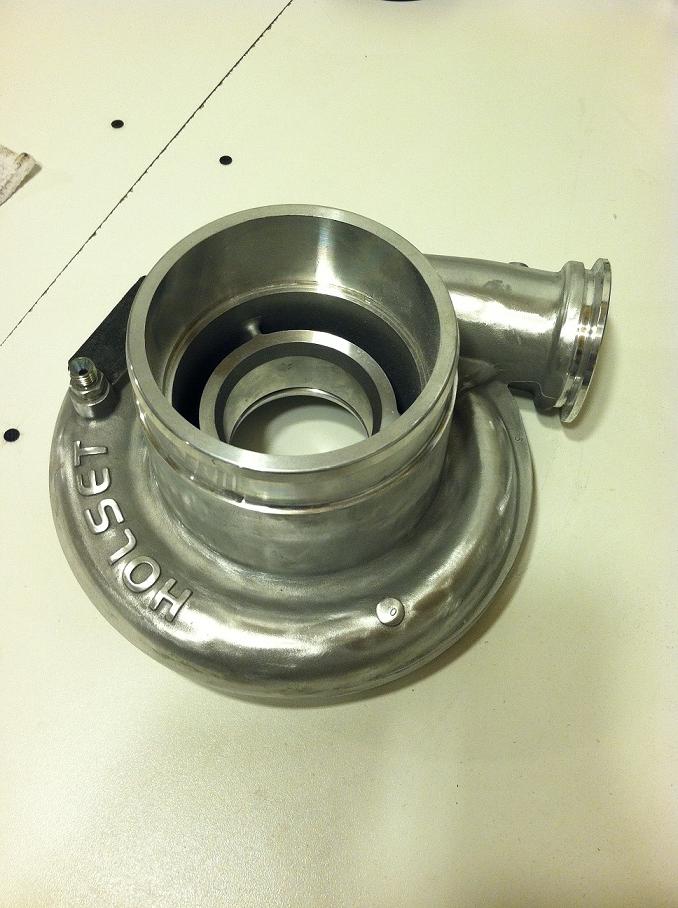
Mostly all the turbo kit components. I'm running a Holset HX55 turbo that has an HX50 hot side, 60mm wastegate, 50mm blow off valve and twin intercoolers, 60lb injectors. I would like to fab the intercoolers into one to enter on the side and exit out the top, but I'm not sure yet if I'm going to that or not.
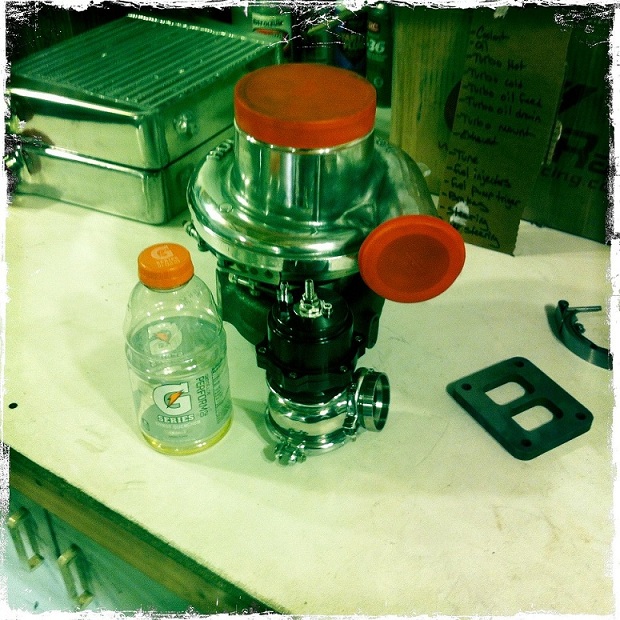
Before I started the instal I decided to polish the turbo housing. Wow, what a process!!
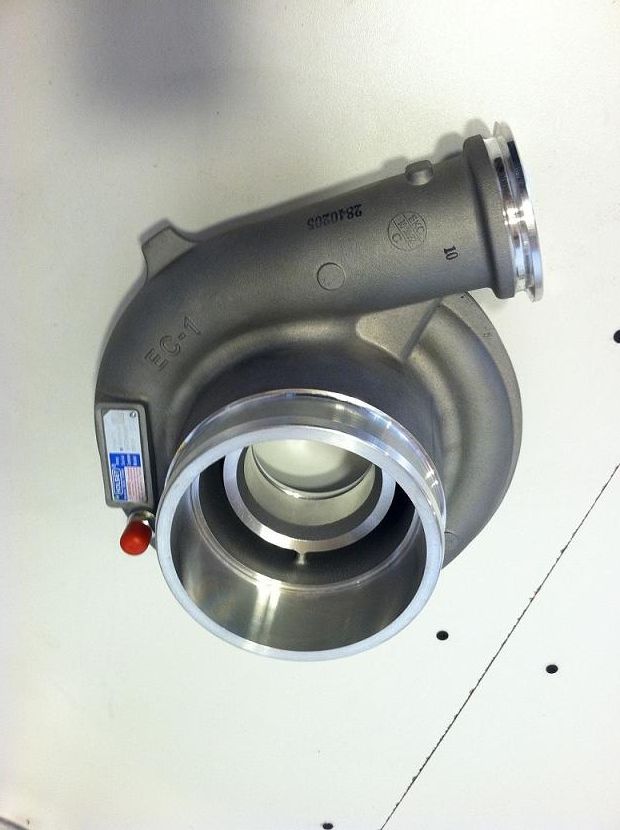
here is the state of polishing its at now, and a good size reference next to a gatorade bottle
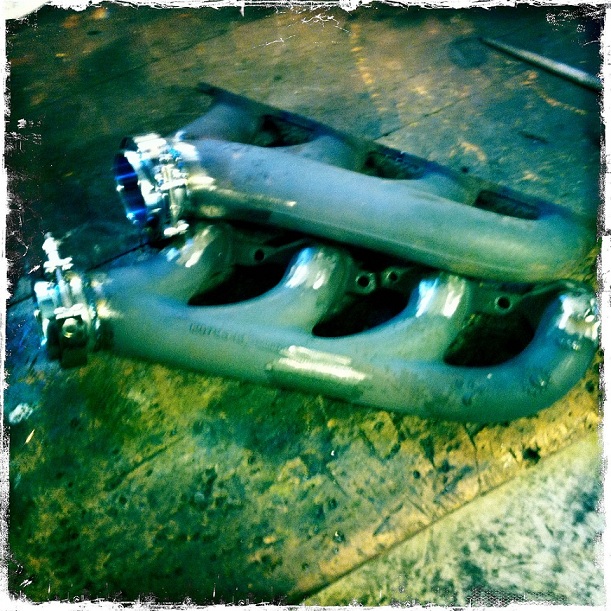
I'm running the factory truck manifolds, so I smoothed out the heat sheild mounts and cut off the 3 bolt flanges to weld on some v-band clamps

Mostly all the turbo kit components. I'm running a Holset HX55 turbo that has an HX50 hot side, 60mm wastegate, 50mm blow off valve and twin intercoolers, 60lb injectors. I would like to fab the intercoolers into one to enter on the side and exit out the top, but I'm not sure yet if I'm going to that or not.
Before I started the instal I decided to polish the turbo housing. Wow, what a process!!
here is the state of polishing its at now, and a good size reference next to a gatorade bottle
I'm running the factory truck manifolds, so I smoothed out the heat sheild mounts and cut off the 3 bolt flanges to weld on some v-band clamps
Last edited by User-C3; 10-24-2012 at 02:39 PM.