
78 LS1-T56 Turbocharged Build
 08-15-2013, 09:53 AM
#121
Instructor

Thread Starter


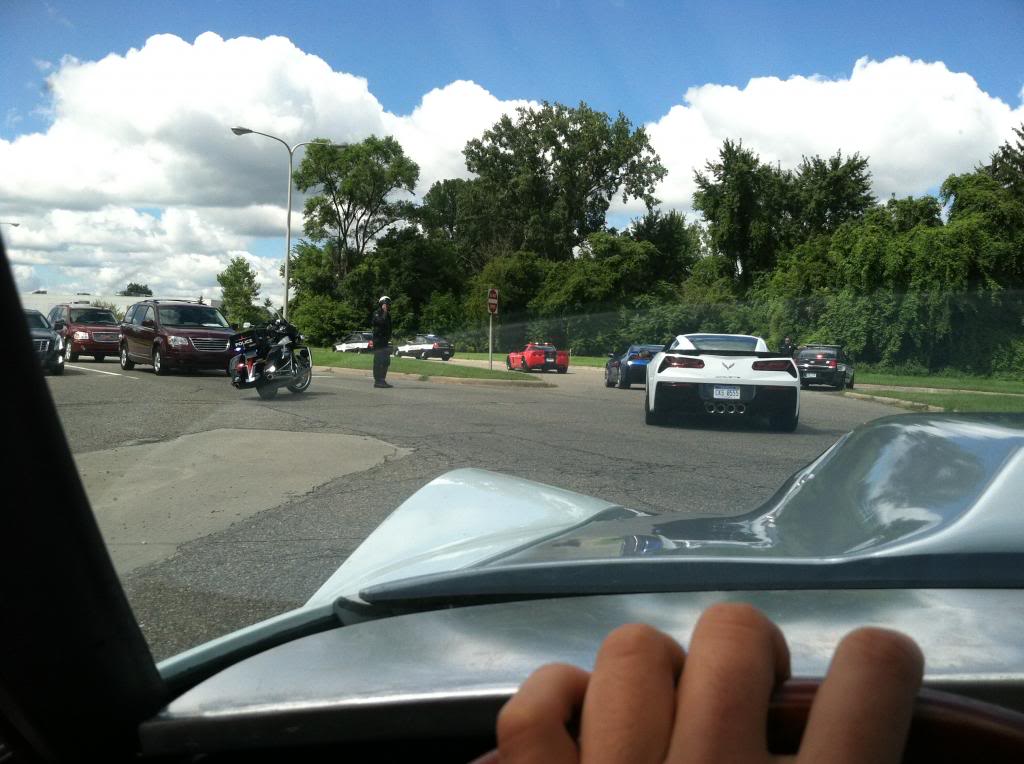
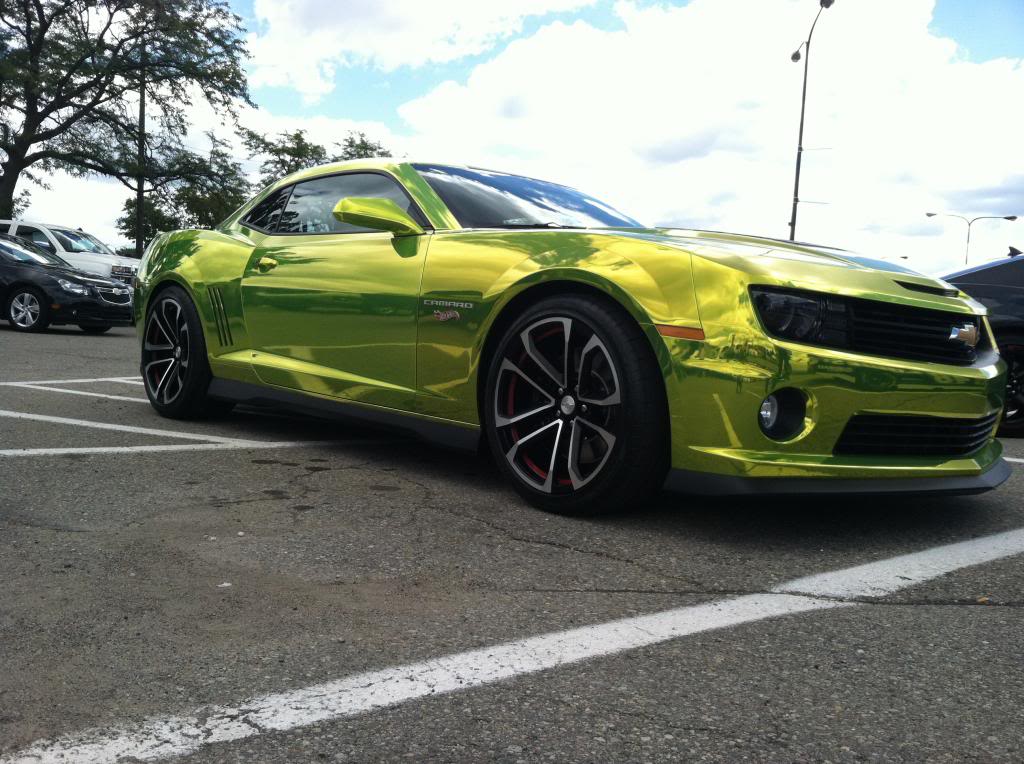
Had the big yearly car show with work today for the woodward dream cruise. They had a couple of the new transformer trucks there, and the hotwheels camaro. We do a show in the morning around the lake in front of our building and then there is a sweet police escorted drive down to the event on woodward. It was a pretty fun day at work.

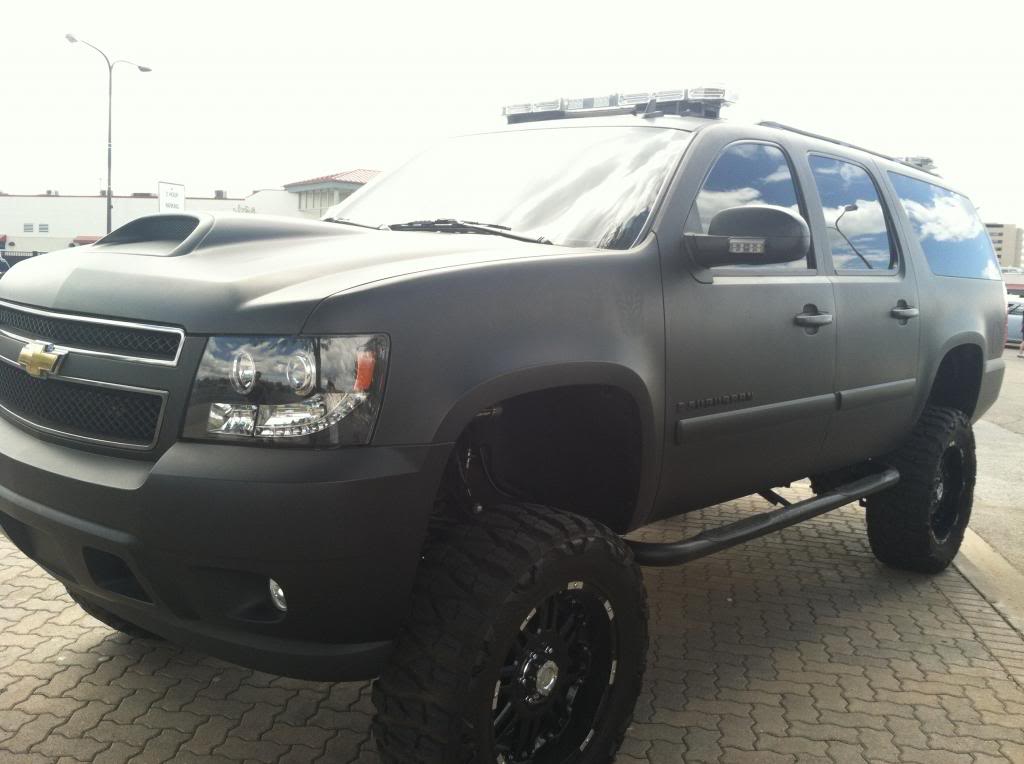
here are the transformer trucks. I think the black one is called dreadbot or something like that.
and here is the green chrome hotwheels camaro


here are the transformer trucks. I think the black one is called dreadbot or something like that.


and here is the green chrome hotwheels camaro

 08-15-2013, 11:15 AM
#122
Safety Car


Cool pics!! 
08-15-2013, 04:27 PM
#123
Drifting

That's looks like the best day ever at work. How does the car run? I bet it got a lot of attention at the show. Nice to see you having some time to enjoy the car.
Riggs
Riggs
09-18-2013, 01:55 PM
#124
Instructor
Thread Starter
havnt been doing any real work on the car. went to a test and tune the other weekend and did some drifting. Here is a quick clip of one corner, ended up spinning on this one but who cares. does give a good sound clip of the car.
on the to do list.
-fix front spoiler that I ripped off and split in half drifting.
-make a mold of the spoiler so I can make multiples for the multiple spoilers I will be ripping off the car.
-finish interior
-fab and install hydro hand brake
-start designing for more steering angle and rack and pinion that is "not" steeroids!
In the meantime I just moved into a new house, lots of work to do on the house, and left my beautiful garage that I just built for an old crappy smaller one that needs to be completly rewired and new lighting. So theres where I sit.
09-19-2013, 08:03 AM
#126
Instructor
Thread Starter
running out of things to do is never a worry of mine. I sometimes wish it was.
I have a grand am rack at the moment I picked up a while back and was going to make my own mounts, but I just dont like the setup of it at all. I have been bouncing around the idea of making a jig for the control arm mounts that is adjustable outboard, and moving my entire control arm setup out 3-4 inches and fabbing new mounts. This would give me a much larger range of factory rack and pinions I could use and would allow for some serious steering angle. I have never seen a c3 thats wider in front than in back but I have also been toying with the idea of doing the same with the back or at least just building new arms out back that put the wheel outboard a few more inches on each side. this would also help with wheel selection.
I have a grand am rack at the moment I picked up a while back and was going to make my own mounts, but I just dont like the setup of it at all. I have been bouncing around the idea of making a jig for the control arm mounts that is adjustable outboard, and moving my entire control arm setup out 3-4 inches and fabbing new mounts. This would give me a much larger range of factory rack and pinions I could use and would allow for some serious steering angle. I have never seen a c3 thats wider in front than in back but I have also been toying with the idea of doing the same with the back or at least just building new arms out back that put the wheel outboard a few more inches on each side. this would also help with wheel selection.
09-19-2013, 08:09 PM
#127
Drifting
I like the way you think. Those ideals would be great to see on a C3 and it's not something that you see any one else doing. I look forward to seeing these improvements as you start to tackle them.
Terry
Terry
05-30-2015, 09:45 PM
#128
Advanced
I've got a question about your VATS override- do you happen to know which pin on the ecm is for VATS?
My brother is doing an LS swap into a car and we'd like to get the VATS out of our way.
He might end up needing to buy a new ecm that's been overridden, but he'd like to figure out another way if it's possible.
I'll be doing an almost identical swap to yours in my 78 this summer, and hopefully turbo it too, so I might have the same question as he does.
Also, are you running ALL of the vats/ecm components in your 78? I'll need to know all of the necessary parts to take out of the donor vehicle so I can do that cool resistor loop like you did.
Thanks for any info you can give me.
Cheapo78Vette
06-01-2015, 12:58 PM
#129
Instructor
Thread Starter
I've got a question about your VATS override- do you happen to know which pin on the ecm is for VATS?
My brother is doing an LS swap into a car and we'd like to get the VATS out of our way.
He might end up needing to buy a new ecm that's been overridden, but he'd like to figure out another way if it's possible.
I'll be doing an almost identical swap to yours in my 78 this summer, and hopefully turbo it too, so I might have the same question as he does.
Also, are you running ALL of the vats/ecm components in your 78? I'll need to know all of the necessary parts to take out of the donor vehicle so I can do that cool resistor loop like you did.
Thanks for any info you can give me.
Cheapo78Vette
My brother is doing an LS swap into a car and we'd like to get the VATS out of our way.
He might end up needing to buy a new ecm that's been overridden, but he'd like to figure out another way if it's possible.
I'll be doing an almost identical swap to yours in my 78 this summer, and hopefully turbo it too, so I might have the same question as he does.
Also, are you running ALL of the vats/ecm components in your 78? I'll need to know all of the necessary parts to take out of the donor vehicle so I can do that cool resistor loop like you did.
Thanks for any info you can give me.
Cheapo78Vette
whatever your route, good luck, its fun and frustrating, but worth it.
05-06-2016, 10:05 AM
#130
Instructor
Thread Starter
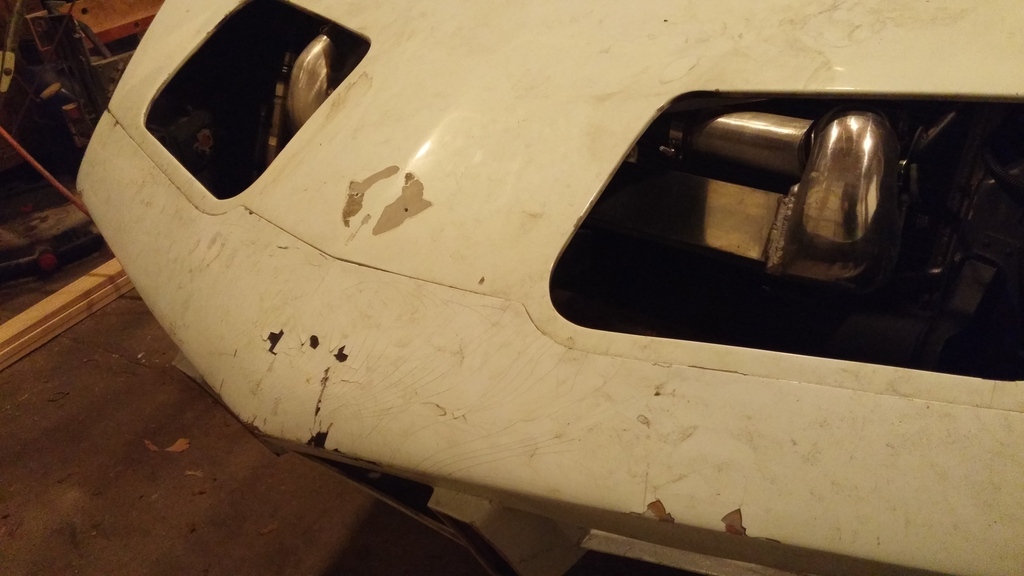
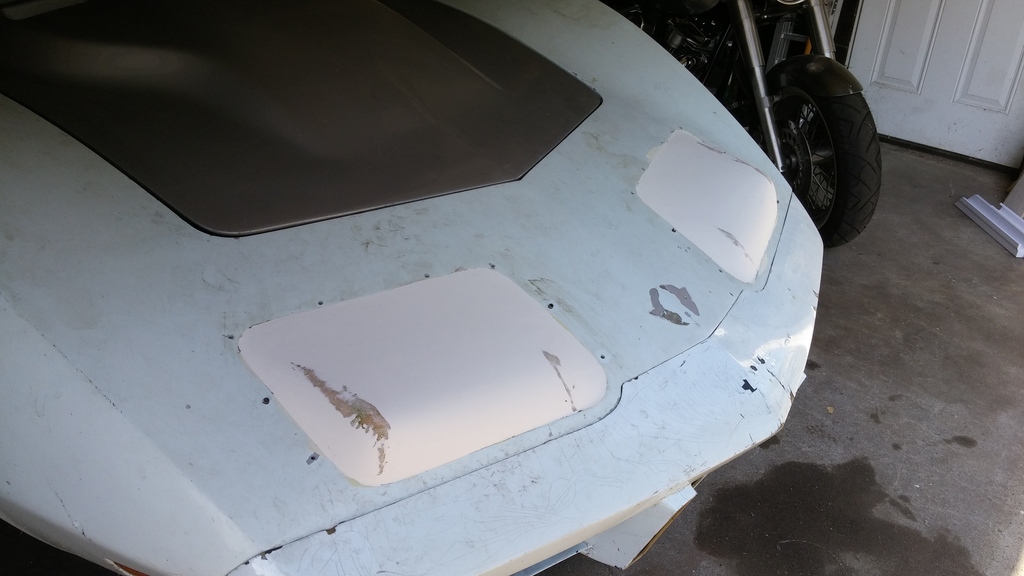
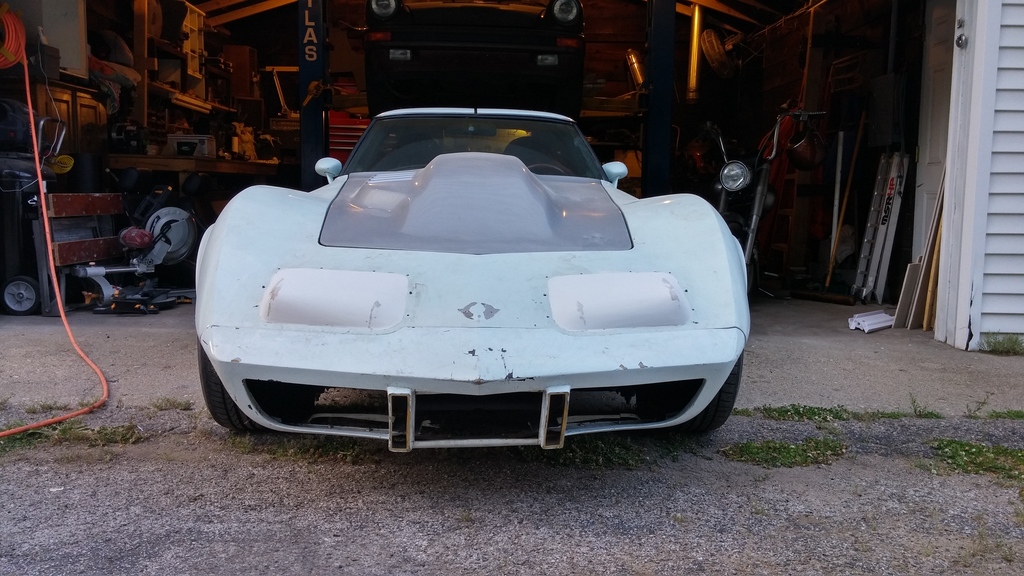
Been a long time since I've posted anything on here. Thought about selling the car, and had it up for sale for a little while, but once the weather got nice again and I started driving it again I remembered how awesome this car is. So It's staying for now. I have ben working on a headlight solution. Because of the intercooler the factory headlights are a no go anymore, so I started fabing some custom fixed headlights with LED light bars. The idea is a cross between the C5 fixed headlights and the L88 style.
I started with a cardboard paper template.
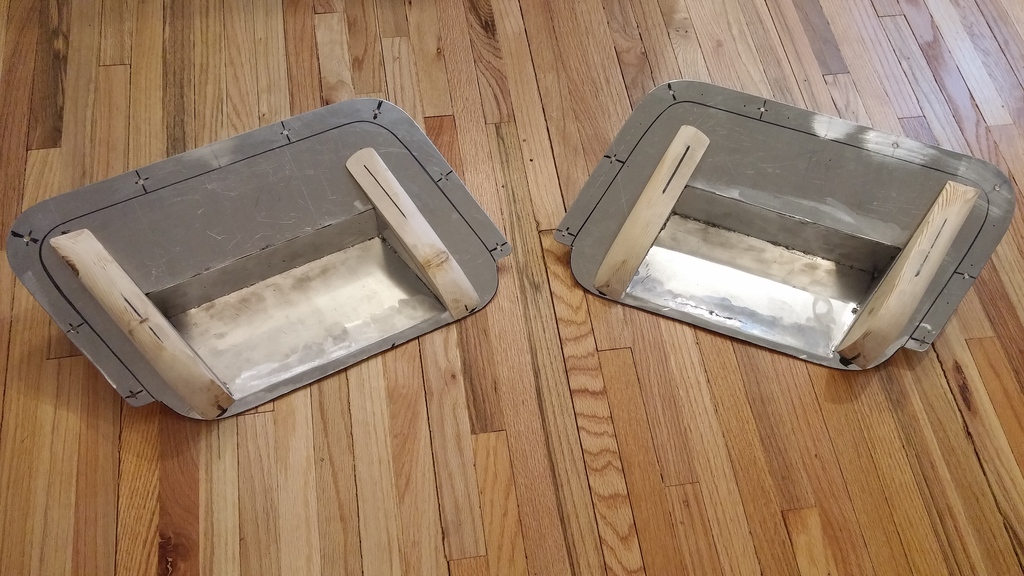
Then started transferring to aluminum.
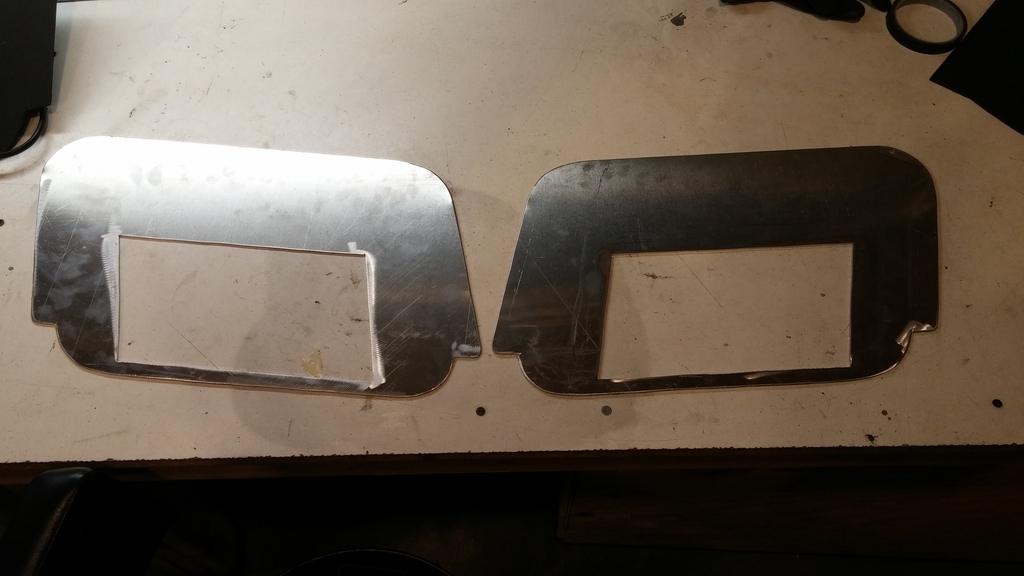
The buckets
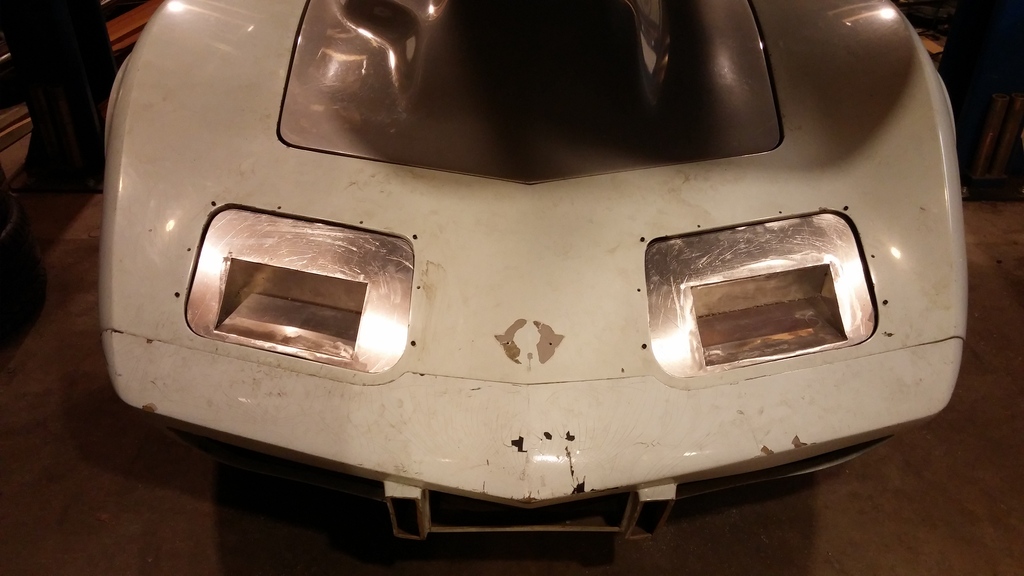
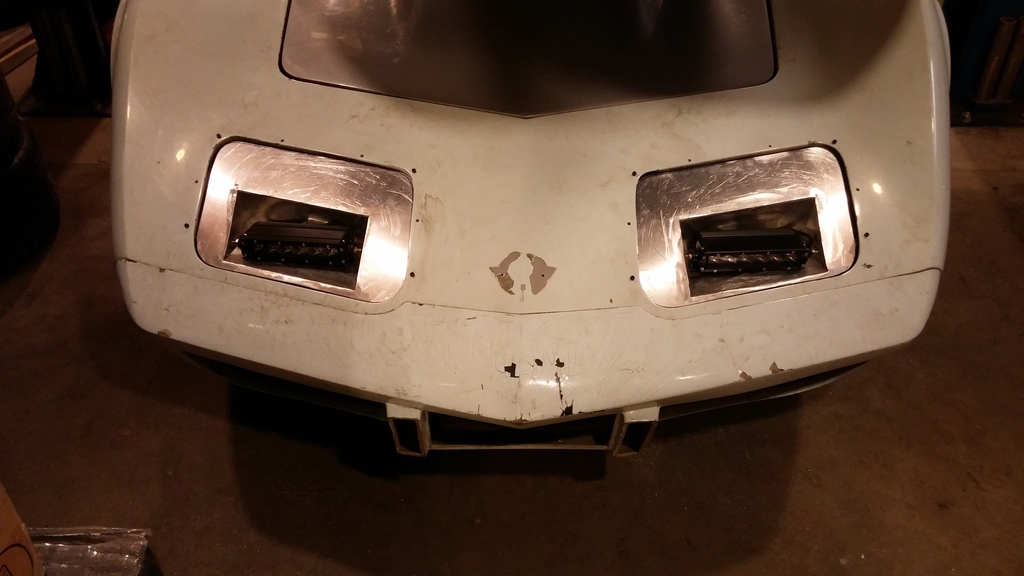
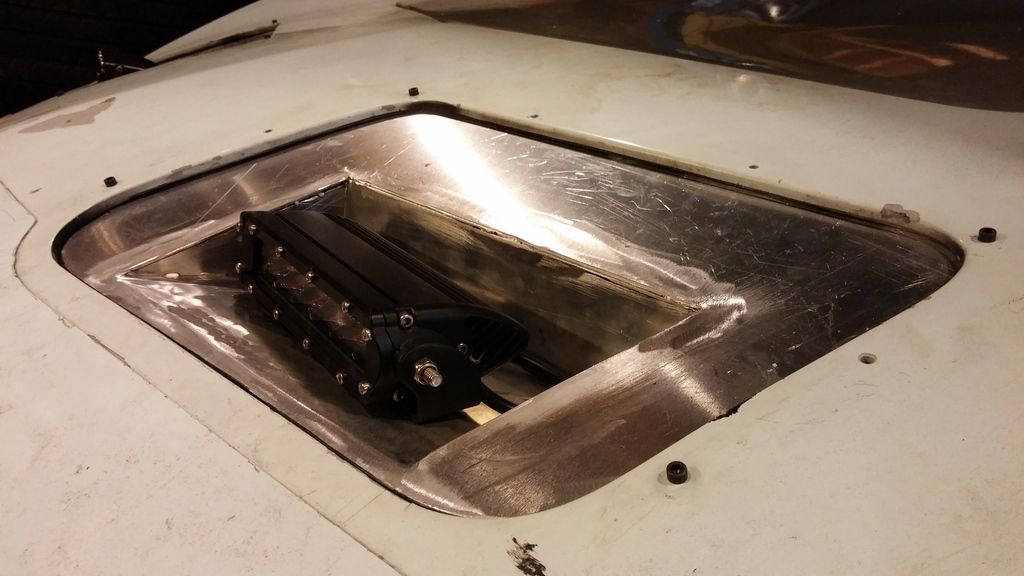
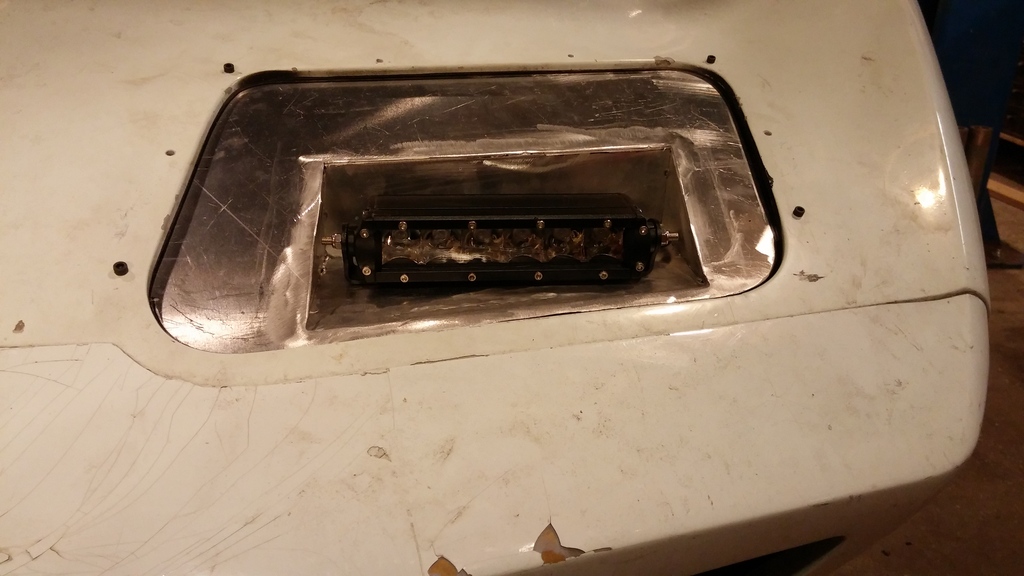
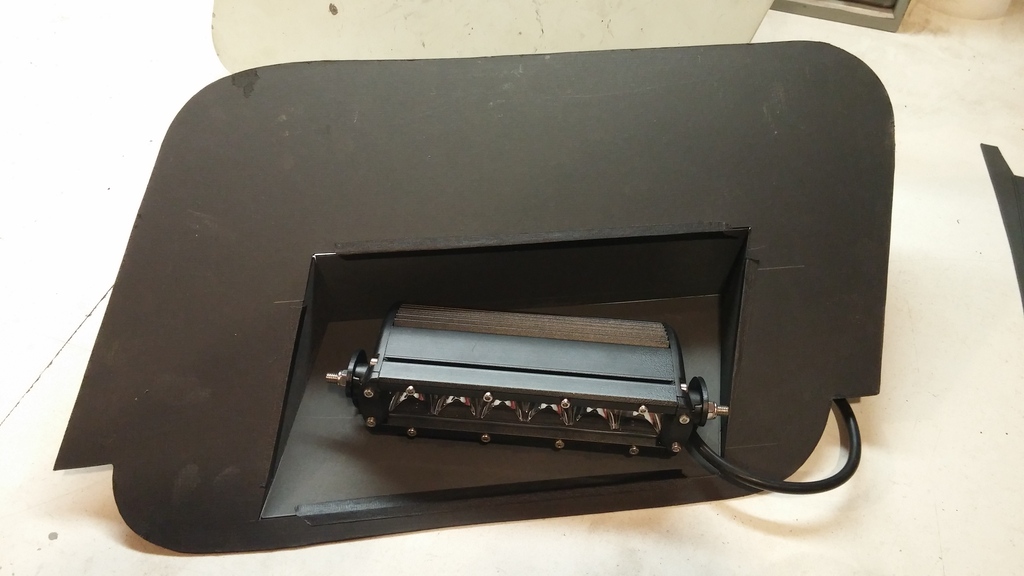
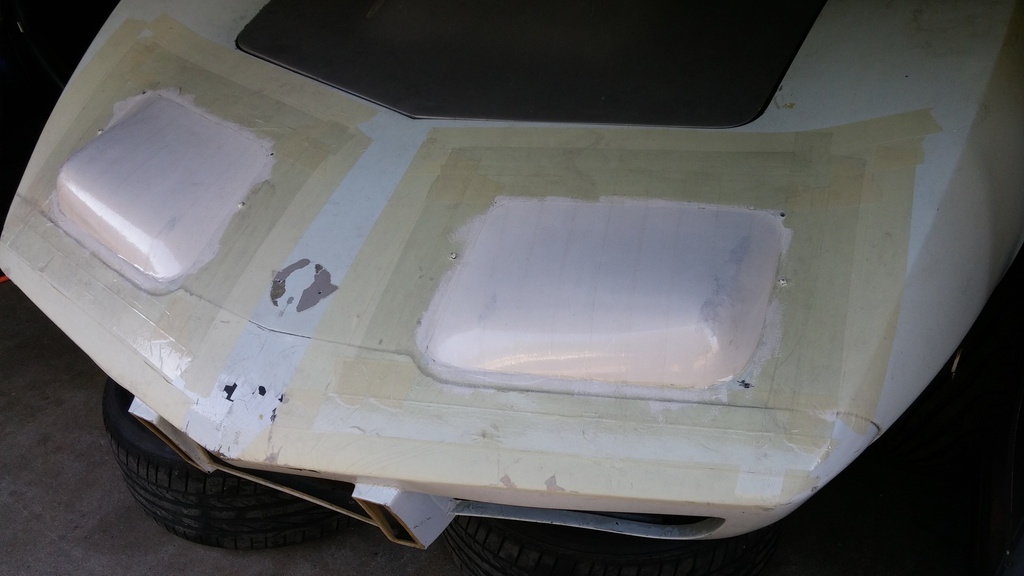
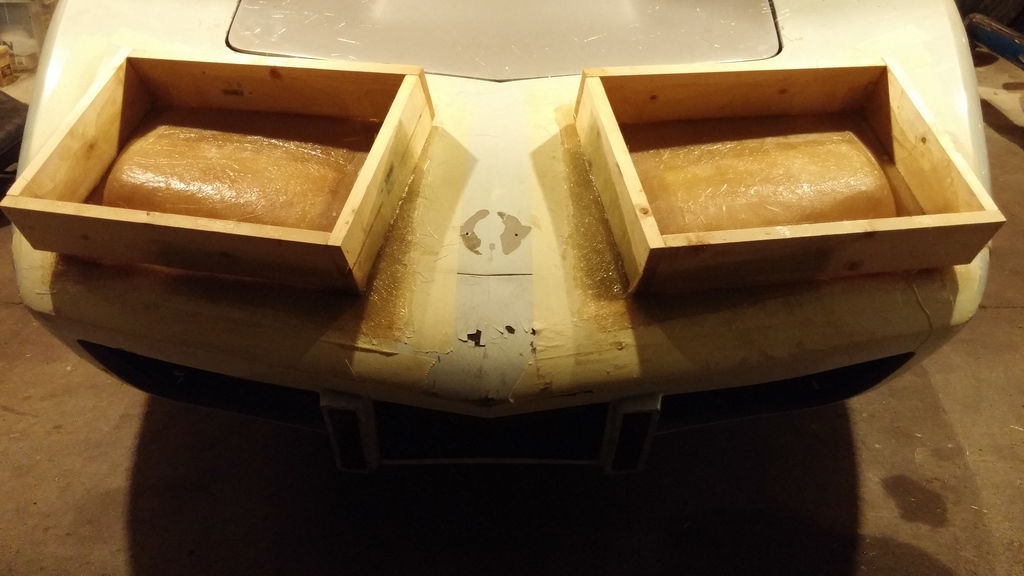
With the light bars in place they stick above surface a bit. I debated between fixing the factory headlight covers with a slight open pop. While it does look better than the factory open position, this is just not the look I want all the time. If I could have them open and close to this position it would of been good, but there just isnt the space.
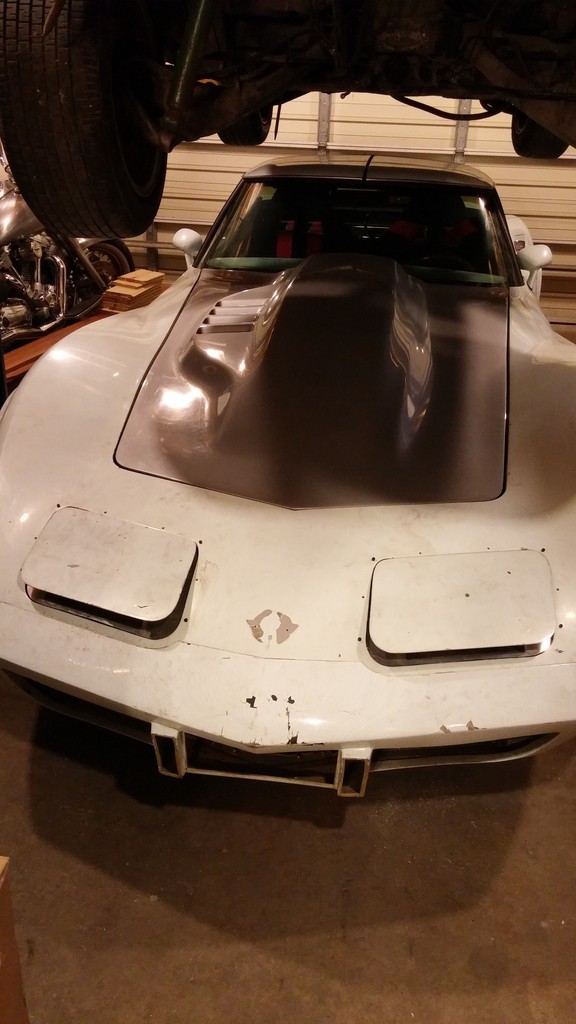
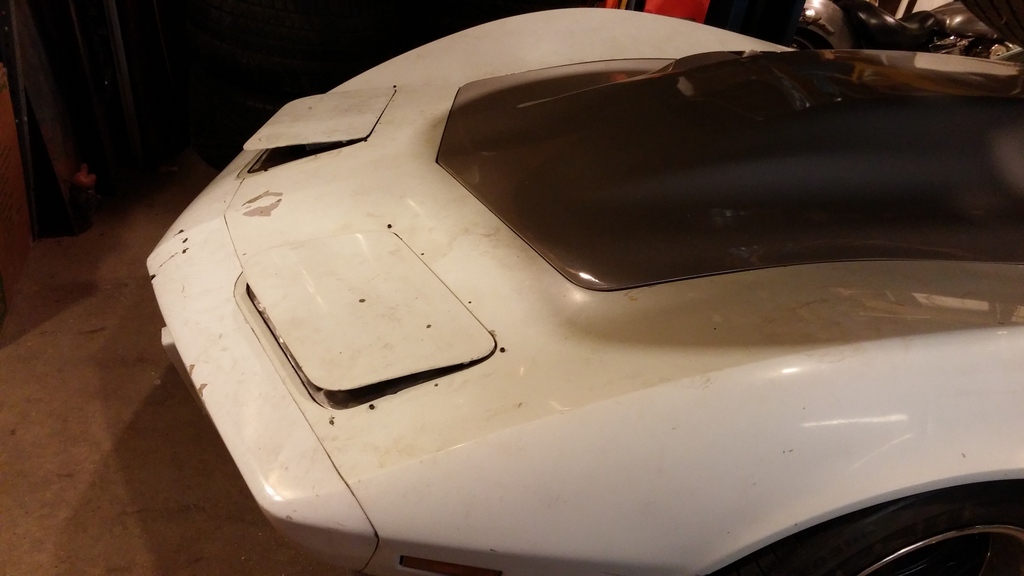
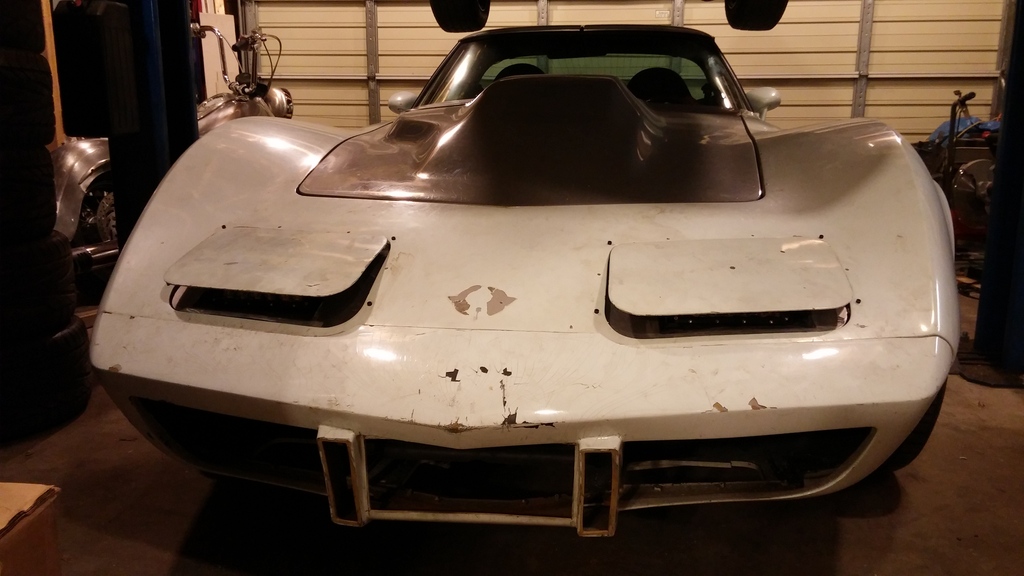
So I've been working on the fixed lenses. Currently making the shape/form of the lens which I will pull a mold off of and then have molds to slump or vacuform plexy into to have a final clear plexy cover.
I started with some simple wood forms to get the general rail surfaces to clear the light bars.
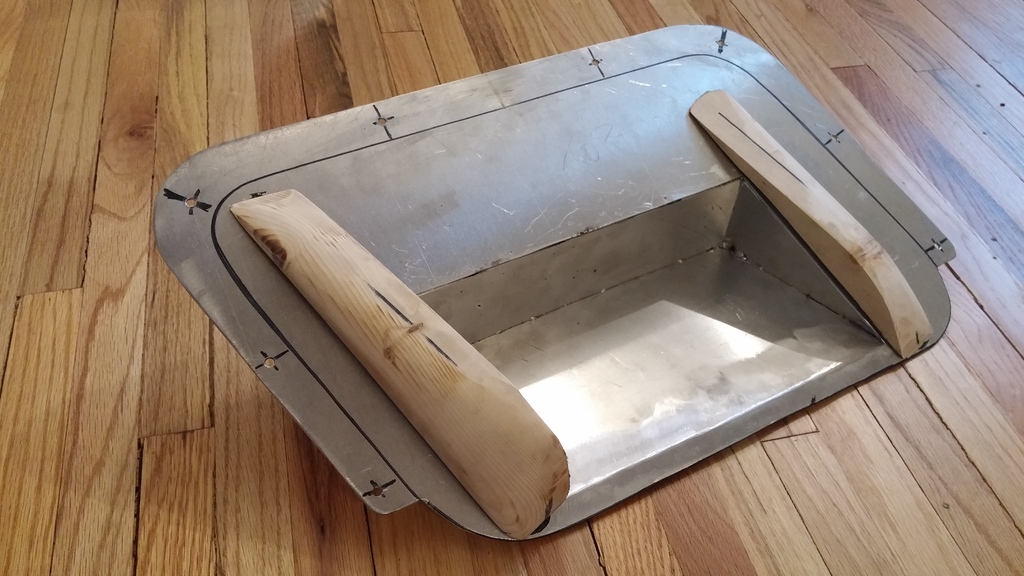
I covered the aluminum buckets with foil to make sure no fiberglass would adhere to it.
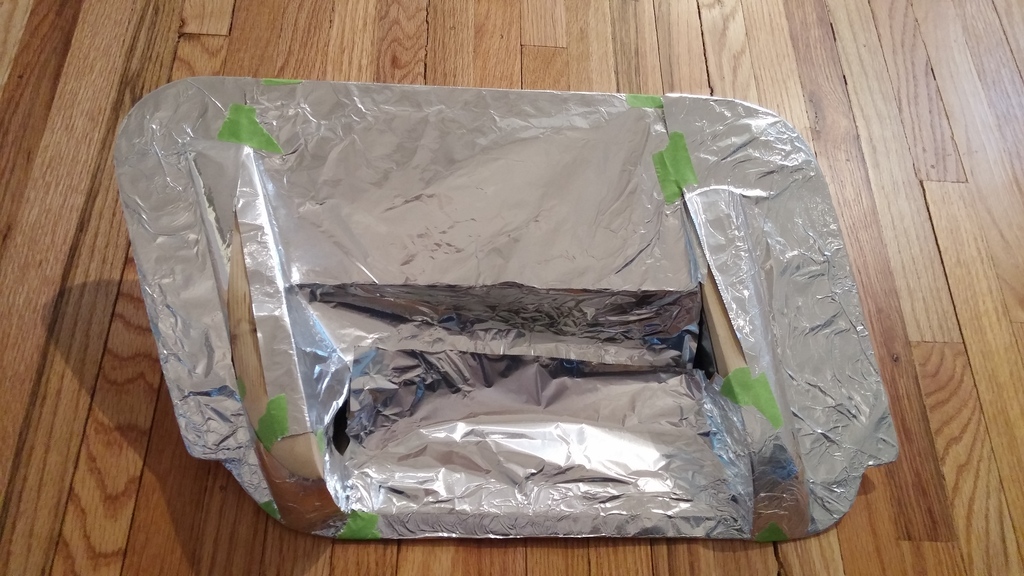
I used some cotton to stretch over the entire form to get a rough main shape to start with. Installed them back on the car to maintain the flats and then started the resin and a couple layers of fiberglass. I now have a rough start to the shapes and will fill and shape the rest to get the final forms of the covers.

I started with a cardboard paper template.

Then started transferring to aluminum.

The buckets


With the light bars in place they stick above surface a bit. I debated between fixing the factory headlight covers with a slight open pop. While it does look better than the factory open position, this is just not the look I want all the time. If I could have them open and close to this position it would of been good, but there just isnt the space.


So I've been working on the fixed lenses. Currently making the shape/form of the lens which I will pull a mold off of and then have molds to slump or vacuform plexy into to have a final clear plexy cover.
I started with some simple wood forms to get the general rail surfaces to clear the light bars.


I covered the aluminum buckets with foil to make sure no fiberglass would adhere to it.

I used some cotton to stretch over the entire form to get a rough main shape to start with. Installed them back on the car to maintain the flats and then started the resin and a couple layers of fiberglass. I now have a rough start to the shapes and will fill and shape the rest to get the final forms of the covers.


Last edited by User-C3; 05-06-2016 at 10:16 AM.
05-06-2016, 10:14 AM
#131
Instructor
Thread Starter
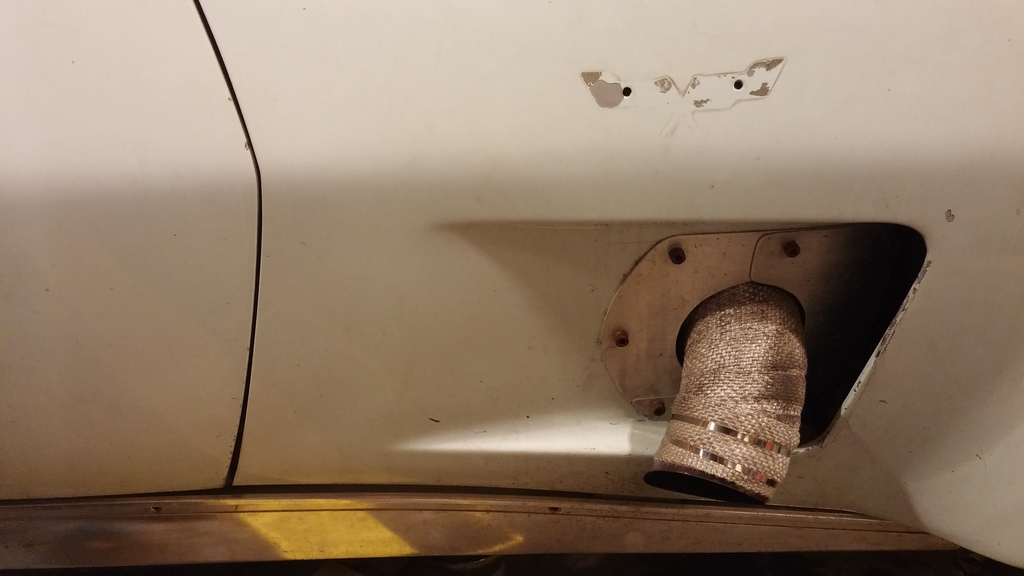
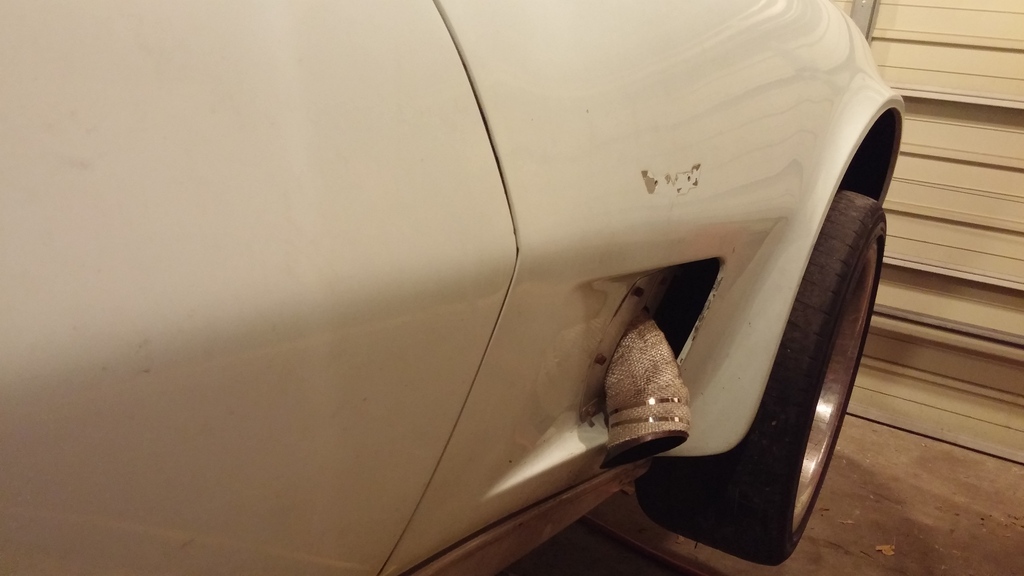
I've also chopped off the exhaust so it is now just a dump out the fender. Surprisingly not any louder at lower rpms and average cruising, but does bark pretty good wide open.
I've also started making a hydraulic hand brake. I've got the handle sorted out. I started with a 1/2 piece of aluminum.
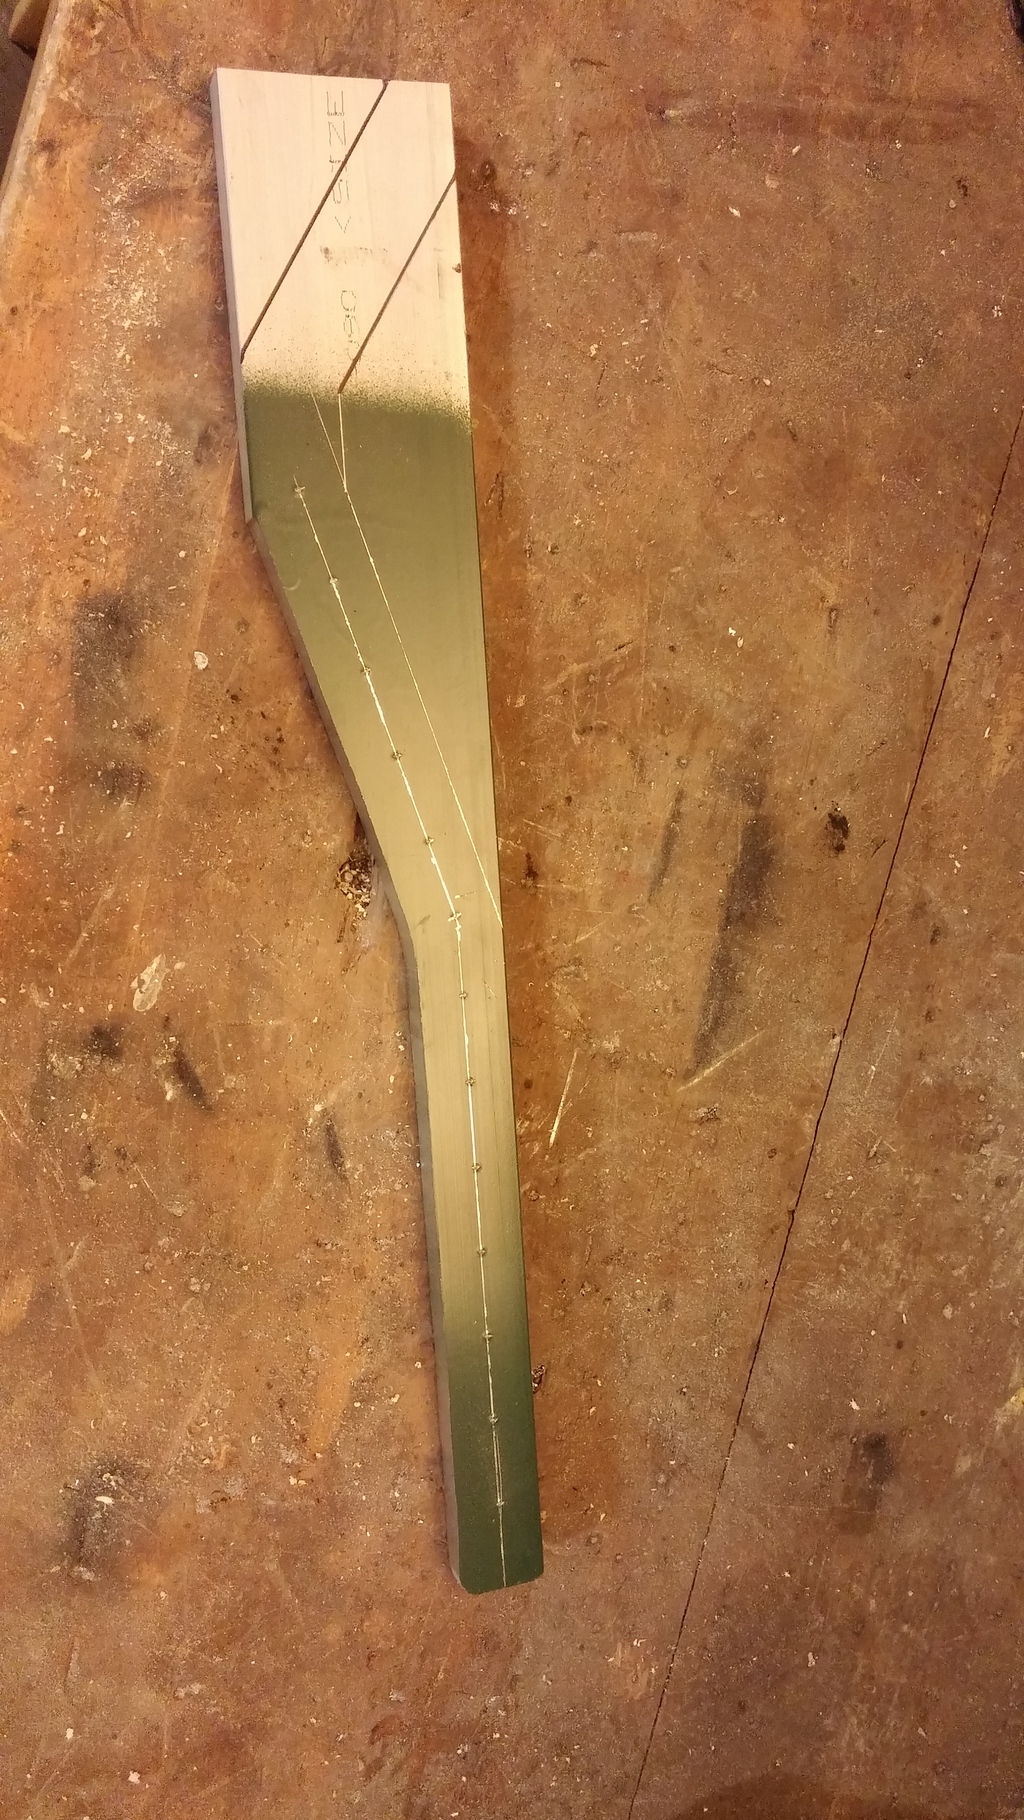
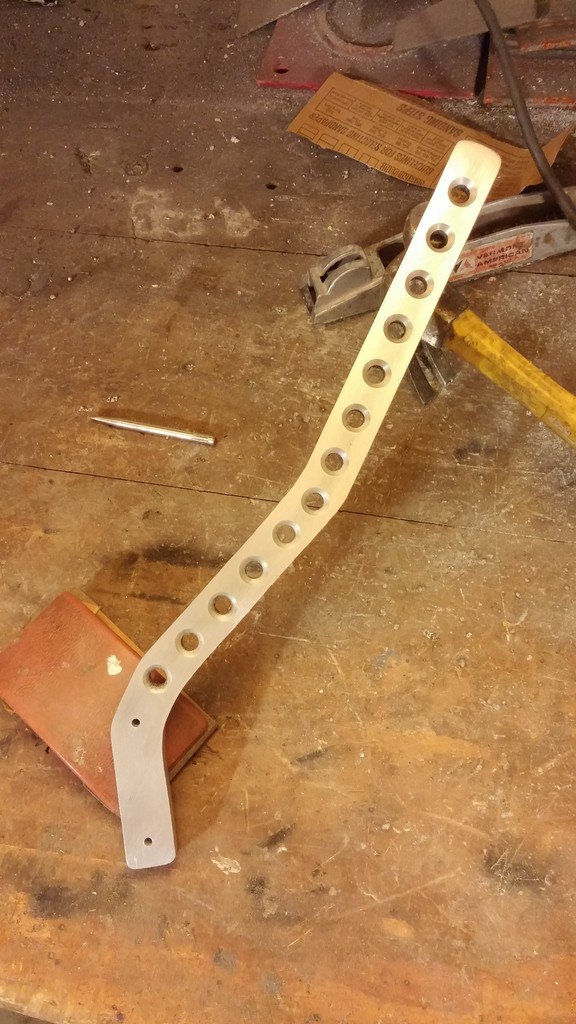


I've also started making a hydraulic hand brake. I've got the handle sorted out. I started with a 1/2 piece of aluminum.

 05-06-2016, 10:17 AM
#132
Instructor
Thread Starter
I am hoping to paint this thing sometime this summer. I cant take the rough condition of the paint and body. Working on putting some super wide meats under it also, so flares should be in order soon before paint.
05-06-2016, 06:53 PM
#133
Drifting
Thanks for the update. This is a very cool build you have, glad to see you didnt sell it off and you're continuing with the build.
Keep up the progress, this is how cool rides become awesome.
Terry
Keep up the progress, this is how cool rides become awesome.
Terry
Last edited by riggs 74; 05-06-2016 at 06:54 PM.
07-13-2016, 09:03 AM
#134
Instructor
Thread Starter
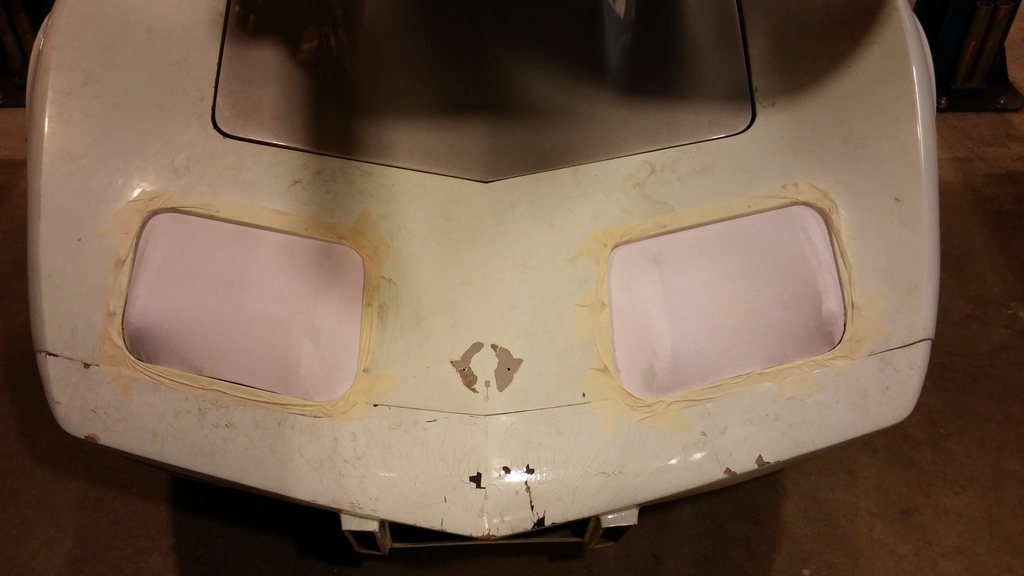
Progress on the headlights has been continuing but slow. I have gone a little further into the process to be able to make positive casts to make multiples of the lenses down the road.
The lens forms
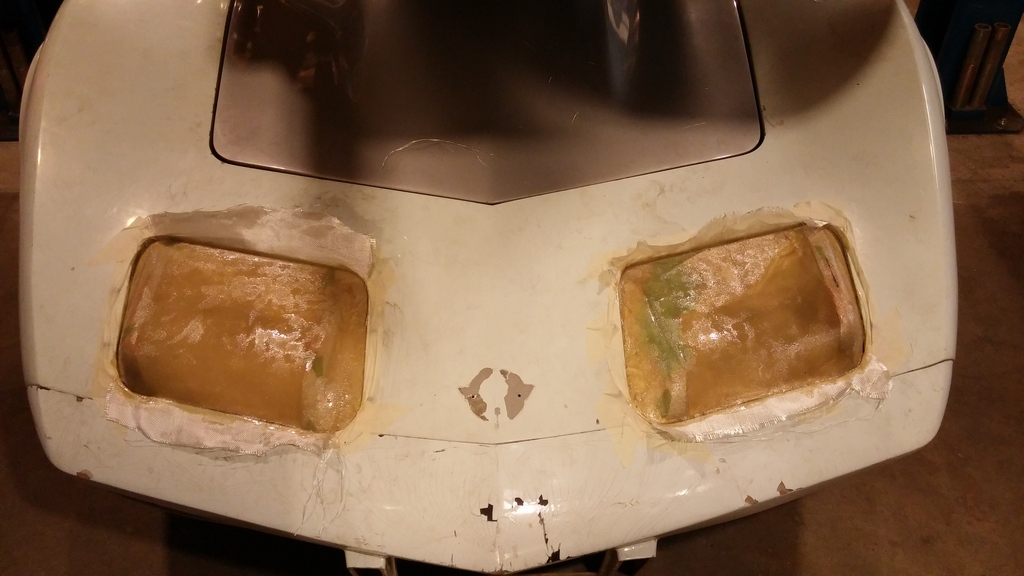
After the forms were done I covered them in box tape and then 3 or 4 coats of wax
Here are the molds of the forms before I have removed them from the car. Hopefully they pop off fairly easily. The wood is a simple support structure for them and also create a nice flat surface for them to sit on while using them.
The lens forms


After the forms were done I covered them in box tape and then 3 or 4 coats of wax

Here are the molds of the forms before I have removed them from the car. Hopefully they pop off fairly easily. The wood is a simple support structure for them and also create a nice flat surface for them to sit on while using them.


Last edited by User-C3; 07-13-2016 at 09:15 AM.
07-13-2016, 09:10 AM
#135
Instructor
Thread Starter
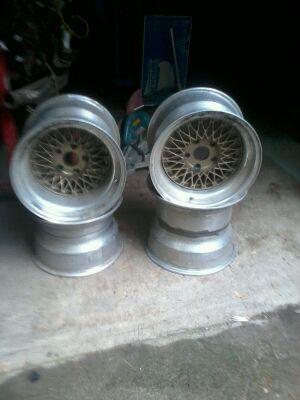
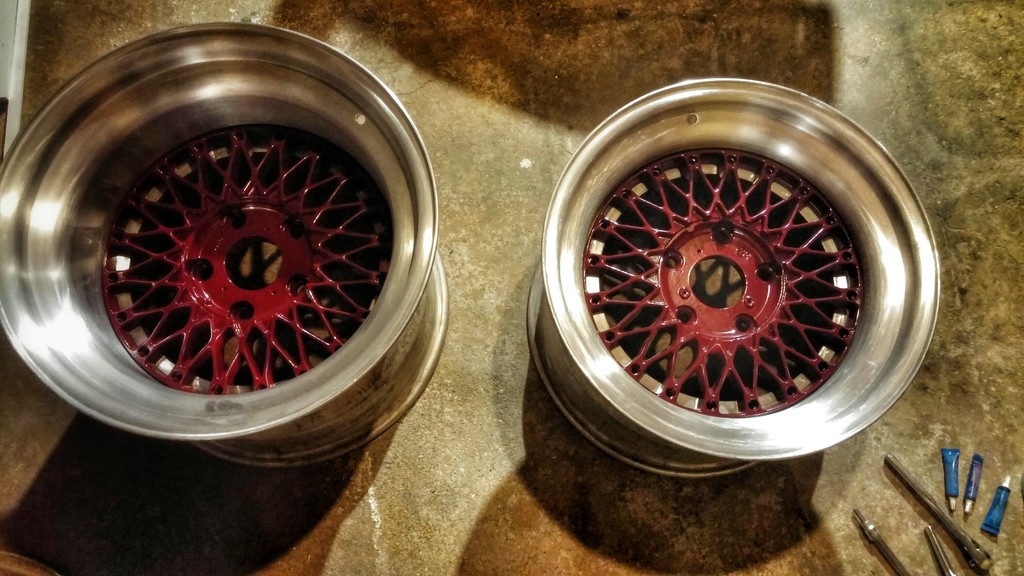
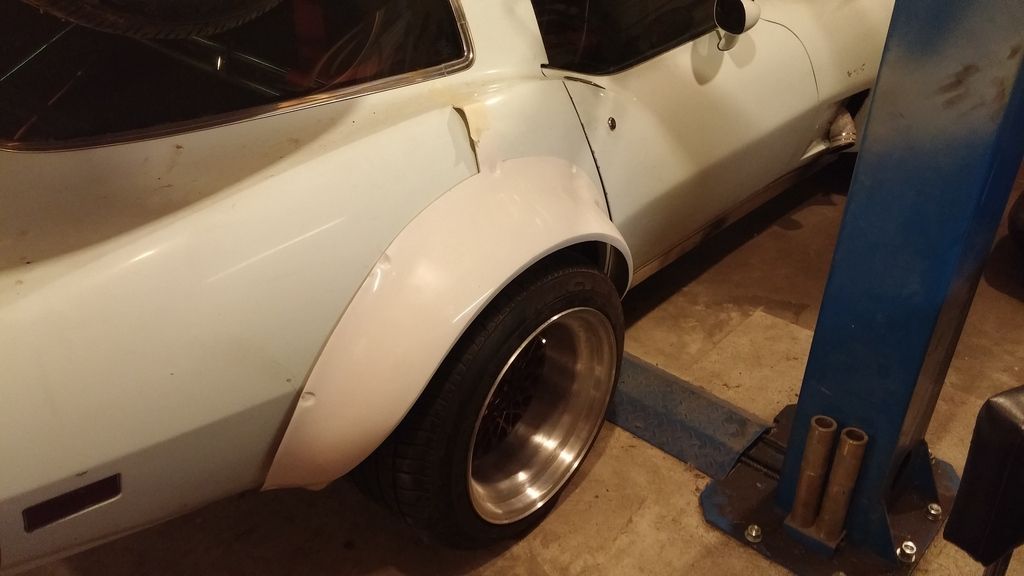
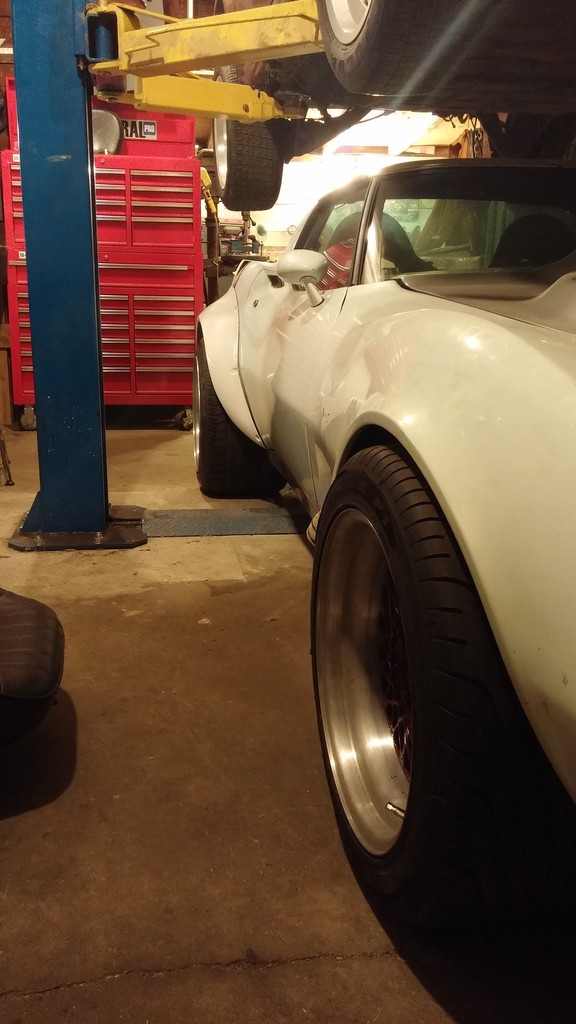
I have also taken the plunge to go flared. Always loved the look but didnt want to spend the money. Had previously refurbished some work mesh 3 piece wheels, 17x14 rear and 17x11 front. Found some flares on ebay for cheap so on they are going. Just got the wheels on the car last night, will start really fitting the flares tonight.
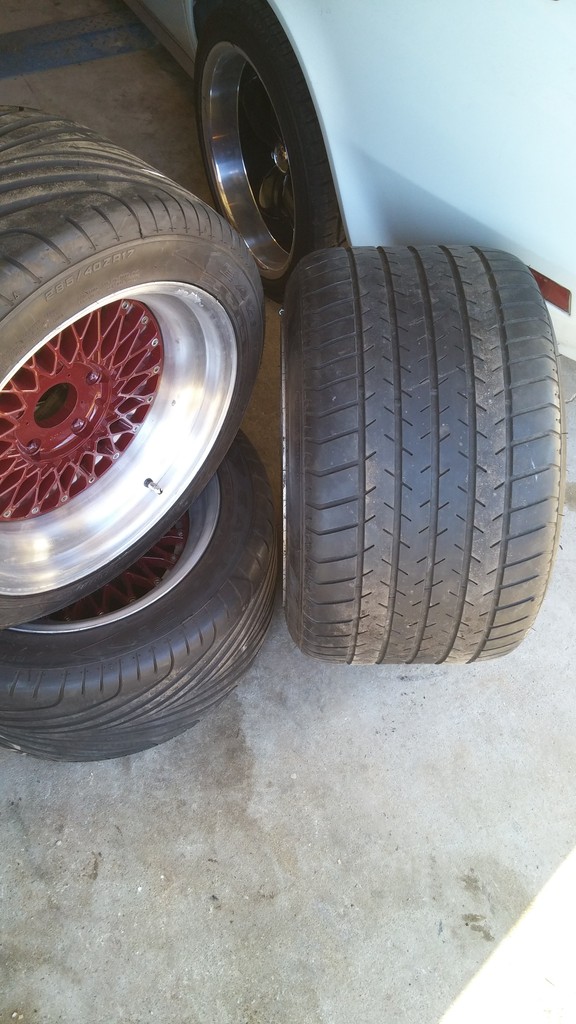
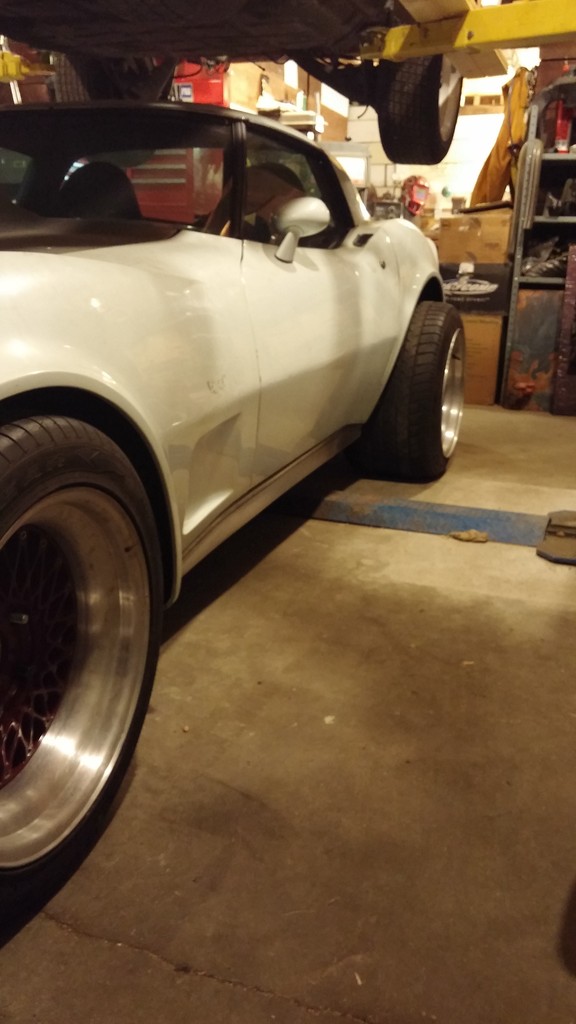
Quick little mockup


Quick little mockup


The following users liked this post:
Metalhead140 (07-13-2016)
07-14-2016, 08:13 AM
#138
Instructor
Thread Starter
Hell. Yes.
This!! What colour? Those Works look killer!
The color will stay white, and soon hopefully this year, but doubtful will be repainted.
The wheels I had actually refurbished for my porsche project but decided to keep that car stock. I think I have made the right decision.
07-14-2016, 08:28 AM
#139
Drifting
Member Since: Aug 2015
Location: NSW, Australia
Posts: 1,939
Received 472 Likes
on
344 Posts
C3 of Year Finalist (track prepared) 2019
Cool. What's the Porsche? If I find some cool flares and wheels for an affordable price I'll have to do it. Love those big fat 17"s with stepped lips. Looks just the right mix of new and old tough in my opinion. Too cool.
07-14-2016, 09:55 AM
#140
Instructor
Thread Starter
If I didnt find these flares for the price I did I wouldnt be doing it yet. Although on the flip side I worked on them a bit last night and I think the guy I got them from did some cutting on them. Its going to take a decent amount of work to get them to look good as bolt on. May have been easier to just buy new flares. Oh well, thats what I get for trying to save a few hundred bucks, ends up even when I add in all the time I will spend.