
Bee Jay's Batwing install
 10-12-2008, 11:24 PM
#1
Safety Car

Thread Starter
Member Since: Nov 2005
Location: Lompoc, CA. Santa Barbara County
Posts: 3,932
Received 543 Likes
on
198 Posts

I tried to add to a much earlier thread on this topic, but it is closed. Anyways, I finally started my batwing install this weekend. I have my trailing arms out, and I bought some offset trailing arms to replace them. They are off getting built up with new bearings.

But since I have half of the rear end out, I thought now would be a good time to do the batwing install.
Yep, While I'm in there, the start to most Corvette projects. I'll also mount the rear end an inch higher to lower the car and it's cg.
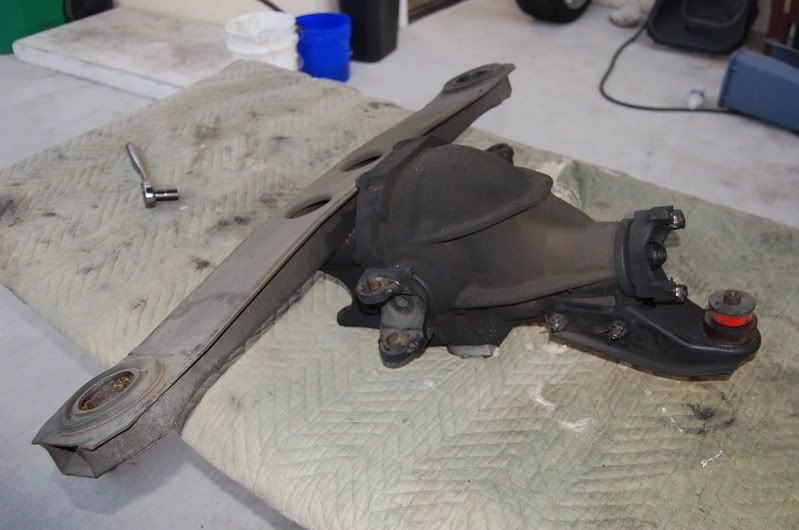
Removing the iron diff and crossmember was easy. I expected more trouble.
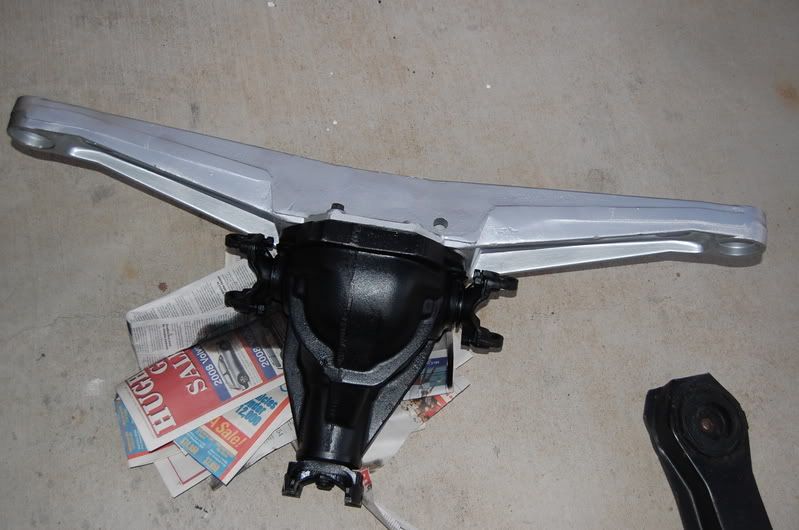
The batwing weighs 20 lbs. The iron cover and steel crossmeber weigh 35lbs, so I guess I'm only saving 15lbs.
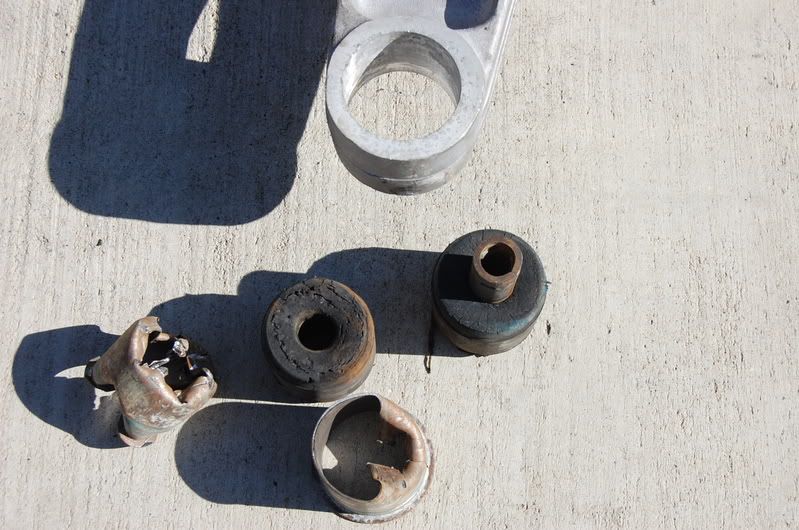
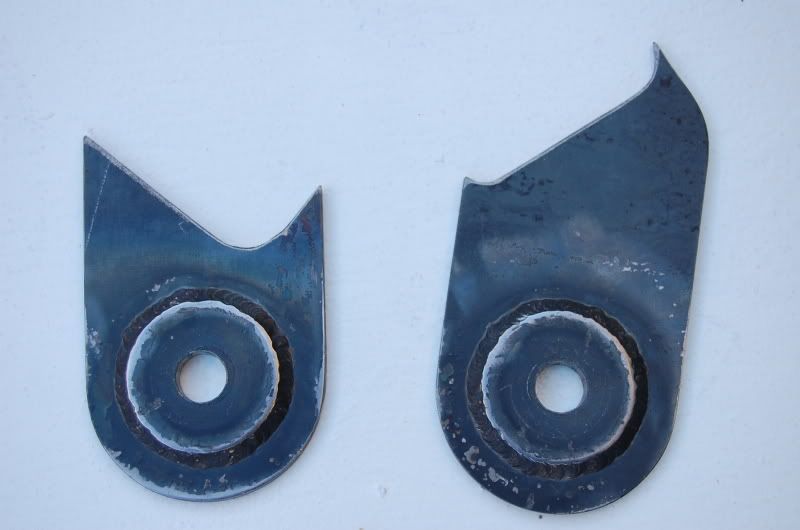
Removing the stock rubber bushings from the aluminum batwing was a major pain in the a$$. But now I know how to do it. Press the rubber out, hack saw a groove in the steel sleeve, and then chisel them out.
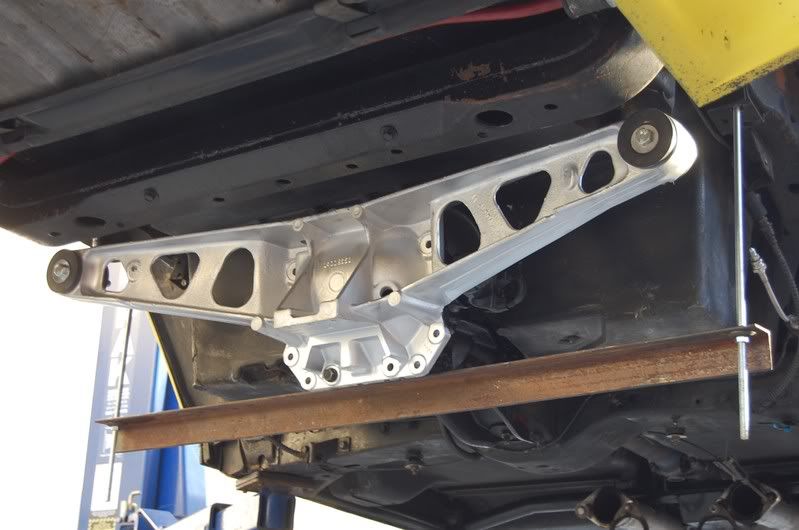
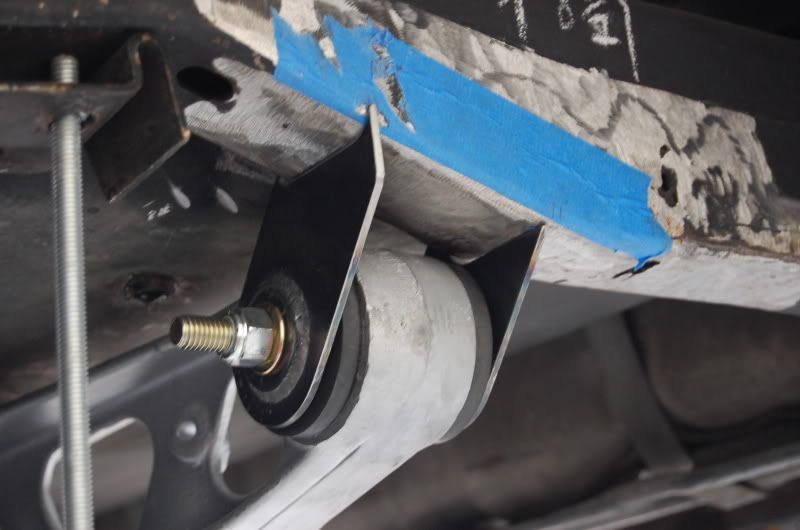
I built a tool to temporarily mount the rear end in place while I build and weld in the brackets. This tool allows me to finely adjust the height of the rear end and the batwing can be removed out of the way when it's time to weld in the brackets. You can see that the original crossmember brackets are in the way and will have to come out. I hope my sawsall can handle that. There will be no turning back, there will be nowhere to mount the original cross member.

More later.
Bee Jay
But since I have half of the rear end out, I thought now would be a good time to do the batwing install.
Yep, While I'm in there, the start to most Corvette projects. I'll also mount the rear end an inch higher to lower the car and it's cg.
Removing the iron diff and crossmember was easy. I expected more trouble.
The batwing weighs 20 lbs. The iron cover and steel crossmeber weigh 35lbs, so I guess I'm only saving 15lbs.
Removing the stock rubber bushings from the aluminum batwing was a major pain in the a$$. But now I know how to do it. Press the rubber out, hack saw a groove in the steel sleeve, and then chisel them out.
I built a tool to temporarily mount the rear end in place while I build and weld in the brackets. This tool allows me to finely adjust the height of the rear end and the batwing can be removed out of the way when it's time to weld in the brackets. You can see that the original crossmember brackets are in the way and will have to come out. I hope my sawsall can handle that. There will be no turning back, there will be nowhere to mount the original cross member.
More later.
Bee Jay
Last edited by Bee Jay; 09-13-2009 at 11:47 AM.
 10-13-2008, 12:06 AM
#2
CFOT Attention Whore


looks like a fine start. i'll be interested to see how it works out in the end. since you're going this route, you mind me asking why you just didn't go with the entire '80-82 aluminum rear?
 10-13-2008, 03:35 AM
#3

Cuz they're weak! The iron ones are way stronger and have a greater aftermarket.
10-13-2008, 03:49 AM
#4
Drifting

Member Since: Apr 2006
Location: gold coast queensland
Posts: 1,911
Likes: 0
Received 2 Likes
on
2 Posts
awesome pics bee jay and good write up. excellent work !! im sure my my 81 aluminium diff will let me down soon enough with the way i drive it. how much better are the billsteins over what you had before?
10-13-2008, 09:11 AM
#5
Tech Contributor
Member Since: Jun 2004
Location: I tend to be leery of any guy who doesn't own a chainsaw or a handgun.
Posts: 18,346
Received 767 Likes
on
549 Posts
I ended up with the same 15 pound weight difference. (Apparently my cheap scale in the garage was somewhat accurate.) Keep the pictures coming! 
10-13-2008, 09:15 AM
#6
Team Owner

Member Since: Apr 2002
Location: All humans are vermin in the eyes of Guru VA
Posts: 62,198
Likes: 0
Received 1 Like
on
1 Post
Cruise-In IV Veteran
Cruise-In V Veteran
There is a guy in the C4 sections selling an adapter plate to mount a Dana 44 rearend if that is better which I think it is.
 12-14-2008, 03:16 PM
#8
Safety Car
Thread Starter
Member Since: Nov 2005
Location: Lompoc, CA. Santa Barbara County
Posts: 3,932
Received 543 Likes
on
198 Posts
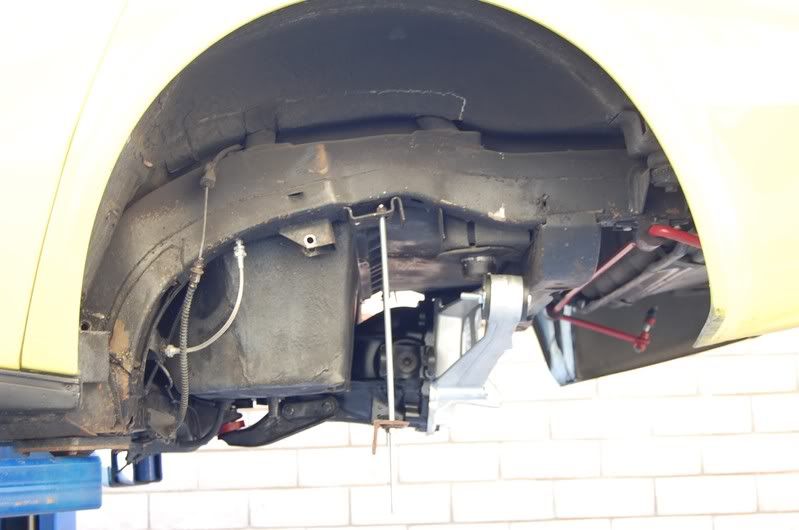
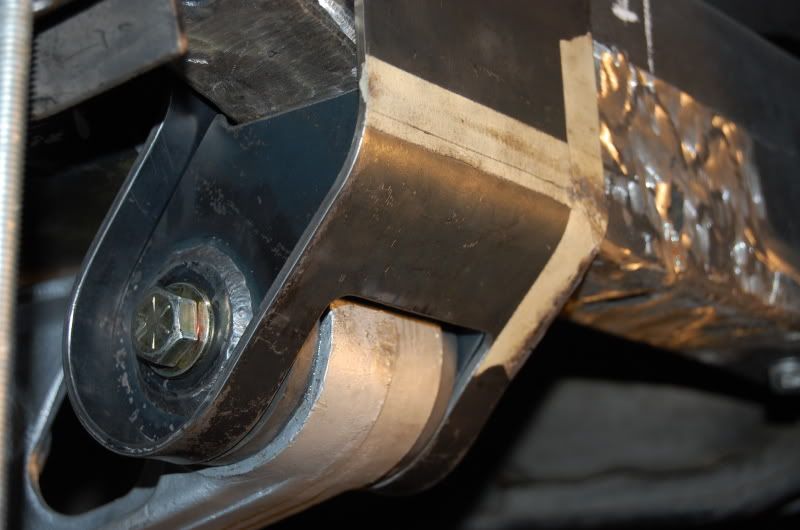
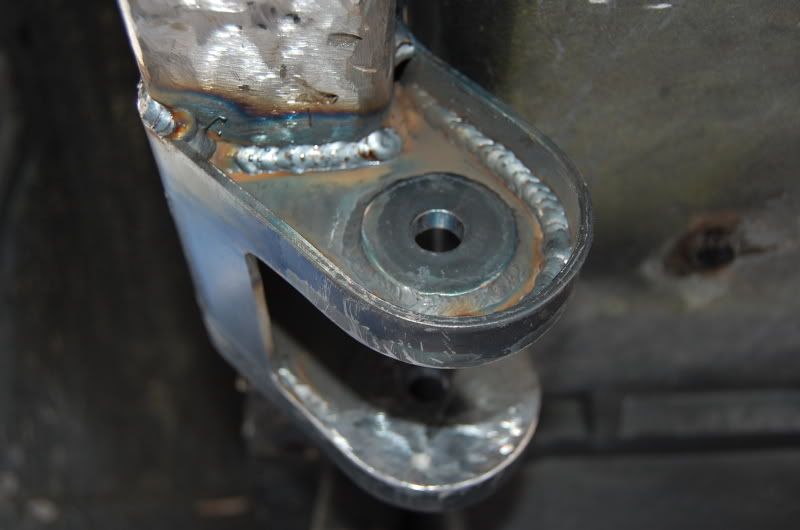
The brackets are built and in. My friend Gill, we call him the "Detail Man" took Twin Turbos CAD and about a thousand measurements on my car, and designed these brackets. My friend Norm, with MAD welding skills, welded the brackets in. They are very elegant and strong. Check them out.
Hey, can somone please tell me the torque specs for the batwing cover bolts to the rear end.
Bee Jay
Hey, can somone please tell me the torque specs for the batwing cover bolts to the rear end.
Bee Jay
Last edited by Bee Jay; 09-13-2009 at 11:48 AM.


 12-14-2008, 08:24 PM
#13
Safety Car
Thread Starter
Member Since: Nov 2005
Location: Lompoc, CA. Santa Barbara County
Posts: 3,932
Received 543 Likes
on
198 Posts
 . Also, I think it looks cool
 .
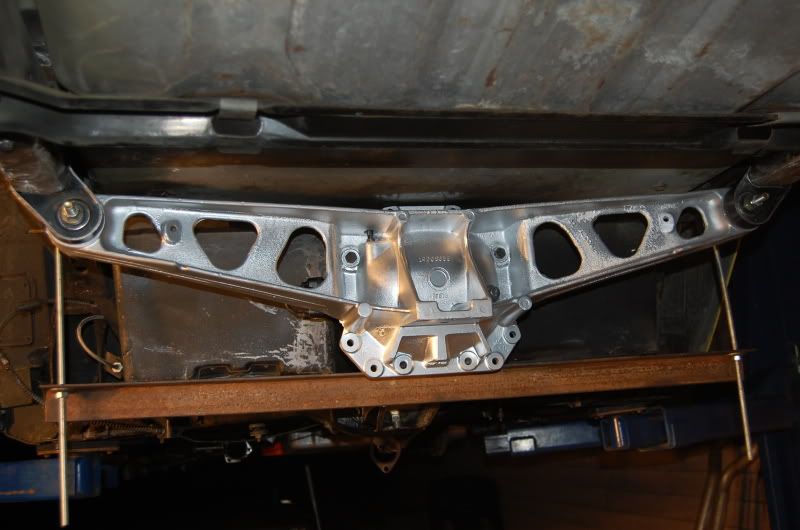
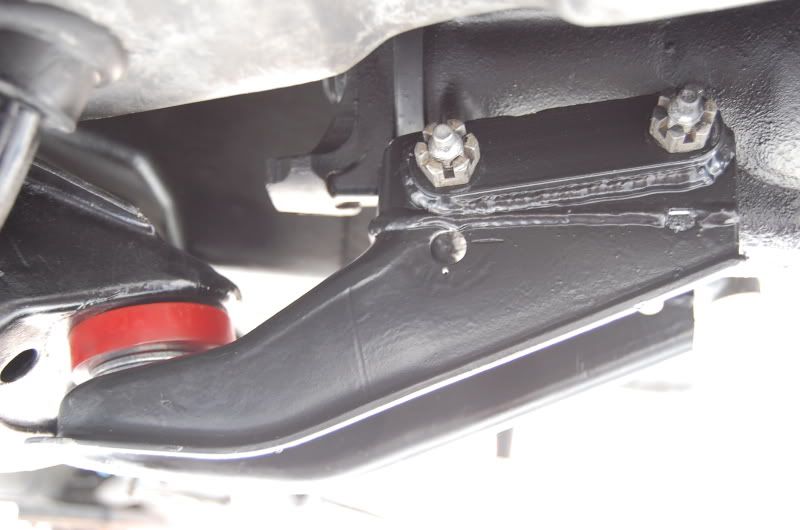
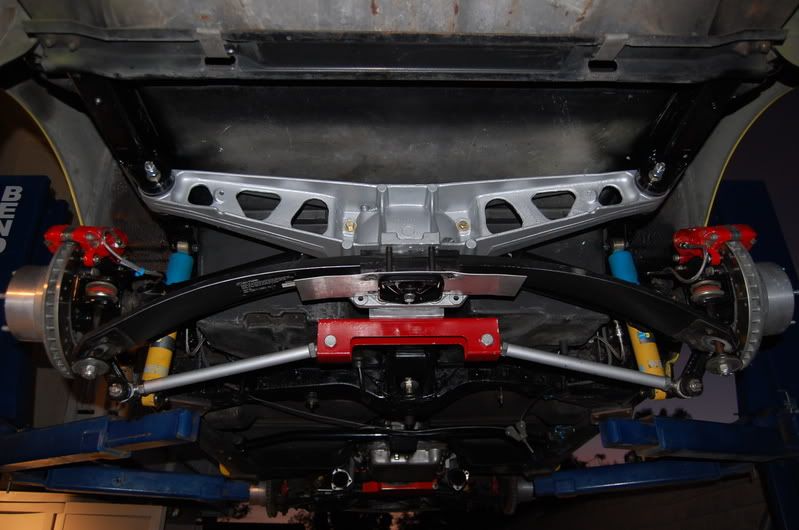
.It's another "while I'm in there" job, I had to remove my trailing arms to have the guts transferred to my new offset trailing arms, so I might as well do the batwing conversion while I'm in there. Actually I was hoping to raise the rear end 1" and lose about 50lbs. I ended up raising the rear end only 1/2" and I will lose 35lbs. To raise the batwing/iron rear end a full 1" higher than the original location would require modification of my hatch area floor and notching my frame for clearance. I had to trim the batwing top even with the iron rear end cover top. That gave me another 1/4" to raise the batwing. Raising the batwing to within 1/4" of the floor and 1/4" of the frame resulted in the 1/2" rise. The aluminum batwing is only 15 lbs lighter than the iron cover and crossmember, but I eliminated the crossmember that supported the rear end crossmember, just like GM did in 1980. Check this thread:
http://forums.corvetteforum.com/c3-t...necessary.html
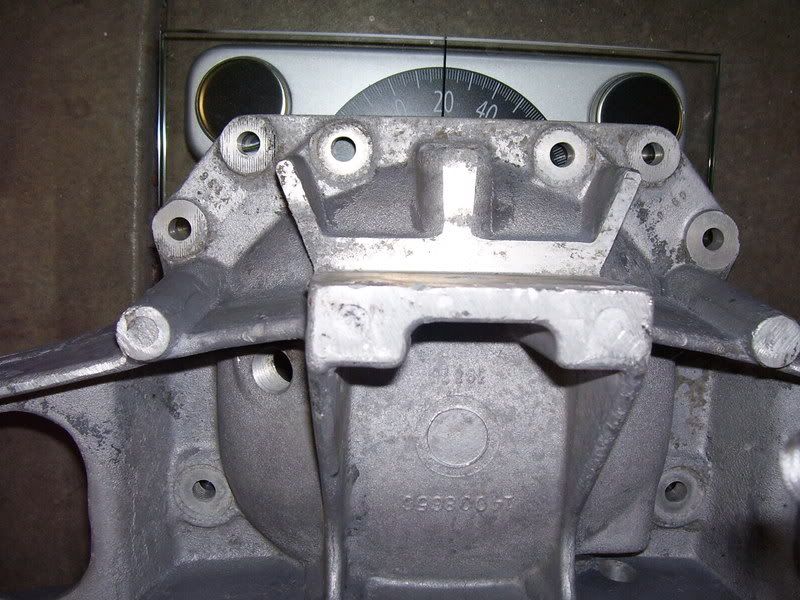
That crossmember weighed 20lbs. So I lost 35lbs. Here is the nose mount modified to raise 1", the washers are there to bring it back to 1/2" rise.
Bee Jay
Last edited by Bee Jay; 09-13-2009 at 11:49 AM.
12-15-2008, 11:27 PM
#16
Safety Car
Thread Starter
Member Since: Nov 2005
Location: Lompoc, CA. Santa Barbara County
Posts: 3,932
Received 543 Likes
on
198 Posts
The batwing is in and solidly mounted Sunday evening. After that I got the driveshaft in and called it quits. It was getting cold and my Cowboys were comming on. I'm going home to Texas for Christmas Thursday, so I'll mount the offset trailing arms and finish this whole project maybe for New Years. I want to buy and burn some of this $1.80 a gallon premium. can someone please tell me what to torque the batwing cover bolts to the rear end.
Merry Christmas everybody.
Bee Jay
Merry Christmas everybody.
Bee Jay
Last edited by Bee Jay; 09-13-2009 at 11:49 AM.
12-27-2008, 09:58 PM
#17
Safety Car
Thread Starter
Member Since: Nov 2005
Location: Lompoc, CA. Santa Barbara County
Posts: 3,932
Received 543 Likes
on
198 Posts
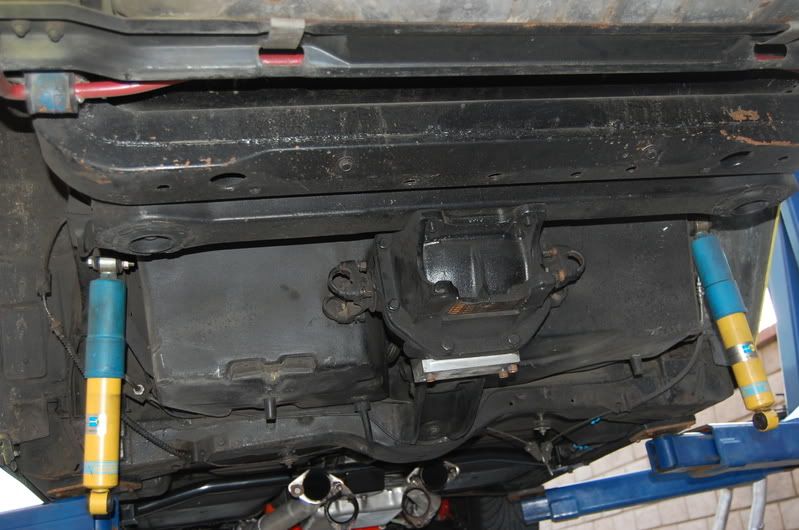
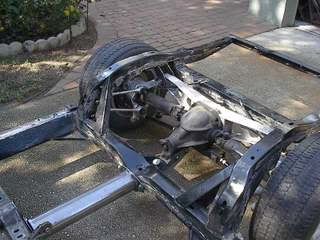
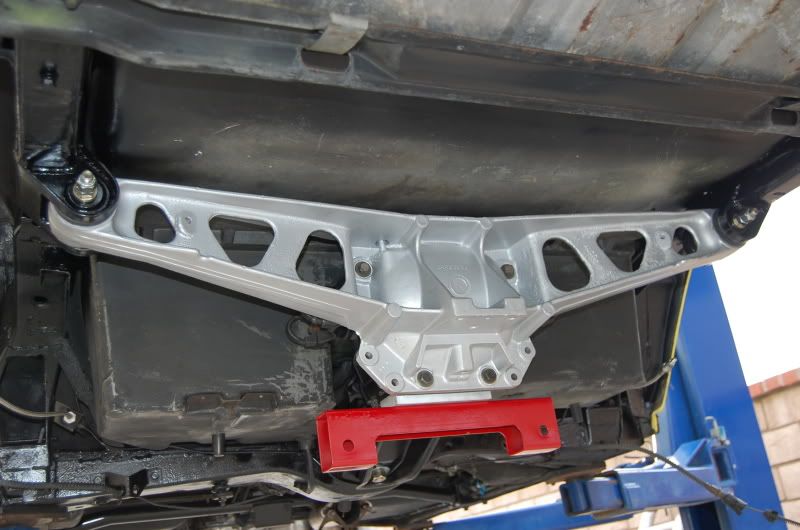
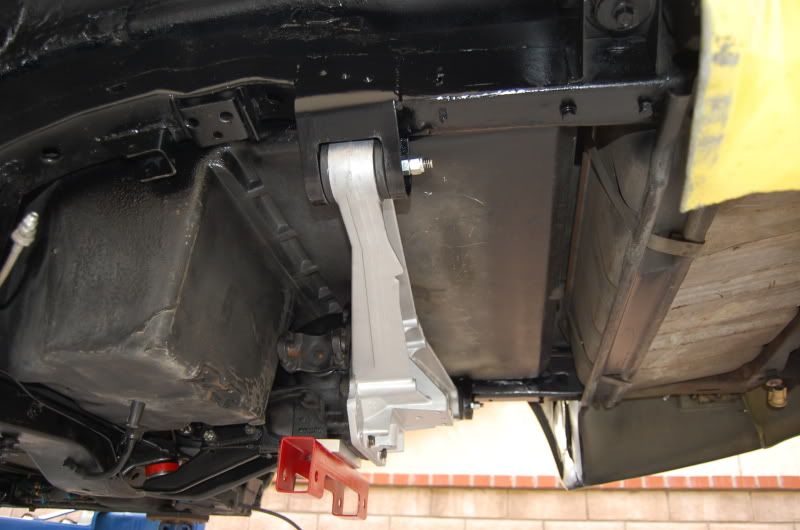
I'm back from my Christmas vacation in San Antonio Tx. It's a good thing I'm saving 35lbs with this batwing install, cause I just gained 20lbs. I got to work on the car a good nine hours today. Taking stuff apart goes much faster than putting stuff back together again. I had to raise the diff 1/4" and raise the tranny mount 3/4" to get the crank/tranny parallel with the rear end. Installing the offset trailing arms was a lotta fun, especially the bolts and alignment shims. It's important to know, the batwing mounts the leaf spring with a 3 hole plate instead of the original 4 hole plate. You must have a 3 hole plate and the needed bolts to mount the spring properly. I sure would like to know how you concours weenies put your cars together without chipping the powder coat or scratching the paint. I filled the diff with 2 pints of Valvoline synthetic gear oil. I need to bleed the brakes and hang the exhaust. Maybe tomorow after church, but the Cowoys are playing maybe their last game of the season. I need to get the car back in the garage before the rainy season gets here. Here's a pic. That batwing looks kinda cool in there. Removing that uneeded crossmember opens things up a bit too.
Bee Jay
Bee Jay
Last edited by Bee Jay; 09-13-2009 at 11:50 AM.
12-27-2008, 11:35 PM
#18
Safety Car

Looks fantastic!
Is that strut set-up designed to give you better camber angles through the wheel travel? It looks lower than where an OEM set-up might fall.
Like to see some pics of ride height before and after.
B.
Is that strut set-up designed to give you better camber angles through the wheel travel? It looks lower than where an OEM set-up might fall.
Like to see some pics of ride height before and after.
B.
12-27-2008, 11:48 PM
#19
Race Director


Looking good. You are close to getting it back on the road. I may have asked you this before but I am going to ask again. Whose strut rod setup are you using?
12-28-2008, 12:11 AM
#20
Safety Car
Thread Starter
Member Since: Nov 2005
Location: Lompoc, CA. Santa Barbara County
Posts: 3,932
Received 543 Likes
on
198 Posts