
Started in on the '81 today - Long story
 05-09-2008, 06:11 PM
#21
Instructor


Member Since: Apr 2006
Location: Henrietta New York
Posts: 232
Likes: 0
Received 0 Likes
on
0 Posts
If you want to remove the cross shaft out of the LCA this process has worked well for me. Assuming the lower arm is on the bench. Take a small drill bit or hole saw in a drill and drill out all the rubber in both sleeves. Takes a little time (not much). But prevents the use of heat (smell etc. and the uncertainty of what the heat will do to the metal). Once rubber is out of both sleeves you can use an air hammer or cold chisel to crush the outer metal sleeve on the single hole side of the LCA shaft. I chose the hammer/chisel method just to better control the crush. Just enough to tap it out relatively easily. I clamp the arm to a table using a wood clamp to stop it from "bouncing" as I hit the sleeve. Once that metal sleeve is removed, slide the shaft through the control arm hole and remove the shaft. Once shaft is out you do the same crushing for the other outer metal sleeve. The inner metal sleeve stuck to the shaft is of split design so you just have to start at each end of the shaft and spread them enough with a thin chisel or ?? to work them loose. PB blast or the likes helps loosen them. You'll see easily once shaft is out what you need to do. Wish I took pics that I could share.
 05-12-2008, 08:16 AM
#22
Race Director

Thread Starter

Well, I got the LCA completely apart on Saturday. I did not have much time to do anything else, but at least I got that much done.
As mentioned previously, one bushing had already disintegrated, and I was able to hog out what was left of the other one with a drill bit.
I used a chisel and hammer to work a gap around the bushing sleeves, and seeing how slow that was going, and how handy my air chisel was, I took them the rest of the way out with that.
The arms got a little scratched, but I am planning on cleaning them up and shooting some black spray paint on them anyway, so no big deal there.
Getting the rivets out of the ball joint was fun too. More air chisel and some drilling too.
One down three to go!
05-12-2008, 03:20 PM
#23
Team Owner


Member Since: Oct 2004
Location: Springfield MO
Posts: 23,831
Likes: 0
Received 7 Likes
on
7 Posts
St. Jude Donor '07

That's what I was hoping, that once I got all of the bushings and sleeves out of the way that it would be more obvious.
I had a 2 jaw puller that I tried to use on the ball joint, but I had so much tension on the thing that it was bending, and the joint still wouldn't pop.
Since I am replacing the ball joints (and grease boots) I didn't feel too bad about tearing things up a bit with the pickle fork. I wouldn't touch anything that I cared about with one, that's for sure.
Edit:
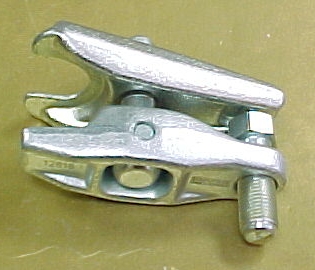
Do you mean something like this:
I had a 2 jaw puller that I tried to use on the ball joint, but I had so much tension on the thing that it was bending, and the joint still wouldn't pop.
Since I am replacing the ball joints (and grease boots) I didn't feel too bad about tearing things up a bit with the pickle fork. I wouldn't touch anything that I cared about with one, that's for sure.
Edit:
Do you mean something like this:
If you want to remove the cross shaft out of the LCA this process has worked well for me. Assuming the lower arm is on the bench. Take a small drill bit or hole saw in a drill and drill out all the rubber in both sleeves. Takes a little time (not much). But prevents the use of heat (smell etc. and the uncertainty of what the heat will do to the metal). Once rubber is out of both sleeves you can use an air hammer or cold chisel to crush the outer metal sleeve on the single hole side of the LCA shaft. I chose the hammer/chisel method just to better control the crush. Just enough to tap it out relatively easily. I clamp the arm to a table using a wood clamp to stop it from "bouncing" as I hit the sleeve. Once that metal sleeve is removed, slide the shaft through the control arm hole and remove the shaft. Once shaft is out you do the same crushing for the other outer metal sleeve. The inner metal sleeve stuck to the shaft is of split design so you just have to start at each end of the shaft and spread them enough with a thin chisel or ?? to work them loose. PB blast or the likes helps loosen them. You'll see easily once shaft is out what you need to do. Wish I took pics that I could share.
05-12-2008, 04:20 PM
#24
Racer
Member Since: Mar 2006
Location: Guantanamo Bay, Cuba (home in Colorado Springs)
Posts: 291
Likes: 0
Received 0 Likes
on
0 Posts
There seems to be nothing that won't fight you on these older C3's, when you attempt this level of work.
I had to cut the radiator support in half just to get it out.
The front suspension was removed after I pulled the frame out from under the body. I went back with the 440# springs.
I see things on the design that make me think; "what were they thinking"!
http://www.cardomain.com/ride/2658106
Sandblasting and powdercoating will do wonders for "restoration".
05-18-2008, 08:44 PM
#25
Race Director
Thread Starter
Truer words have never been typed...
I just got all four left side control arm bushings hammered in, and when I go to change out the bump stop on the LCA, I notice that one of the shock mount bolts that I screwed back in to the LCA to keep from losing looks a little loose.
A closer look reveals that the little square nut that the shock mount bolt tightens to has lost its tack welds and has come loose frm the LCA.
Lovely, now I need to find a welder for a 30 second job before I can put anything back together...


 06-10-2008, 09:08 AM
#27
Race Director
Thread Starter
Progress update...
I got the driver's side all back together over the weekend. The shorter540 lb. springs went in really easily by lining everything up and jacking the LCA up underneath it.
A safety chain looped through the spring and around the frame is a great idea here, btw.
I did manage to forget to move my brake caliper back before attaching the ball joint nuts, so I had to disconnect the hose (making another huge mess) to run it behind the spindle.
I read that to torque the cross shaft bolts correctly, that the weight of the car needed to be on the suspension, so I put the wheels back on and lowered it down off of the jack stands to do so.
Even though all of the accessories are still off, and the radiator is out, it still looks good to have the car back on it's own feet.
I'm going to get after the passenger side this weekend and see how much I can get through. The second side always goes faster.
06-10-2008, 02:13 PM
#28

LOL. I think that you should write a book. (You have a knack) Hopefully it will become a bestseller and you make a million bucks and theh hire somebody to do all the work! Of course, then you won't have anything left to write about, so make sure that you invest the million, minus the cost of the resto. J
 06-11-2008, 07:49 AM
#30
Race Director
Thread Starter
It will probably work out that way since I already have everything off of the front of the motor and the radiator is out. There is just no way I'm putting that God forsaken fan shroud back in.
Another case of "while I'm in there..."
Another case of "while I'm in there..."
07-12-2008, 08:07 PM
#31
Race Director
Thread Starter
Finally got to go after the passenger side with a vengence.
Ball joints would not budge, again. Having not been able to procure one of the better tools to do it with, I managed to support the LCA with my big floor jack, and cut through the top of the ball joint shaft above the spindle with a hacksaw. It wasn't pretty, but it got the job done. Now I can drill/punch it out of the top of the spindle.
Necessity is the mother of invention, Bubba is invention's bastard cousin.
Next up, more bushing fun!
09-08-2008, 08:31 AM
#32
Race Director
Thread Starter
So close...
I nearly got the passenger side completed yesterday. When I went to install the new (shorter, higher rate) spring, I lifted the car off of the jack stand instead of getting close enough to bolt up the spindle. Strangely, this didn't happen when I did the driver's side.
I suppose I will have to go the spring compressor route to get it buttoned back up, but it is close.
If anyone is still reading, a helpful tip. Definitely put your bushings and cross shaft in the freezer to shrink them down. The difference was about 5 hits as compared to about 10 minutes of pounding.
I actually tried to use a long bolt threaded in to the end of the shaft to pull the bushing in to the LCA, but managed to strip the threads out and ended up having to order a new cross shaft for the passenger side.
So I'm now four months in to the front suspension rebuild, and it sucks every bit as much as everyone tells you that it does. I'm just glad that I am getting it out of the way first.
09-21-2008, 04:30 PM
#33
Race Director
Thread Starter
Well, four and a half months later, I finished the front suspension today. The new springs (540 lb.) definitely pick the front end up a bit more than the worn out stockers, but the absence of the weight of any radiator or accessories over the front may be exaserbating that effect.
Hopefully these bushings will last a good long while, I do not care to do that again.
I put it down on it's wheels and even closed the hood, and I must say, she looks mighty good, even though it won't be driving around any time soon. Up next, engine swap...
Hopefully these bushings will last a good long while, I do not care to do that again.
I put it down on it's wheels and even closed the hood, and I must say, she looks mighty good, even though it won't be driving around any time soon. Up next, engine swap...
09-21-2008, 04:57 PM
#34
Safety Car


My front suspension/steering rebuild this year also took 4 months. What started off with just me buying a few Moog items turned into:
-460lb coil cut 1/2 turn
-Big block radiator w/ Mark VIII fan set
-VBP spreader bar
-VBP rack and pinion
-Hydroboost set-up
-Ported CFI intake w/ emissions delete to combat an intake gasket coolant leak
VERY late nights and many weekend hours. Getting the balljoints&bushings free were the funnest parts!! I used Black epoxy spray paint on the control arms though adn they came out looking fantastic.
I could have kept going as I need to do the rear end (2.87 to 3.07s) and tranny rebuild and maybe a 2040 cam w/ 1.6RR upgrade, but I just wanted to get some time in this year driving it.
Still not sure whether to sell it or keep it either. A C5-Z06 is calling my name hard.
B...
-460lb coil cut 1/2 turn
-Big block radiator w/ Mark VIII fan set
-VBP spreader bar
-VBP rack and pinion
-Hydroboost set-up
-Ported CFI intake w/ emissions delete to combat an intake gasket coolant leak
VERY late nights and many weekend hours. Getting the balljoints&bushings free were the funnest parts!!
I used Black epoxy spray paint on the control arms though adn they came out looking fantastic.I could have kept going as I need to do the rear end (2.87 to 3.07s) and tranny rebuild and maybe a 2040 cam w/ 1.6RR upgrade, but I just wanted to get some time in this year driving it.
Still not sure whether to sell it or keep it either. A C5-Z06 is calling my name hard.
B...
09-21-2008, 05:13 PM
#35
Drifting

I just a total suspension rebuild as well....and it took me just shy of 3 months, I think. Lots of hot sundays, sweat mixing with oil and frustration. Nothing quite like working 10 hours, then coming home, and getting to work on the car for another 5. Good times.
Actually......it WAS good times. It was pretty horrible while I was doing it, but I think to myself.....it was either that, or sit on the couch and watch dumb reality shows, or play some video games that I'm completely tired of. So yeah, think of it like that.
As for those ball joins on the tie rod ends....I used one of those little puller tools, rather than a fork, and it worked freaking phenominally. The first one, I tried the fork, and after about 20 minutes, went to autozone, covered in grease, and sprang for their rent a tool program. Took me another 30 minutes with that awesome tool, and i had all the ball joints out. Of course, getting those little cotter pins out of the castle nuts prior to popping of the ball joints........well, let's just say that it took a while. Also, sorry to hear about your shroud issue, I ALMOST had the same deal, but as able to maneuver the bolts back enough on the UCA to slide them out at an angle, after finagling the control arm. The one closest to the front of the car was the worst, but after enough wiggling, I got her out. Otherwise, I was going to make a small cut on the shroud.
The good news is, after it's all out, putting the new stuff back in is cake. Now, next free chance I get, I have to adjust the toe on my front left wheel...right now, it's a little pigeon toed.
I guess I wrote that long bit there to say...........
Good job, I and others know the horror you just went through, and congratulations on seeing it through without killing and inoccent bystanders.
11-07-2008, 10:37 PM
#37
Melting Slicks

Replaced the 4 ball joints on the 76 I just got.
It is hard to know when to stop on the projects. I started in to only replace the brake calipers/master cylinder as it had really bad brakes and then ended up buying 2 new rotors, bearings/seals/new shocks and then onto the ball joints as the boots were torn and might as well do them too while you are in there.
These posts were helpful thanks.
Piece of info that might be helpful. I bought a front end kit from Harbor Freight for $89 which I thought was expensive at the time. Quite a few neat little pullers and the H tool too. The H tool was invaluable to get the ball joints popped loosed and the tie rod ends too. I used numerous PB blaster soakings and alternately tapped the knuckle/ball joint with a small hammer in between tighting the H tool bolt. I also tapped the back of the H tool. Tapping and alternately tighting with the H tool seemed to do the trick better than the socket/bolt splitter in Haynes/factory service manual for me. I am guessing the tapping helps get the PB stuff through the joint.
Good luck and thanks again.
11-01-2009, 05:06 PM
#38
Race Director
Thread Starter
Been a long time since I posted, and progress has been slow, but I thought that I would post up an update.
I got the new engine in the car a month or so ago and bolted up the headers, my seperntine rig, and the radiator. I plumbed my fuel lines while it was on the stand, and am a fitting away from having that work. I put the new Dewitts radiator in (not wired up).
I took one side of my serpentine brackets back off to get the fuel pump mounted, so that's what you see below.
Slowly but surely (I hope).
Here are a few pics I grabbed before the battery on the camera went kaput.
12-07-2009, 06:02 PM
#39
Race Director
Thread Starter
Since this is the official diary of my restoration, I figured that I'd update it a bit.
Given that the a/c was non functional, I gave the old compressor and lines the heave-ho. I accordingly had the big old whatchamacallit staring at me from the passenger side firewall just taking up space, so I decided it needed to go too, to be replaced with a delete plate. For those experiencing miscellaneous a/c system problems, I would suggest taking that thing off if you have everything else apart. I will take a picture of the pile of leaves, twigs, grass, small mammalian skeletons and other assorted flotsam that had been sucked up through the years. There is no way a system could work well with that much gunk up in there. Someone (probably me) should put a screen on the intake side of that, wherever it is.
On a side note, I read that acdelete.com is really slow to respond after ordering the cover piece, but I will keep you guys posted on how the order goes and will give them the benefit of the doubt, in any case I am not in a big rush.
Anyway, I actually have started a checklist of things to finish prior to firing up the new engine for the first time. It is long, but it is at least finite and should not require covering any unusual ground in the great scheme of car restoration.
As I have mentioned in a few other threads, I found out a few things along the way.
1) Late model serp brackets do not play well with mechanical fuel pump lines. I had to cut part of the area where the smog pump once resided off to route the line to the carb.
2) OEM C3 power steering pump reservoirs will bolt up to the brackets just fine, but the drain side line hits the block, thus preventing you from bolting the bracket to the engine. I now have the reservoir from a '95 truck with the spring and regulator from my old pump.
3) if you use a late model PS pump reservoir, and you have a '79 or older, you will need a custom pressure line from the pump, or you may be able to swap out the fitting from your old pump body, but your old lines will not work with an new pump.
I still need to get the kickdown cable sorted out. It no longer seems able to reach what I think is the right spot on the carb linkage. Being a one year deal with the 1981's, there is not much info out there on how to deal with that, but I'll get there.
I also need to get a pic of the starter wiring. I did not remember how it came off, and I am going back with a mini-starter, so I'll probably post up a thread asking for that, I did not see anything in my research.
I also discovered a great deal of bubbishness going on with the vacuum lines for the headlights, and I broke the canister in the front with my own hamfistedness. I think that I'll probably end up going with the McSpeed fix using electric motors. I'm going to try to get those off of an '00 to '02 Trans Am, just so I can say that I have parts from 4 decades worth of GM cars on this thing when I'm finally done. (non-CCC carb from the 70's, car from the 80's, serp brackets from the 90's) Heck, I may get a 2010 Corvette badge and go for 5!
My running joke is that I will get this project finished in time for my daughter to drive it to her senior prom. She turns 2 in January, and I'm thinking that I might not have the aftermarket a/c hooked up yet, so she'll have to sweat it out a bit.
All in good fun. Happy wrenching.
12-11-2009, 03:13 PM
#40
Race Director
Thread Starter
To follow up, ACdelete shipped my panel yesterday, so they seem to be working pretty quickly these days. I talked to them on the phone and they were very friendly too.
I'll post pics once I get it in/on.
I'll post pics once I get it in/on.