When you click on links to various merchants on this site and make a purchase, this can result in this site earning a commission. Affiliate programs and affiliations include, but are not limited to, the eBay Partner Network.
Repo trim for the 3 doors is a bit small so doors needed some light sanding. This didn't surprise me as I remember a forum member in Australia had the same issue when he redid his rear compartment door assembly. There is a small lip on the original doors that the frame butts up against and wanted to keep the lip. Chucked up a drum sander in my drill press and set the clearance to retain the lip. Early on had thought about filling the screw holes in the door trim before painting and gluing them on as original. Decided on using screws. I spent hours & hours chipping the old frames off the doors and never want to repeat that.
Doors needed slight sanding so new frames fit. Wanted to keep the lip. Doors are some kind of fiberglass so good dust mask required.
Hey Rick, would you mind sharing info on the lift you are using, seems like it goes higher than most I have looked at. Many Thanks.
Made by Dannmar. I like the lift height. Awesome doing brakes, bodywork & painting standing up. Downside is very limited access to middle of car for clutch/trans work. Lift is heavy but can move it around to wherever you want.
Stainless plate is so I can move it around with floor jack
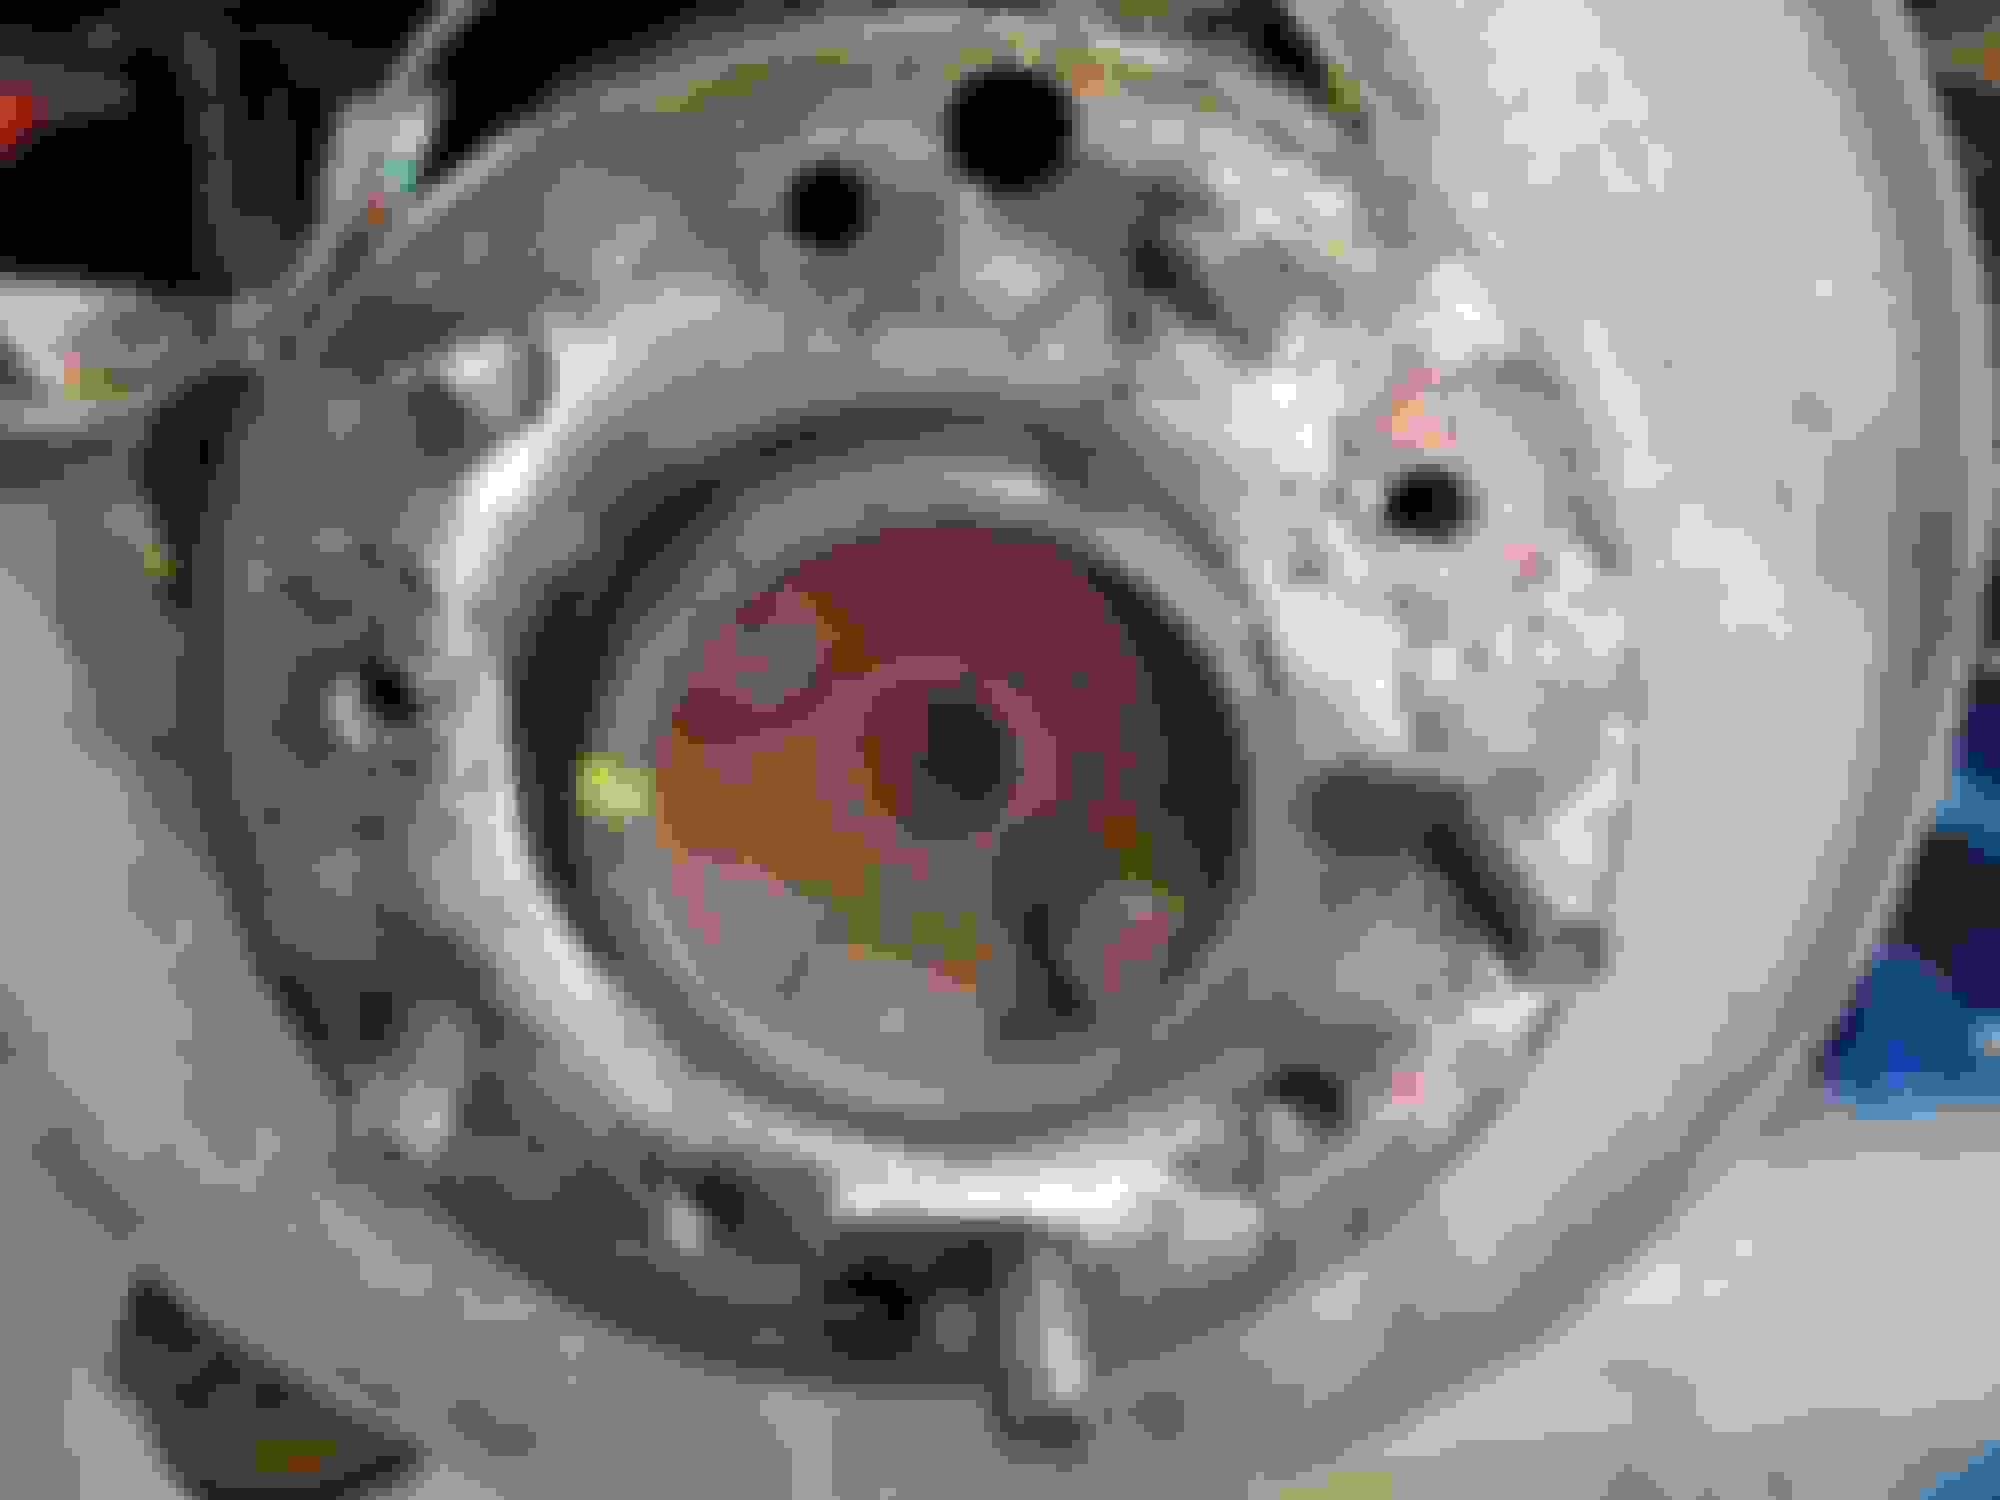
I saw a thread a while back from a member where he bolted the brake rotors on the rear axles/front spindles after driving the rivets out. Looked it over and seemed easy enough. Rear axle holes are a hair too big for 3/8-24 but works okay. Made a jig at work out of scrap stainless round stock for a tap guide. To help ensure is threaded straight for doing this on the car. Push up against the axle flange and hold down tight while running the tap in. Better than eyeballing it. I suppose all this is not necessary. Not like I'm going to re-live my days when we would floor the gas pedal and just before the valves started to float, sidestep the clutch. The hardest part is getting the taper in rotors to correct depth.
Back to the rear compartment door assembly. Doors and pushbutton latches are the only parts original to the car. Door pulls are used from ebay. For whatever reason a prior owner broke off the original finger pulls. For mostly repo parts it fit together reasonably well. Need to massage the door fit at hinge before mounting in car.
Fitting the door trim.
Guessing the locking latch goes on the middle door?
I am procrastinating putting the new wiring in for no reason. It's straightforward and no big deal. There is a lot of it. Bought all new wiring, stem to stern. What is laid out is 3/4's of it. The rear harness is in and doors-PW & PDL. There is 5-6 bags of wiring just in the engine bay. Have lots of pics of low mileage 78's to refer to so all is run correct. And the vacuum hoses. Once it's all in then things progress rapidly.
Lot's of wiring to a car.
6 bags just for the engine bay. Plus some grounds.
Oh man, the fuse panel is not easy to get mounted. Maybe if the old harness is going back in, it might be easier since it has taken a 'set'. Mine is new. Found a section of PVC conduit to hold it in place while running the screws in. Not easy otherwise. Helps to have a long extension also. That panel is way back in there. The 2 foot long 1/4" drive extension that rarely gets used sure came in handy.
Looking over the old wiring harness found this. Some resistance in the headlight circuit or just what happens with 45 year old wiring. All new wiring was not cheap but then, how do you put a price on hopefully, no wiring issues? There was a lot of splices, wire nuts, etc. with original wiring. Not worth messing with. Would constantly blow the brake light fuse also.
I bought complete new wiring harnesses for my 73.
Thankfully all the old wiring was in good un molested condition.
It was old and the insulation was brittle so it’s all getting replaced.
Like you said, not cheap.
I'm guessing it's not going to get any easier. Seems like every square inch under the hood is occupied by something. Alarm horn is not easy to install. Of course it didn't work. Neither did the other 2 horns. All 3 off to be rebuilt. The 'L/H' marking tells me the fender has been replaced. They did a good job. Would never know.
Almost need 3 hands to get this alarm horn installed.
Well, that was expensive. Had to recruit my son to hook up the headlight wiring. I'm too big to squeeze in between the front spoiler and sway bar to get into the nose for plugging in the light wiring. Arms not long enough to do from underneath. Agreed to taking him and his brother to arcade store if he could get it done. Cold and rainy day and would have taken them anyway but might at as well get what I needed done .

 03-10-2024, 02:25 PM


 .
. 


