
1970 unplanned restoration
 04-28-2014, 09:35 PM
#41
Instructor

Thread Starter

A couple of updated photos.
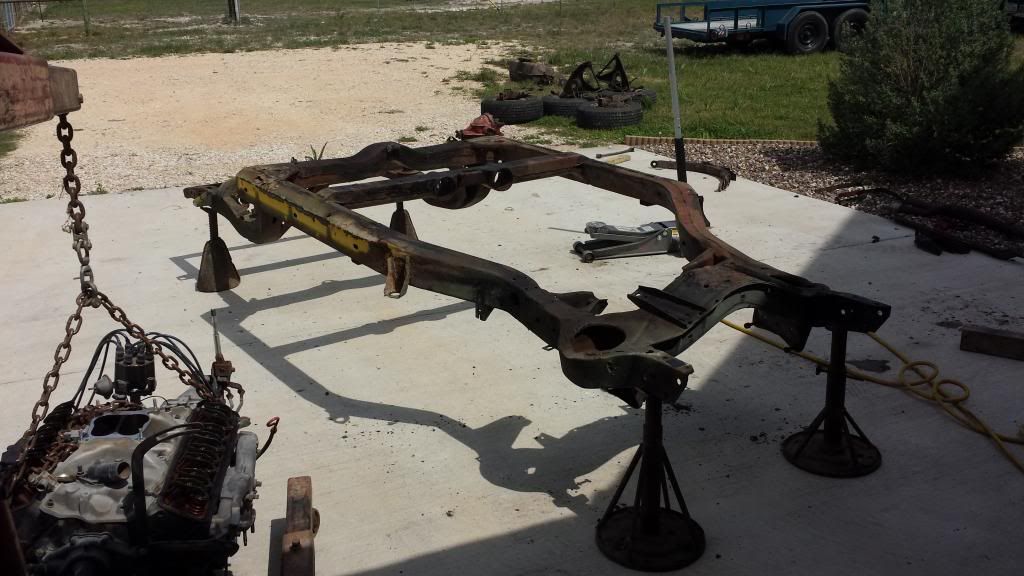
Here is the frame I picked up. It had been undercoated at some point in its life, peeling the tar off was not fun but it was like new under it.
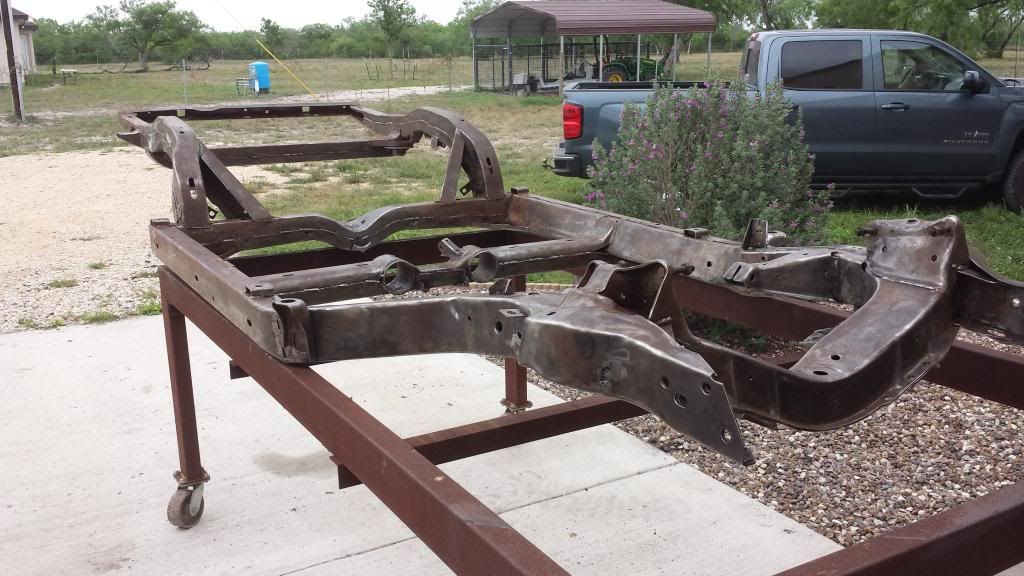
Frame after sandblasting and paint.
Here is the frame I picked up. It had been undercoated at some point in its life, peeling the tar off was not fun but it was like new under it.


Frame after sandblasting and paint.


 04-28-2014, 10:30 PM
#42
Melting Slicks

Well it looks like your a glutton for punishment. Welcome to the club
If it means anything, a lot of us got bit a little when buying our cars. Good luck with the build
If it means anything, a lot of us got bit a little when buying our cars. Good luck with the build
04-29-2014, 07:29 AM
#43
Melting Slicks


WOW, sorry to hear you got screwed/lied to on the Vette! I do know how you feel though, I got taken on a 69 Charger R/T several years back so I know how much it stings!
Keep up the good work
Keep up the good work
04-29-2014, 07:42 AM
#44
Le Mans Master

Member Since: May 2008
Posts: 8,960
Received 2,682 Likes
on
1,413 Posts
2022 C3 of the Year Finalist - Modified

Finally getting this crazy train back on the tracks.
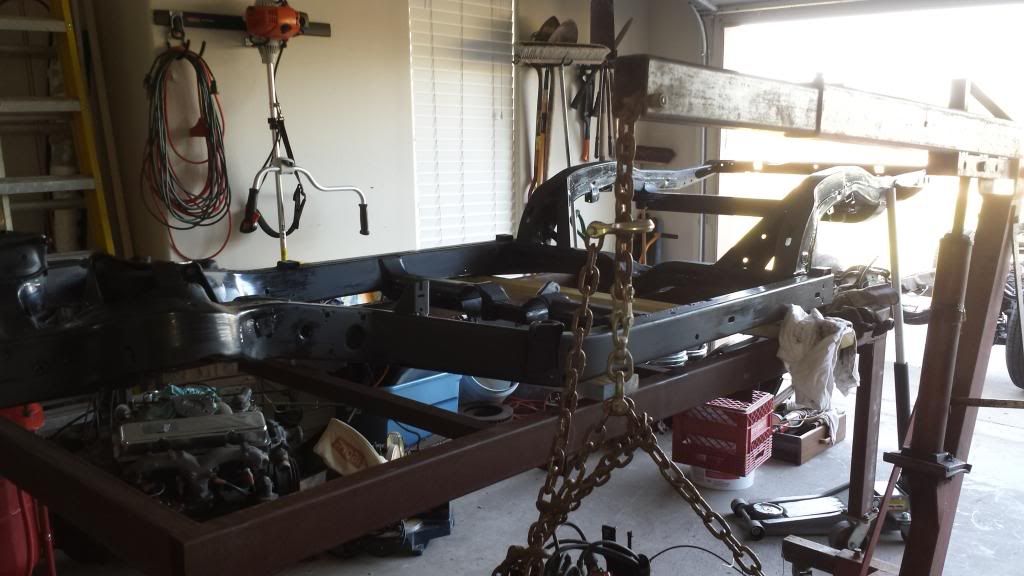
Picked up a 1969 frame and associated parts from a forum member that wanted to clean out some space in his shop. It was a great deal and much appreciated. I have been trying to find the time to make a 2.5 hour trip to pick up a rear clip from another forum member. Wanted to go Sunday, but ended up getting a late start. I sand blasted and painted the frame Saturday and was really worn out by Sunday. On a side note, I am not that impressed with POR15 semi-gloss. It does not dry uniform in color (at least for me). I tried twice and finally gave up, it will do the job of protecting the frame but there is a mix of gloss and semi-gloss in color. Maybe after it dries a few days it will even out. Not that it matters, I do not plan on ever seeing most of it again after installing the body.
I will be posting up some photos of the progress soon.
 04-29-2014, 12:47 PM
#45
Drifting

I really hope your purchase price wasn't WAY too high. That would really be insulting.
That water being already under the bridge, I'm sure you will be very, very, very pleased with the end product. You're making amazing progress and you will know EVERYTHING about your car.
I wish you the best of luck and enjoyment on your journey.
That water being already under the bridge, I'm sure you will be very, very, very pleased with the end product. You're making amazing progress and you will know EVERYTHING about your car.
I wish you the best of luck and enjoyment on your journey.
04-29-2014, 04:07 PM
#46
Instructor
Dwayne, Try using the Eastwood ceramic chassis black. It sprays pretty consistently and is very durable. Nice work on the frame. It looks like it was in pretty good shape under all that undercoating. Glad I could help
Evan Q.
Evan Q.
04-29-2014, 10:08 PM
#47
Instructor
Thread Starter
I will look into the Eastwood product. I am not sure I want to blast the POR15 off, once it dried that stuff seems really hard. The color leveled out some, but it still has some patches of gloss. It is the strangest paint I have dealt with.


 05-04-2014, 12:04 AM
#50
Melting Slicks


I have used this primer over POR 15 and it worked very well and is easy to sand. Pretty sure it is sprayable too. I used a brush at the time and then sanded smooth. Then I used just a semi flat john Deere Blitz type black for a top coat. I do not remember the exact brand I used at the time but the results were excellent.
Bill
05-04-2014, 07:53 PM
#51


Whats next Tex70, I see front brake line are you head towards the rear or setting rear brake lines. Looks like you made some good progress . Keep it up
R
R
05-04-2014, 07:59 PM
#52
The frame also looks like it come a long way from that first pic. You putting back stock suspension or kicking it up to steroid suspension.
Last edited by SB64; 05-04-2014 at 08:02 PM.
05-04-2014, 09:29 PM
#53
Instructor
Thread Starter
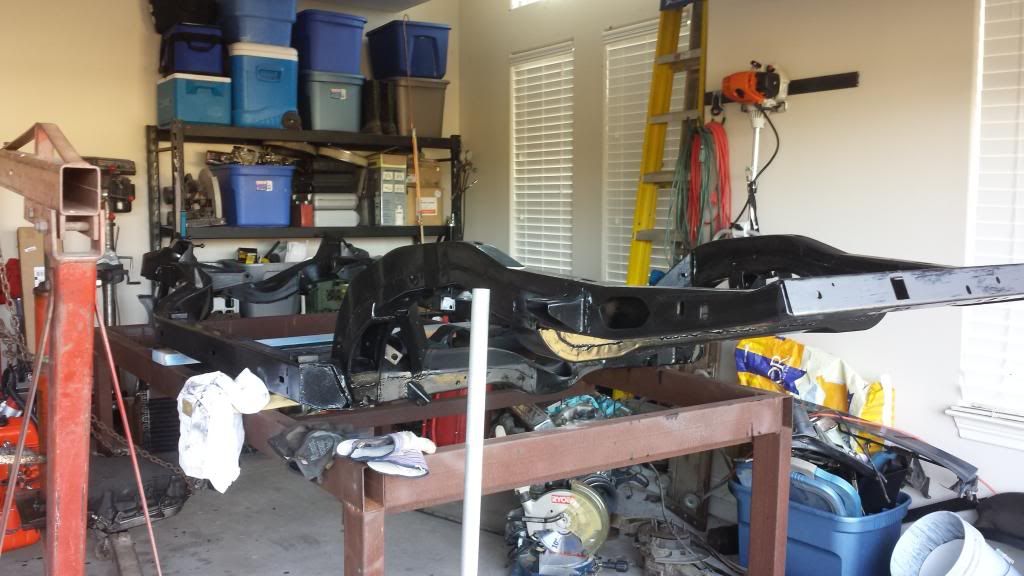
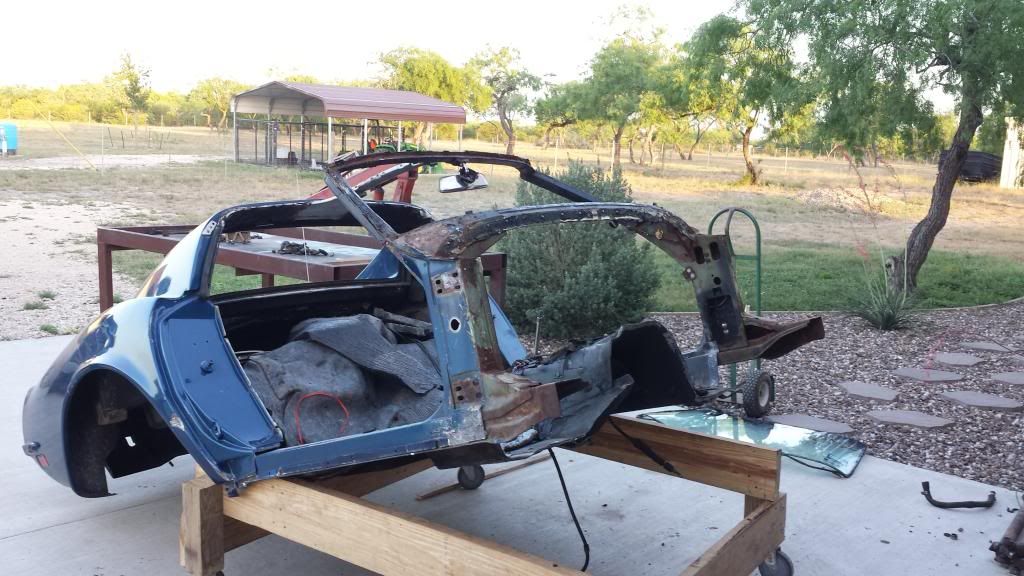
I jumped over to the birdcage and removed the wiring harness and interior items so I can pull off the front firewall this week, I need that for the cage and rear clip I am going back together with.
 05-05-2014, 06:09 AM
#54
Please take pics of removing a firewall. Many of us are interested in how that is done. Good luck everything is really coming along. Rear suspension in you might be able to mount tires and have a rolling chassis. YEAH!
R
R
05-05-2014, 09:15 AM
#56
Instructor
Thread Starter
LOL, I don't think I am in any position to guide anybody else on destroying a car. We will see how it works out before I post any pictures, keep in mind that I have never done this before (fiberglass un-bonding). I do have a good amount of experience with the mechanical stuff.
05-05-2014, 09:21 AM
#57
Instructor
Thread Starter
I hope to save it, but I am not done yet. I will wait on the victory party until after I drive it around the block. I have completely disassembled the entire car, I cannot imagine there being any more "surprises" left so I am optimistic that I am on the down hill side of things.
05-05-2014, 09:58 PM
#59
Instructor
Thread Starter
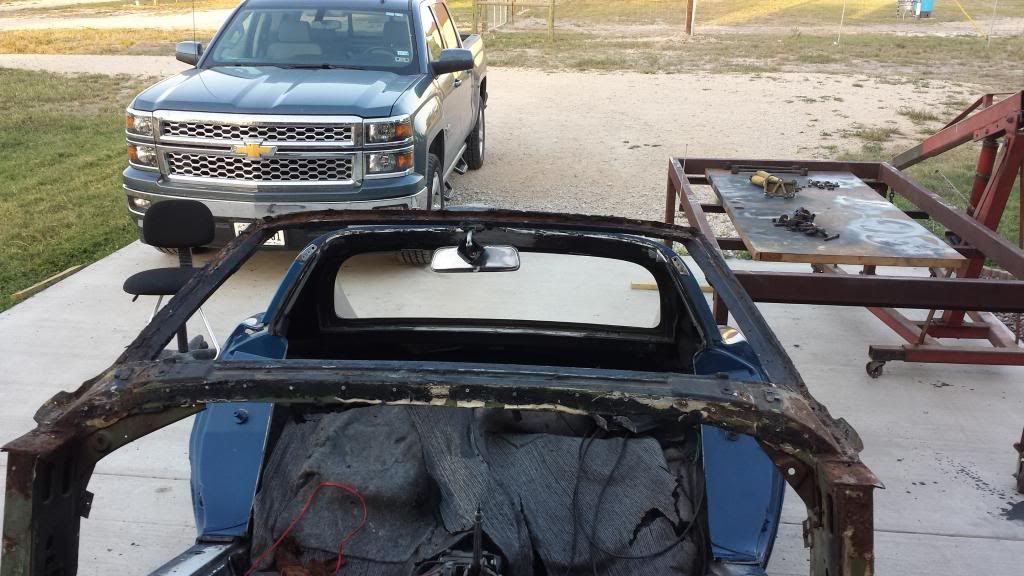
Popped out the firewall today. I am either getting better at destroying things or the firewall just comes out easy (or I should say easier).
The lower driver side lip was already broken before I touched it.
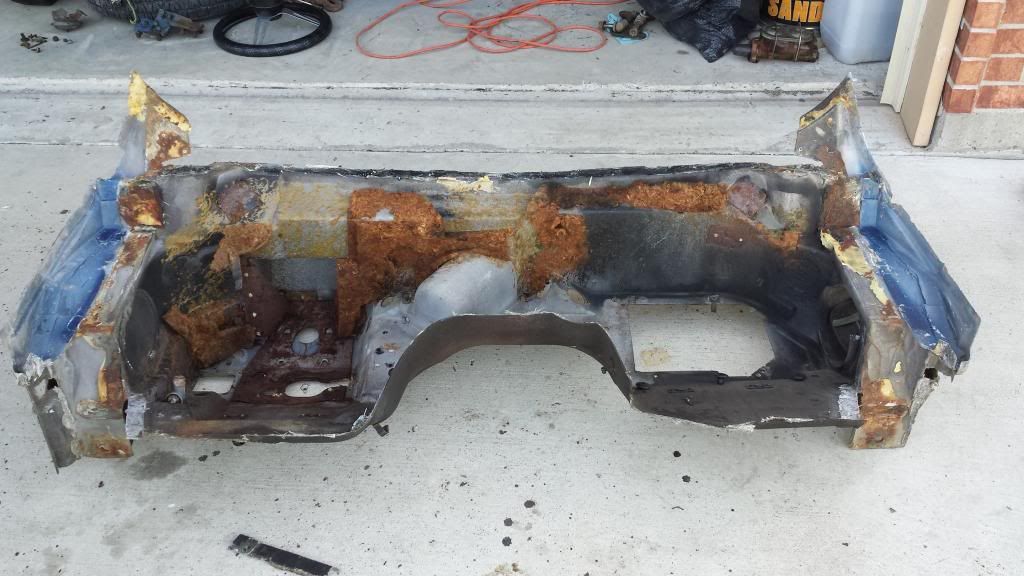
Not much left on this carcass, almost have all the meat picked off the bones.
Based on the condition the rest of this car was in, I was surprised how good the windshield frame is. Not perfect, but I have seen a lot worse posted on the forum. I may have some frame pieces for sale after I clean them up to be sure they are re-usable.
The lower driver side lip was already broken before I touched it.

Not much left on this carcass, almost have all the meat picked off the bones.

Based on the condition the rest of this car was in, I was surprised how good the windshield frame is. Not perfect, but I have seen a lot worse posted on the forum. I may have some frame pieces for sale after I clean them up to be sure they are re-usable.
