
Small Garage Restoration

 05-20-2013, 09:34 PM
#22
Melting Slicks


How about no garage?
I did not pull the body off however, but everything else save the engine drop happened right in the back yard.
It can be done.
You can do it.


I did not pull the body off however, but everything else save the engine drop happened right in the back yard.

It can be done.

You can do it.
 05-20-2013, 09:38 PM
#23
Burning Brakes

Member Since: Mar 2010
Location: Surrey British Columbia
Posts: 987
Likes: 0
Received 6 Likes
on
6 Posts
I did my frame-off in a single car attached garage. My biggest problem was finding a place for all of the parts as they came off the car. I erected extra pine shelves on one side of the garage. That helped. I put parts in the 8 X 16 garden shed. That helped. I put parts in the crawl space. That helped. When the body was lifted I placed it in one of those zippered up car tents. That helped a lot. After the chassis rebuilt was completed, I would roll the body out of the car tent and do the fiberglass repairs; then push it back inside and zipped it up to keep the body out of the elements. This past winter we had a rare snow fall of about 4". I was working two back-to-back double shifts so I didn't get home for three days. On my last day before I got home it started to rain and the weight of the wet snow collapsed the car tent. Nothing was damaged because I had already separated the body parts. Unfortunately I had to move the front and rear clips into the garage; gently placing them on my beautifully restored chassis. Now I have no room to work on my car.
So... I can't let my restoration grind to a halt because of something so minor as no space to work on it, so we're buying a new house. The restoration is on hold temporarily until we move, hopefully by the summer. The three houses we're looking at each have large garages, plus of course extra rooms in the house for the wife. That makes us both happy. If the car tent hadn't collapsed, we'd still be here and I'd still be working on my restoration out of a single car garage. We were looking for an excuse to move, the Corvette gave it to us. I love that car!
So... I can't let my restoration grind to a halt because of something so minor as no space to work on it, so we're buying a new house. The restoration is on hold temporarily until we move, hopefully by the summer. The three houses we're looking at each have large garages, plus of course extra rooms in the house for the wife. That makes us both happy. If the car tent hadn't collapsed, we'd still be here and I'd still be working on my restoration out of a single car garage. We were looking for an excuse to move, the Corvette gave it to us. I love that car!
05-21-2013, 08:28 PM
#24
Racer

Thread Starter
I already showed my wife examples of houses with large garages. She told me that she like the one with the detached garage and asked if it had bedroom!
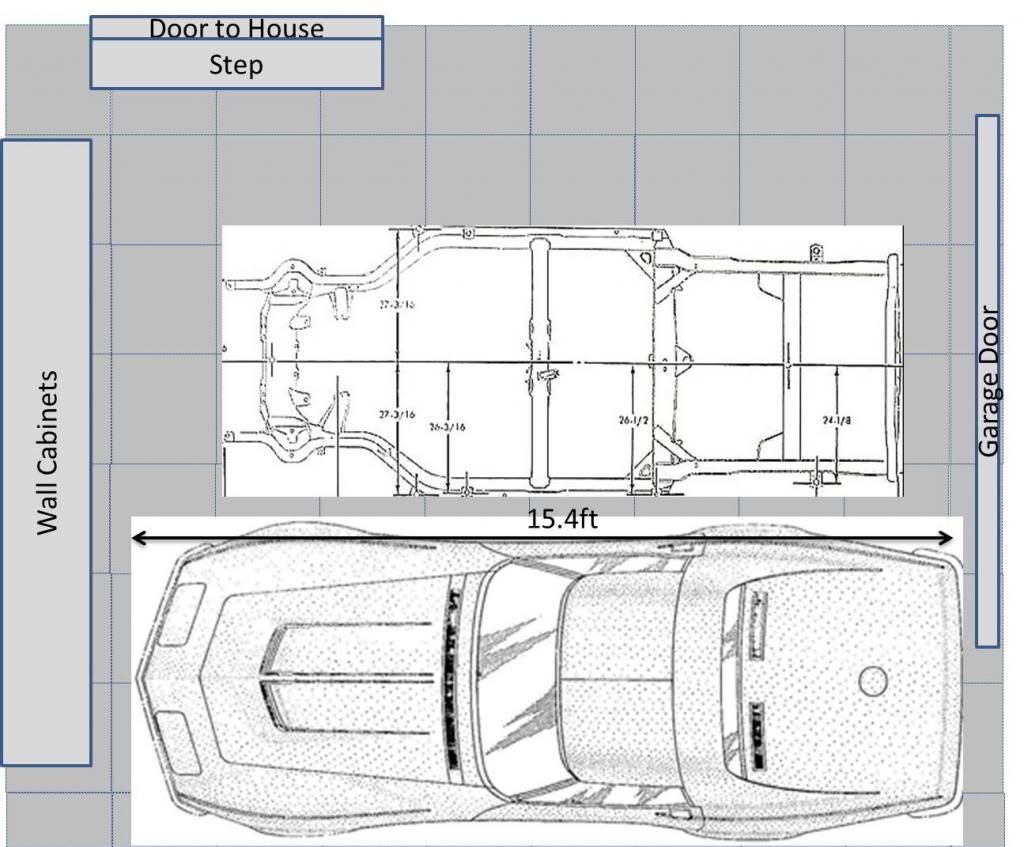
Today i drew up a scaled drawing of my garage, the body and the frame...it will fit but i will need it all on castors to move around. All of the extra stuff in the garage, bikes, golf clubs, rug cleaner, etc has got to move to storage.
Today i drew up a scaled drawing of my garage, the body and the frame...it will fit but i will need it all on castors to move around. All of the extra stuff in the garage, bikes, golf clubs, rug cleaner, etc has got to move to storage.
05-21-2013, 08:50 PM
#25
Racer
Thread Starter
Here is a layout for my garage ... it will be tight but it will fit. Eventually, I may be able to move the frame out of the garage when I strip the body and do some fiberglass repair.
 05-22-2013, 08:26 AM
#27
Team Owner

Member Since: Sep 2006
Location: Westminster Maryland
Posts: 30,173
Likes: 0
Received 2,878 Likes
on
2,515 Posts

Hi b,
From your drawing and dimensions it appears the length is going to be more of a limiting factor than the width; a 19' bay is quite shallow.
The addition length I had allowed me to move the 2 parts forward and rearward to gain work room.
I think I would come up with a system that allowed me to easily move the body out of the garage to work on the chassis and then move it back in at the end of the day. On a dolly with large rubber tires a body is easy to move by one person.
I spent a lot of time figuring out how to do it in the space available and working by myself.
Regards,
Alan
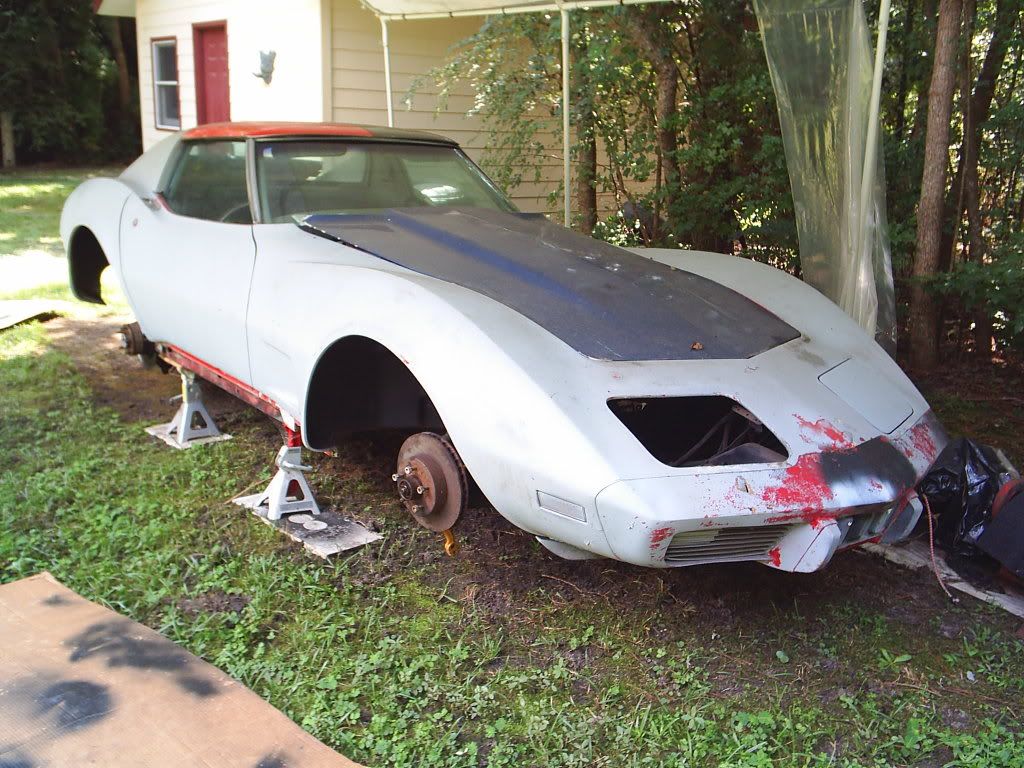
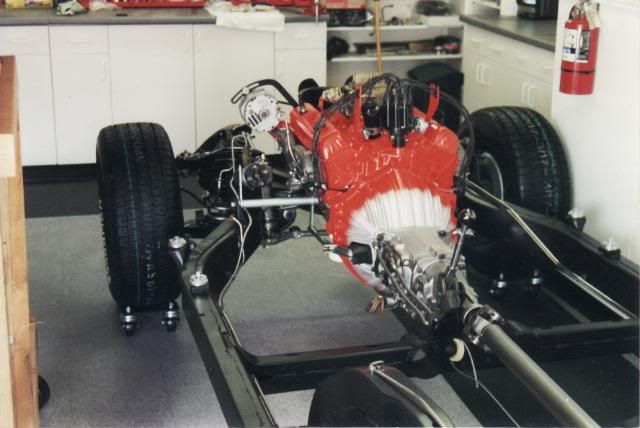
In this picture you can see the chassis is on dollies too. I had to be able to move it sideways as well as forward and backward. For a long time, (years), the chassis was on jack-stands which were sitting on dollies. Note the body is now off the tall dolly and sitting on a low dolly.
From your drawing and dimensions it appears the length is going to be more of a limiting factor than the width; a 19' bay is quite shallow.
The addition length I had allowed me to move the 2 parts forward and rearward to gain work room.
I think I would come up with a system that allowed me to easily move the body out of the garage to work on the chassis and then move it back in at the end of the day. On a dolly with large rubber tires a body is easy to move by one person.
I spent a lot of time figuring out how to do it in the space available and working by myself.
Regards,
Alan
In this picture you can see the chassis is on dollies too. I had to be able to move it sideways as well as forward and backward. For a long time, (years), the chassis was on jack-stands which were sitting on dollies. Note the body is now off the tall dolly and sitting on a low dolly.

 05-22-2013, 09:37 AM
#28
Racer
Thread Starter
I agree ... body on a rolling/low dolly will probably be needed and I'll keep it covered so I can put it out when it's raining if necessary. I live in a commuinty that controls any modifications to the homes/yards. Right now, I have a request to add a 2nd car to the one car driveway. That will really help if I could roll out the chasis or body and swap them around without having to do it in the street.
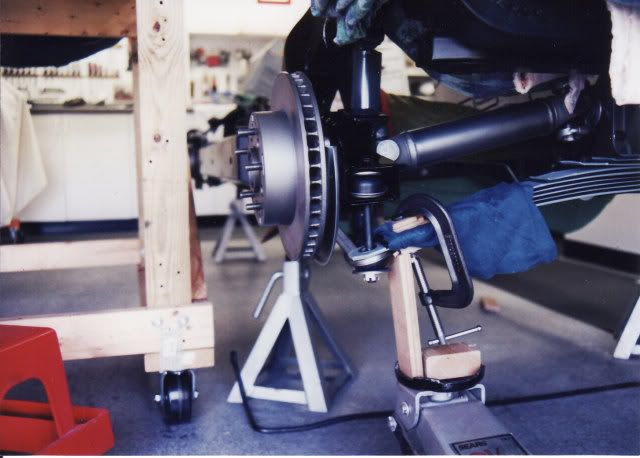
On your other body dolly, was the body only resting on the floor pans? I can see on the low dolly that it is resting at the body mount points.
On your other body dolly, was the body only resting on the floor pans? I can see on the low dolly that it is resting at the body mount points.
05-22-2013, 02:55 PM
#29
Team Owner
Member Since: Sep 2006
Location: Westminster Maryland
Posts: 30,173
Likes: 0
Received 2,878 Likes
on
2,515 Posts
Hi B,
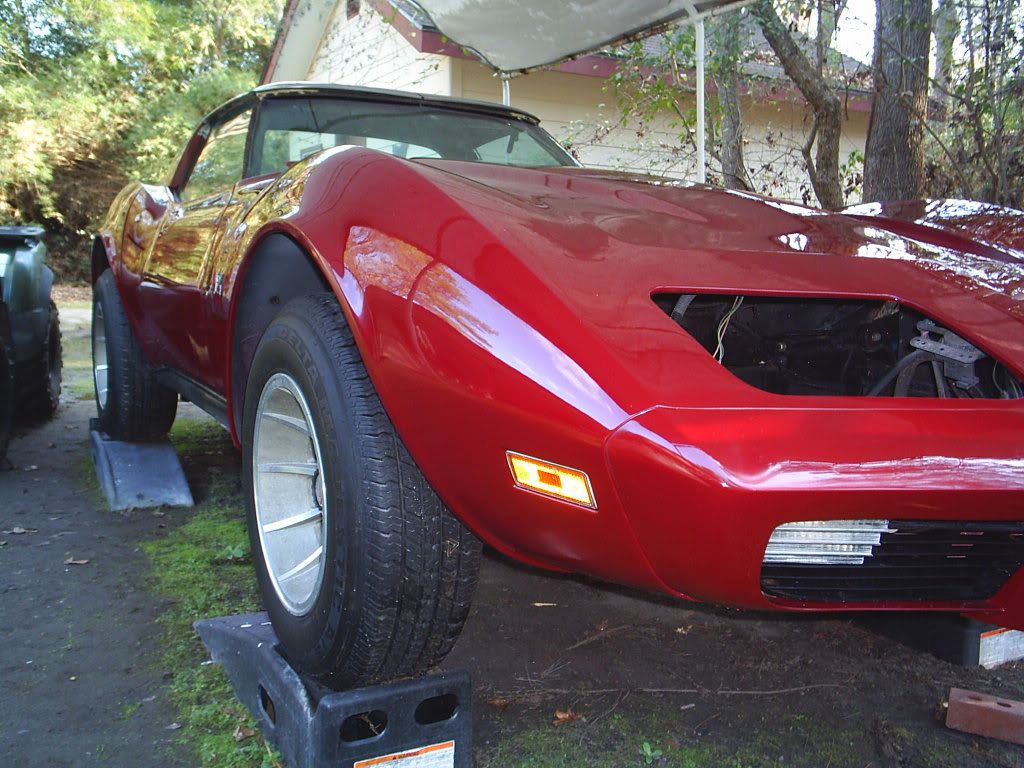
Yes, on the tall dolly the body sat on the square formed by the dolly's top 4 pieces.
With a coupe that has a front clip that's still well bonded to the cowl and aprons, sagging isn't a problem.
Regards,
Alan
Yes, on the tall dolly the body sat on the square formed by the dolly's top 4 pieces.
With a coupe that has a front clip that's still well bonded to the cowl and aprons, sagging isn't a problem.
Regards,
Alan
05-25-2013, 12:43 PM
#30
Racer
Thread Starter
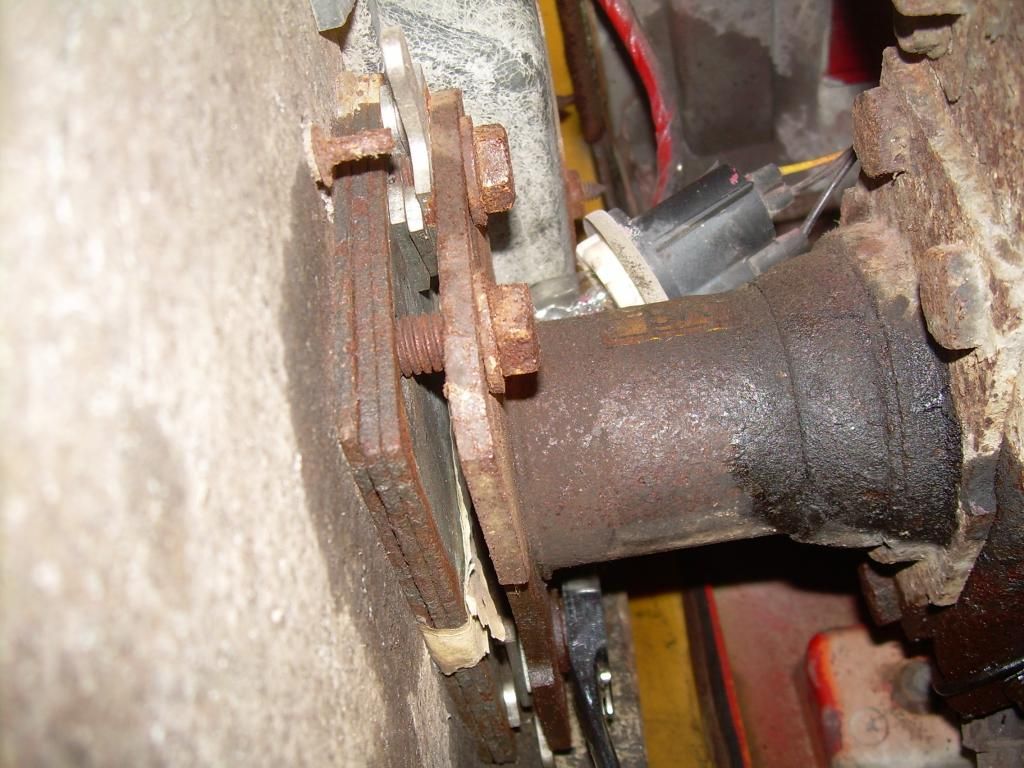
Started working through the body removal checklist today. Removed the 8 rear bumper support bolts, no problem. But, the driver side had about 3/4 inch of extra shims. Passenger side had only two shim plates. Driver side had 3 shim plates and an extra 3 shims placed diagonally on two of the bolts. I guess something is bent some where. It appears that the bumper may have been off recently, the bolts came out really easy.
Disconnected: Starter cable/wires, Carbon Canister, Oil Pressure Wire, Parking brake cable, Battery ground to frame, Shifter cable and down shift wire, Speedo cable.
Question: the checklist says I need to disconnect the seat belt retainer cable from the frame to the bottom of seat. I don't see anything like this on my car. From underneath, I see a large bolt on both sides under the seat but it connects to a rotted piece of metal that doesn't appear to be connected to the frame. Anyone have a picture of these bolts?
Here's a pic of the driver side bumper bracket shims I talked about ...
06-01-2013, 05:51 PM
#31
Racer
Thread Starter
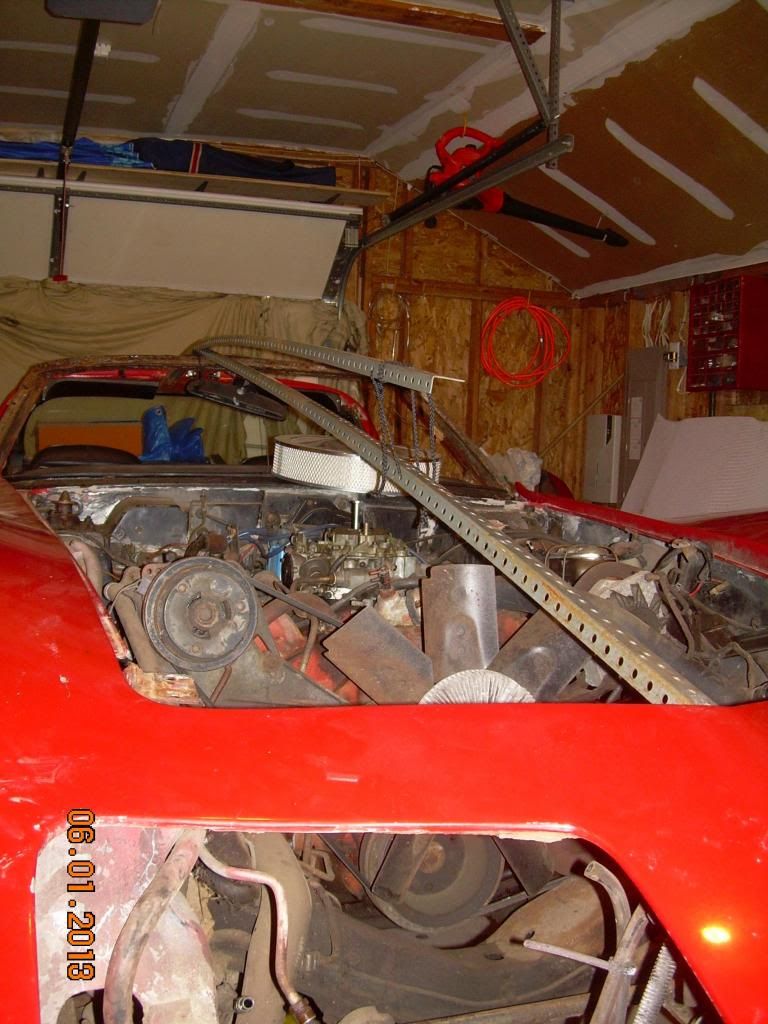
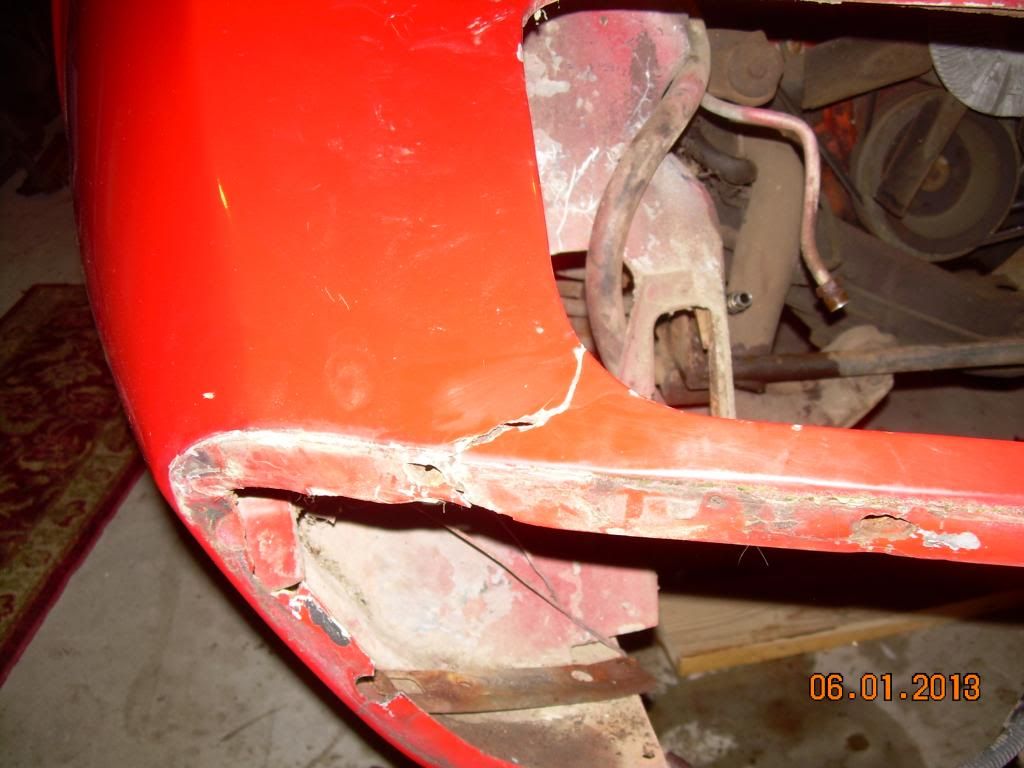
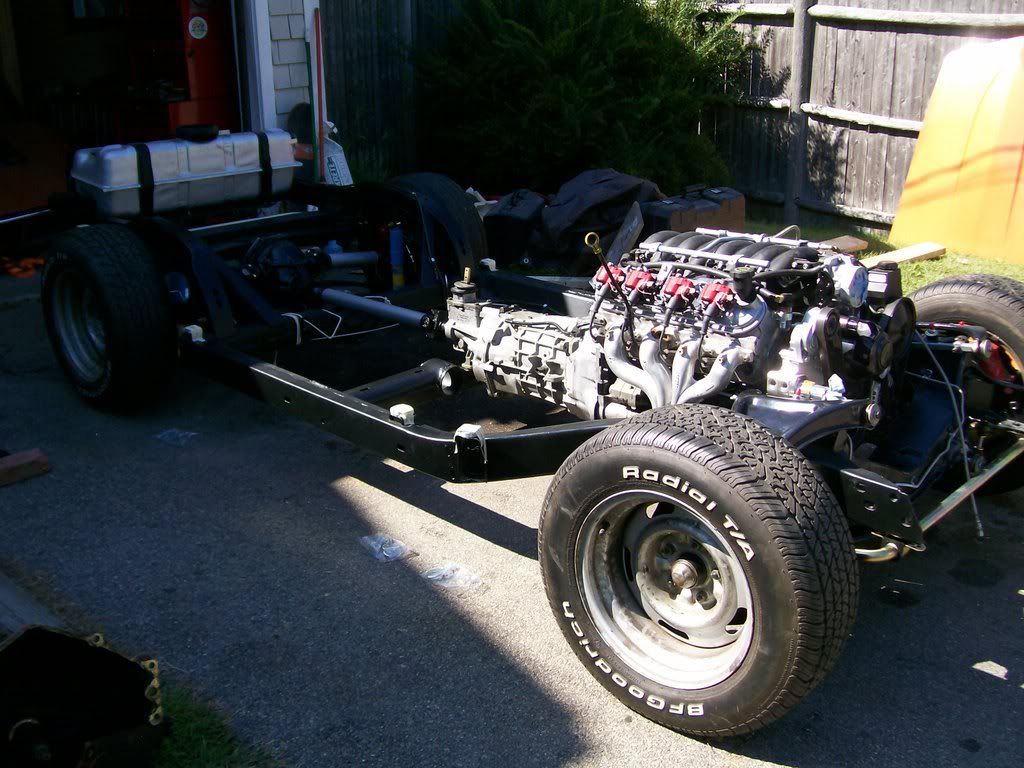
I've made some progress dismantling the car and getting ready to lift off the body. Rear bumper frame disconnected, all the wires, hoses and brake lines also. Front bumper, supports, radiator and frame, headlight assemblies (pain!!!), seats (rusted tracks so PAIN!!!). A previous repair to the fiberglass around the right side headlight failed so I'm going to put a "splint" on it before I remove the body. Also, I decided to add a little support to the front using some angle iron I had laying around....just some insurance since there is no support for the front end. 6 Hours dealing with 38 years of rust, dirt, antifreeze and just a little tranny fluid. Love it!

 06-01-2013, 08:37 PM
#32
Le Mans Master

I was going to tell you to send denpo a PM for pictures of his garage. The picture he posted makes it look way bigger than it really is.
IT really goes to the old saying-,"Where there's a will, there's a way".
IT really goes to the old saying-,"Where there's a will, there's a way".
06-02-2013, 08:01 AM
#33
Racer
Thread Starter
I agree. When I saw the other posts of restorations outside without even a small garage I decided not to worry about my "small" garage. But, the extra space of the rented storage unit is coming in handy ... I have another load of parts and pieces to take over today.
06-03-2013, 09:41 PM
#34
Safety Car

Member Since: Aug 2001
Location: North Easton Mass
Posts: 4,883
Likes: 0
Received 8 Likes
on
8 Posts

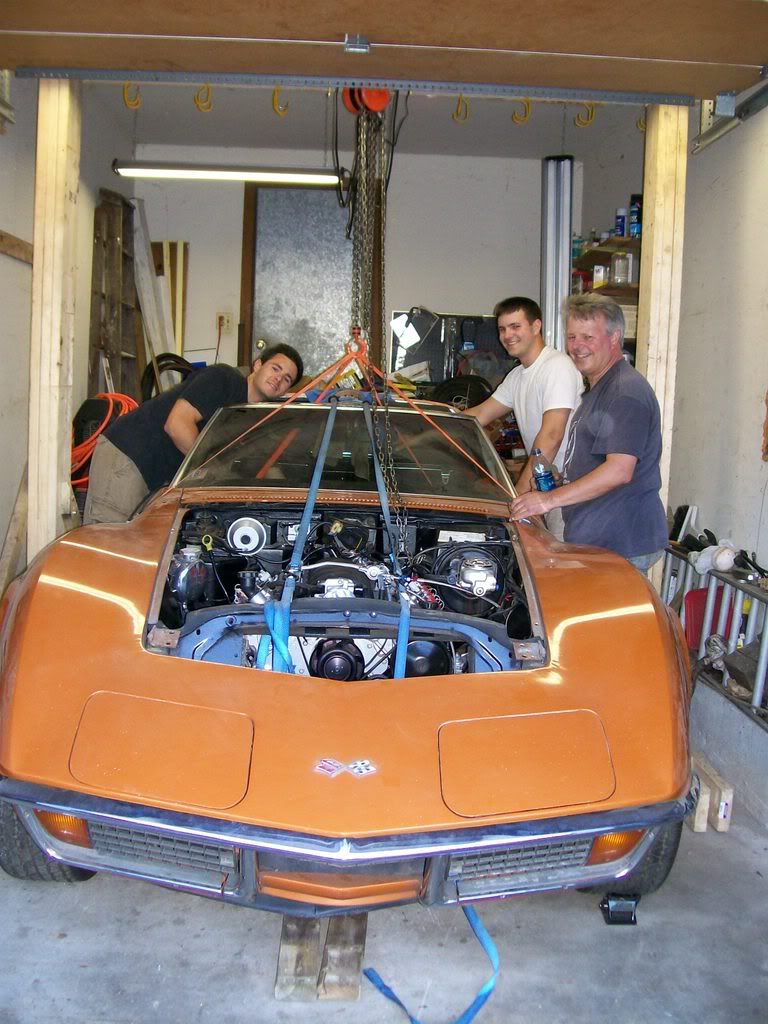
My garage has a decently tall ceiling but is very narrow. We pulled the body off, and while it was hanging from the chain hoist we built the frame for it to rest on. There was enough room to wheel the chassis underneath (barely). Most of the work on the car was done in the driveway to the great amusement of the neighbors.

Rick B.
Rick B.


 06-03-2013, 10:11 PM
#35
Intermediate

Member Since: Jun 2013
Location: Nebraska City NE
Posts: 34
Likes: 0
Received 0 Likes
on
0 Posts
Good inspirational thread, you guys have done some nice work with limited space. I do not feel so cramped now in my old steel sided pole shed ~14x30 with 12' or better ceiling. I better quit looking now before I decide to remove the body from frame.
06-04-2013, 09:03 AM
#37
Racer
Thread Starter
Rick B>>> It looks like the lifting straps you used were pretty thin ... how'd they hold up and where did you buy them? Have any more pictures of where you attached them? I'll be using an engine cherry picker to lift off my body ... soon.
06-04-2013, 10:32 AM
#38
Hi B,
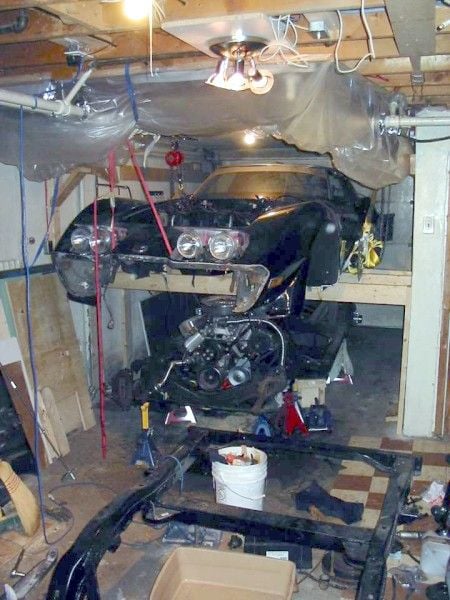
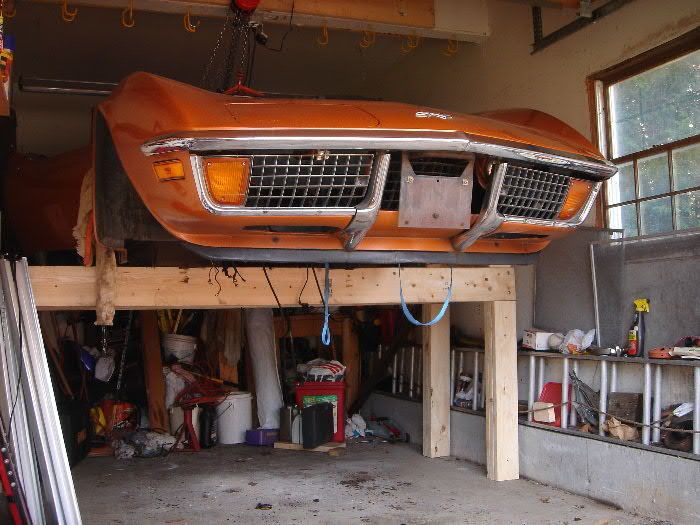
I restored my 71 in a garage in my basement. It's about 14' wide and only about 7'-6" high.
I built a tall dolly to put the body on after I lifted it. This allowed me to work next to the body while I restored the chassis and running gear.
I would push the dolly forward and backward to gain access to the chassis as I worked on it. If you'll notice the front clip and rear clip were unsupported so I could work on the chassis sitting on a rolling stool.
Jig's list is very good. BAG & MARK EVERYTHING. There will be an incredible amount of small parts and fasteners. A boxing/bagging system is the only hope you have of finding what you need when you need it.
Regards,
Alan


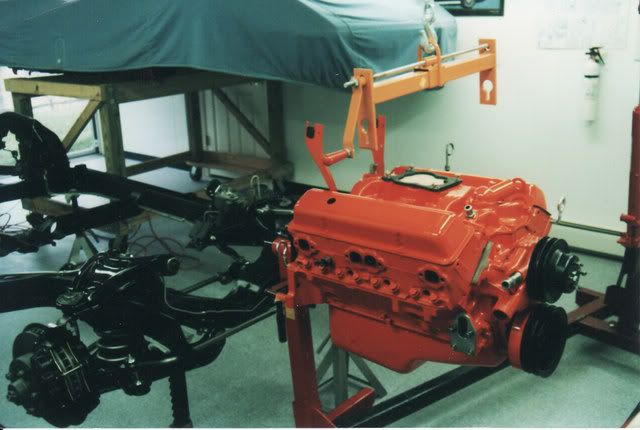
 clean.....
06-04-2013, 06:50 PM
clean.....
06-04-2013, 06:50 PM
#39
Safety Car
Member Since: Aug 2001
Location: North Easton Mass
Posts: 4,883
Likes: 0
Received 8 Likes
on
8 Posts
I certainly don't recommend my risky behaviour and would recommend buying the super heavy and expensive body lift straps from a vendor.
Rick B.
06-04-2013, 06:55 PM
#40
Drifting


Member Since: Aug 2010
Location: Kanuckistan
Posts: 1,617
Received 127 Likes
on
68 Posts
2022 C3 of the Year Finalist - Modified

Those pic may give you a better idea of how small it is :


And a pic of my worst moment, there was probably more corvette material than breathing air in the garage.

Add to that the fact the garage is also where we store many other kind of stuff. Winter is the worst, I have to deal with the garden furniture.
Of course the seats are in my computer/electronic room, along with the door glasses.
My terrasse is loaded with body parts, and there a rear clip in my tiny garden.
