
Small Garage Restoration
 07-14-2014, 11:33 AM
#301
Le Mans Master

Member Since: Dec 2009
Location: Saskatoon Saskatchewan
Posts: 6,397
Received 640 Likes
on
463 Posts

I thought the hardest part of removing the front clip was seperating it where it bonded to the firewall so I'm surprised it went so quickly for you two. I had on occaision thought about putting a front clip from a 69 on my 79 but thought sperating the bonding area would be far too much work so maybe I can reconsider that.

 07-14-2014, 09:16 PM
#304
Racer


I thought the hardest part of removing the front clip was seperating it where it bonded to the firewall so I'm surprised it went so quickly for you two. I had on occaision thought about putting a front clip from a 69 on my 79 but thought sperating the bonding area would be far too much work so maybe I can reconsider that.
I suspect getting it back ON is a totally different story tho.
07-15-2014, 03:04 PM
#306
Racer
Thread Starter
On the topic of getting the front clip back on ... I'll need some advice once I'm ready but that it is down the road. I am hoping that I don't have to pull the engine (again). I want to be able to drop the body back on the chassis in the next month or so. I removed the rear bumper yesterday and will probably leave it off until after the body is back in place. The biggest job I have to do now is fix cracks in the firewall; I have a number of them on the driver's side area, around the steering column hole and around where the break pedals/brake booster mounts. Also a large hole on the top corner that was repaired with bondo (repaired is not a good word ... it wasn't repaired it was covered with bondo and sprayed over with undercoating).
Someone mentioned what a pain the headlights were to remove ... that was last year but they were a REAL PITA! It's one of the first things I disassembled and I remember thinking that my project isn't going to be easy because of them.
Someone mentioned what a pain the headlights were to remove ... that was last year but they were a REAL PITA! It's one of the first things I disassembled and I remember thinking that my project isn't going to be easy because of them.
07-16-2014, 02:11 PM
#307
Racer
Thread Starter
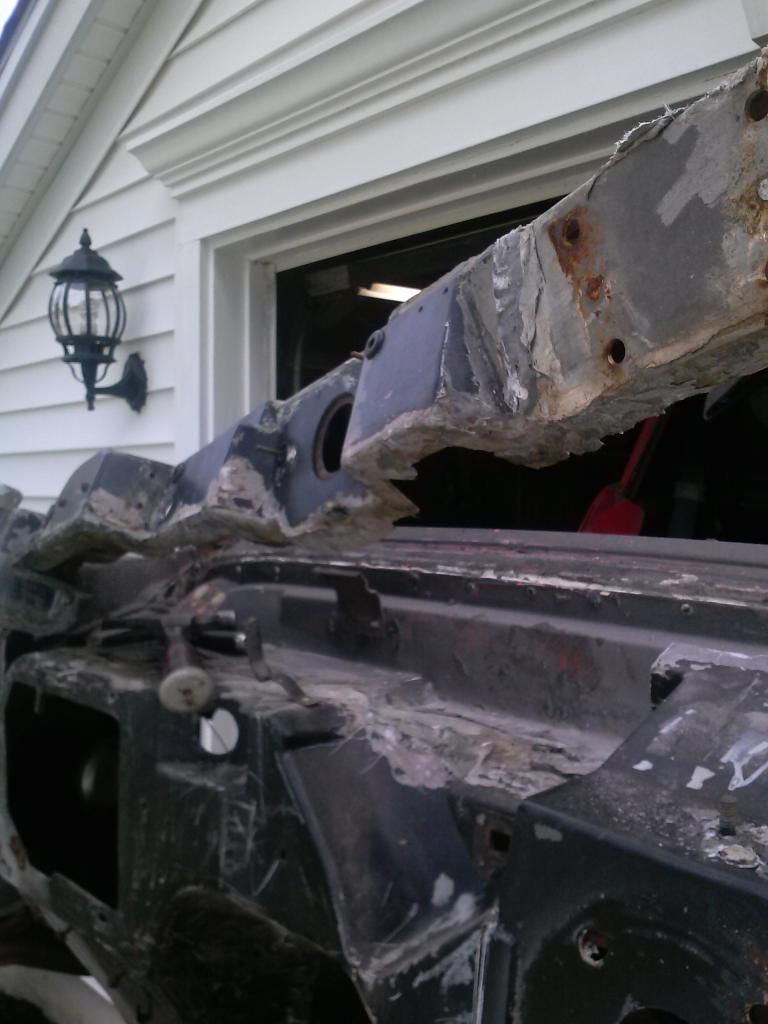
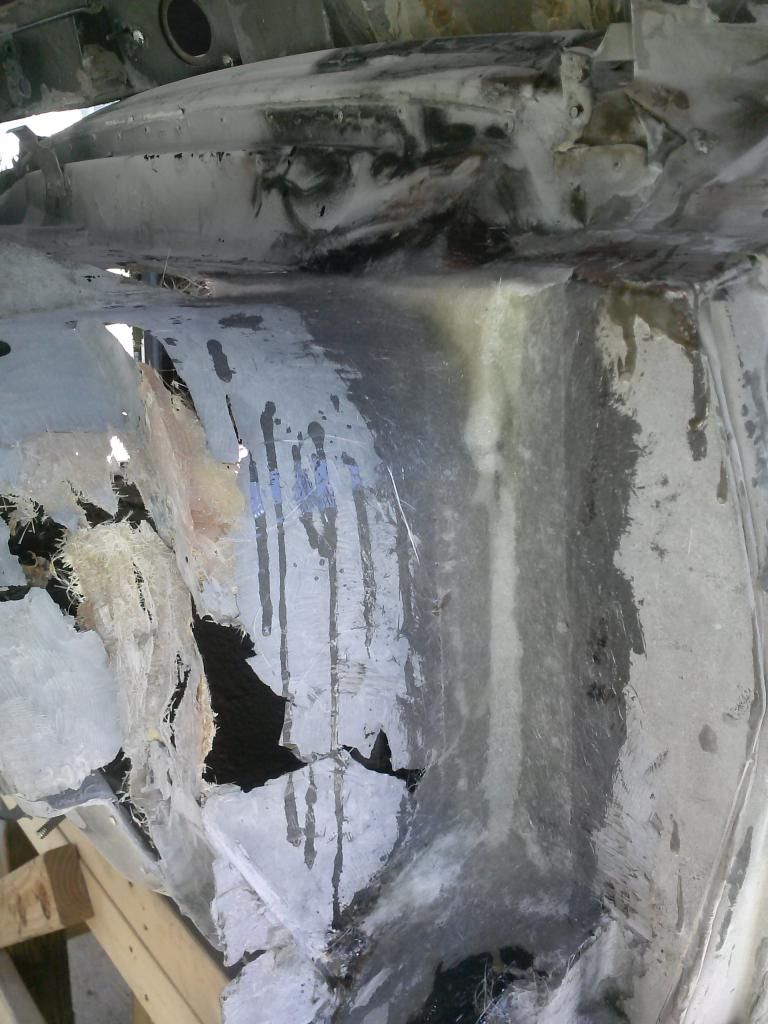
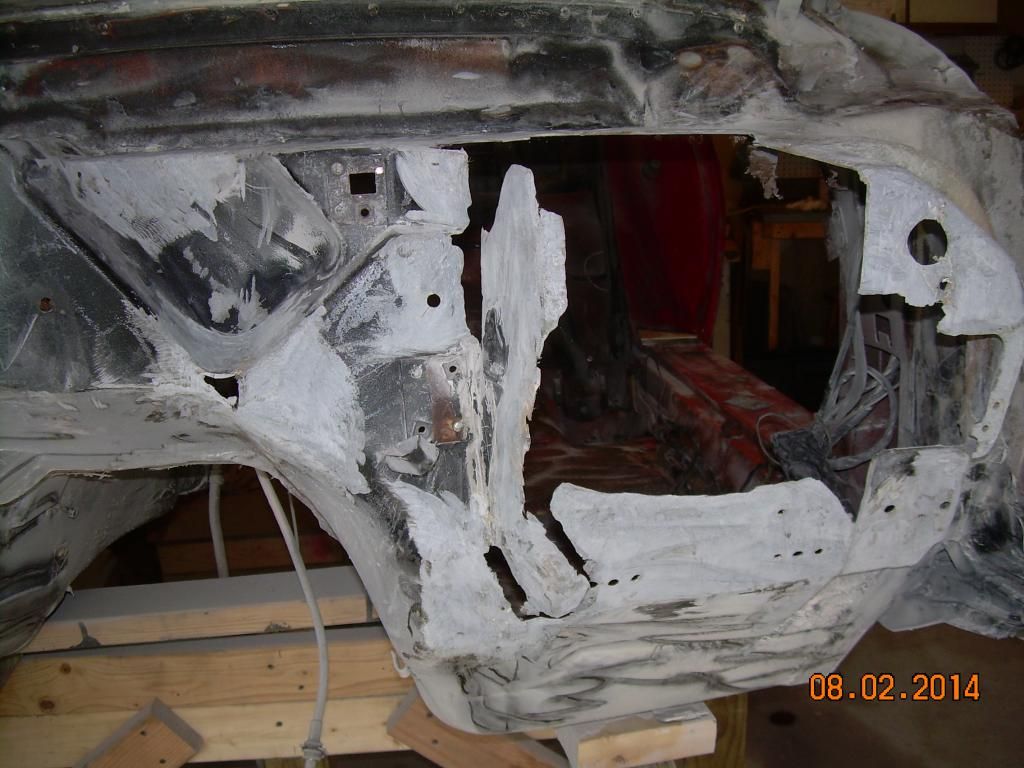
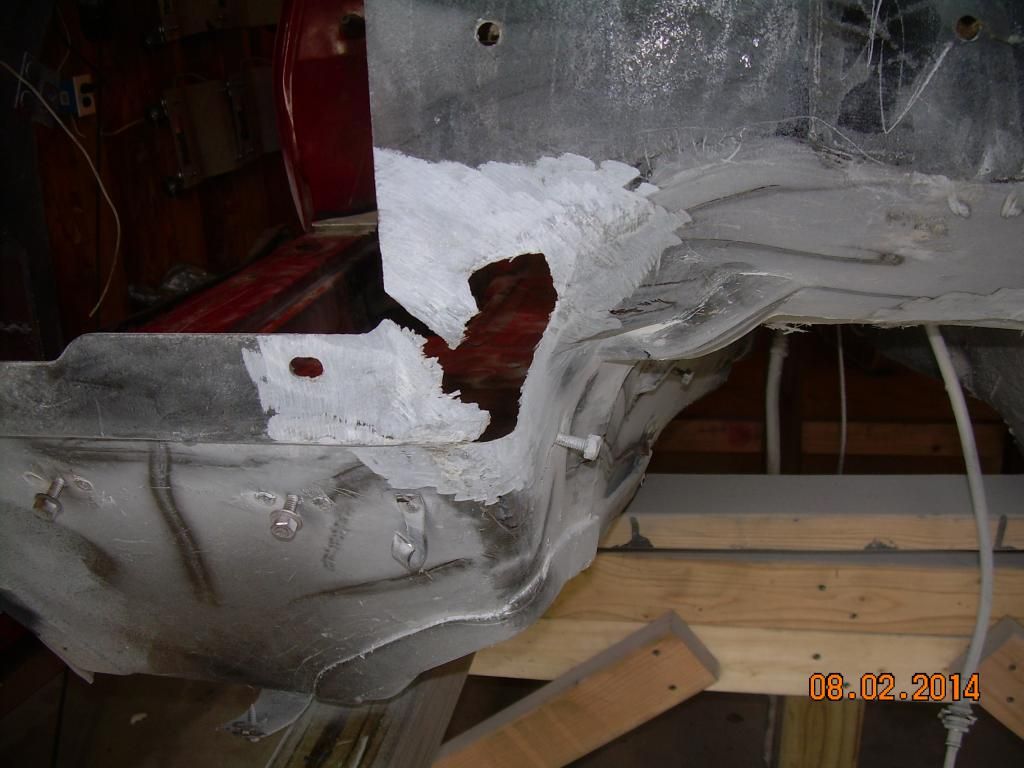
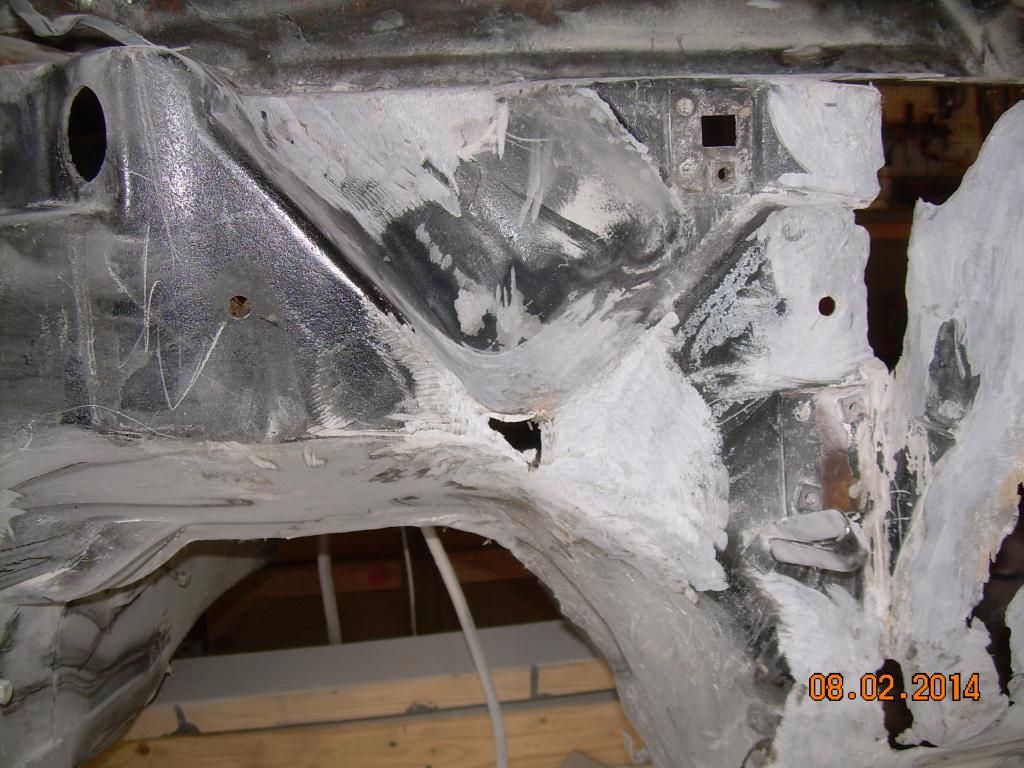
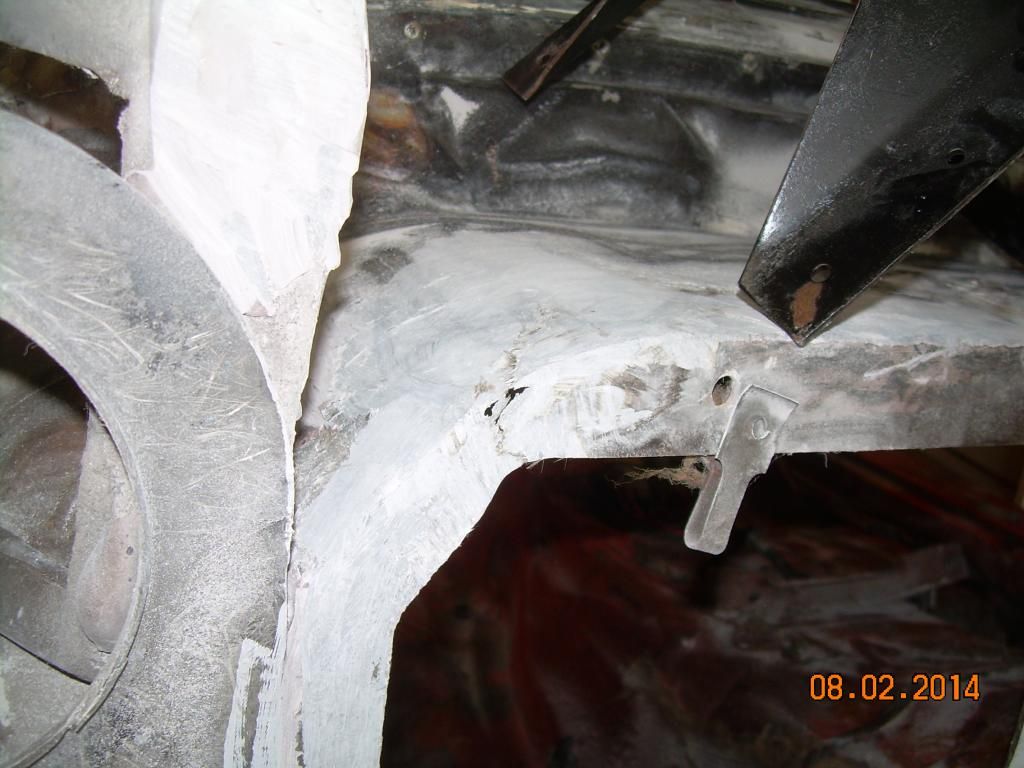
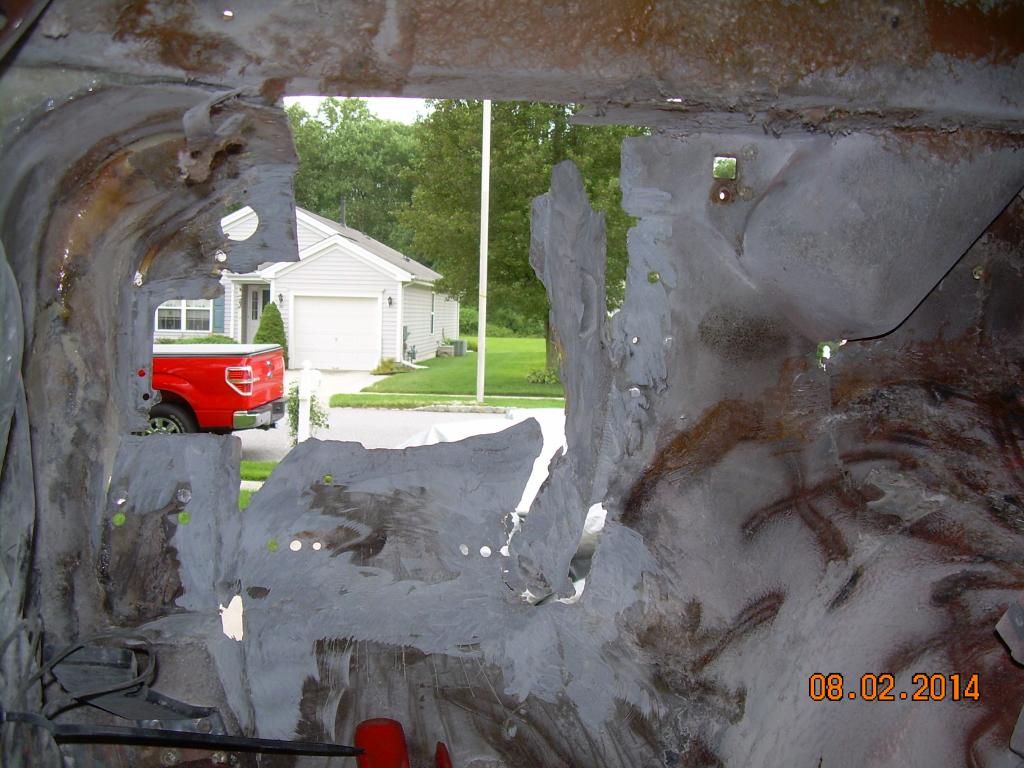
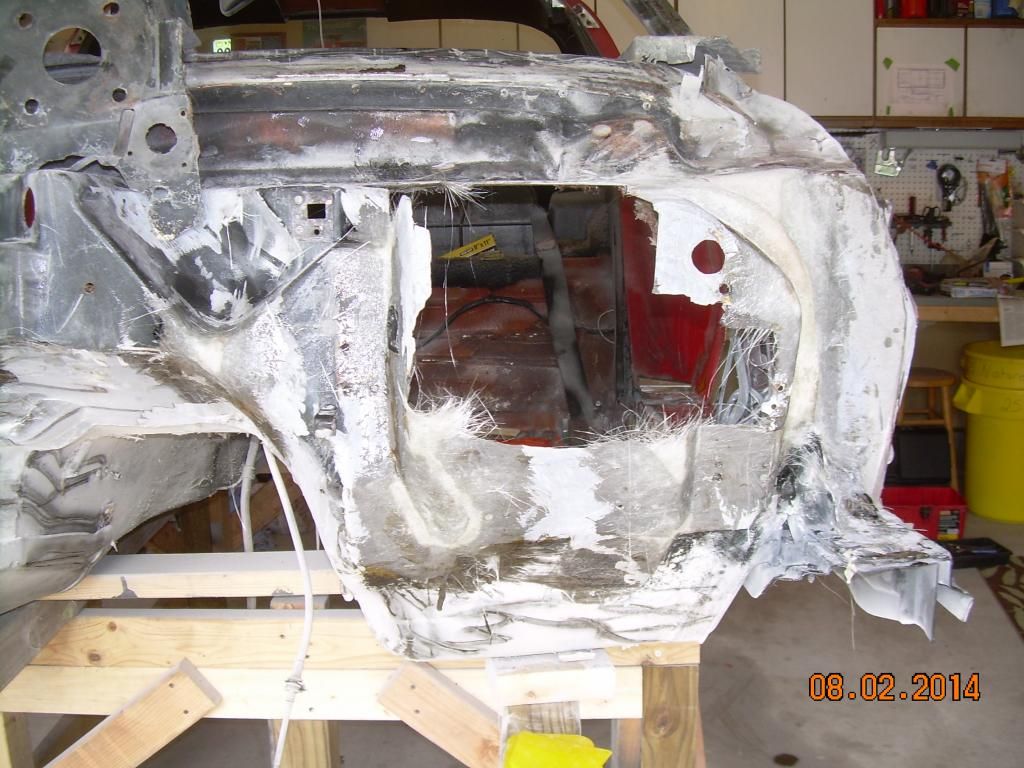
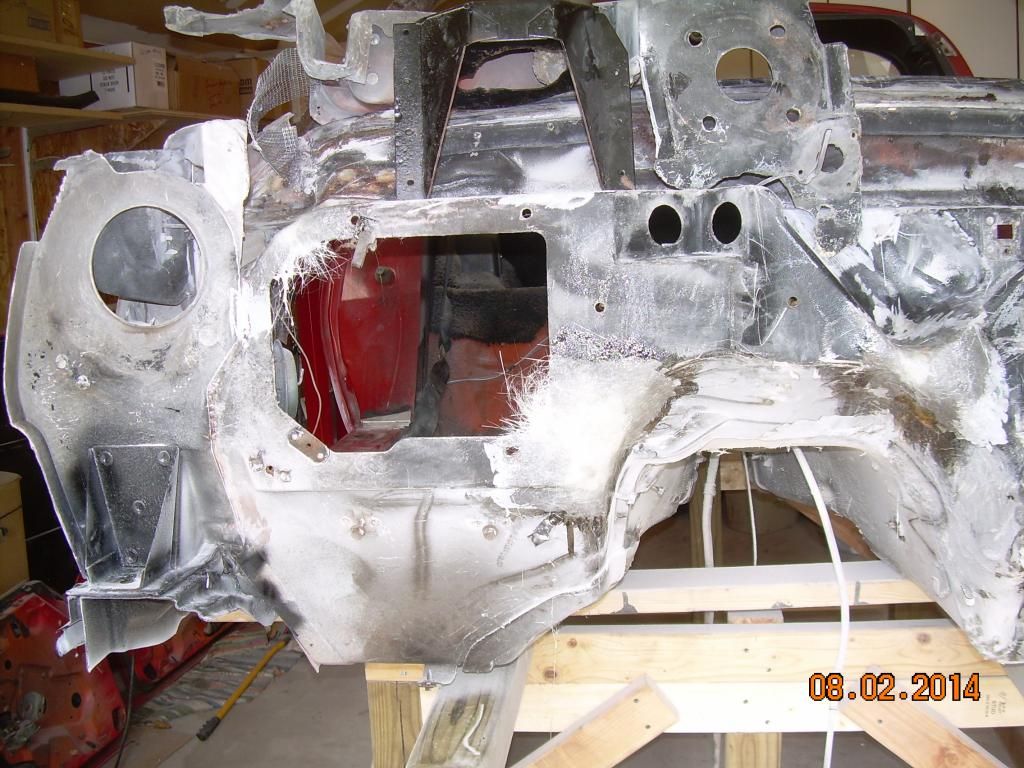
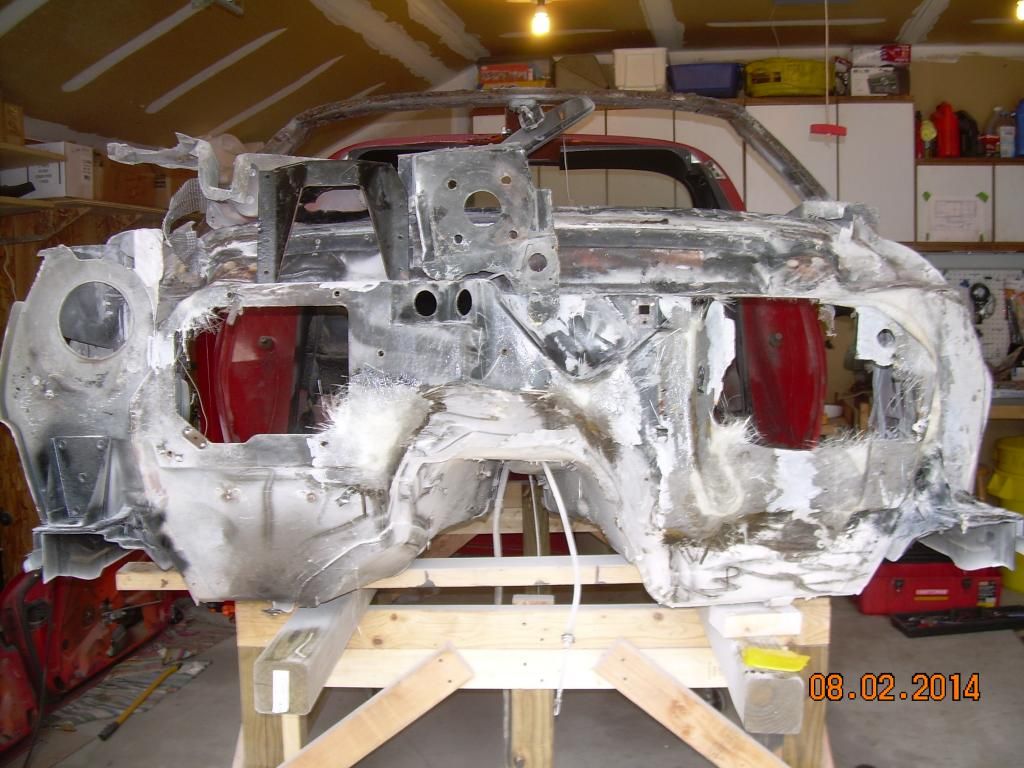
I started to clean up the firewall today so i could start repairing it. The left side (driver side) is in bad shape and the entire top piece bonding was cracked. So, i removed the top/front piece and will be able to reuse
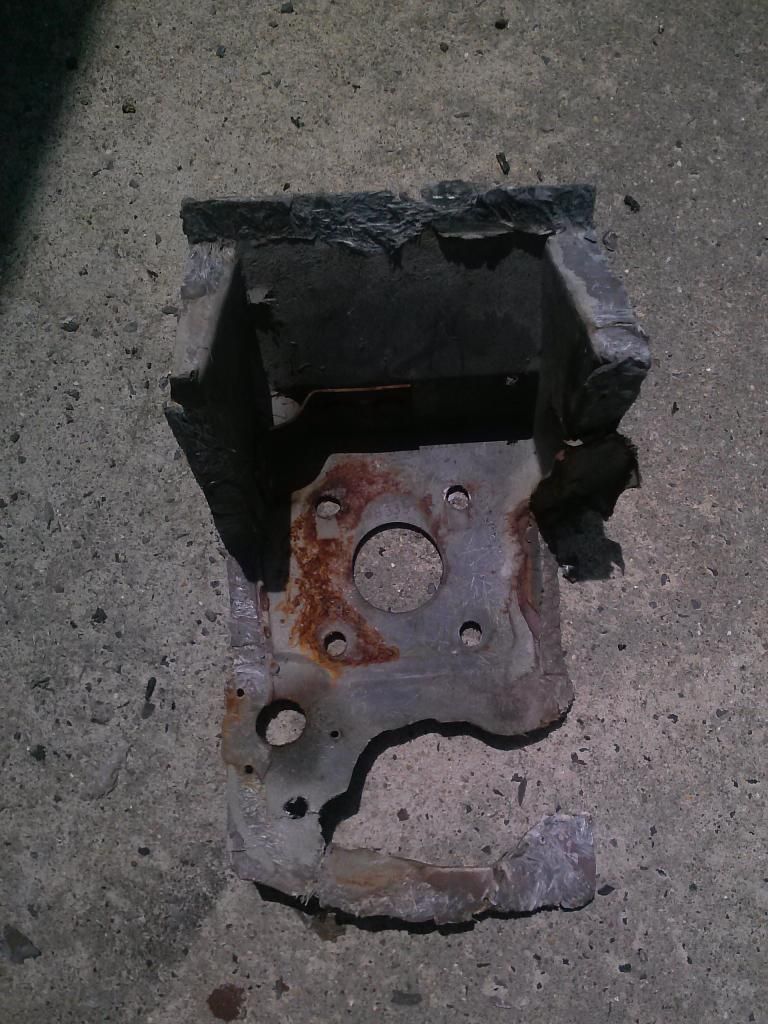
Multiple cracks and poor repairs around the steering and brake housing areas and the side of firewall in front of the door hinge pillar is severely cracked. I removed the steering/brake part of the firewall.
The right side of the firewall is solid.
What to do? Options:
1. Repair it in place best I can
2. Remove the firewall and repair it on a bench
3. Find a good used firewall for a car with fiberglass floors.
I think I can repair most of it in place but the damage is pretty bad in spots and attacking the repairs from both sides would be better on a bench. Buying a used replacement is worrisome because am afraid many of the bonds holding it together may crack or release and it may not save me much work.
Here are some pictures of the bad areas...
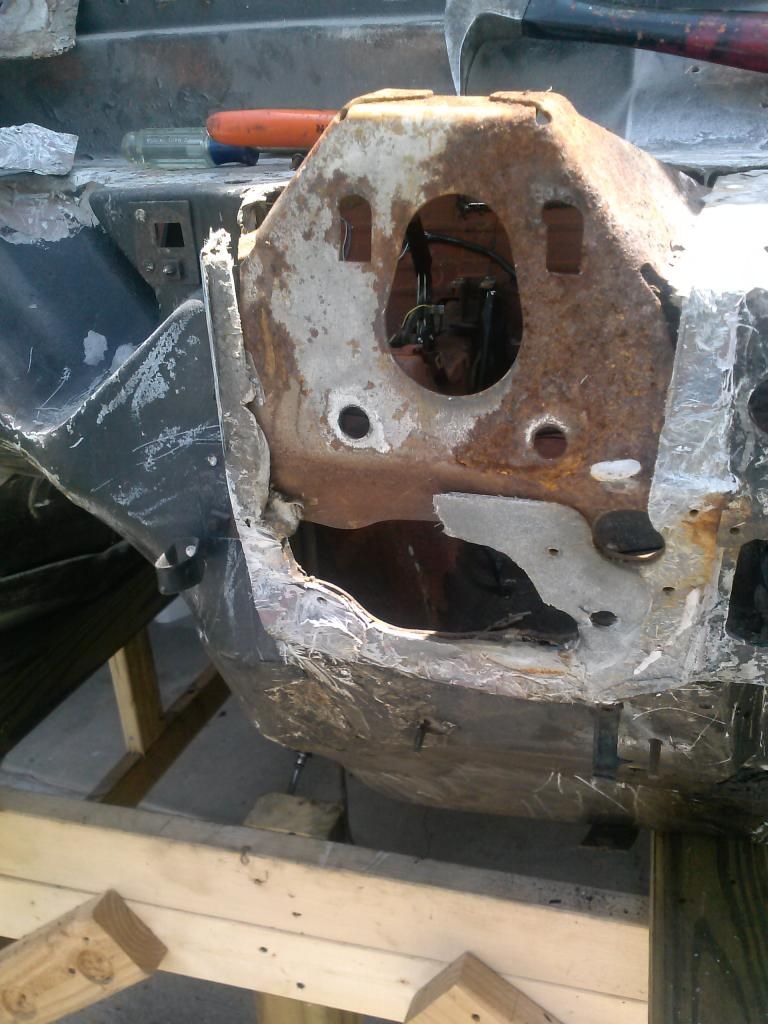


 07-16-2014, 02:39 PM
#308
Le Mans Master
Member Since: Dec 2009
Location: Saskatoon Saskatchewan
Posts: 6,397
Received 640 Likes
on
463 Posts
What little experience I have with this sort of thing working in metal makes me think you'd be better off getting a good used piece and splicing that in. I've found that when I'm doing anything other than the most minor of reforming complex shapes that require precise fitment its very easy to get your repairs in the wrong shape and then things don't want to line back up and bolt back on.
Before you atttempt repairing this you could attempt to remove a used piece and if it comes out relatively solid then that's the way to go. If you make a mess of the used piece removing it then you are probably better off fixing what you've got. You'd be out the cost of the used piece if it didn't work but at least that'd give you a chance of having a better fix.
Before you atttempt repairing this you could attempt to remove a used piece and if it comes out relatively solid then that's the way to go. If you make a mess of the used piece removing it then you are probably better off fixing what you've got. You'd be out the cost of the used piece if it didn't work but at least that'd give you a chance of having a better fix.
07-16-2014, 02:57 PM
#309
Le Mans Master


What to do? Options:
1. Repair it in place best I can
2. Remove the firewall and repair it on a bench
3. Find a good used firewall for a car with fiberglass floors.
That is a tough one! If you went Option 1, could you repair it to YOUR satisfaction, appearance wise and esp. function wise? Option 2, could you do this, without damaging the surrounding area? Option 3, you worried about the bonds being damaged in purchasing one. Is this because you're not sure the seller would be as careful as you are? Because you're basically doing the same thing in Option 2 to fix it on the bench.
07-16-2014, 03:38 PM
#310
Racer
Thread Starter
What to do? Options:
1. Repair it in place best I can
2. Remove the firewall and repair it on a bench
3. Find a good used firewall for a car with fiberglass floors.
That is a tough one! If you went Option 1, could you repair it to YOUR satisfaction, appearance wise and esp. function wise? Option 2, could you do this, without damaging the surrounding area? Option 3, you worried about the bonds being damaged in purchasing one. Is this because you're not sure the seller would be as careful as you are? Because you're basically doing the same thing in Option 2 to fix it on the bench.
1. Repair it in place best I can
2. Remove the firewall and repair it on a bench
3. Find a good used firewall for a car with fiberglass floors.
That is a tough one! If you went Option 1, could you repair it to YOUR satisfaction, appearance wise and esp. function wise? Option 2, could you do this, without damaging the surrounding area? Option 3, you worried about the bonds being damaged in purchasing one. Is this because you're not sure the seller would be as careful as you are? Because you're basically doing the same thing in Option 2 to fix it on the bench.
One thing is certain, i could repair it much better than whoever attacked it previously. I dont care about the firewall looking original but i do care about it being solid. I will be using West System epoxy for any repairs.
07-17-2014, 03:38 PM
#311
Racer
Thread Starter
I decided to try and repair the firewall and glassed up the longest crack as a test. It took three layers to get it thick enough. After it hardens I will see how it "feels" and decide to continue or change course.
 07-27-2014, 07:26 PM
#312
 07-27-2014, 09:04 PM
#313
Racer
Thread Starter
http://www.corvette-restoration.com/..._Checklist.pdf
As you work, go slowly and safely and you'll find things along the way. As far as the order, I just tried to do what made sense as I disassembled the car. Keep all the parts and label them. All of the nuts, bolts and small items should go into labeled plastic bags. Take lots of pictures so you have a record and for reassembly help. Get an assembly manual and a shop manual and consult this forum ... lots of help here. The most difficult part for me was the rusty condition of the car and bolts/nuts that were frozen. I removed optional items to make the car lighter: Seats, doors, headlight assemblies, front bumper and support assembly, T-tops, windshield. I couldn't get the rear bumper off before I lifted the body because all of the little nuts and bolts were rusted badly.
07-27-2014, 10:54 PM
#314
i started with list on the corvette restoration website. My car is a 75 so there were some differences but you'll spot these things as you go.
http://www.corvette-restoration.com/..._checklist.pdf
as you work, go slowly and safely and you'll find things along the way. As far as the order, i just tried to do what made sense as i disassembled the car. Keep all the parts and label them. All of the nuts, bolts and small items should go into labeled plastic bags. Take lots of pictures so you have a record and for reassembly help. Get an assembly manual and a shop manual and consult this forum ... Lots of help here. The most difficult part for me was the rusty condition of the car and bolts/nuts that were frozen. I removed optional items to make the car lighter: Seats, doors, headlight assemblies, front bumper and support assembly, t-tops, windshield. I couldn't get the rear bumper off before i lifted the body because all of the little nuts and bolts were rusted badly.
08-04-2014, 09:50 AM
#315
Racer
Thread Starter
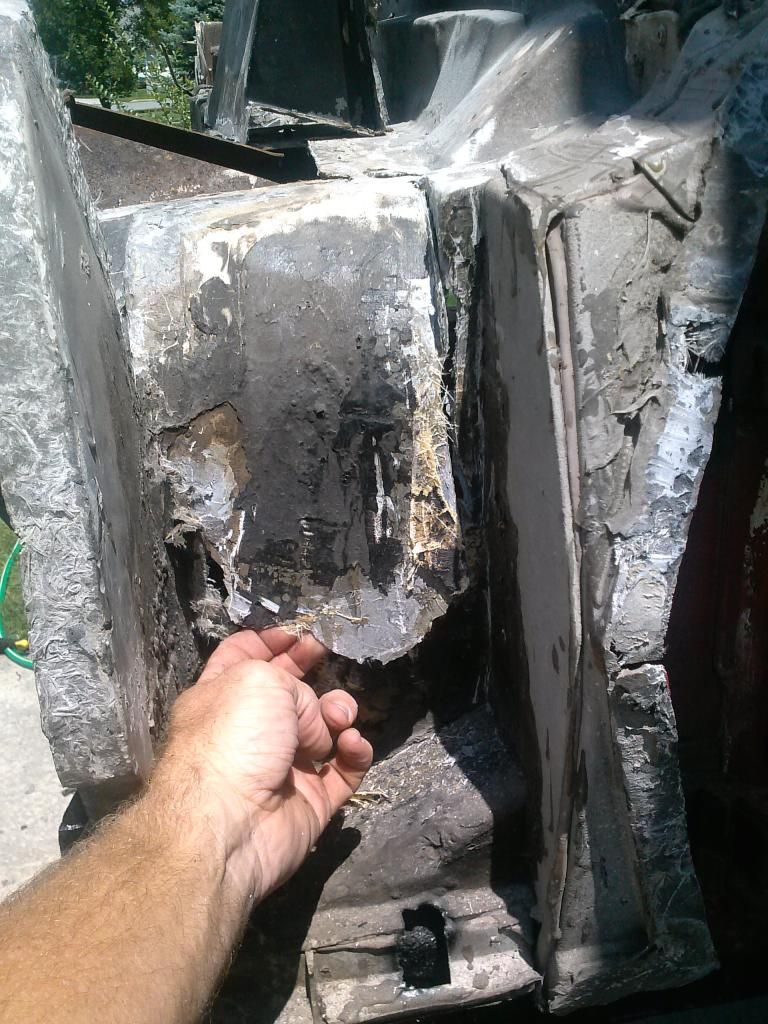
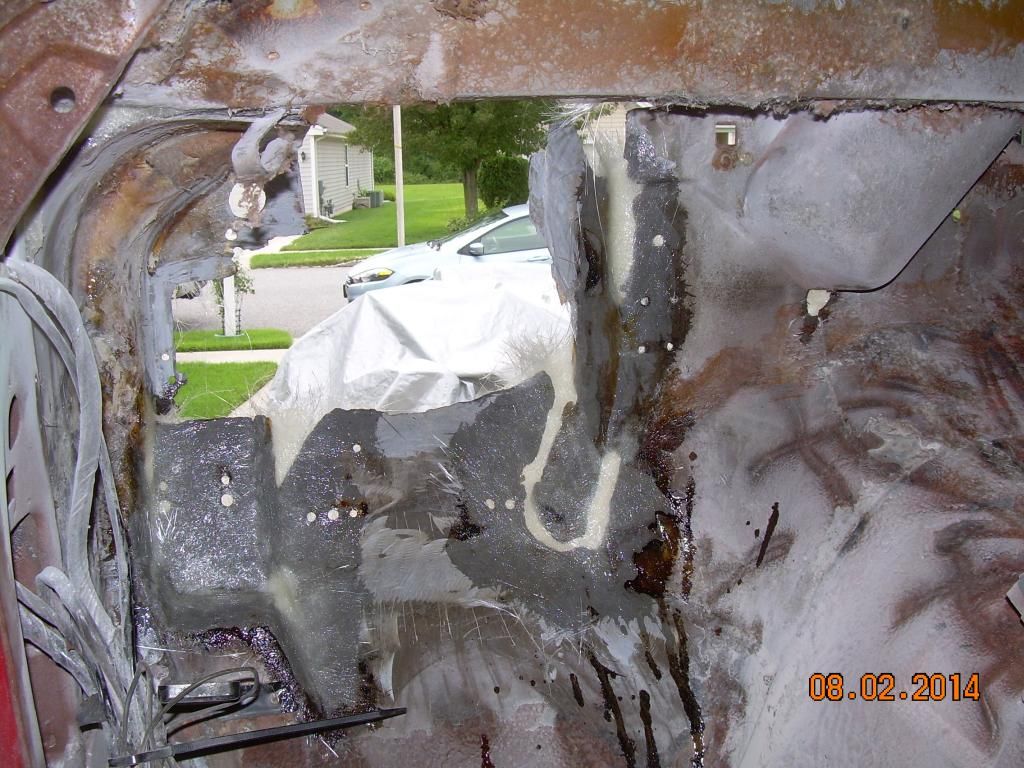
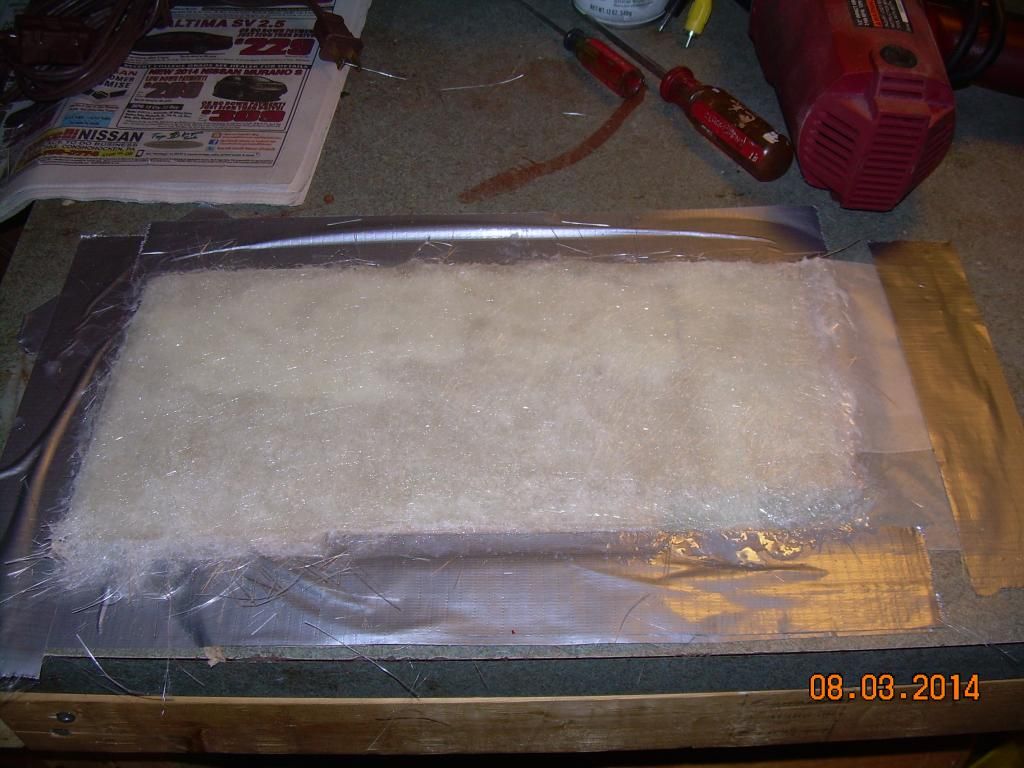
It's been slow going due to family commitments but I am grinding away at the firewall repairs. Here are a few shots of the latest repair areas. On the driver side, these areas were all bad previous repairs done with the wrong epoxy (I suspect) and areas under the epoxy were not down to fiberglass ... some cases the patch was on top of paint or undercoating. The last picture is a new piece of flat fiberglass that I need to repair the front of the steering wheel area of the firewall. This will be epoxy'd in place and then all the holes will be cut using the outer cover and inner metal reinforcement as templates. The passenger side repairs are cracks in the original fiberglass with no previous repair work ... much easier.


Last edited by bwinterstine; 08-04-2014 at 09:51 AM. Reason: Forgot one pictture
08-04-2014, 04:32 PM
#316
I know this would take away from originality but would there be a benefit to working some metal into the fireway repair? Either sandwiched between layers of glass or just bolt in a metal one?
I feel like I'm closer to shopping for a vette of my own so I'm imagining myself in these repair scenarios......
I feel like I'm closer to shopping for a vette of my own so I'm imagining myself in these repair scenarios......
08-09-2014, 11:33 AM
#317
Instructor

That is the mount for the "Z" bar for standard transmission shift linkage.
I am working on my '75 finally, slowly but surely. Not retired yet, but damn close!

Mike
08-20-2014, 08:56 AM
#318
Racer
Thread Starter
I've got the majority of the main section firewall fiberglass work completed. I still have to repair the top (long) section of the cowl and the outer fiberglass brake/steering cover. These can both be done independent of putting the body back on the chassis. Also, I want to make sure the steering wheel aligns to the steering box correctly before I do any final assembly of that area of the firewall.
I've rented a storage garage for the past year+ and before I head south for the winter I want to clean it out and end the lease. But, I need space. So, time to put the body back on. I've completed all of the repairs that requires access and only need to: remove the temporary battery, wires and gauges, install the tranny tunnel insulation and re-run the long battery cable. I may also put the drive shaft back on. I have new body mounts and bolts.
Anyone see any craziness in this? I know that some of the future work may be more difficult, e.g., installing the front clip with the engine already installed, but I'm up for that sort of challenge (I think).
08-20-2014, 09:16 AM
#319
Drifting


Member Since: Aug 2010
Location: Kanuckistan
Posts: 1,617
Received 127 Likes
on
68 Posts
2022 C3 of the Year Finalist - Modified
I've got the majority of the main section firewall fiberglass work completed. I still have to repair the top (long) section of the cowl and the outer fiberglass brake/steering cover. These can both be done independent of putting the body back on the chassis. Also, I want to make sure the steering wheel aligns to the steering box correctly before I do any final assembly of that area of the firewall.
I've rented a storage garage for the past year+ and before I head south for the winter I want to clean it out and end the lease. But, I need space. So, time to put the body back on. I've completed all of the repairs that requires access and only need to: remove the temporary battery, wires and gauges, install the tranny tunnel insulation and re-run the long battery cable. I may also put the drive shaft back on. I have new body mounts and bolts.
Anyone see any craziness in this? I know that some of the future work may be more difficult, e.g., installing the front clip with the engine already installed, but I'm up for that sort of challenge (I think).
I've rented a storage garage for the past year+ and before I head south for the winter I want to clean it out and end the lease. But, I need space. So, time to put the body back on. I've completed all of the repairs that requires access and only need to: remove the temporary battery, wires and gauges, install the tranny tunnel insulation and re-run the long battery cable. I may also put the drive shaft back on. I have new body mounts and bolts.
Anyone see any craziness in this? I know that some of the future work may be more difficult, e.g., installing the front clip with the engine already installed, but I'm up for that sort of challenge (I think).
Actually you'd better do all the stuff to the engine before putting the front clip back on, so you wouldn't be scared by the idea of pulling the engine out one more time because you forgot something.
08-20-2014, 06:24 PM
#320
Racer
Thread Starter
The engine is pretty much ready to go...I may pull the carb at some point to get access to the idle screws (Need to remove the covers) put that shouldn't be a problem. Good to know you were able to put the clip on w/ the engine in place. Thanks!