
1971 Journey
 02-18-2013, 05:47 PM
#121
Melting Slicks

Thread Starter


December 2010
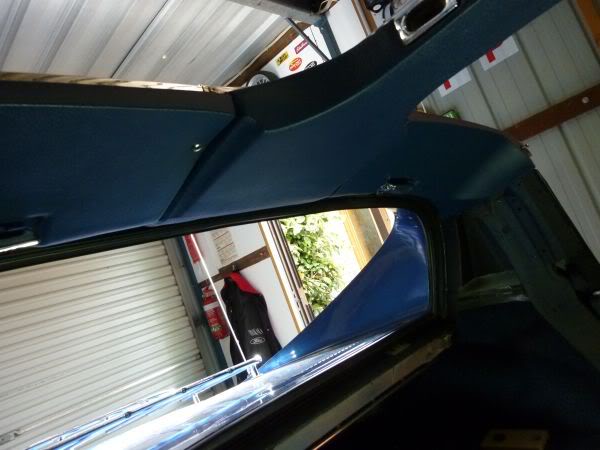
Got my latest vinyl paint back from my local paint shop.
He kept it for a week and kept tweaking it to get its as close as possible.
I was fairly happy with the original mix but this one has a little more green in it and is not as clean a blue so to my eye matches a bit better.
Sprayed out a few panels and it is great, very happy.
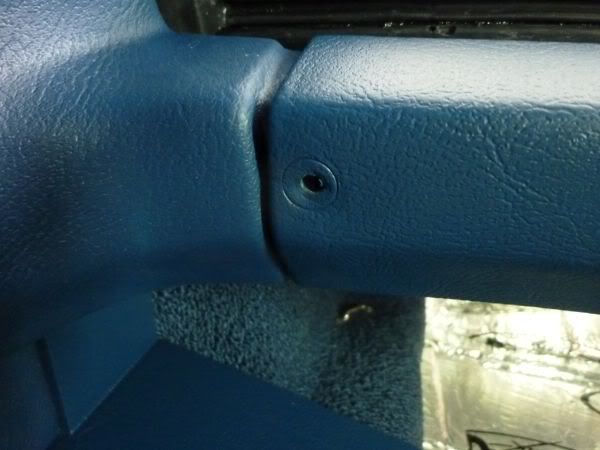
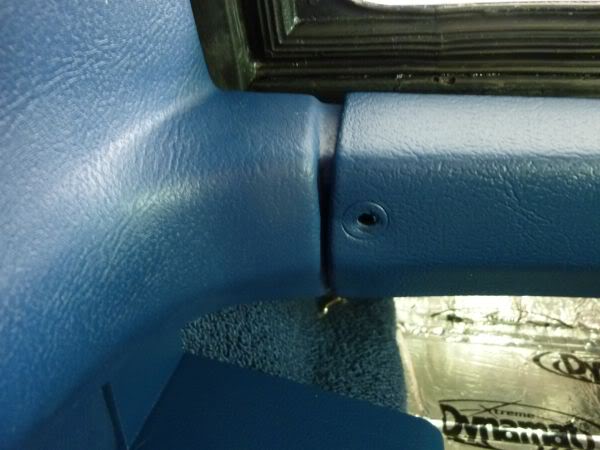
The b pillar is reproduction and the other window trim and belt cover are painted.
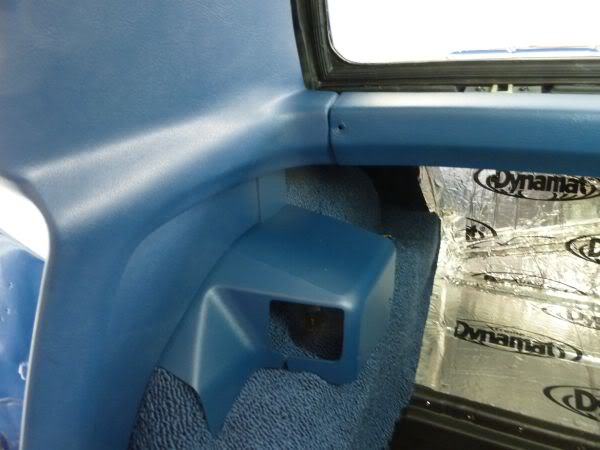
I ended up with about 2 litres this time so I wont have to go through it again if i need to repair at some time.
I asked about the paint itself and it appears to be a vinyl base resin that you tint up. Meant to be very flexible and can be used on seats as well etc.
Got my latest vinyl paint back from my local paint shop.
He kept it for a week and kept tweaking it to get its as close as possible.
I was fairly happy with the original mix but this one has a little more green in it and is not as clean a blue so to my eye matches a bit better.
Sprayed out a few panels and it is great, very happy.
The b pillar is reproduction and the other window trim and belt cover are painted.
I ended up with about 2 litres this time so I wont have to go through it again if i need to repair at some time.
I asked about the paint itself and it appears to be a vinyl base resin that you tint up. Meant to be very flexible and can be used on seats as well etc.
Last edited by CraigH; 04-09-2023 at 08:15 PM.
 02-18-2013, 07:10 PM
#122
Melting Slicks
Thread Starter
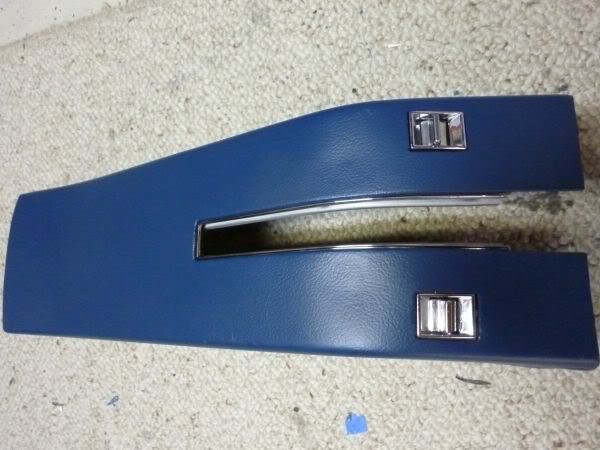
Was not at all happy with console unit for the brake I got from Corvette America.
Everything else from them has been good but this item was not trimmed properly in my opinion.
They offered me a credit for the unit which was great customer service when it was over a year since I got it.
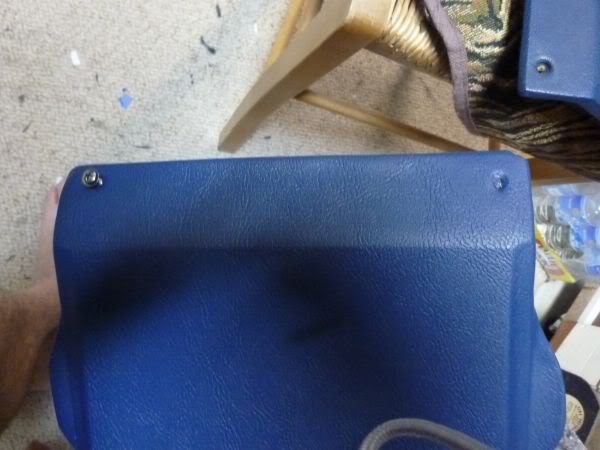
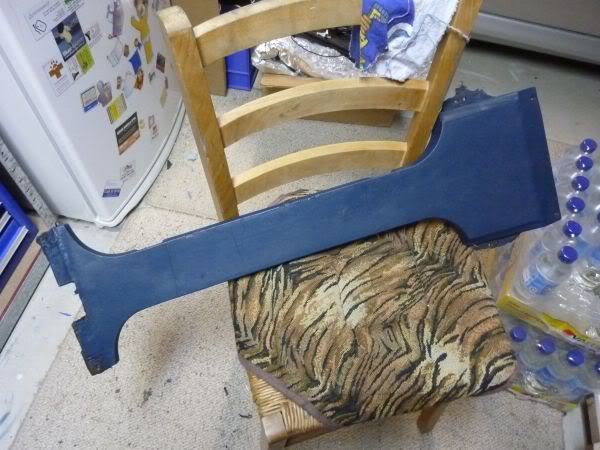
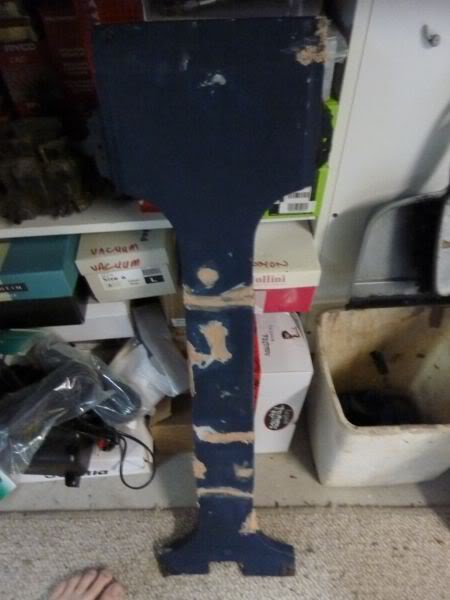
So the plan was to restore the original console piece.
The part was in good condition with no major cracks but 40 years of wear and a few gouges here and there.
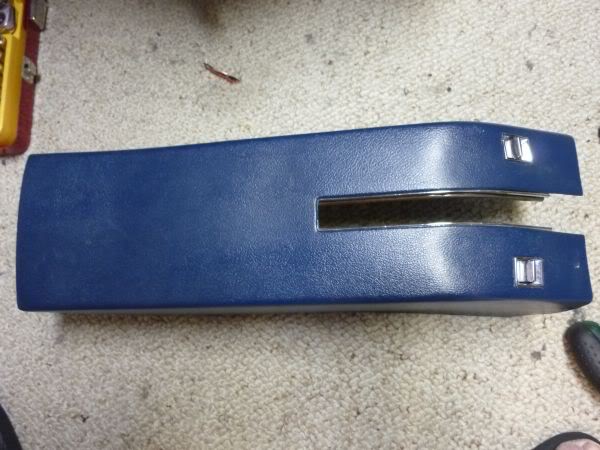

First disassemble it.
Everything else from them has been good but this item was not trimmed properly in my opinion.
They offered me a credit for the unit which was great customer service when it was over a year since I got it.
So the plan was to restore the original console piece.
The part was in good condition with no major cracks but 40 years of wear and a few gouges here and there.
First disassemble it.
Last edited by CraigH; 04-09-2023 at 08:14 PM.
 02-18-2013, 07:11 PM
#124
Melting Slicks
Thread Starter
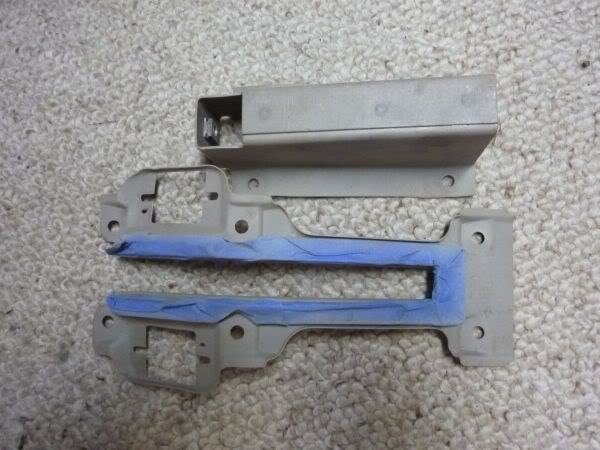
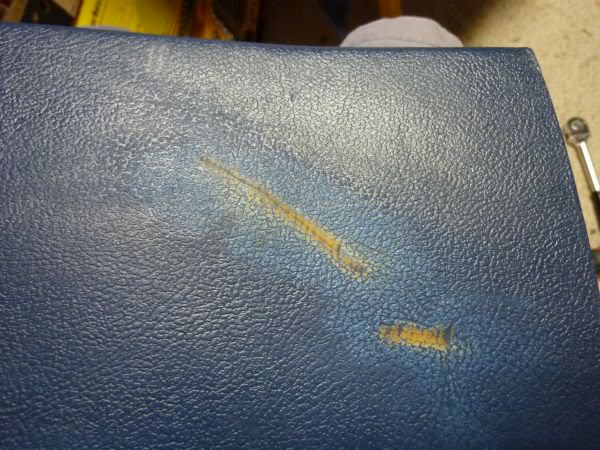
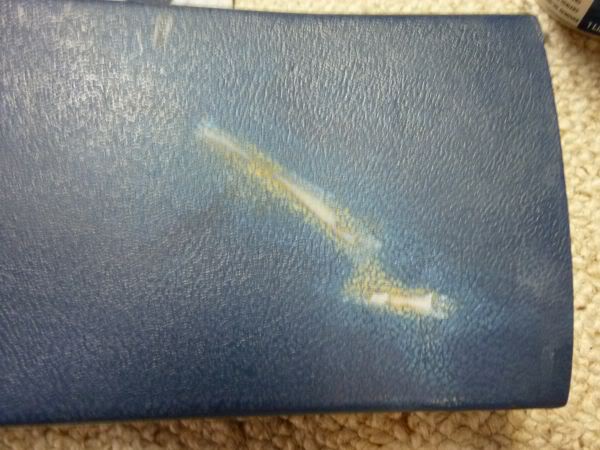
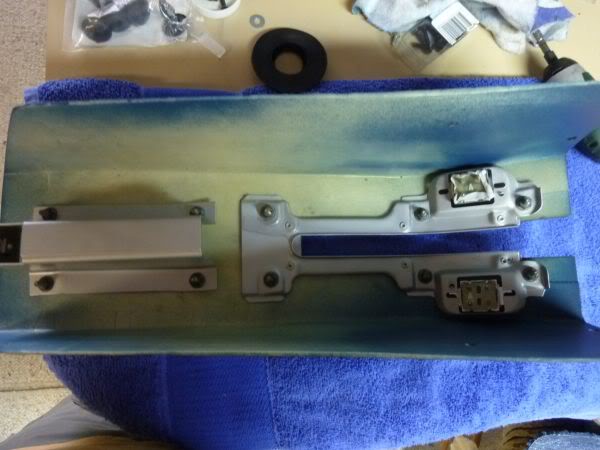
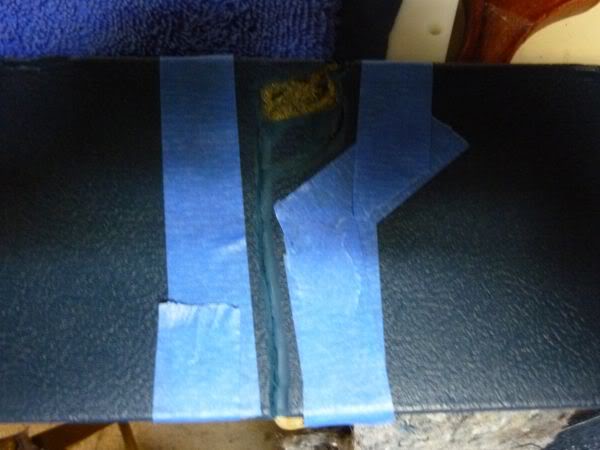
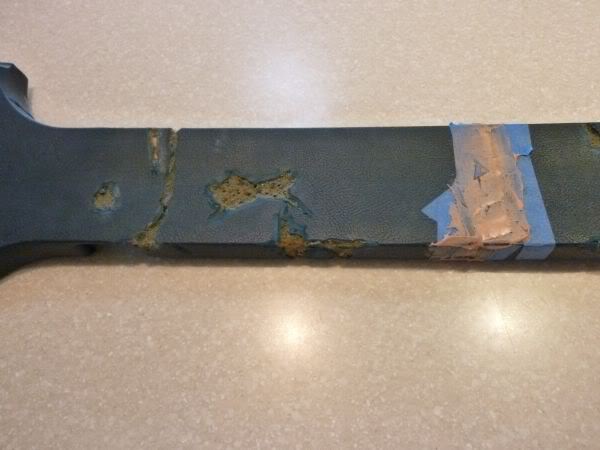
The gouges in the console were all roughed up with sandpaper
Then masked in close to the gouge.
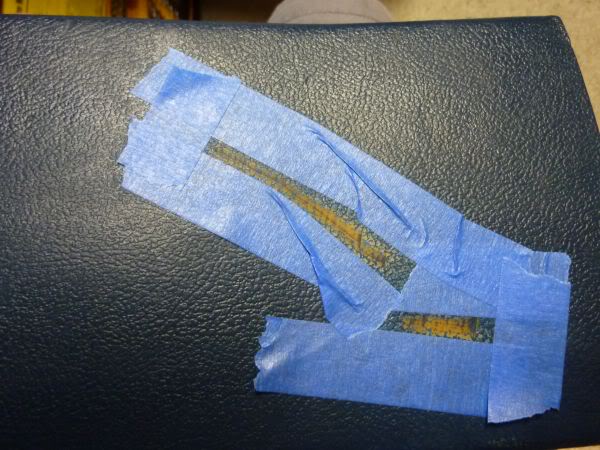
Filled with a very thin layer of body filler.
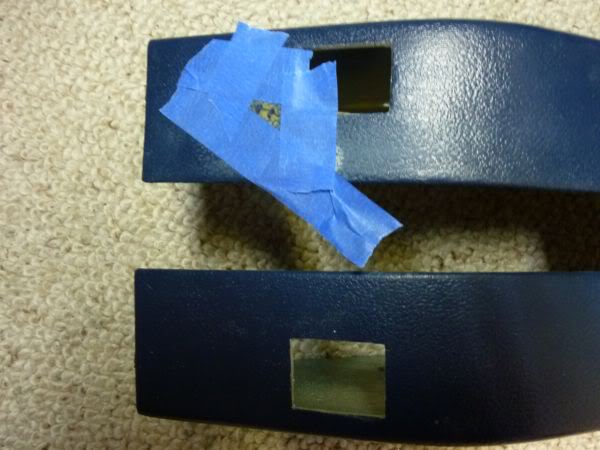
I also spent a bit of time making the holes for the power windows a bit neater. Wow what tool did they use to do this it is so rough.
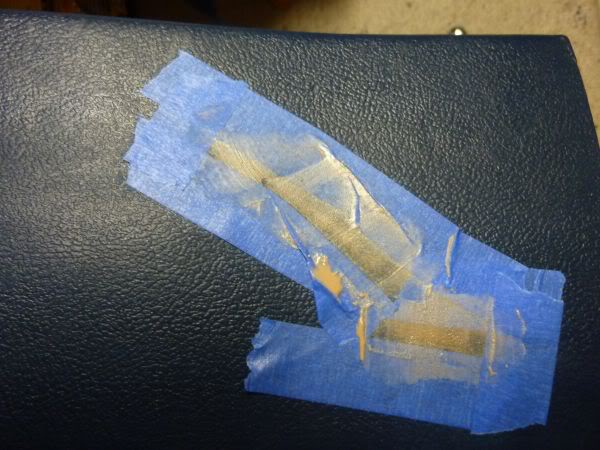
Sanded again with tape in place.

Then the tape removed.
All repairs then got a light coat of vinyl undercoat.
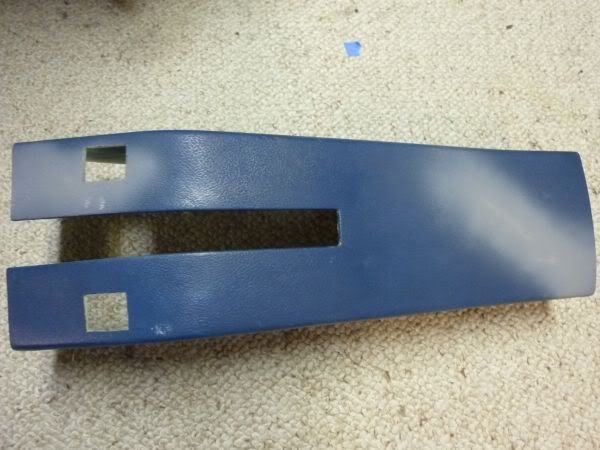
All ready for a spray with blue vinyl paint.
Then masked in close to the gouge.
Filled with a very thin layer of body filler.
I also spent a bit of time making the holes for the power windows a bit neater. Wow what tool did they use to do this it is so rough.
Sanded again with tape in place.
Then the tape removed.
All repairs then got a light coat of vinyl undercoat.
All ready for a spray with blue vinyl paint.
Last edited by CraigH; 04-09-2023 at 08:14 PM.
02-18-2013, 07:11 PM
#125
Melting Slicks
Thread Starter
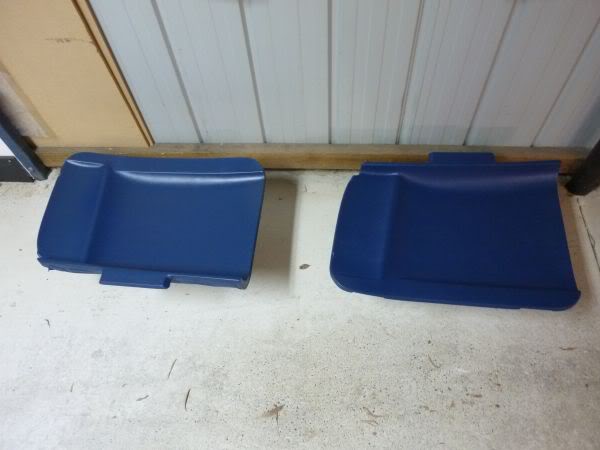
Also all my previous painted parts are now painted with the new and improved colour mix.
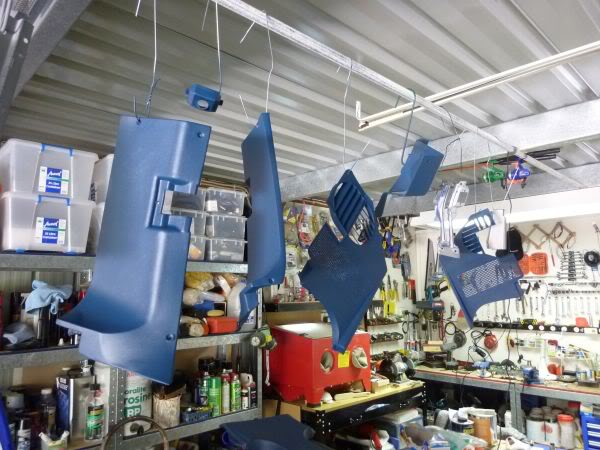
Also primed all the hinges, frames and small parts from the storage boxes.
It hope to be able to spray the remainder of blue parts on Sunday if its a nice day.
If I can get the new Aeriel and cable in this afternoon then all I need to do once everything drys is put things back together.
If I am very lucky the interior will be on the home stretch this week.
Last edited by CraigH; 04-09-2023 at 08:13 PM.
02-18-2013, 07:12 PM
#126
Melting Slicks
Thread Starter
Fitted the new rubber feet to the aerial plate
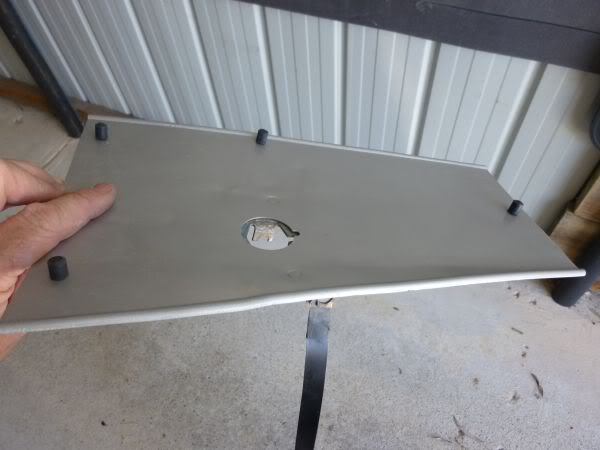
Then fitted the base and secured from above.
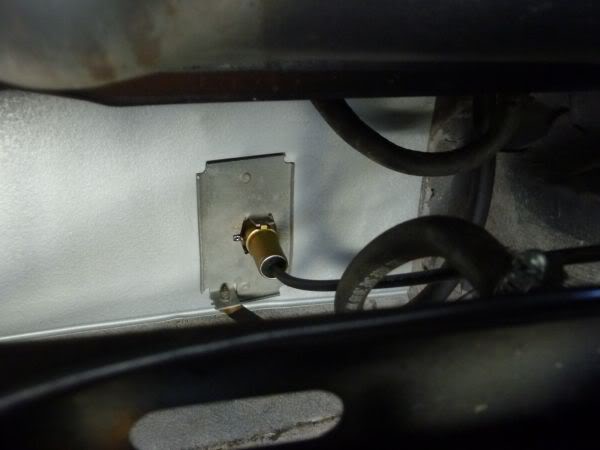
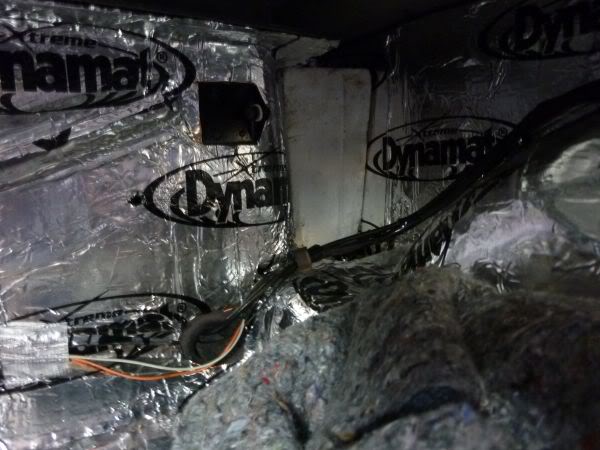
Ran the cable through the rear grommet then over the wheel arch.
I decided not to follow the standard way that goes down drivers side and over instruments as I am not wanting to pull the dash again :-)
Later models run it down passenger side so I followed that method.
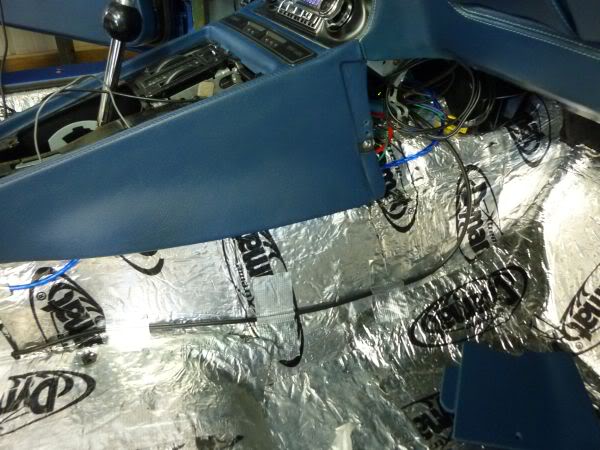
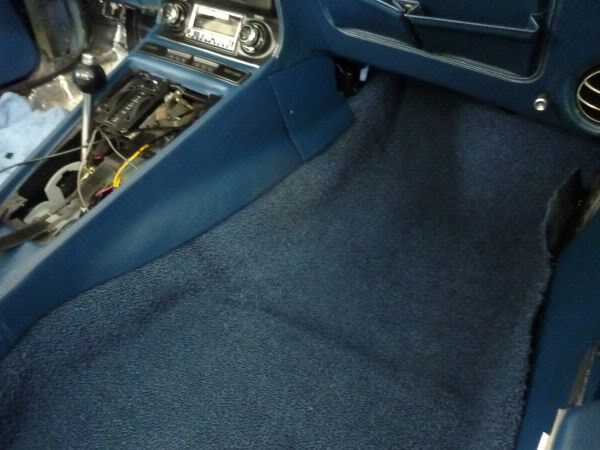
Test fitted the passenger carpets as well.
Then fitted the base and secured from above.
Ran the cable through the rear grommet then over the wheel arch.
I decided not to follow the standard way that goes down drivers side and over instruments as I am not wanting to pull the dash again :-)
Later models run it down passenger side so I followed that method.
Test fitted the passenger carpets as well.
Last edited by CraigH; 04-09-2023 at 08:13 PM.
The following users liked this post:
Primoz (10-17-2022)
02-18-2013, 07:12 PM
#127
Melting Slicks
Thread Starter
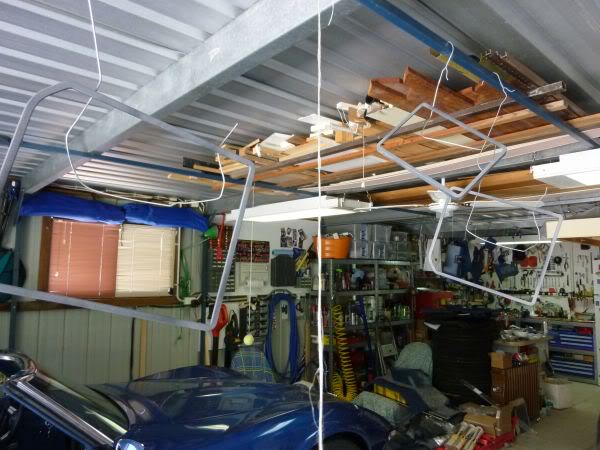
Finished painting all my parts before the wind came up today.
Very pleased with how the T Top repairs turned out.

Very pleased with how the T Top repairs turned out.
Last edited by CraigH; 04-09-2023 at 08:13 PM.
02-18-2013, 07:12 PM
#128
Melting Slicks
Thread Starter
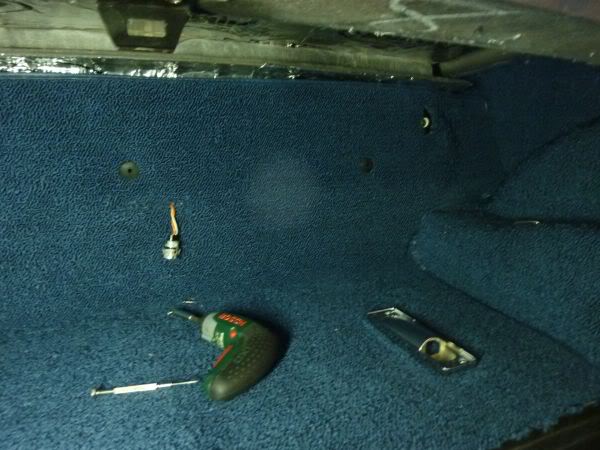
Then it was back onto the carpets.
Finished the rear drivers side.
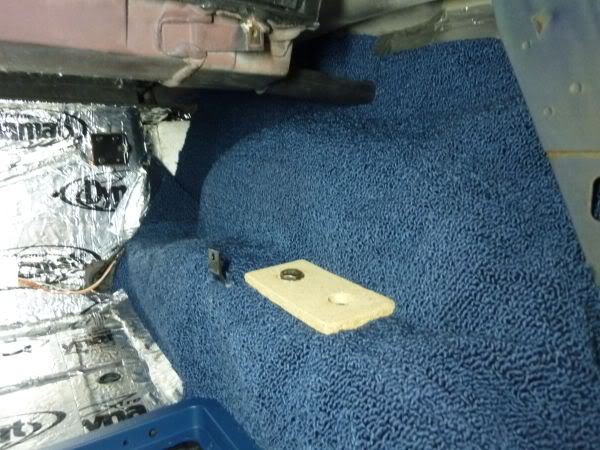
Put center carpet in and used a soldering iron to make the holes for the rubber plugs. A chop stick down the plug gets them in fairly easily.
Tested with storage frame and all edges trimmed.
Courtesy light fitted.
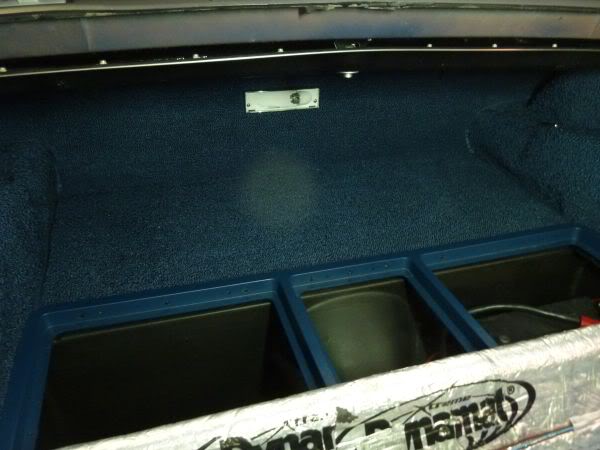
Rear window storage shelf back in
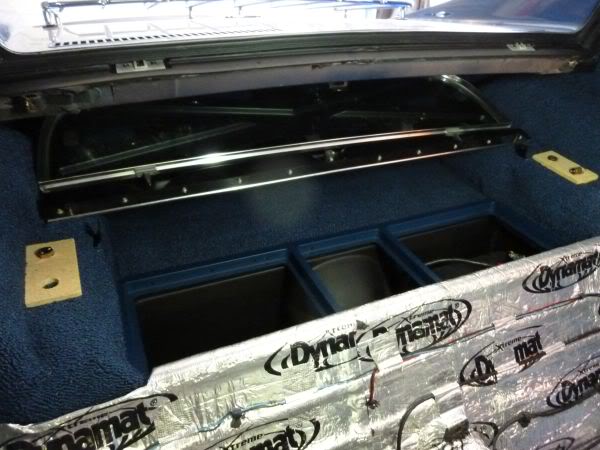
Started on the panel behind the seats now.
Finished the rear drivers side.
Put center carpet in and used a soldering iron to make the holes for the rubber plugs. A chop stick down the plug gets them in fairly easily.
Tested with storage frame and all edges trimmed.
Courtesy light fitted.
Rear window storage shelf back in
Started on the panel behind the seats now.
Last edited by CraigH; 04-09-2023 at 08:13 PM.
02-18-2013, 07:13 PM
#129
Melting Slicks
Thread Starter
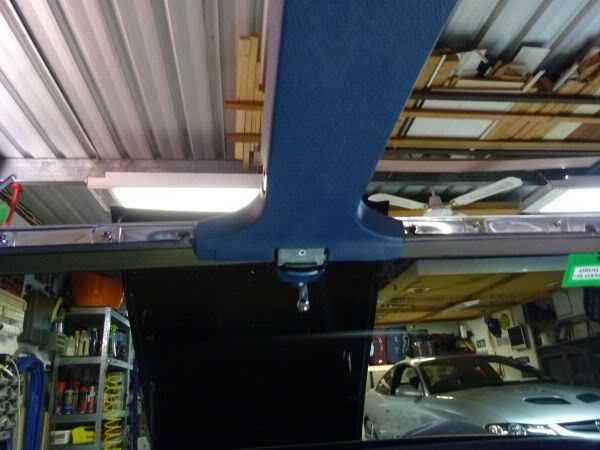
Brake console put back together.
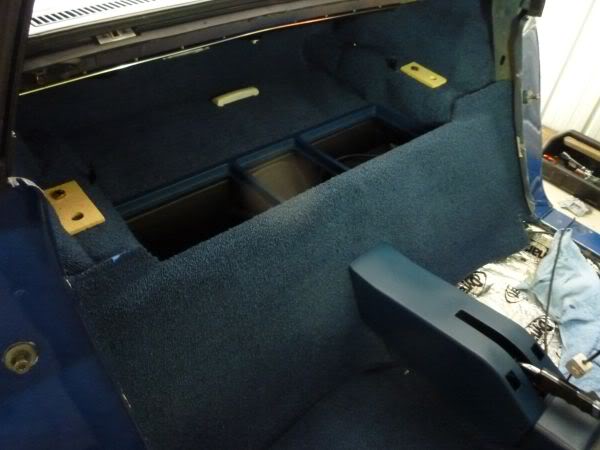
More of the carpets done.
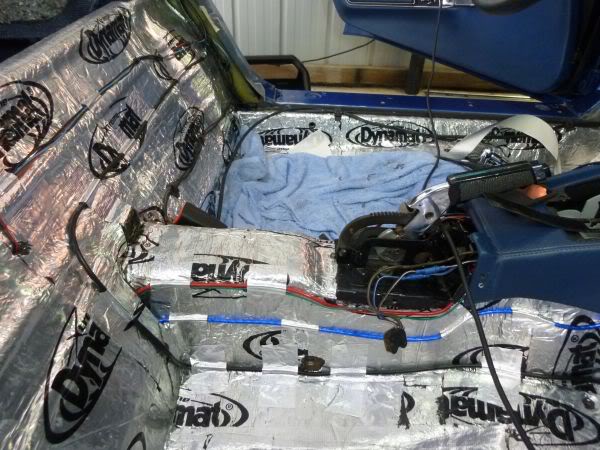
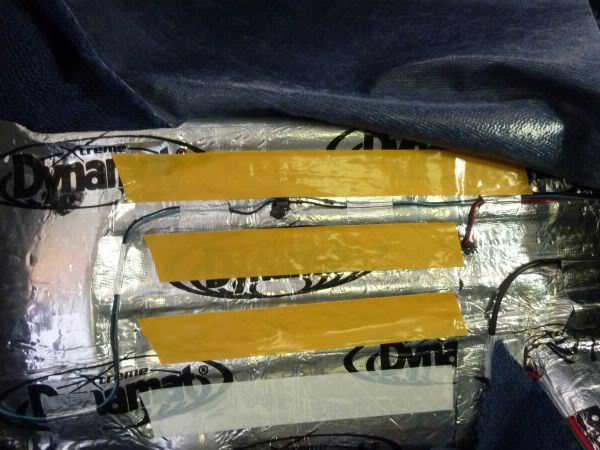
Only drivers side to complete now. Have not used any glue yet but I may on the back of the bulkhead if i cant find any other way to get it to sit down.
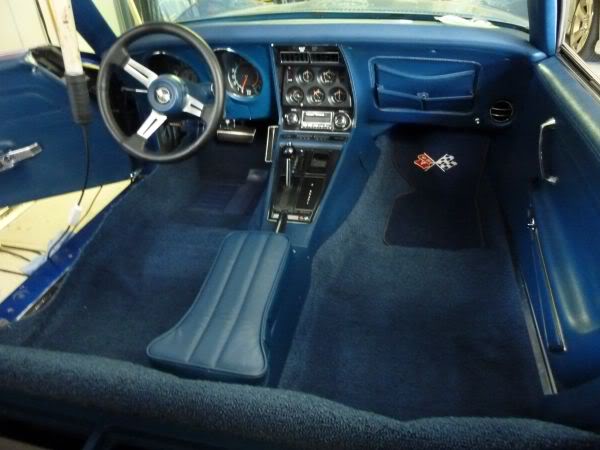
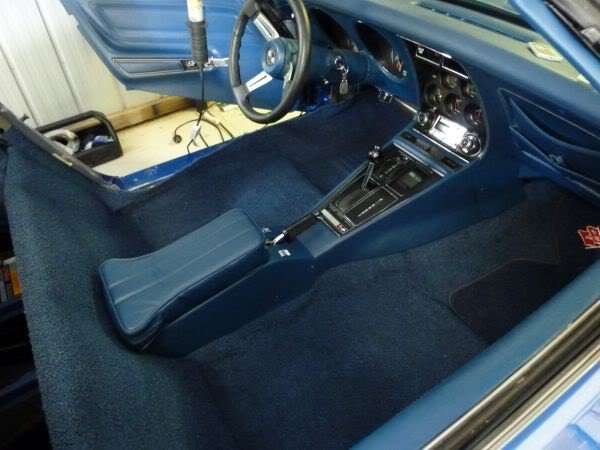
Once its all in and before final holes are cut for seats etc I will take the front back out and put some extra heat barrier in a few spots.
More of the carpets done.
Only drivers side to complete now. Have not used any glue yet but I may on the back of the bulkhead if i cant find any other way to get it to sit down.
Once its all in and before final holes are cut for seats etc I will take the front back out and put some extra heat barrier in a few spots.
Last edited by CraigH; 04-09-2023 at 08:13 PM.
02-18-2013, 07:14 PM
#130
Melting Slicks
Thread Starter
Have been too busy to do much this week but I have done a bit here and there.
Carpets are all trimmed, just need to make holes for seats and glue part of the bulkhead piece.
Replaced the vent ***** as the old ones were all scratched.
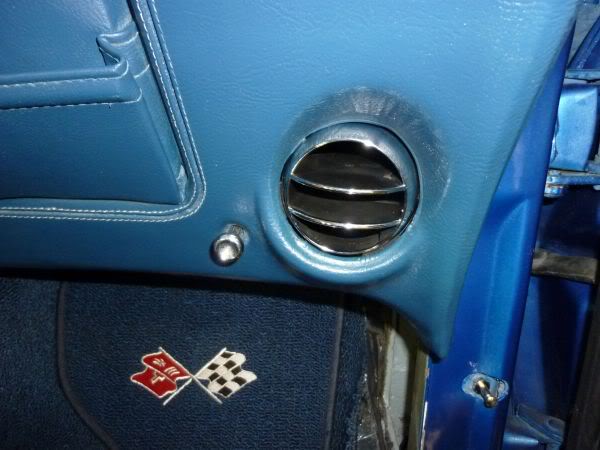
Removed all remaining clips etc around the roof panels and cleaned, painted etc and put them back.
Treated a small area of surface rust near mirror - very minor but why not.
Now I can start putting trim parts back in on the weekend.
Carpets are all trimmed, just need to make holes for seats and glue part of the bulkhead piece.
Replaced the vent ***** as the old ones were all scratched.
Removed all remaining clips etc around the roof panels and cleaned, painted etc and put them back.
Treated a small area of surface rust near mirror - very minor but why not.
Now I can start putting trim parts back in on the weekend.
Last edited by CraigH; 04-09-2023 at 08:12 PM.
02-18-2013, 07:14 PM
#131
Melting Slicks
Thread Starter
One step forward 2 steps back.
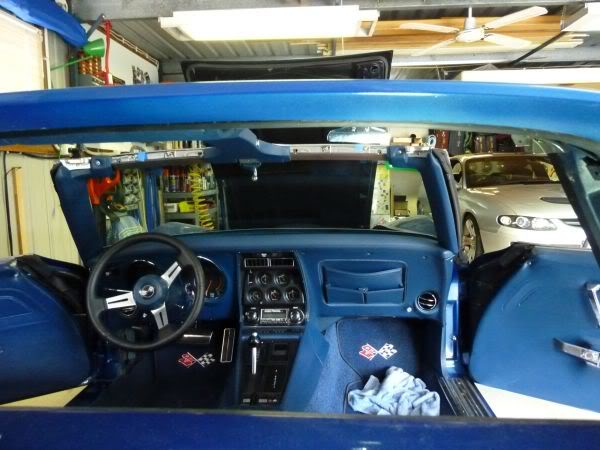
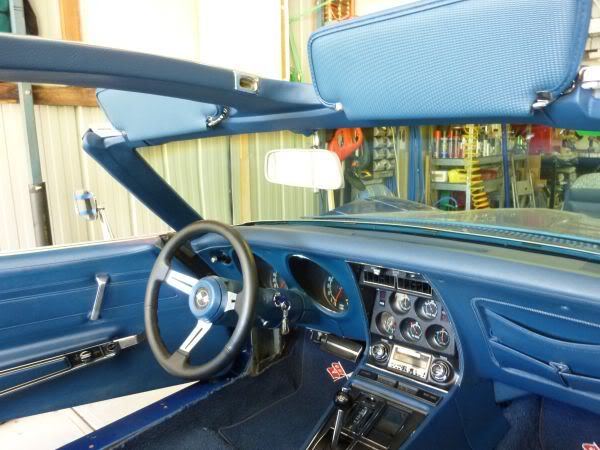
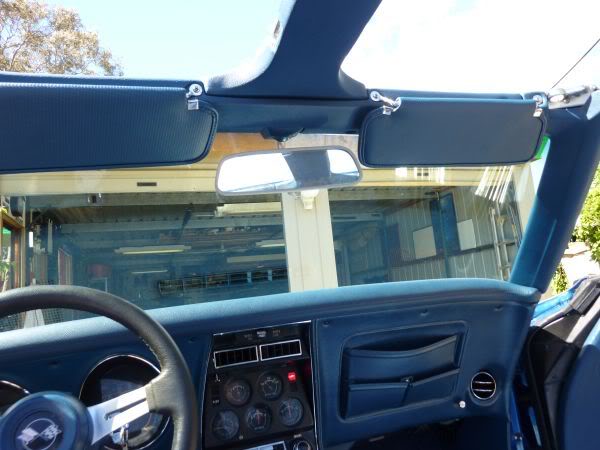
Before I started the refit I decided to paint around the screen with flat back enamel so it looks neat around the trim panels.

Then fit first part the mirror trim.

Before I started the refit I decided to paint around the screen with flat back enamel so it looks neat around the trim panels.
Then fit first part the mirror trim.
Last edited by CraigH; 04-09-2023 at 08:12 PM.
02-18-2013, 07:14 PM
#132
Melting Slicks
Thread Starter
Then I hit an issue.
Fitted the new T-Top center panel.
It fitted ok but I needed to adjust a few of the front corners that were not glued down well enough and were bulging up.
The new panel is not as well built as the original by a long way especial on all the rounded corners which are more folds than molded.
Adjusted a few corners for better fit and continued on and fitted the header bar then I found out the that the T-Top center panel was about 6mm short on one side at the back.
#%#@$%$ !!!!!!
So I am now trying two options.
1) Extend the new panel and fill and re make the hole that will now be out by 6mm. So I peeled back the vinyl and extended the plastic then bent the vinyl back.
2) Repair all the cracks in the old panel and repaint it.
Has heaps of cracks but I will give it a go.
Whichever one looks better I will go with.
Last edited by CraigH; 04-09-2023 at 08:12 PM.
02-18-2013, 07:15 PM
#133
Melting Slicks
Thread Starter
Set out to repair the t-top panel but the more I fixed the more cracks I found.
I have fixed most of them but it need a heap of work to finish and is still a very brittle part.
Put it aside for a while and went back to the reproduction one.
I have fixed most of them but it need a heap of work to finish and is still a very brittle part.
Put it aside for a while and went back to the reproduction one.
Last edited by CraigH; 04-09-2023 at 08:10 PM.
02-18-2013, 07:15 PM
#134
Melting Slicks
Thread Starter
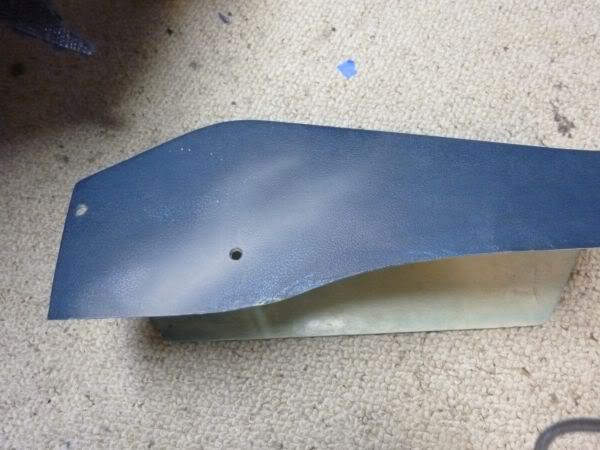
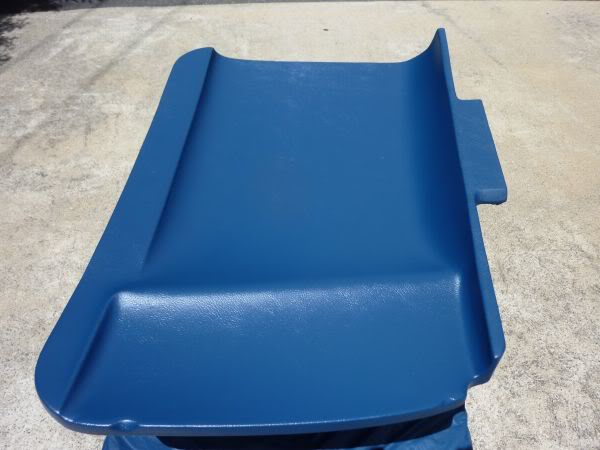
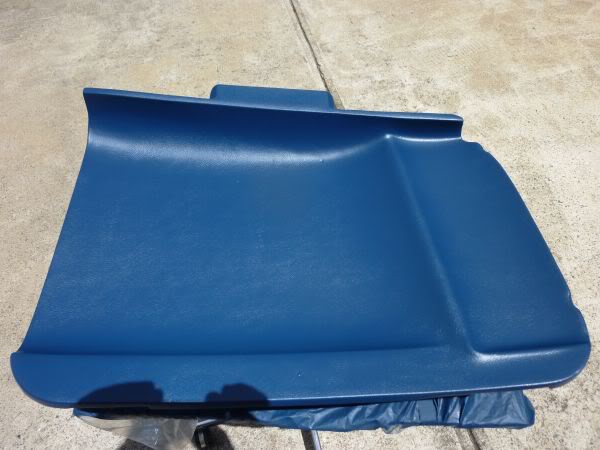
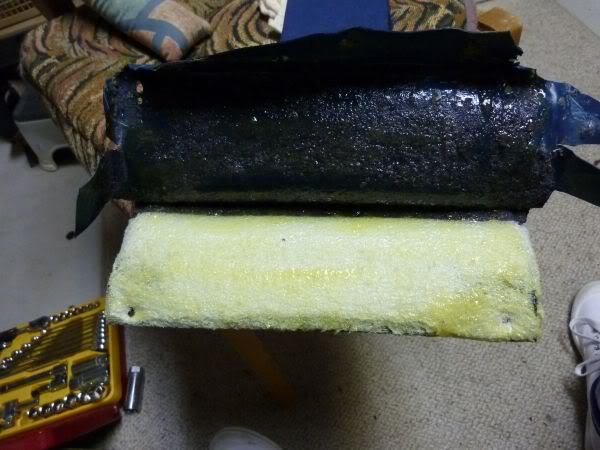
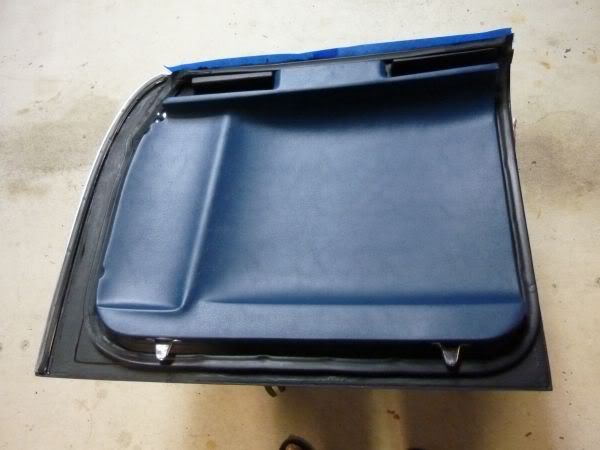
So to fix the issues with the reproduction one I decided to rebuild the back of it.
If you have an issue with cutting up a new $250 part then look away.
Peeled off the vinyl.
Cut back all the padding.
Then cut out the center section that slopes towards the rear window.
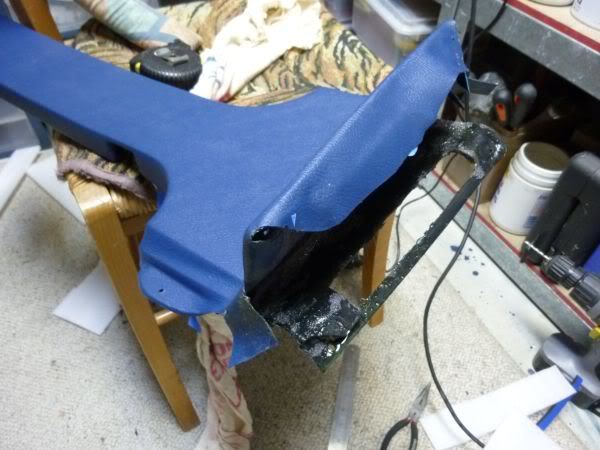
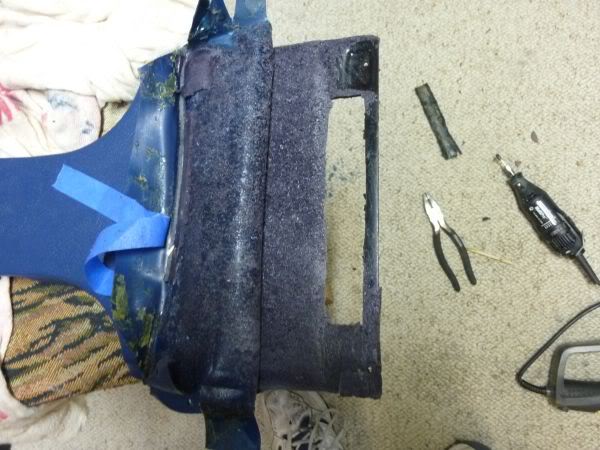
Then with a heat gun I heated up the end of it and flattened it out.
Then did it again and put the slope back to how the original was.
Or at least a lot closer.
I also cut and extended one side so it would be square.
Then covered it with foam padding.
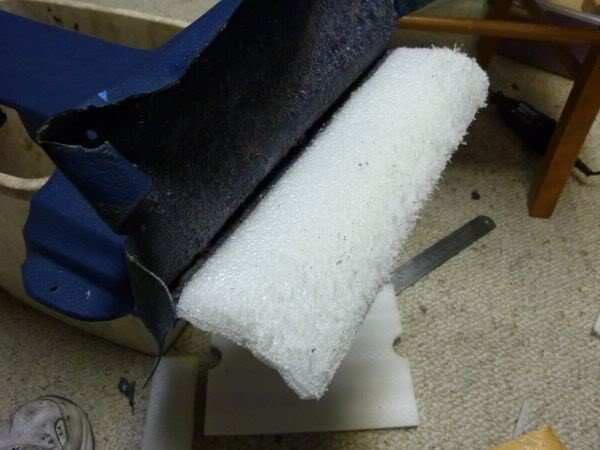
Sanded the padding to the shape I wanted
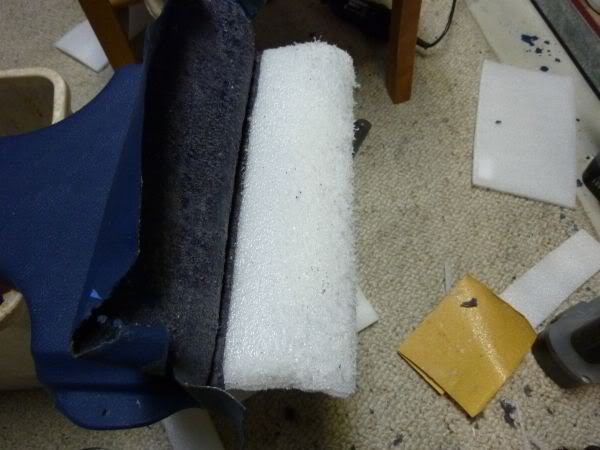
And re stretched the vinyl over it.
Its not glued yet just taped so I can see if needs more work.
Put it back in the car and seems to fit up much better
If you have an issue with cutting up a new $250 part then look away.
Peeled off the vinyl.
Cut back all the padding.
Then cut out the center section that slopes towards the rear window.
Then with a heat gun I heated up the end of it and flattened it out.
Then did it again and put the slope back to how the original was.
Or at least a lot closer.
I also cut and extended one side so it would be square.
Then covered it with foam padding.
Sanded the padding to the shape I wanted
And re stretched the vinyl over it.
Its not glued yet just taped so I can see if needs more work.
Put it back in the car and seems to fit up much better
Last edited by CraigH; 04-09-2023 at 08:10 PM.
02-18-2013, 07:16 PM
#135
Melting Slicks
Thread Starter
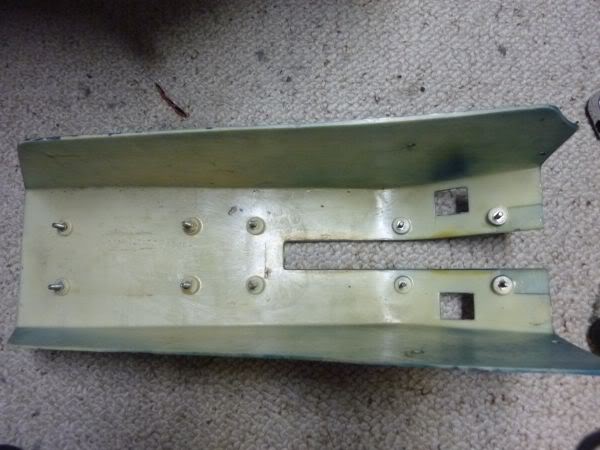
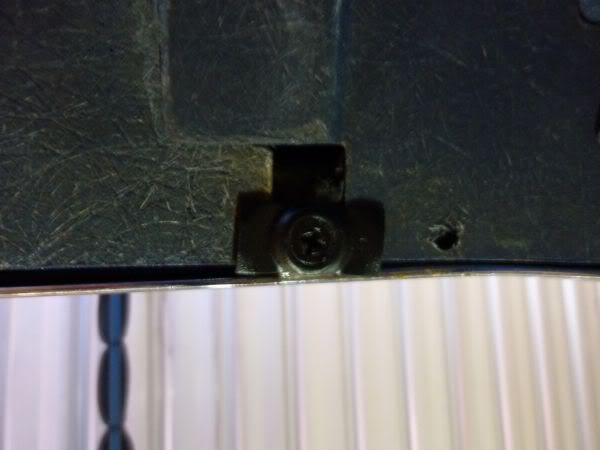
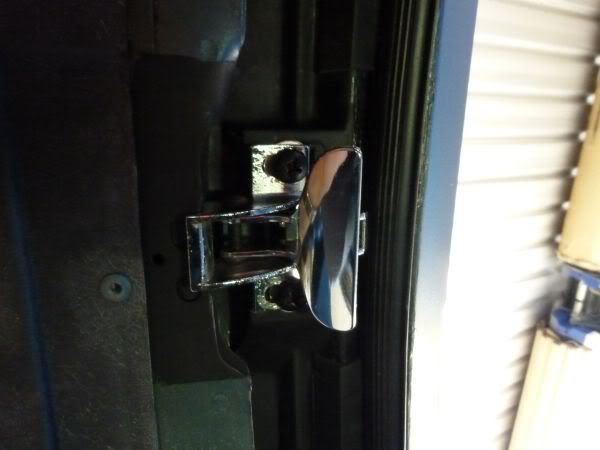
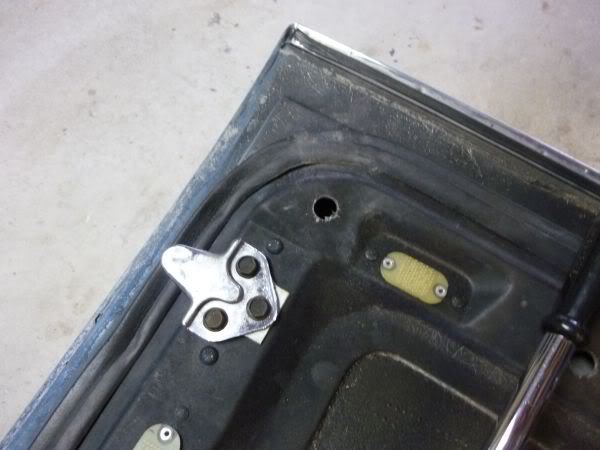
For those with removable back windows I had always been unsure how the latch was meant to mount to the birdcage.
Under the metal lip or over it.
My vette one each way so that was no help.
Did a bit of research but in the end it was fitting all the panels to the proper spots that sorted it out.
The latch needs to be over the metal not under. It will work each way but if under it makes the task of getting the glass in and out more difficult once all trim is in place.
So why was one of mine under - well because the birdcage cutout in my car did not allow enough adjustment for the latch if above and it would make it super hard to latch it.
The proper solution was to notch the birdcage a bit for the latch.
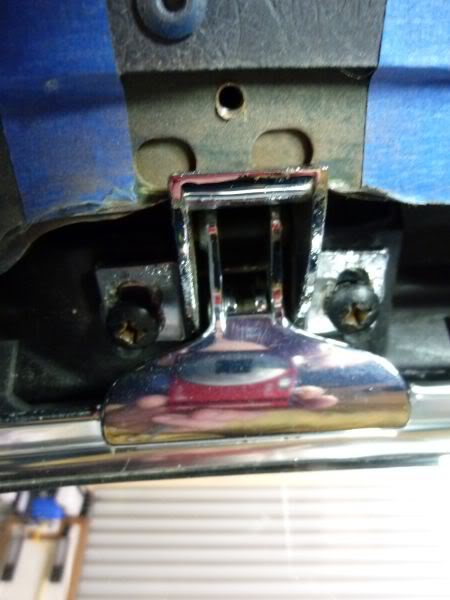
I took 5-6 mm off the face of the cage to allow the latch to be fully adjustable on its bolts.
Now all I need to do it paint it.
Under the metal lip or over it.
My vette one each way so that was no help.
Did a bit of research but in the end it was fitting all the panels to the proper spots that sorted it out.
The latch needs to be over the metal not under. It will work each way but if under it makes the task of getting the glass in and out more difficult once all trim is in place.
So why was one of mine under - well because the birdcage cutout in my car did not allow enough adjustment for the latch if above and it would make it super hard to latch it.
The proper solution was to notch the birdcage a bit for the latch.
I took 5-6 mm off the face of the cage to allow the latch to be fully adjustable on its bolts.
Now all I need to do it paint it.
Last edited by CraigH; 04-09-2023 at 08:10 PM.
02-18-2013, 07:19 PM
#136
Melting Slicks
Thread Starter
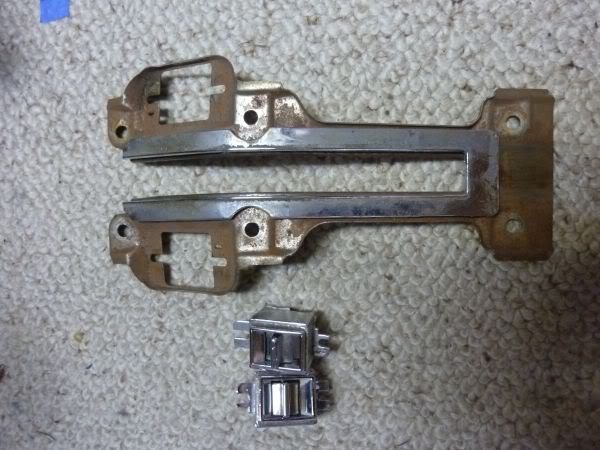
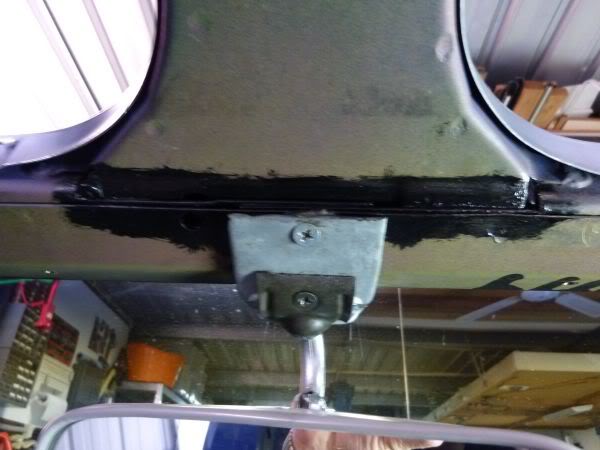
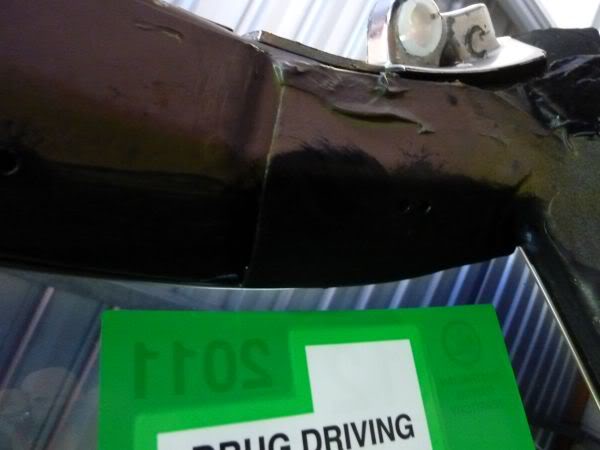
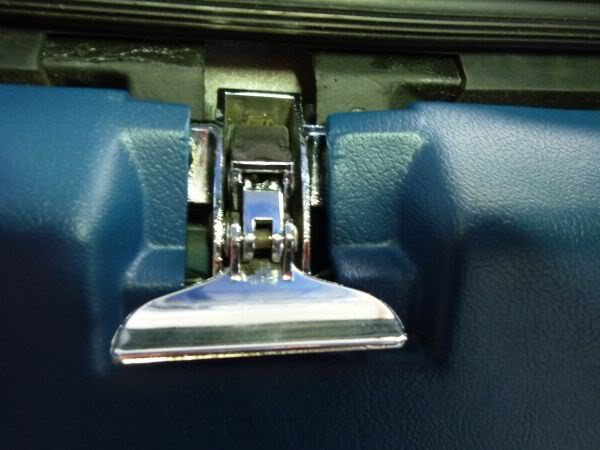
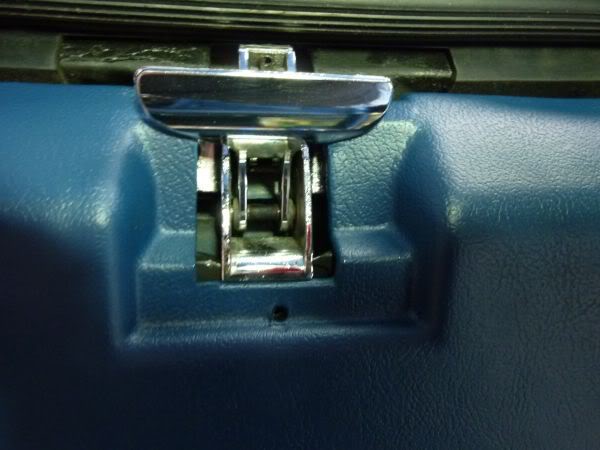
Painted up around the latch.
Then adjusted them to be level with washers under one side or the other dependent on how flat the brackets are in the birdcage.
Finished modifification allows for the full adjustment of the latches in and out dependent on how new or compressed the weatherstrip is.
Also they now work with minimum effort and fit into the trims nicely.
Last edited by CraigH; 04-09-2023 at 08:09 PM.
02-18-2013, 07:20 PM
#137
Melting Slicks
Thread Starter
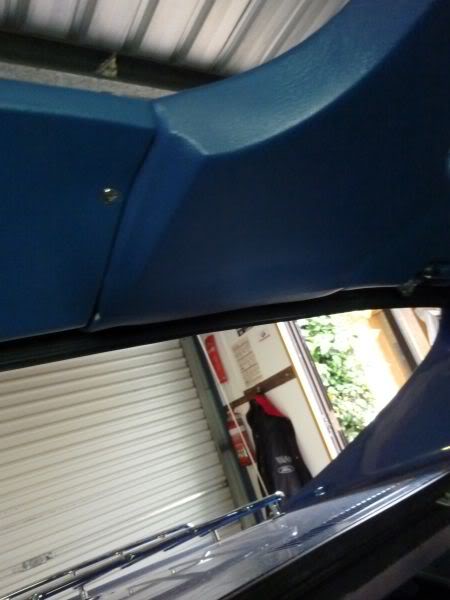
Finished of the T Top trim as well.
Contact cement and a bit of heat and it all smoothed out ok.
Mounted back in the vette.
Contact cement and a bit of heat and it all smoothed out ok.
Mounted back in the vette.
Last edited by CraigH; 04-09-2023 at 08:09 PM.
02-18-2013, 07:20 PM
#138
Melting Slicks
Thread Starter
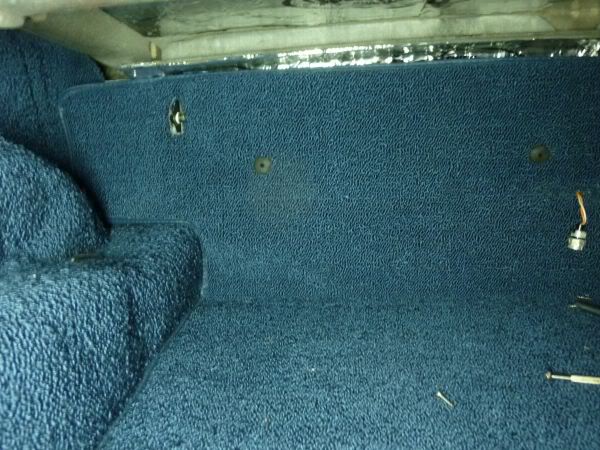
Finished off the bulkhead carpet.
About 3cm of contact glue behind the top edge of bulkhead and the same on the carpet.
Ensure you have enough carpet to go under the storage frame first.
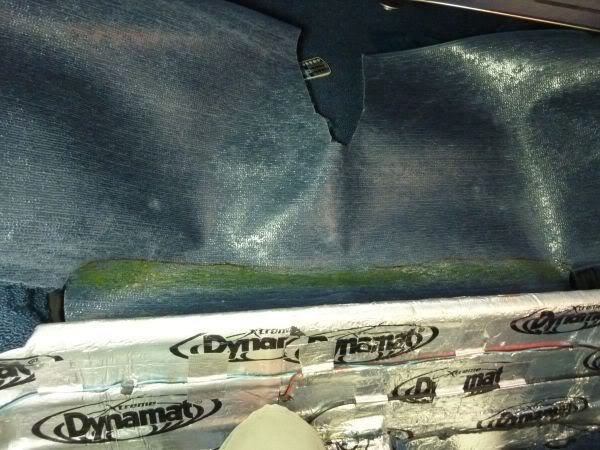
Fold it over (helps if you have 2 people)
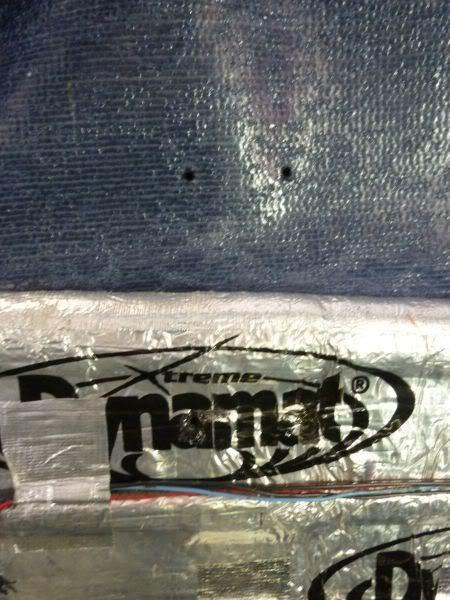
Then burn holes for the TTop hook.

Will give the double sided carpet tape a go for a while for the verticals.
About 3cm of contact glue behind the top edge of bulkhead and the same on the carpet.
Ensure you have enough carpet to go under the storage frame first.
Fold it over (helps if you have 2 people)
Then burn holes for the TTop hook.
Will give the double sided carpet tape a go for a while for the verticals.
Last edited by CraigH; 04-09-2023 at 08:07 PM.
02-18-2013, 07:21 PM
#139
Melting Slicks
Thread Starter
Finished off the header bar, sunvisors etc.
I put the bar in the sun for a few hours and it was nice any easy to move around.
Only needed to drill one new hole.
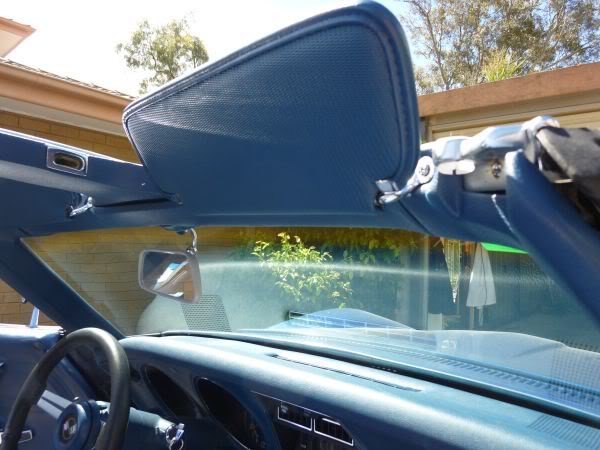
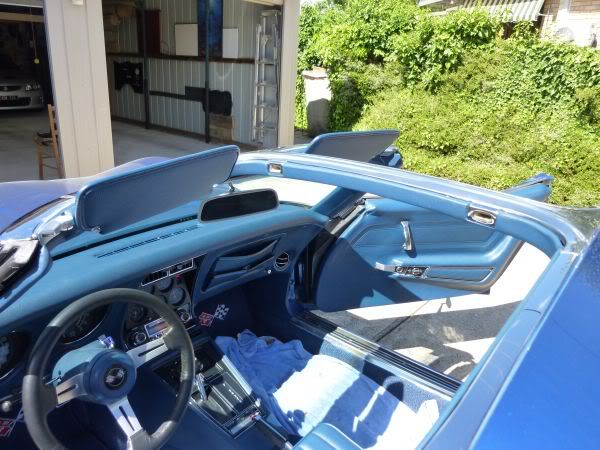
I put the bar in the sun for a few hours and it was nice any easy to move around.
Only needed to drill one new hole.
Last edited by CraigH; 04-09-2023 at 08:07 PM.
02-18-2013, 07:21 PM
#140
Melting Slicks
Thread Starter
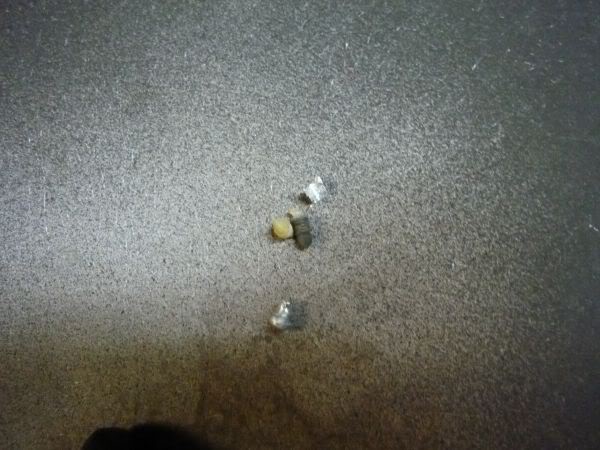
Cleaned up one of my T Tops.
If you ever wondered what rattles in your top its the old rivet ends from last time weatherstrip was changed. Drill a 1/2 hole in a corner and use some vacuum to get them out.
Took off the hardware and cleaned it up.
Repainted around the T Top matt black and the outer trim holder satin black.
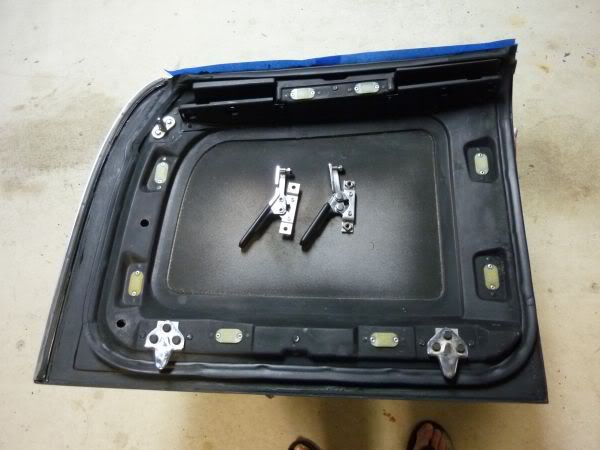
Test fitted the trim.
If you ever wondered what rattles in your top its the old rivet ends from last time weatherstrip was changed. Drill a 1/2 hole in a corner and use some vacuum to get them out.
Took off the hardware and cleaned it up.
Repainted around the T Top matt black and the outer trim holder satin black.
Test fitted the trim.
Last edited by CraigH; 04-09-2023 at 08:07 PM.
The following users liked this post:
STL Zombie Hunter (10-31-2021)