
1971 Journey
 04-28-2014, 11:57 PM
#701
Melting Slicks

Thread Starter


I am in awe of your talent and patience (neither of which I possess) and your rebuild is fantastic.
I am new to corvettes and this forum and would appreciate
I have recently purchased a 1971 C3 454 corvette for my wife which has a rebuilt engine.
I need to fit some thermo fans to it as it gets too hot when sitting in traffic.
What type of car did the thermo fans that you fitted to your C3 come out of?
I think your fan controller design is great how can I get one.
Ray
The fans are a model very similar to the SPAL ones sold everywhere but cheaper.
Got them on ebay from whites performance for US$125.
the thing about keeping a vette cool is to ensure yo have all gaps between support, radiator and hood. Any gaps and you loose efficiency.
Also fitting rubber sealing strips in the front apron to force the maximum air into the radiator itself maxes a big difference.
I have helped a couple of vette owners here with big blocks get the temp under control and it is not hard but you need to think about where would the air go at speed and sitting still.
With regard to the Thermatic Fan Controller I run a new version has been built by my friend and he will sell it going forward.
I am not allowed to actively discuss or canvass interest on the forum as I am not a sponsor however once he finishes the new version I will cover the install as part of my build thread.
Last edited by CraigH; 04-29-2014 at 05:54 AM.
 04-30-2014, 07:38 PM
#702
Melting Slicks
Thread Starter
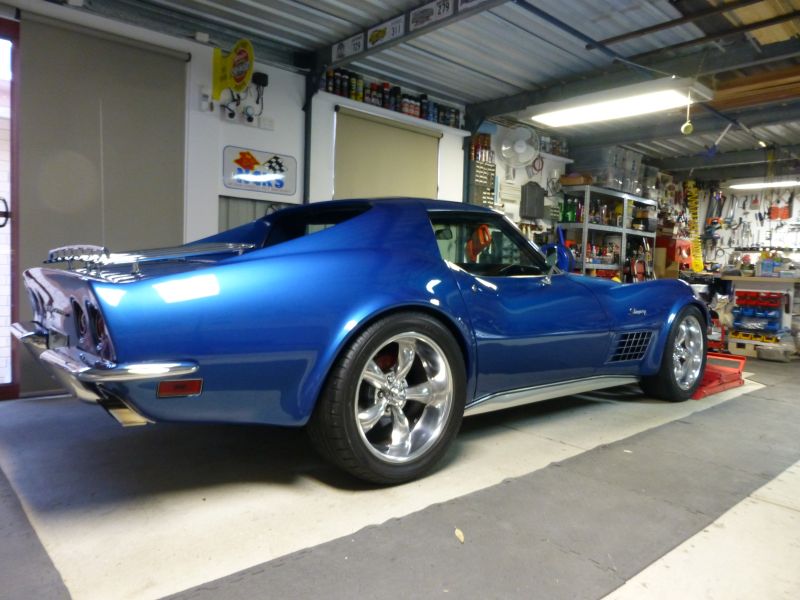
So I am revisiting the rear alignment now I have got some more time.
With a piece of aluminium running along the side of the frame and one on the hub I aligned them parrallel adjusting the inner shims.
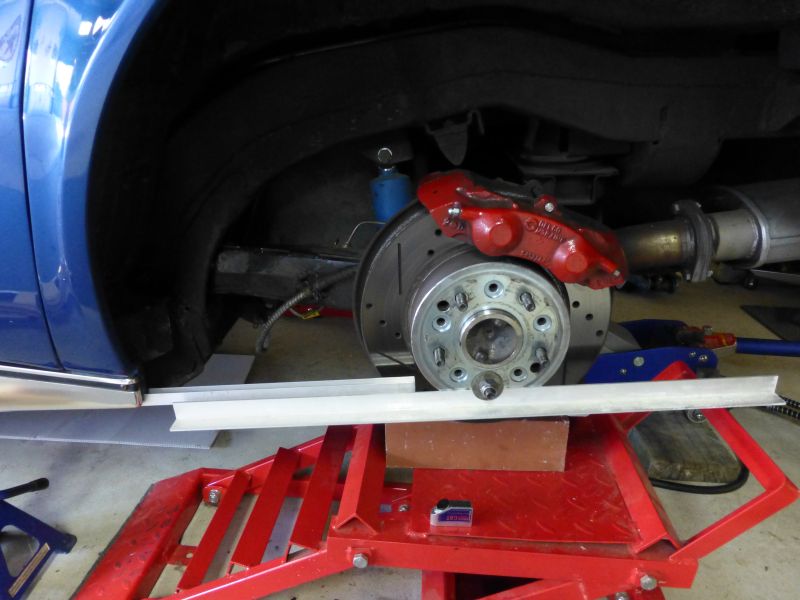
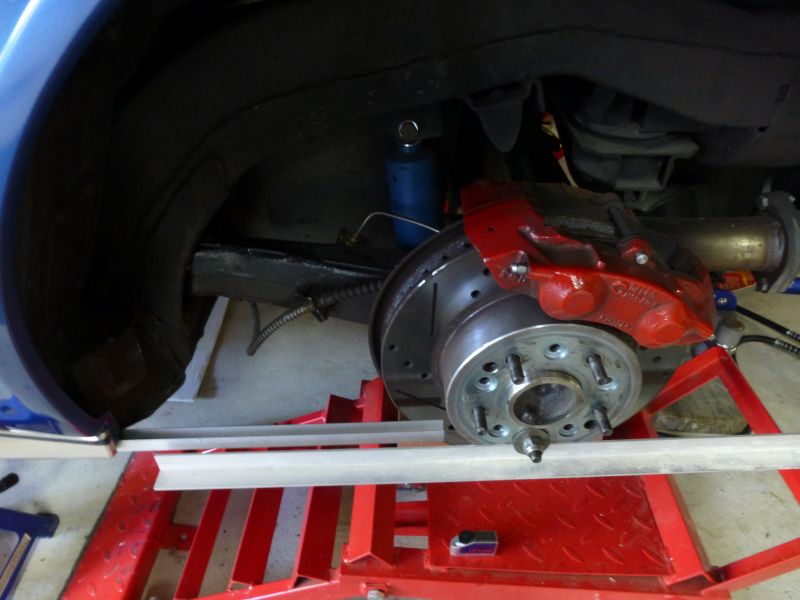
Then using a laser align tool I checked it in relation to the front tires and the beam hits in the middle of the font tire.
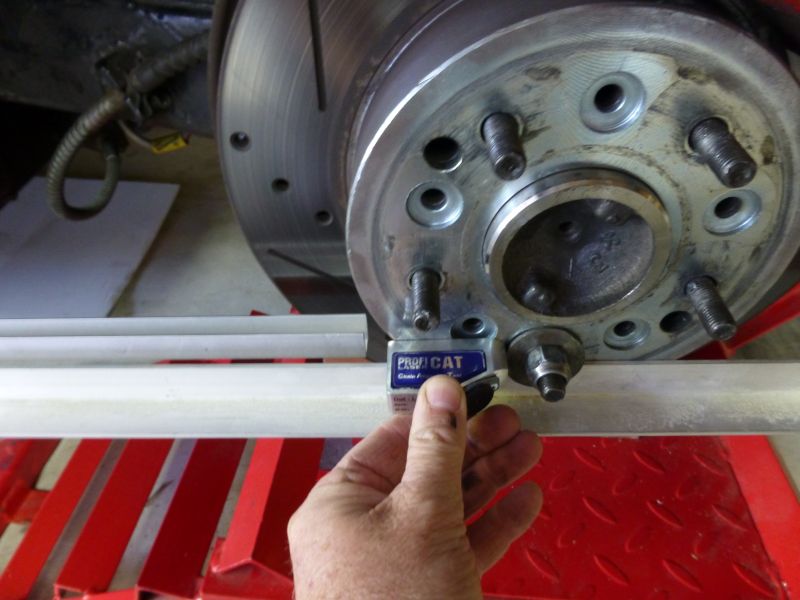
So if this is my baseline
With a piece of aluminium running along the side of the frame and one on the hub I aligned them parrallel adjusting the inner shims.
Then using a laser align tool I checked it in relation to the front tires and the beam hits in the middle of the font tire.
So if this is my baseline
Last edited by CraigH; 04-10-2023 at 05:03 AM.
05-06-2014, 05:48 AM
#703
Melting Slicks
Thread Starter
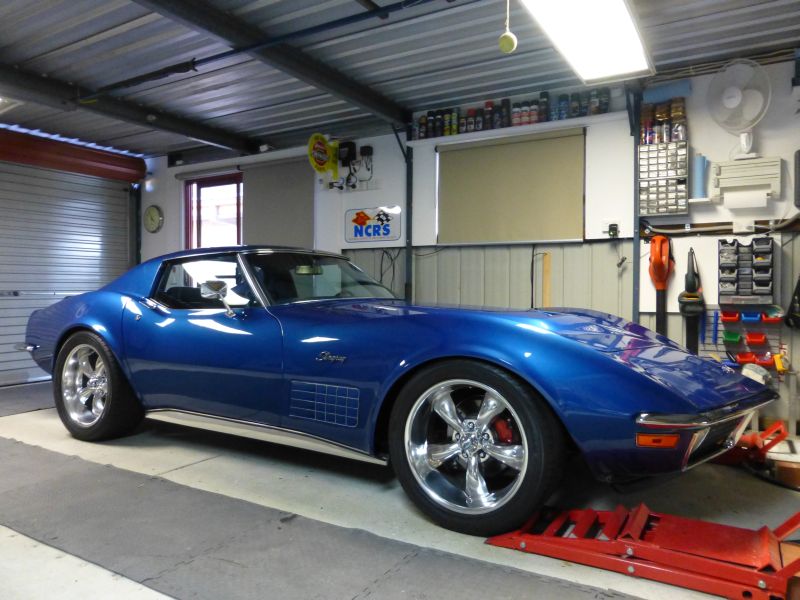
So after doing the work on the rear arm alignments I finally got to take it for a good run yesterday.
Wow what a difference it made to get the arms first aligned with the chassis then some toe in.
Still need to get it the alignment shop for proper settings but even like this its the best its been since I got it.
Was so happy with how it sat on the road and handled bumps etc that a 10 minute test turned into and hour and a half.


 11-27-2014, 08:10 AM
#706
I am redoing a 1971 vette I need help with these plz can anyone share me pictures of the following t top inside view of molding/ all molding in back of seat area / seat belt locations. / im replacing all the seat belts and trim work and the Manuela are not clear as a picture,, please help
11-27-2014, 09:23 AM
#707


Roger
11-27-2014, 05:47 PM
#710
Melting Slicks
Thread Starter
I am redoing a 1971 vette I need help with these plz can anyone share me pictures of the following t top inside view of molding/ all molding in back of seat area / seat belt locations. / im replacing all the seat belts and trim work and the Manuela are not clear as a picture,, please help
Not exactly sure what your after but this page shows the trim pieces being painted and re fitted to roof and rear of Vette.
https://www.corvetteforum.com/forums...journey-7.html
If there is a specific shot you want that I have not shown let me know what area and from what angle you want it an I can take it for you.
Craig
11-27-2014, 06:19 PM
#711
Hi Kevin
Not exactly sure what your after but this page shows the trim pieces being painted and re fitted to roof and rear of Vette.
https://www.corvetteforum.com/forums...journey-7.html
If there is a specific shot you want that I have not shown let me know what area and from what angle you want it an I can take it for you.
Craig
11-27-2014, 06:48 PM
#712
Melting Slicks
Thread Starter
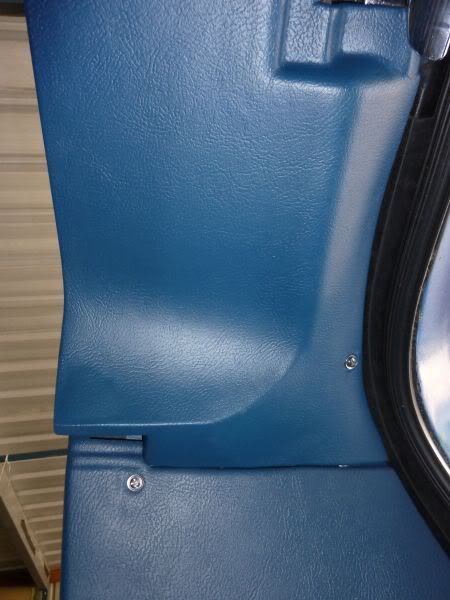
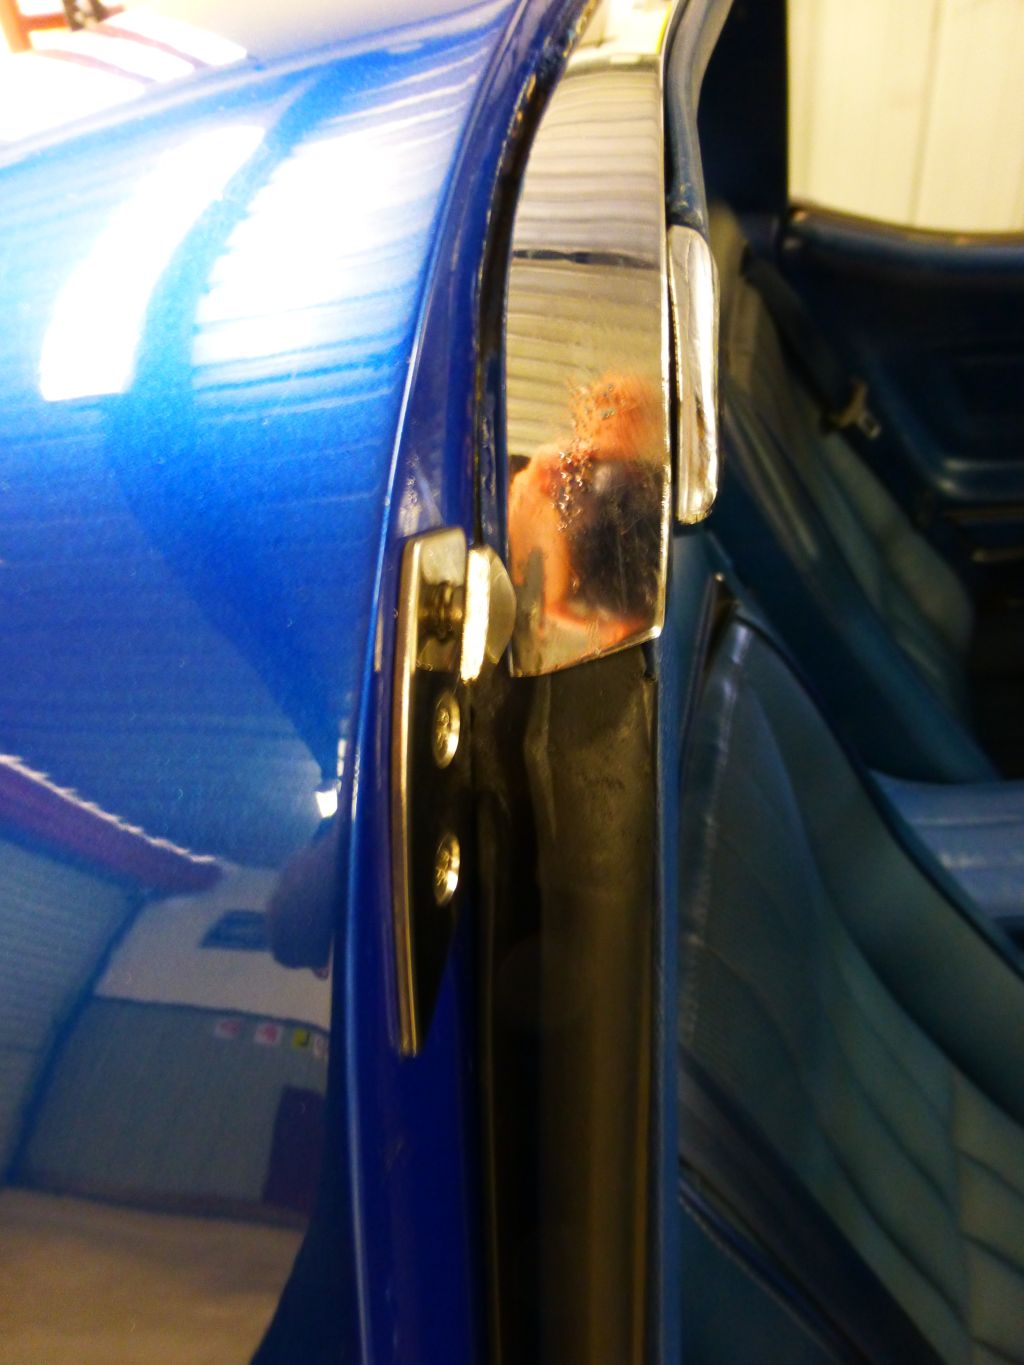
yes 3 things I need pictures of as you can see in the pictures I have I am turning a 1981 into a 1971/1969 the 2things I need help is one the 81 has dome light in center of the t top but I think in 71 its pushed to back area and 2nd thing I need pictures with is the part that is listed on ecklers corvette parts part number Part #: 29639 Roof Panel Trims, Rear, Coupe, 1969-1972 it has 2 cut outs on each I know something its to be used on it not sure why the cut out is for and 3rd is the t tops I am using 71 type not 81 glass type so the part of the t top that has a needle type on the end that goes into the cab part I like to know how yours works maybe I need to change the base of mine,,if you like you can pm me a email I will send you pictures what I need see how it works..
Part #29639 if the two panels that sit between the centre T-Top trim and the side B pillar trims.
Its the panels hanging nearest ....
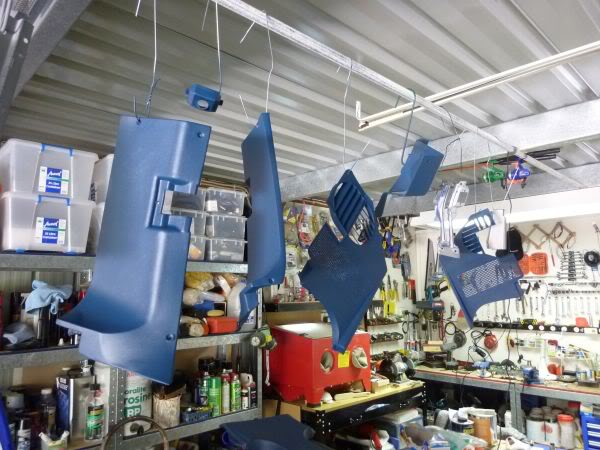
This picture shows looking back at one side where it touches centre trim..
The cutouts are for the removable rear glass retainer clamps
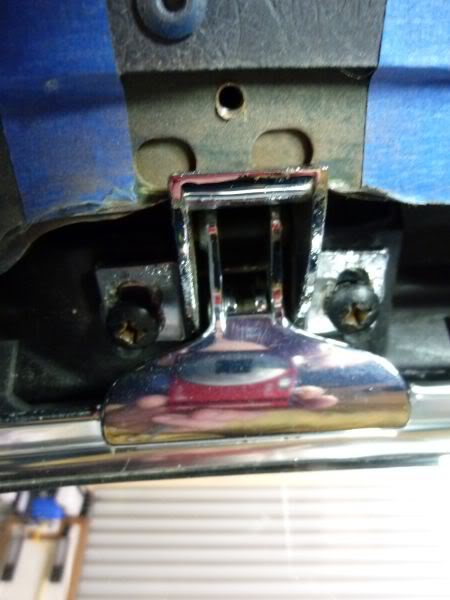
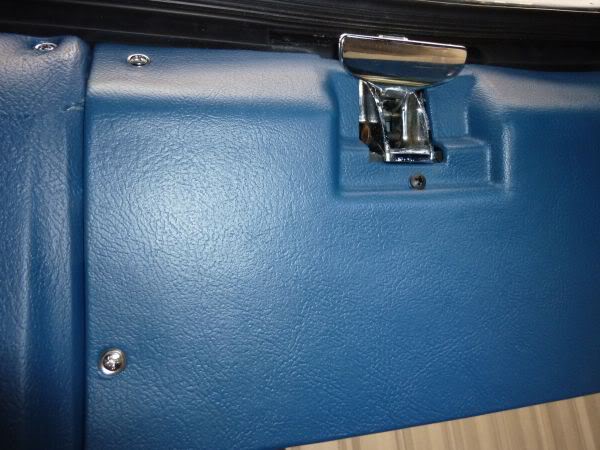
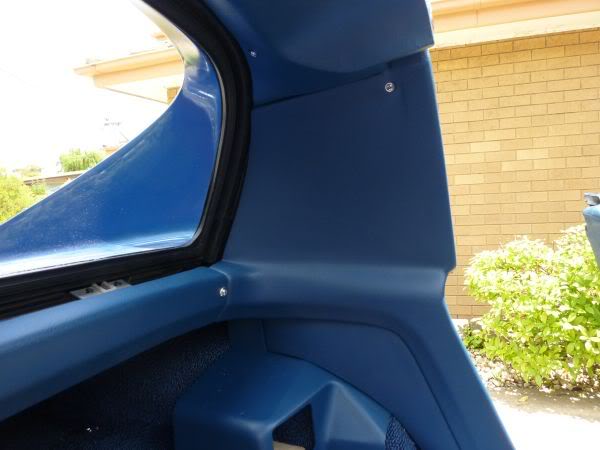
Hope that is clearer.
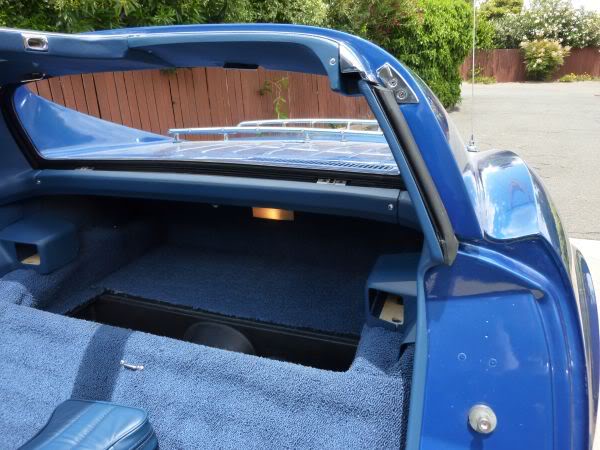
There is no dome light on earlier vettes, rather the light is on the rear bulkhead as can be seen in the photo above
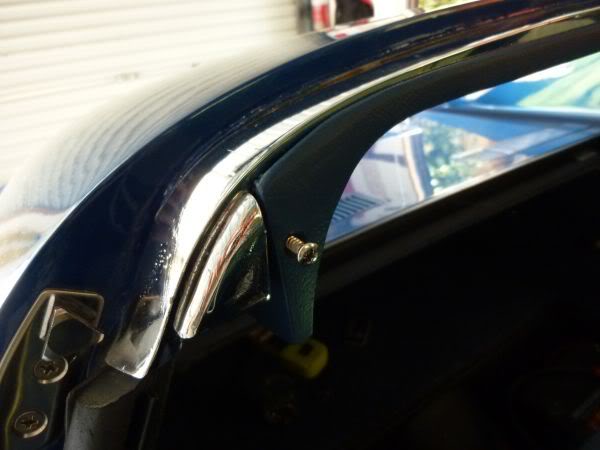
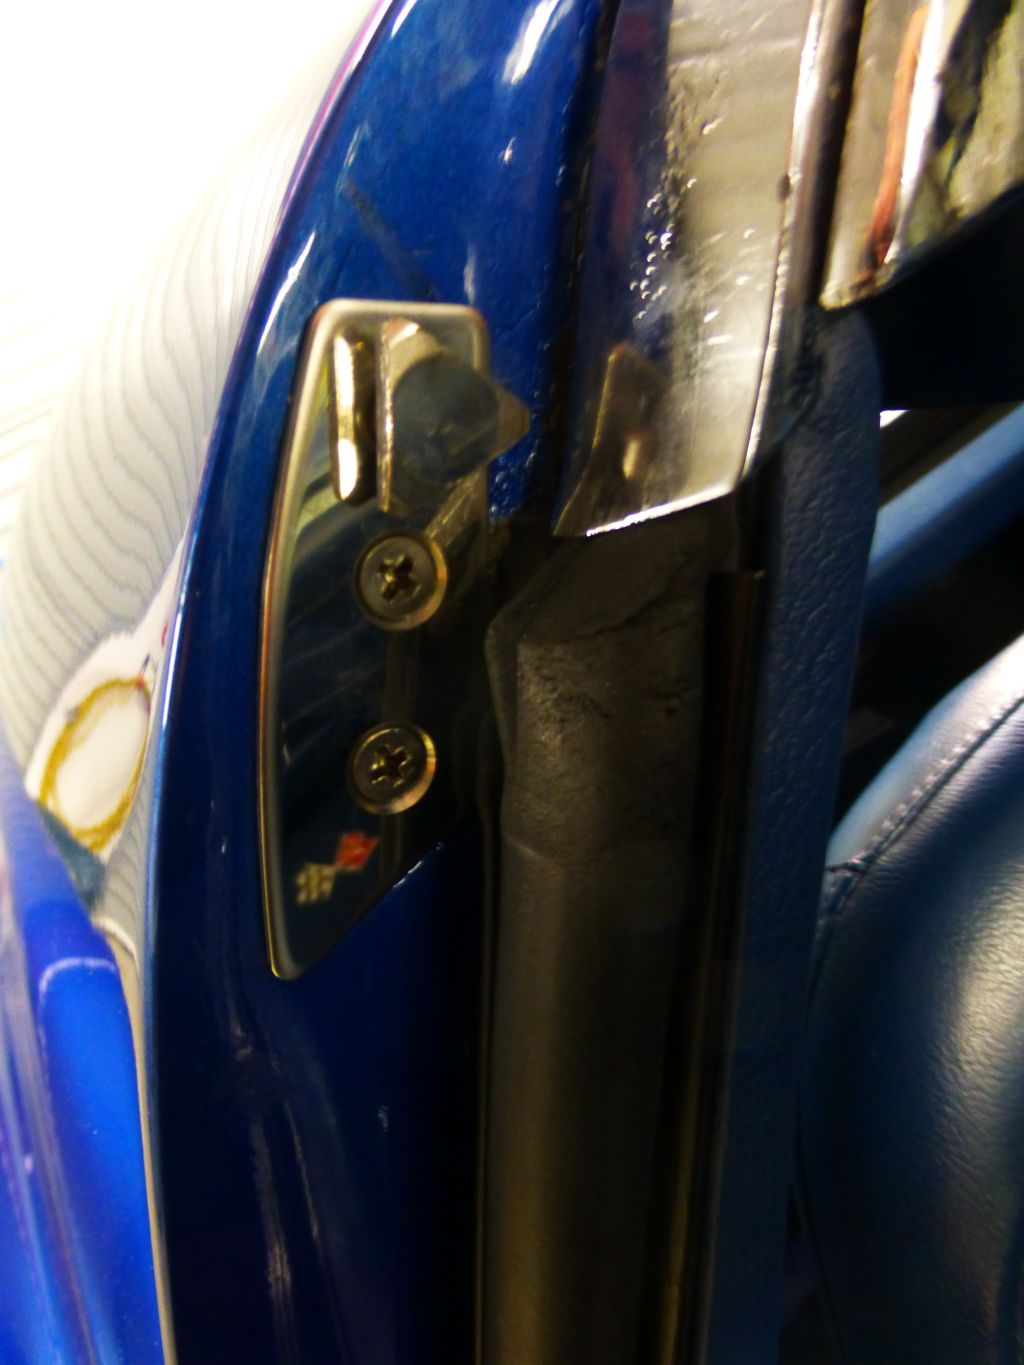
As for the T-Top latch, as you say yours is the newer pin type, earlier ones use this style
Last edited by CraigH; 04-10-2023 at 11:05 PM.
11-27-2014, 10:26 PM
#713
Hi Kevin
Part #29639 if the two panels that sit between the centre T-Top trim and the side B pillar trims.
Its the panels hanging nearest ....

This picture shows looking back at one side where it touches centre trim..

The cutouts are for the removable rear glass retainer clamps


Hope that is clearer.
There is no dome light on earlier vettes, rather the light is on the rear bulkhead as can be seen in the photo above
As for the T-Top latch, as you say yours is the newer pin type, earlier ones use this style

Part #29639 if the two panels that sit between the centre T-Top trim and the side B pillar trims.
Its the panels hanging nearest ....
This picture shows looking back at one side where it touches centre trim..
The cutouts are for the removable rear glass retainer clamps
Hope that is clearer.
There is no dome light on earlier vettes, rather the light is on the rear bulkhead as can be seen in the photo above
As for the T-Top latch, as you say yours is the newer pin type, earlier ones use this style
11-28-2014, 08:41 PM
#714
Melting Slicks
Thread Starter
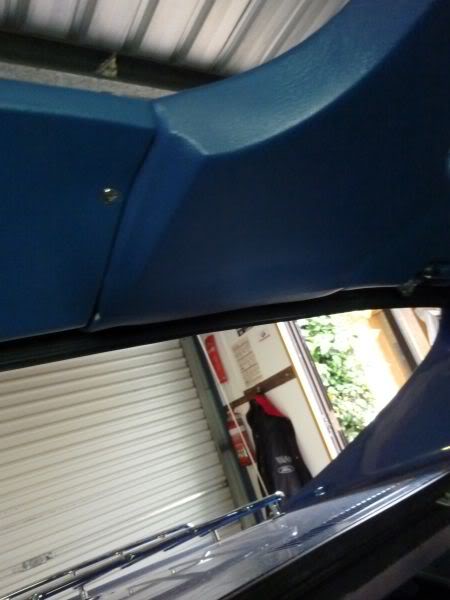
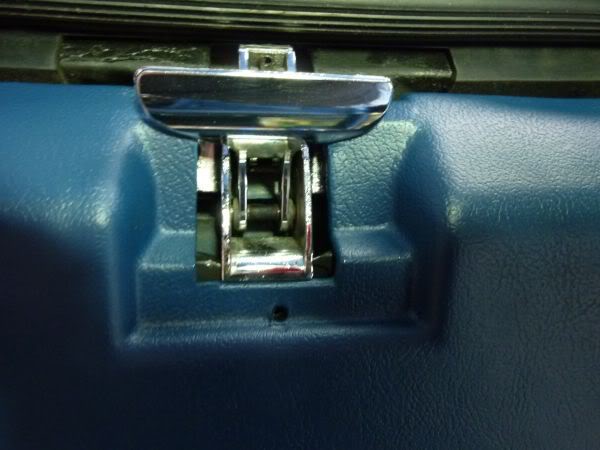
I am not sure if you need to swap back to the early typr of locking pins, as long as the tops and teh B pillar match you should be ok.
Here is the 71 setup.
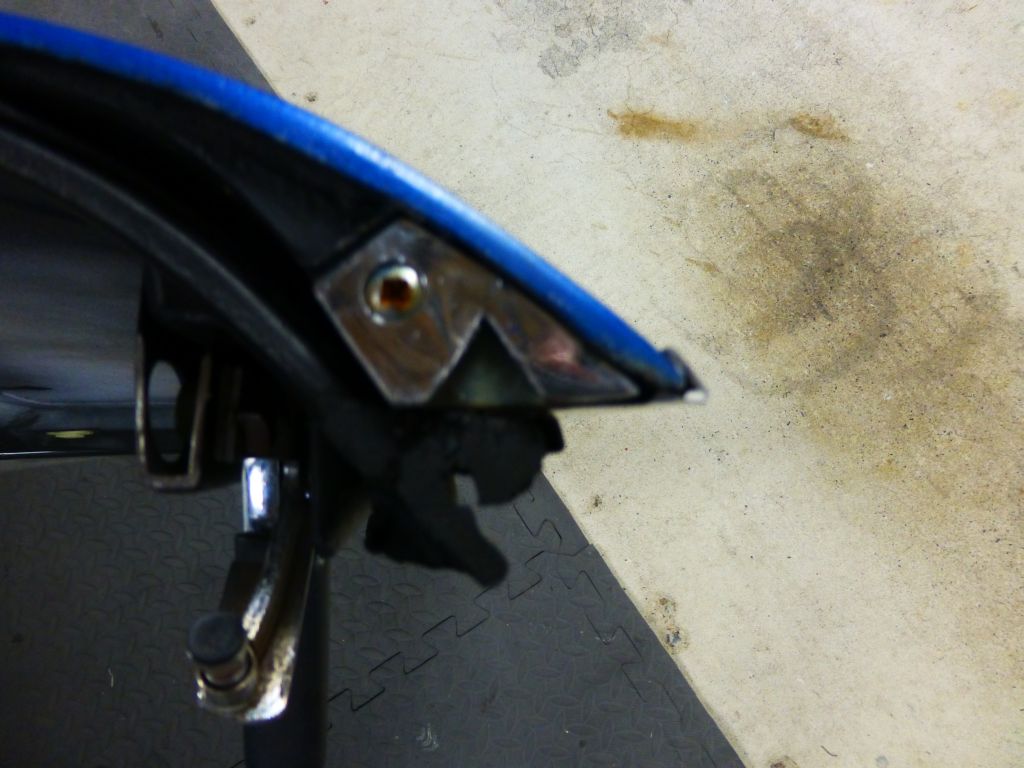
Here is the 71 setup.
Last edited by CraigH; 04-10-2023 at 05:02 AM.
11-28-2014, 11:35 PM
#715


 11-29-2014, 12:55 AM
#716
Melting Slicks
Thread Starter
May be on the other side of the world but always happy to help out where I can.
A photo can often help where 100's of words often can not.
I can assure you I am always looking through the great photos others have posted for each job I undertake.
Good luck with the project.
Craig
11-29-2014, 01:08 AM
#717
Glad the pictures cleared it up for you Kevin.
May be on the other side of the world but always happy to help out where I can.
A photo can often help where 100's of words often can not.
I can assure you I am always looking through the great photos others have posted for each job I undertake.
Good luck with the project.
Craig
May be on the other side of the world but always happy to help out where I can.
A photo can often help where 100's of words often can not.
I can assure you I am always looking through the great photos others have posted for each job I undertake.
Good luck with the project.
Craig
12-29-2014, 05:58 PM
#718
Melting Slicks
Thread Starter
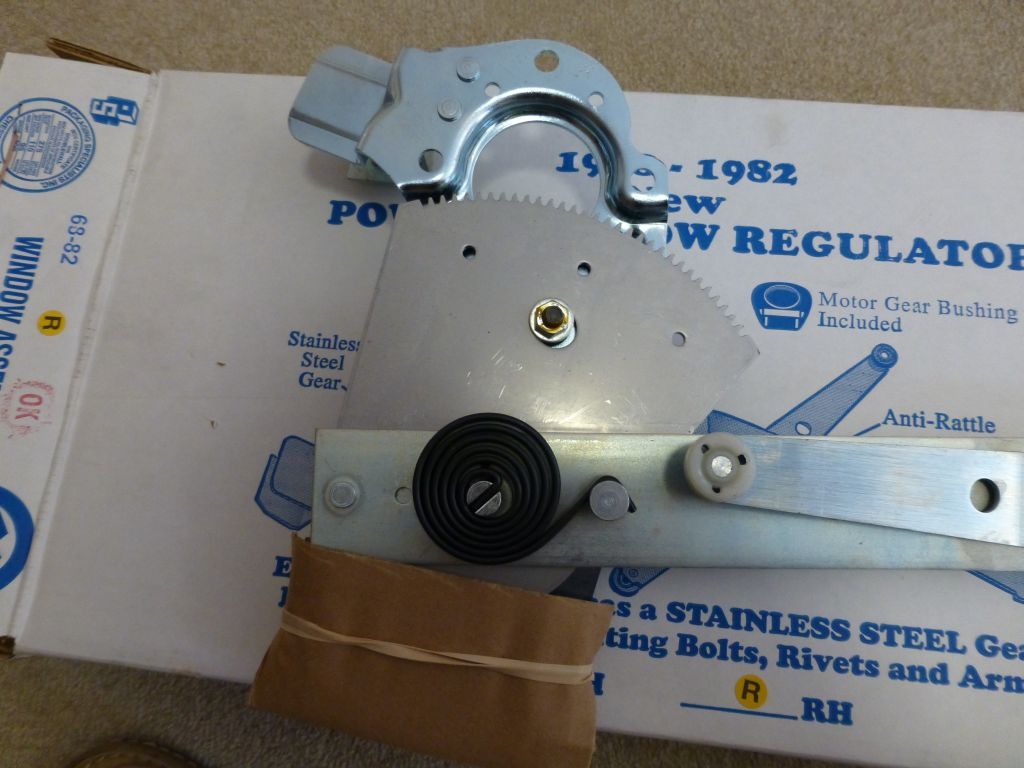
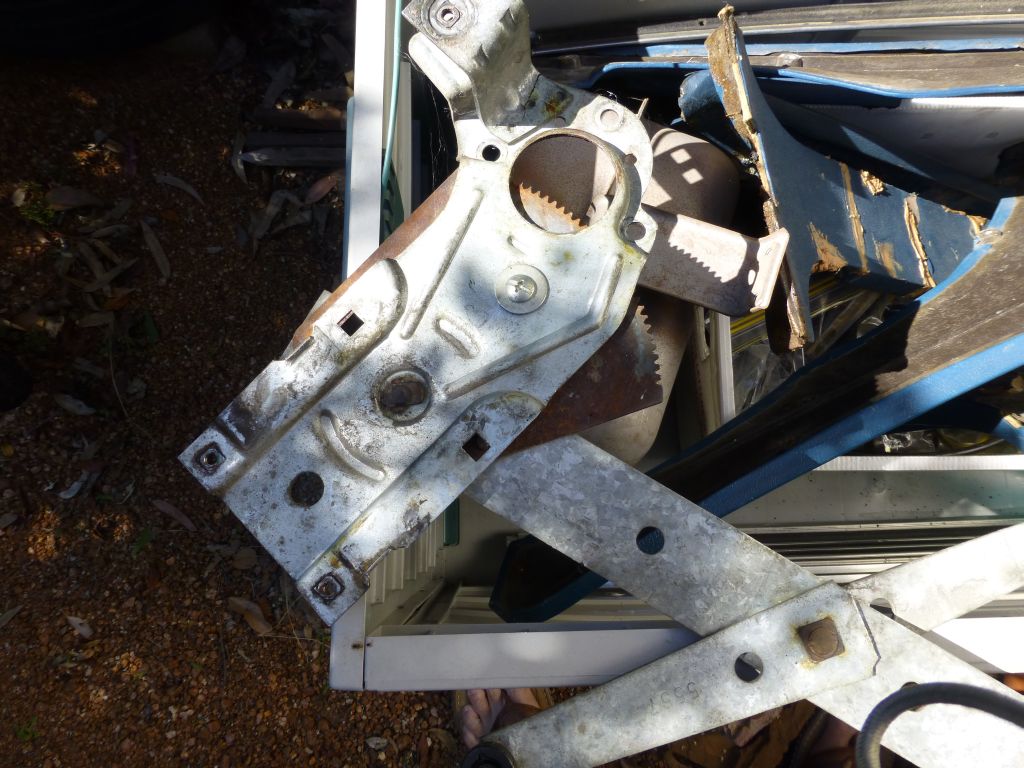
GPGG70 pointed out that I did not show how to lock the window regulator mechanism before removing the motor - on page 29
Page 29 - September 2012
I removed the entire mechanism as one from the door
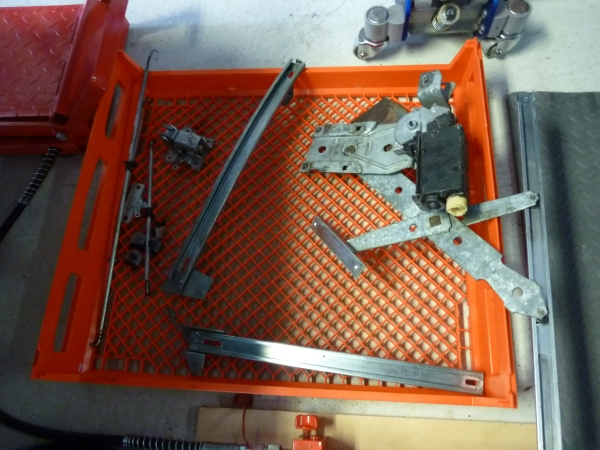
You must then put a bolt through the safety hole to lock the mechanism before removing the motor.
Here are some photos of a new regulator from Willcox Corvette (That I need to install in my other door) and my old one showing where the bolt goes.
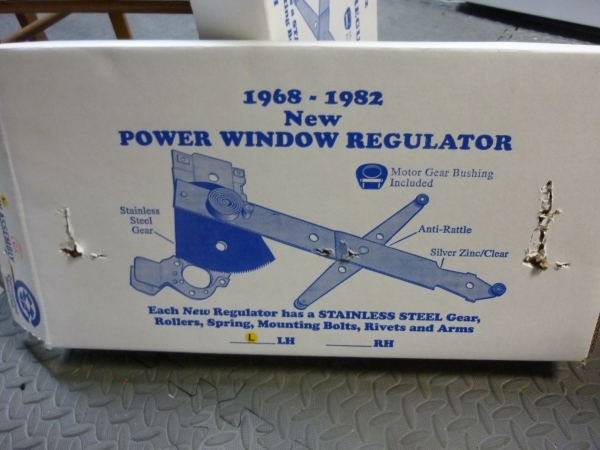

Page 29 - September 2012
I removed the entire mechanism as one from the door
You must then put a bolt through the safety hole to lock the mechanism before removing the motor.
Here are some photos of a new regulator from Willcox Corvette (That I need to install in my other door) and my old one showing where the bolt goes.
Last edited by CraigH; 04-10-2023 at 05:02 AM.
01-16-2015, 07:08 PM
#719
Melting Slicks
Thread Starter
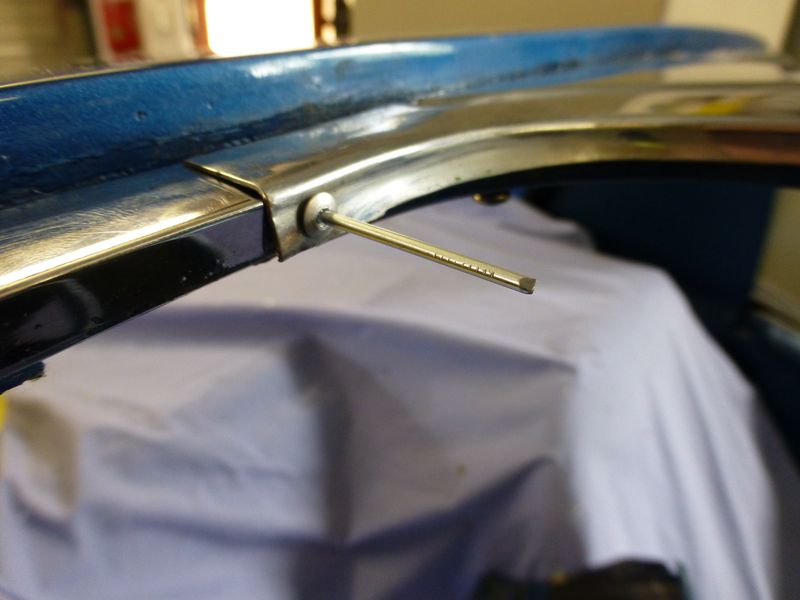
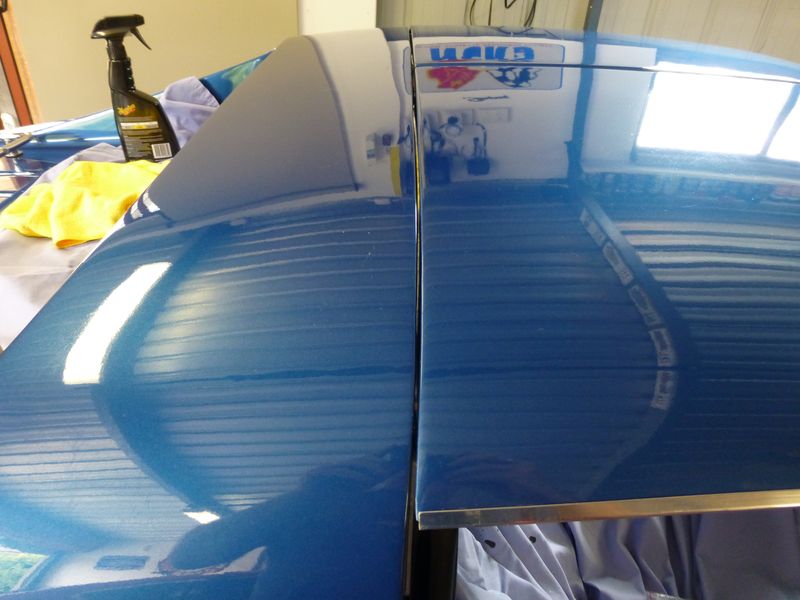
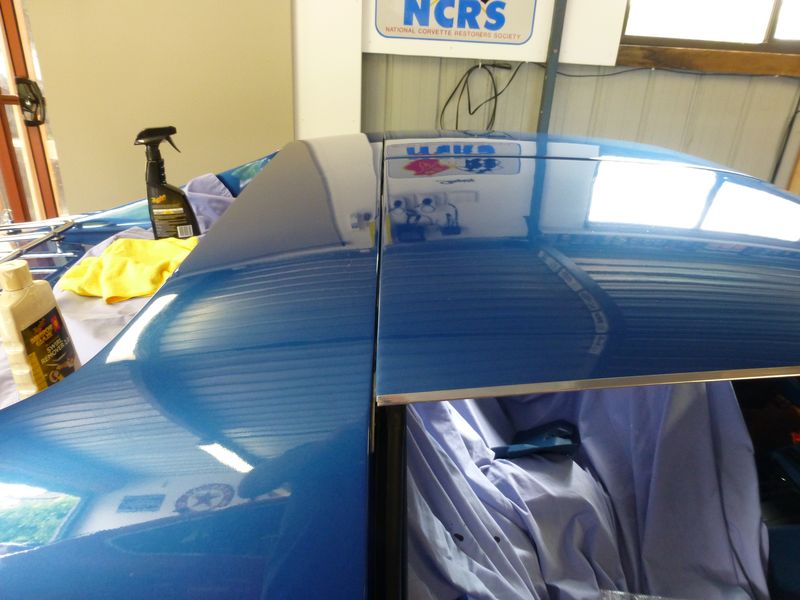
I have always had the passenger t-Top that sat out a bit on its edge, no matter how I seemed to adjust it. (Turns out the fiberglass on the curve has warped a bit over 40 years but...)
So I decided to see if could make the best of its fit.
Also behind the chrome and stainless rear halo trim was 40 years of calking compounds what went up to the top of the trim pieces leaving no channels for water run off.
So I removed the side halo trim side pieces by drilling out the rivets, digging out the caulking etc. Then I found some high spots in the glass underneath so sanded them down and repainted the surface.
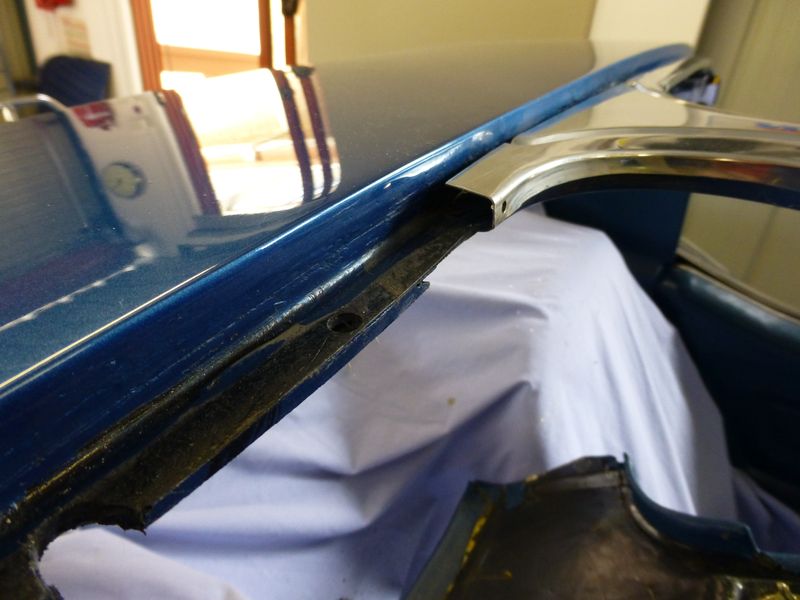

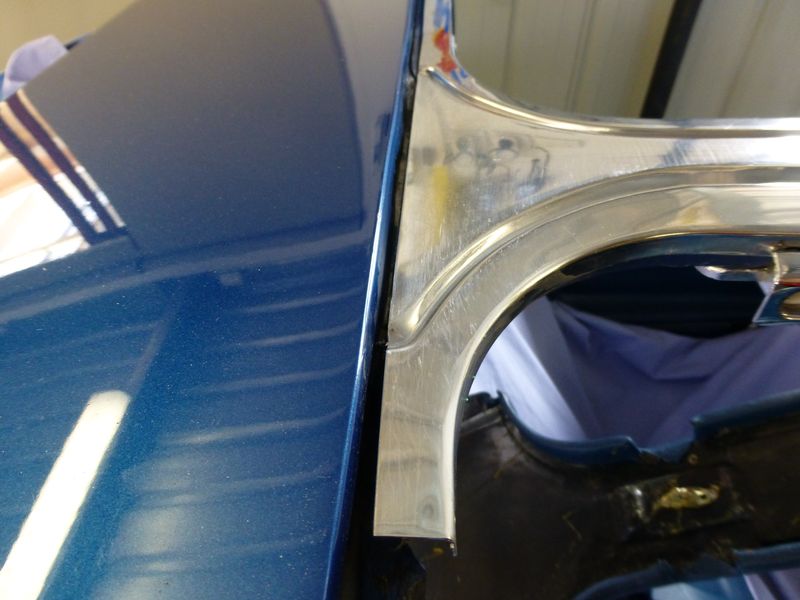
Cleaned up the side Halo drip trims
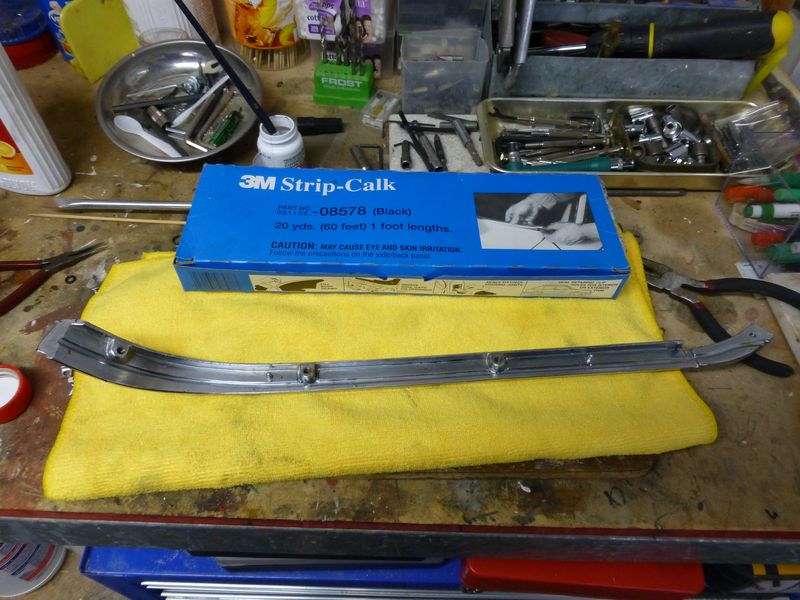
Added 3M caulking stips to the channels that are on the bottom of the trims
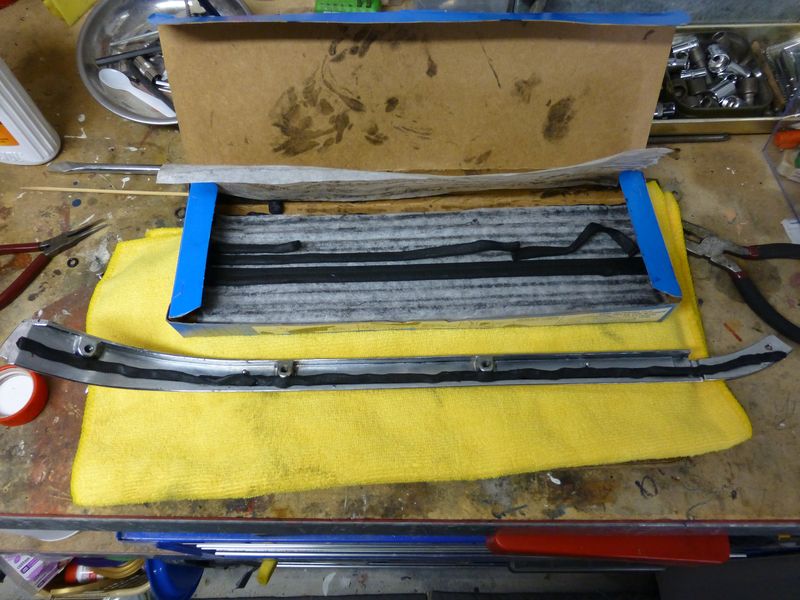
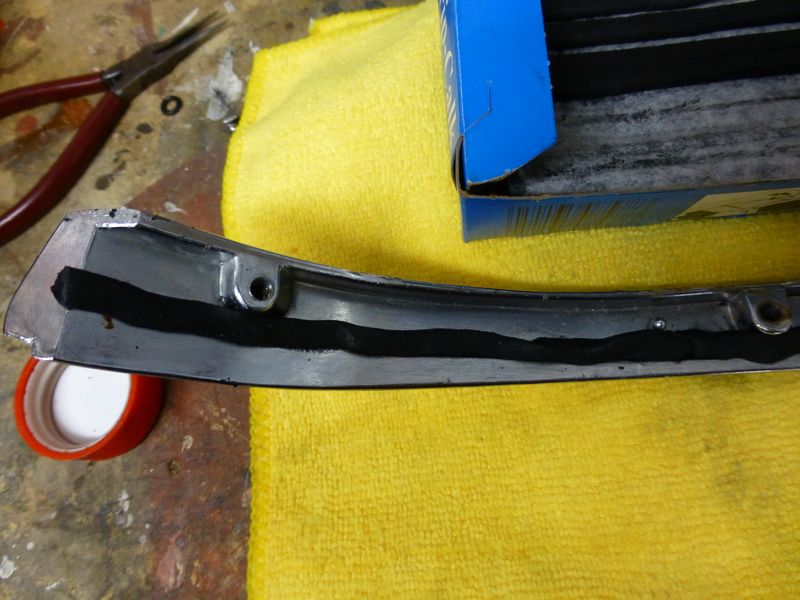
Refitted the side trims and tightened them down and riveted them back to the centre trim.

I also added a strip of windscreen sealant along the back edges of the trims to ensure no leaks, not correct I know but its low and allows the channels to flow while still keeping the vette as water tight as possible :-)
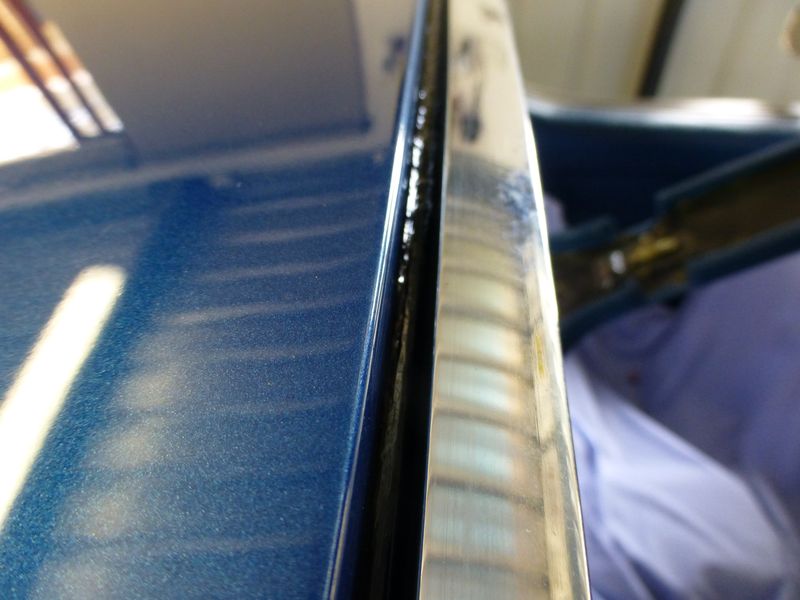
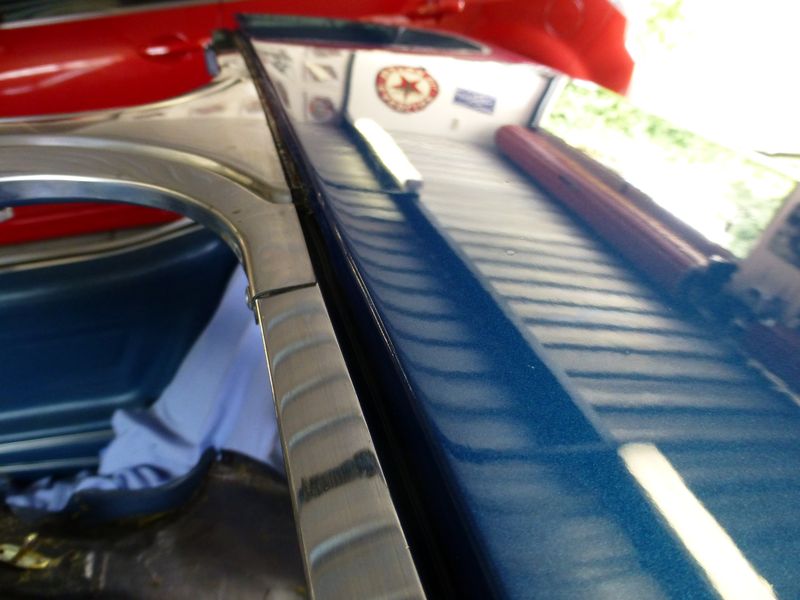
Adjusted the T-Tops to fit as straight as i could, and in fact it now sits so close on the passenger side, just a little warping of the last inches of the top, but I am fairly happy with it now
So I decided to see if could make the best of its fit.
Also behind the chrome and stainless rear halo trim was 40 years of calking compounds what went up to the top of the trim pieces leaving no channels for water run off.
So I removed the side halo trim side pieces by drilling out the rivets, digging out the caulking etc. Then I found some high spots in the glass underneath so sanded them down and repainted the surface.
Cleaned up the side Halo drip trims
Added 3M caulking stips to the channels that are on the bottom of the trims
Refitted the side trims and tightened them down and riveted them back to the centre trim.
I also added a strip of windscreen sealant along the back edges of the trims to ensure no leaks, not correct I know but its low and allows the channels to flow while still keeping the vette as water tight as possible :-)
Adjusted the T-Tops to fit as straight as i could, and in fact it now sits so close on the passenger side, just a little warping of the last inches of the top, but I am fairly happy with it now
Last edited by CraigH; 04-10-2023 at 05:02 AM.
02-01-2015, 10:59 PM
#720
Old Fart Pilot

Craig,
Just got done reading the whole thread. You do great work and I've bookmarked and subscribed to the thread to ensure I don't miss any updates. I'm still disassembling my '71 for a body off resto (my first ever) and I know I'll be referring to your posts for help in the future.
Happy Vette'ing,
Paul
Just got done reading the whole thread. You do great work and I've bookmarked and subscribed to the thread to ensure I don't miss any updates. I'm still disassembling my '71 for a body off resto (my first ever) and I know I'll be referring to your posts for help in the future.
Happy Vette'ing,
Paul