1971 Journey


 10-23-2013, 09:16 PM
#642
Melting Slicks

Thread Starter

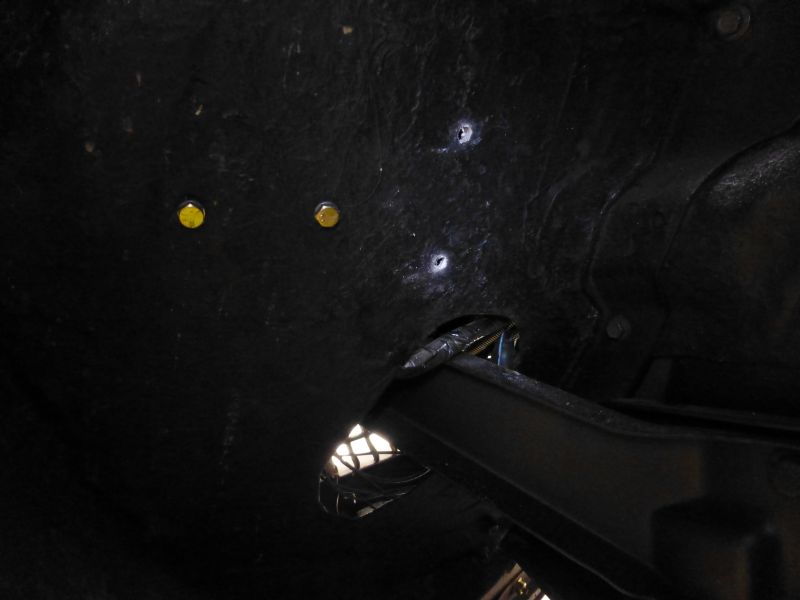
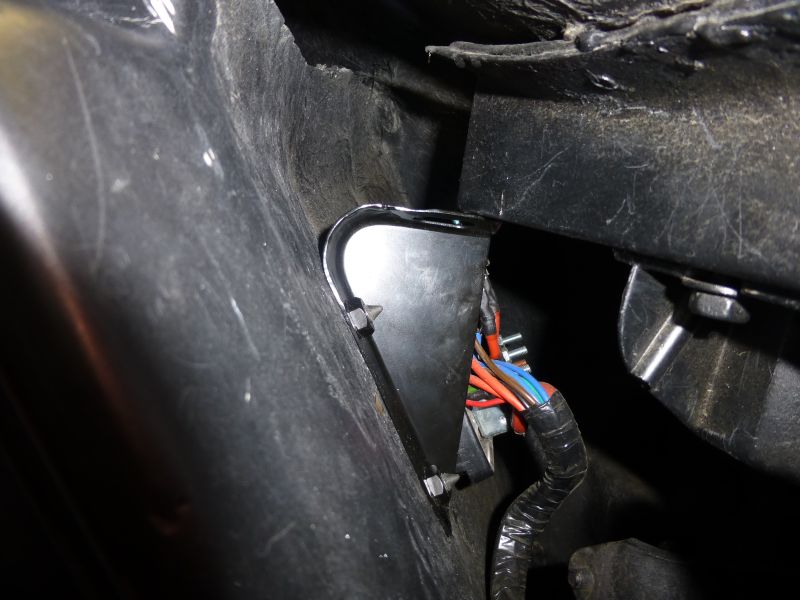
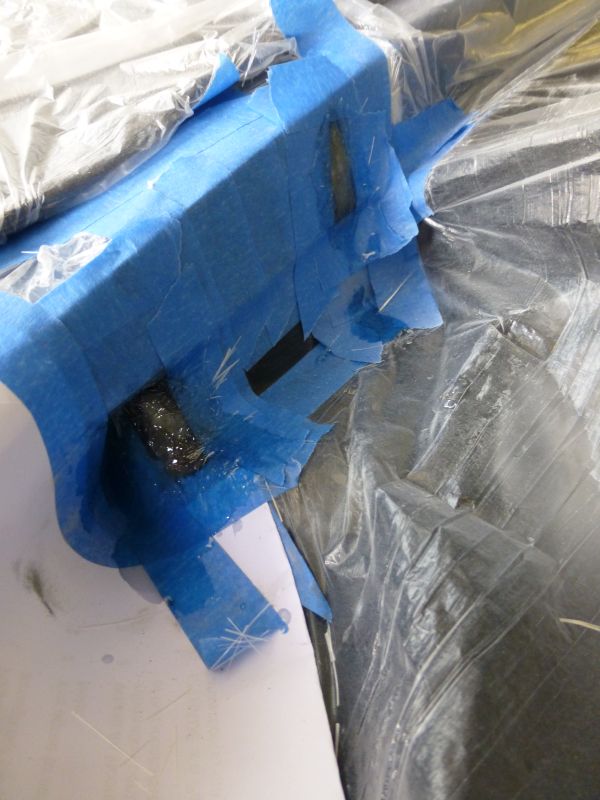
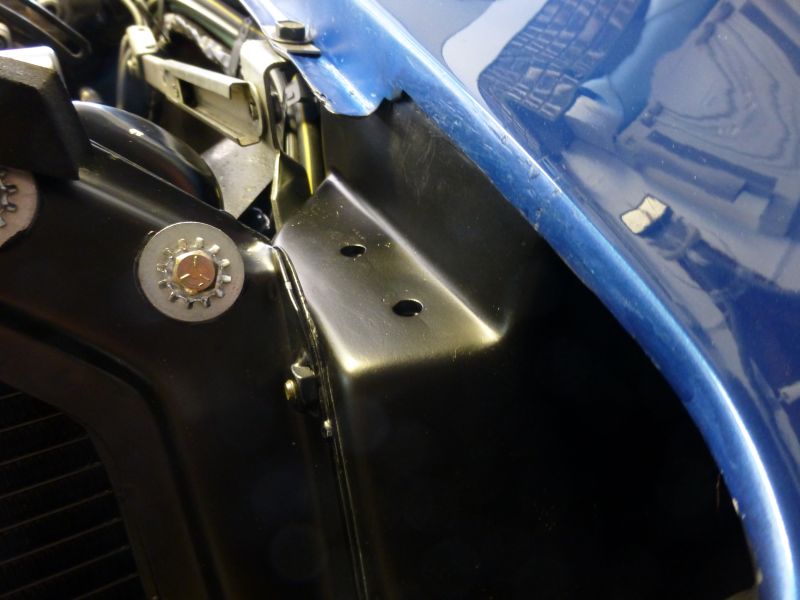
While I had the hood off it was a good time to fit the missing side support backet from the nose.
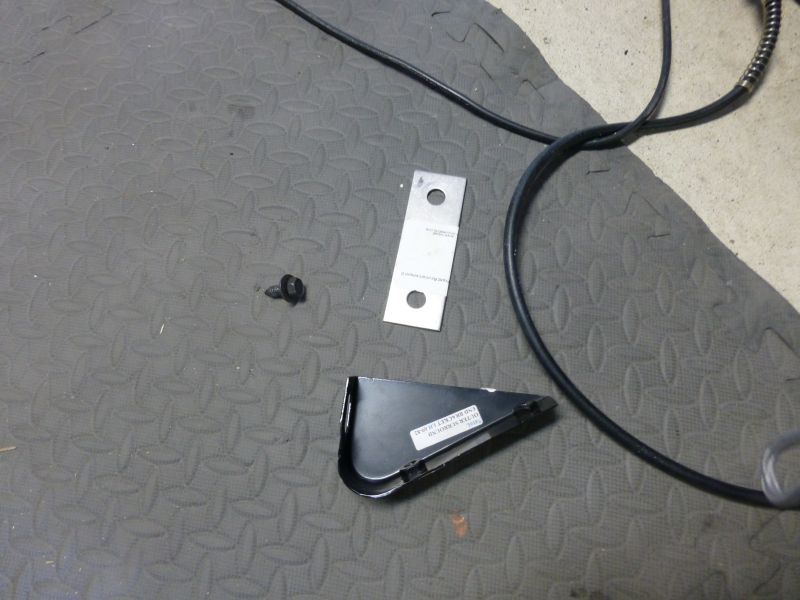
The front passenger corver had been repaired before and the inner guard is not 100% correct (have modified some of it previously to correct issues.)
I store my extra electrical fuses etc up there but enough room exists for the bracket.
Measured up, drilled and test fitted bracket so it was firm against the metal support in the nose.
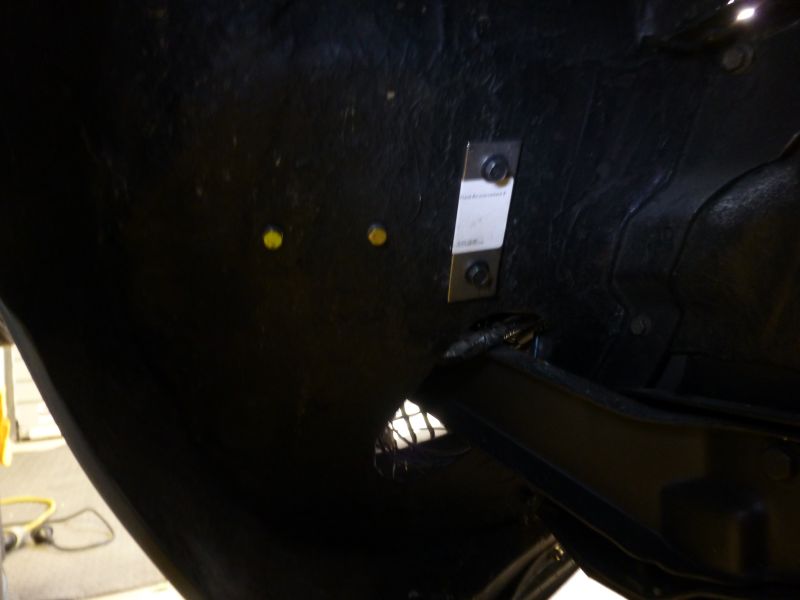
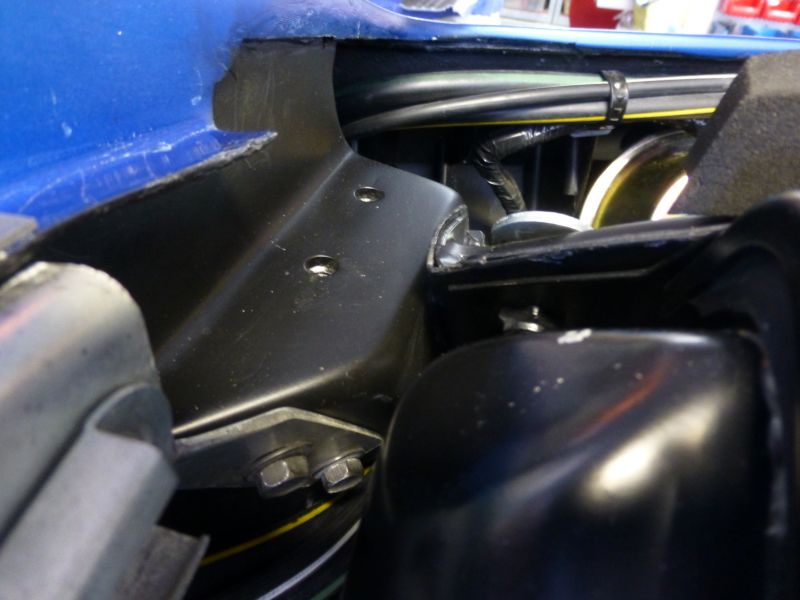
Refinished bracket and final fit
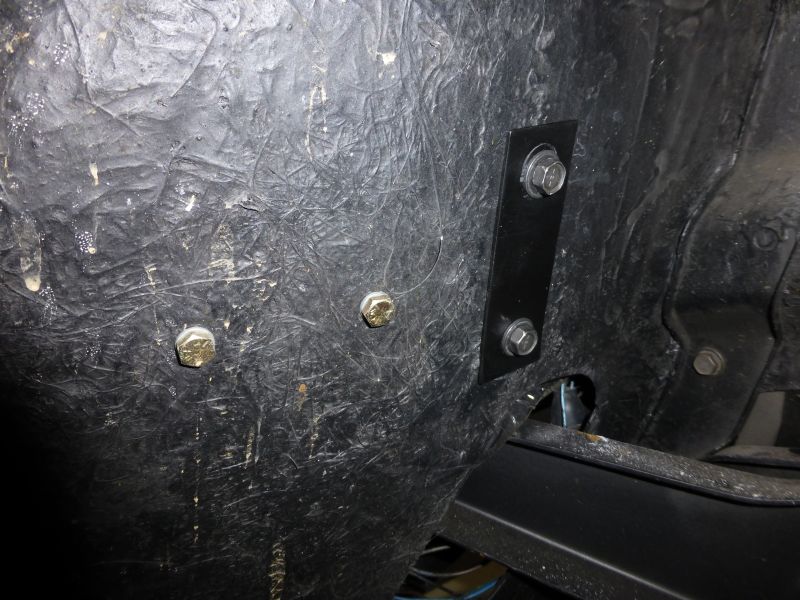
Now I can shim up the nose if needed to gain a better hood fit.
The front passenger corver had been repaired before and the inner guard is not 100% correct (have modified some of it previously to correct issues.)
I store my extra electrical fuses etc up there but enough room exists for the bracket.
Measured up, drilled and test fitted bracket so it was firm against the metal support in the nose.
Refinished bracket and final fit
Now I can shim up the nose if needed to gain a better hood fit.
Last edited by CraigH; 04-10-2023 at 04:54 AM.
11-15-2013, 11:33 PM
#643
Melting Slicks
Thread Starter
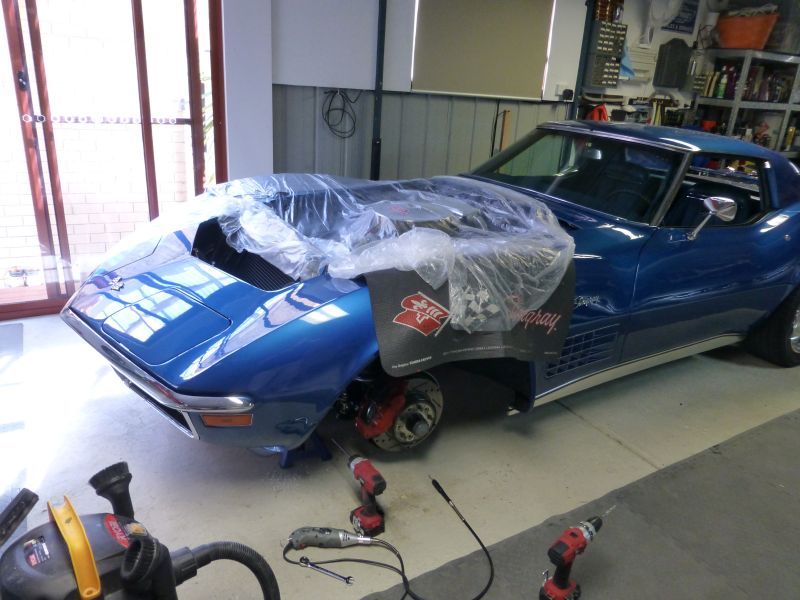
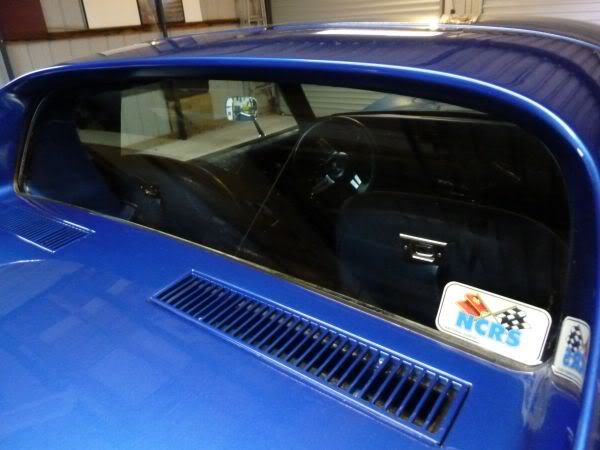
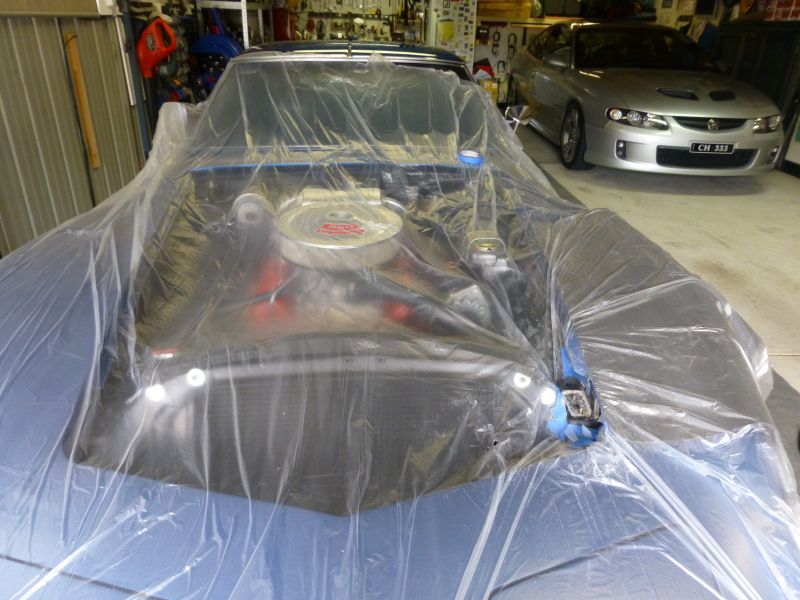
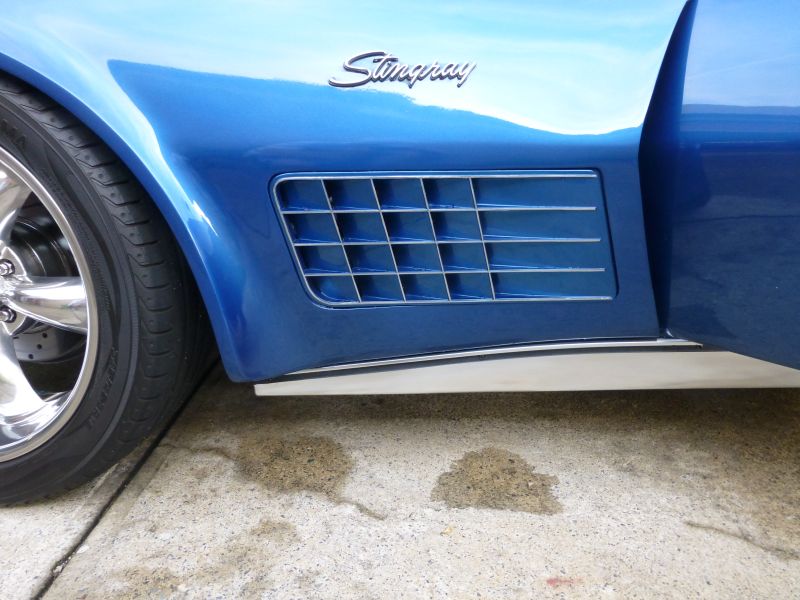
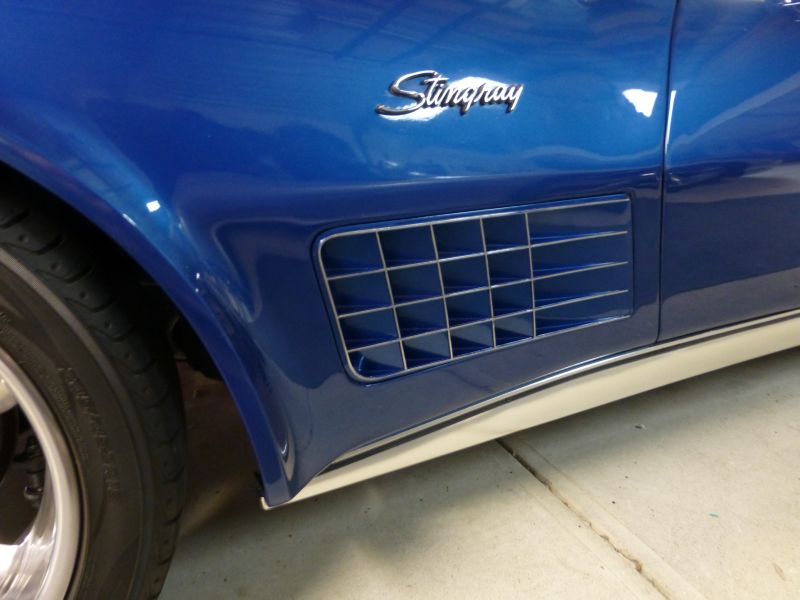
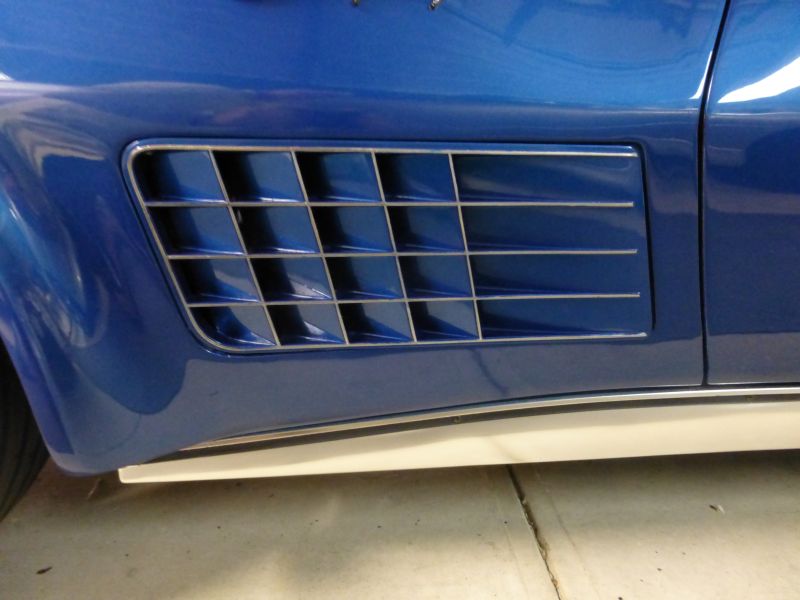
The new hood is at the painters so I needed to prepare the Egg Crate vents for a repaint as well as they were pealing in a few spots.
Some citus based stripper and all done.
Very quick

Some citus based stripper and all done.
Very quick
Last edited by CraigH; 04-10-2023 at 04:54 AM.
11-20-2013, 11:16 PM
#644
Melting Slicks
Thread Starter
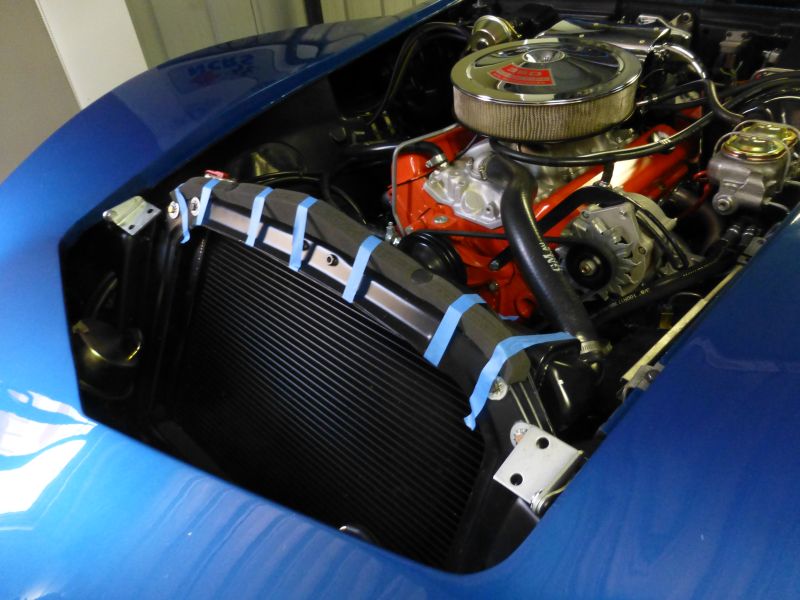
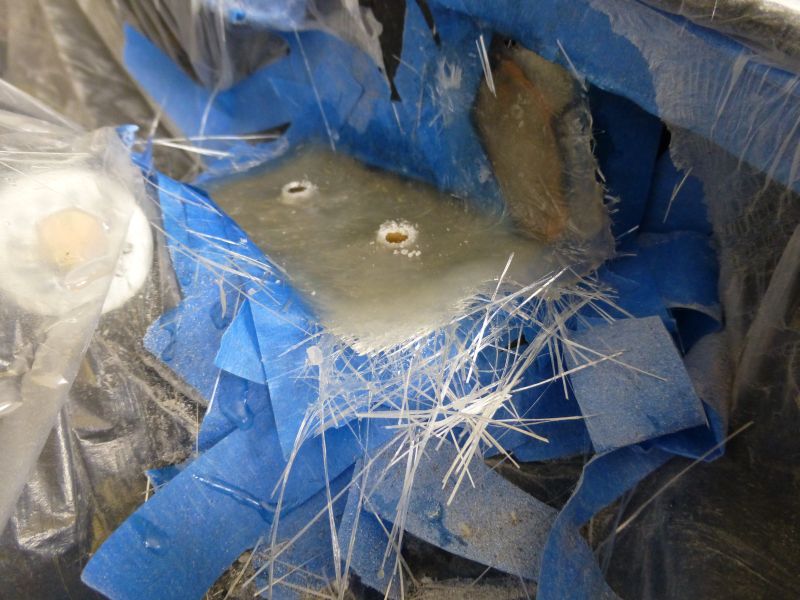
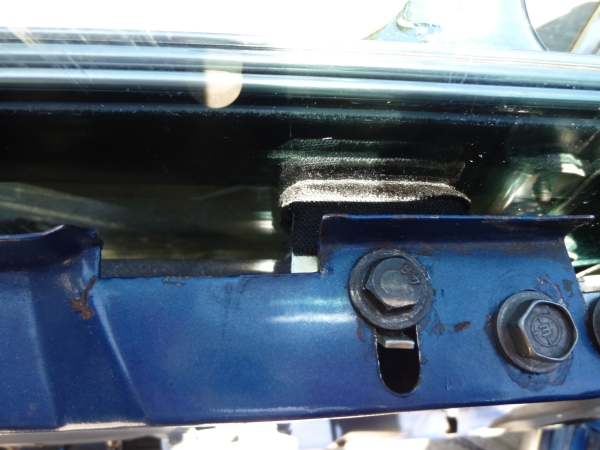
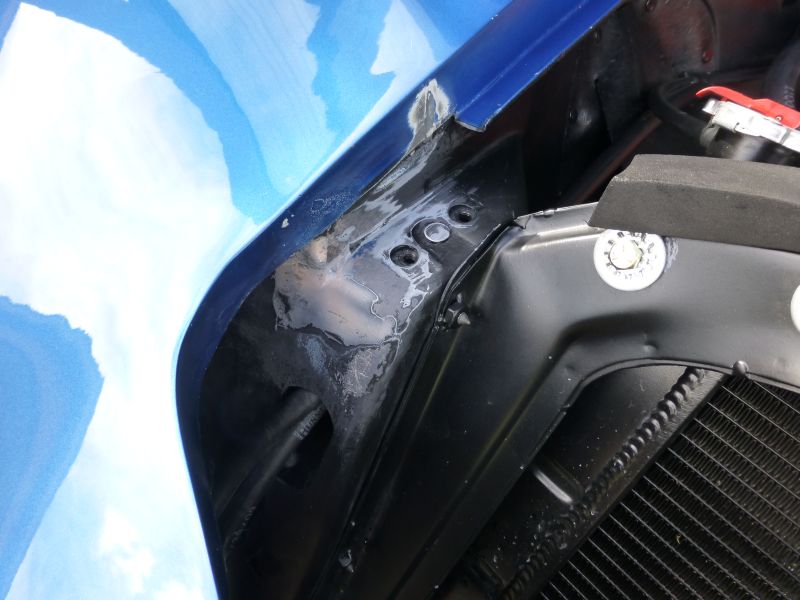
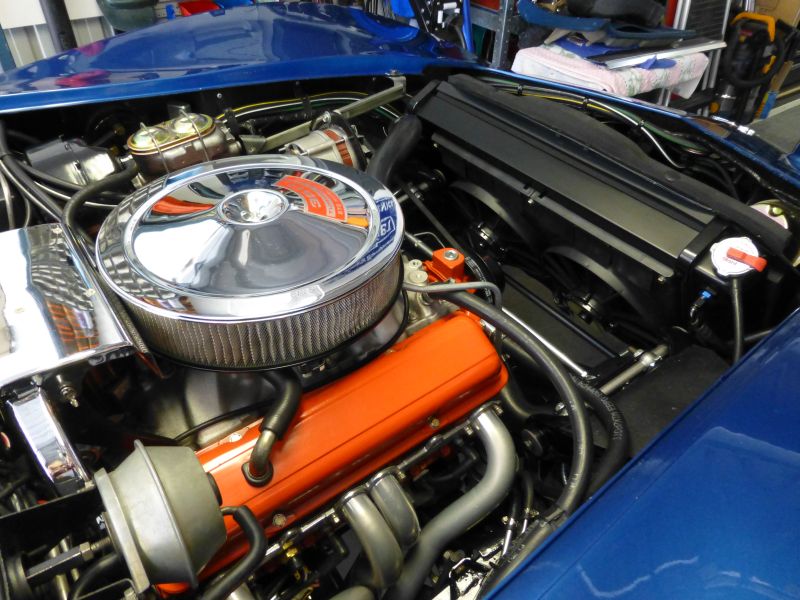
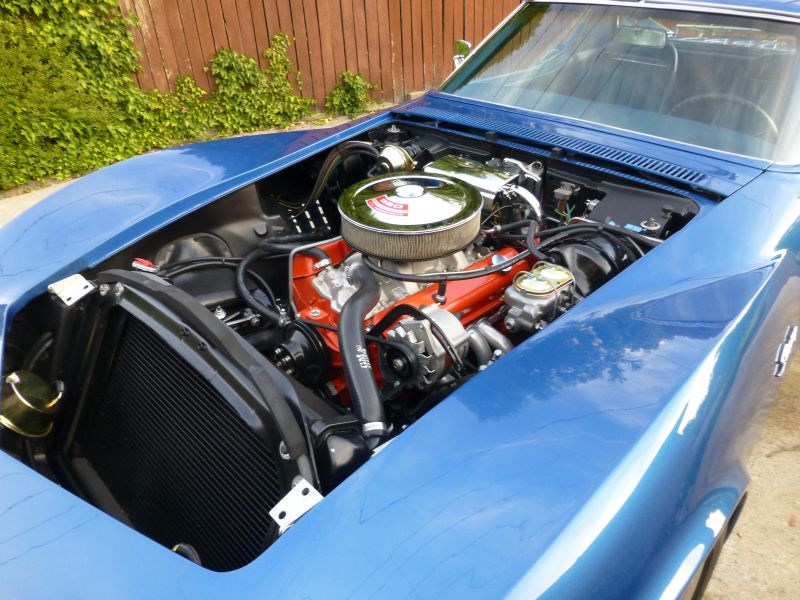
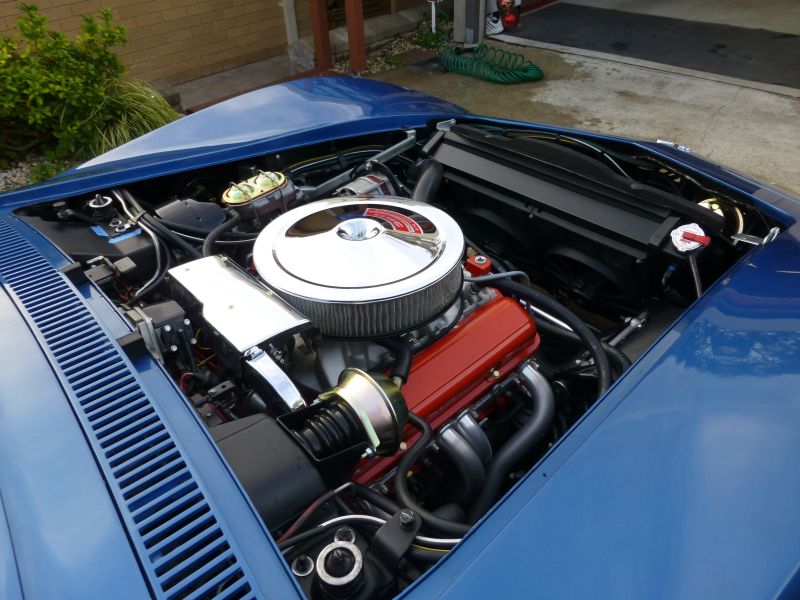
While the hood is out to be painted its a good time to repair some minor glass cracks I noticed in engine bay and fix the mount point for one of the hinges.
Earlier in its life when the front corner was repaired they did not finish it off properly so now I wanted to fix the hinge mount pad.
It had been cut out then the hinge mounted with spacers under it.
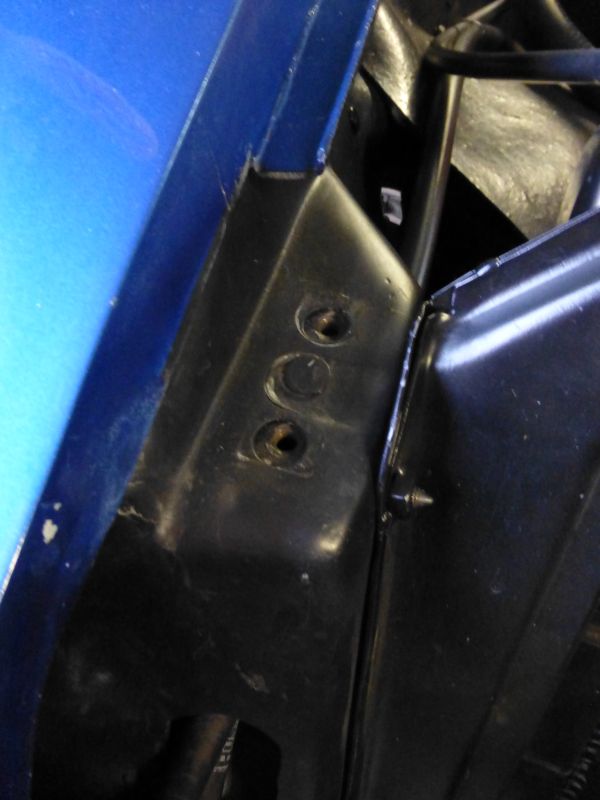
So cover it all up.
Grind it out so I have something to bond with.
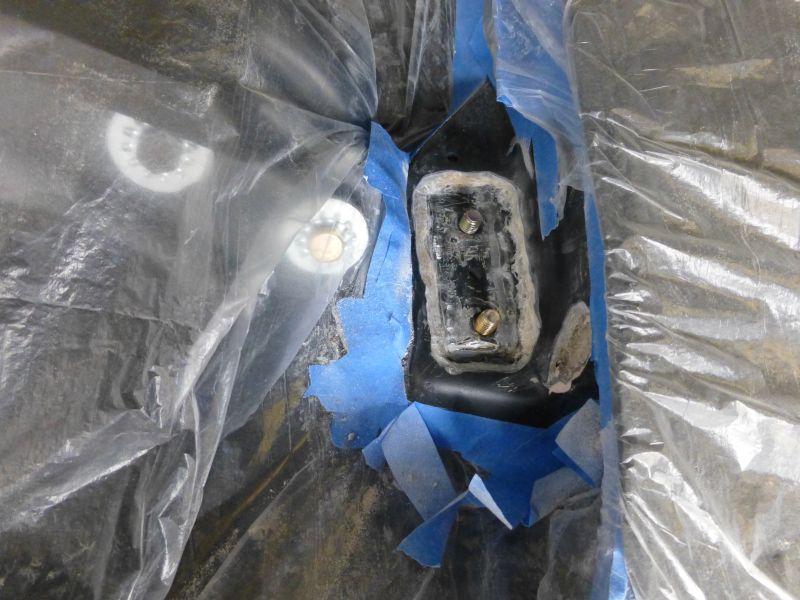
And glass it all up.


Earlier in its life when the front corner was repaired they did not finish it off properly so now I wanted to fix the hinge mount pad.
It had been cut out then the hinge mounted with spacers under it.
So cover it all up.
Grind it out so I have something to bond with.
And glass it all up.
Last edited by CraigH; 04-10-2023 at 04:54 AM.
11-22-2013, 12:56 AM
#645
Melting Slicks
Thread Starter
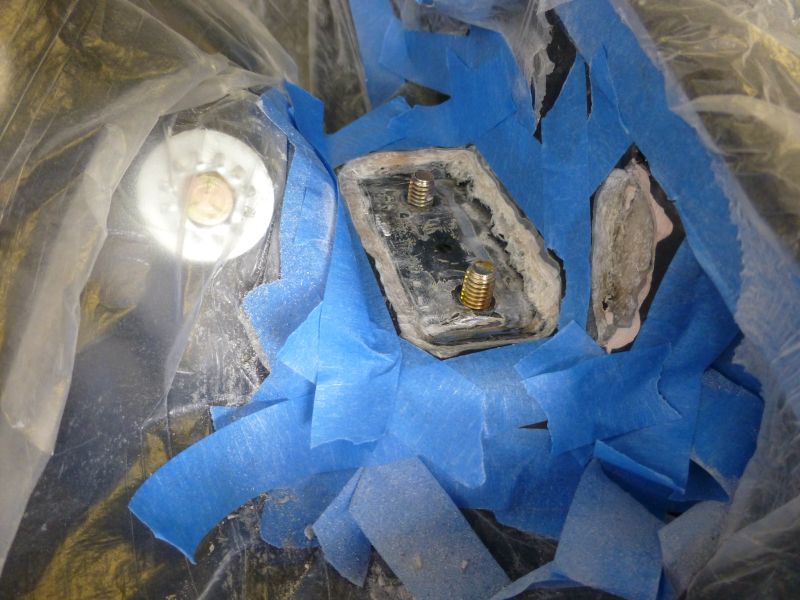
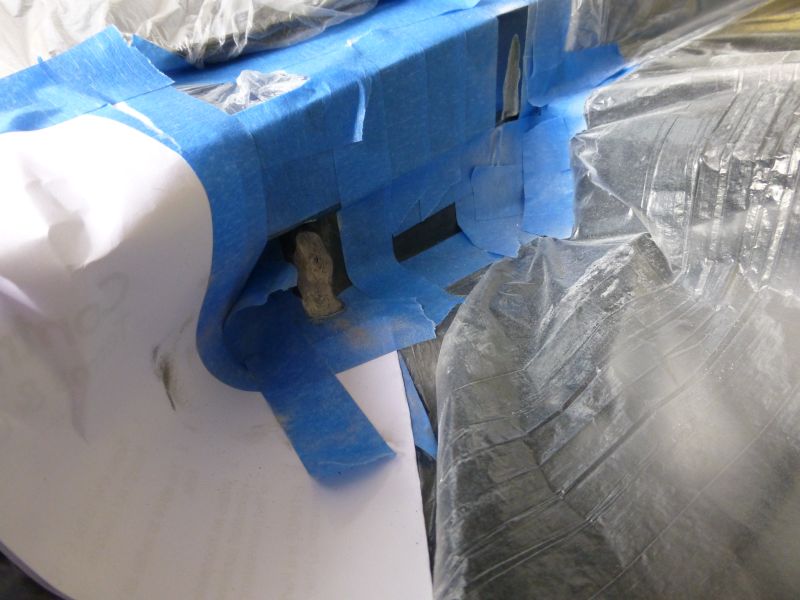
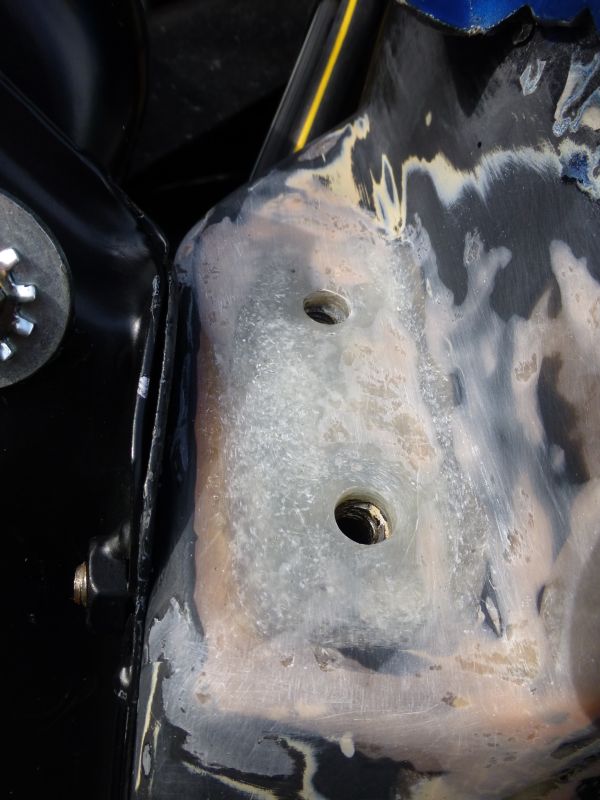
Sanded all the glass back and then found filler on the front edges and near where it touches the guards.
Seemed faily solid so just sanded it all ready for primer and final fill and finish.
Both hinge points are now level and the drivers one is repaired and nice and flat.
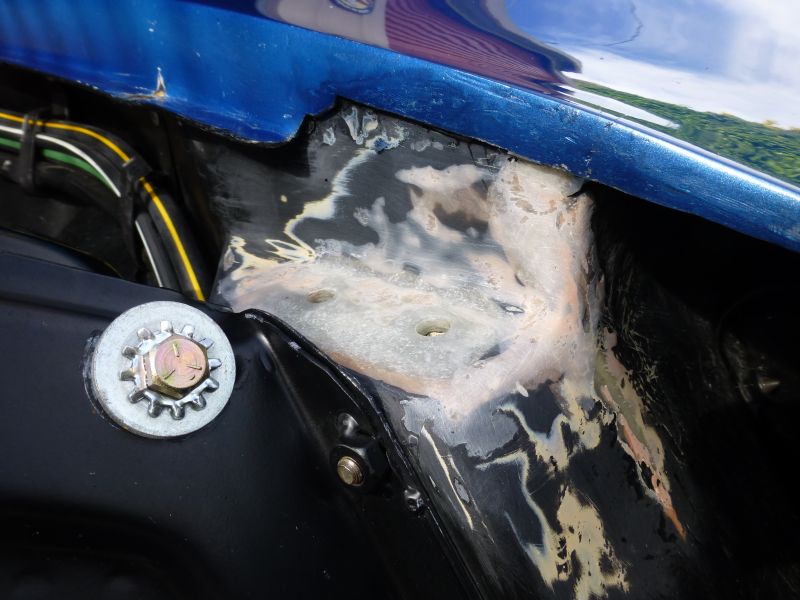
Seemed faily solid so just sanded it all ready for primer and final fill and finish.
Both hinge points are now level and the drivers one is repaired and nice and flat.
Last edited by CraigH; 04-10-2023 at 04:54 AM.
 12-06-2013, 04:41 AM
#647
Melting Slicks
Thread Starter
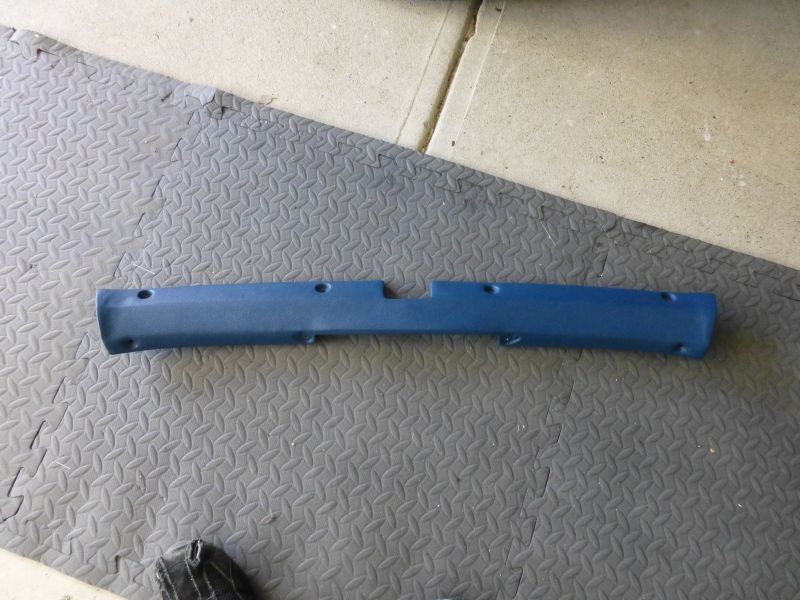
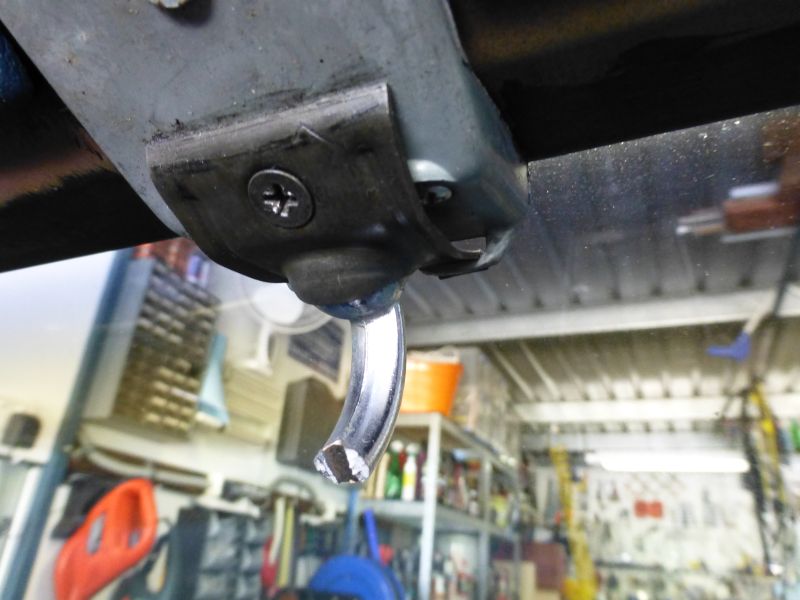
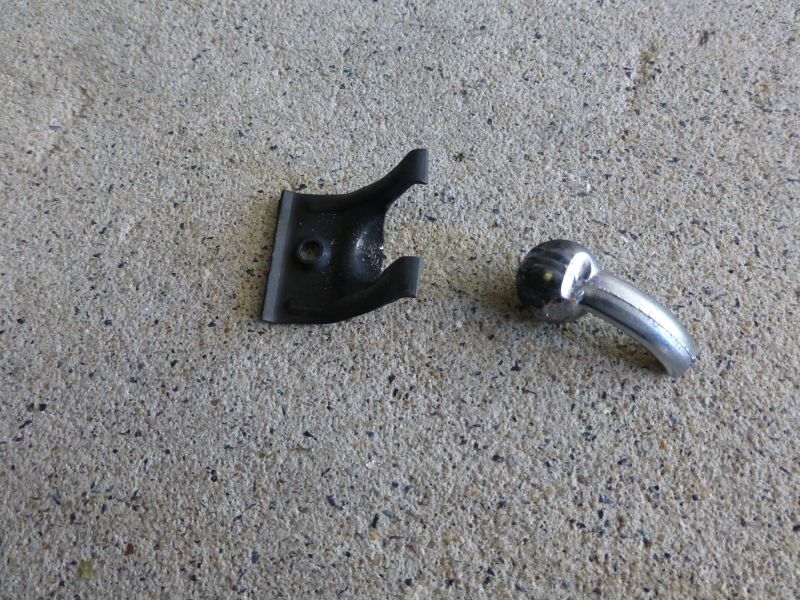
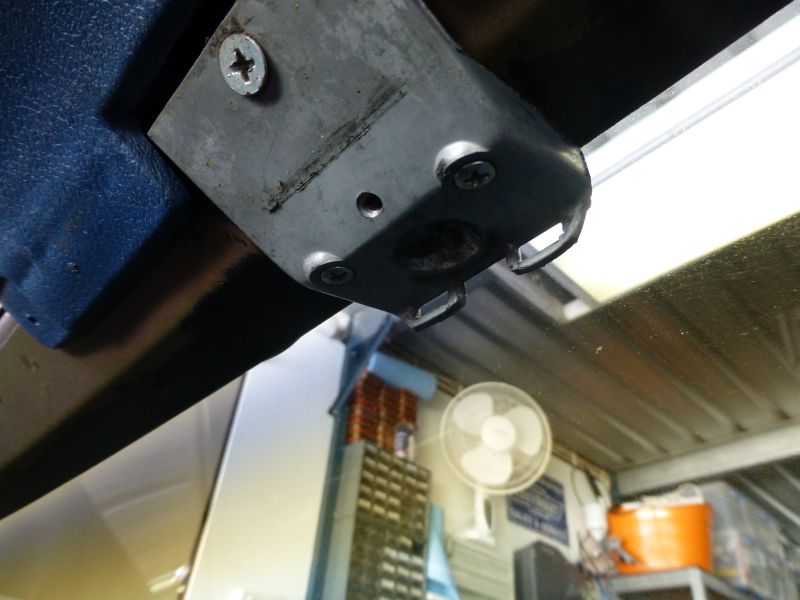
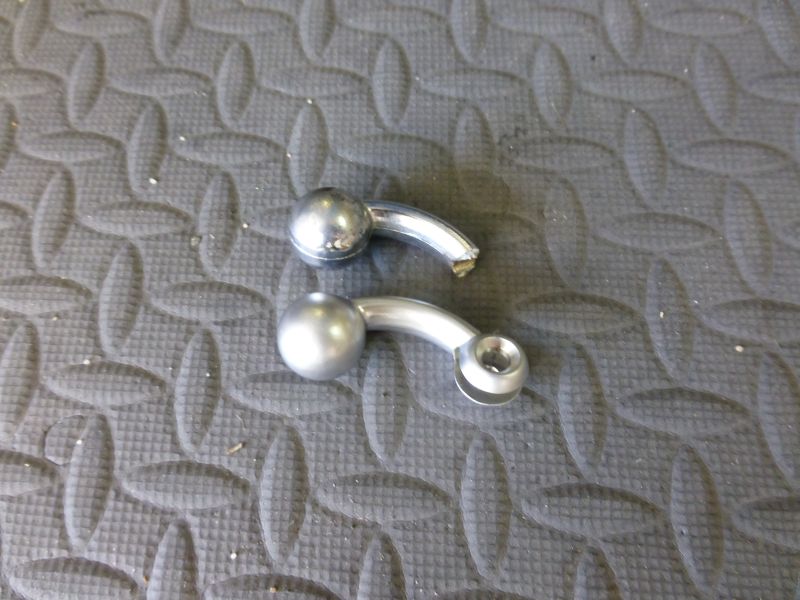
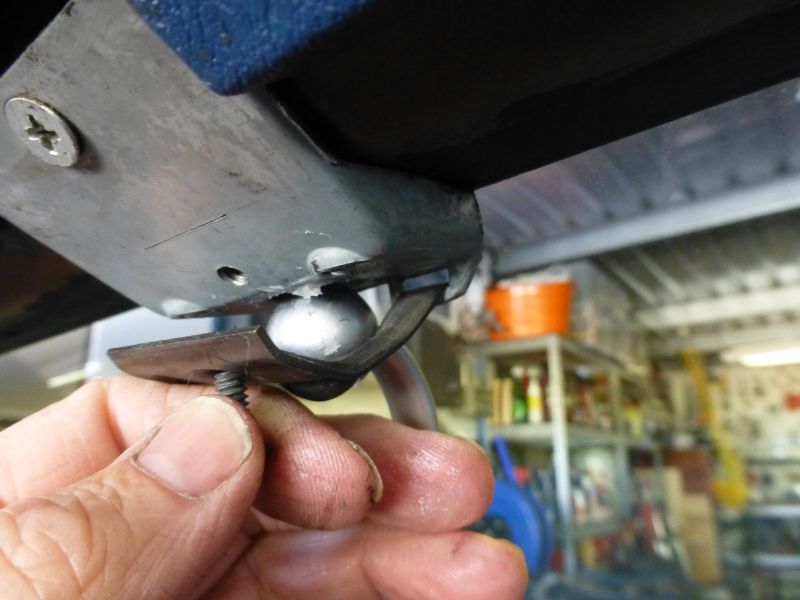
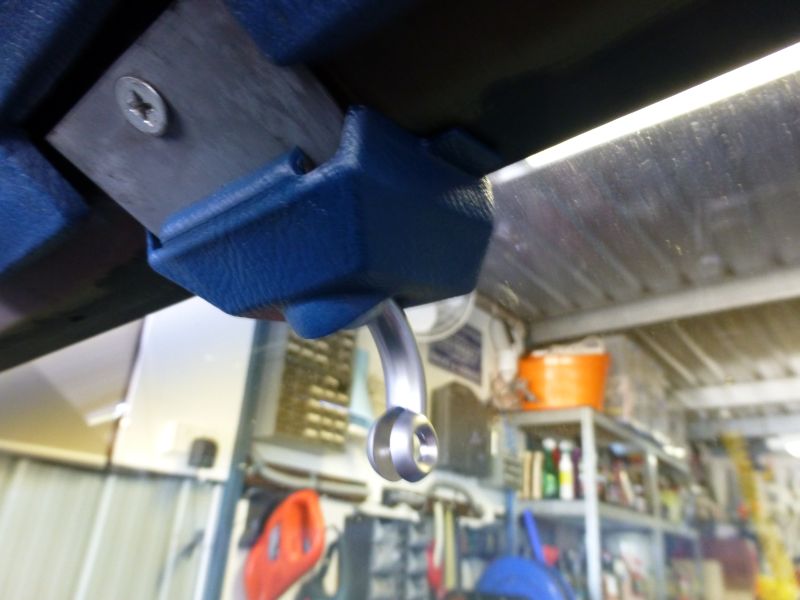
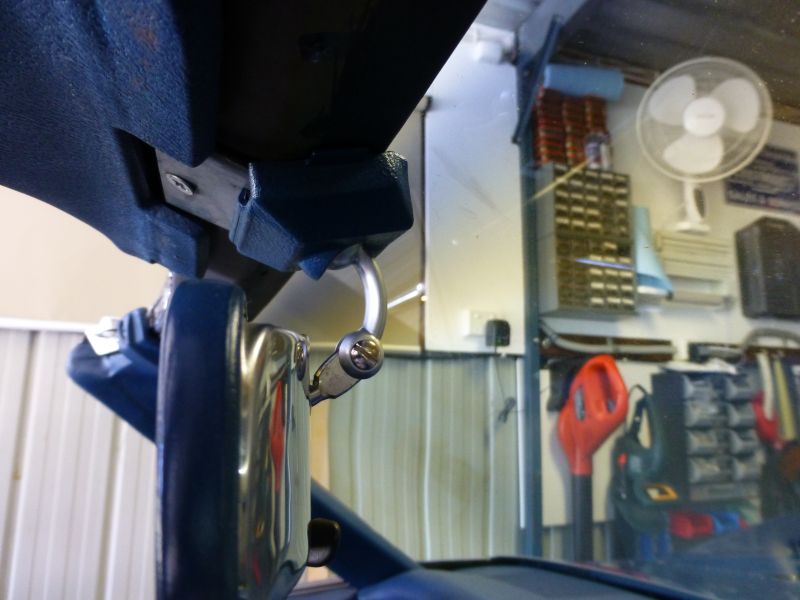
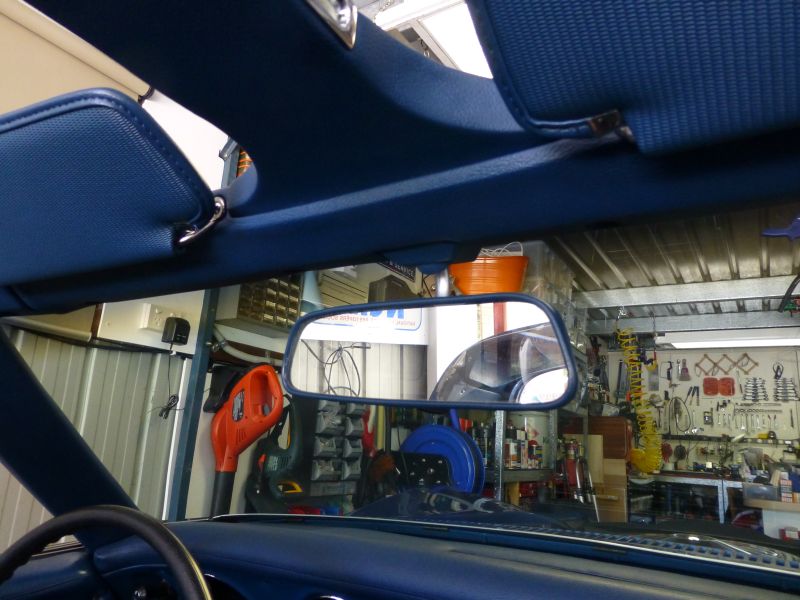
Managed to snap off the rear view mirror with my head :-(
So here is replacing the parts - 20 minute job
Sun shades and header trim off first then.....
So here is replacing the parts - 20 minute job
Sun shades and header trim off first then.....
Last edited by CraigH; 04-10-2023 at 04:53 AM.
12-08-2013, 04:06 AM
#648
Melting Slicks
Thread Starter
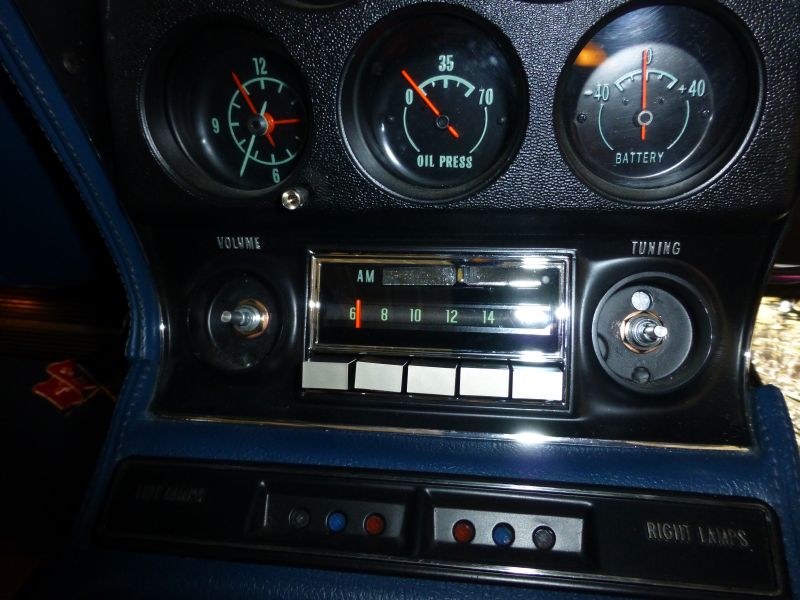
I have never been realy happy with the reproduction Retro Radio I have in my 71.
The first one had an issue with the auxilary in circuitry that I think I may have caused so I wont put the manufacturer down, so ordered a second one and was ready to replace it when.....
I saw the RetroSound Model Two so I picked one of them up to try, tested it out on the bench and it is a very full featured unit but the more I played with it the more I decided I wanted a stock looking radio.
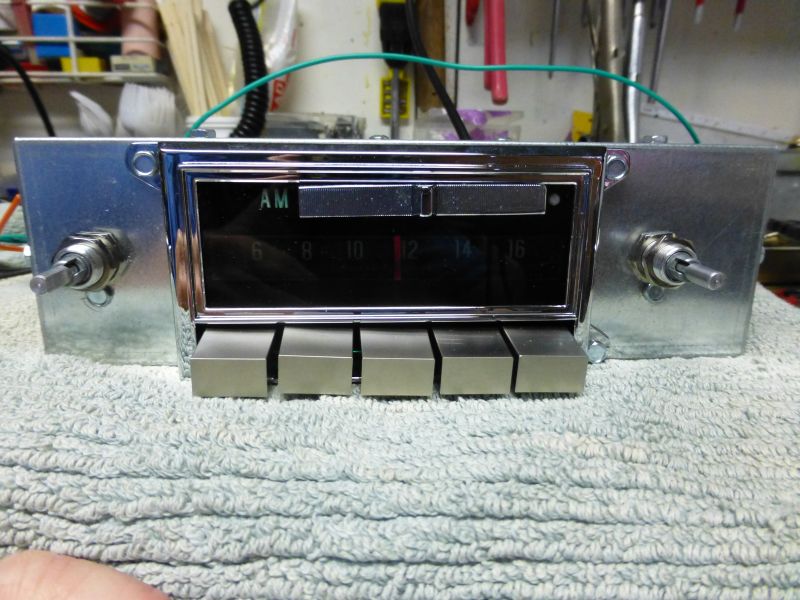
So I purchased an Antique Automobile Radio reproduction for my 71, waited for it to be built and finaly received it.
Today I bench tested it ready to install.
However nothing goes smoothly.....It all seemed to work fine but the balance control did not work. Re read instructions and no luck so I looked up the circuit diagram for the module they install in them and then dismantled it to have a look if something obvious was wrong.
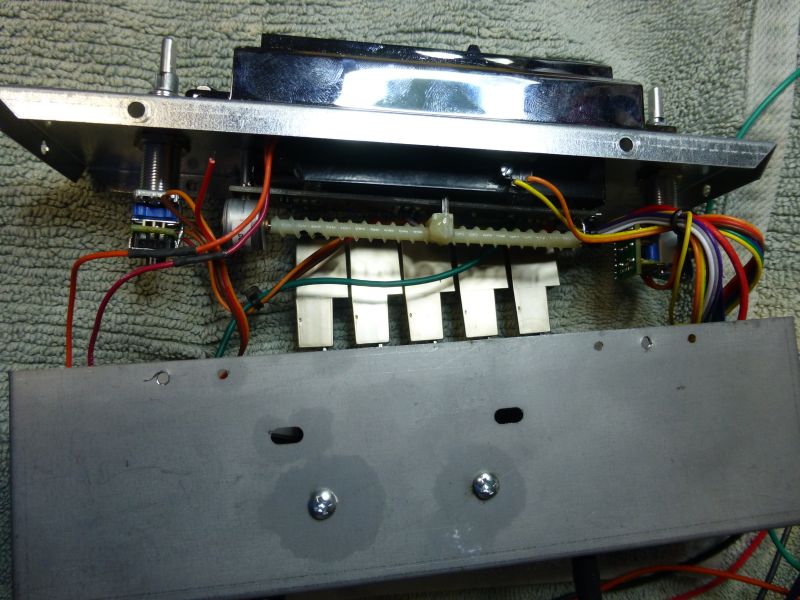
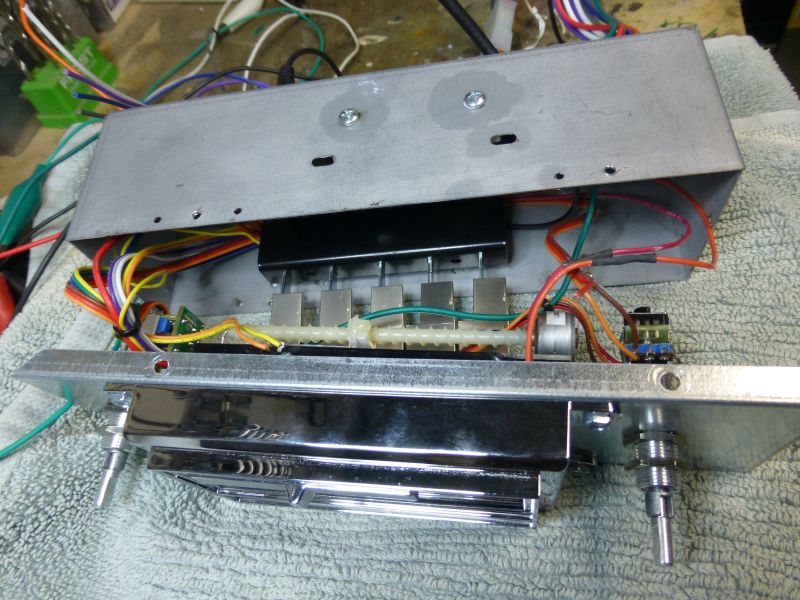
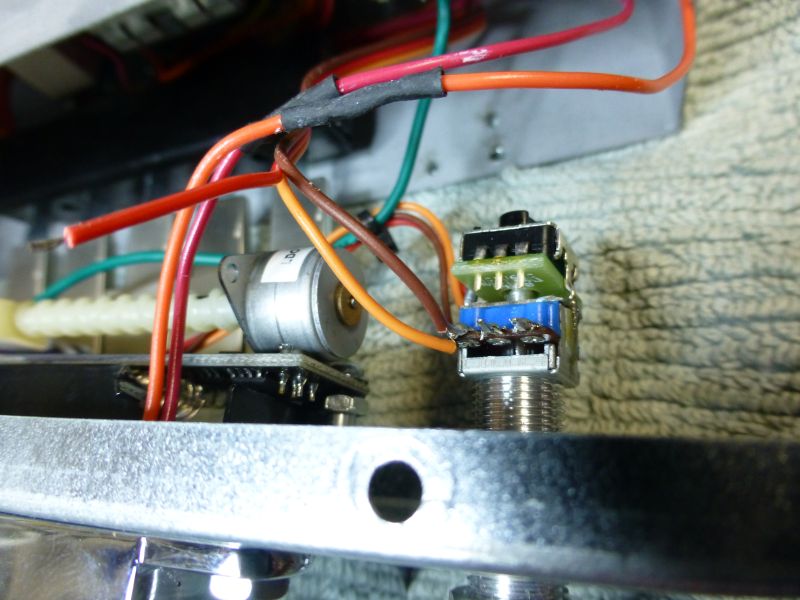
Luckily it was just a bad connection on the potentiomenter, in fact a wire had come off. So a quick solder all 3 leads again and all is good.
Unit auto swaps between aux and radio whenever the ipod is playing, very nice.
Will try and get it installed in the Vette this week with external amps etc so should be fun.
The first one had an issue with the auxilary in circuitry that I think I may have caused so I wont put the manufacturer down, so ordered a second one and was ready to replace it when.....
I saw the RetroSound Model Two so I picked one of them up to try, tested it out on the bench and it is a very full featured unit but the more I played with it the more I decided I wanted a stock looking radio.
So I purchased an Antique Automobile Radio reproduction for my 71, waited for it to be built and finaly received it.
Today I bench tested it ready to install.
However nothing goes smoothly.....It all seemed to work fine but the balance control did not work. Re read instructions and no luck so I looked up the circuit diagram for the module they install in them and then dismantled it to have a look if something obvious was wrong.
Luckily it was just a bad connection on the potentiomenter, in fact a wire had come off. So a quick solder all 3 leads again and all is good.
Unit auto swaps between aux and radio whenever the ipod is playing, very nice.
Will try and get it installed in the Vette this week with external amps etc so should be fun.
Last edited by CraigH; 04-10-2023 at 04:53 AM.
 12-09-2013, 01:52 AM
#650
Melting Slicks
Thread Starter
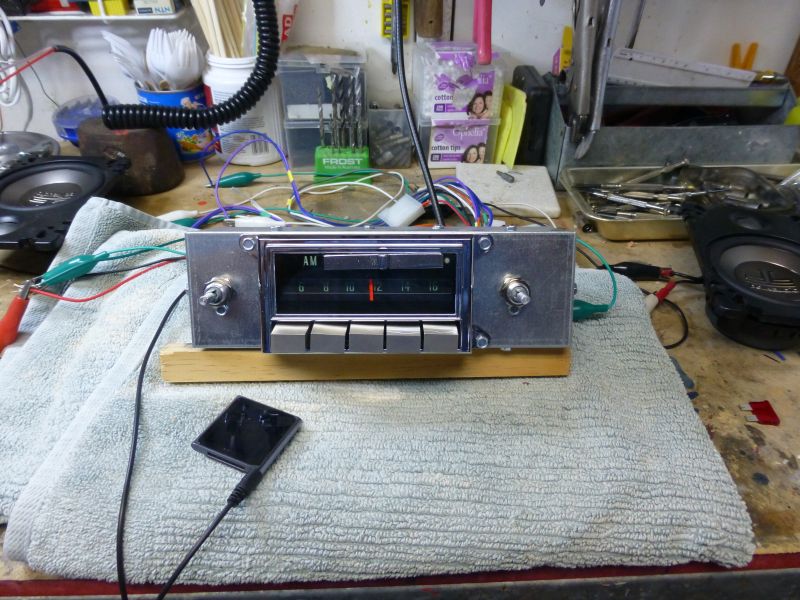
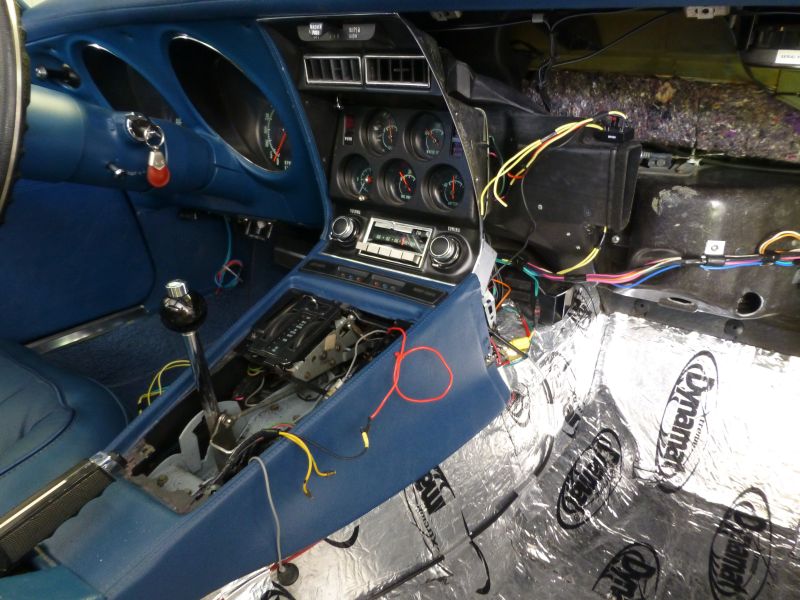
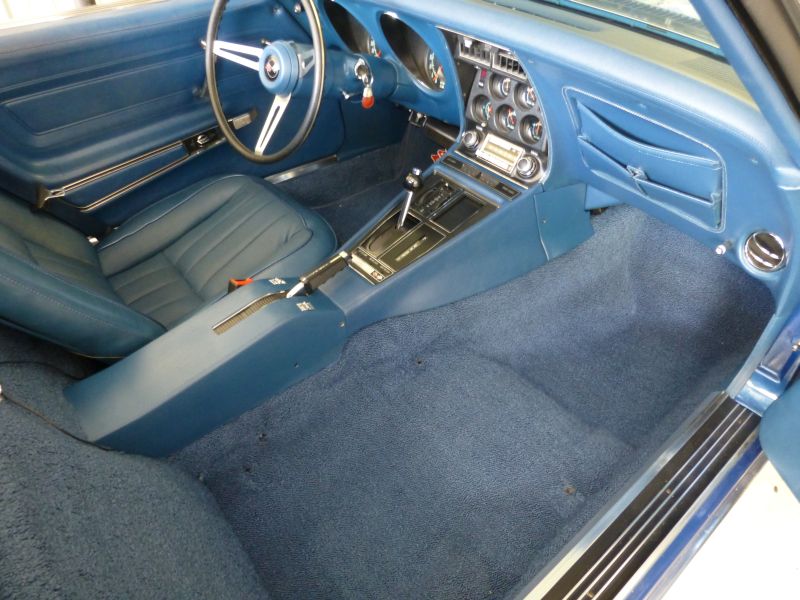
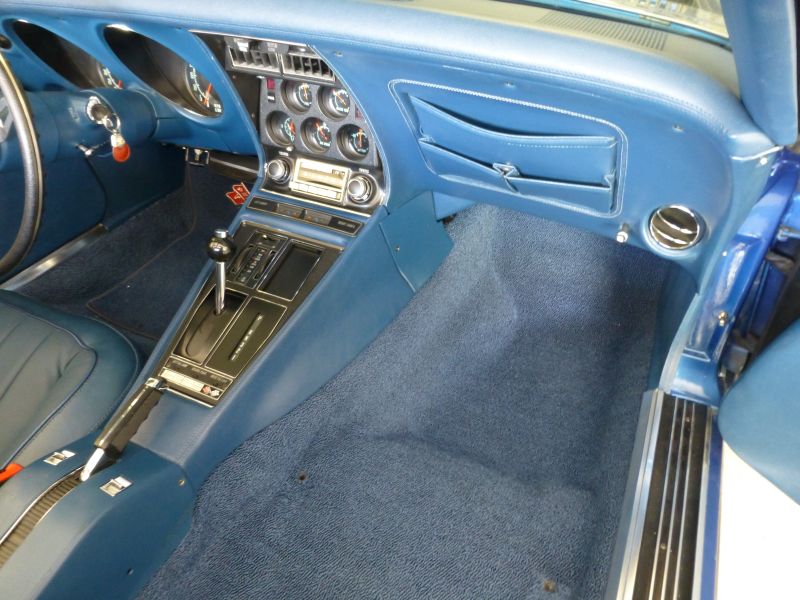
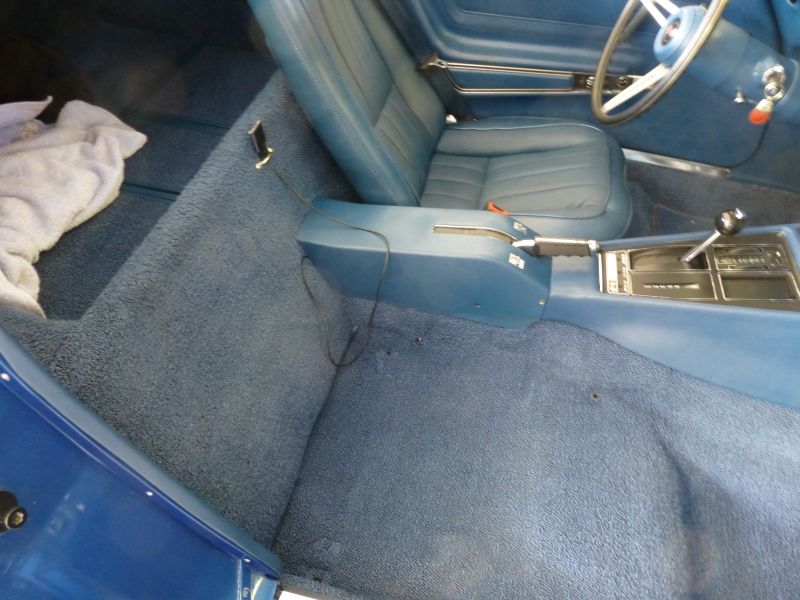
Removed the seat belt retractor and seat.
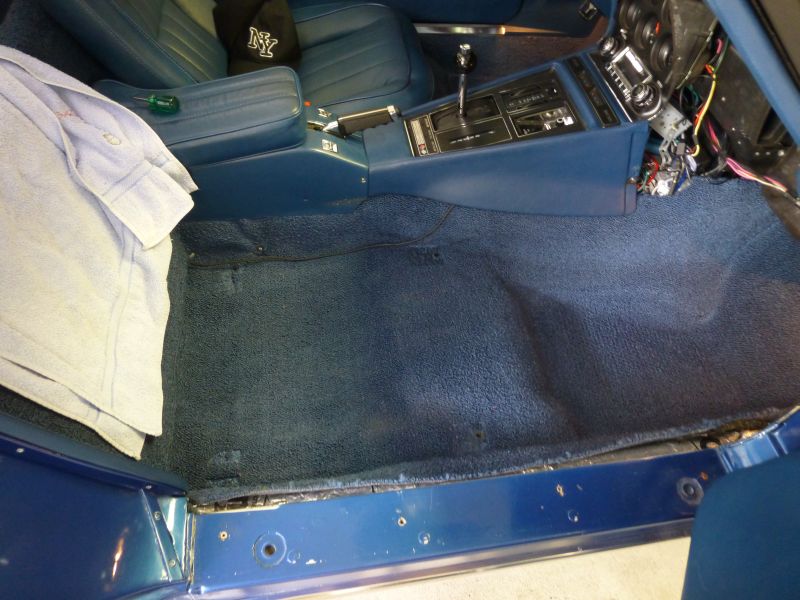
Then the carpet
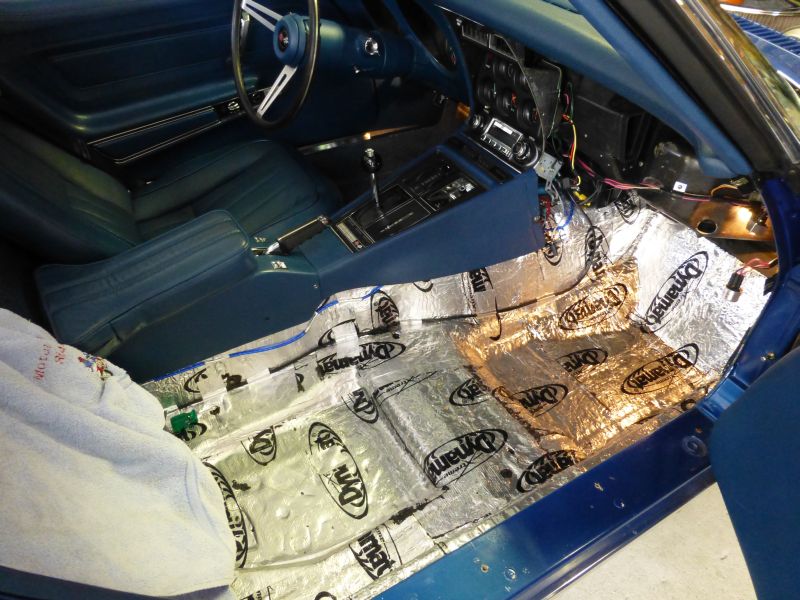
Then removed old deck and wiring the bolted in the new one.
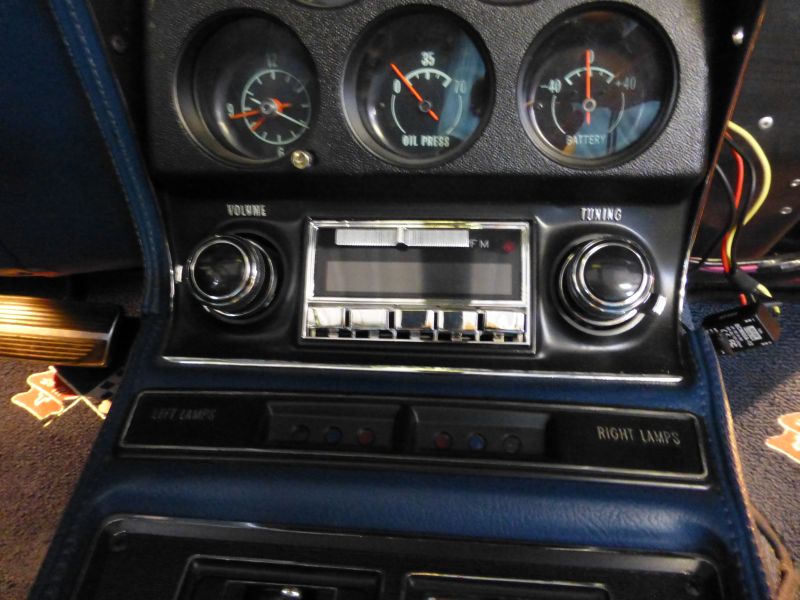
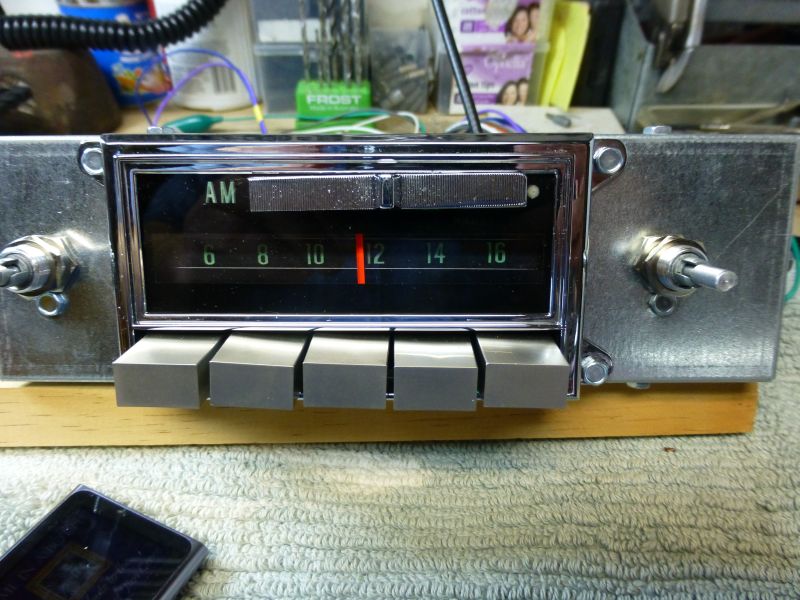
The Antique Automotive Radio is so easy to fit as the body is only a couple of inches deep. Everything lined up perfect. Something that was not the case with the original Retro Radio where I had to adjust it heaps to get a good fit.

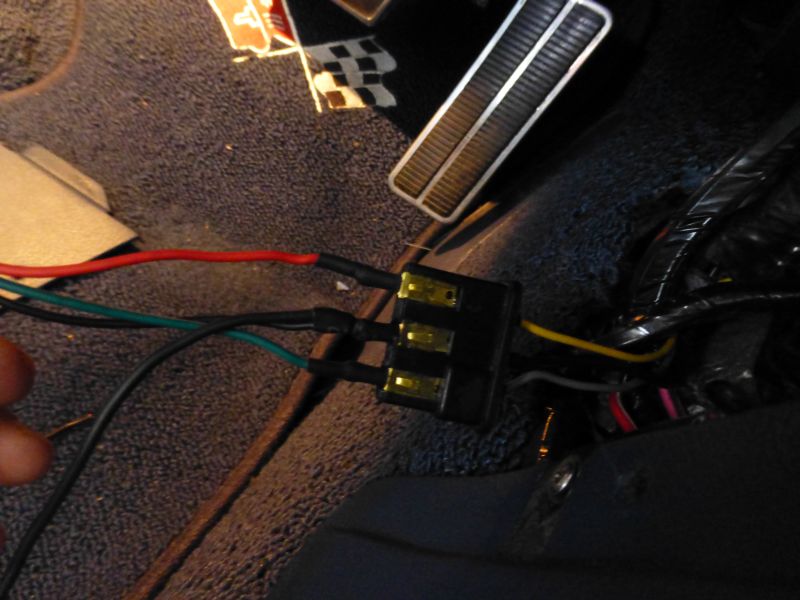
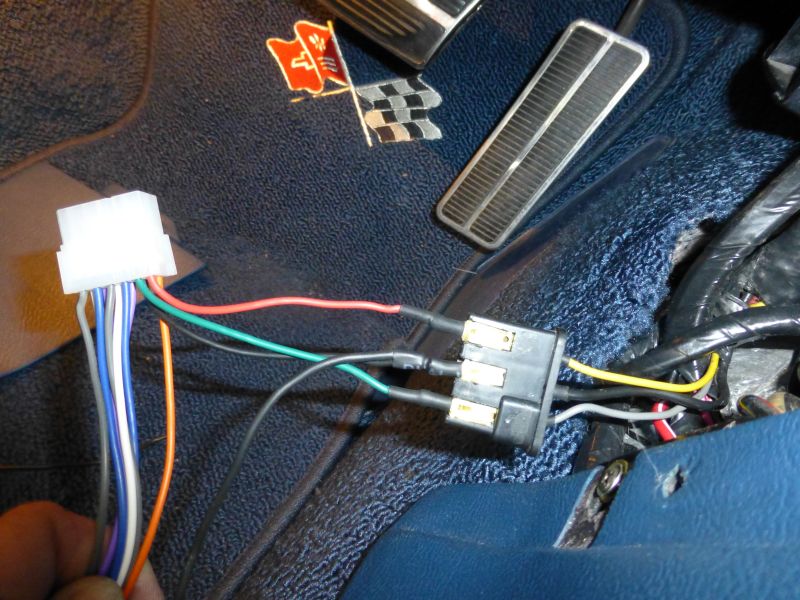
Wired up the new harness to original plug.
Fits nicely in cluster.
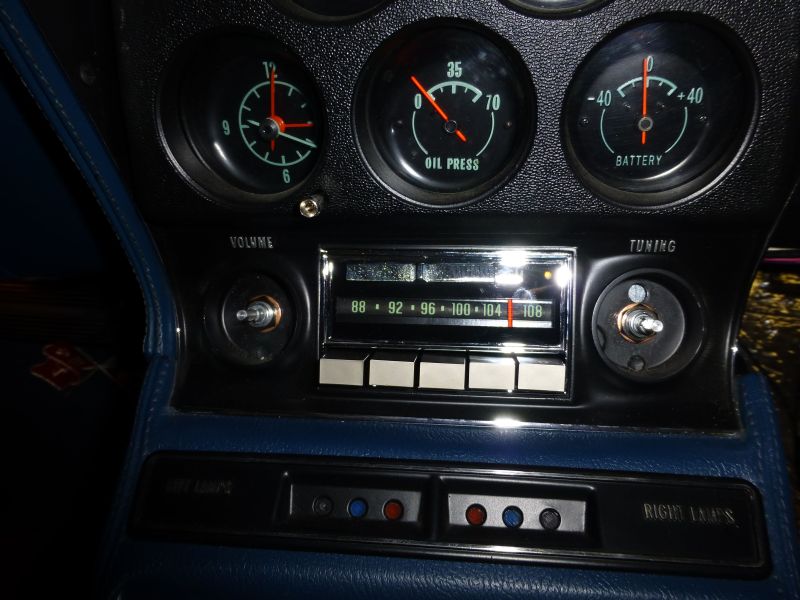
The MBQuart 440.4 amp will go under the seat and run in 4 channel mode - speakers in dash and 2 in the kick panels.
Then the carpet
Then removed old deck and wiring the bolted in the new one.
The Antique Automotive Radio is so easy to fit as the body is only a couple of inches deep. Everything lined up perfect. Something that was not the case with the original Retro Radio where I had to adjust it heaps to get a good fit.
Wired up the new harness to original plug.
Fits nicely in cluster.
The MBQuart 440.4 amp will go under the seat and run in 4 channel mode - speakers in dash and 2 in the kick panels.
Last edited by CraigH; 04-10-2023 at 04:53 AM.
12-14-2013, 01:54 AM
#651
Melting Slicks
Thread Starter
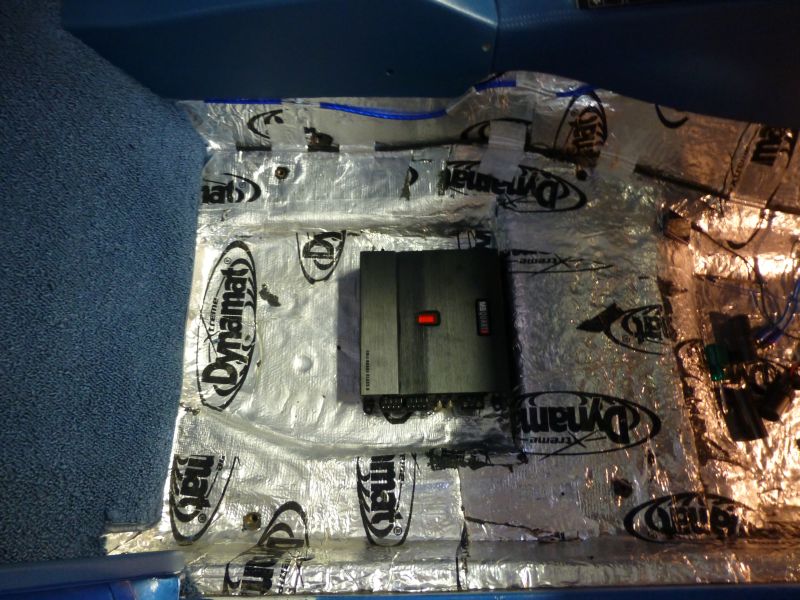
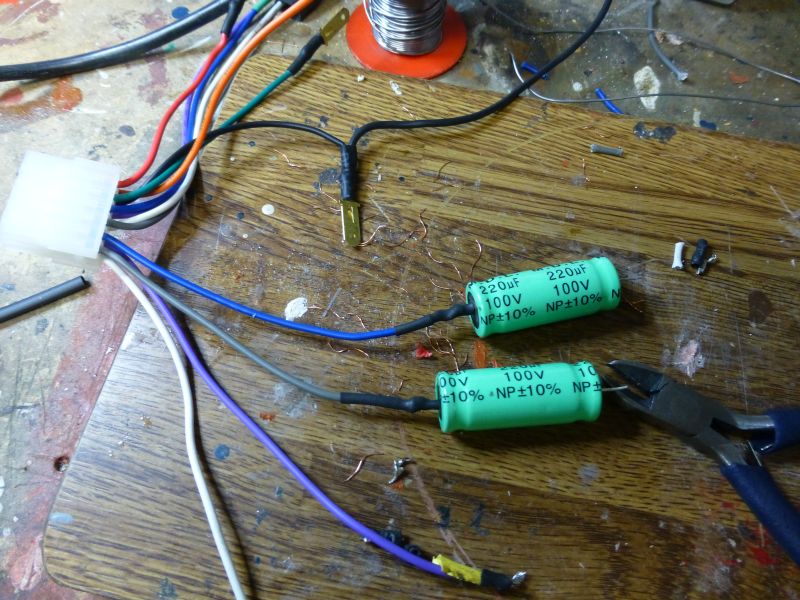
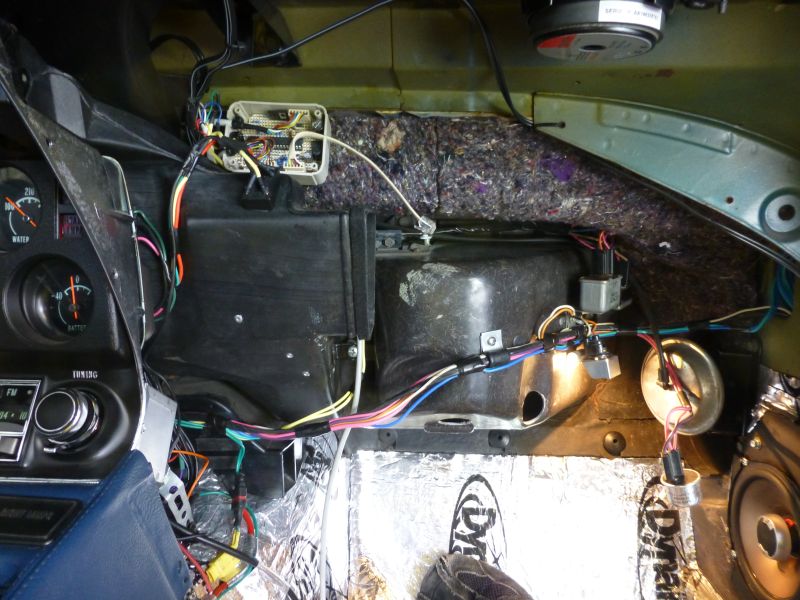
I did a mock up of the system with the amp and in the end decided to just use the head units built in amps because.
- It appeares the controls like balance etc dont apply to the RCA outputs
- There is a very small pop in the system, when when you power it down via ignition switch that sounds worse with the amps.
Overall the 4 x 45w in built amp sounded fine and I could hear it at 60mph with tops off.
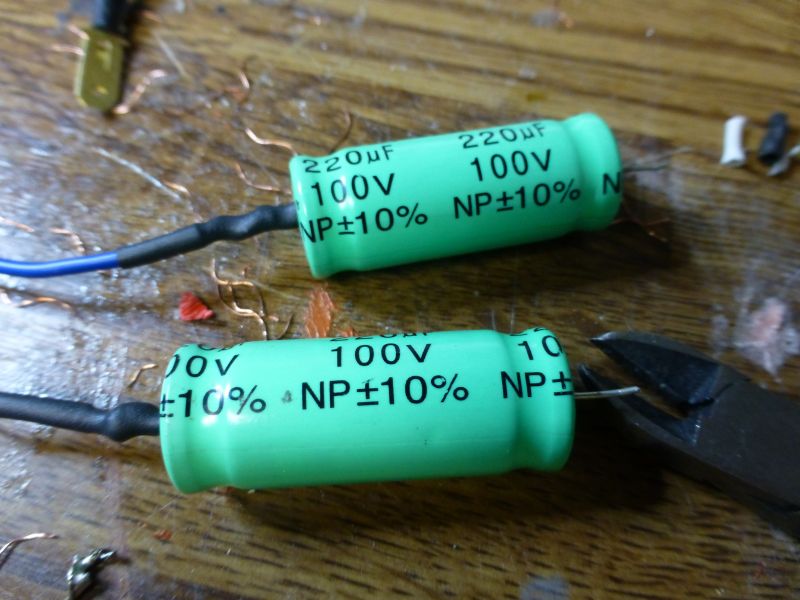
So re worked the harness to include the capacitors for the 4"x6" dash pad speakers to cut the low frquencies.
The 5.25" speakers in the kicks are full range..
- It appeares the controls like balance etc dont apply to the RCA outputs
- There is a very small pop in the system, when when you power it down via ignition switch that sounds worse with the amps.
Overall the 4 x 45w in built amp sounded fine and I could hear it at 60mph with tops off.
So re worked the harness to include the capacitors for the 4"x6" dash pad speakers to cut the low frquencies.
The 5.25" speakers in the kicks are full range..
Last edited by CraigH; 04-10-2023 at 04:53 AM.
12-14-2013, 01:58 AM
#652
Melting Slicks
Thread Starter
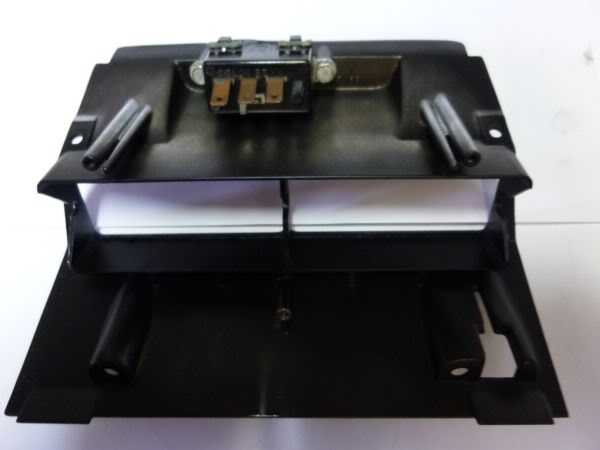
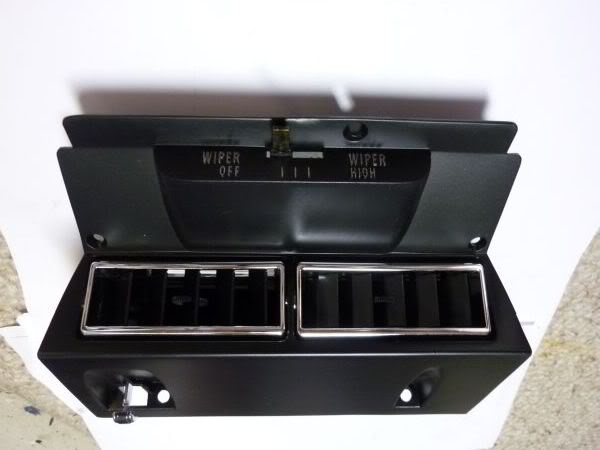
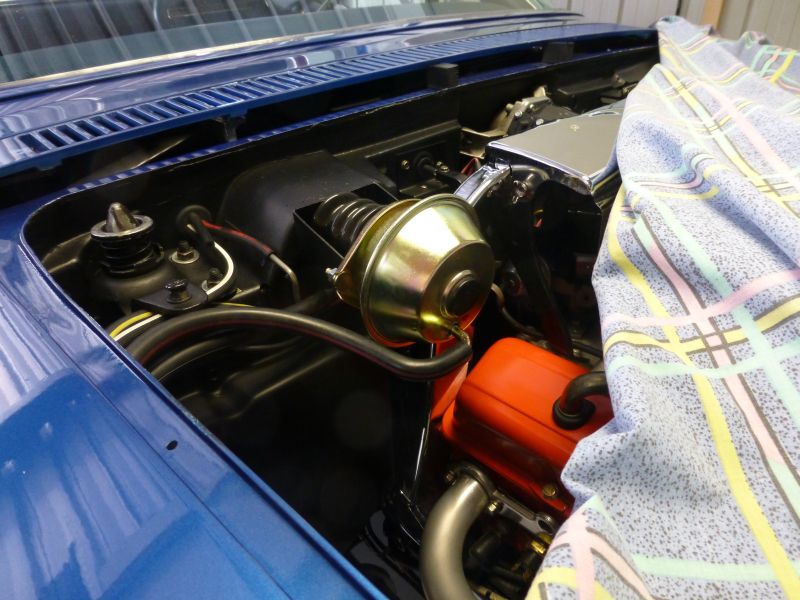
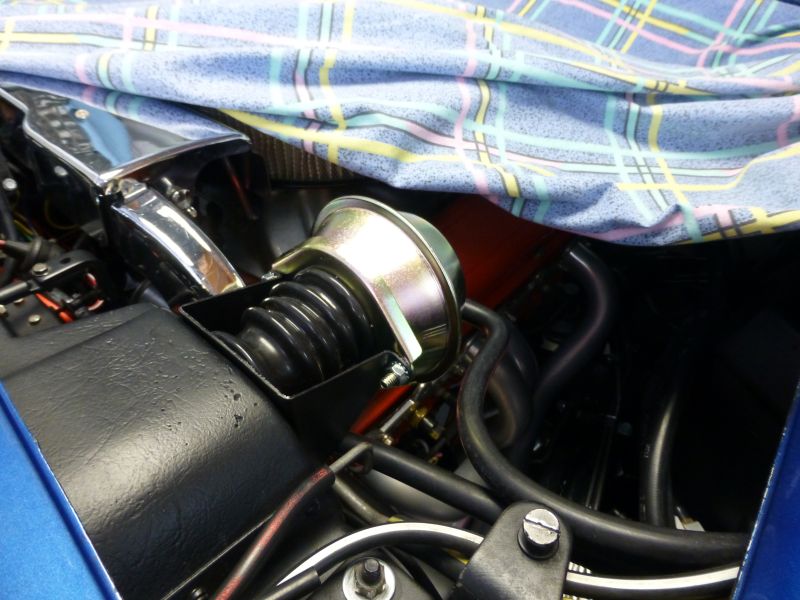
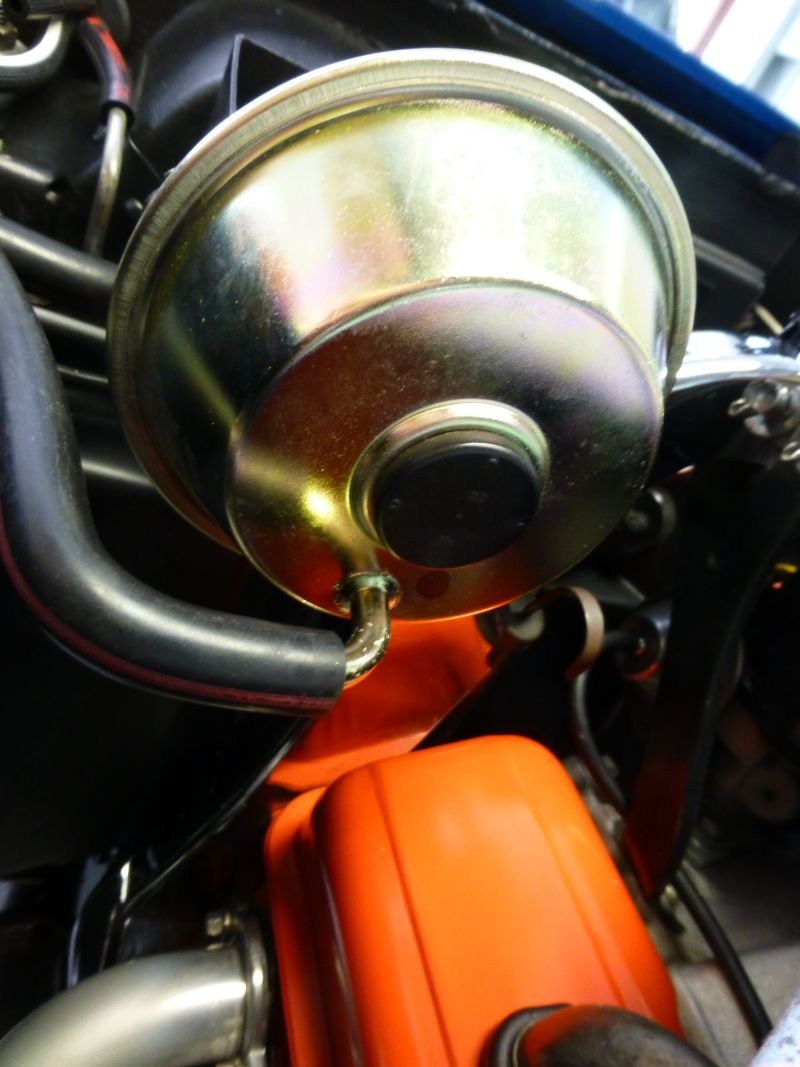
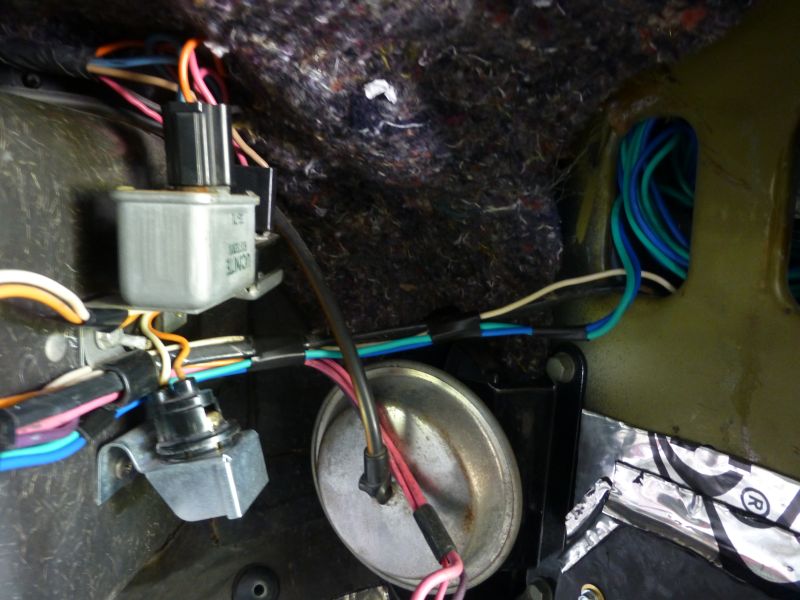
My reproduction wiper door vacuum actuator had failed so I got a refurbished original 71 unit.
Installed it today.
Installed it today.
Last edited by CraigH; 04-10-2023 at 04:53 AM.
12-14-2013, 02:06 AM
#653
Melting Slicks
Thread Starter
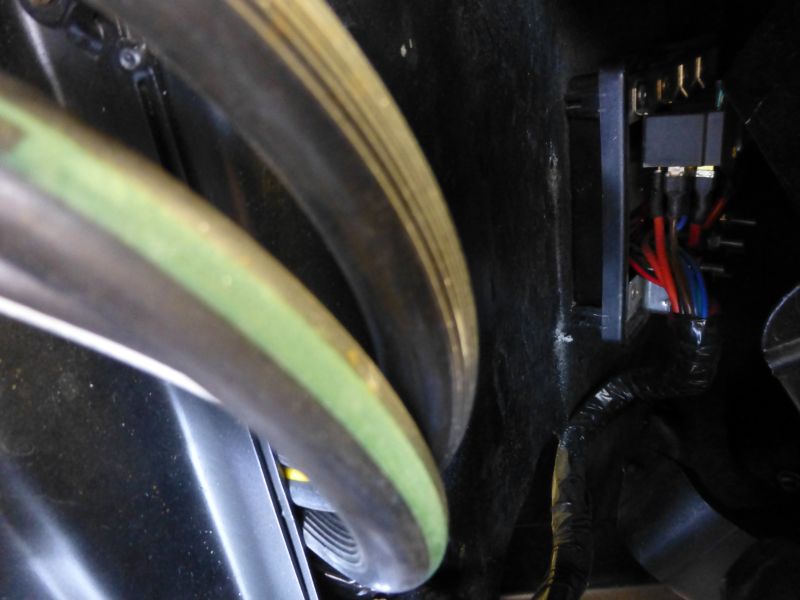
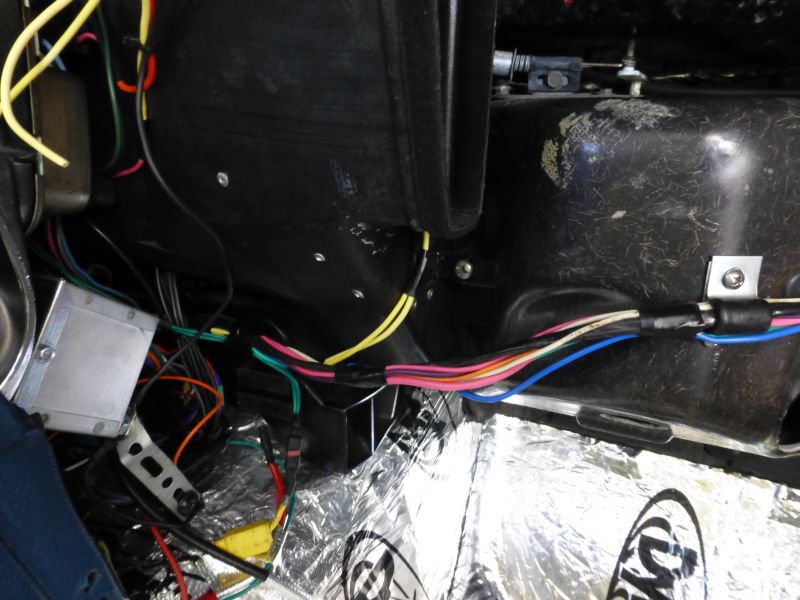
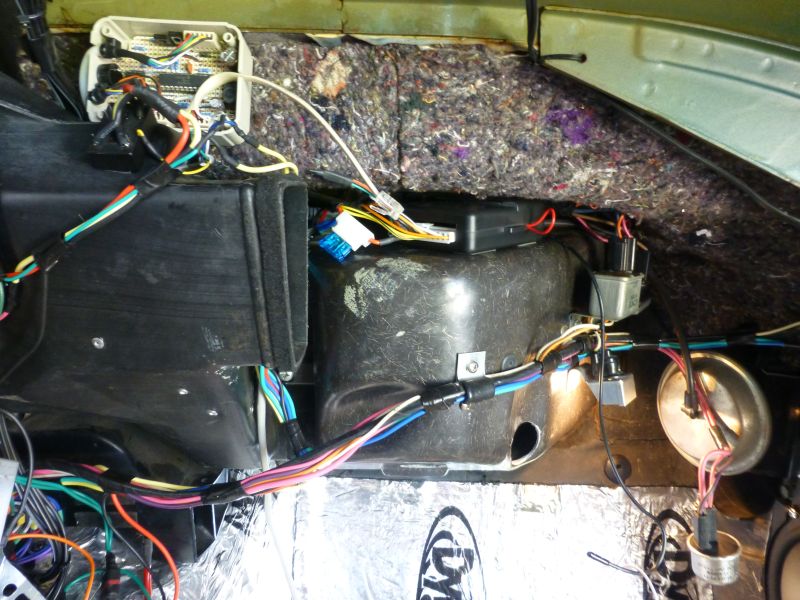
Have been working on a new version of our fan control unit with my friend.
The new model will only need the 3 pin plug removed from the temperature gauge then 2 or 3 wires spliced in then plugged back in.
All you need after that is to run 2 wires to trigger your fan relays.
So I have moved the mocked up unit to inside the passenger dash and run a new harness back to my relay harness on the driver side.
While doing it I added 2 extra wires to allow power door locks to be fitted later.
Last edited by CraigH; 04-10-2023 at 04:53 AM.
12-19-2013, 09:25 PM
#654
Melting Slicks
Thread Starter
Wired in the remote power door lock control module and temporarily mounted it to the top of the heater box.
Will build a mounting plate for it and the thermo fan controller in the new year.
Will build a mounting plate for it and the thermo fan controller in the new year.
Last edited by CraigH; 04-10-2023 at 04:53 AM.
 12-19-2013, 11:12 PM
#657
Melting Slicks
Thread Starter
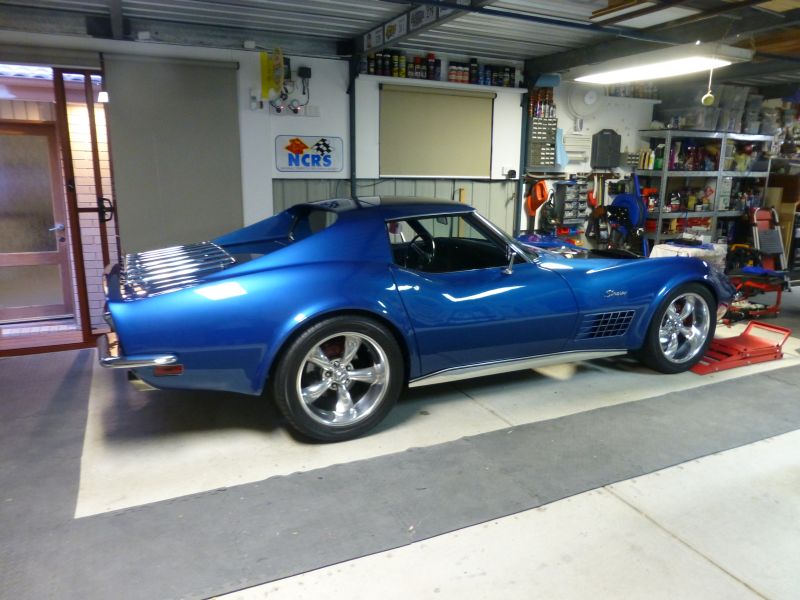
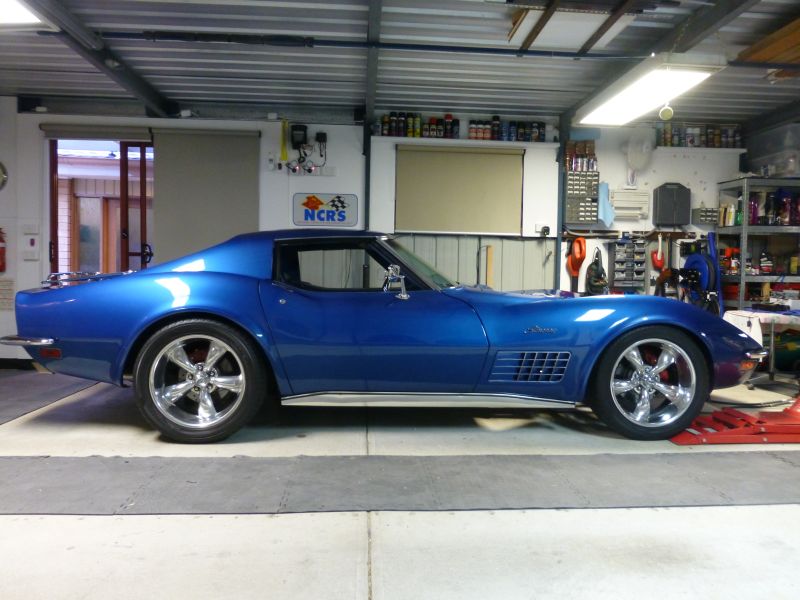
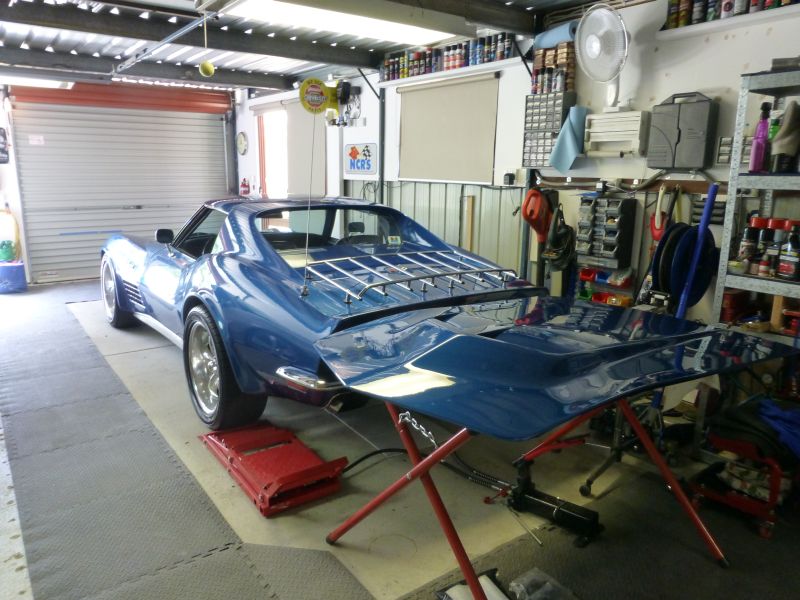
Gave the vette a good wash ready to check the paint match for the hood at the painters to see if we want to do any more on it.
Last edited by CraigH; 04-10-2023 at 04:52 AM.
12-19-2013, 11:18 PM
#658
Melting Slicks
Thread Starter
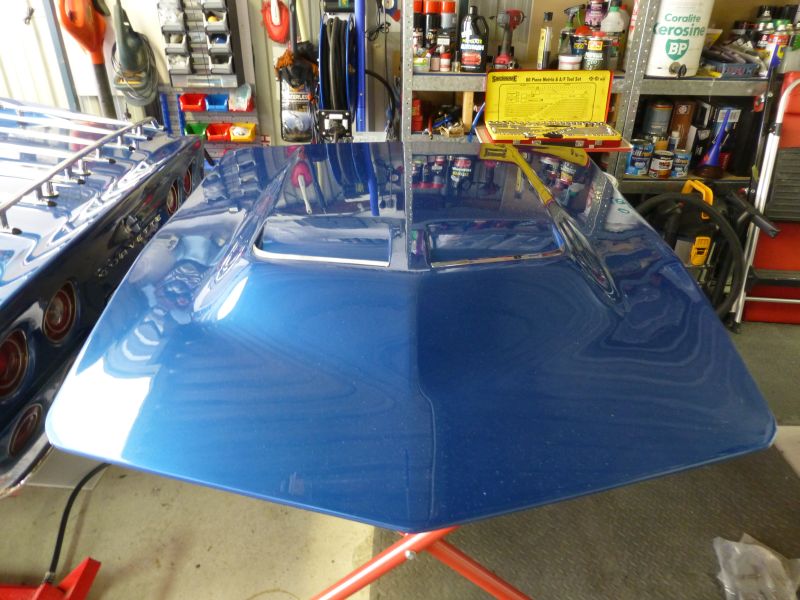
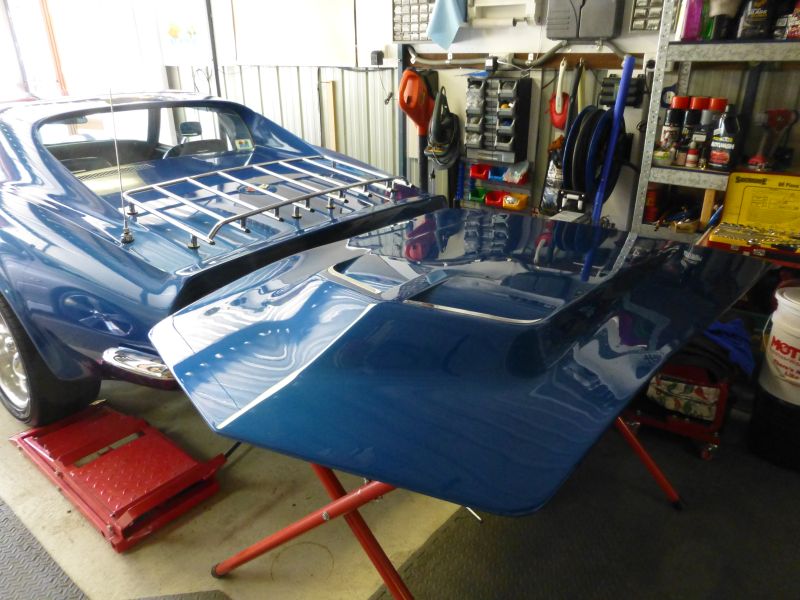
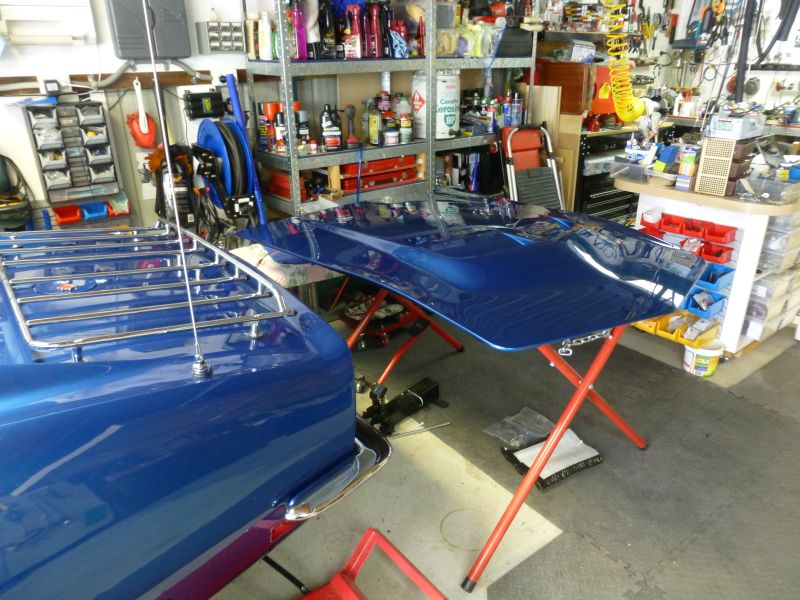
Paint match is so close, you can see a slight difference from certain angles, but I am happy with that at this stage.
We have the formula from the spectrometer and I did not want to do a blend at this stage making it more difficult for the painter.
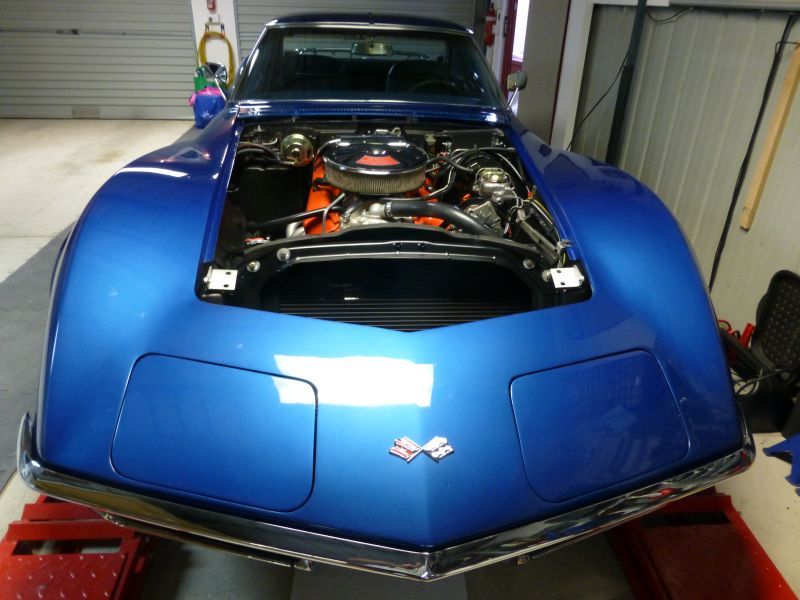
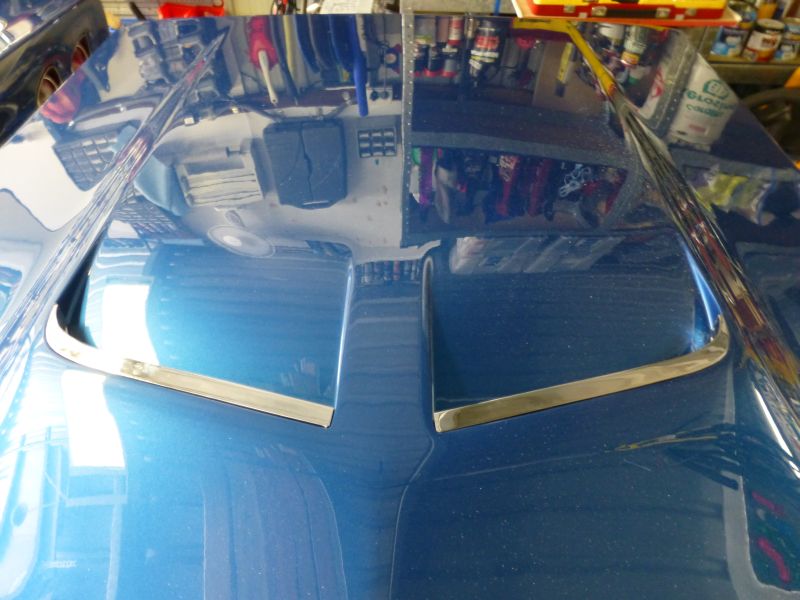
They spent hours working the hood to get a perfect fit for the chrome inserts and flattening the glass.
Sitting on the vette it looks great.
Will paint the rest of front end once get time to fix a few of the small cracks etc
We have the formula from the spectrometer and I did not want to do a blend at this stage making it more difficult for the painter.
They spent hours working the hood to get a perfect fit for the chrome inserts and flattening the glass.
Sitting on the vette it looks great.
Will paint the rest of front end once get time to fix a few of the small cracks etc
Last edited by CraigH; 04-10-2023 at 04:52 AM.