
1971 Journey
 05-02-2013, 11:41 PM
#621
Melting Slicks

Thread Starter


Looks like you have a good amount of work ahead of you, but it will all be fun :-)
Well after you finish each project and overcome all the hurdles and pain you will re define it as fun :-)
Craig

 06-27-2013, 03:47 AM
#623
Melting Slicks
Thread Starter
Got back from being away for the last few weeks and decided I needed some Vette therapy before going back to work next week.
Given my Vette is fairly low the Tie Rod angle can cause some extra bump steer.
So I decided to replace the original style Tie Rod sleeves with new solid aluminium ones and put in the heim jointed outer Tie Rod end kit from Steroids that should reposition the rod angle for less bump steer.
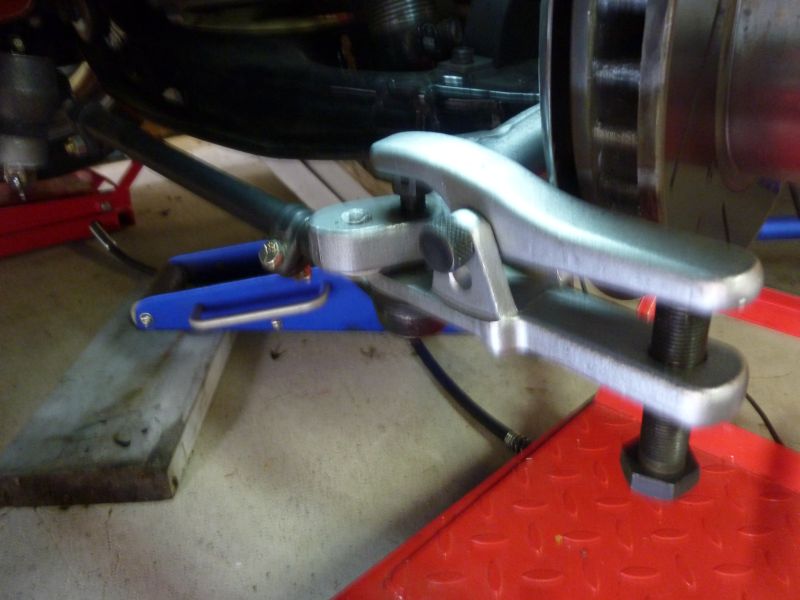
First removed the wheels and then the cotter pin from the castle nut.
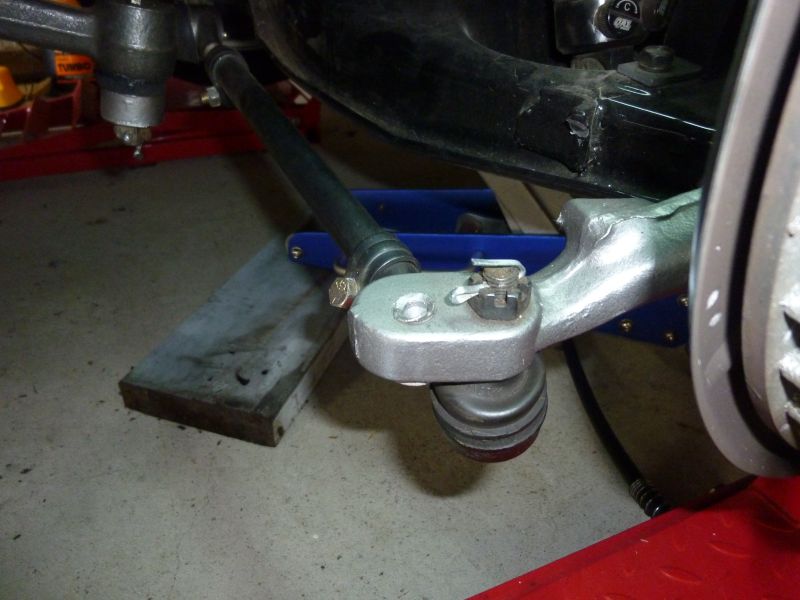
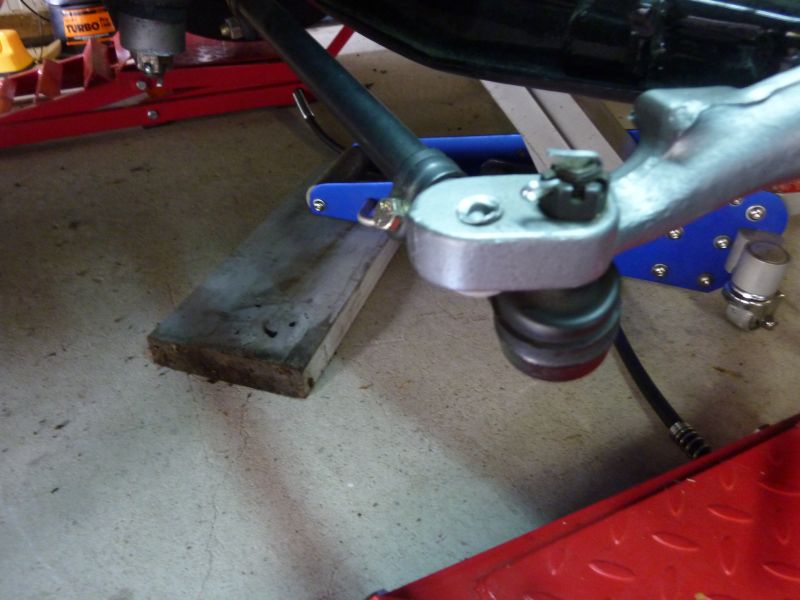
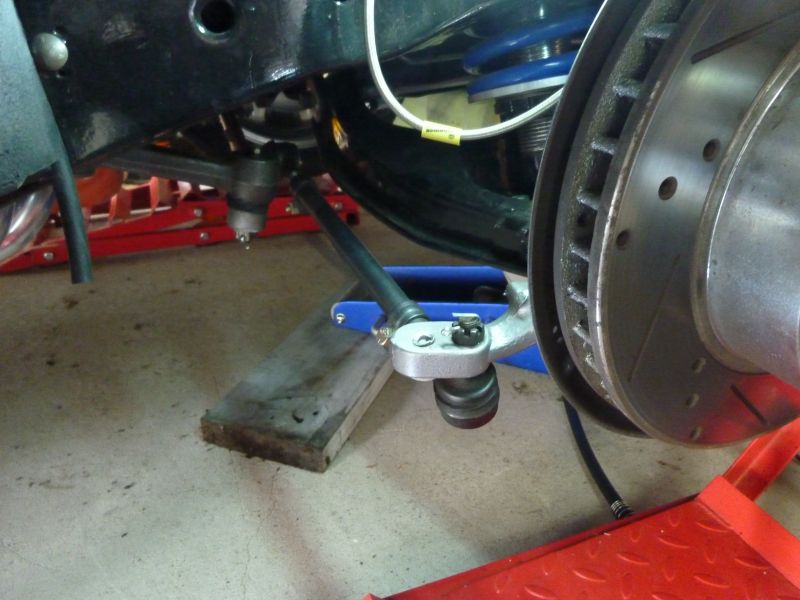
Then with castle nut above the end of the threads I used the removal tool to pop it free.
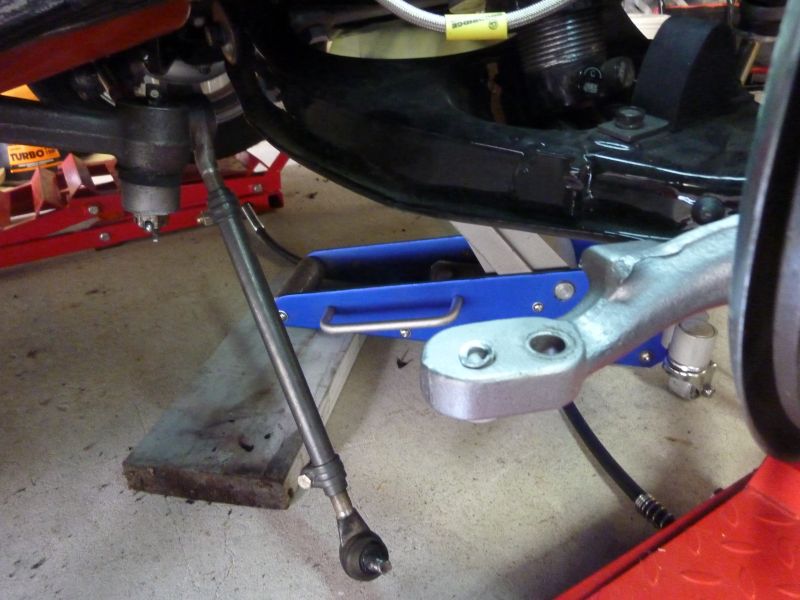
Then I removed the existing rod from the inner tie rod end
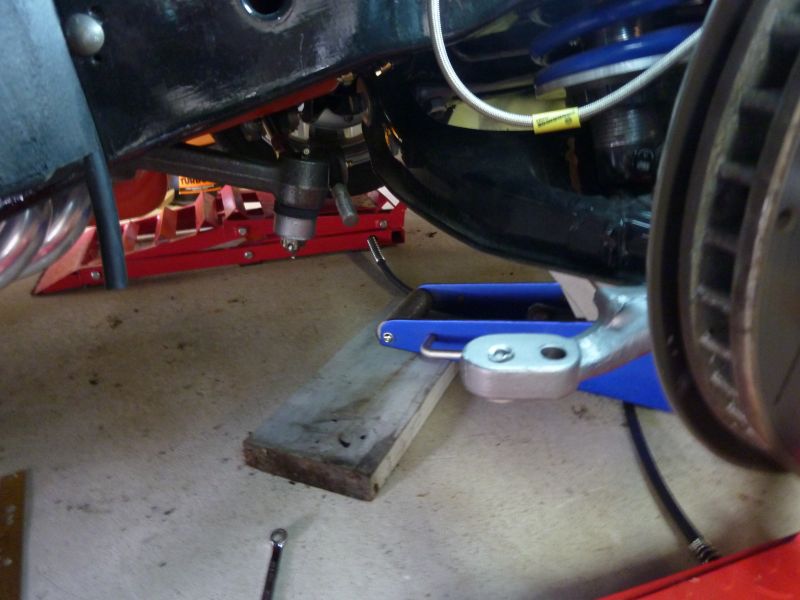
Then installed the new outer end kit and threaded on the new rod.
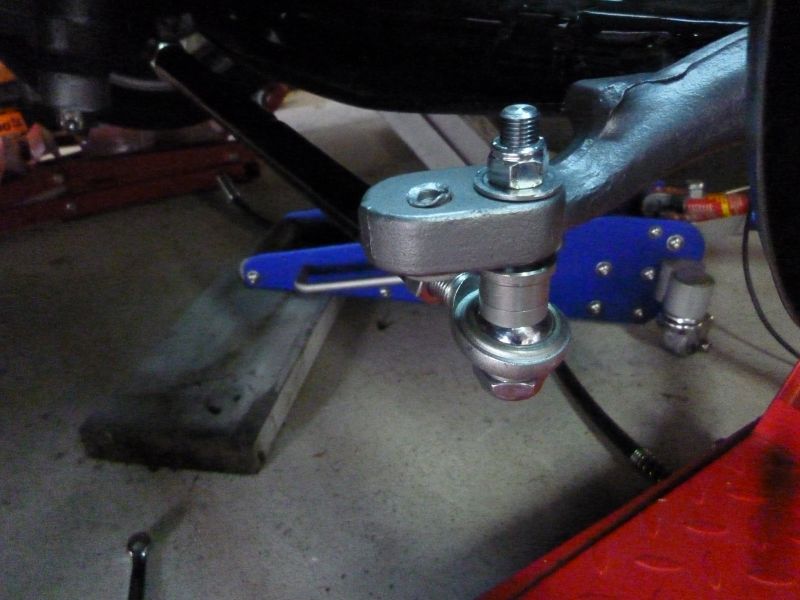
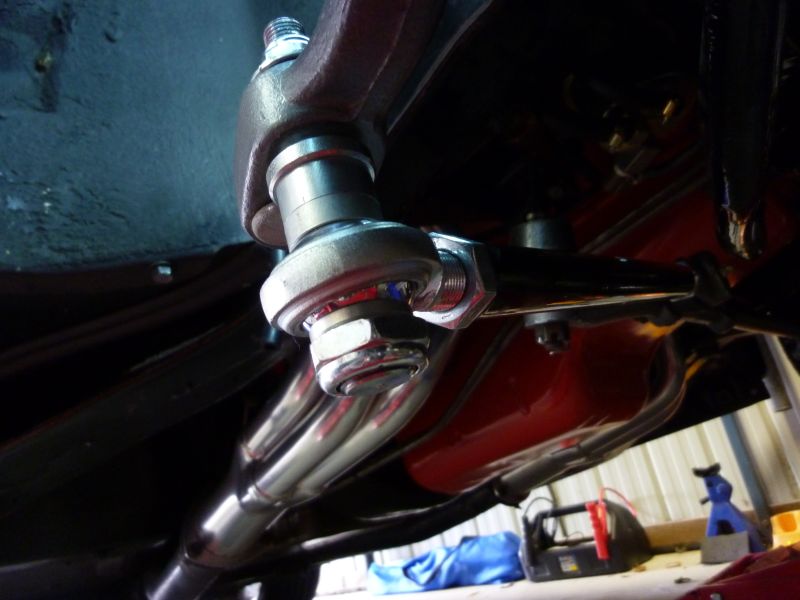
I took measurements before starting to ensure I could roughly get the toe where it was before I started.
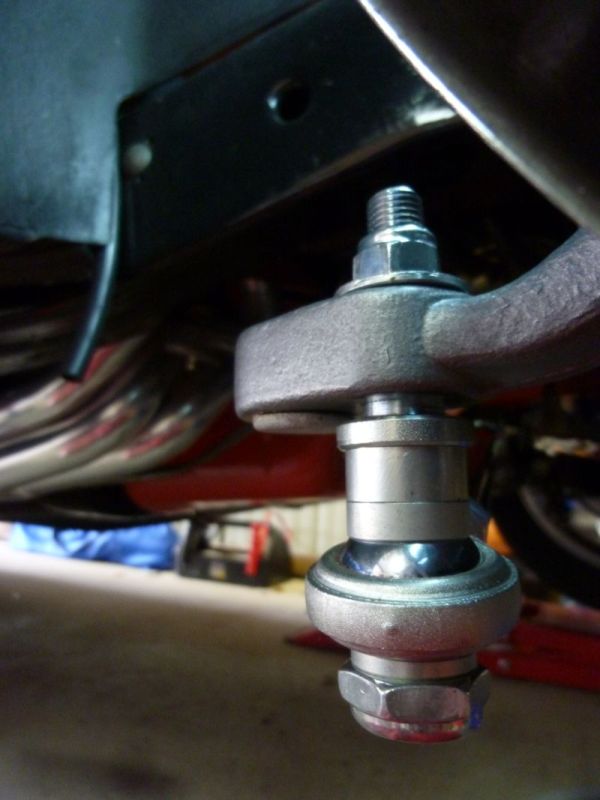
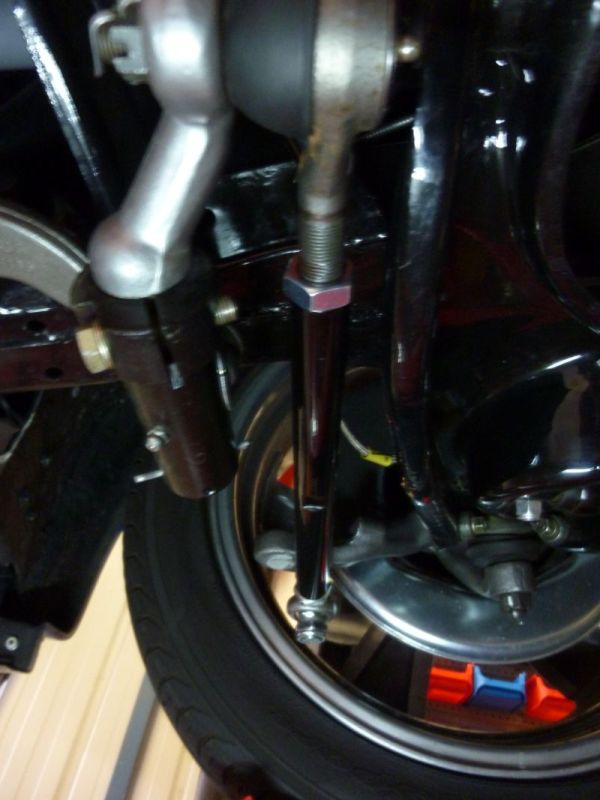
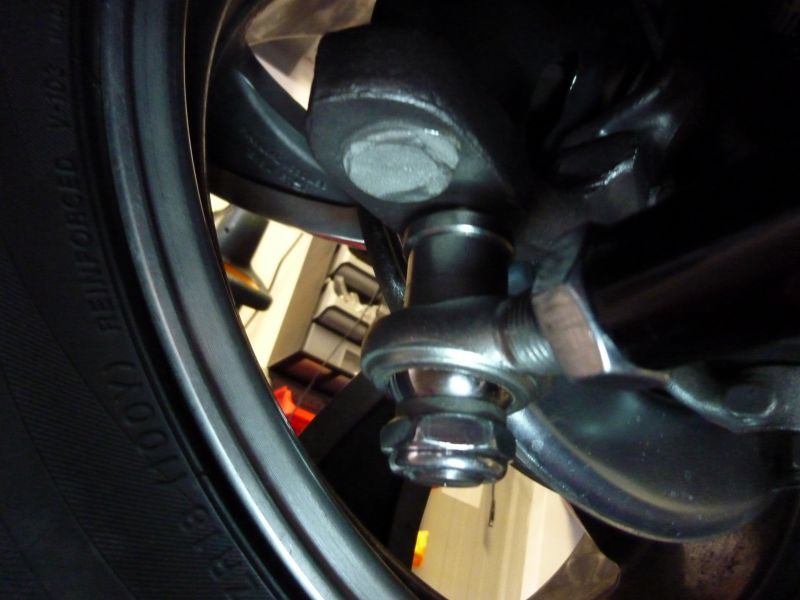
The new set-up puts the Tie Rod in a more level position than before.
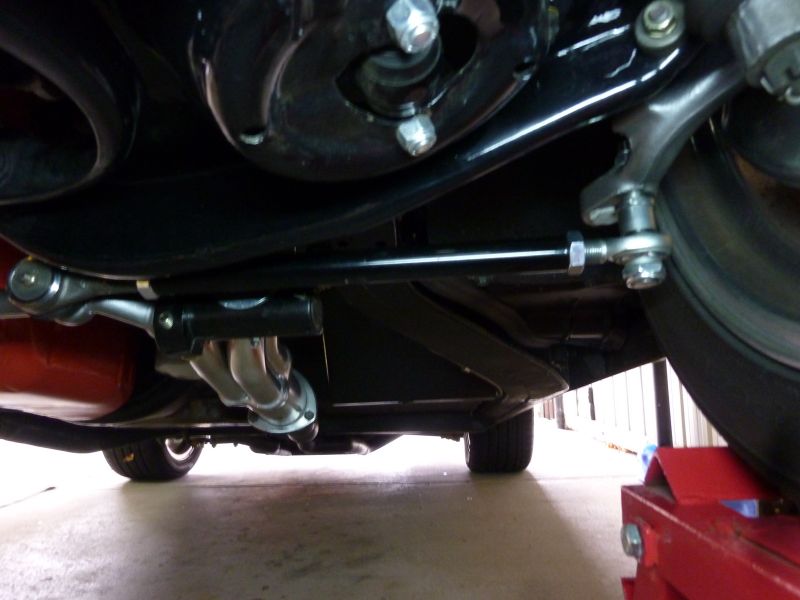
Ready to go for a wheel alignment next week, so hopefully it should be an improvement.
Given my Vette is fairly low the Tie Rod angle can cause some extra bump steer.
So I decided to replace the original style Tie Rod sleeves with new solid aluminium ones and put in the heim jointed outer Tie Rod end kit from Steroids that should reposition the rod angle for less bump steer.
First removed the wheels and then the cotter pin from the castle nut.
Then with castle nut above the end of the threads I used the removal tool to pop it free.
Then I removed the existing rod from the inner tie rod end
Then installed the new outer end kit and threaded on the new rod.
I took measurements before starting to ensure I could roughly get the toe where it was before I started.
The new set-up puts the Tie Rod in a more level position than before.
Ready to go for a wheel alignment next week, so hopefully it should be an improvement.
Last edited by CraigH; 04-10-2023 at 04:51 AM.
07-02-2013, 07:38 PM
#624
Melting Slicks
Thread Starter
A few places I visited on my recent US trip.
Foose & Automotive Expertise Unlimited - Huntington Beach
Bob's Big Boy Dinner
Peterson Automotive Museum

Foose & Automotive Expertise Unlimited - Huntington Beach
Bob's Big Boy Dinner
Peterson Automotive Museum
Last edited by CraigH; 04-10-2023 at 04:51 AM.

 08-17-2013, 11:50 PM
#627
Melting Slicks
Thread Starter
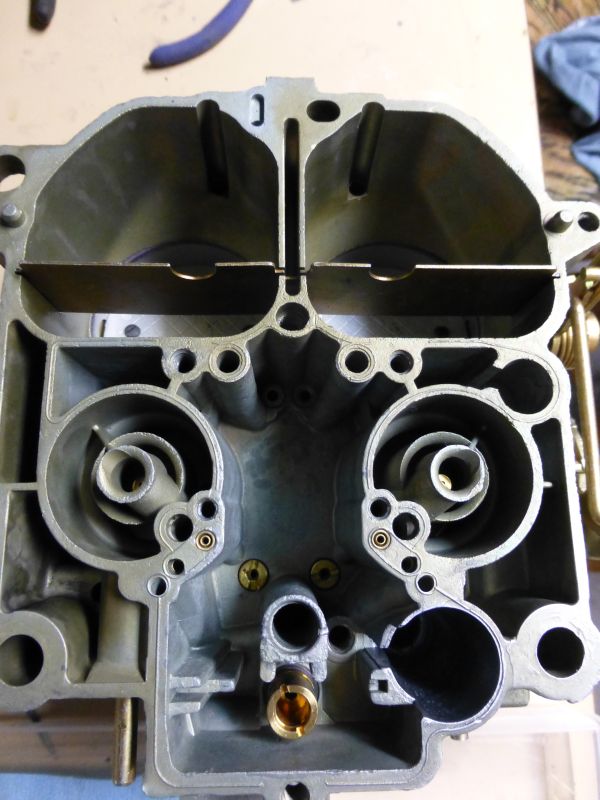
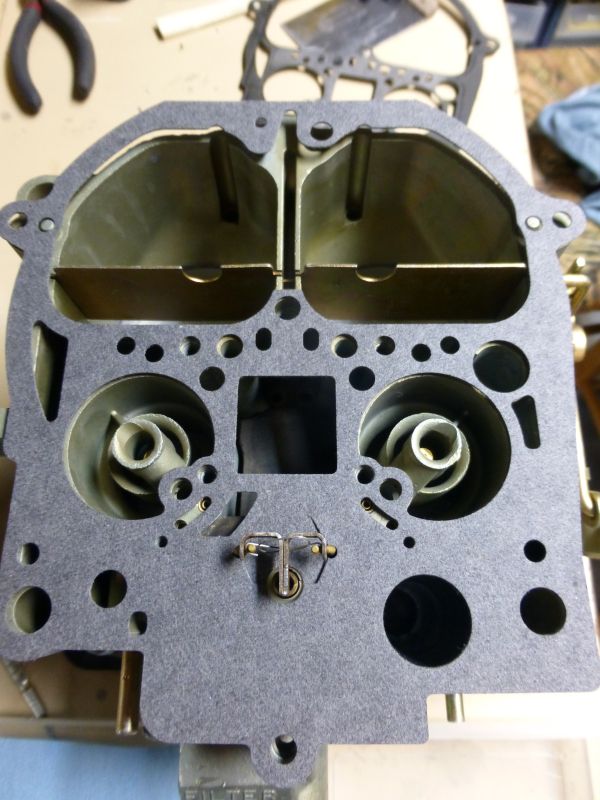
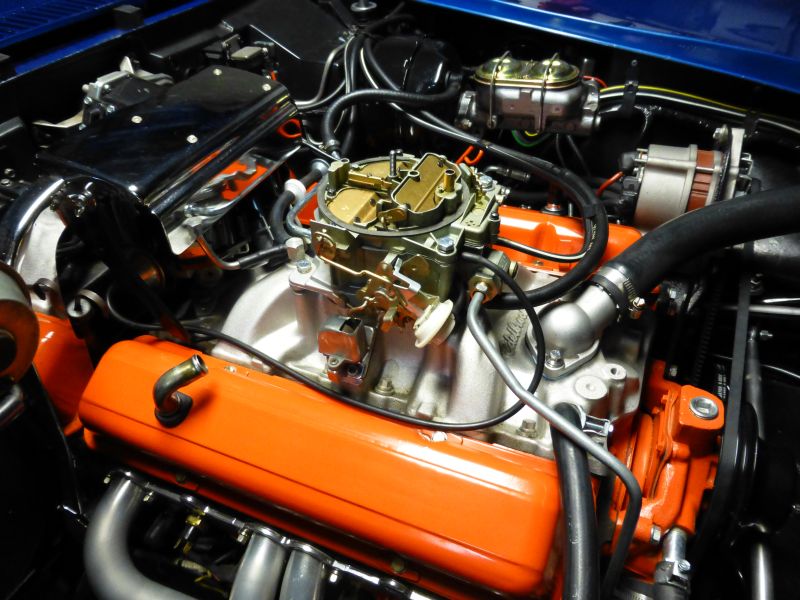
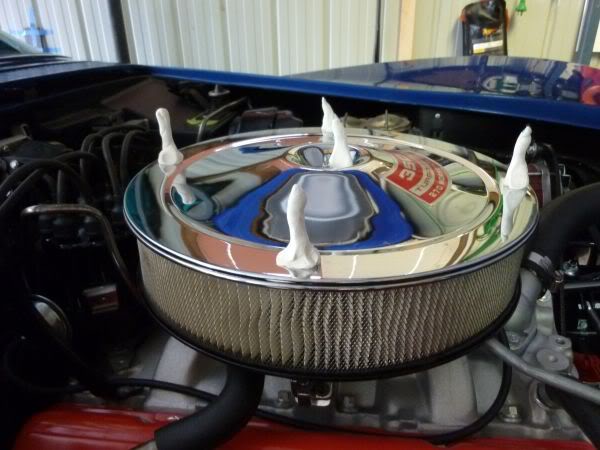
Car has been hard to start recently like the carb is empty of fuel.
Turns out the Accererator pump is not delivering a good squirt.
So Quad had to come off.
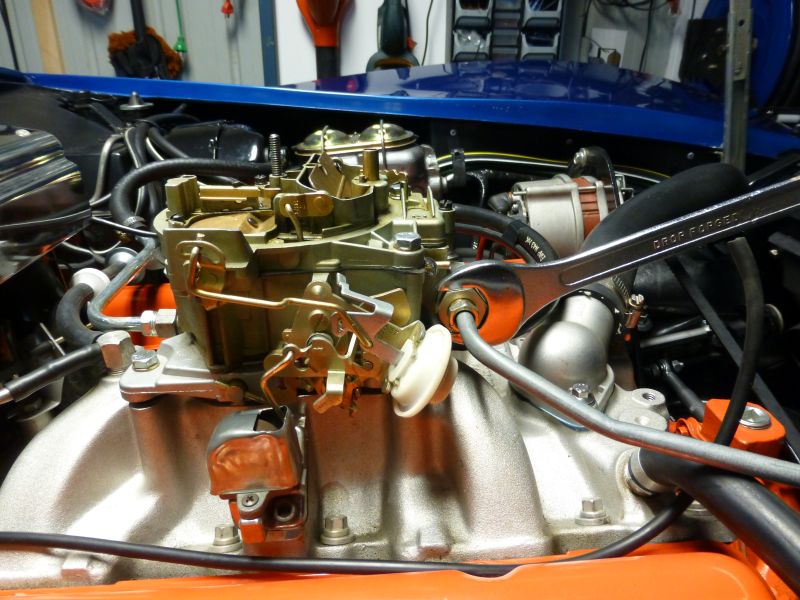
Fuel and vacuum lines, choke and throttle cables.
4 Main bolts out and off.
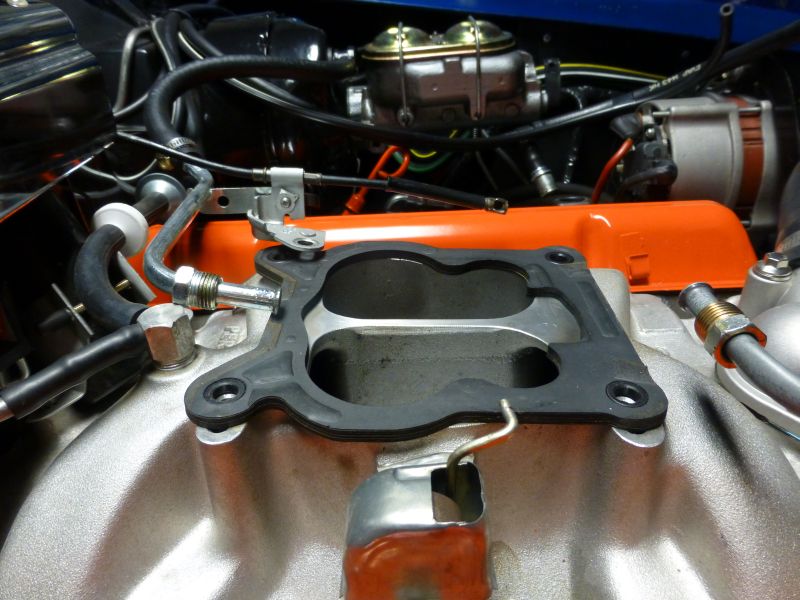
On the bench and ready to take apart.
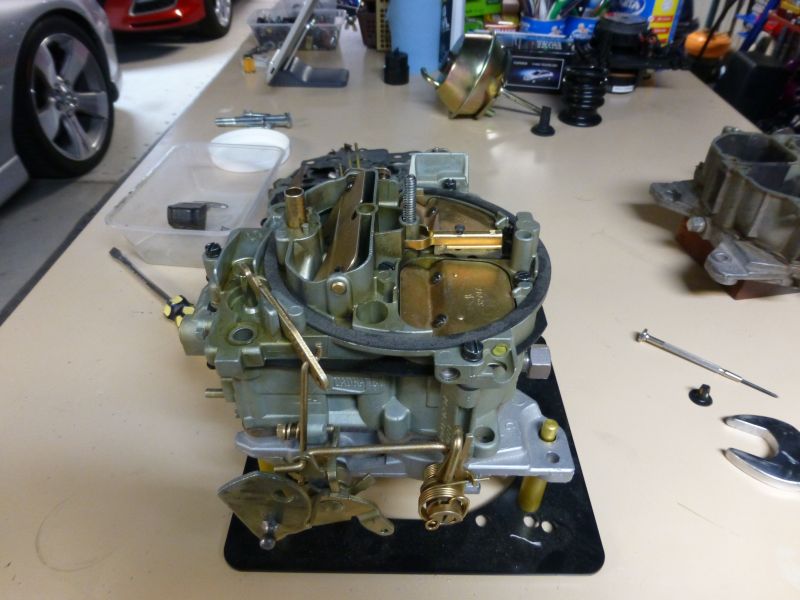
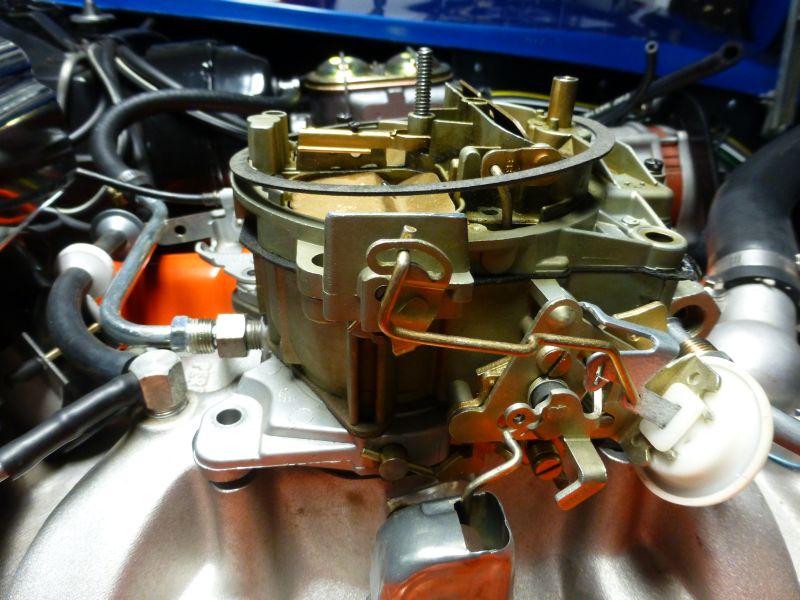
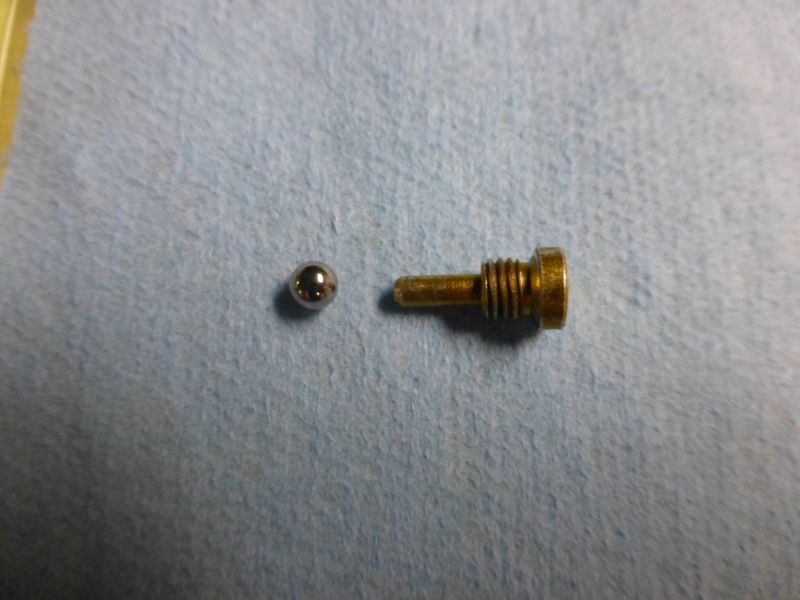
The culprit, the cup had expanded and become very soft.
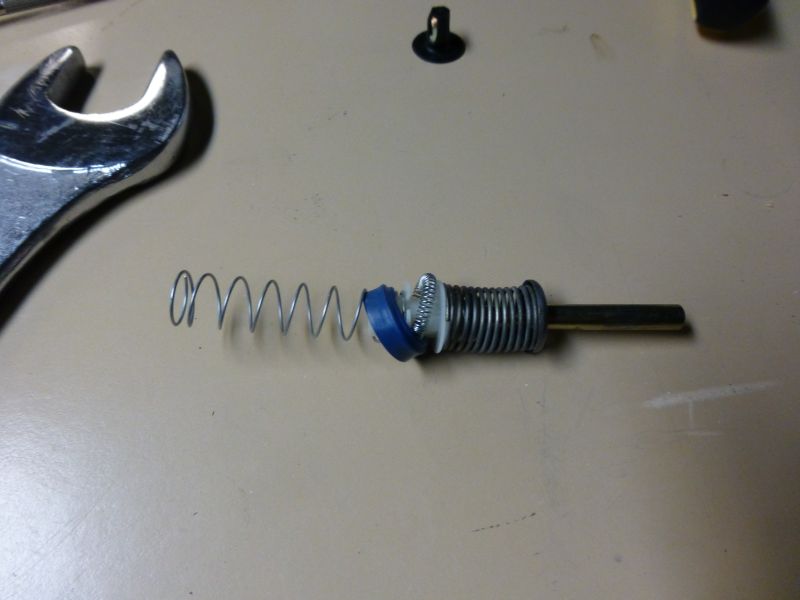
The parts out.
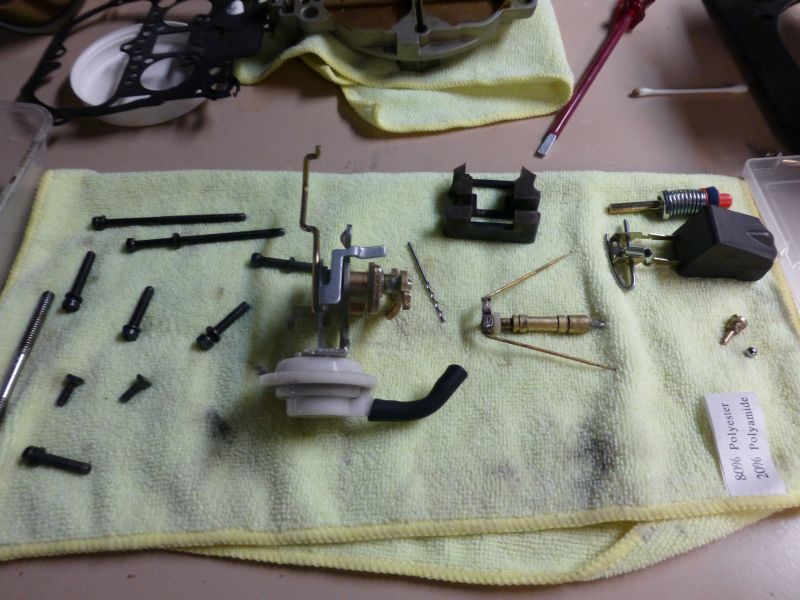
Nice and clean inside.

I need to increase the jets now its a 383 but that can wait till later.
Turns out the Accererator pump is not delivering a good squirt.
So Quad had to come off.
Fuel and vacuum lines, choke and throttle cables.
4 Main bolts out and off.
On the bench and ready to take apart.
The culprit, the cup had expanded and become very soft.
The parts out.
Nice and clean inside.
I need to increase the jets now its a 383 but that can wait till later.
Last edited by CraigH; 04-10-2023 at 04:49 AM.
08-19-2013, 08:53 PM
#628
Melting Slicks
Thread Starter
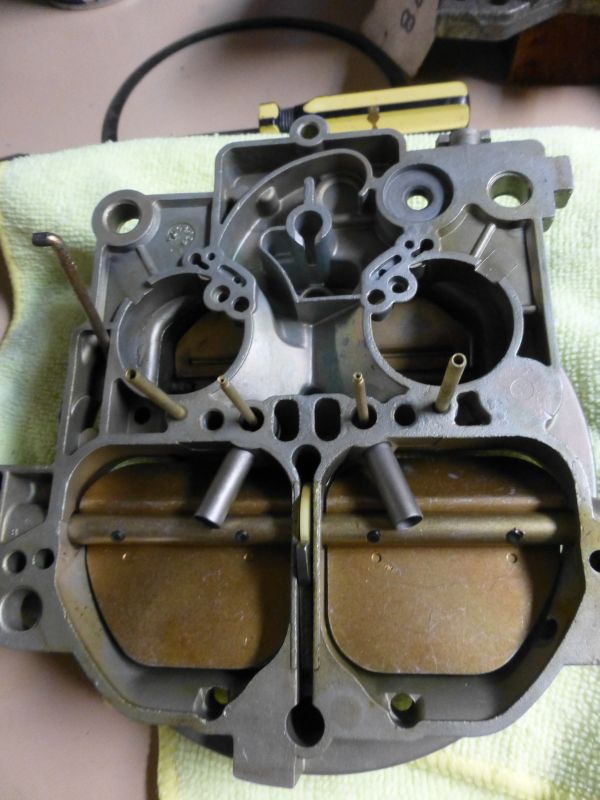
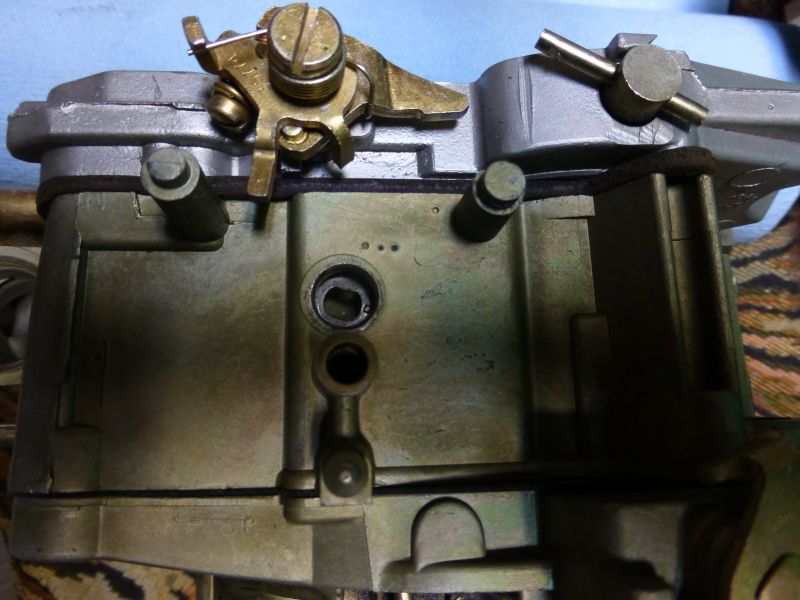
Time to put the Quadrajet back together and on the Vette.
Starting point.
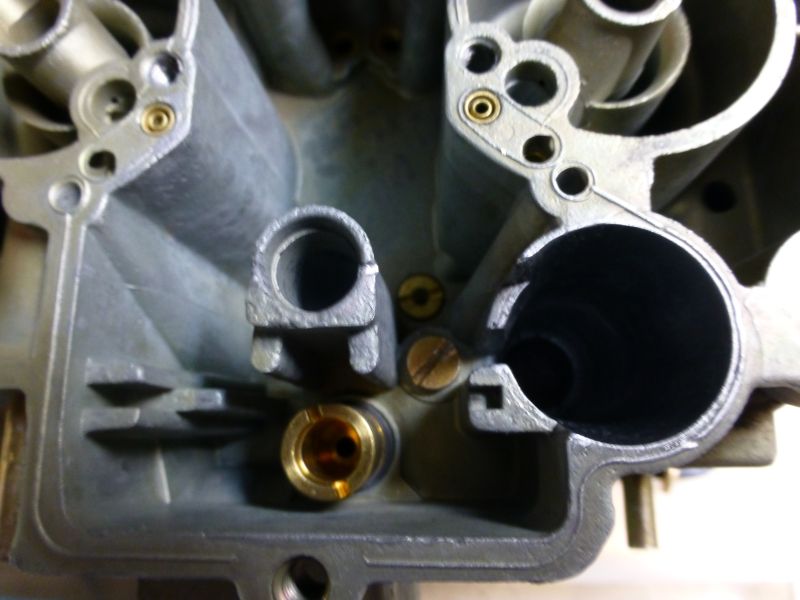
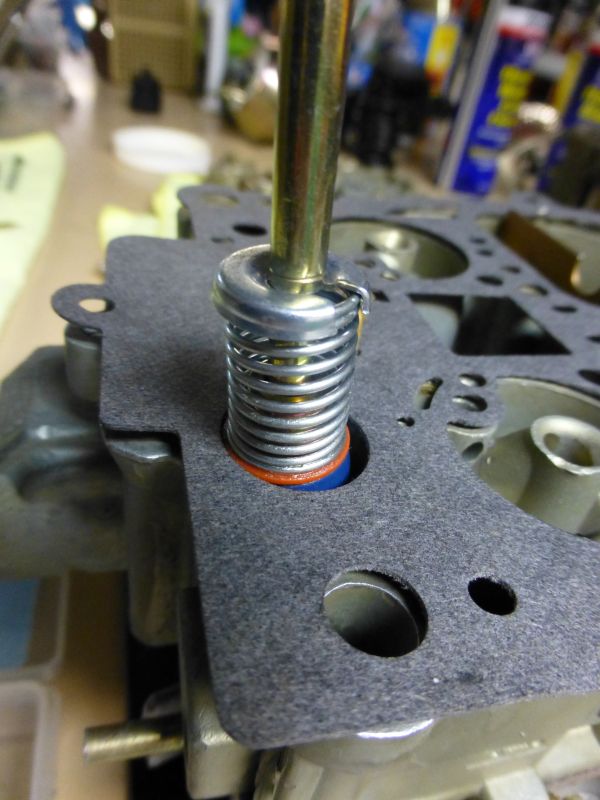
Accelerator Pump check valve. Need to ensure there is no gunk stopping its free movement.
In place below right jet.
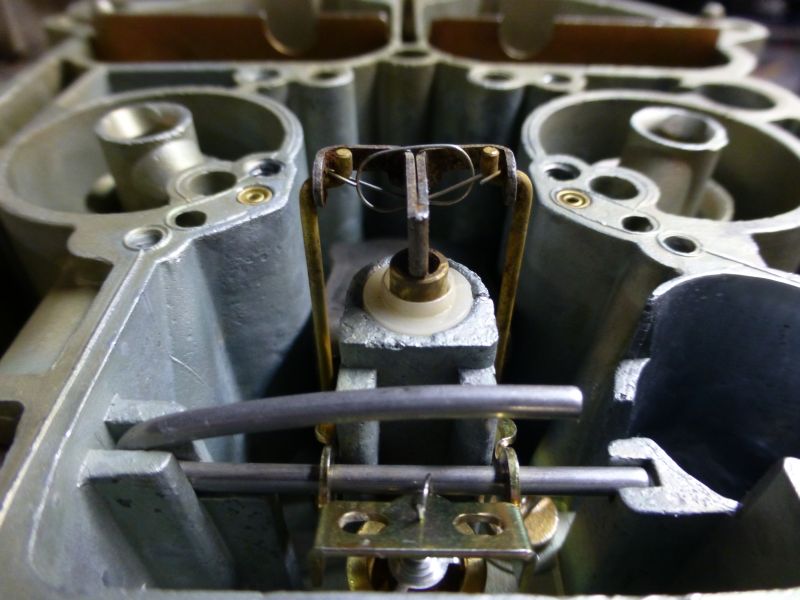
Float and needle.
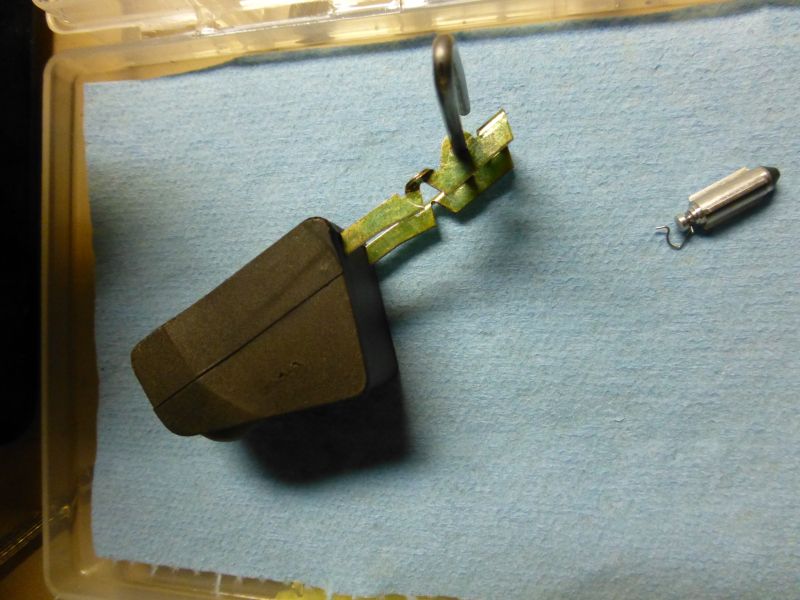
In place.

Operating height from top a little less than 3/8"
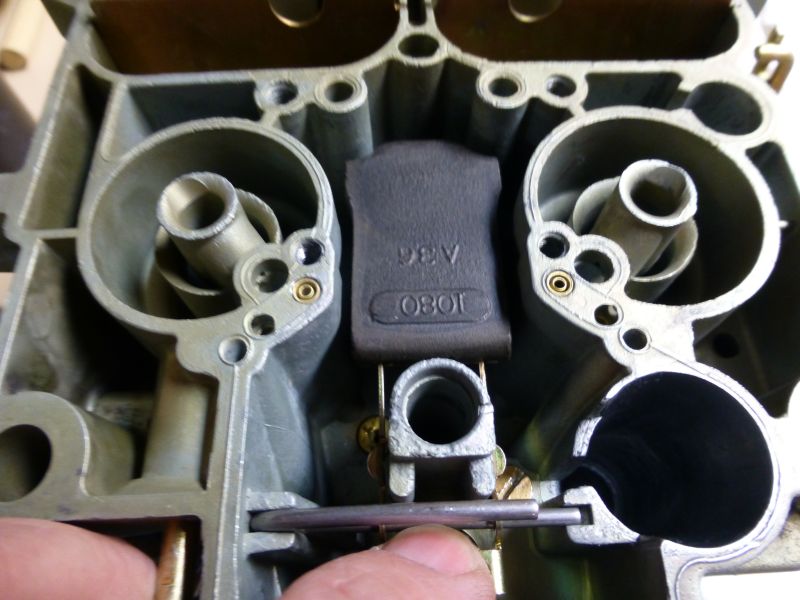
Metering rods.
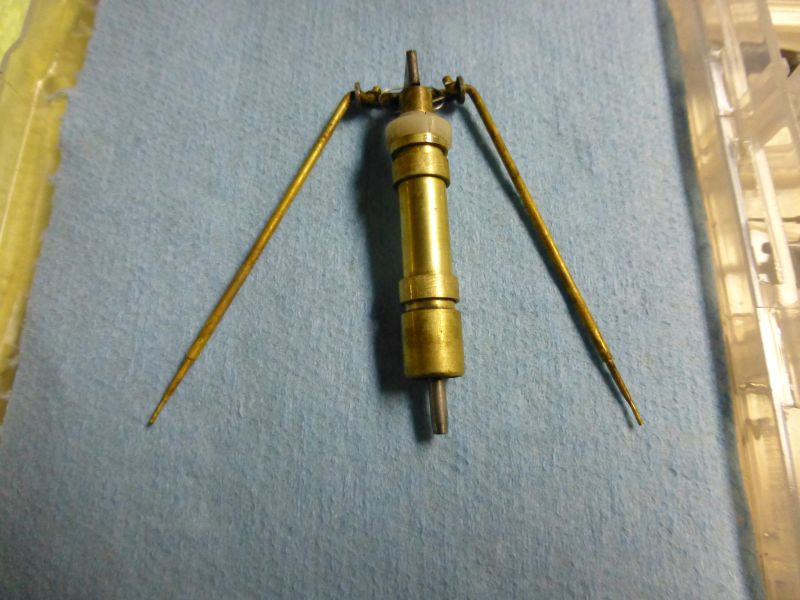
In jets with free movement. Lower them slowly and line them up with jets.
Cover
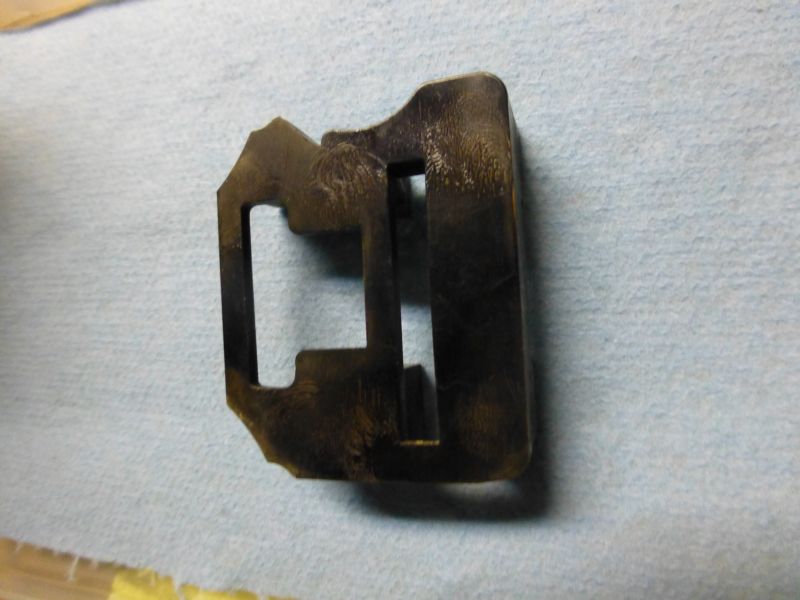
Gasket on.
Accelerator pulp in with a tiny bit of greese on the cup.
AirHorn ready to go back on
Tightened up.
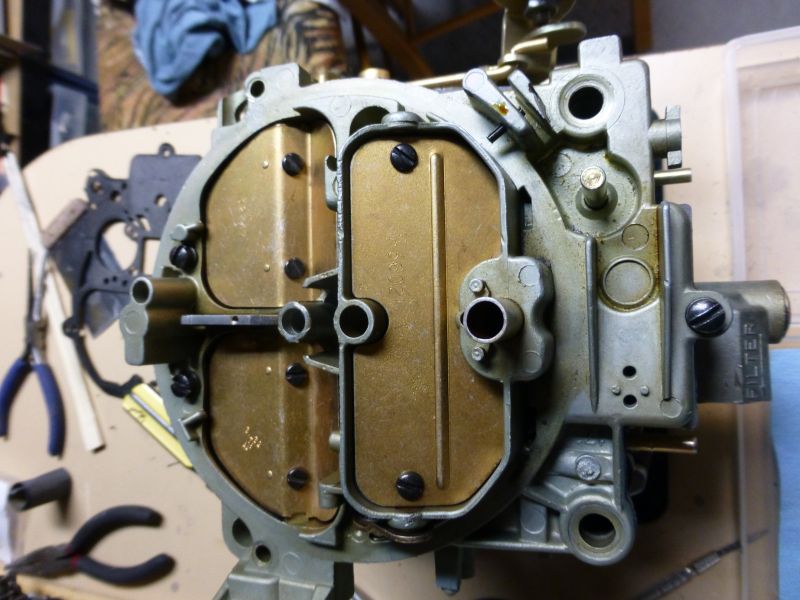
Hold on side and alight the choke lever from inside to allow mechanism to be fitted.
Back on vette and spin motor for a few seconds to fill with fuel. Three good squirts and it started first time. (Its a cold day here)
Starting point.
Accelerator Pump check valve. Need to ensure there is no gunk stopping its free movement.
In place below right jet.
Float and needle.
In place.
Operating height from top a little less than 3/8"
Metering rods.
In jets with free movement. Lower them slowly and line them up with jets.
Cover
Gasket on.
Accelerator pulp in with a tiny bit of greese on the cup.
AirHorn ready to go back on
Tightened up.
Hold on side and alight the choke lever from inside to allow mechanism to be fitted.
Back on vette and spin motor for a few seconds to fill with fuel. Three good squirts and it started first time. (Its a cold day here)
Last edited by CraigH; 04-10-2023 at 04:49 AM.
08-19-2013, 09:38 PM
#629
Melting Slicks
Thread Starter
Just so you dont think I just like to take everything apart for no reason.
I could have just changed the Accelerator Pump without pulling other parts out but just in case there was some burrs in the pumps piston area I went over the entire surface with various grades of abrasive paper to ensure it was as smooth as possible.
I could have just changed the Accelerator Pump without pulling other parts out but just in case there was some burrs in the pumps piston area I went over the entire surface with various grades of abrasive paper to ensure it was as smooth as possible.
10-18-2013, 01:25 AM
#630
Melting Slicks
Thread Starter
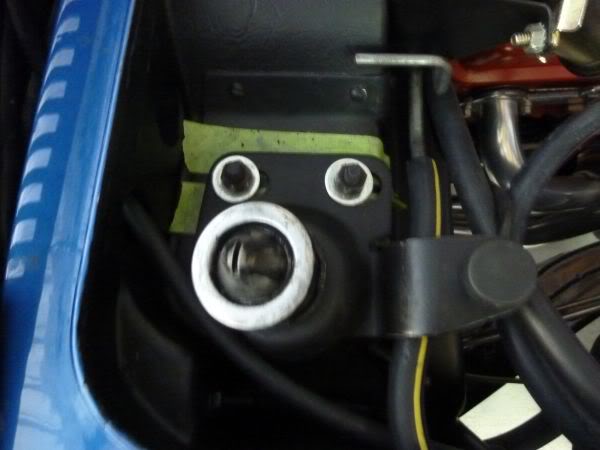
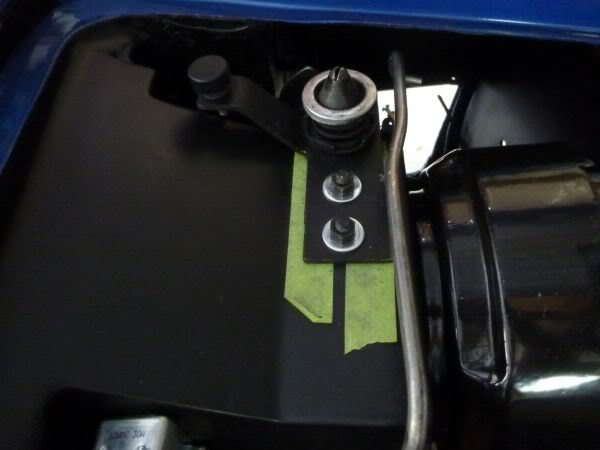
Finaly got around to adjusting T-Top's and got rid of most of the noise.
Fairly happy with the gaps as well but passenger one wont go in as far as the drivers, oh well 40 years and the glass may have changed shape a bit.
Before putting the trim on I decided to add nylon plugs to the hold down screw holes as they were never tight.
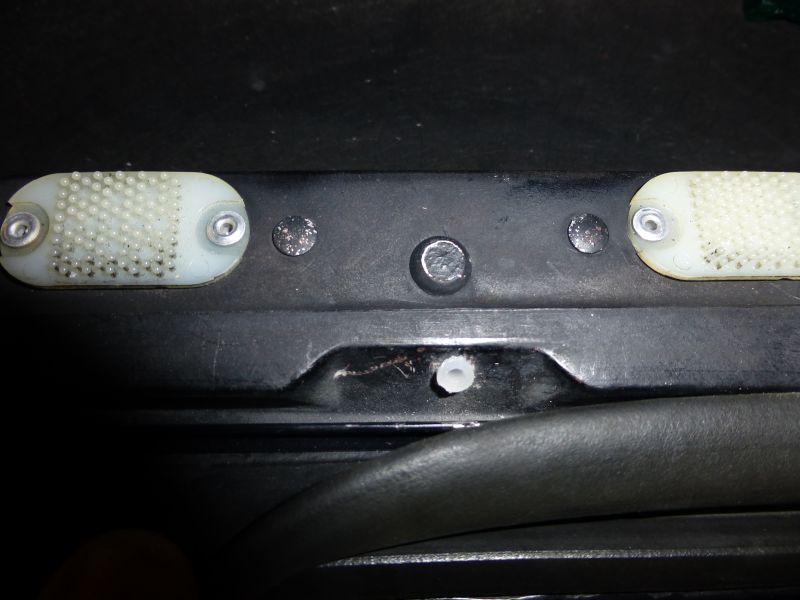
Drilled them out slightly and pushed plugs in.
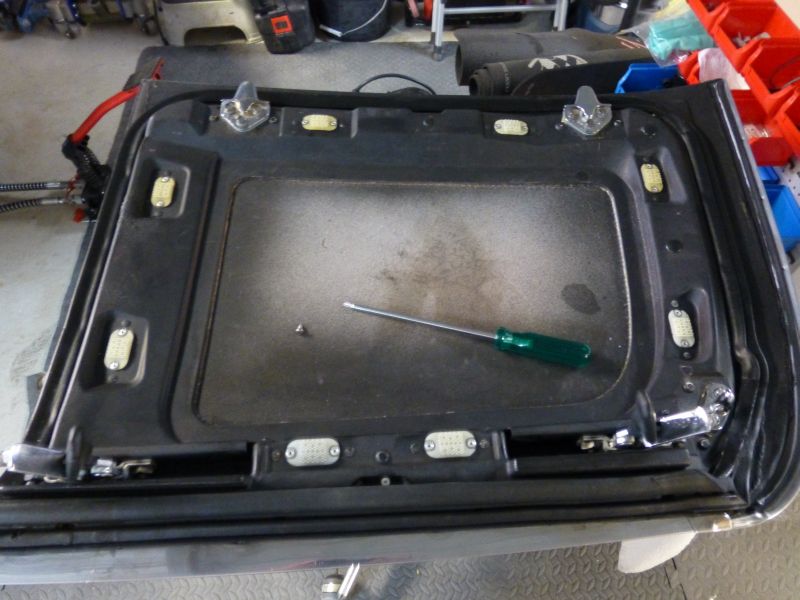
Fits all nice an tight now.
Fairly happy with the gaps as well but passenger one wont go in as far as the drivers, oh well 40 years and the glass may have changed shape a bit.
Before putting the trim on I decided to add nylon plugs to the hold down screw holes as they were never tight.
Drilled them out slightly and pushed plugs in.
Fits all nice an tight now.
Last edited by CraigH; 04-10-2023 at 04:49 AM.
10-18-2013, 02:23 AM
#631
Melting Slicks
Thread Starter
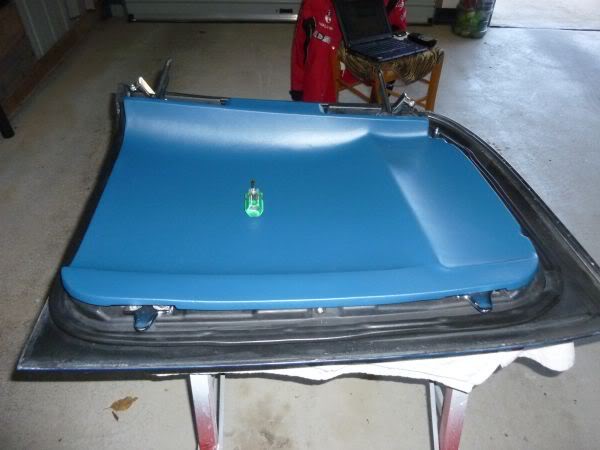
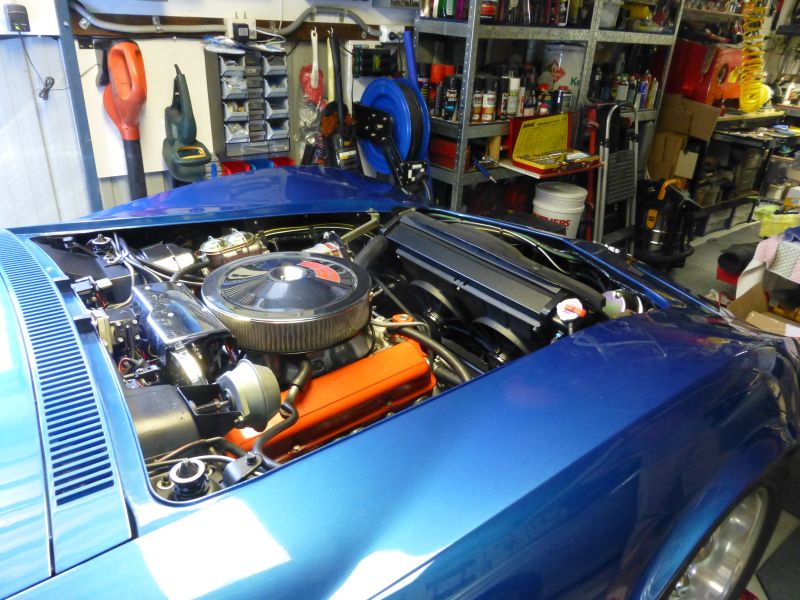
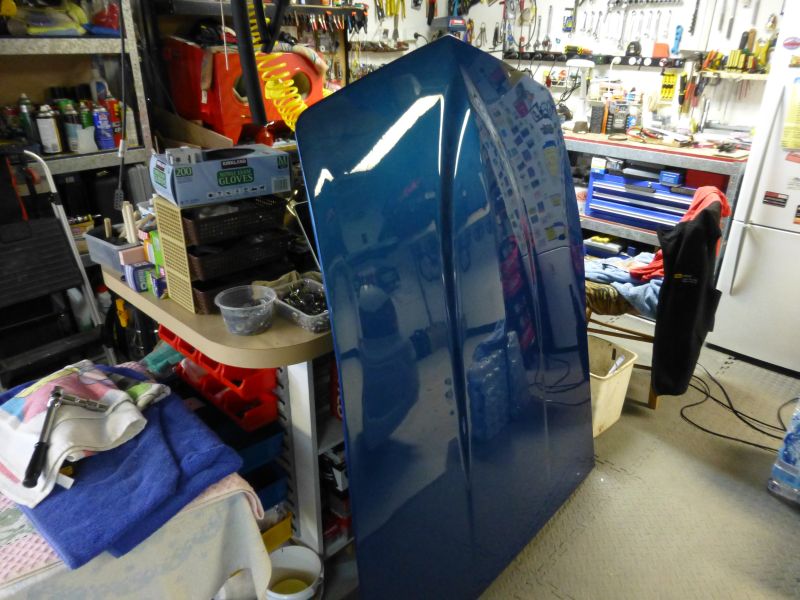
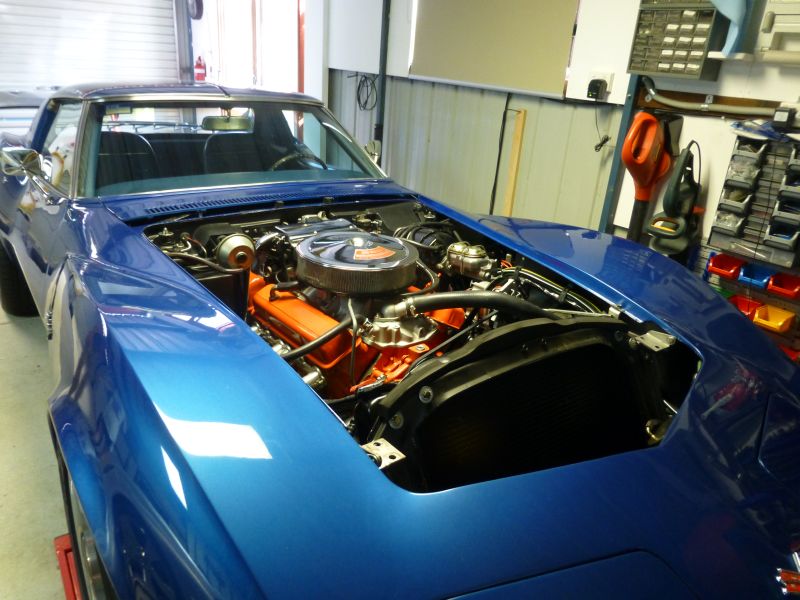
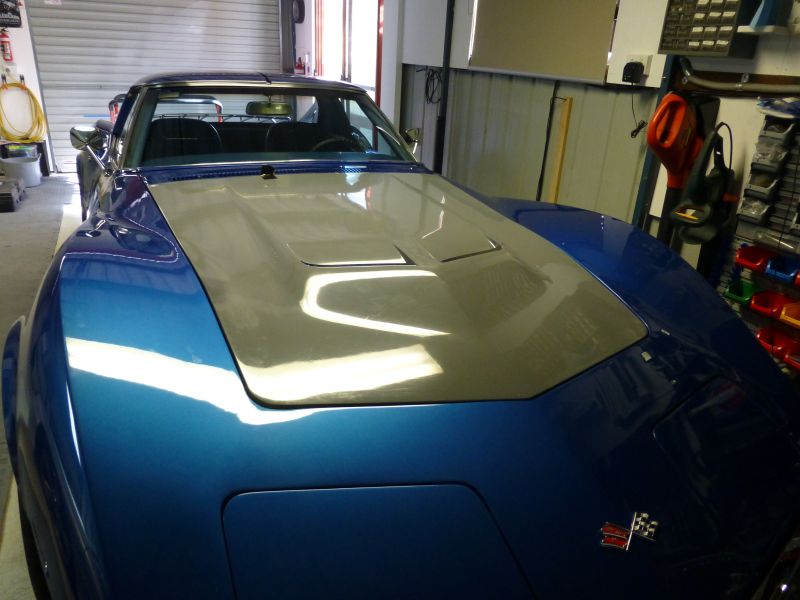
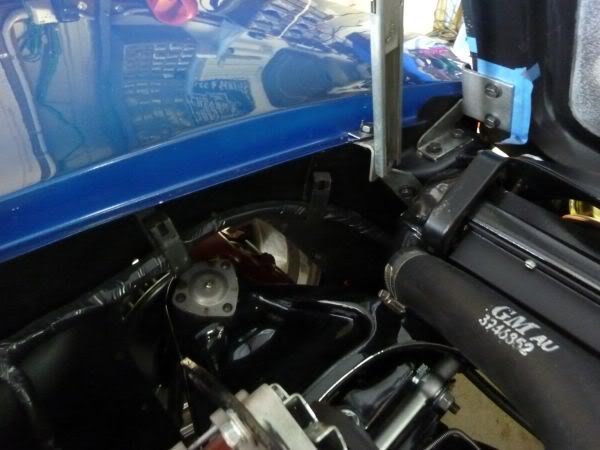
Time to prepare the new big block/LT1 hood.
Drilled out the hood trim mounting holes - they were marked in the glass.

To be expected they did not work well without a fair bit of adjustment but looking ok now.
Drilled out the hood trim mounting holes - they were marked in the glass.
To be expected they did not work well without a fair bit of adjustment but looking ok now.
Last edited by CraigH; 04-10-2023 at 04:49 AM.
 10-18-2013, 02:24 AM
#633
Melting Slicks
Thread Starter
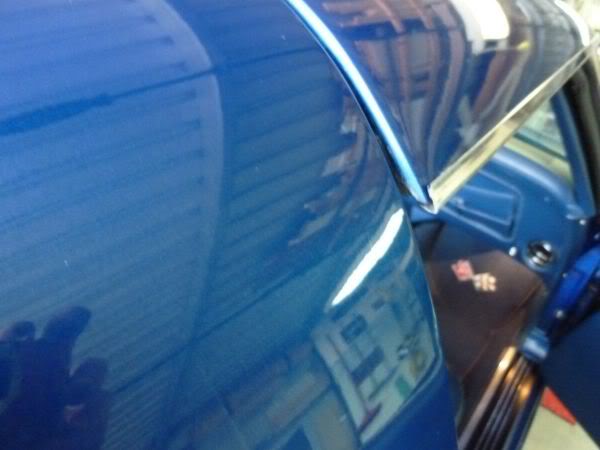
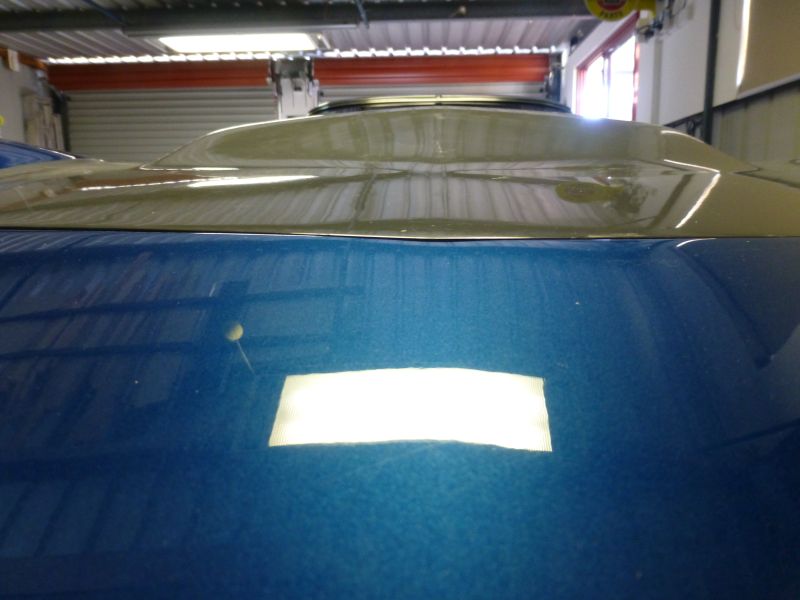
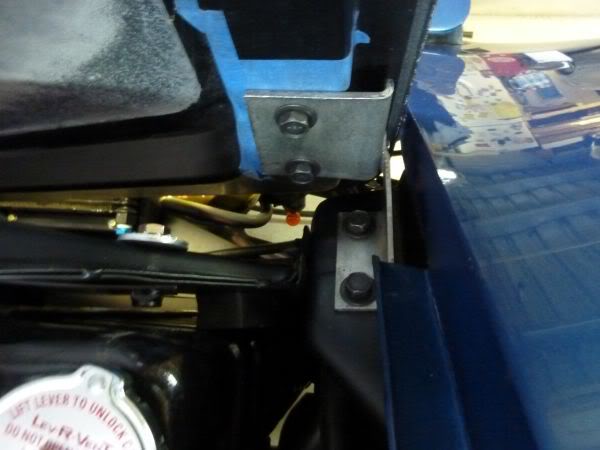
Trial fit the new hood.
A few adjustments and its a good match to the old guards.
Fits better on driver front than original but a bit higher on the passenger front.
I may remove the glass under the passenger hinge then shim it to the height I need
A few adjustments and its a good match to the old guards.
Fits better on driver front than original but a bit higher on the passenger front.
I may remove the glass under the passenger hinge then shim it to the height I need
Last edited by CraigH; 04-10-2023 at 04:48 AM.
10-18-2013, 04:30 PM
#634
Intermediate

Member Since: Aug 2011
Posts: 29
Likes: 0
Received 0 Likes
on
0 Posts
Hi Craig,
Quick question concerning this from page 4 post 73:
"After cleaning up the pillars I masked them of and painted them with satin black enamel."
Did you use a Latex or Oil Base Paint?
Chet
Quick question concerning this from page 4 post 73:
"After cleaning up the pillars I masked them of and painted them with satin black enamel."
Did you use a Latex or Oil Base Paint?
Chet
Last edited by 1$t Vette'68; 10-18-2013 at 04:32 PM.
10-19-2013, 09:18 AM
#636
Intermediate
Member Since: Aug 2011
Posts: 29
Likes: 0
Received 0 Likes
on
0 Posts
10-20-2013, 12:38 AM
#637
Melting Slicks
Thread Starter
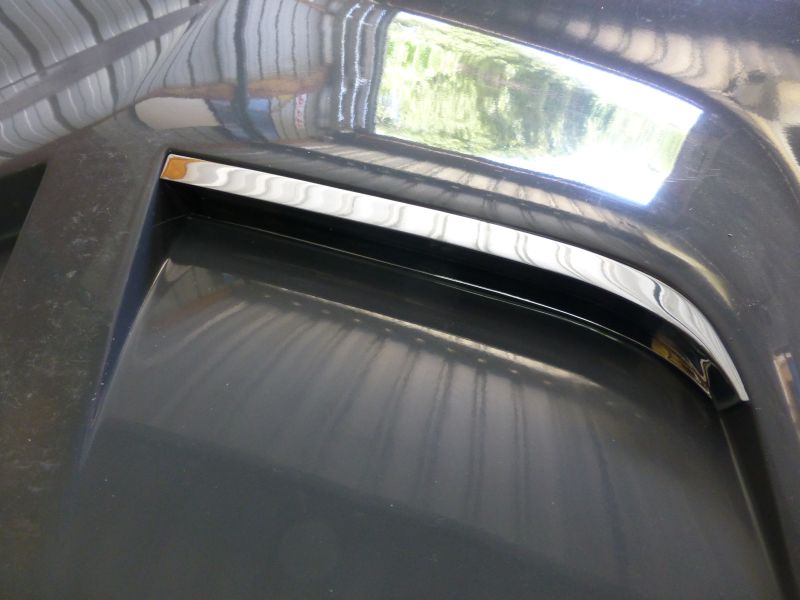
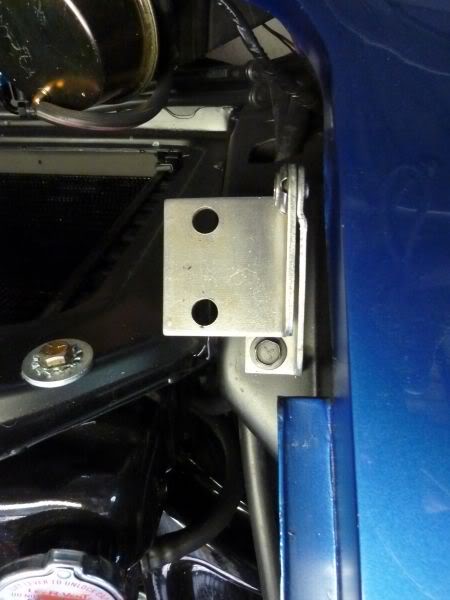
Ran into a snag with the hood latches.
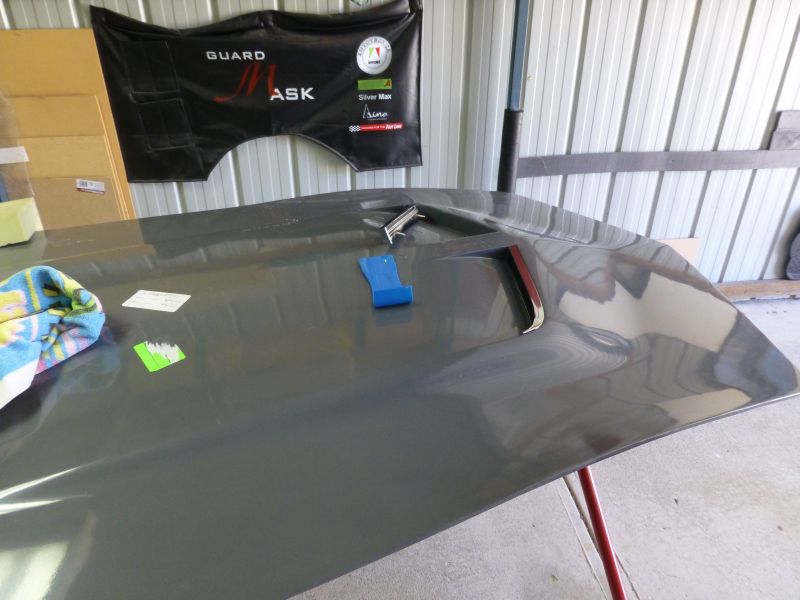
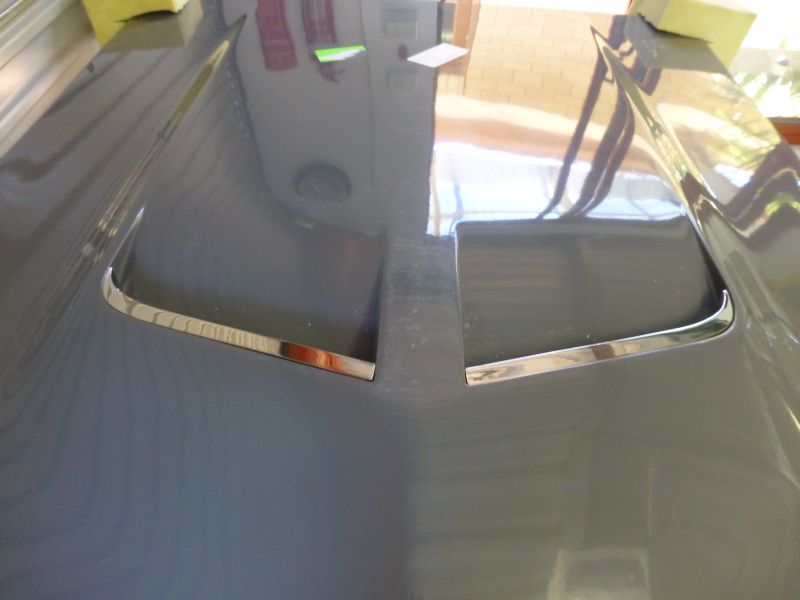
The ACI LT1 hood seems to be based on a 68-69E and as such wont fit the passenger side (RH) latch from my 71 as the rivet bulge stops the plate sitting flush.
ACI Hood
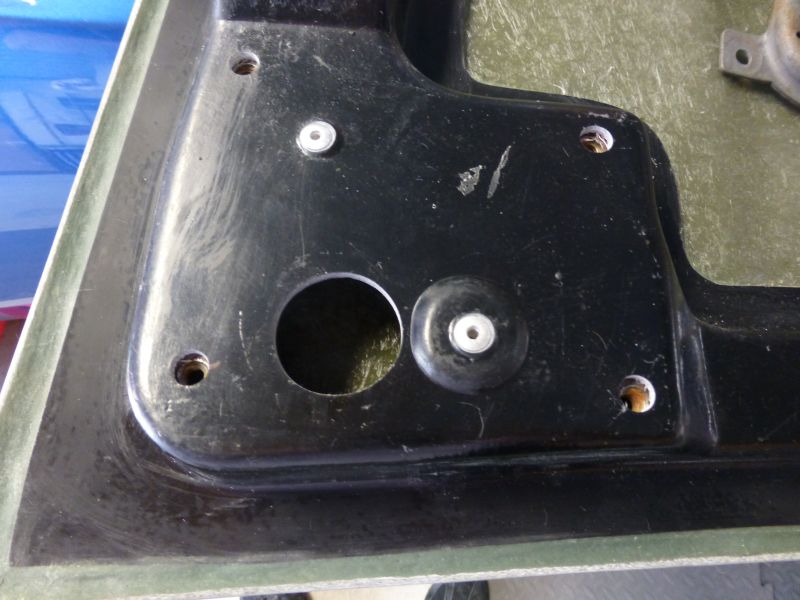
1971 OEM Hood
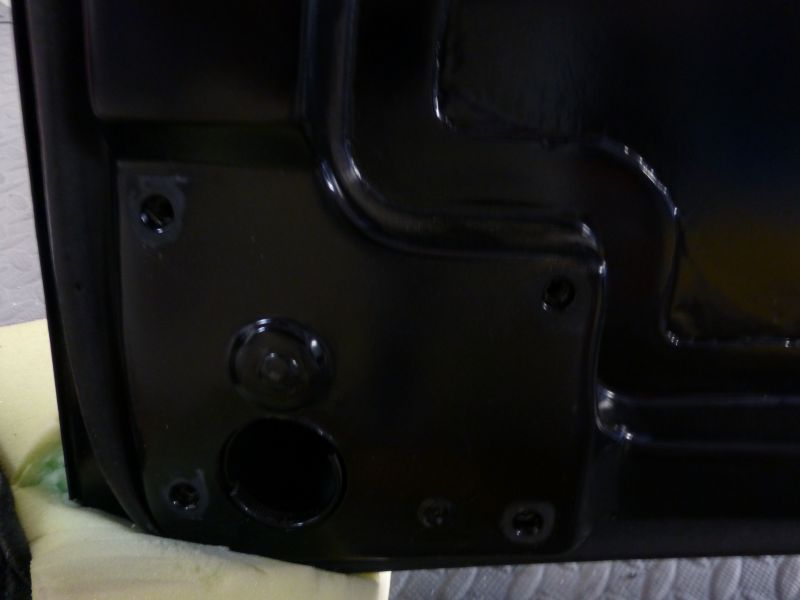
So I either need to find some early hood latches or modify the latch area of the new hood.
Has anyone tried adding new rivets and removed the original one and grinding down the area so the latch can fit ?
Do I have any other options ?
Seems mad that ACI would pattern there hood of such an early hood given ther latches dont seem to be as plentiful !!!!!!!
The ACI LT1 hood seems to be based on a 68-69E and as such wont fit the passenger side (RH) latch from my 71 as the rivet bulge stops the plate sitting flush.
ACI Hood
1971 OEM Hood
So I either need to find some early hood latches or modify the latch area of the new hood.
Has anyone tried adding new rivets and removed the original one and grinding down the area so the latch can fit ?
Do I have any other options ?
Seems mad that ACI would pattern there hood of such an early hood given ther latches dont seem to be as plentiful !!!!!!!
Last edited by CraigH; 04-10-2023 at 04:48 AM.
10-20-2013, 11:22 PM
#638
Instructor

Craig, here is a link to a Corvette salvage yard in Missouri. Their web site and eBay store don't show any 1968/69 hood latches but there is a parts inquire. I am looking for a turn signal lever with cruise control for my 81 that no one makes and used the inquire and they got back to me within a couple of days. I hope you can get to it.
http://www.corvettesalvage.com/
Also try this. I think I saw what you need. Not sure, I am not familiar with the hood on older C3's
https://www.paragoncorvette.com/default.aspx
http://www.corvettesalvage.com/
Also try this. I think I saw what you need. Not sure, I am not familiar with the hood on older C3's
https://www.paragoncorvette.com/default.aspx
Last edited by vetteman1981; 10-21-2013 at 12:04 AM.
10-21-2013, 05:54 AM
#639
Melting Slicks
Thread Starter
Craig, here is a link to a Corvette salvage yard in Missouri. Their web site and eBay store don't show any 1968/69 hood latches but there is a parts inquire. I am looking for a turn signal lever with cruise control for my 81 that no one makes and used the inquire and they got back to me within a couple of days. I hope you can get to it.
http://www.corvettesalvage.com/
Also try this. I think I saw what you need. Not sure, I am not familiar with the hood on older C3's
https://www.paragoncorvette.com/default.aspx
http://www.corvettesalvage.com/
Also try this. I think I saw what you need. Not sure, I am not familiar with the hood on older C3's
https://www.paragoncorvette.com/default.aspx
The salvage site certainly has some interesting parts and cars like the C1 that looks burned.
I think I will end up just modifying the hood to fit 69L-76 latches
10-21-2013, 10:37 PM
#640
Instructor
