
1971 Journey
 02-25-2013, 06:31 PM
#561
Melting Slicks

Thread Starter


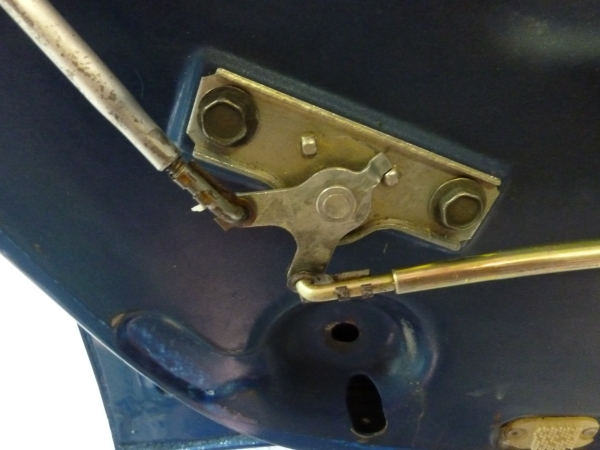
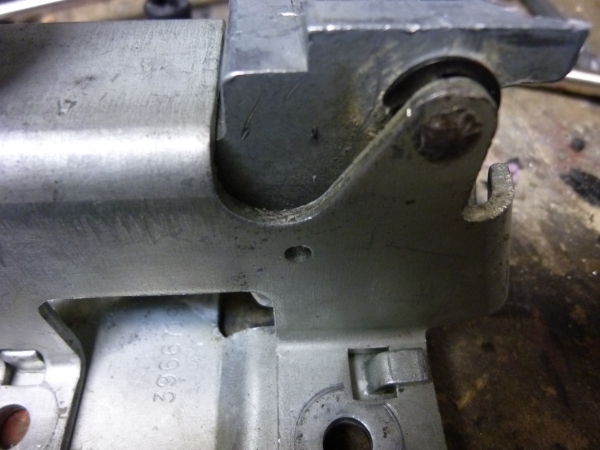
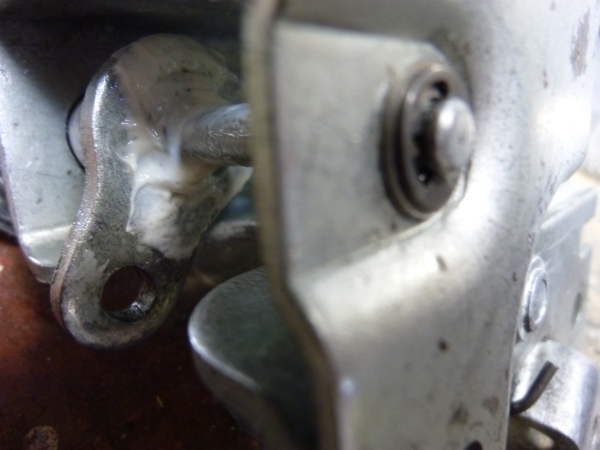
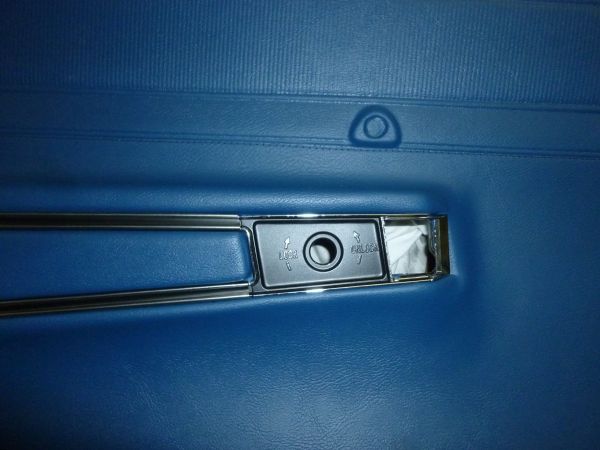
Drivers external door handle had a broken spring that I had replaced with one of the flat springs.
Was never happy with it so pulled it out.
And replaced with a proper spring.
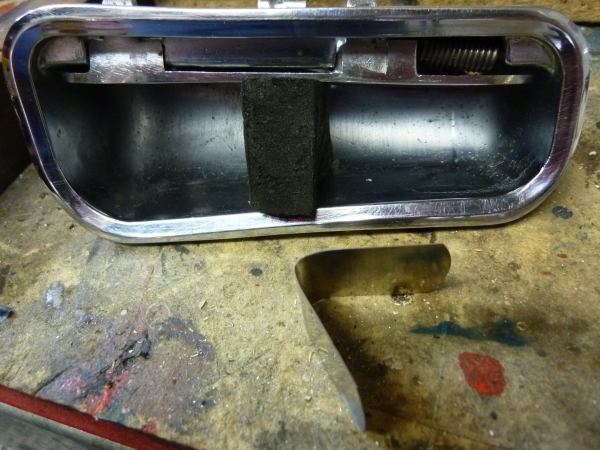
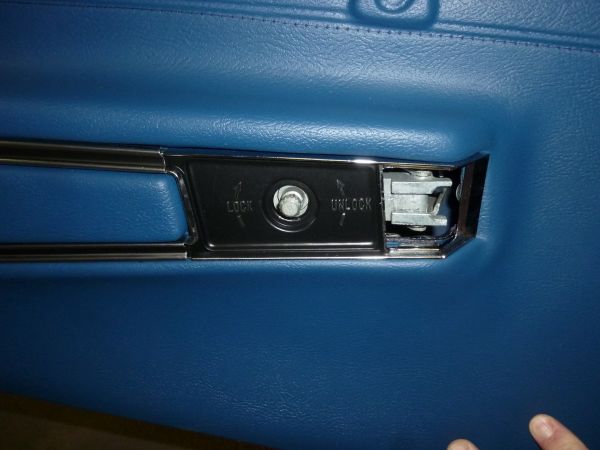
Cleaned up the door lock at same time.
Was never happy with it so pulled it out.
And replaced with a proper spring.
Cleaned up the door lock at same time.
Last edited by CraigH; 04-10-2023 at 04:42 AM.
 02-25-2013, 06:31 PM
#562
Melting Slicks
Thread Starter
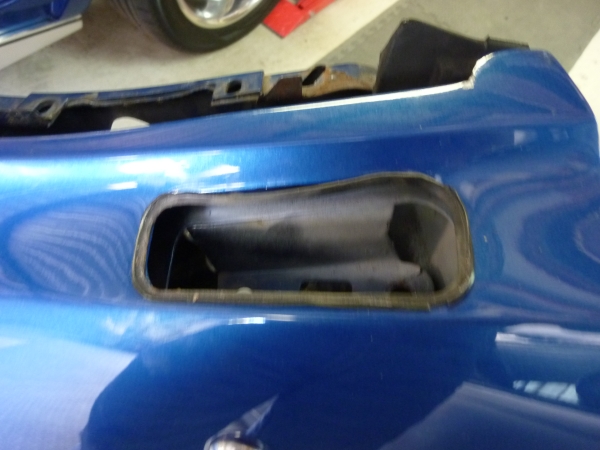
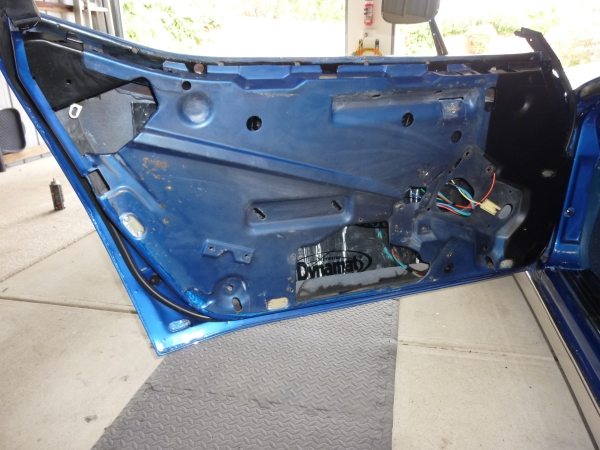
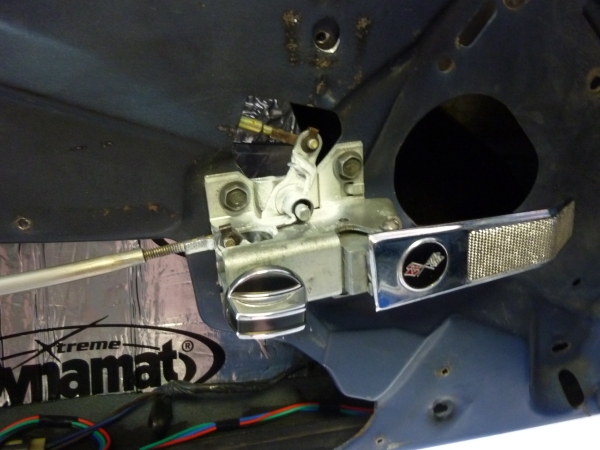
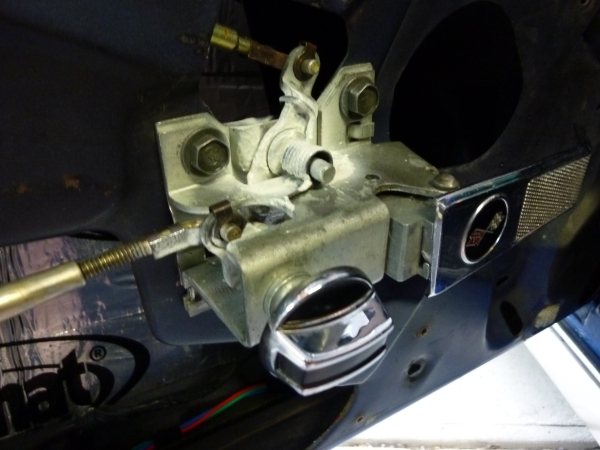
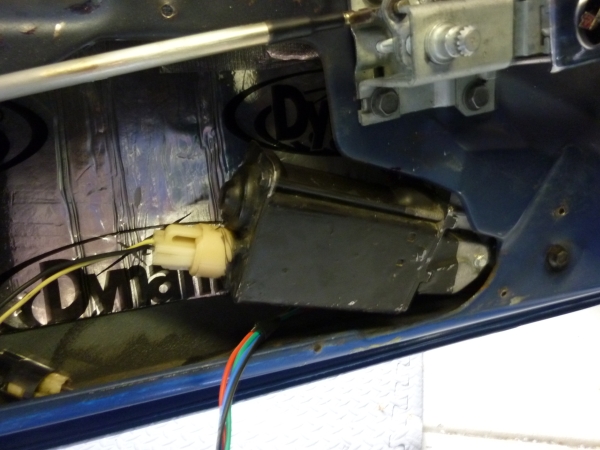
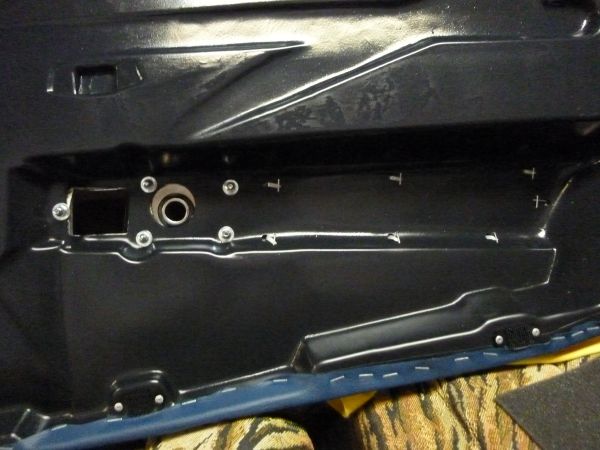
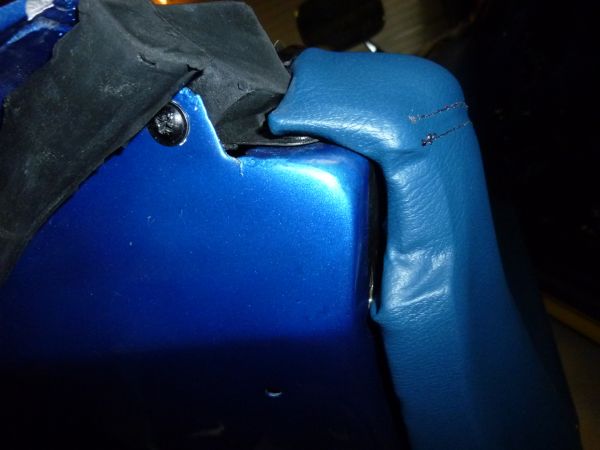
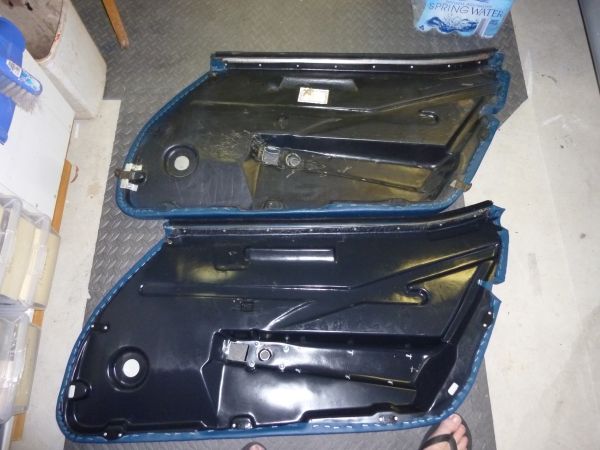
Cleaned the door inside and out
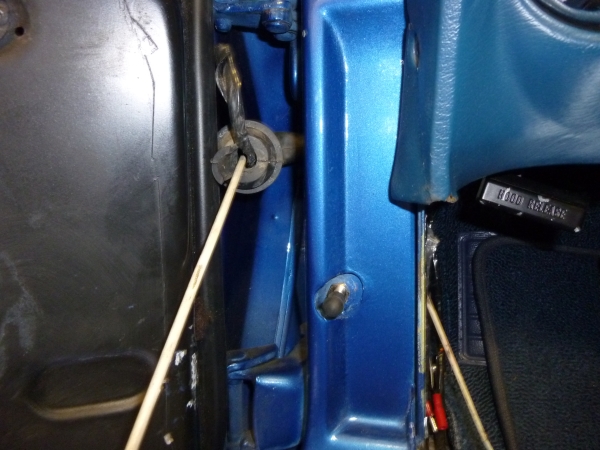
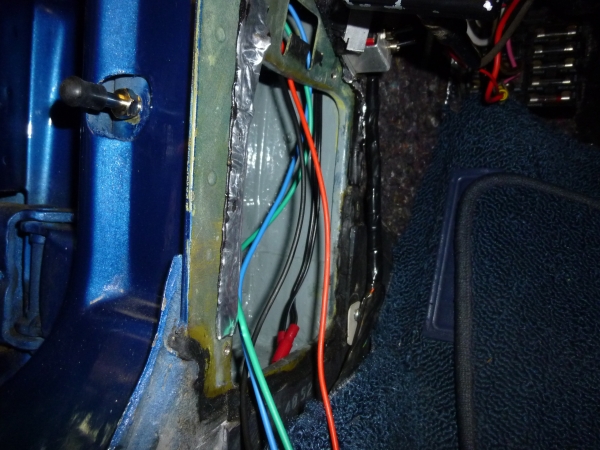
Decided to add power door actuators and remote activation.
Not that easy to run extra wires into the door but i got them there.
Ran a flexible piece first to pull them through.
Inside door was fairly good.
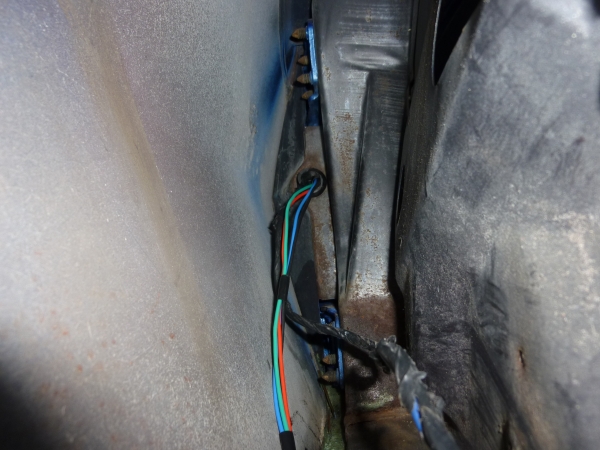
Treated all rust and gave it a coat of paint to protect it.
Decided to add power door actuators and remote activation.
Not that easy to run extra wires into the door but i got them there.
Ran a flexible piece first to pull them through.
Inside door was fairly good.
Treated all rust and gave it a coat of paint to protect it.
Last edited by CraigH; 04-10-2023 at 04:42 AM.
02-25-2013, 06:32 PM
#563
Melting Slicks
Thread Starter
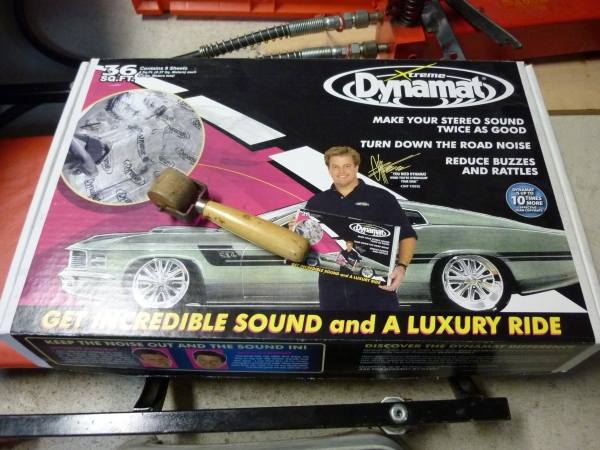
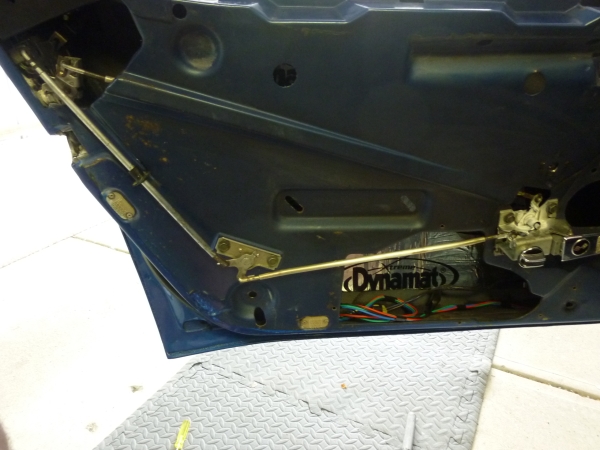
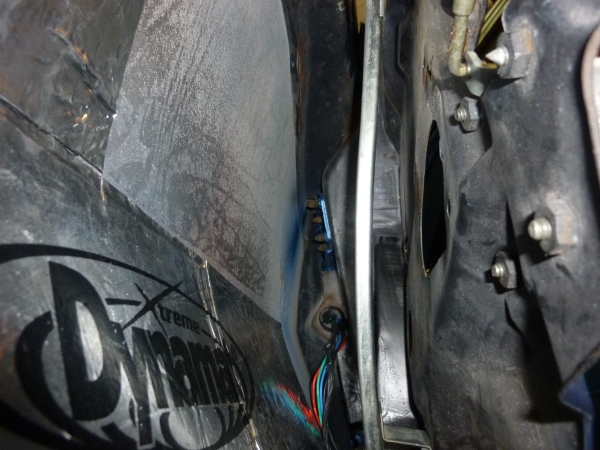
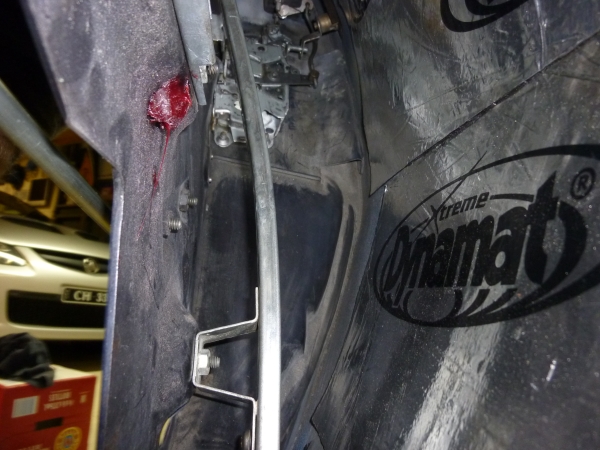
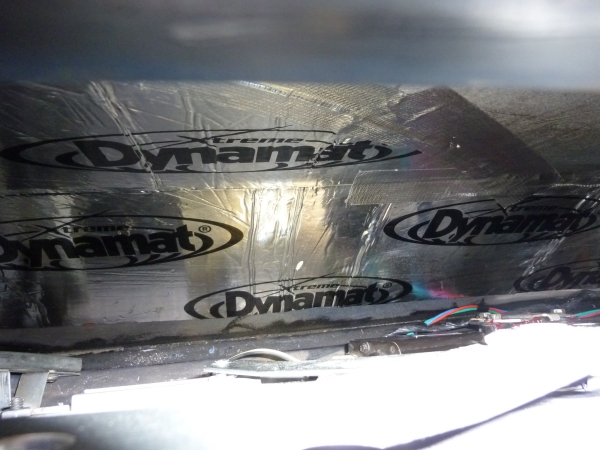
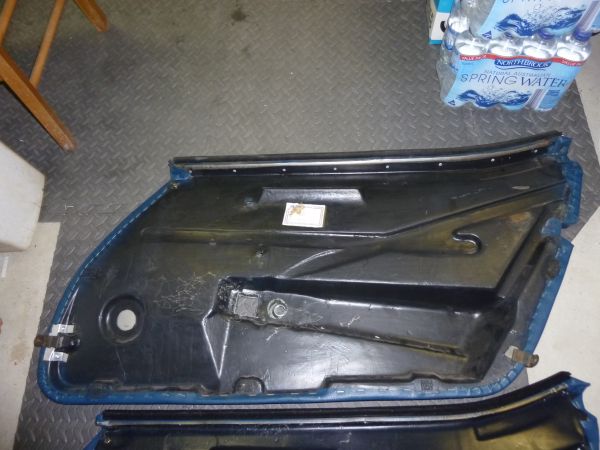
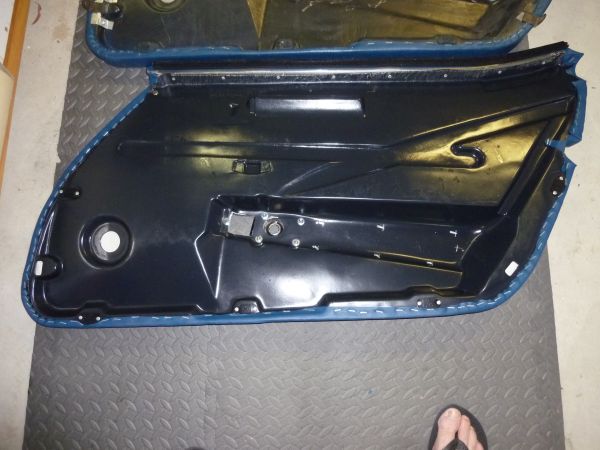
Applied Dynamat to inside of door
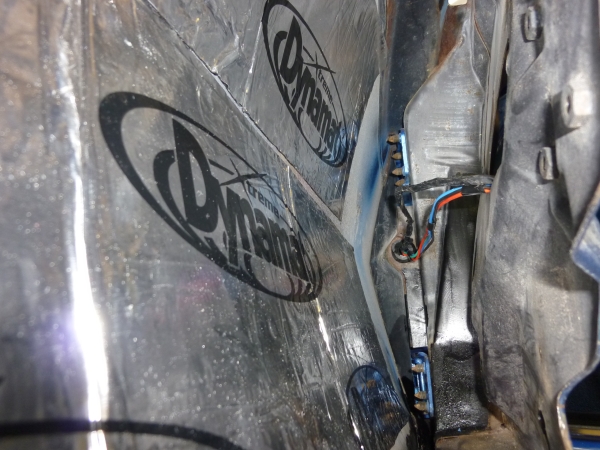
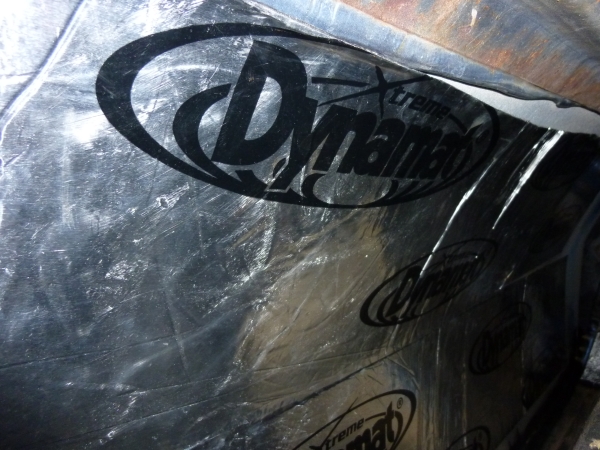
Will Dynamat metal surface once I get the mechanism back on.
Repainted end trims satin black.
Will Dynamat metal surface once I get the mechanism back on.
Repainted end trims satin black.
Last edited by CraigH; 04-10-2023 at 04:41 AM.
02-25-2013, 06:33 PM
#564
Melting Slicks
Thread Starter
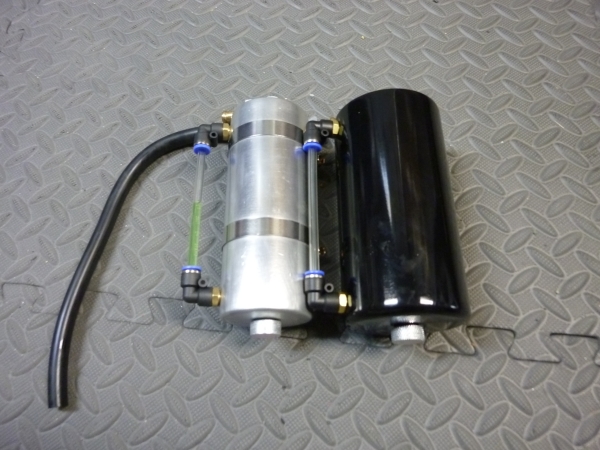
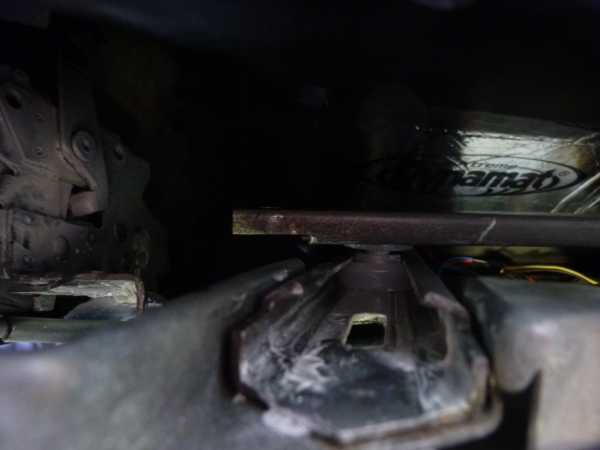
Finished off the radiator expansion tank today.
Fitted a hose that drops to the bottom of the tank and o-ringed where it enters.

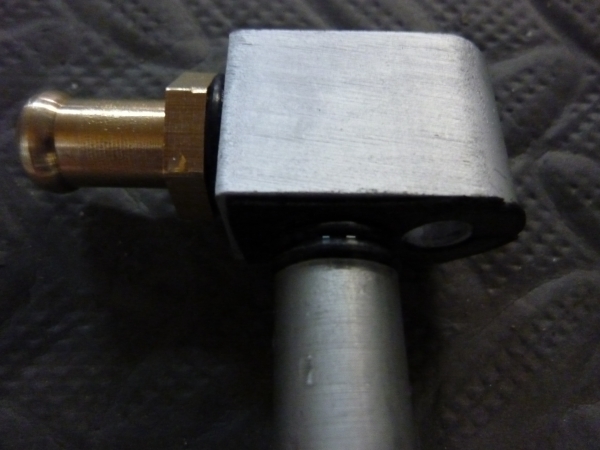
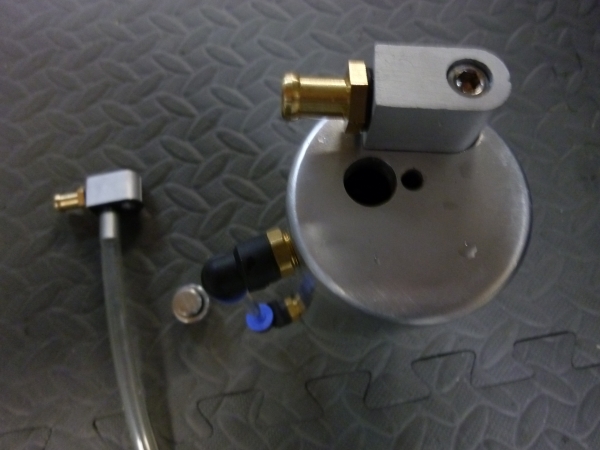
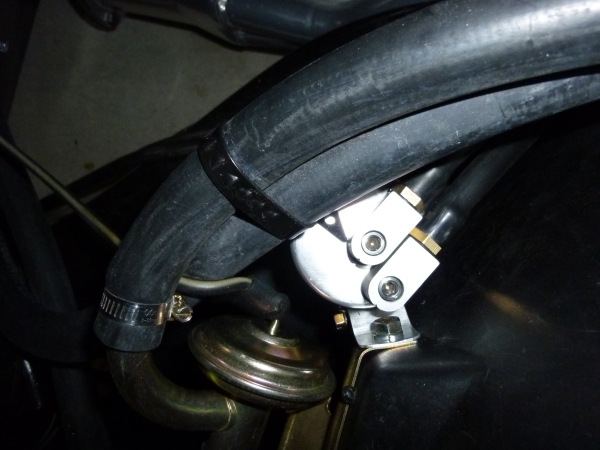
Built a simple bracket to mount it below the vacuum solenoid for the heater.

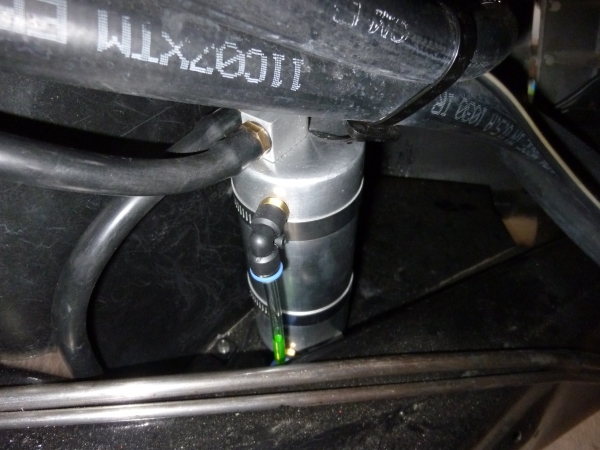
Filled the radiator up to full then allowed fluid to run into the overflow tank, sealed it all up and went for a run.
Seemed to operate well, level raised when hot and went down when cold.
Fitted a hose that drops to the bottom of the tank and o-ringed where it enters.
Built a simple bracket to mount it below the vacuum solenoid for the heater.
Filled the radiator up to full then allowed fluid to run into the overflow tank, sealed it all up and went for a run.
Seemed to operate well, level raised when hot and went down when cold.
Last edited by CraigH; 04-10-2023 at 04:41 AM.
02-25-2013, 06:33 PM
#565
Melting Slicks
Thread Starter
A few things have turned up over last weeks.
Almost have everything I need to do the doors.
Dynamat to finish the metal surfaces.
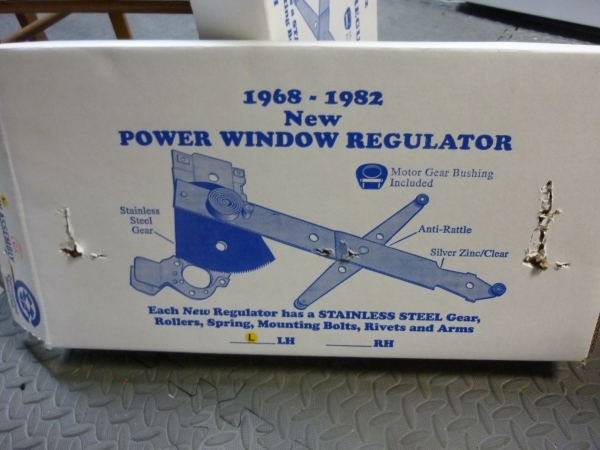
Window regulators.
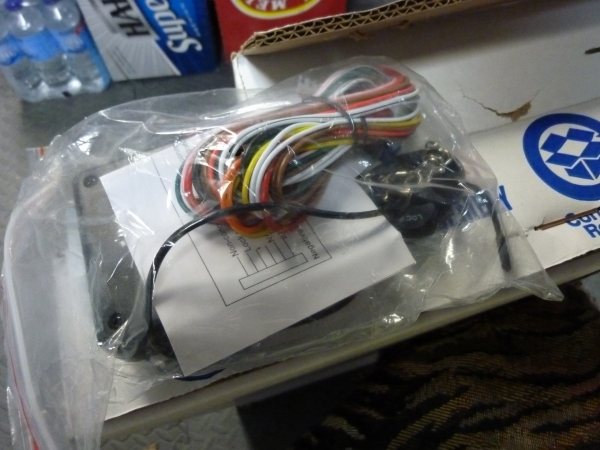
Central locking kit.
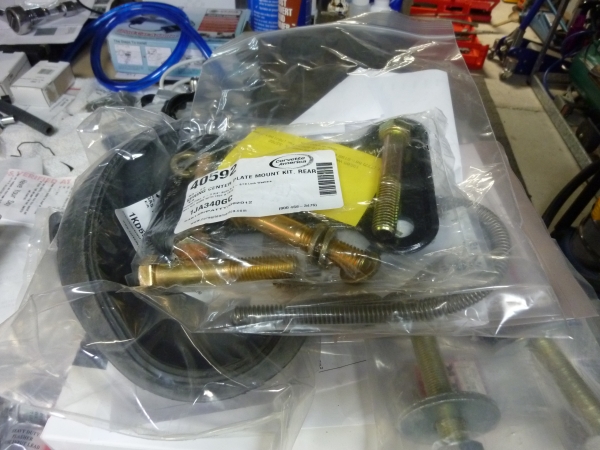
Rear suspension parts including a VB&P fiberglass rear spring.
Air Fuel monitor, bung and sender.
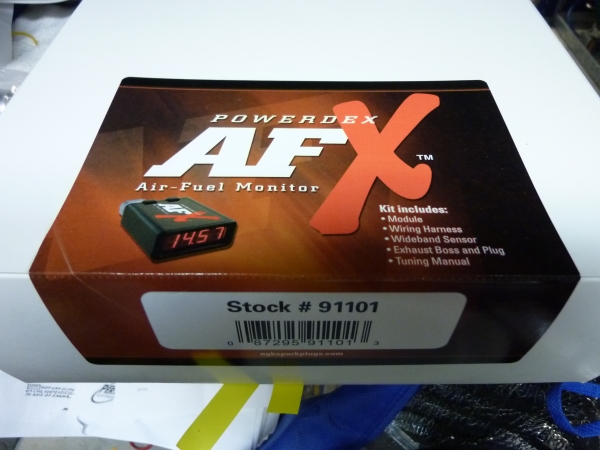
Will let me tune the Quadrajet properly for the new engine capacity. Wont stay in the car, its just for testing, cheaper than paying for a single dyno run and at least I will learn stuff this way.
Almost have everything I need to do the doors.
Dynamat to finish the metal surfaces.
Window regulators.
Central locking kit.
Rear suspension parts including a VB&P fiberglass rear spring.
Air Fuel monitor, bung and sender.
Will let me tune the Quadrajet properly for the new engine capacity. Wont stay in the car, its just for testing, cheaper than paying for a single dyno run and at least I will learn stuff this way.
Last edited by CraigH; 04-10-2023 at 04:41 AM.
02-25-2013, 06:34 PM
#566
Melting Slicks
Thread Starter
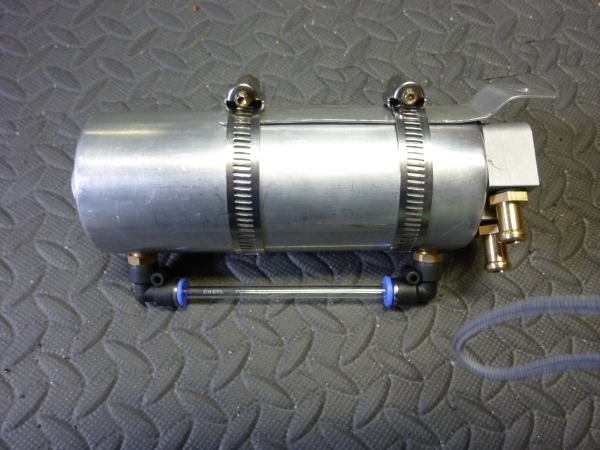
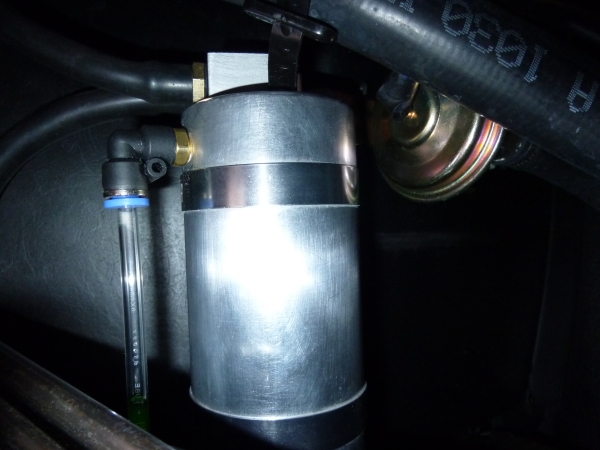
Slight revision to my radiator overflow tank.
original one worked but when vette was at temp the level was at 100% so have replaced with a larger version.
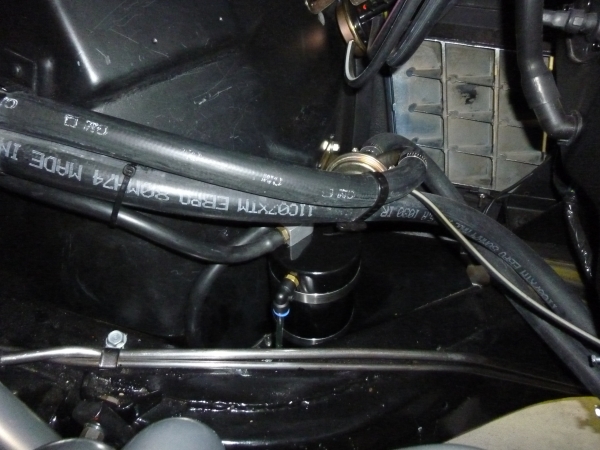

original one worked but when vette was at temp the level was at 100% so have replaced with a larger version.
Last edited by CraigH; 04-10-2023 at 04:41 AM.
02-25-2013, 06:34 PM
#567
Melting Slicks
Thread Starter
Need to get back to putting the window mechanism back in as we have a run on the 28th.
Work travel etc have all been getting in the way :-)
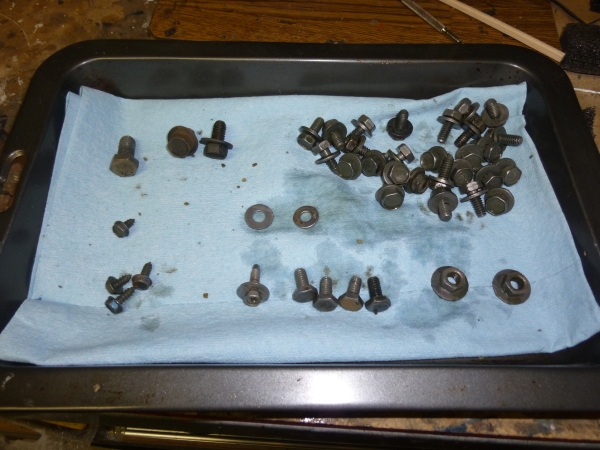
Cleaned up all the nuts and bolts and was surprised how many there were for one door.
Work travel etc have all been getting in the way :-)
Cleaned up all the nuts and bolts and was surprised how many there were for one door.
Last edited by CraigH; 04-10-2023 at 04:41 AM.

 02-25-2013, 06:36 PM
#569
Melting Slicks
Thread Starter
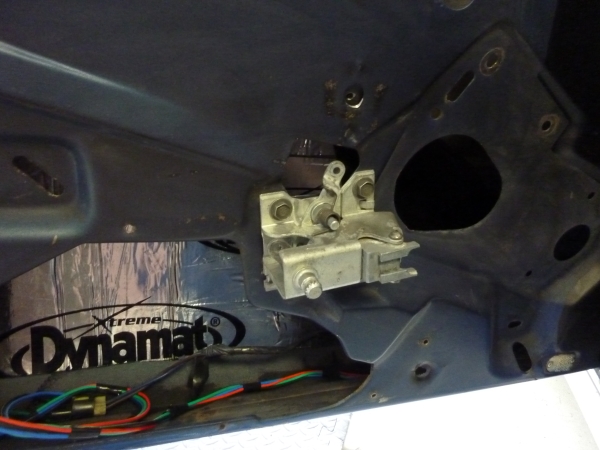
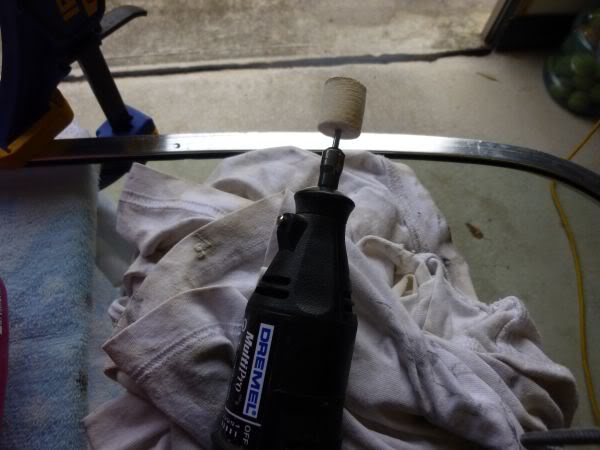
Did not get much done this weekend on Vette but I did spend a little time on the inner door lock mechanism.
Went through and shimmed out the areas that had worn and can rattle when you shut the door.
Also used resin shrink wrap on a couple of rods ends that were a bit loose.
Can slam the door with no rattles.
Went through and shimmed out the areas that had worn and can rattle when you shut the door.
Also used resin shrink wrap on a couple of rods ends that were a bit loose.
Can slam the door with no rattles.
Last edited by CraigH; 04-10-2023 at 04:40 AM.
02-25-2013, 06:36 PM
#570
Melting Slicks
Thread Starter
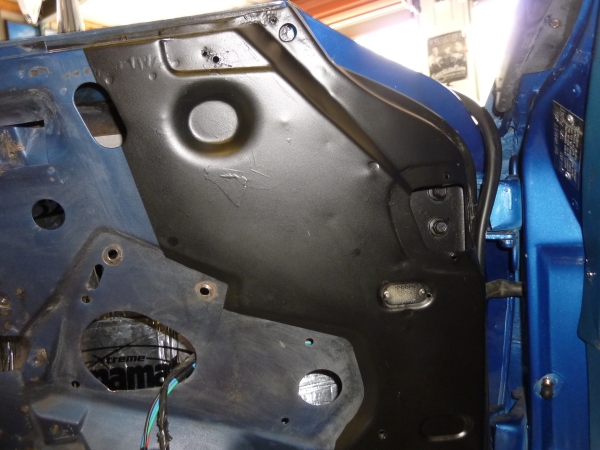
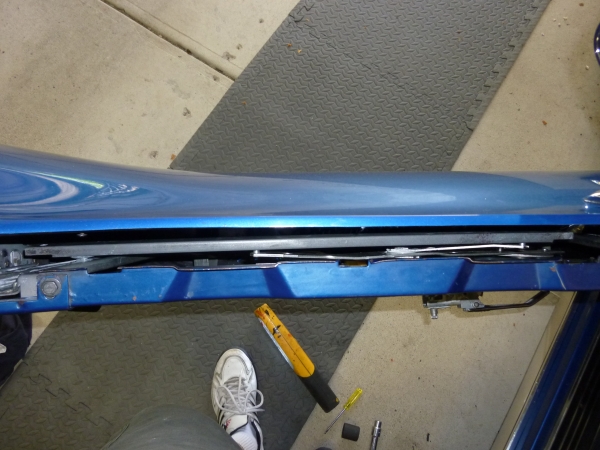
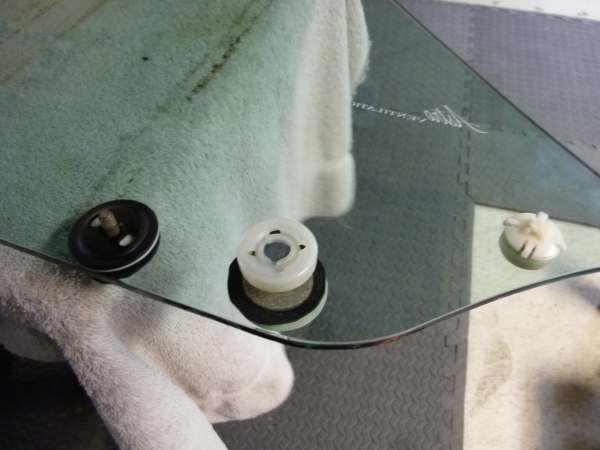
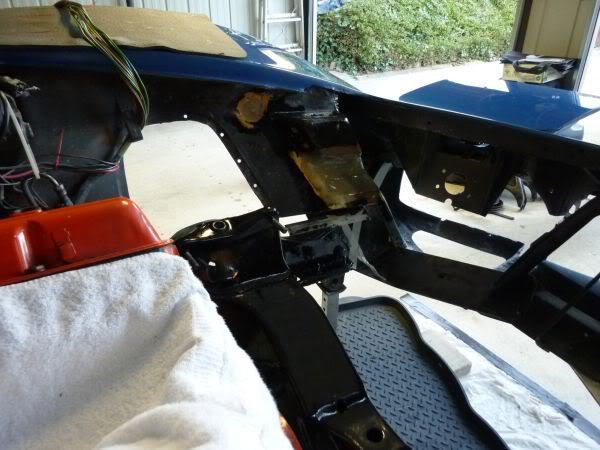
I have progressed a bit with putting the door back together.
First applied White Lithium Grease to the runner tracks.
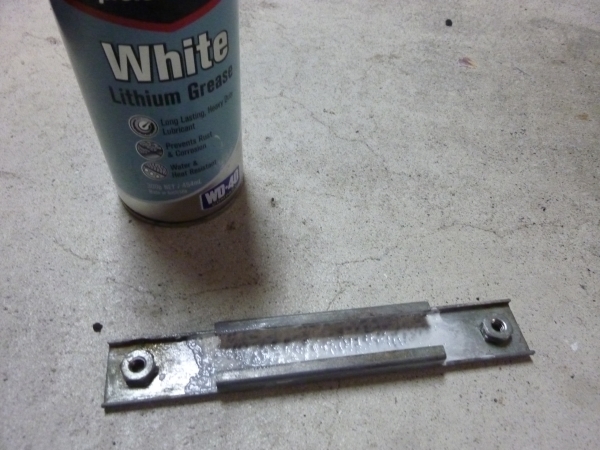
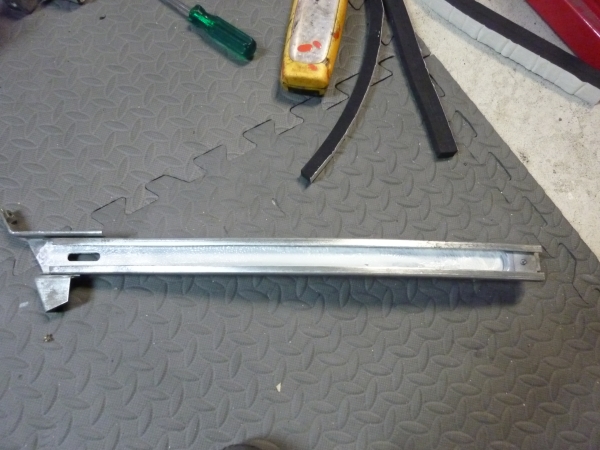
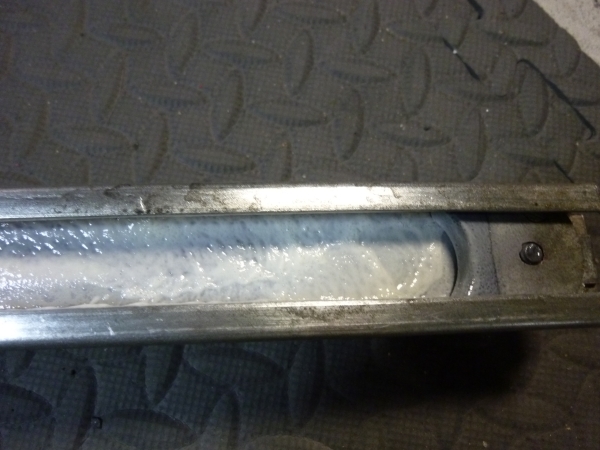
Fitted the tracks back to the door.
View left and right inside door.
Will need to get rid of that blob of grease. Done :-)
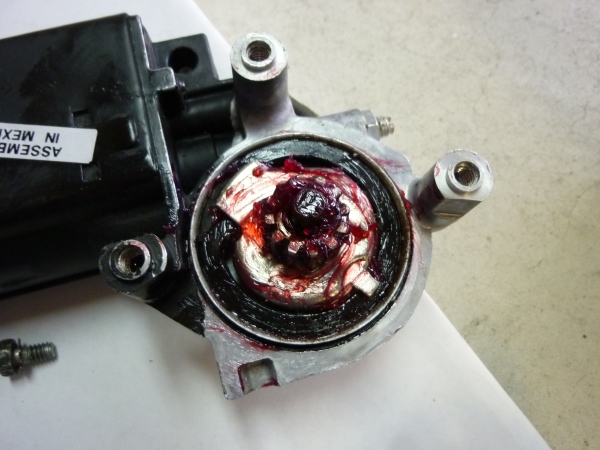
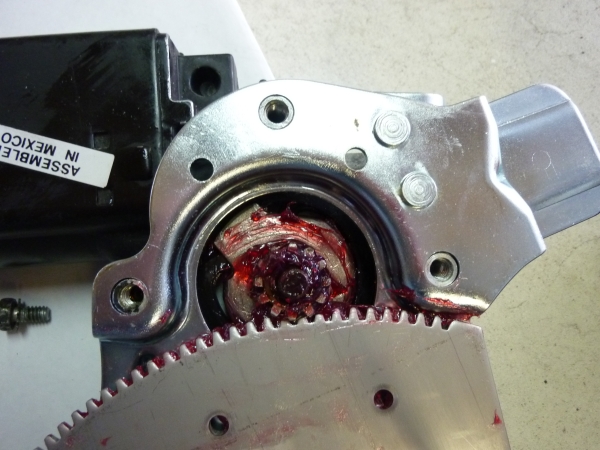
Greased up the window motor and put gear back in.
Fitted it to the regulator.
Then slid it back into the door through the lower access hole and tightened up the 3 bolts.
First applied White Lithium Grease to the runner tracks.
Fitted the tracks back to the door.
View left and right inside door.
Will need to get rid of that blob of grease. Done :-)
Greased up the window motor and put gear back in.
Fitted it to the regulator.
Then slid it back into the door through the lower access hole and tightened up the 3 bolts.
Last edited by CraigH; 04-10-2023 at 04:40 AM.
 02-25-2013, 06:37 PM
#572
Melting Slicks
Thread Starter
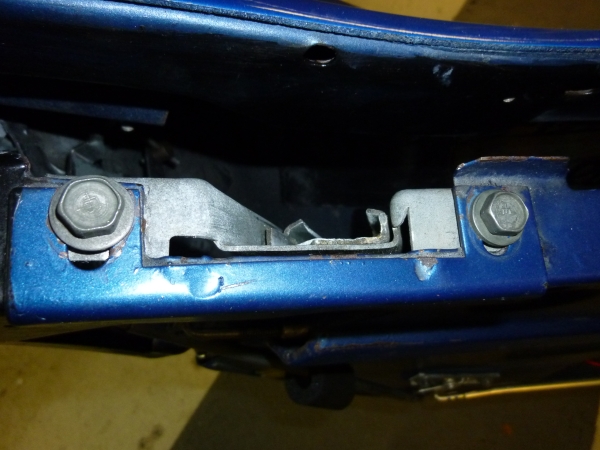
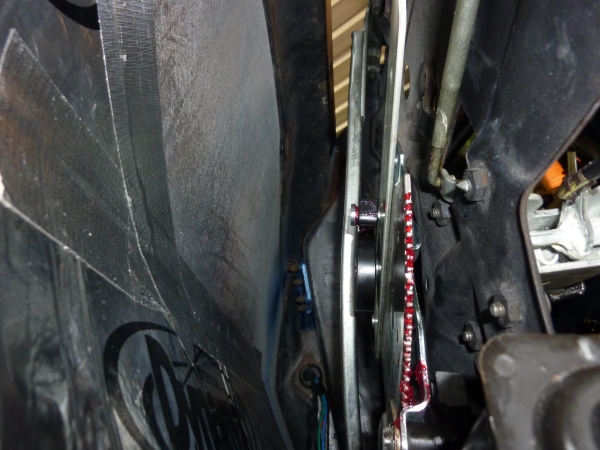
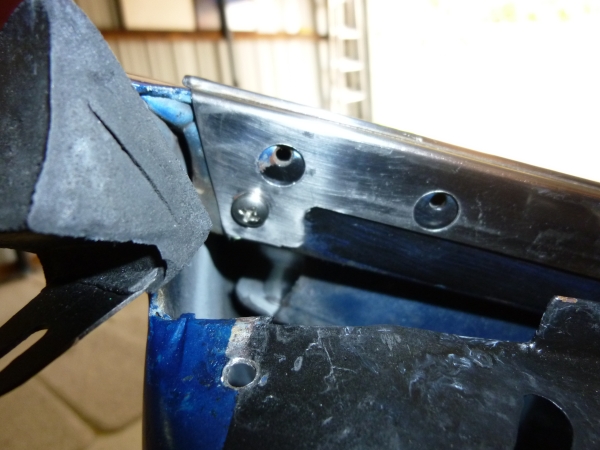
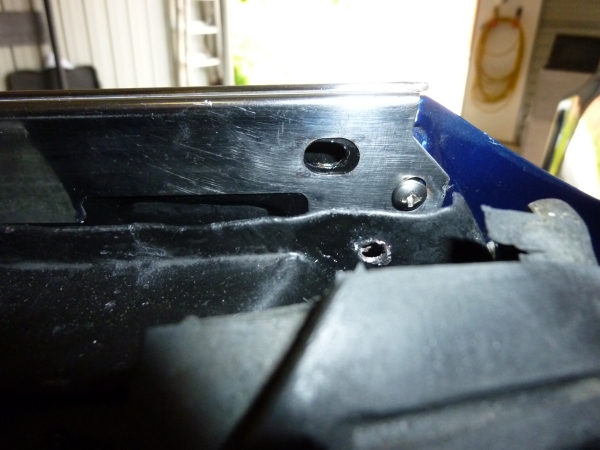
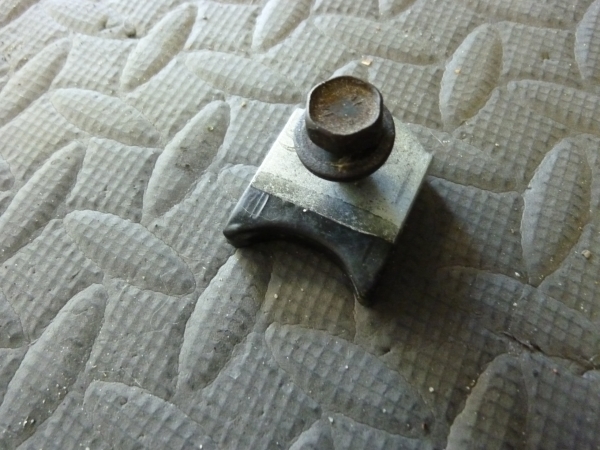
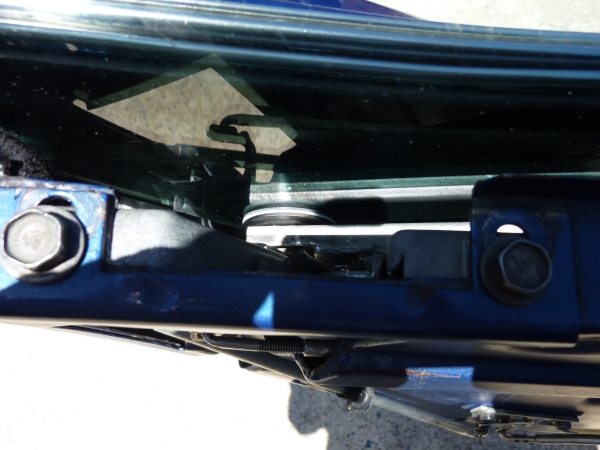
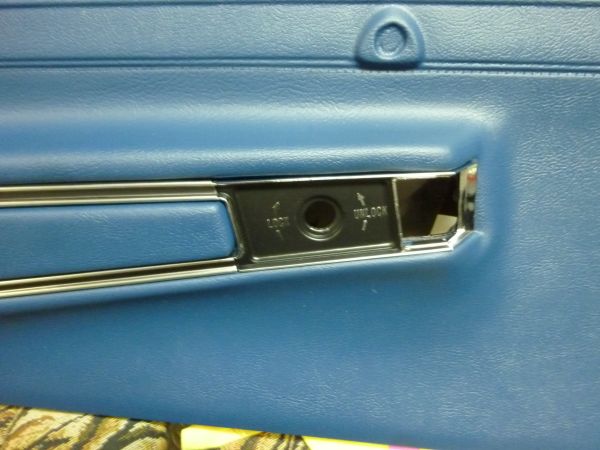
So now I have fitted new hardware to the cross bar.
I found the easiest way to fit it to the door was to slide the middle roller first from above then lower it to the back of the door fitting the rear glide then push it down in the track to allow the font roller to go on.
A little bit of fiddling to get all 3 on.
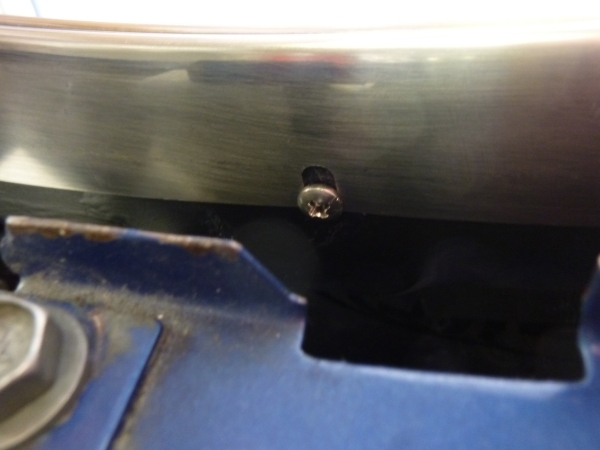
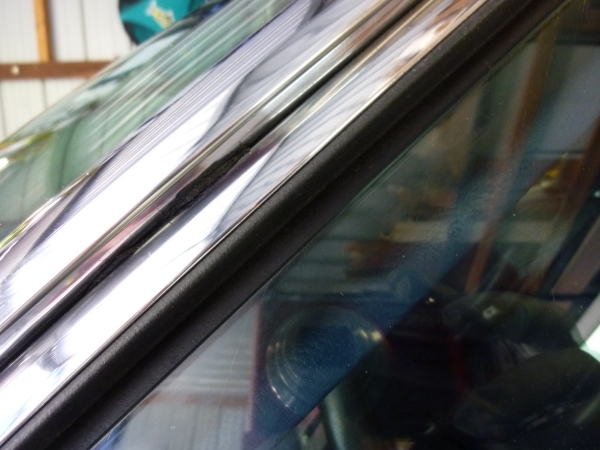
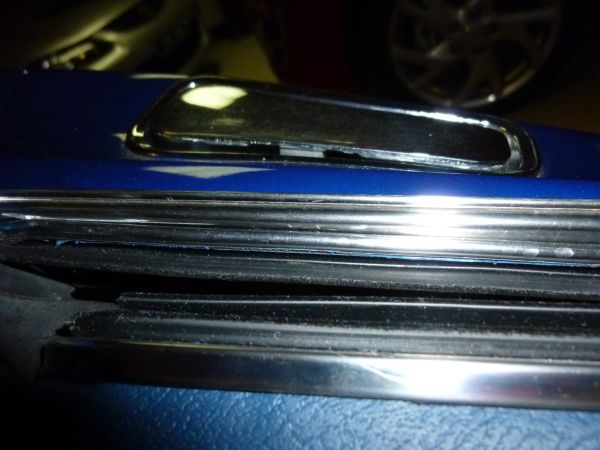
Outer stainless trim polished and refitted.
Stainless screw at each end a couple of screws along the bottom.
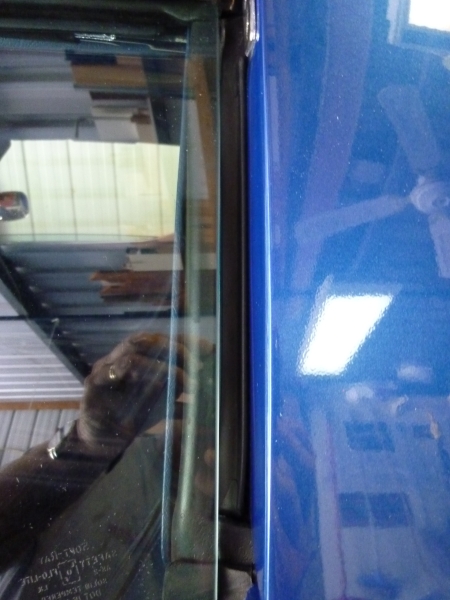
Attempted to fit the outer window felts and i am very disappointed with the quality.
They seem to have a different curve to the originals and when you try and line up the end nearest the rear of the car it buckles the entire strip.
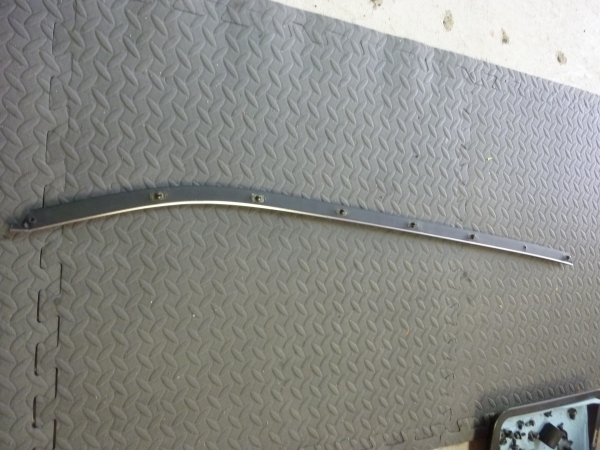
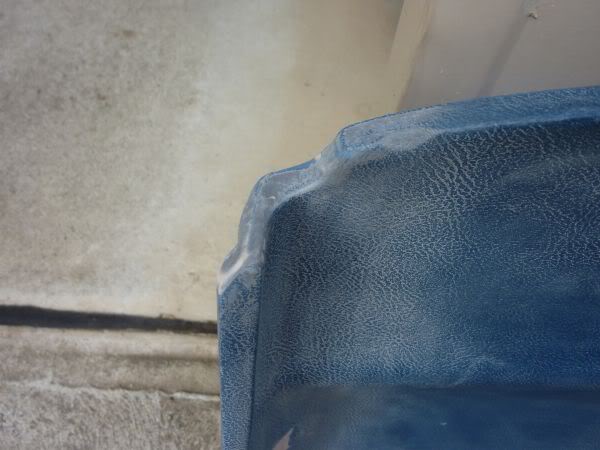
This is what it looks like when fitted and in my view its way too high at the rear.
Lower it and it all buckles and wont attach properly.
The other side of the car the stainless goes down under the fiberglass not above or level with it.
If anyone could check this for me would appreciate it.
What is correct, below level above !!!!!!
Will order a new set from Zip tonight and hope for a better fit !!!!!!!
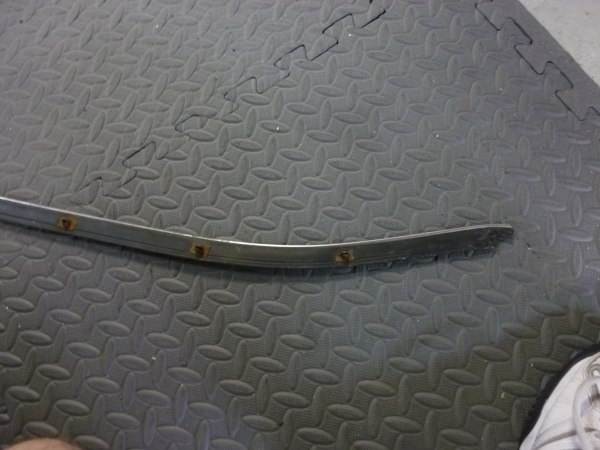
Reworked it again and removed one of the press clips and it sits a bit better.
Still not happy and will order another set but its closer.

The end should tuck under the fiberglass, checked in the NCRS archives.
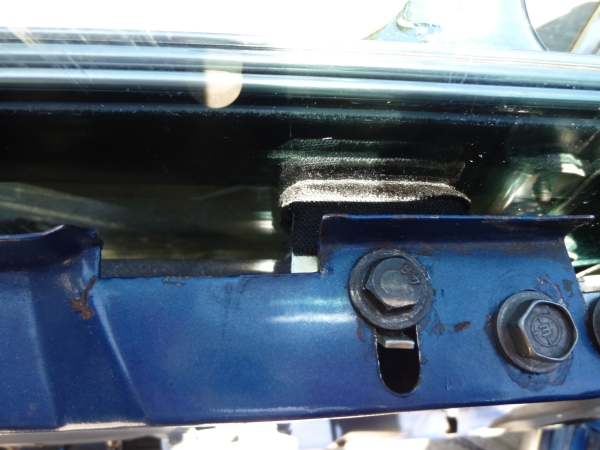
I have refurbished and/or replaced all the hardware on the glass.
Used the tool to remove the fittings.
Turns out I did not have the rubber washers so quick trip to Clark Rubber and I had some material.

Still a few scratches in the glass but am happy with it for now. Drive with windows down most of teh time anyway :-)
Craig, you may have to watch the amount that front roller sticks out. You will not have enough adjustment with the glass tilt in/out.
If the roller is too far out from the glass it will cause the top of the glass to tilt in too far with not enough adjustment at the top of the runners to tilt it back out.
slotting the washer and allowing the roller to sit a mil or so closer to the glass makes a big difference at the top of the glass.
Maybe even check how far its sits out compared to the old roller.
Don't ask me how I know :evil:
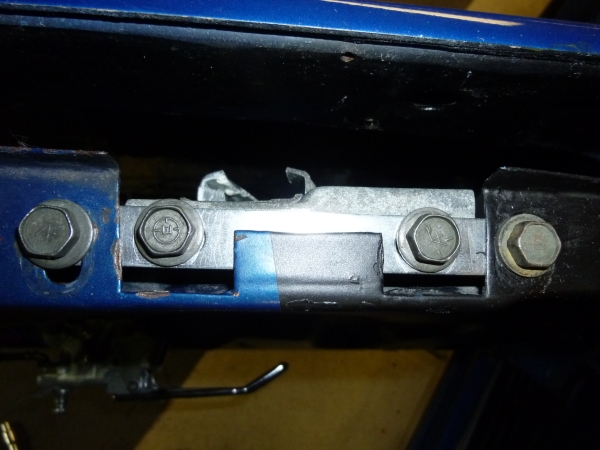
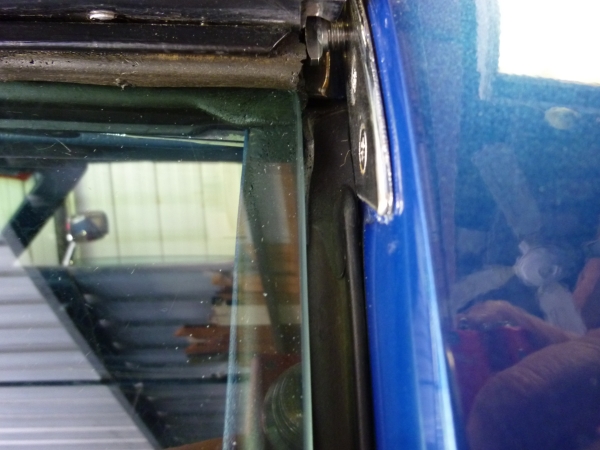
Matt and I put the glass back last night and I have done a first run at aligning it.
First put the anti wrattle pads in.
Also the top bump stops.
By adjusting the horizontal bracket behind these two bolts you can ajust the front back tilt of the glass.
The aim is to get the glass parrallel to the A and B pillars without the glass fully up.
Then adjust the glass either forward or back via inner pair of bolts in here. This directly moves the front track that glass runs in

The front and rear track can then be moved in or out to adjust how much the glass tilts in.
Brad thanks for the tips but I am not fully sure about this adjustment yet as I got some strange results.
It fits fairly well but the top does not always pop into the weatherstrip channel, may need some more inward tilt.
Well for a first go I am happy, door panel back on so I can do a run on the weekend.
Will finish the job when my new door panels arrive.
I found the easiest way to fit it to the door was to slide the middle roller first from above then lower it to the back of the door fitting the rear glide then push it down in the track to allow the font roller to go on.
A little bit of fiddling to get all 3 on.
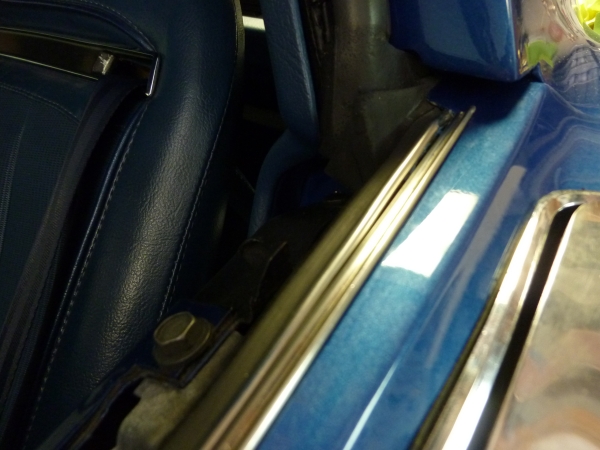
Outer stainless trim polished and refitted.
Stainless screw at each end a couple of screws along the bottom.
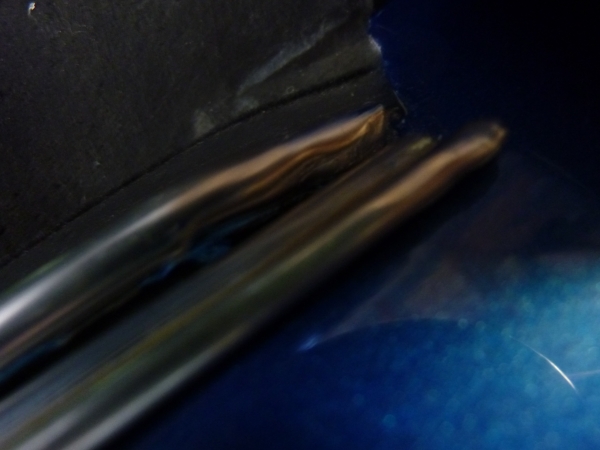
Attempted to fit the outer window felts and i am very disappointed with the quality.
They seem to have a different curve to the originals and when you try and line up the end nearest the rear of the car it buckles the entire strip.
This is what it looks like when fitted and in my view its way too high at the rear.
Lower it and it all buckles and wont attach properly.
The other side of the car the stainless goes down under the fiberglass not above or level with it.
If anyone could check this for me would appreciate it.
What is correct, below level above !!!!!!
Will order a new set from Zip tonight and hope for a better fit !!!!!!!
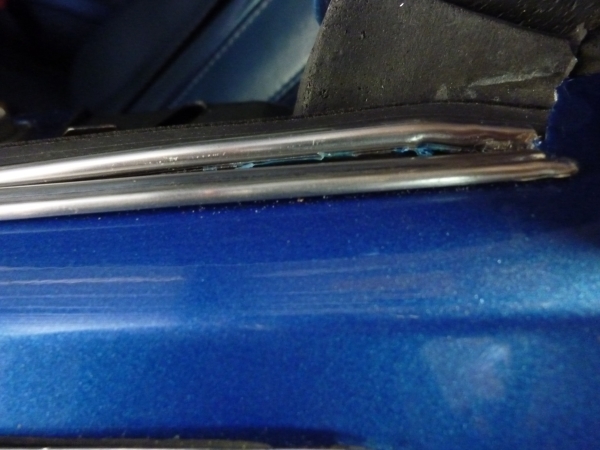
Reworked it again and removed one of the press clips and it sits a bit better.
Still not happy and will order another set but its closer.
The end should tuck under the fiberglass, checked in the NCRS archives.
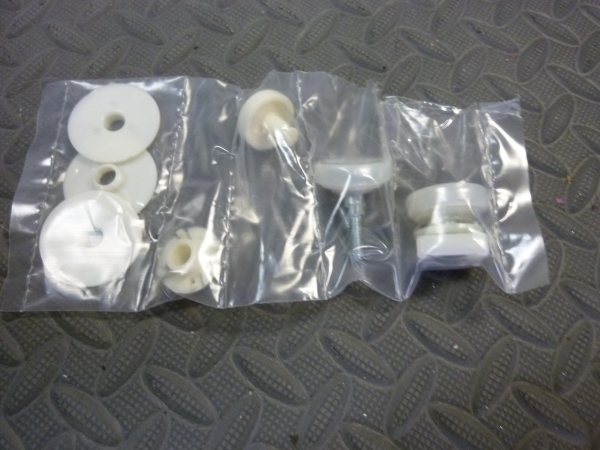
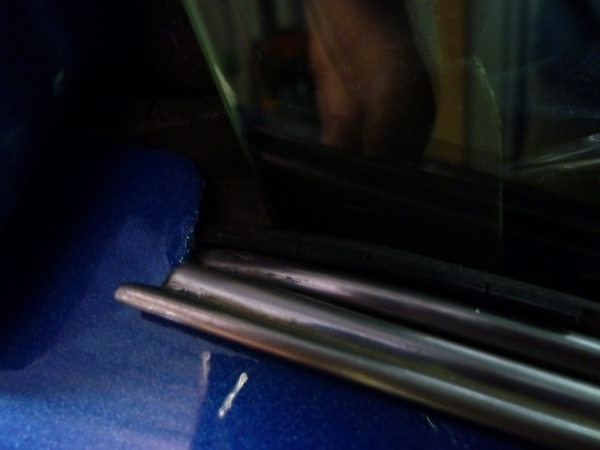
I have refurbished and/or replaced all the hardware on the glass.
Used the tool to remove the fittings.
Turns out I did not have the rubber washers so quick trip to Clark Rubber and I had some material.
Still a few scratches in the glass but am happy with it for now. Drive with windows down most of teh time anyway :-)
Originally Posted by Wabco40
Craig, you may have to watch the amount that front roller sticks out. You will not have enough adjustment with the glass tilt in/out.
If the roller is too far out from the glass it will cause the top of the glass to tilt in too far with not enough adjustment at the top of the runners to tilt it back out.
slotting the washer and allowing the roller to sit a mil or so closer to the glass makes a big difference at the top of the glass.
Maybe even check how far its sits out compared to the old roller.
Don't ask me how I know :evil:
First put the anti wrattle pads in.
Also the top bump stops.
By adjusting the horizontal bracket behind these two bolts you can ajust the front back tilt of the glass.
The aim is to get the glass parrallel to the A and B pillars without the glass fully up.
Then adjust the glass either forward or back via inner pair of bolts in here. This directly moves the front track that glass runs in
The front and rear track can then be moved in or out to adjust how much the glass tilts in.
Brad thanks for the tips but I am not fully sure about this adjustment yet as I got some strange results.
It fits fairly well but the top does not always pop into the weatherstrip channel, may need some more inward tilt.
Well for a first go I am happy, door panel back on so I can do a run on the weekend.
Will finish the job when my new door panels arrive.
Last edited by CraigH; 04-10-2023 at 04:37 AM.
02-25-2013, 06:39 PM
#573
Melting Slicks
Thread Starter
Did a run to Crookwell today with the GT club.

........................................ ...
Have had an anoying TTop squeak that I have been tring to get rid of for ages.
I know Corvettes, noises, part of the territory but.........
Adjusted panels, it went away till it got hot.
Raised panels, seemed to fix it but did not look good.
Put silicone spray on the rubber seals, seemed to work.
In the end it kept coming back and with any noise its hard to hear exactly where it was from.
So I decided to see if it was the seals again and coverered the stainless with masking tape to see if it was rubber against stainless that was the culprit.
Still squeaked !!!!!!.
However I noticed some rubbing on teh tape near the front edge in front of the seals.
This relates to the small rubber strip along the front of the roof panel.
Was so worried about seals etc I did not even notice it.
So later today I will treat it with silicone and see if my noise is gone.
Lets hope
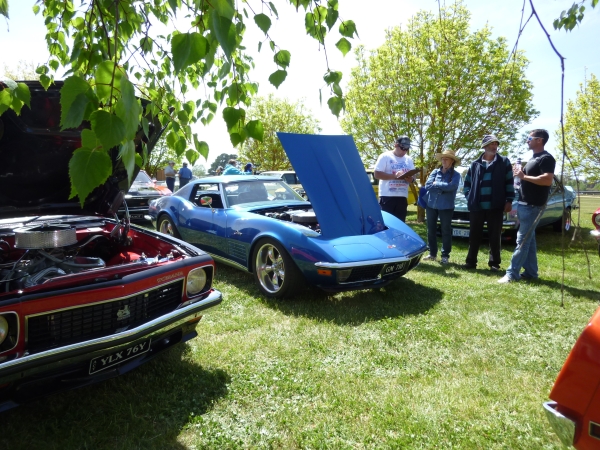
Attended the American Car Nationals in Queanbeyan today.
Great event with lots of cool cars and bikes.

........................................ .......
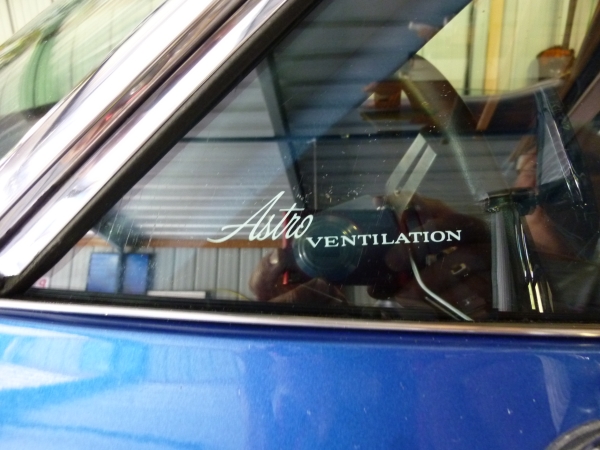
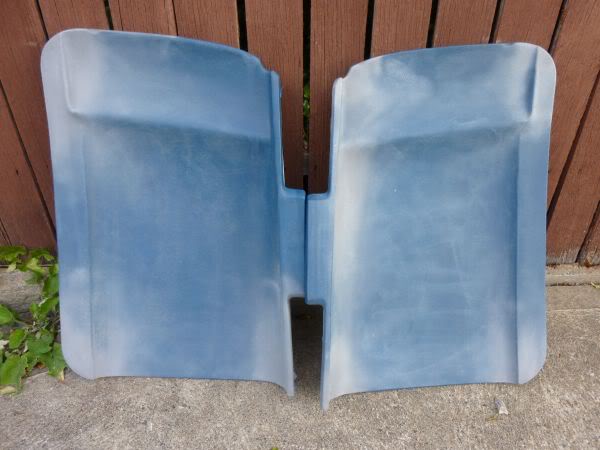
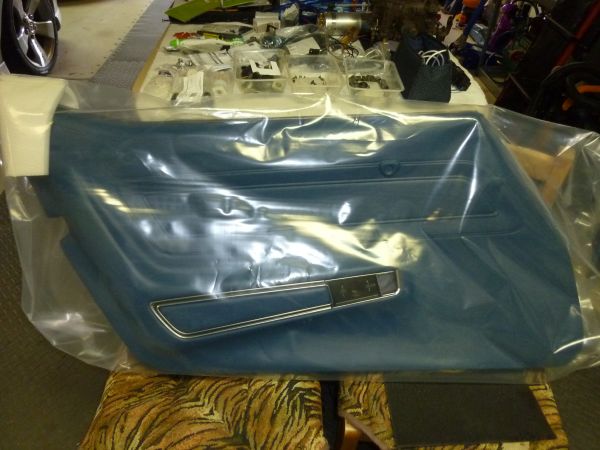
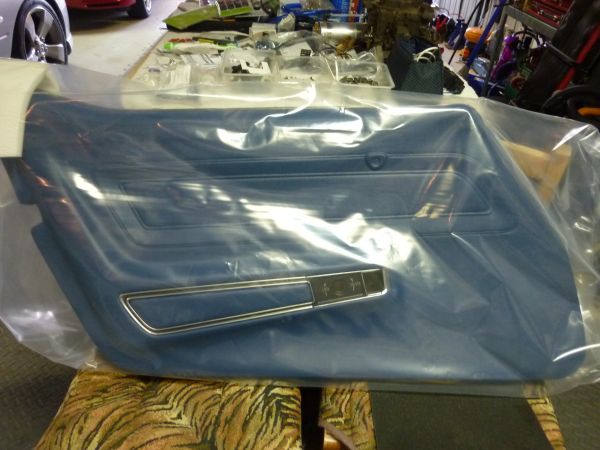
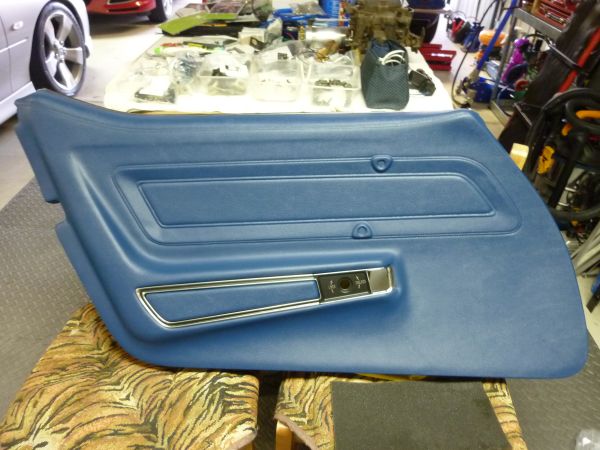
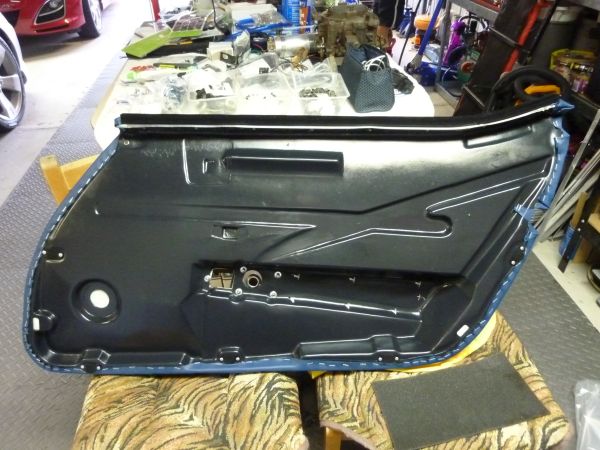
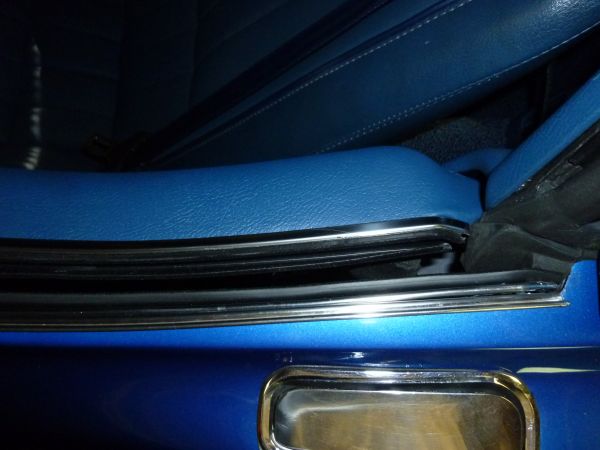
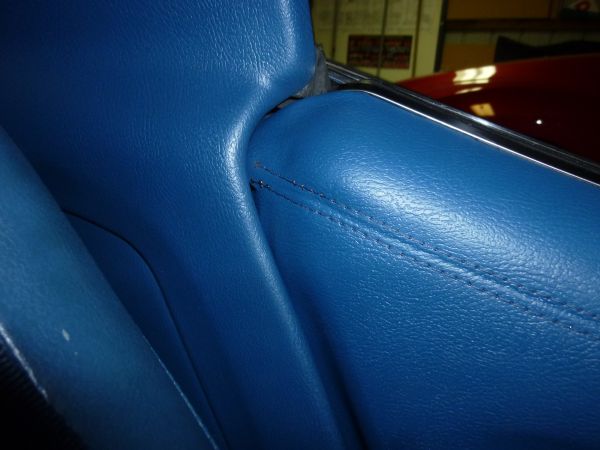
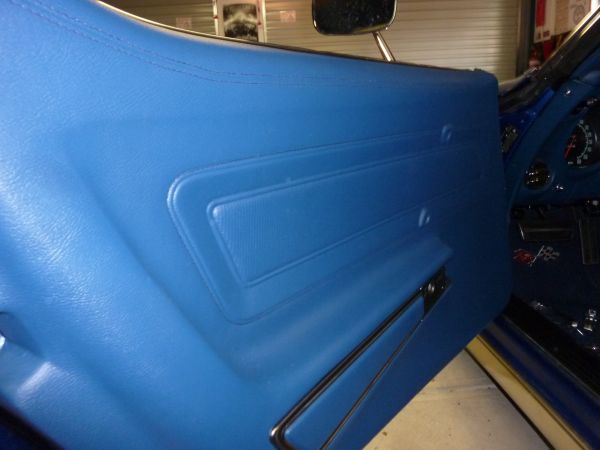
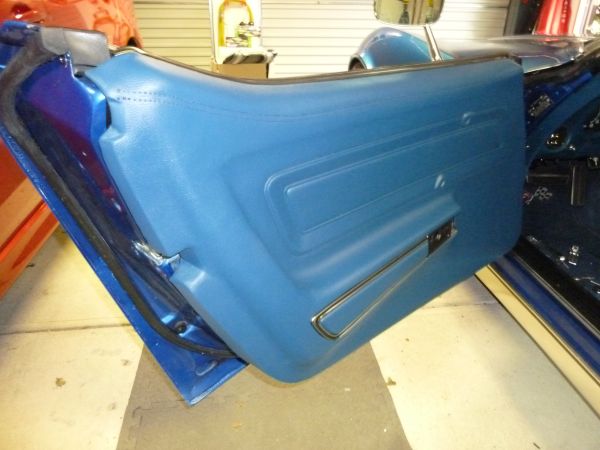
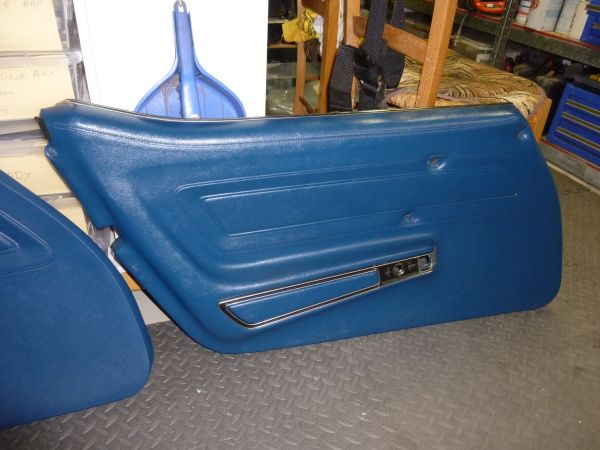
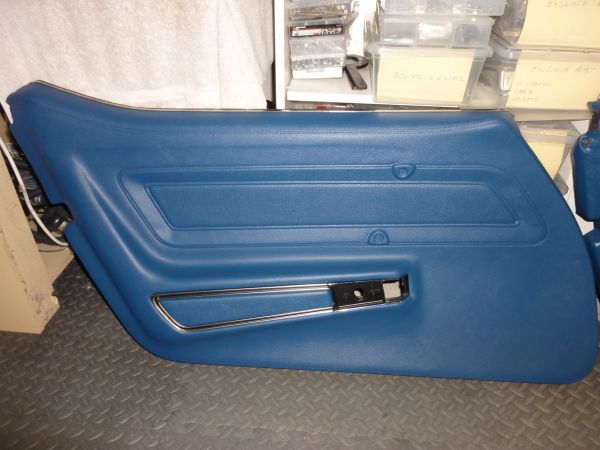
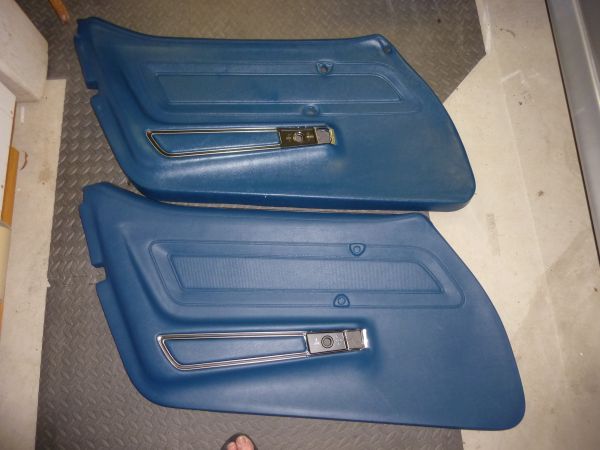
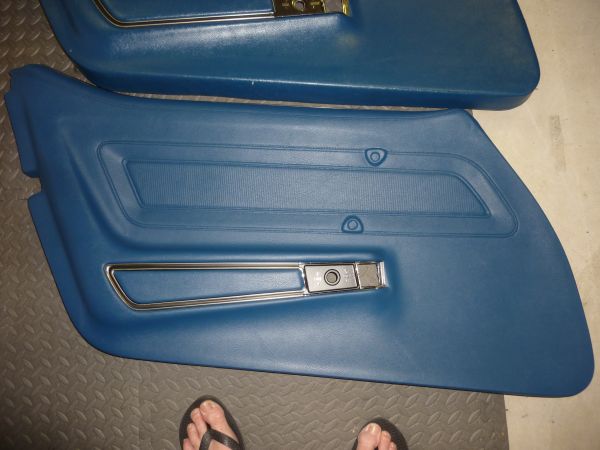
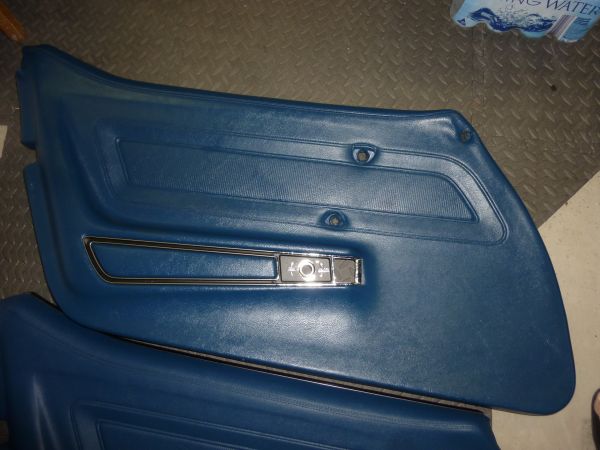
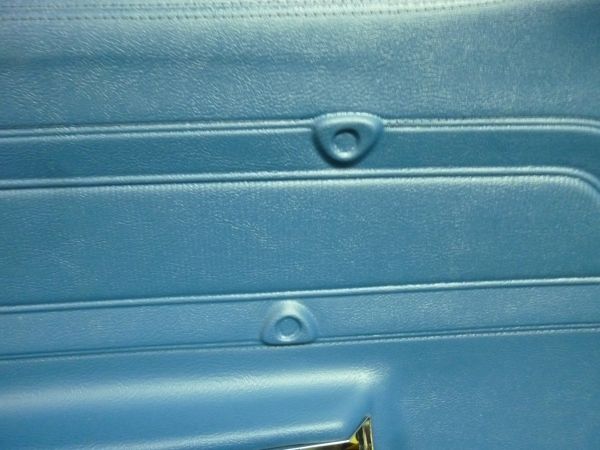
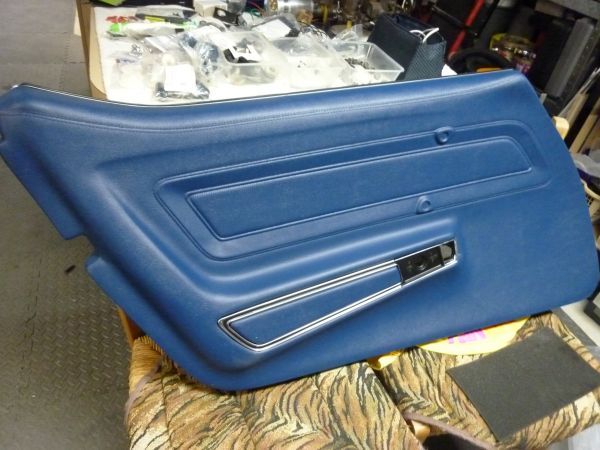
I trial fitted the new Corvette America door panels this evening for those who have been asking.
To my eye they fitted very nicely.
The velcro did not hold but I think the ones on my door itself need renewing.
All fittings lined up fine.
I intend to fit them without the upper screws as it looks so much neater and the top is held in tight by design.
My comparison is my existing panel that are aftermarket.
They are not the same molds so not sure where the set on the car come from.
Are Al Knock ones better, possibly but I am sure they cost heaps more and with 10 or 15% off at Willcox at present !!!!
Will fit them up properly next year when I re foam the seats and add new leather covers.
I refitted the old ones :-(
Here are a few shots

........................................ ...
Have had an anoying TTop squeak that I have been tring to get rid of for ages.
I know Corvettes, noises, part of the territory but.........
Adjusted panels, it went away till it got hot.
Raised panels, seemed to fix it but did not look good.
Put silicone spray on the rubber seals, seemed to work.
In the end it kept coming back and with any noise its hard to hear exactly where it was from.
So I decided to see if it was the seals again and coverered the stainless with masking tape to see if it was rubber against stainless that was the culprit.
Still squeaked !!!!!!.
However I noticed some rubbing on teh tape near the front edge in front of the seals.
This relates to the small rubber strip along the front of the roof panel.
Was so worried about seals etc I did not even notice it.
So later today I will treat it with silicone and see if my noise is gone.
Lets hope
Attended the American Car Nationals in Queanbeyan today.
Great event with lots of cool cars and bikes.
........................................ .......
I trial fitted the new Corvette America door panels this evening for those who have been asking.
To my eye they fitted very nicely.
The velcro did not hold but I think the ones on my door itself need renewing.
All fittings lined up fine.
I intend to fit them without the upper screws as it looks so much neater and the top is held in tight by design.
My comparison is my existing panel that are aftermarket.
They are not the same molds so not sure where the set on the car come from.
Are Al Knock ones better, possibly but I am sure they cost heaps more and with 10 or 15% off at Willcox at present !!!!
Will fit them up properly next year when I re foam the seats and add new leather covers.
I refitted the old ones :-(
Here are a few shots
Last edited by CraigH; 04-10-2023 at 10:52 PM.
02-25-2013, 06:40 PM
#574
Melting Slicks
Thread Starter
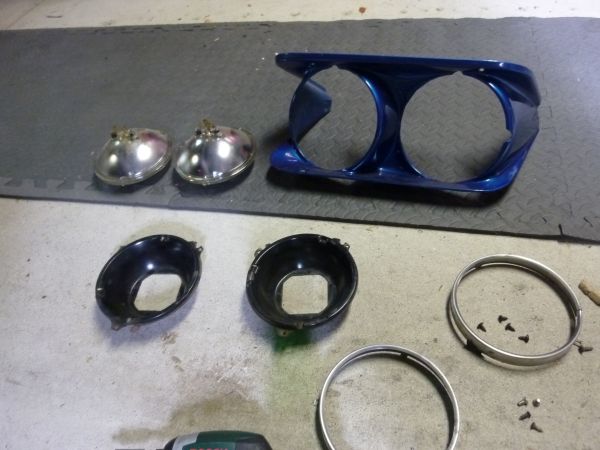
Have driven the vette a bit at night recently and the lights are ok but could do being a bit higher to give more throw. So I decided to adjust them up using the garage door as the measure.
Well one thing leads to another.
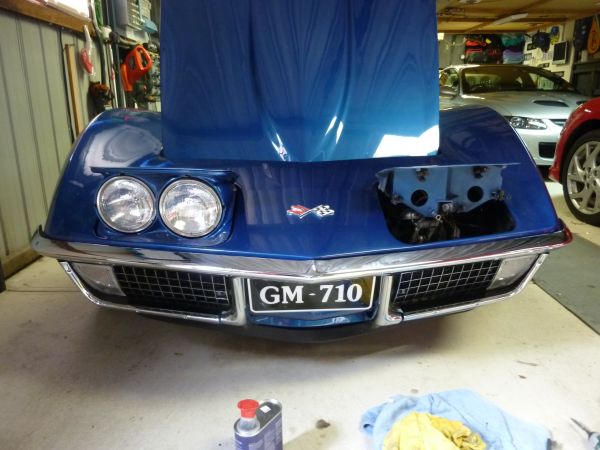
Also the passenger side light did not sit up tight so I spent some time adjusting it so it locks up nice and tight.
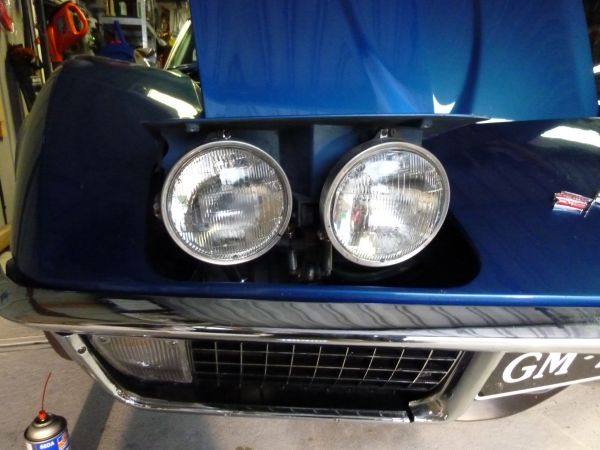
Will paint the buckets tomorrow and finish them off.
Well one thing leads to another.
Also the passenger side light did not sit up tight so I spent some time adjusting it so it locks up nice and tight.
Will paint the buckets tomorrow and finish them off.
Last edited by CraigH; 04-10-2023 at 04:37 AM.
02-25-2013, 06:42 PM
#575
Melting Slicks
Thread Starter
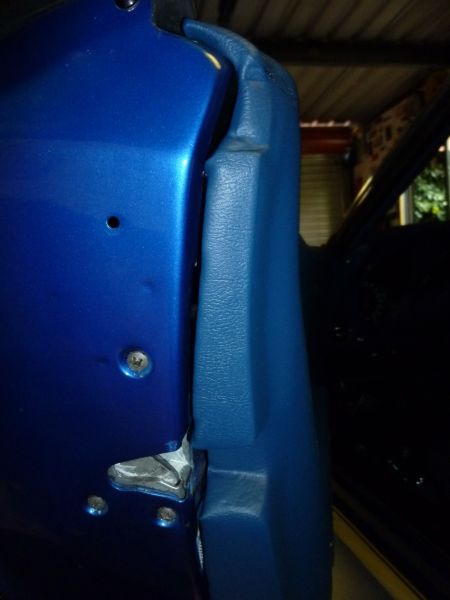
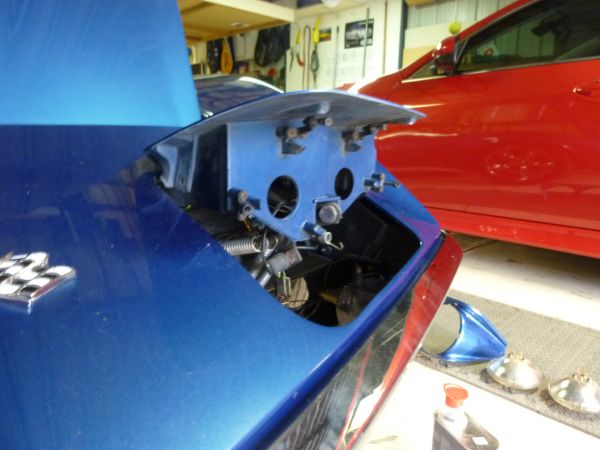
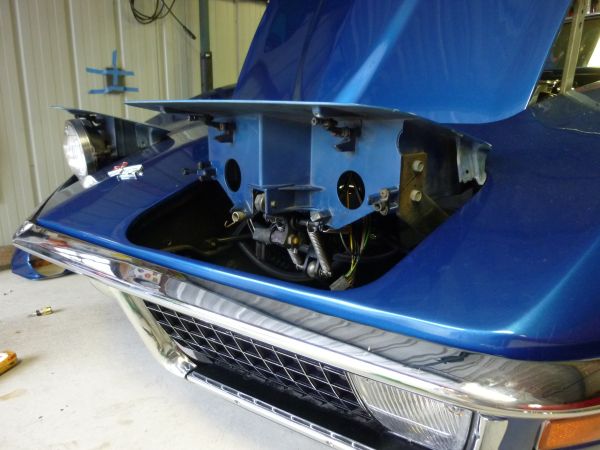
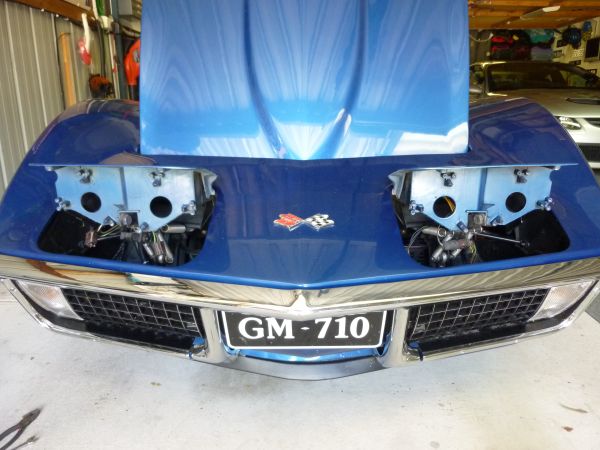
Fully stripped down of all parts.
All parts cleaned in simple Green First.
Metal parts then an acid clean to remove any rust.
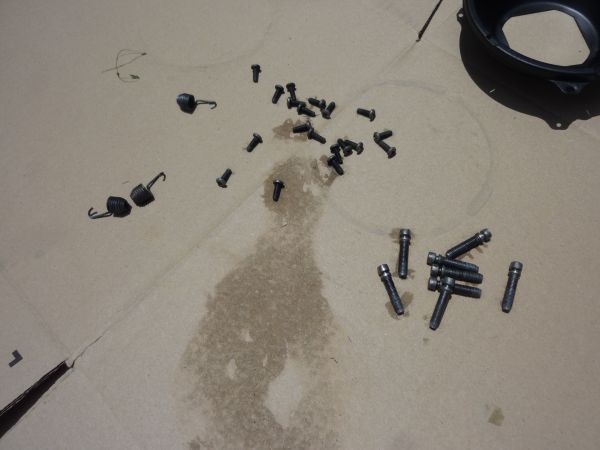
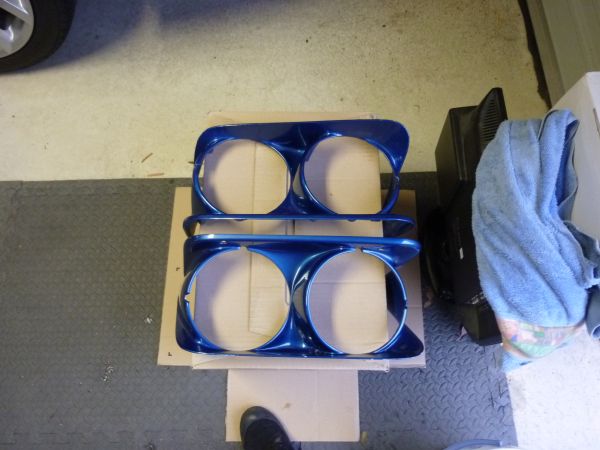
Repainted and baked all the light buckets.
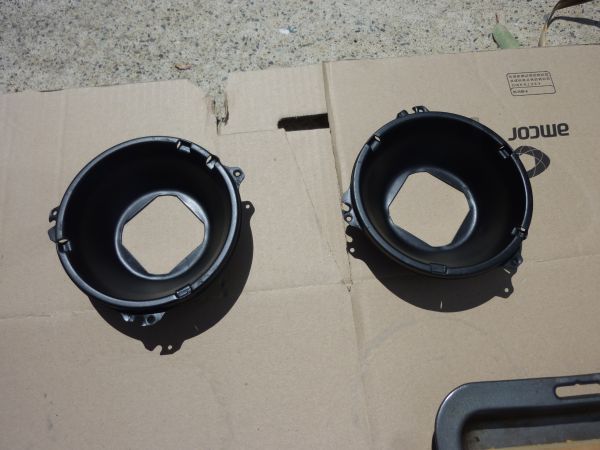
Buckets and adjusters back.
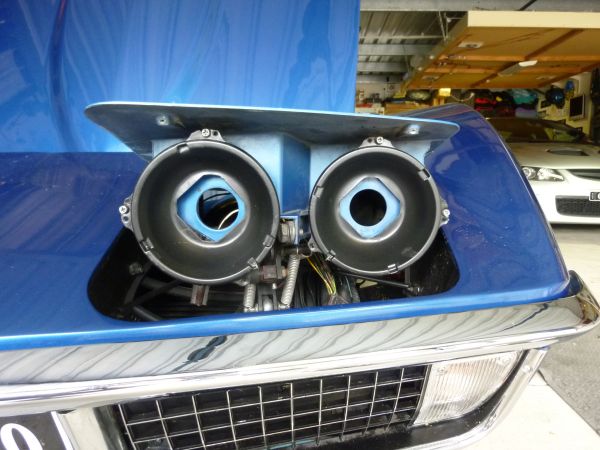
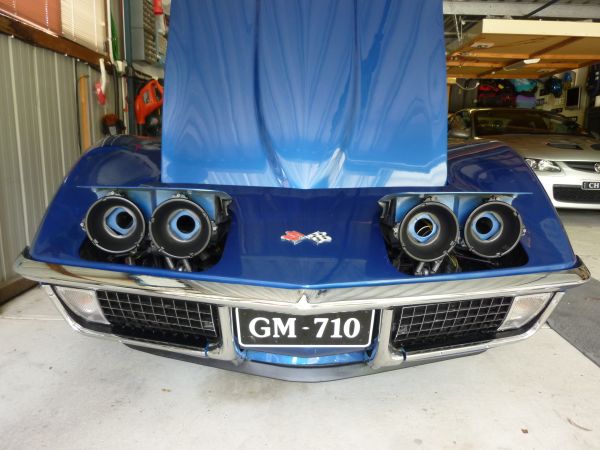
Lights back with new rings.
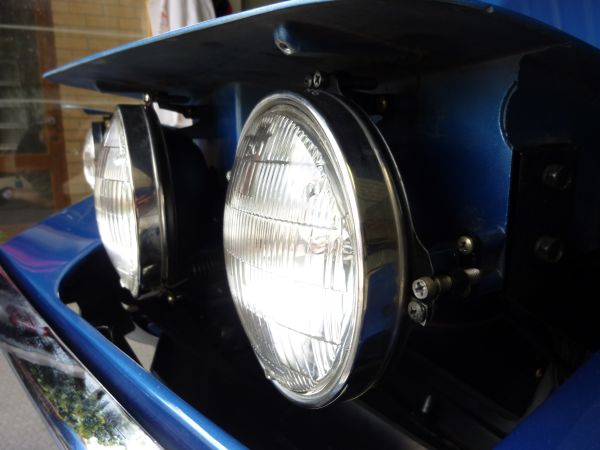
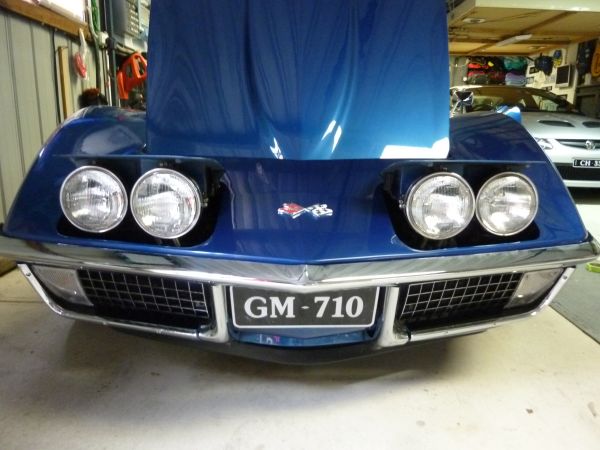
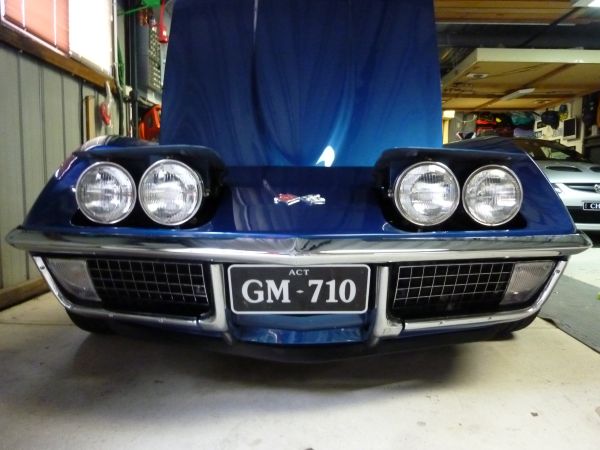
Lights adjusted against garage door
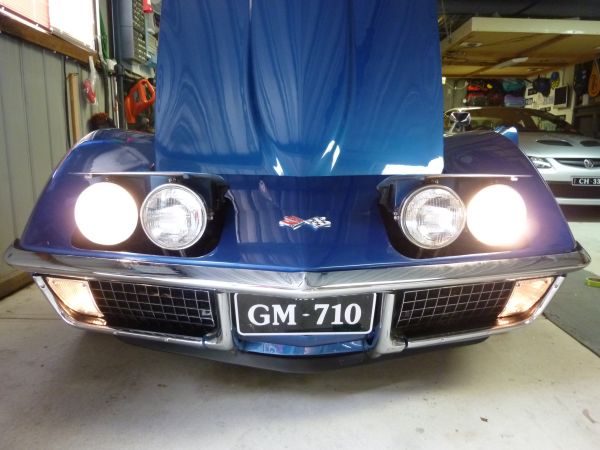
Will take for a drive tonight and see how it is then put main trim back on.
All parts cleaned in simple Green First.
Metal parts then an acid clean to remove any rust.
Repainted and baked all the light buckets.
Buckets and adjusters back.
Lights back with new rings.
Lights adjusted against garage door
Will take for a drive tonight and see how it is then put main trim back on.
Last edited by CraigH; 04-10-2023 at 04:37 AM.
02-25-2013, 06:43 PM
#576
Melting Slicks
Thread Starter
Spent a big part of today working on the paint with Mothers products
Started with a machine application of polish to remove the fine scratches in the clear.
Then hand applied a glaze
Folowed by an application of carnuba wax.
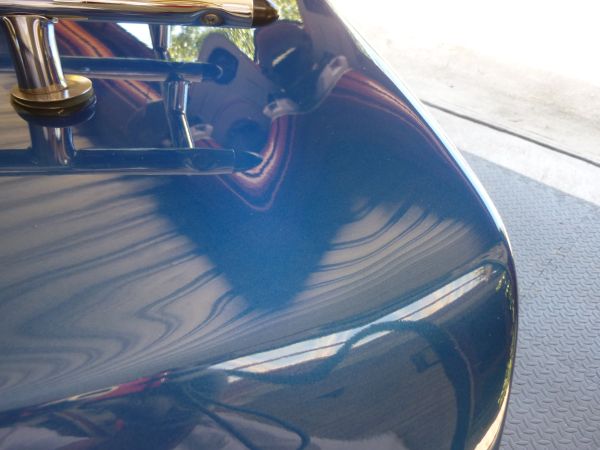
Was very happy with the results.
Started with a machine application of polish to remove the fine scratches in the clear.
Then hand applied a glaze
Folowed by an application of carnuba wax.
Was very happy with the results.
Last edited by CraigH; 04-10-2023 at 04:36 AM.
02-25-2013, 06:43 PM
#577
Melting Slicks
Thread Starter
Car handles great but given its fairly low it does still exhibit some bump steer.
Am thinking of adding this modification to the steering to dial it out.
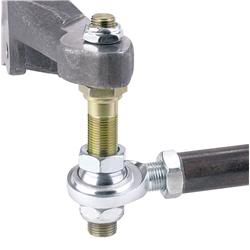
http://www.speedwaymotors.com/Adjust...Heim,3333.html
This would allow the tie rods to be level rather than sloping up and cure most of the bump steer potential.
Would need to get solid threaded tie rods at same time.
I dont like the VB&P or Gulstrand kits as it appears you need to drill out the taper of the steering arm to mount them so there is no going back.
Am thinking of adding this modification to the steering to dial it out.
http://www.speedwaymotors.com/Adjust...Heim,3333.html
This would allow the tie rods to be level rather than sloping up and cure most of the bump steer potential.
Would need to get solid threaded tie rods at same time.
I dont like the VB&P or Gulstrand kits as it appears you need to drill out the taper of the steering arm to mount them so there is no going back.
Last edited by CraigH; 04-10-2023 at 04:36 AM.
02-25-2013, 06:45 PM
#578
Melting Slicks
Thread Starter
These ones from Speed direct come with both taper bolts, adjusting sleeves, hein joints all for $67.

All I would need then is the threaded tie rod or possibly even use the existing ones. even though I hate the clamp method to tighten them up.
New rod sleeves with left and right threads are $38 so will probably just get those as well.
That way I can have the heim joint outer and the original tie rod end inner.
Would let me do way more adjustment :-)
All these bits are from the steriods R&P kit but will work with a non R&P vette.
02-25-2013, 06:46 PM
#579
Melting Slicks
Thread Starter
Getting the car ready for the Summernats has been a pain with the heat.
Today I took 2 of the rims of.
Cleaned them up.
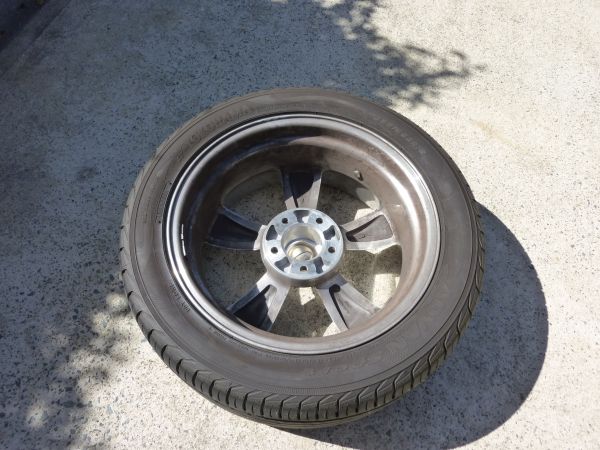
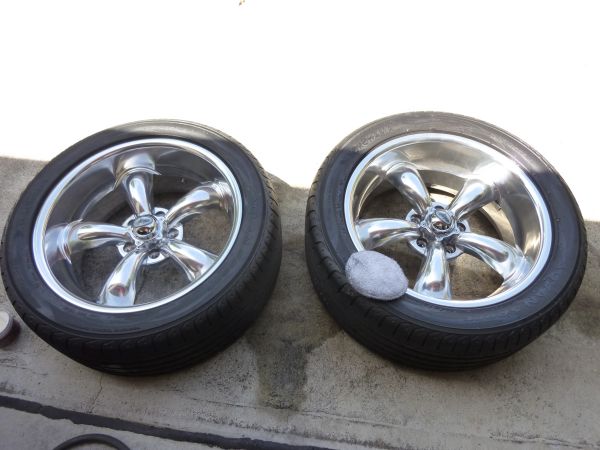
Then polished them.
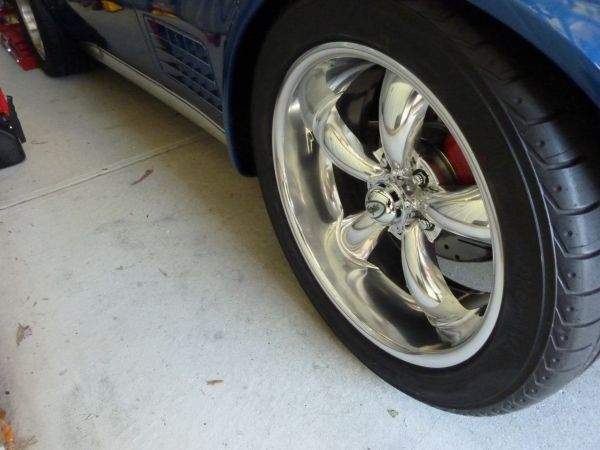
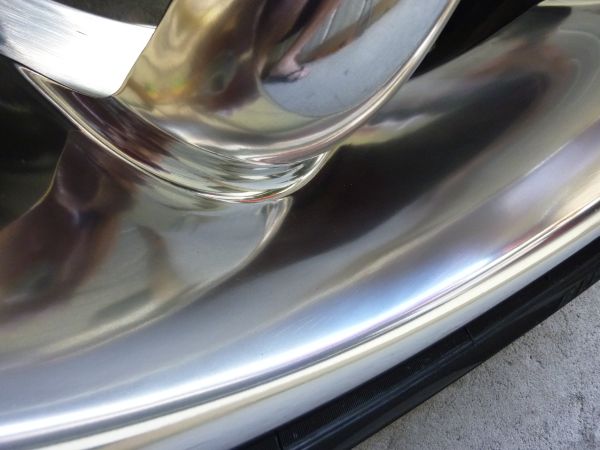
Tried a few different Mothers metal and alloy polished including Liguid metal but came back to Meguiars All Metal polish.
Done using a small power ball.
Today I took 2 of the rims of.
Cleaned them up.
Then polished them.
Tried a few different Mothers metal and alloy polished including Liguid metal but came back to Meguiars All Metal polish.
Done using a small power ball.
Last edited by CraigH; 04-10-2023 at 04:36 AM.
02-25-2013, 06:47 PM
#580
Melting Slicks
Thread Starter
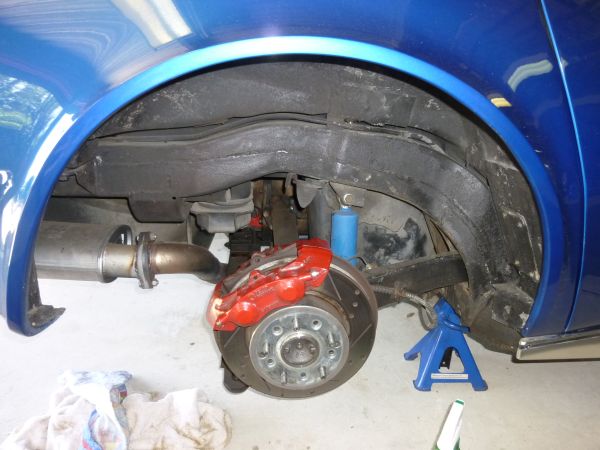
December 2012
Replaced the brake pads with Hawke HPS's at the same time
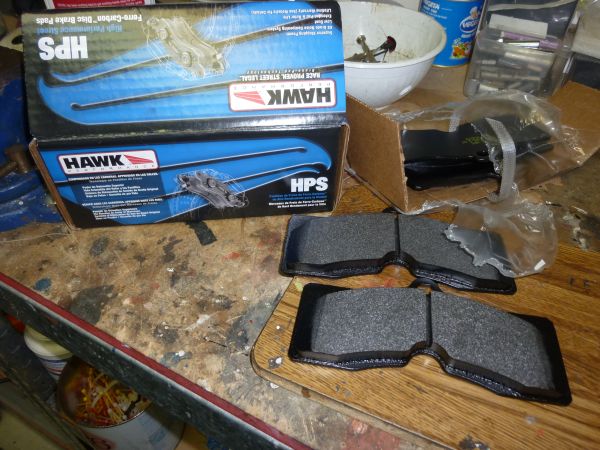
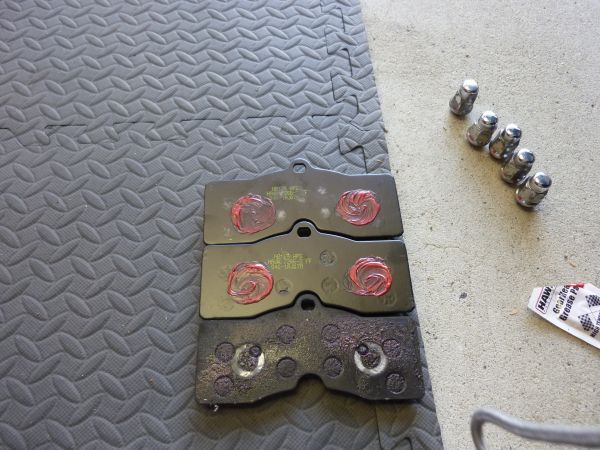
Had a noise when car went into reverse that was the pad vibrating against the piston so this may also fix that :-)
Replaced the brake pads with Hawke HPS's at the same time
Had a noise when car went into reverse that was the pad vibrating against the piston so this may also fix that :-)
Last edited by CraigH; 04-10-2023 at 04:36 AM.