
1971 Journey
 02-18-2013, 07:51 PM
#181
Melting Slicks

Thread Starter


Have had a flat battery the last 2 weeks.
Vette had not been driven for a 5 days and it was dead.
The only drain I could find was the clock and the radio memory but that will need a bit more investigation.
Was not happy with old battery as one side post did not work properly.
So I purchased a Federal 778MF with 770 Cold Cranking Amps.

New bolts from Stinger for the cables.
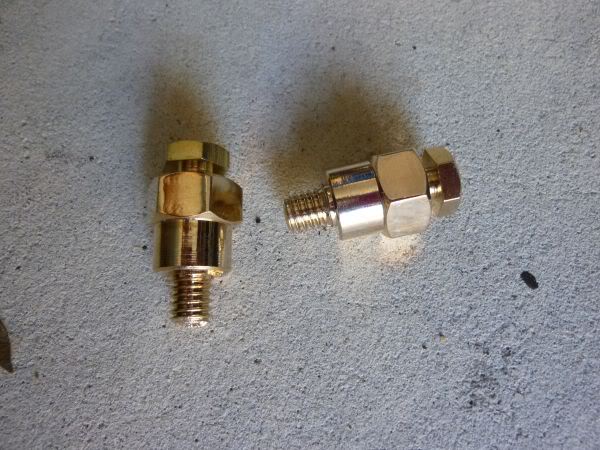
They hold the main cables and have an extra bolt at front for any other wires.
I want to attach the stereo memory and the Battery Tender.
Put it in and took it for a drive to top it all up.
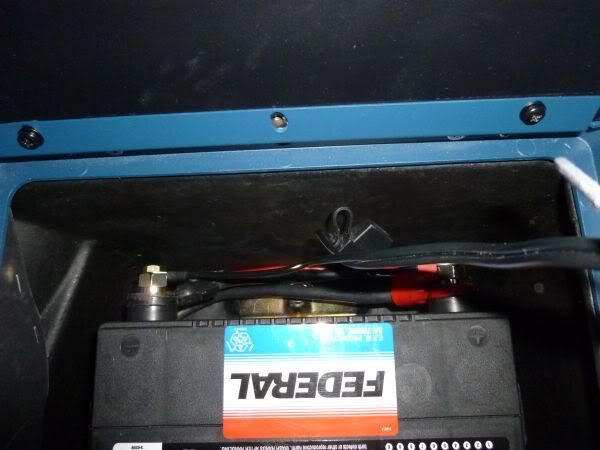
May pull it out tomorrow and try and run the Battery Tender leads out the old breather holes and mount the plug under the car.
Would look a bit neater and make plugging the charger in easier.
Vette had not been driven for a 5 days and it was dead.
The only drain I could find was the clock and the radio memory but that will need a bit more investigation.
Was not happy with old battery as one side post did not work properly.
So I purchased a Federal 778MF with 770 Cold Cranking Amps.
New bolts from Stinger for the cables.
They hold the main cables and have an extra bolt at front for any other wires.
I want to attach the stereo memory and the Battery Tender.
Put it in and took it for a drive to top it all up.
May pull it out tomorrow and try and run the Battery Tender leads out the old breather holes and mount the plug under the car.
Would look a bit neater and make plugging the charger in easier.
Last edited by CraigH; 04-09-2023 at 08:48 PM.
 02-18-2013, 07:52 PM
#182
Melting Slicks
Thread Starter
The rear shocks had seen better days so I got some Bilstein Sports to replace them.
Removed the old shocks.
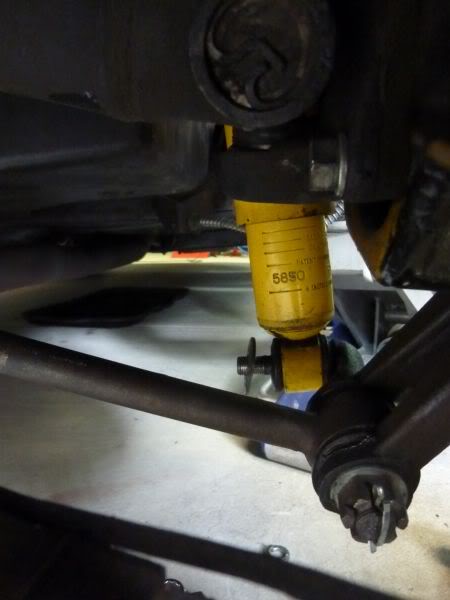
New shocks in with all new fittings.

Rear rides much better with none of the bounce from before and sits flatter in corners.
Removed the old shocks.
New shocks in with all new fittings.
Rear rides much better with none of the bounce from before and sits flatter in corners.
Last edited by CraigH; 04-09-2023 at 08:47 PM.
02-18-2013, 07:53 PM
#183
Melting Slicks
Thread Starter
Had a quick look at the drain on my battery by hooking a multimeter between the battery terminal and the cable.
Key off drain test.
With doors open 1.98 amps
With door lights off .25....26
With stereo memory removed .25
hmm too high
Pulled courtesy light/clock/lighter fuse 0.00.
Wow clock must be draining a lot !!!!!!!
After a little thought and luck I thought to check the courtesy light in the rear compartment. The storage door was not 100% shut and it was the .25 drain.
Close it properly drain = close to 0.
This is certainly one of the drawbacks of fixing every electric courtesy item in the car :-)
02-18-2013, 07:54 PM
#184
Melting Slicks
Thread Starter
Has been nice taking a break from major vette projects and having a chance to enjoy and drive the car.
Another car show in Canberra this weekend "Wheels", open to all car types and next weekend its the American Classics show.
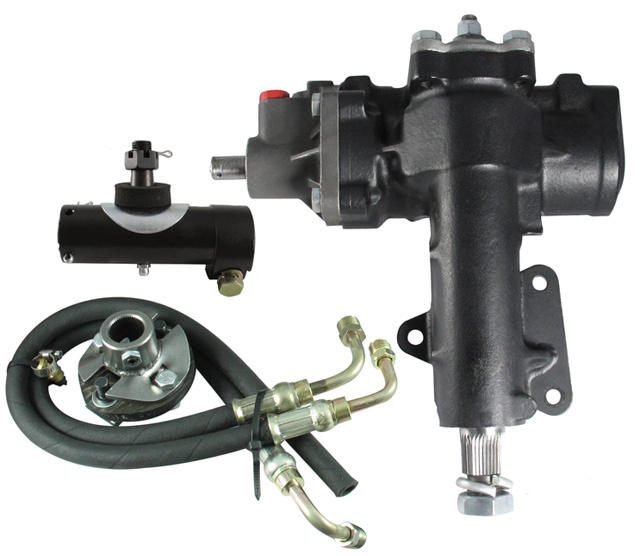
Have been accumulating more bits and pieces for my next assault though.
My Borgeson steering box and associated parts turned up during the week so am looking forward to working on the front suspension and steering.
Another car show in Canberra this weekend "Wheels", open to all car types and next weekend its the American Classics show.
Have been accumulating more bits and pieces for my next assault though.
My Borgeson steering box and associated parts turned up during the week so am looking forward to working on the front suspension and steering.
 02-18-2013, 07:55 PM
#186
Melting Slicks
Thread Starter
The vacuum system on the vette all works fine but there are some minor leaks in the control and main circuits that can cause it to do things like lift the wiper door on start up.
I know all the hoses under the bonnet need to be replaced but that will be done when I strip it all for clean and paint.
I had already replaced all vacuum hoses in dash and the wiper door actuator that I knew it had a leak. But the wiper door still popped on startup.
So to simplify things I needed to isolate the lights and wiper circuits.
1) Clamp the small control hose that comes through firewall and goes to front of car.
2) Clamp the main hoses to the front.
That way I could check just the wiper circuit with my vacuum pump and sure enough no wiper door pop up problems.
So there is a small leak in either the hoses, control valves or actuators for the lights.
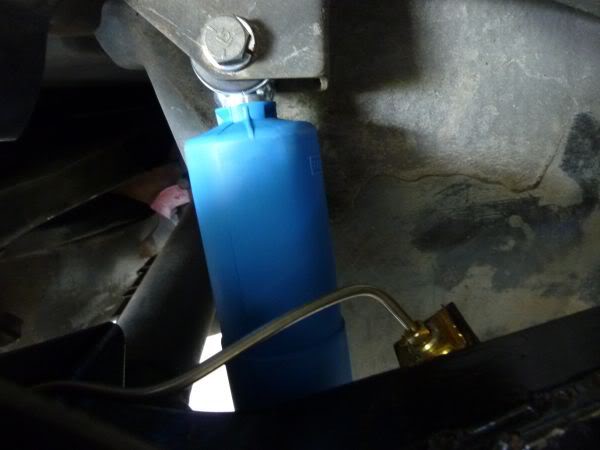
While I was at it I did a vacuum leak down test on the tank I built and it did not do very well.
Turns out the liquid pipe seal I had used dried up and started to leak so I pulled it out and redid all joints with pipe tape.
Now it will hold vacuum for as long as I try.
Will put it back in tomorrow then do a bit more testing to see exactly where the leaks are in the light circuits.
Its amazing that a small leak anywhere can cause enough vacuum change to set off one of the actuators in an alternate circuit.
I know all the hoses under the bonnet need to be replaced but that will be done when I strip it all for clean and paint.
I had already replaced all vacuum hoses in dash and the wiper door actuator that I knew it had a leak. But the wiper door still popped on startup.
So to simplify things I needed to isolate the lights and wiper circuits.
1) Clamp the small control hose that comes through firewall and goes to front of car.
2) Clamp the main hoses to the front.
That way I could check just the wiper circuit with my vacuum pump and sure enough no wiper door pop up problems.
So there is a small leak in either the hoses, control valves or actuators for the lights.
While I was at it I did a vacuum leak down test on the tank I built and it did not do very well.
Turns out the liquid pipe seal I had used dried up and started to leak so I pulled it out and redid all joints with pipe tape.
Now it will hold vacuum for as long as I try.
Will put it back in tomorrow then do a bit more testing to see exactly where the leaks are in the light circuits.
Its amazing that a small leak anywhere can cause enough vacuum change to set off one of the actuators in an alternate circuit.
Last edited by CraigH; 04-09-2023 at 08:46 PM.
The following 2 users liked this post by CraigH:
DavidKrull (10-20-2023),
Primoz (04-29-2021)
 02-18-2013, 07:56 PM
#188
Melting Slicks
Thread Starter
I have previously fixed the TH400 pan leak caused by a split seal and warped pan.
There was still a leak towards the rear of the transmission and it was not the rear seal as it was already replaced.
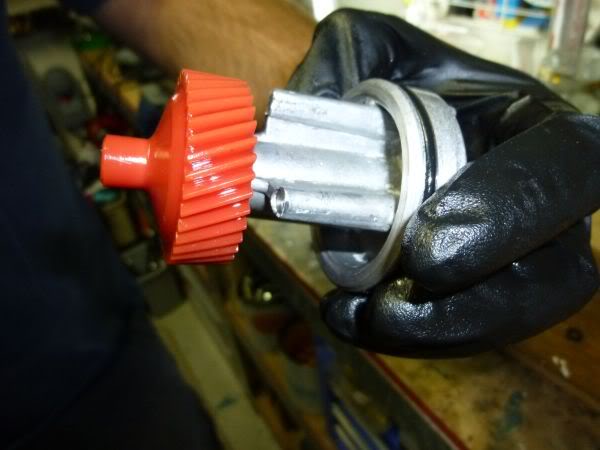
After some investigation it appears the only other area leaking was the speedo cable connection.
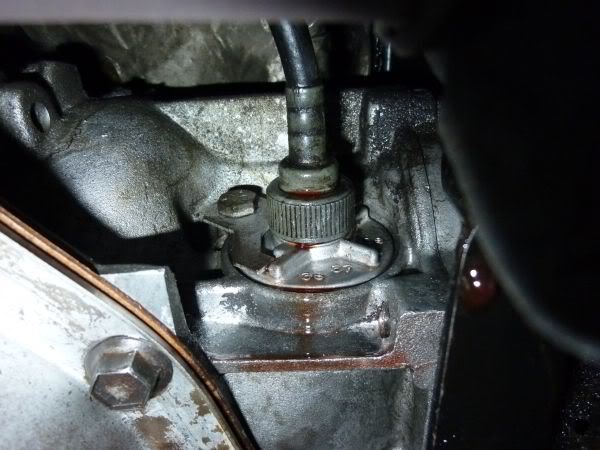
It could be the outer o-ring or the inner cable seal, or both.
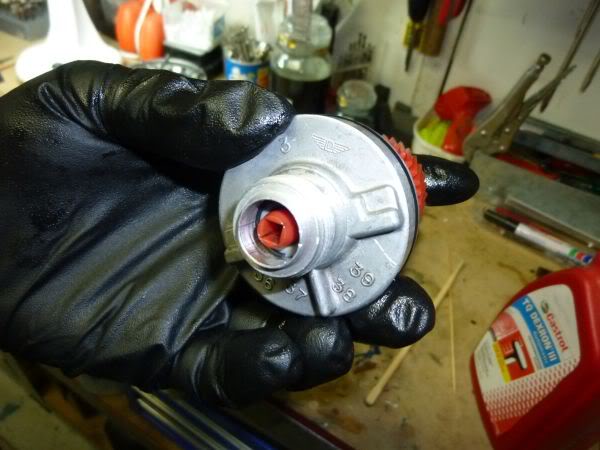
So I took it out after marking its orientation.
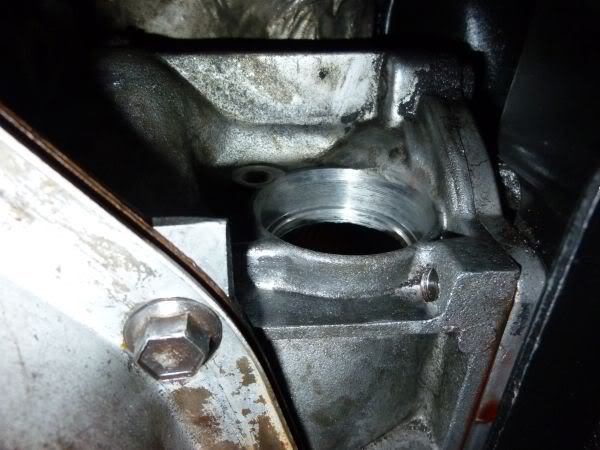
Removed the old o-ring and seal and cleaned it up. Also cleaned up the hole it mounts in.
Inserted a new cable seal and put the wire ring in that holds it in place.

Put the speedo drive cog back in and ready to go back in.
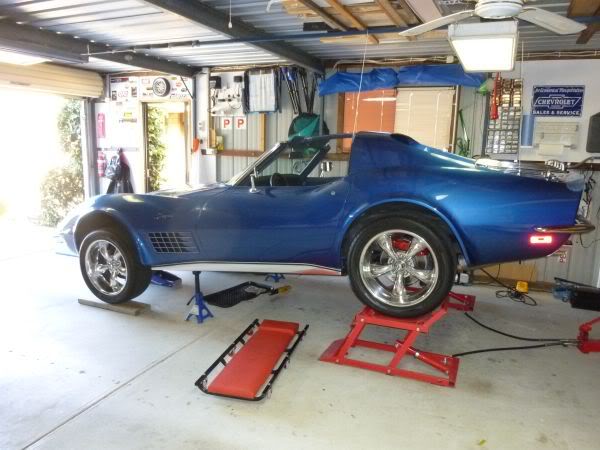
Helps having the vette up nice and high for this.
Lets see if that fixes the problem.
There was still a leak towards the rear of the transmission and it was not the rear seal as it was already replaced.
After some investigation it appears the only other area leaking was the speedo cable connection.
It could be the outer o-ring or the inner cable seal, or both.
So I took it out after marking its orientation.
Removed the old o-ring and seal and cleaned it up. Also cleaned up the hole it mounts in.
Inserted a new cable seal and put the wire ring in that holds it in place.
Put the speedo drive cog back in and ready to go back in.
Helps having the vette up nice and high for this.
Lets see if that fixes the problem.
Last edited by CraigH; 04-09-2023 at 08:45 PM.
02-18-2013, 07:56 PM
#189
Melting Slicks
Thread Starter
Just to loop back on my vacuum system testing from earlier.
The wiper circuits are all good and fairly leak free (new under bonnet hoses will make them 100%)
The headlight circuit is a different story.
One of the valves will not hold vacuum on its control line (white hose) and needs replacing.
Both actuators could do with new seals on the actuator side however after doing a vacuum leak down test on both sides of each one ....... one of them has a slow leak in the rear side of the actuator that means it has a fault in the internal diaphragm that is not fixable.
So new actuators added to next order.
Overall checking the vacuum system is fairly simple if you isolate each sub system and then test each components operation.
02-18-2013, 07:57 PM
#190
Melting Slicks
Thread Starter
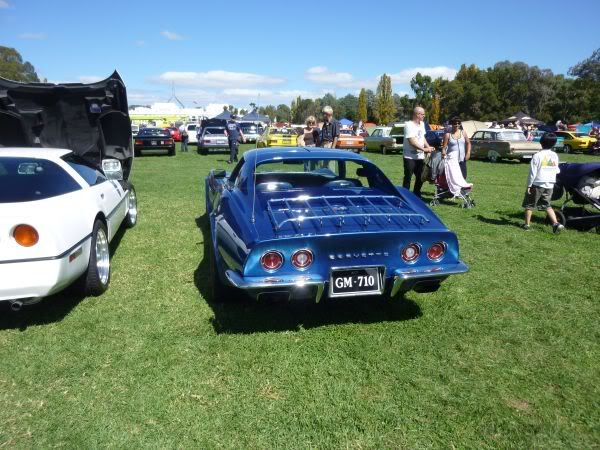
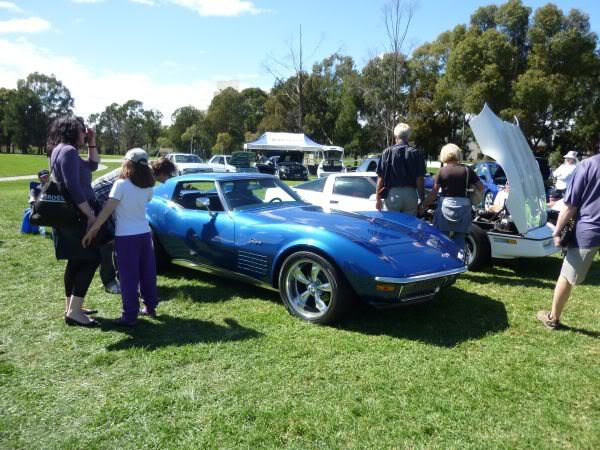
April 2011
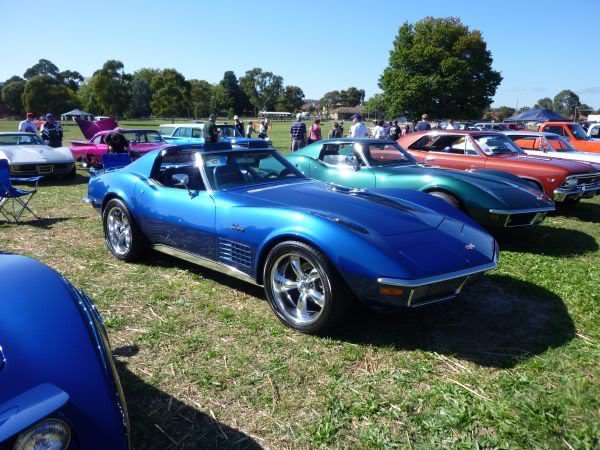
Went and did a display at the Brumbies Vs Hurricanes match tonight for the Summernats.
These were taken before the crowds arrived.


Went and did a display at the Brumbies Vs Hurricanes match tonight for the Summernats.
These were taken before the crowds arrived.
Last edited by CraigH; 04-09-2023 at 08:45 PM.
02-18-2013, 07:58 PM
#191
Melting Slicks
Thread Starter
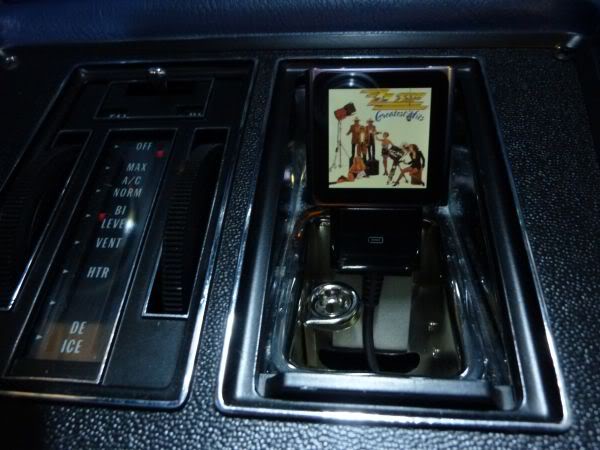
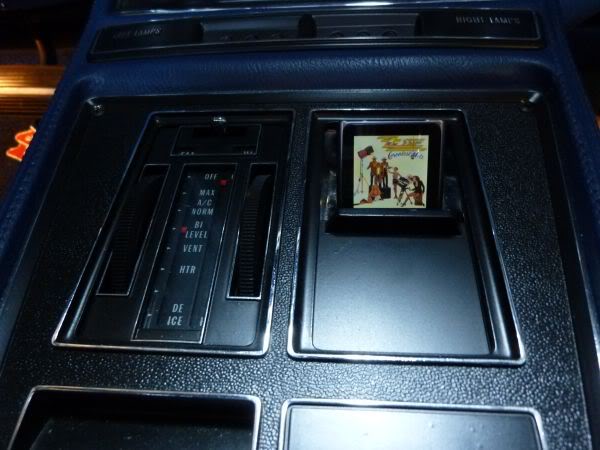
Have been to busy to get much done over last few weeks but decided to do a small job of mounting the ipod neatly.
Picked up a new ipod Nano duty free last week so I started with a new ashtray and marked it out to get the ipod cable through the base.
Drilled then filed it out neatly.
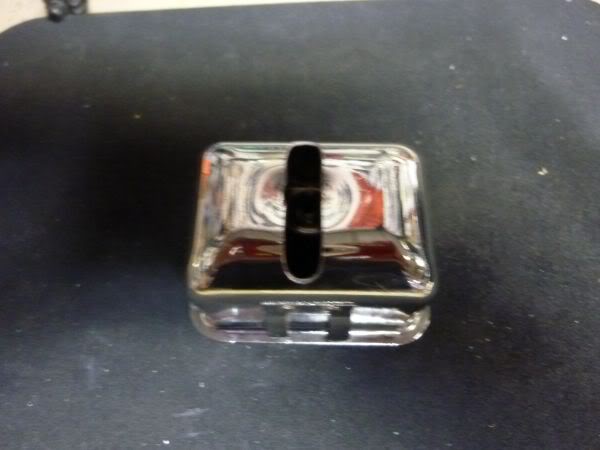
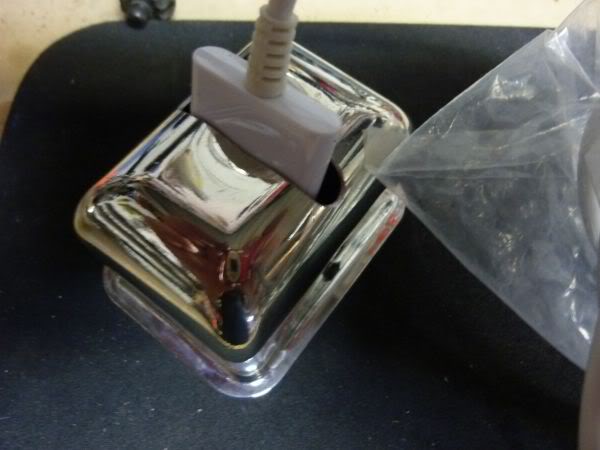
On the inside of ashtray I made an aluminum bracket to hold the ipod connector angled towards the dash.
Media blasted the finished bracket, pop riveted it into the ashtray and used double sided tape to securely hold the connector.
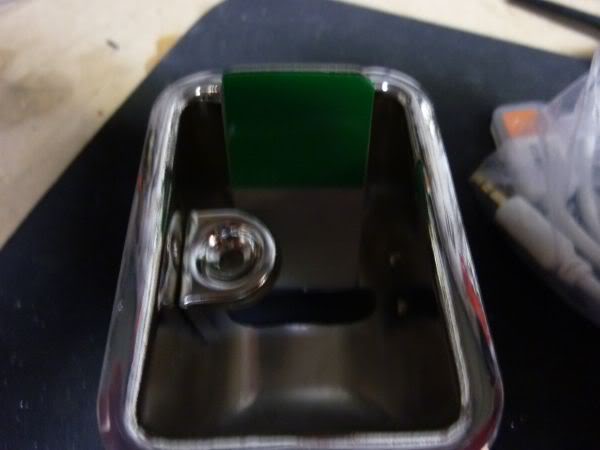
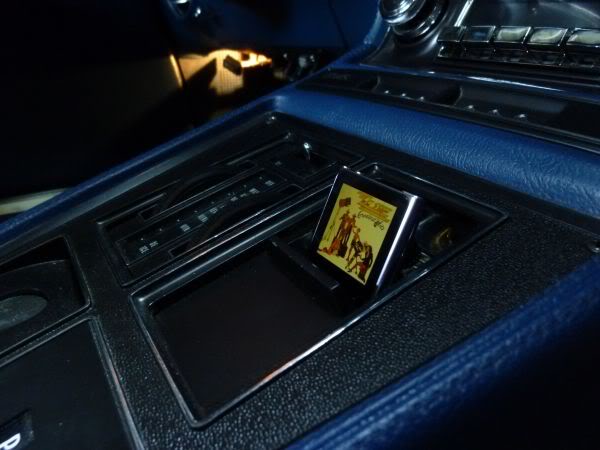
The ashtray door can still shut without touching the connector and you can easily get your fingers on to disconnect the ipod.
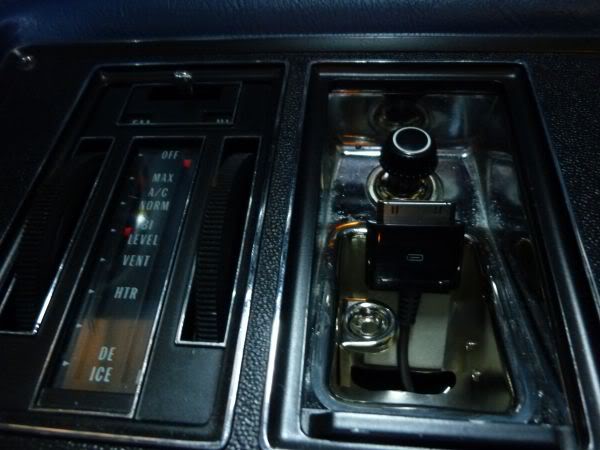
Connected.
Picked up a new ipod Nano duty free last week so I started with a new ashtray and marked it out to get the ipod cable through the base.
Drilled then filed it out neatly.
On the inside of ashtray I made an aluminum bracket to hold the ipod connector angled towards the dash.
Media blasted the finished bracket, pop riveted it into the ashtray and used double sided tape to securely hold the connector.
The ashtray door can still shut without touching the connector and you can easily get your fingers on to disconnect the ipod.
Connected.
Last edited by CraigH; 04-09-2023 at 08:42 PM.
02-18-2013, 07:58 PM
#192
Melting Slicks
Thread Starter
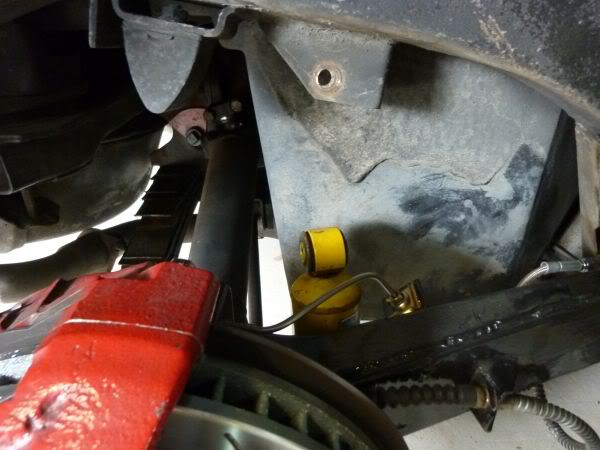
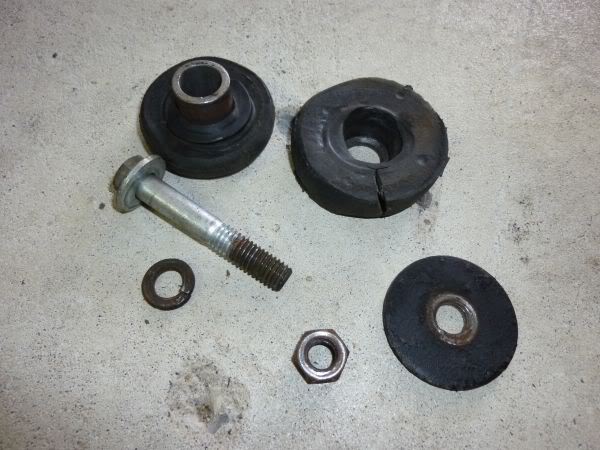
Replaced the snubber cushion for the diff.
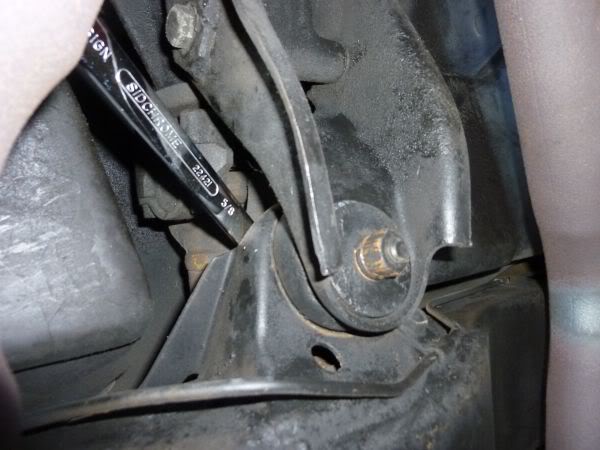
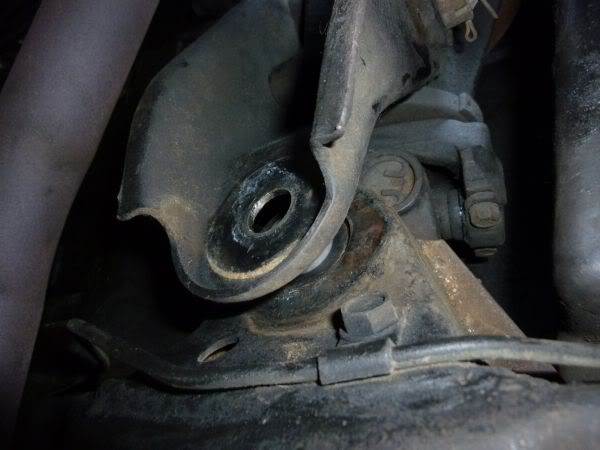
Original one was getting a bit worn and in fact was completely split.
New one in and compressed.
I think I will do some more cleaning of the underside next.
Original one was getting a bit worn and in fact was completely split.
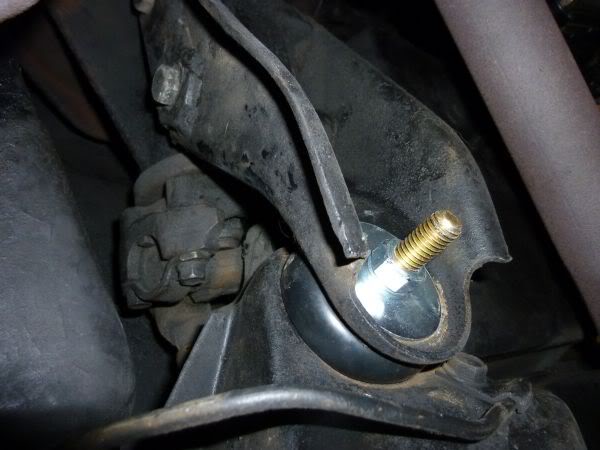
New one in and compressed.
I think I will do some more cleaning of the underside next.
Last edited by CraigH; 04-09-2023 at 08:42 PM.
02-18-2013, 07:58 PM
#193
Melting Slicks
Thread Starter
I have been trying to track down a squeak I have had when you go in reverse or compress the rear suspension (turns wheel in reverse slightly)
Have the half shafts out looking for the culprit.
Was almost convinced it was a rear bearing but I had no real flex in the wheel when it is up on a stand.
While looking for possible parts i worked my way from bearings to bearing assemblies to complete trailing arms - why not :-)
Had picked out a nice set of new trailing arms with all new parts from the US, had shipping worked out etc........but thought I would give it one more go to see if I could track it down more.
Turned out to be something so simple.
Was a resonance between the disk piston and the pad. Had champhered the pads and used anti squeal nylon end pieces when I rebuilt them but I did not use any spray on the back of the pads.
Took them out re filed the ends again, sprayed them and put them back.
No noise....lets see how long it lasts.
One hell of a lot cheaper than trailing arms.
02-18-2013, 07:59 PM
#194
Melting Slicks
Thread Starter
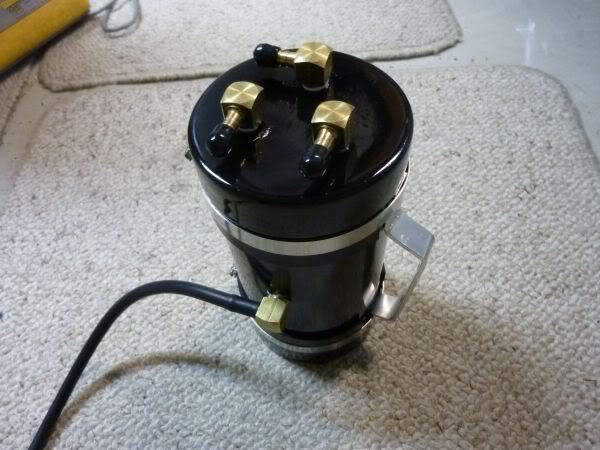
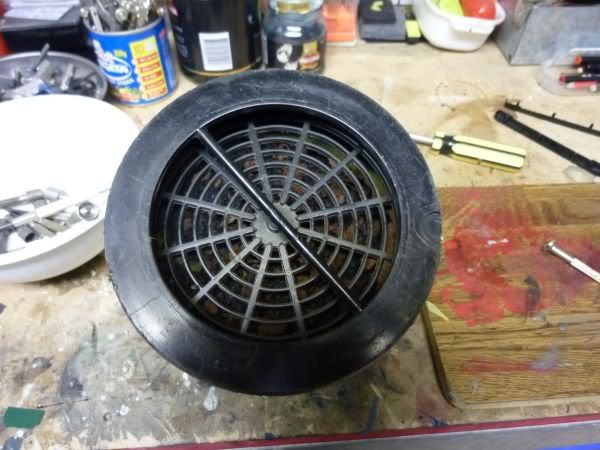
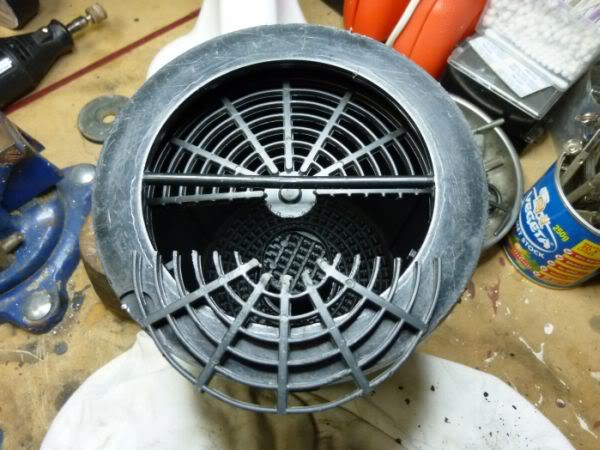
Started to rebuild the vapor canister I picked up a while ago.
First I removed the filter
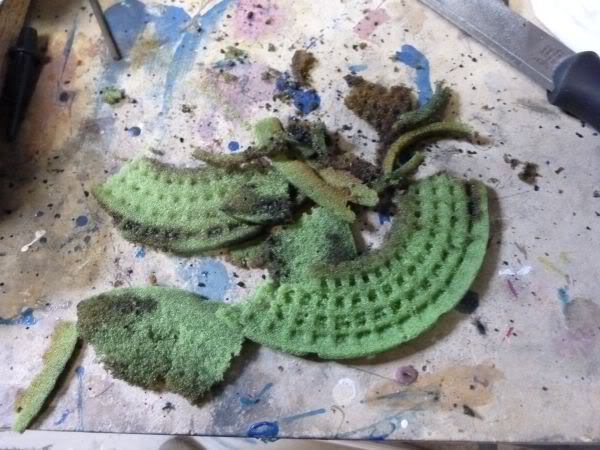
Then I removed a lot of old foam that was crumbling away inside.
All the charcoal then was able to be taken out and I was left with some more old foam rings inside.
I thought the best thing to do would be to test the operation of the valve.
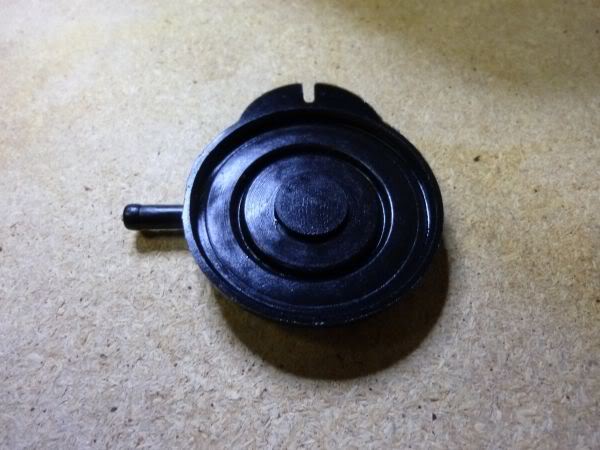
Dissembled the valve and cleaned all the parts.
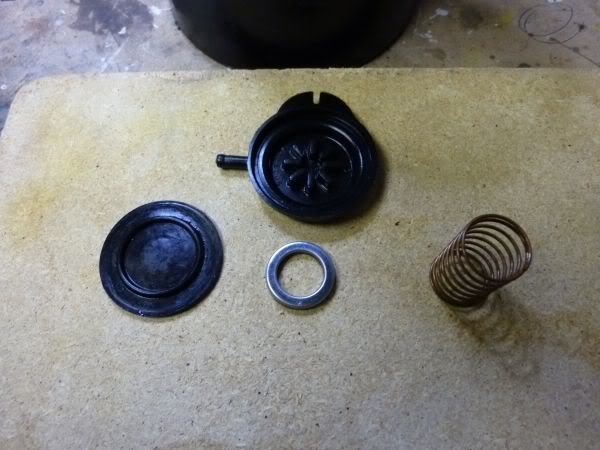
After some lubricant on the diaphragm it went back together.
Applied vacuum to the PCV tube and it held vacuum fine.
Then applied vacuum to the carb tube and it opens valve and allows PCV tube to extract contents of the canister.
Problem is it never closes again unless I take it apart and put back together again.
Not sure if I have done something wrong or I am applying too much vacuum and distorting the rubber diaphragm
First I removed the filter
Then I removed a lot of old foam that was crumbling away inside.
All the charcoal then was able to be taken out and I was left with some more old foam rings inside.
I thought the best thing to do would be to test the operation of the valve.
Dissembled the valve and cleaned all the parts.
After some lubricant on the diaphragm it went back together.
Applied vacuum to the PCV tube and it held vacuum fine.
Then applied vacuum to the carb tube and it opens valve and allows PCV tube to extract contents of the canister.
Problem is it never closes again unless I take it apart and put back together again.
Not sure if I have done something wrong or I am applying too much vacuum and distorting the rubber diaphragm
Last edited by CraigH; 04-09-2023 at 08:41 PM.
02-18-2013, 08:00 PM
#195
Melting Slicks
Thread Starter
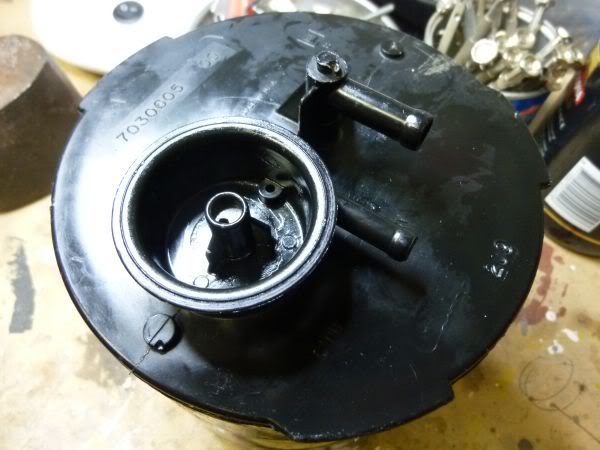
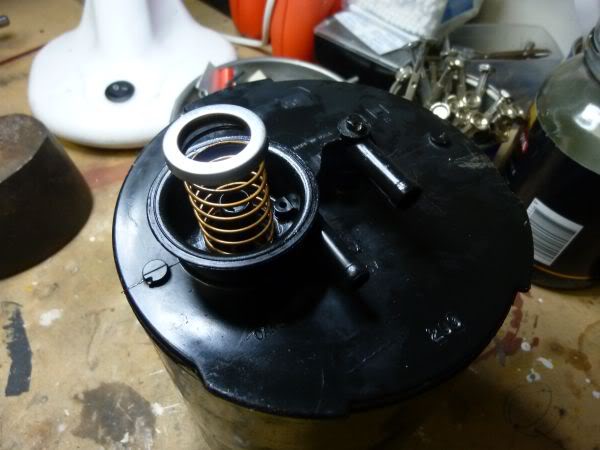
I now have the vacuum control and diaphragm working fine.
Cleaned it up and checked for rips and all was fine.
Had a good look at the airflow through the canister when vacuum is supplied to the PVC inlet and it seems to need a bit of constriction (caused by the charcoal) to get the PVC vacuum to drag down the diaphragm against the spring and seal it from dragging fumes.

So my test setup has vacuum going to both the PVC and carb inlets.
A tap on the carb line simulates ported vacuum changing from none to full.
When the car is at idle it has little vacuum on a ported line (as its above the carb butterfly's) so the vacuum on the PVC line drags the diaphragm down and shuts itself off - so no collected fuel vapor goes into the carb.
When the car is in throttle with the butterflies open ported vacuum would be higher and it will cause the diaphragm to be pulled upward and then allow the pvc vacuum line to drag fuel fumes into the carb.
Now next to cut a section of the base out and add some foam filters top and bottom and fill with new carbon.
Cleaned it up and checked for rips and all was fine.
Had a good look at the airflow through the canister when vacuum is supplied to the PVC inlet and it seems to need a bit of constriction (caused by the charcoal) to get the PVC vacuum to drag down the diaphragm against the spring and seal it from dragging fumes.
So my test setup has vacuum going to both the PVC and carb inlets.
A tap on the carb line simulates ported vacuum changing from none to full.
When the car is at idle it has little vacuum on a ported line (as its above the carb butterfly's) so the vacuum on the PVC line drags the diaphragm down and shuts itself off - so no collected fuel vapor goes into the carb.
When the car is in throttle with the butterflies open ported vacuum would be higher and it will cause the diaphragm to be pulled upward and then allow the pvc vacuum line to drag fuel fumes into the carb.
Now next to cut a section of the base out and add some foam filters top and bottom and fill with new carbon.
Last edited by CraigH; 04-09-2023 at 08:41 PM.
02-18-2013, 08:01 PM
#196
Melting Slicks
Thread Starter
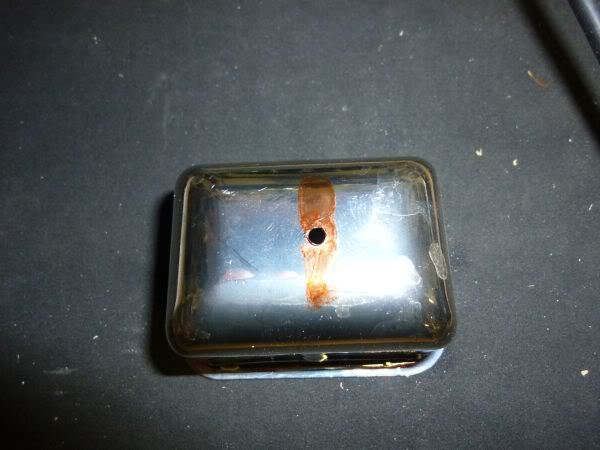
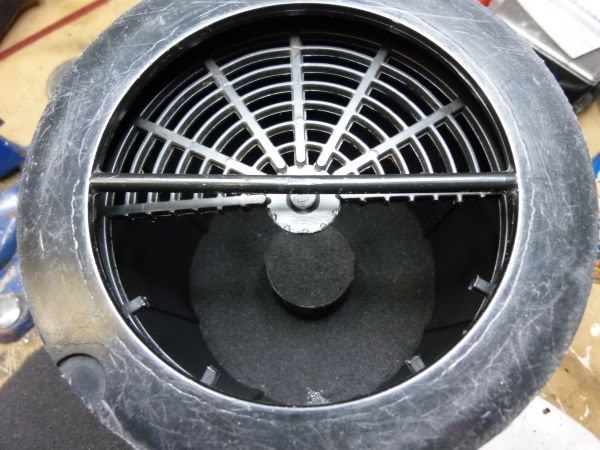
To be able to work inside the canister I cut half of the base out with a sharp blade.
You can see what the inside looks like as well.
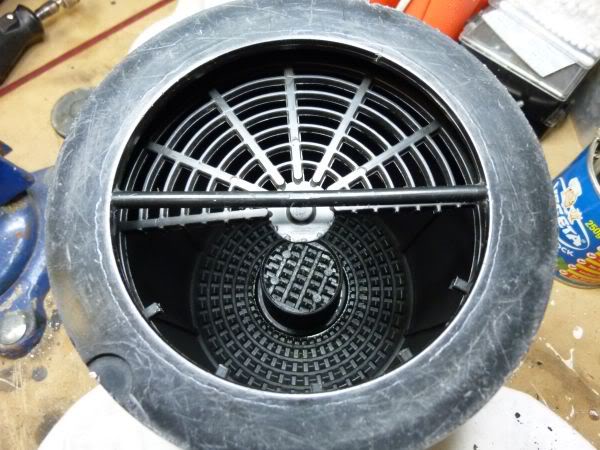
There was originally a foam insert top and bottom to stop charcoal getting into any of the vacuum lines or falling out the bottom if the filter element was missing.
This is all that was remaining.
You can see what the inside looks like as well.
There was originally a foam insert top and bottom to stop charcoal getting into any of the vacuum lines or falling out the bottom if the filter element was missing.
This is all that was remaining.
Last edited by CraigH; 04-09-2023 at 08:41 PM.
 02-18-2013, 08:02 PM
#198
Melting Slicks
Thread Starter
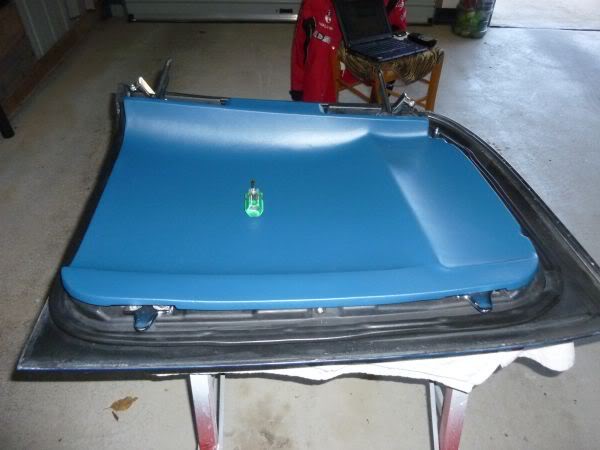
While I am waiting for the carbon for my canister I decided to do some minor tweaks to the alignment of the passenger T-Top.
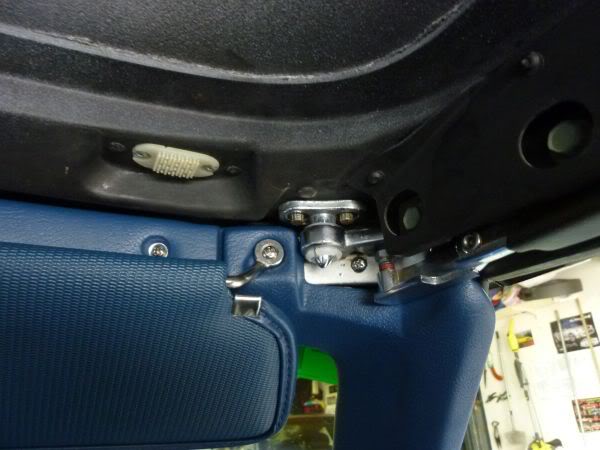
First to remove the Trim, 2 screws and pop the velcro holders.
Loosen up the holding tabs.
And the front alignment pin.
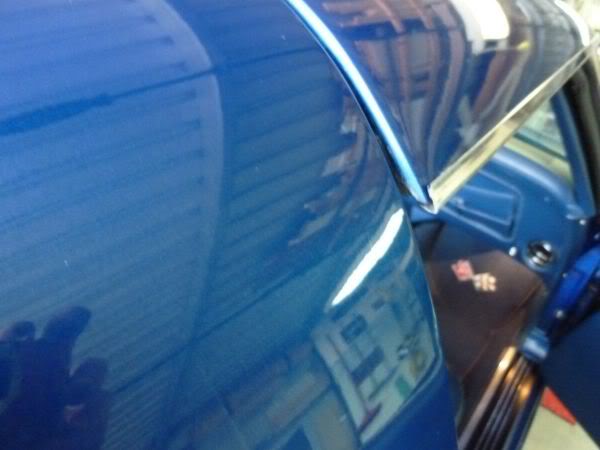
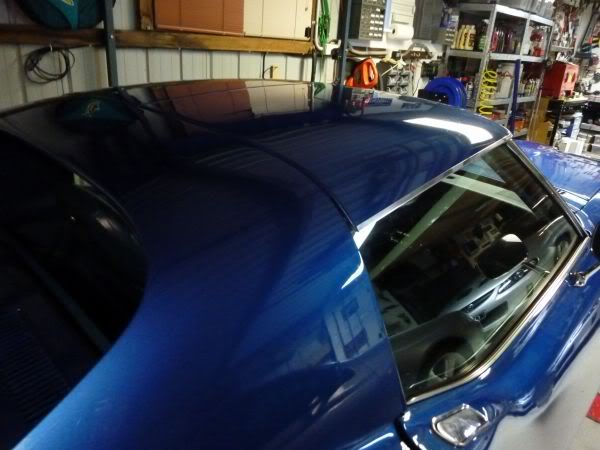
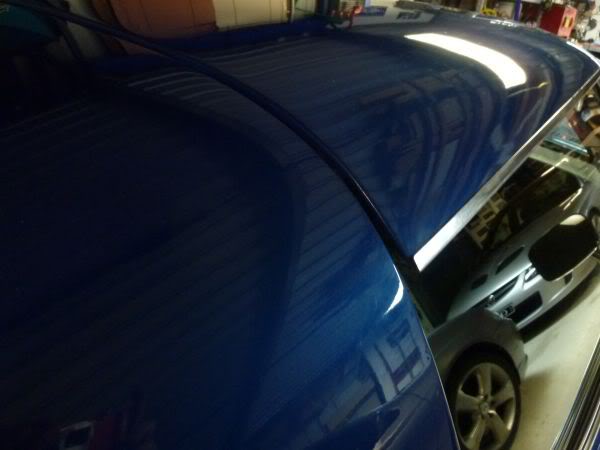
So after lots of adjustment I have it better but not perfect.
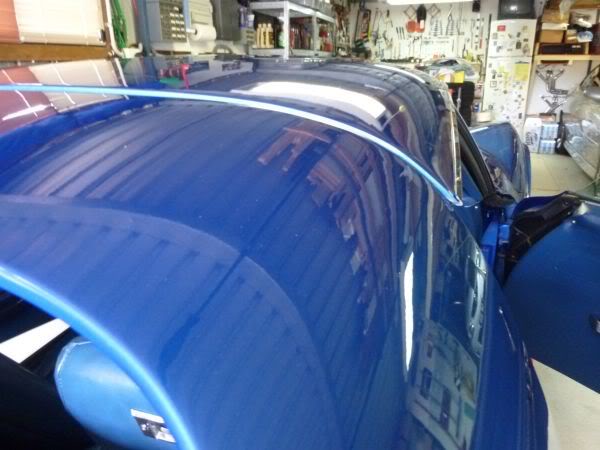

The rear side edge Kicks out a little bit more still on the passenger side but it may just be the age of the fiberglass etc.
First to remove the Trim, 2 screws and pop the velcro holders.
Loosen up the holding tabs.
And the front alignment pin.
So after lots of adjustment I have it better but not perfect.
The rear side edge Kicks out a little bit more still on the passenger side but it may just be the age of the fiberglass etc.
Last edited by CraigH; 04-09-2023 at 08:40 PM.
02-18-2013, 08:02 PM
#199
Melting Slicks
Thread Starter
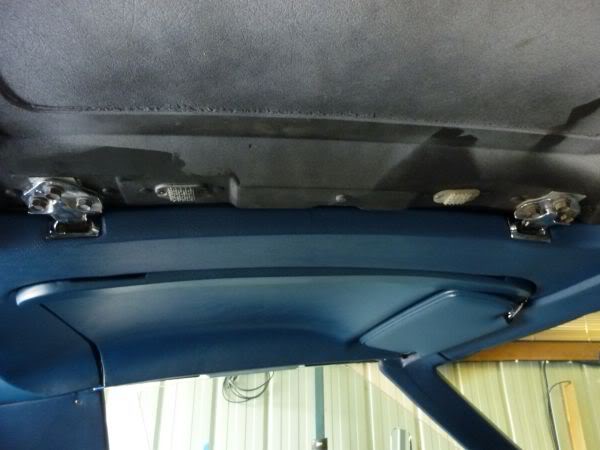
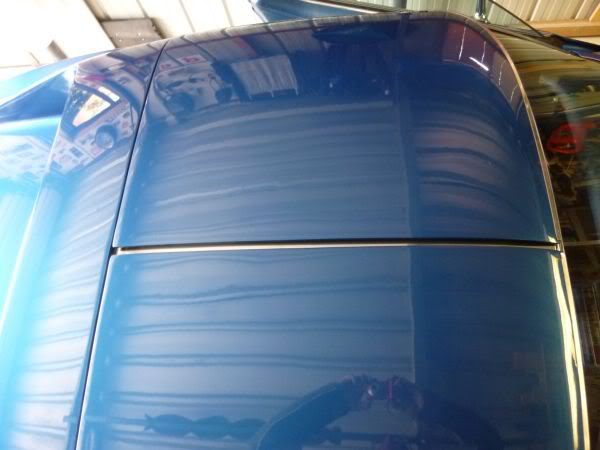
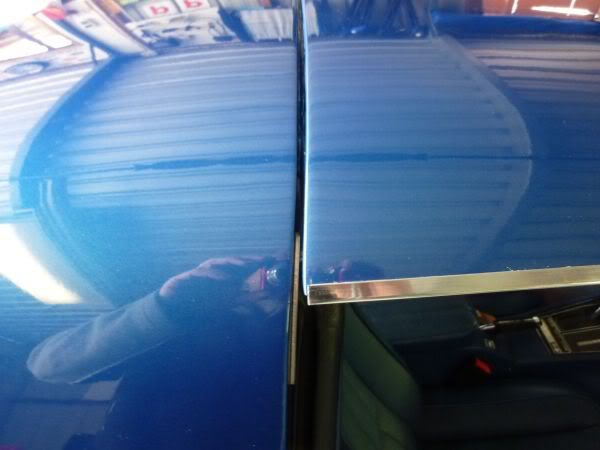
A bit more research and I found I should have had more adjustment in the B pillar alignment point.
Turns out the holes that allow adjustment were full of crap from being repainted so I opened then up and had more adjustment.
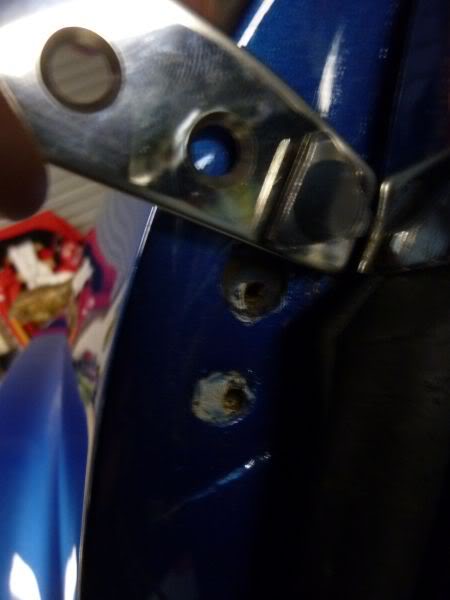
Now after a bit more re alignment its better again.
We are only talking minor adjustment here guys but it just makes it look that little bit better in my view.
This will do for now.
Turns out the holes that allow adjustment were full of crap from being repainted so I opened then up and had more adjustment.
Now after a bit more re alignment its better again.
We are only talking minor adjustment here guys but it just makes it look that little bit better in my view.
This will do for now.
Last edited by CraigH; 04-09-2023 at 08:40 PM.
02-18-2013, 08:03 PM
#200
Melting Slicks
Thread Starter
June 2011
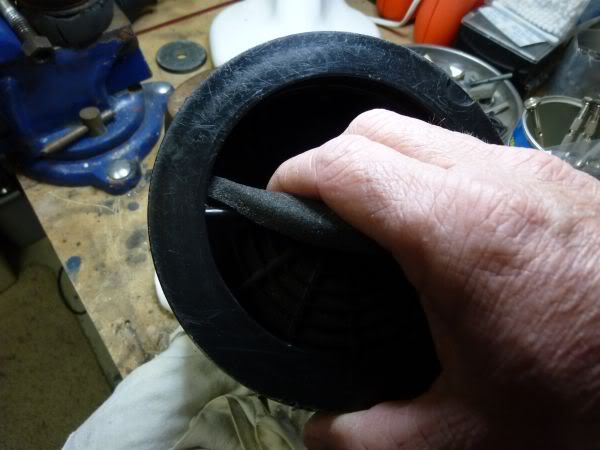
My Carbon turned up during the week so this morning I finished the Vapor Canister.
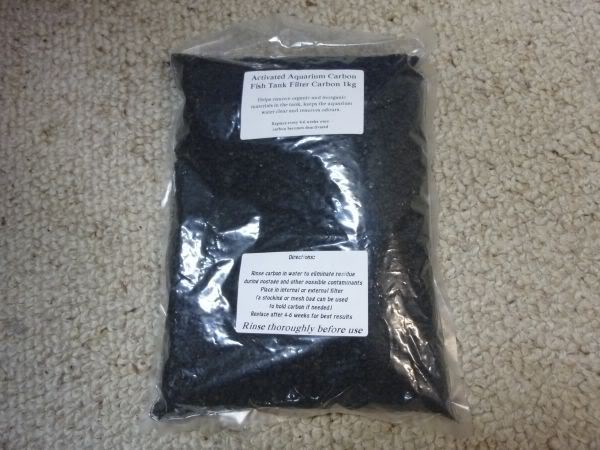
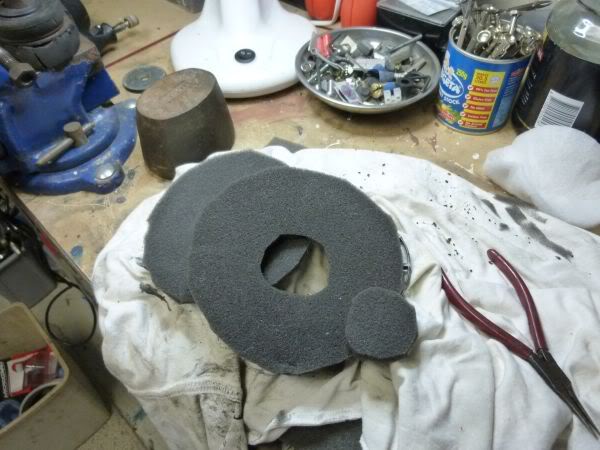
First fill the canister till you have about 3/4" free space at the top.
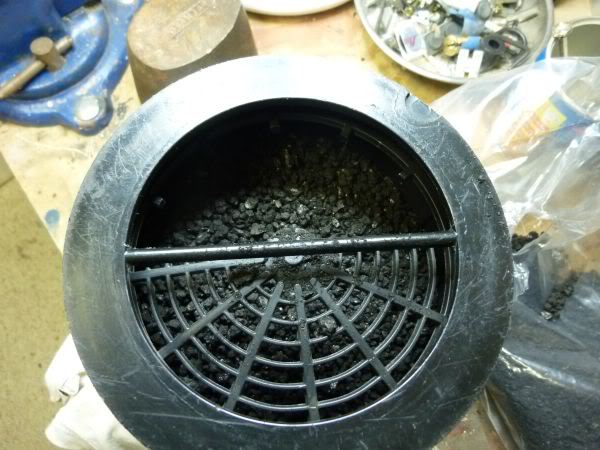
Then insert the foam filter cut our previously.
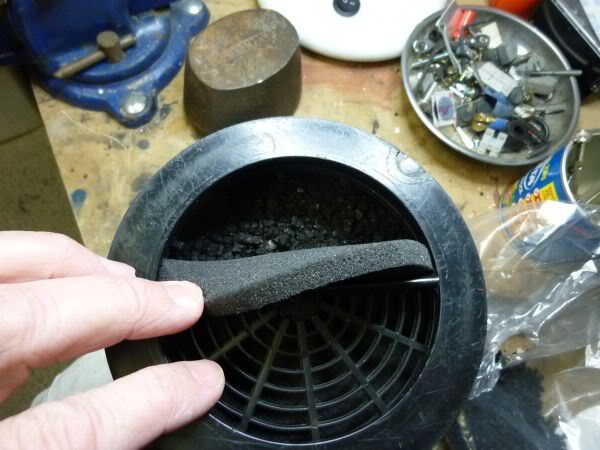
Tilt the canister and push the carbon over to the side that is under the fixed grill pushing the foam up against it.
My Carbon turned up during the week so this morning I finished the Vapor Canister.
First fill the canister till you have about 3/4" free space at the top.
Then insert the foam filter cut our previously.
Tilt the canister and push the carbon over to the side that is under the fixed grill pushing the foam up against it.
Last edited by CraigH; 04-09-2023 at 08:40 PM.