Darth's 1980 build
 08-03-2012, 08:37 PM
#1
Intermediate

Thread Starter
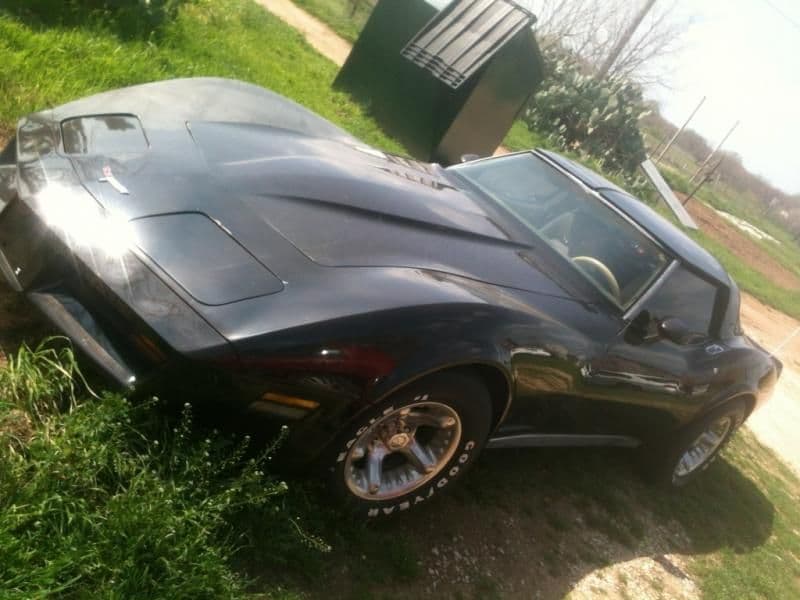
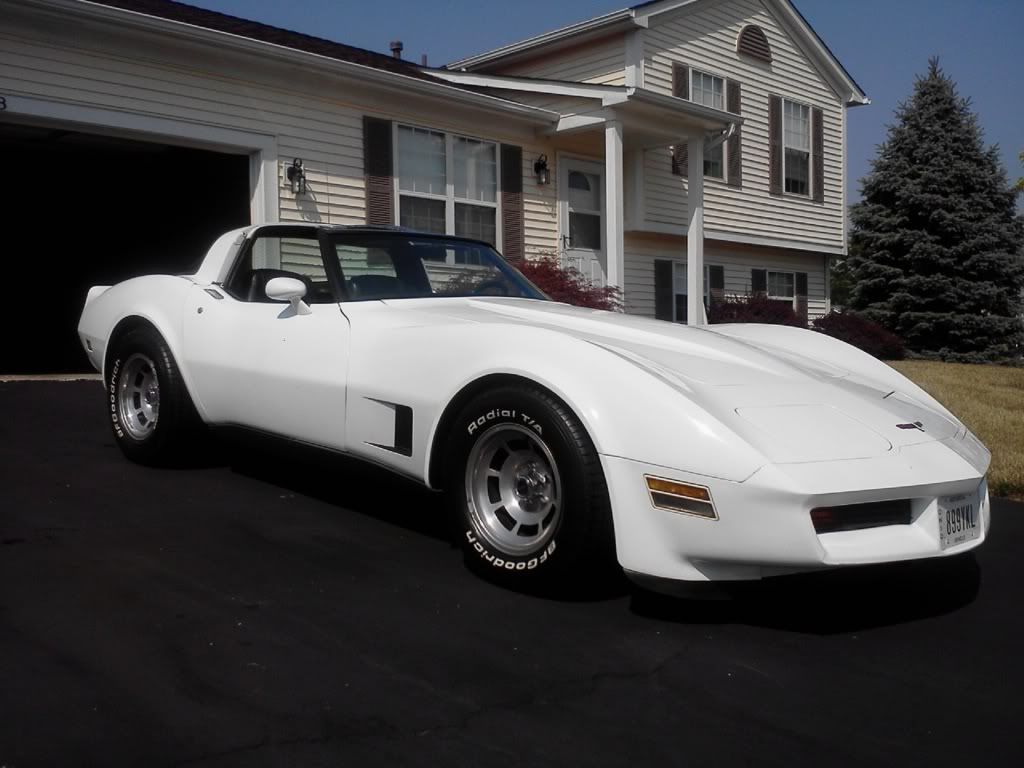
Well i've been lurking around here for a couple of years planning my car and working on it for a couple of months so I thought I would give a build thread a try. I have "fixed up" a couple of C4s before but nothing like what I have planned for this 1980 L48. Here is the pic from craigslist the way I found it near Bowie, Tx.
 08-03-2012, 09:24 PM
#2
Intermediate
Thread Starter
I could tell it had been sitting for a while by the amount of leaves, dirt, and sticks covering the engine and filling the wiper compartment. After clearing off air filter and checking fluids I turned the key and was pleasantly surprised. It started fine and sounded real good....very smooth without any whining, ticking or strange noises. The test drive was pretty scary though....first time I turned the wheel at about 30 mph it jumped from one side of the road to the other like a frog trying to get out of the way of a 18 wheeler. Got it back to the owner and looked underneath it and seen the problem. Every piece of rubber in the front end was gone or severely deteriorated....no rubber in stabilizer bar end links. I did'nt really care because I knew I would be replacing all the suspension anyway. So I offered him 5000 from the 6500 he had it listed for. He accepted and I told him I would be back in a few hours with the cash. Thought about getting a trailer for the 45 min drive back to my house but decided "heck" with it i'll just drive slow. Pulled out of driveway and noticed all of the gas that was in it from the test drive had disapeared when I went to get the money......and suddenly the brakes went to the floor. Anyway way made it home with several bottles of brake fluid and found the broken brake line on drivers rear.
08-04-2012, 12:00 AM
#3
Burning Brakes

Member Since: Oct 2011
Location: long beach California
Posts: 1,093
Likes: 0
Received 2 Likes
on
2 Posts
awesome!!! well get ready for allot of work. good news is compared to your c4s the parts for the c3 is very easy to come by. also allot of vendor competition keeps the pricing of parts resaonable. rebuilding mine has been a blast and a brutal love hate relationship.


 08-07-2012, 07:59 PM
#5
Hey great to see another 80 L48, I got mine about two months ago and it sounds like our drive home were very similar
It's been a lot of work but also a lot of fun...haven't worked on cars in 20 years and never a vette, this site is a great place to gather info, so far I have tackled the list below.
-New tires
-Brake calipers all around mine were shot!!
-Plugs,Wires Cap/Rotor
-Oil/Filter change
-All new U-joints ( be careful I snapped a bolt in Diff yoke )
Ended up pulling the whole rear end out and taking the differential to a machine shop to tap and service diff while out.
Since all of the rear end was out I did a clean up and paint and replaced the rear struts with Van Steele adjustable.
Getting ready to relace Trans pan gasket and valve cover gaskets this weekend.
After that I'm going to tackle the front end like you....so if you would like to talk about your front end rebuild that would be great !!
Good Luck
JB
08-07-2012, 08:36 PM
#6
Intermediate
Thread Starter
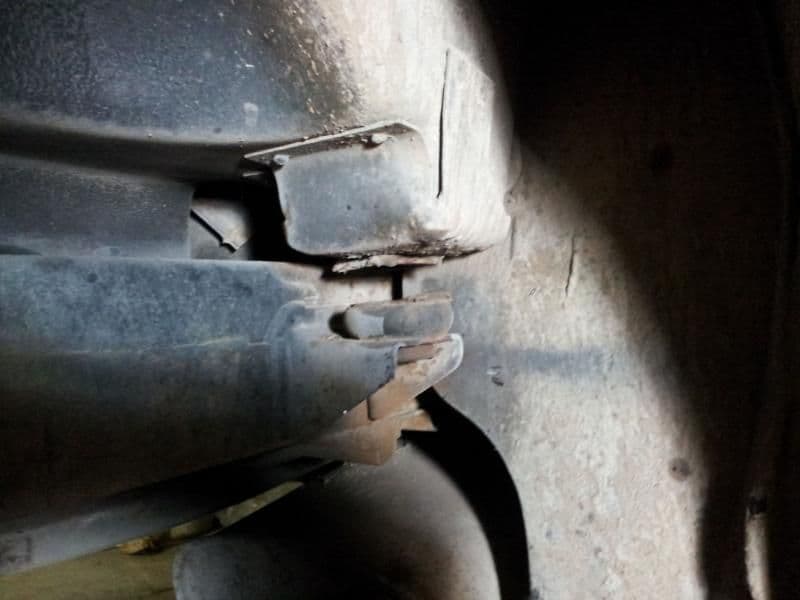
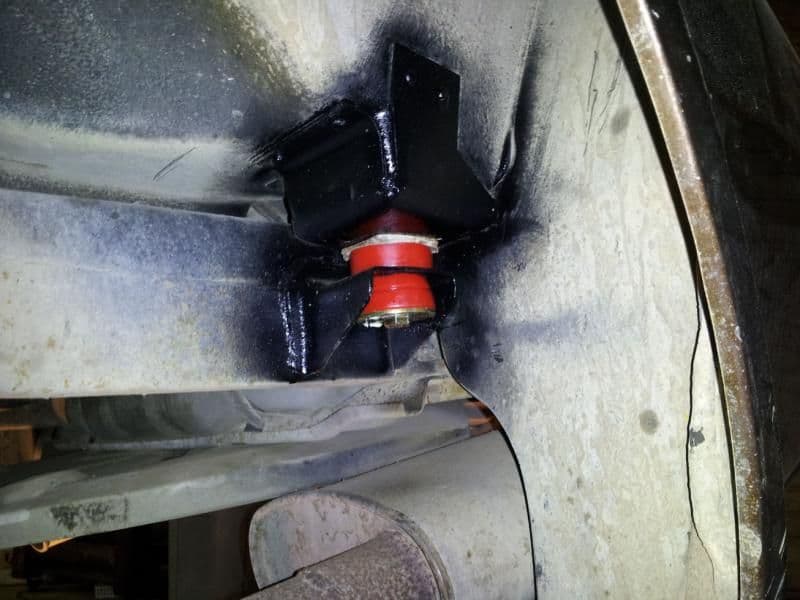
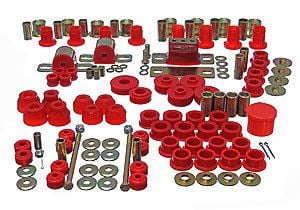
So the final plan is all black inside and out, 383 stroker, upgrade transmission, all new suspension with shark bite rear coil overs and side pipes. First get it driveable. So I ordered complete poly bushing kit, Bilstein sport shocks and 550 lb front springs. Installed sway bar links and bushings.....what a difference! Went ahead and did body mounts next because I figured they would be most difficult.

Last edited by Darth Vette; 08-07-2012 at 10:12 PM.
08-08-2012, 03:37 AM
#7
Intermediate
Thread Starter
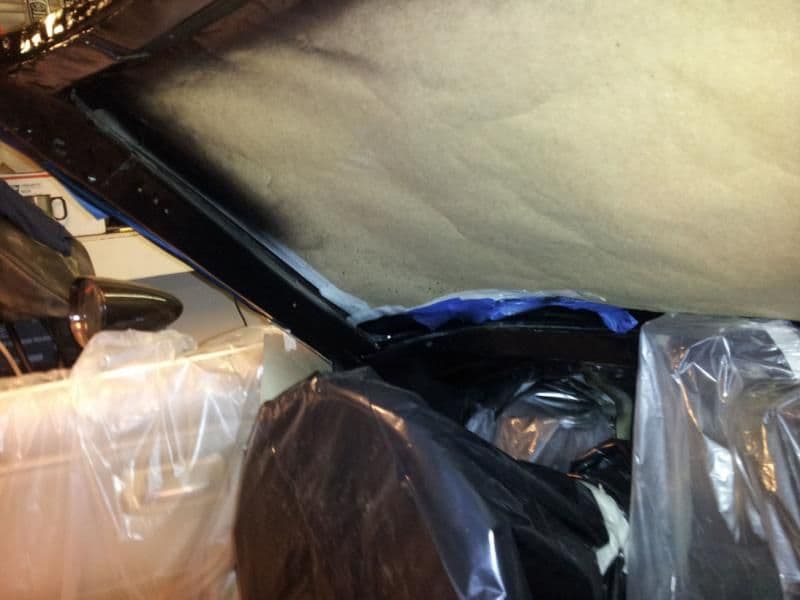
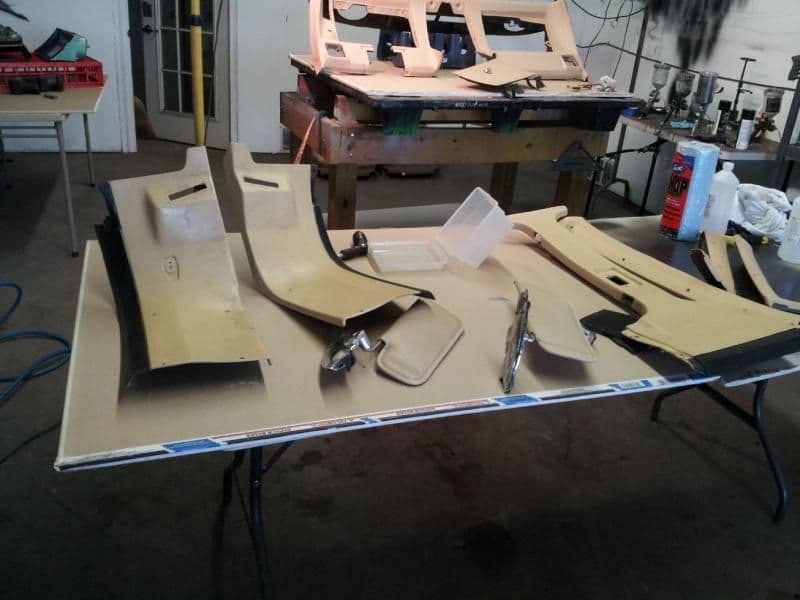
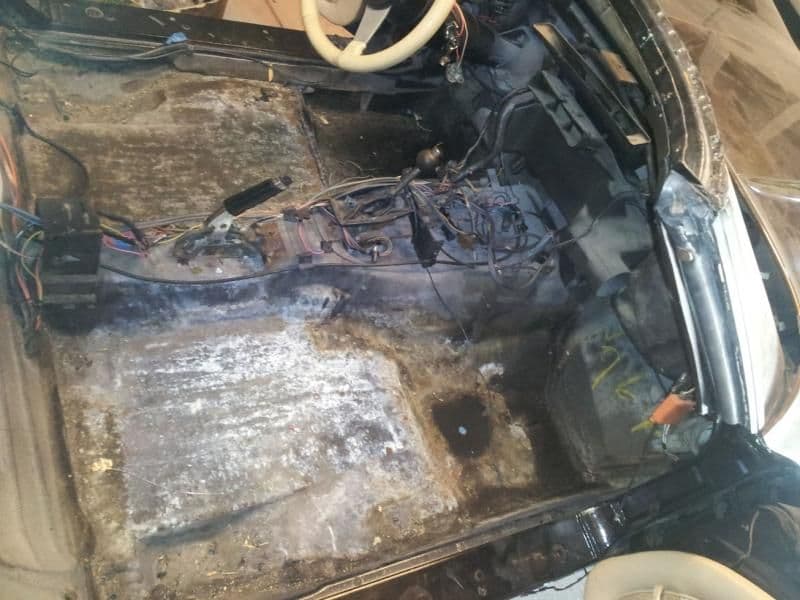
Decided to go ahead and tackle the interior. Found some rust when doing the body mounts in the kick panel so I ripped out everything to figure out the extent of the damage. Rot was mainly behind trim around winshield top and sides. Not too bad though....nothing a wire brush, some paint and glass seal could'nt fix.

08-08-2012, 03:55 AM
#8
Intermediate
Thread Starter
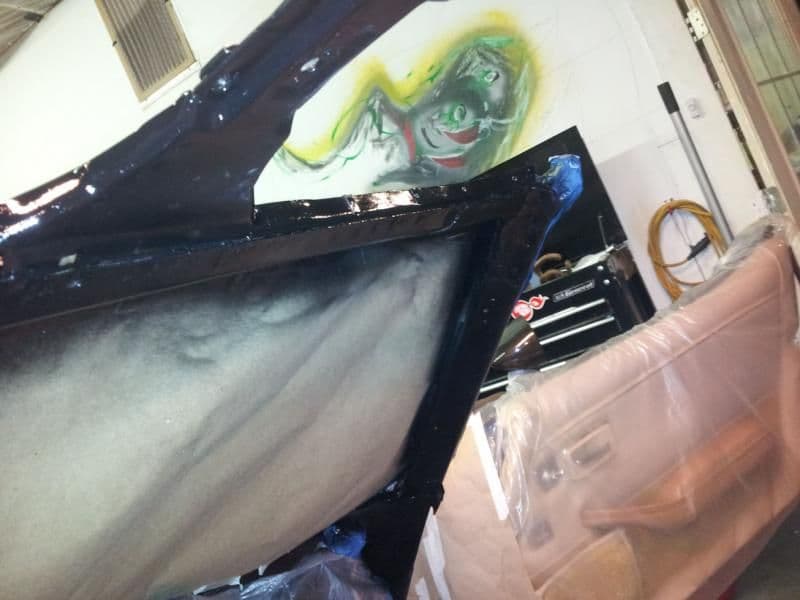
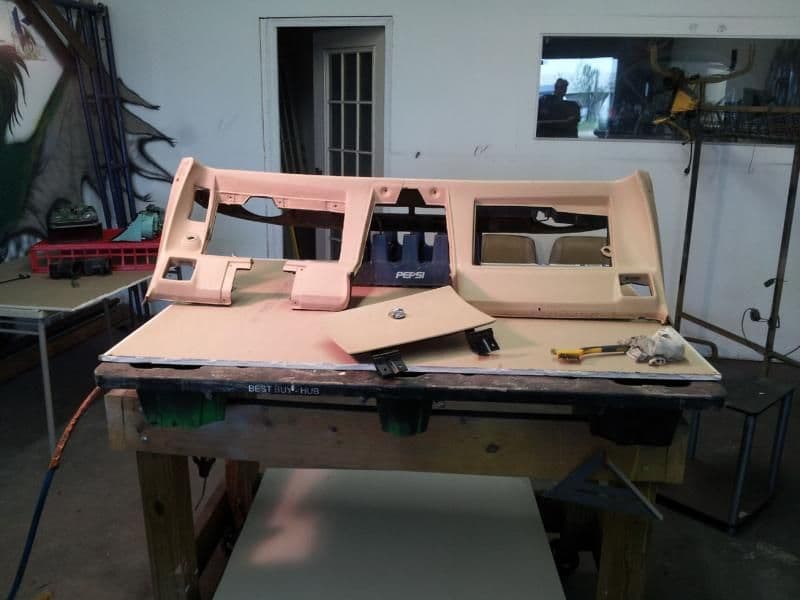
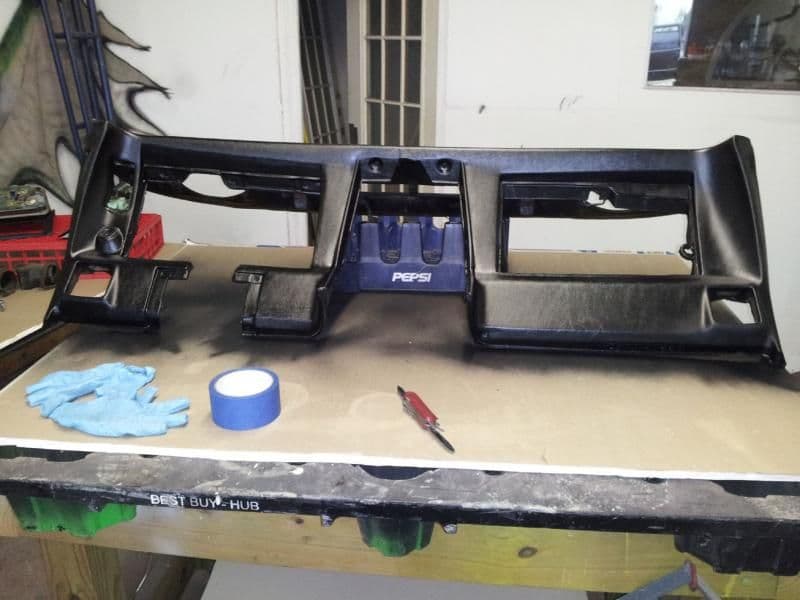
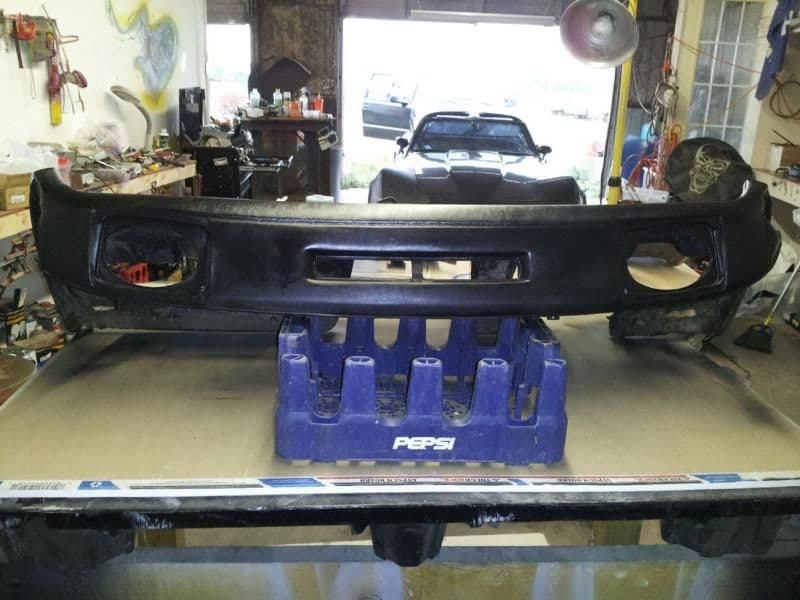
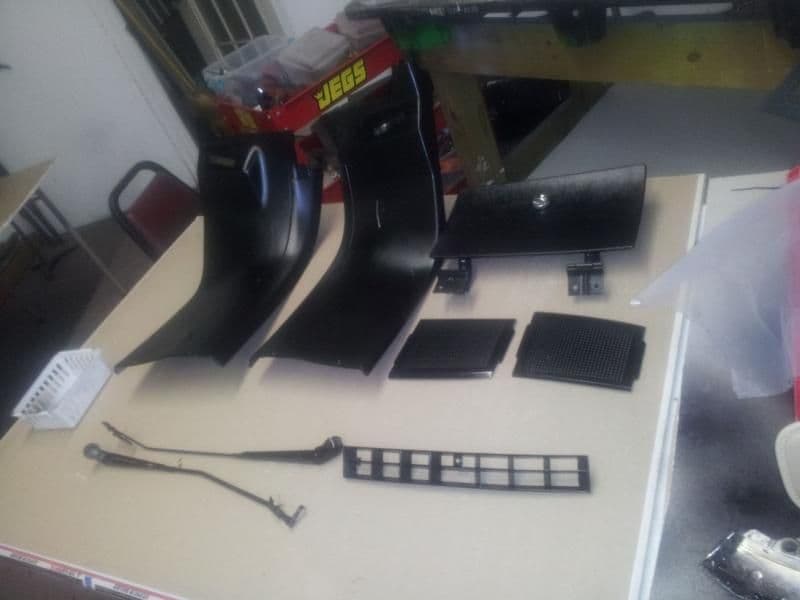
Now like Mick Jagger said I want to turn it all black. I have had success with dyes, plastic paint used with adhesion promoter before so I thought I would give it a try and only have to replace the parts I screwed up but it turned out pretty good.
08-08-2012, 11:25 AM
#9
Burning Brakes
Darth,
Looks awesome. Many of us have had similar experiences on the drive home after the sale. One of the first things I did was to replace the rubber and leather boots around the shifter. You are off to a great start. The interior was the first big project I did. It took four months.
Could you post a quick shot of that mural on your wall? My brain and eyes can't process what that might be.
Good Luck, welcome to the L-48 club.
08-08-2012, 09:09 PM
#11
Racer

I could tell it had been sitting for a while by the amount of leaves, dirt, and sticks covering the engine and filling the wiper compartment. After clearing off air filter and checking fluids I turned the key and was pleasantly surprised. It started fine and sounded real good....very smooth without any whining, ticking or strange noises. The test drive was pretty scary though....first time I turned the wheel at about 30 mph it jumped from one side of the road to the other like a frog trying to get out of the way of a 18 wheeler. Got it back to the owner and looked underneath it and seen the problem. Every piece of rubber in the front end was gone or severely deteriorated....no rubber in stabilizer bar end links. I did'nt really care because I knew I would be replacing all the suspension anyway. So I offered him 5000 from the 6500 he had it listed for. He accepted and I told him I would be back in a few hours with the cash. Thought about getting a trailer for the 45 min drive back to my house but decided "heck" with it i'll just drive slow. Pulled out of driveway and noticed all of the gas that was in it from the test drive had disapeared when I went to get the money......and suddenly the brakes went to the floor. Anyway way made it home with several bottles of brake fluid and found the broken brake line on drivers rear.
 08-08-2012, 09:27 PM
#12
Safety Car


You are getting things done! I also want to replace my body mounts, but have been putting it off. Seeing your new mounts in place wants me to put it back on my long list of things to do.
The interior swap looks good. What brand adhesion promoter did you use, and what was the black dye paint. I have to redo some of the trim in my 73.
kdf
The interior swap looks good. What brand adhesion promoter did you use, and what was the black dye paint. I have to redo some of the trim in my 73.
kdf
11-02-2012, 08:22 AM
#13
Intermediate
Thread Starter
My job forces me to travel alot so haven't had time to update.....but I have been working on car. kdf1986....I just used the adhesion promoter & dye paint from O'Reillys but I wish I would have waited and used a primer and dye. I am going to get this... http://www.ebay.com/itm/120844527782...84.m1423.l2649
and spray it on with a HLVP gun for the door panels. But for now I am going to tackle some of the harder stuff and use up the parts I have already bought.
and spray it on with a HLVP gun for the door panels. But for now I am going to tackle some of the harder stuff and use up the parts I have already bought.
11-02-2012, 08:39 AM
#14
Intermediate
Thread Starter
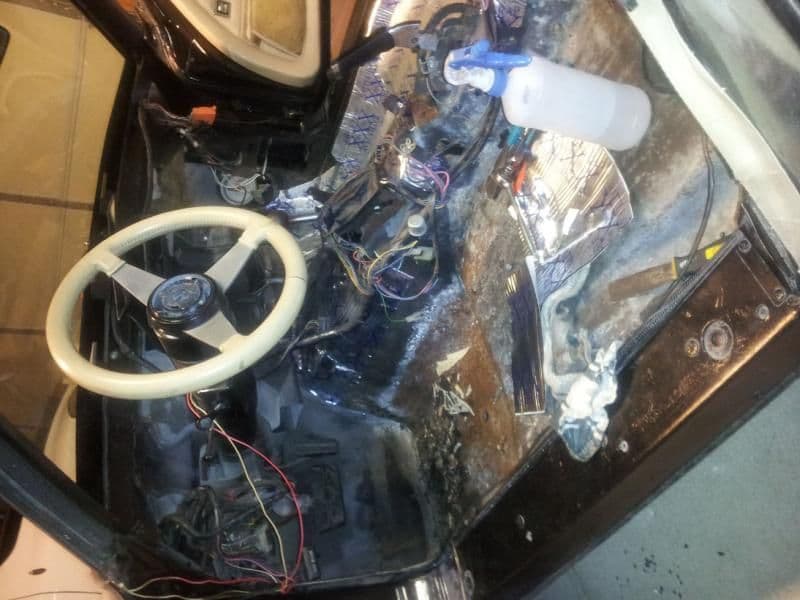
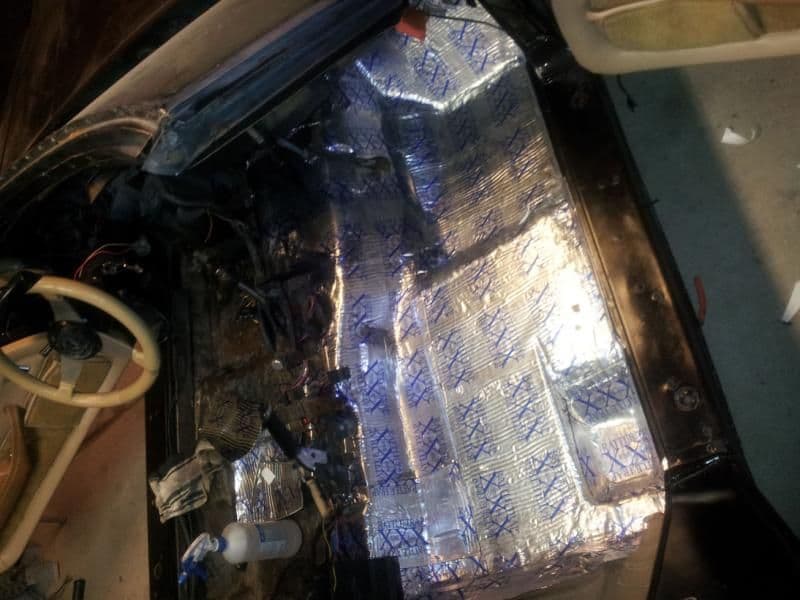
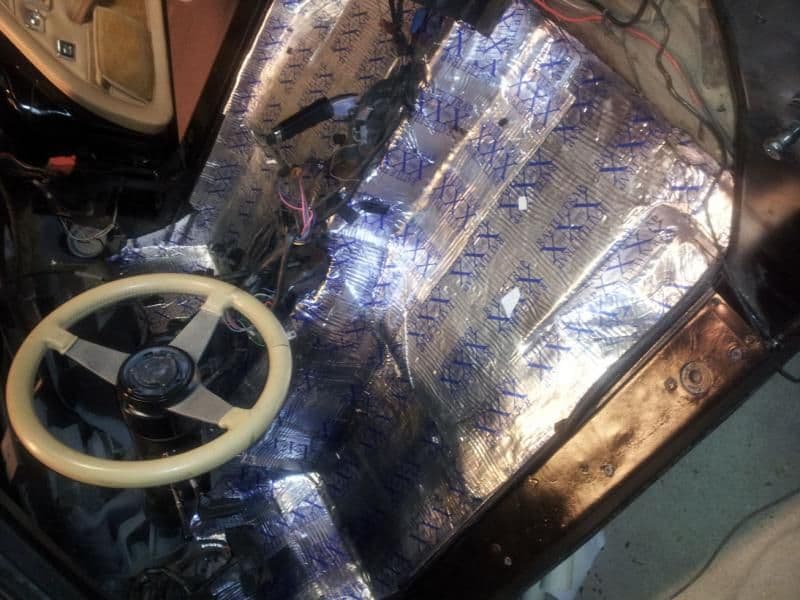
So after removing the NASTY jute stuff under the carpet I gave it a good once over with a wire brush and was happy to find only light surface rust so it got a good scrubbin' and a layer of RattleTrap mat.
Last edited by Darth Vette; 11-02-2012 at 08:48 AM.
11-03-2012, 12:38 AM
#15
Intermediate
Thread Starter
I am going to build a 383 Stroker for the beast but with a daughter entering 2nd year of college yet another car was needed......

So the old L48 will have to do for a little while. It still runs good and seems tight so tune up, distributor cap and rotor, 10.5mm wires, and headers started a gentle awakening.

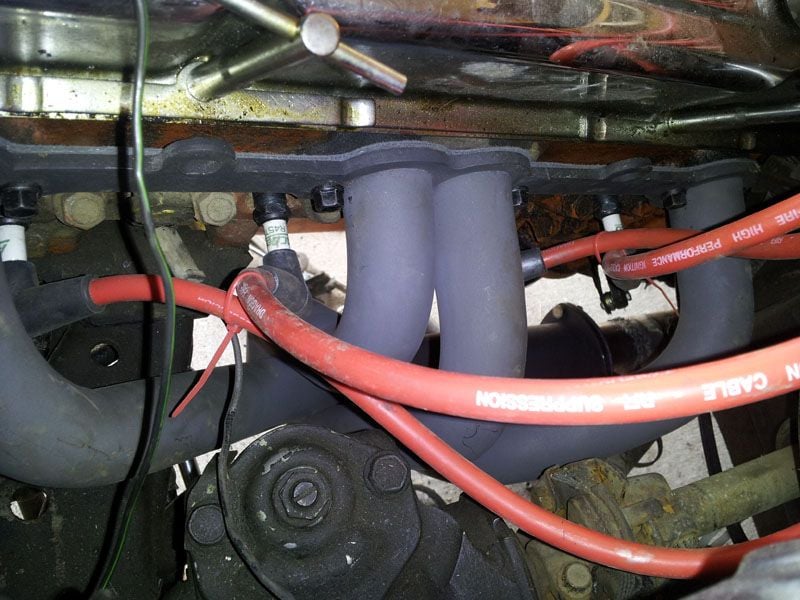
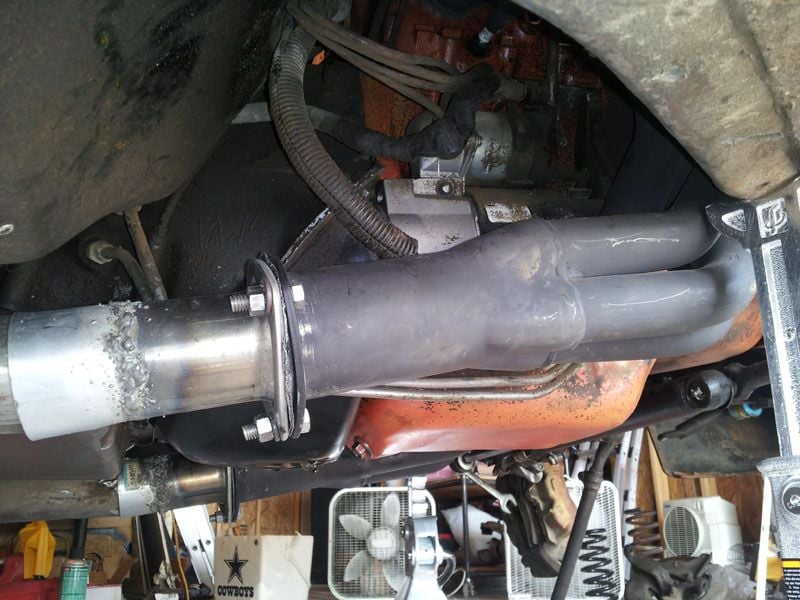
Please no cracks about the welding.....I am practicing and they are temporary.
So the old L48 will have to do for a little while. It still runs good and seems tight so tune up, distributor cap and rotor, 10.5mm wires, and headers started a gentle awakening.
Please no cracks about the welding.....I am practicing and they are temporary.
 11-03-2012, 01:26 AM
#17
Intermediate
Thread Starter
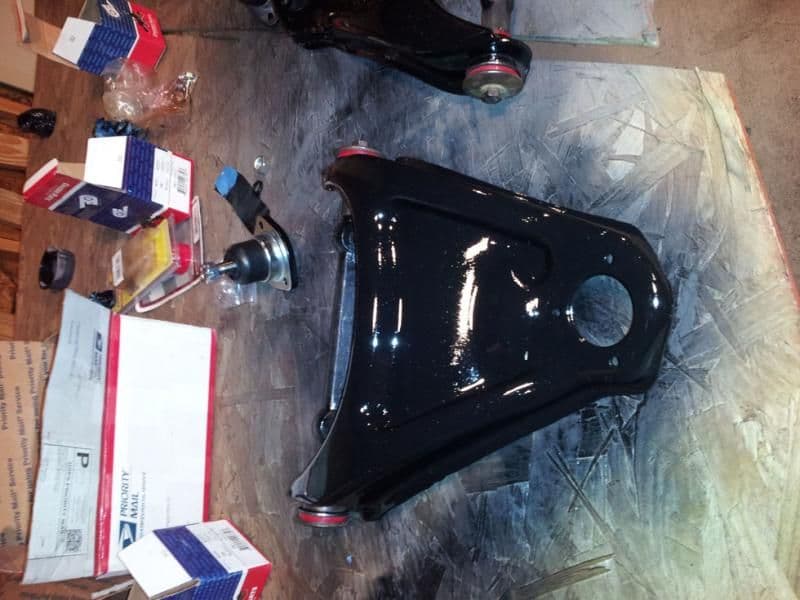
Now to get it where I could drive it. As I stated before wen with complete poly bushing set
550lb springs and Bilstein Sport shocks all around.
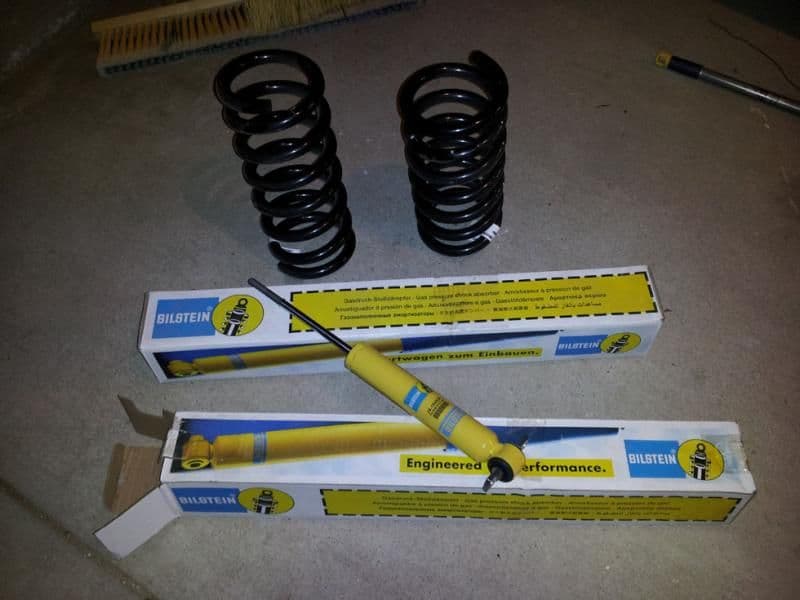
550lb springs and Bilstein Sport shocks all around.
11-03-2012, 01:36 AM
#18
Intermediate
Thread Starter
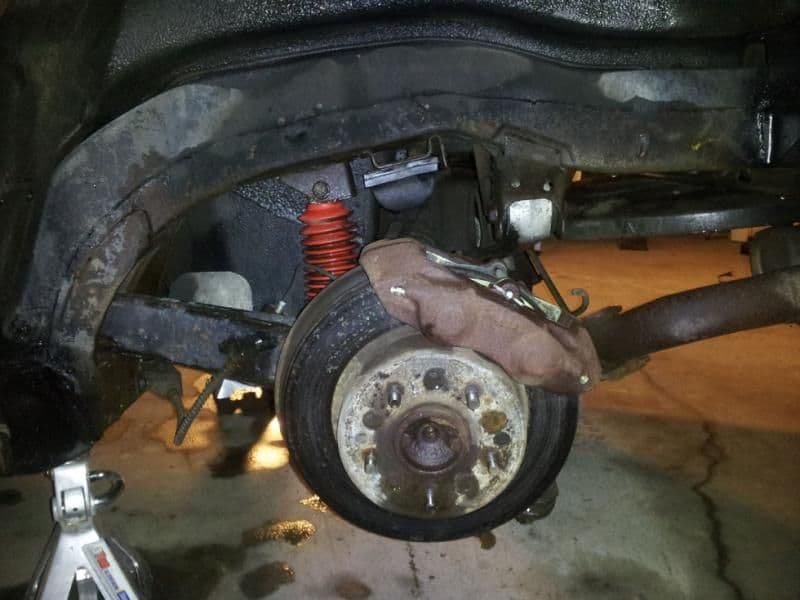
Started with front
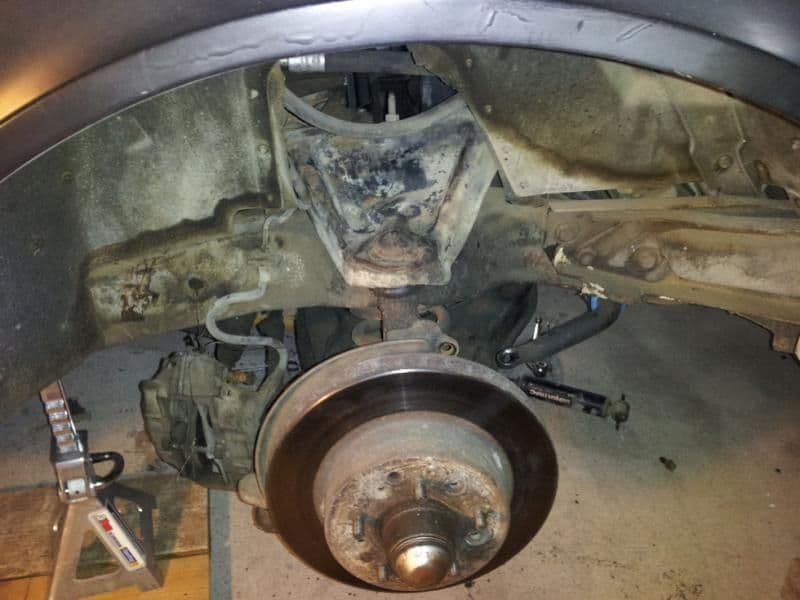
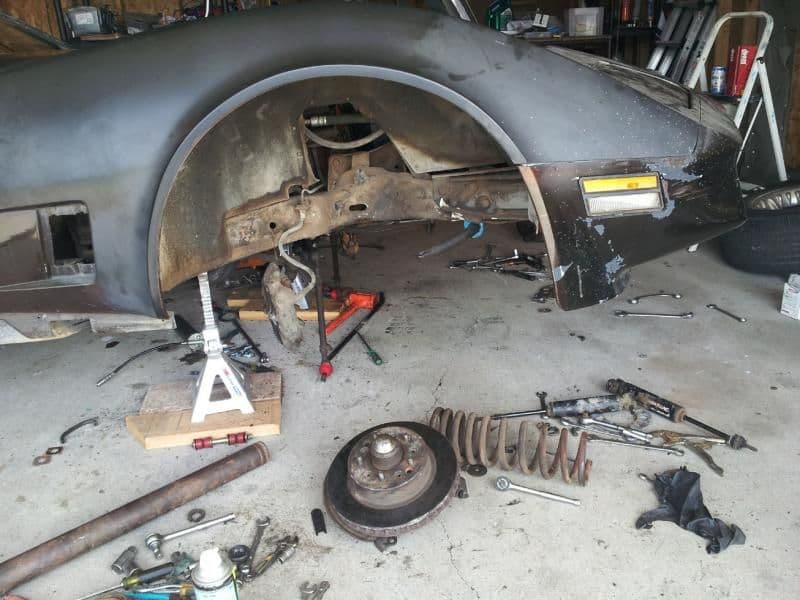
I was surprised at how much shorter the new springs were, but with the extra stiffness it only lowered the front maybe 1/2".

This set up is VERY stiff but it cuts like Barry Sanders and will just as hard to catch!!

I was surprised at how much shorter the new springs were, but with the extra stiffness it only lowered the front maybe 1/2".
This set up is VERY stiff but it cuts like Barry Sanders and will just as hard to catch!!
11-03-2012, 01:43 AM
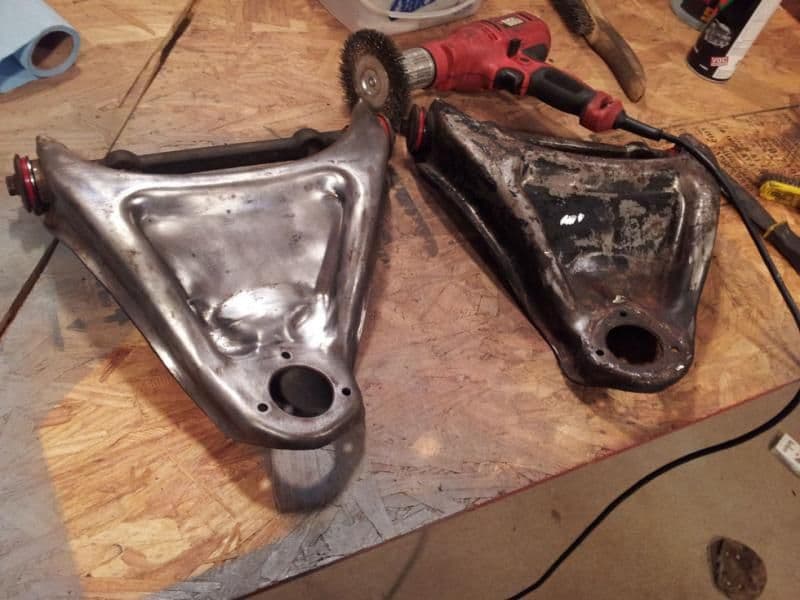
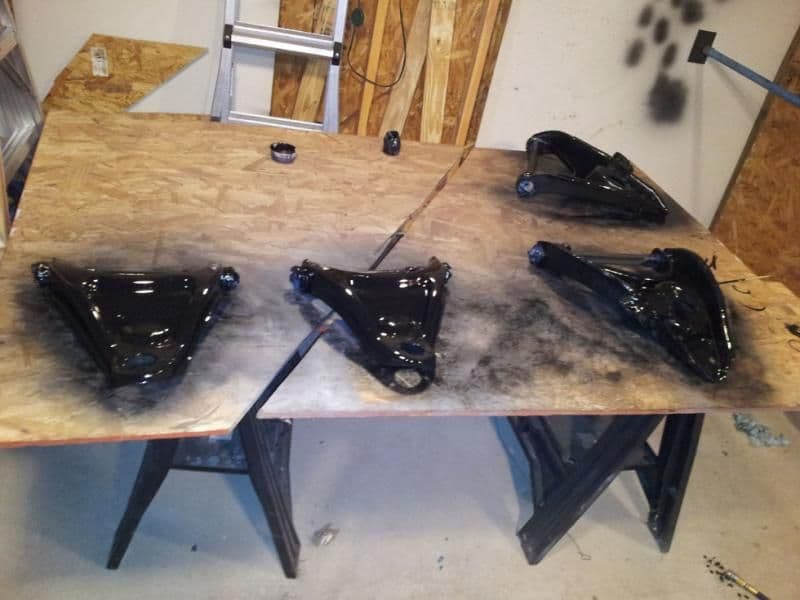
#19
Intermediate
Thread Starter
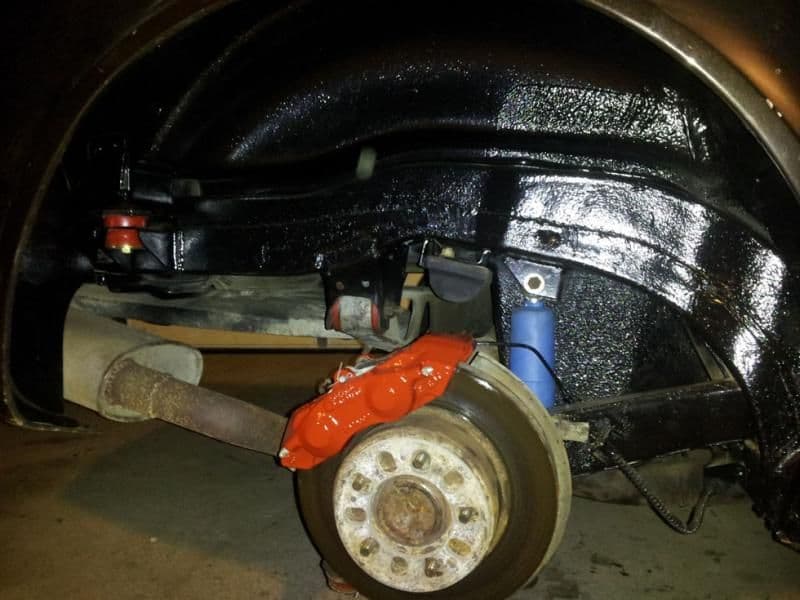
While fixing up jet skis and boats I ran across a one part epoxy that sprays easy and is very durable. I decided to use it on the a-arms and fender wells.
11-03-2012, 02:01 AM
#20
Intermediate
Thread Starter
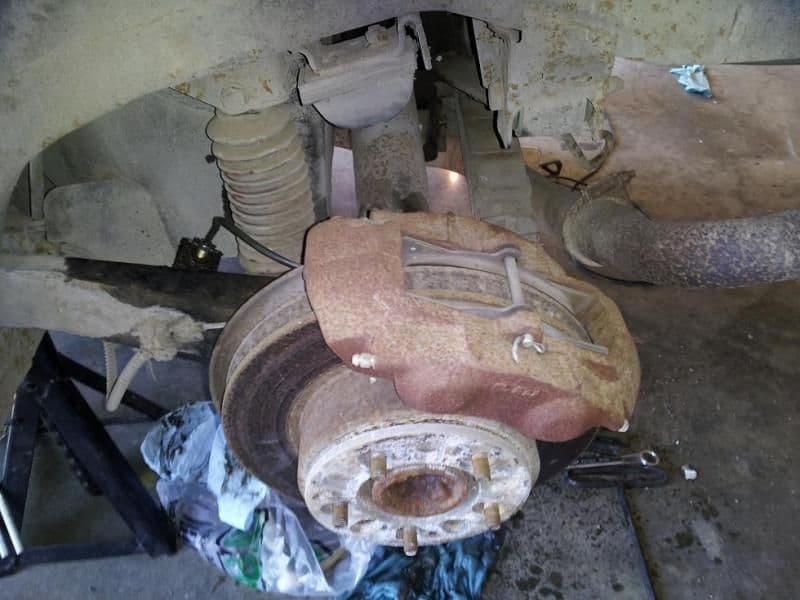
The rear was pretty straight forward. The old differential carrier bushing was pretty tough to remove though. I wrestled with the first one for a couple of hours before I got on here and search how to do it. Use hole saw and remove as much as the rubber as you can then use a hacksaw blade and cut through the pressed in metal part and it comes out pretty easy. Second one only took about 30 min.