
New Member- '76 Resto Mod
 04-01-2012, 08:20 PM
#1
Burning Brakes

Thread Starter
I've been scouring over this site for over a year now and it has been an invaluable tool on figuring out my current project. I've finally started to reasemble my car, and I know I'm going to have a slew of questions. So I figured I should join up and introduce my myself.
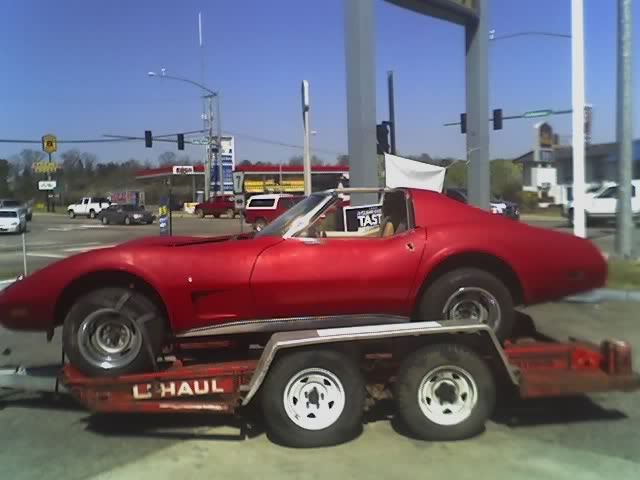
I bought my '76 in 2008. It was rough, a theft recovery. No title, hood, t-tops, or drivetrain. I only knew enough about C3's to check the frame at the kick-up. Seemed cheap at the time, but I now know better.
Didn't do much for the next three years except start removing the interior.
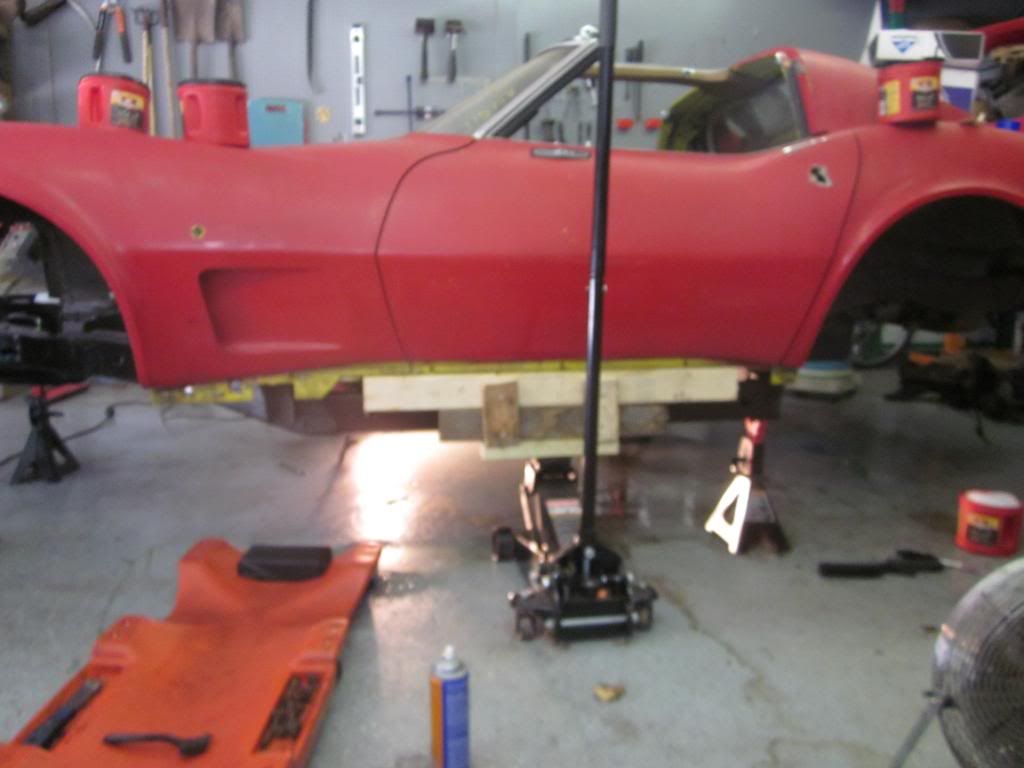
Finally got my rear in gear about a year ago and stripped it all the way down. Then spent what seems like forever on my back cleaning and painting the frame with POR15.
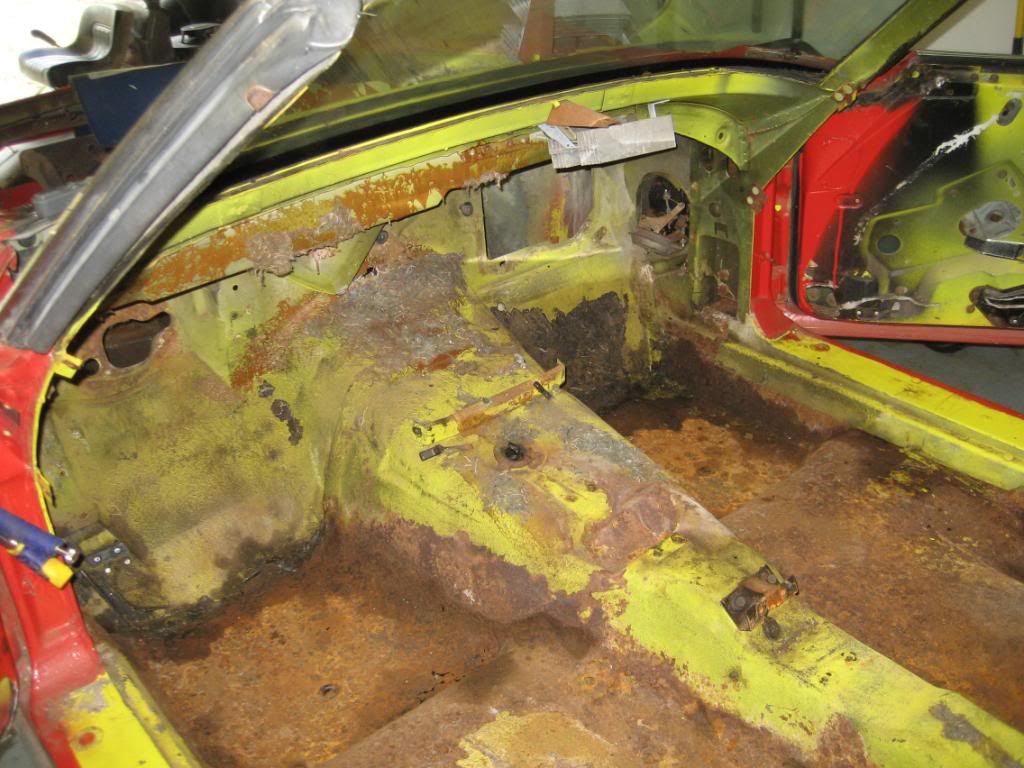
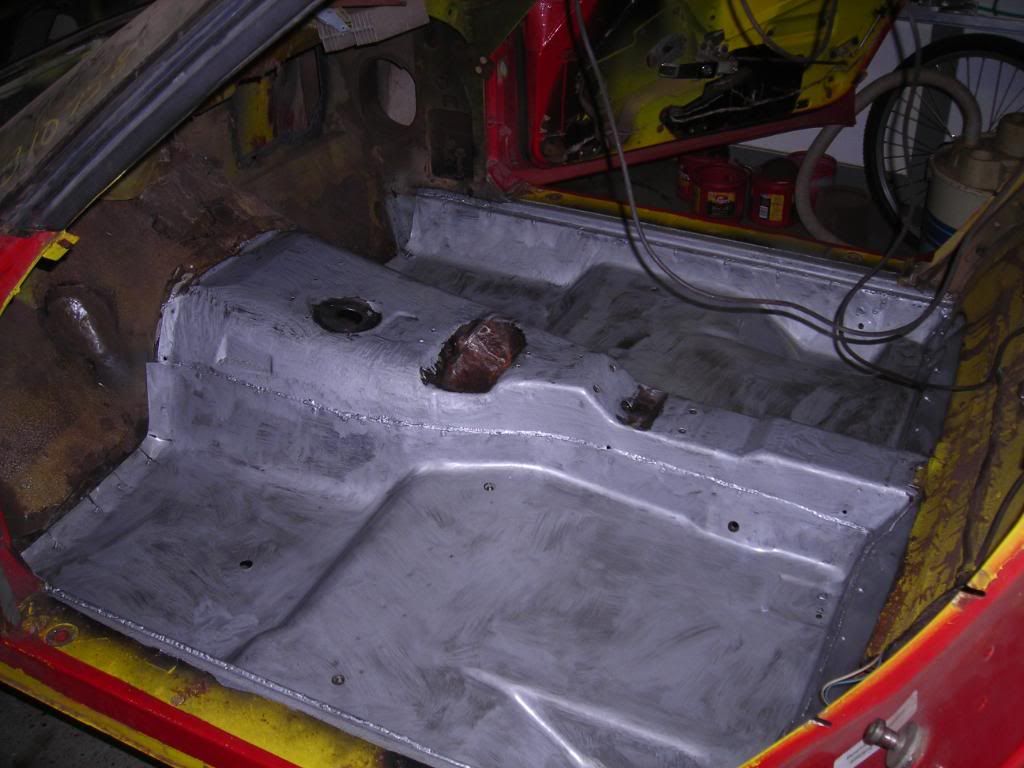
One thing I was scared of was the floorpans. Didn't notice all the holes till I removed the interior. I got lucky that the birdcage wasn't in the same shape.
Help from my Dad.
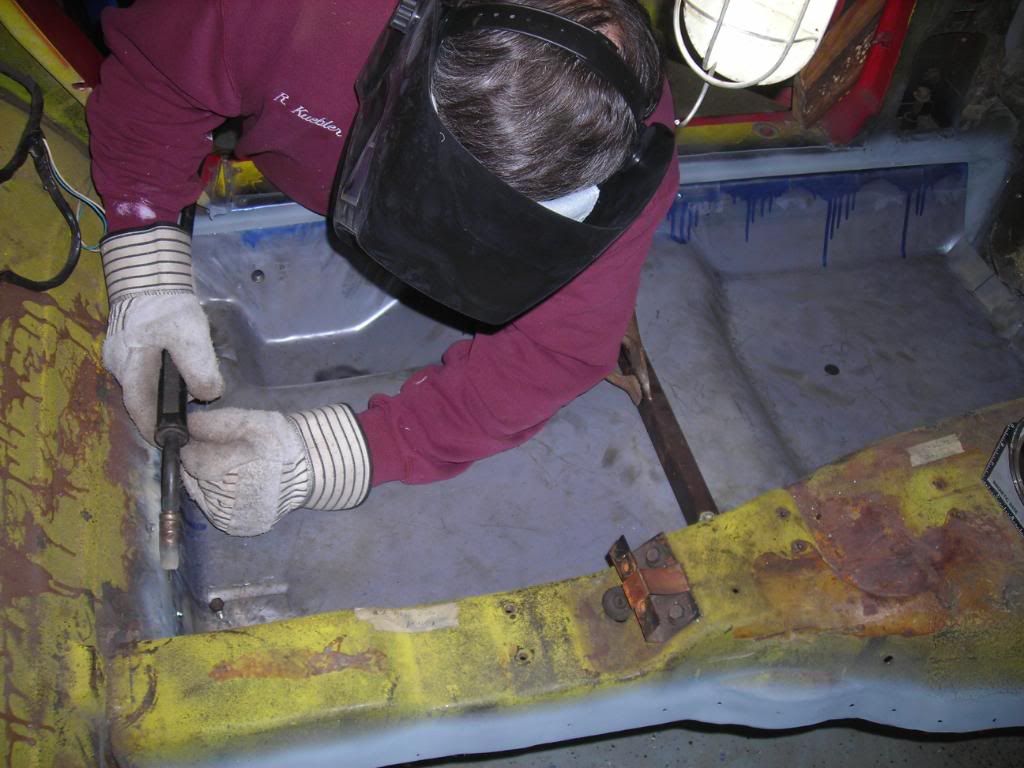
Riveted and painted. Not all the pretty, but carpet should take car of it.
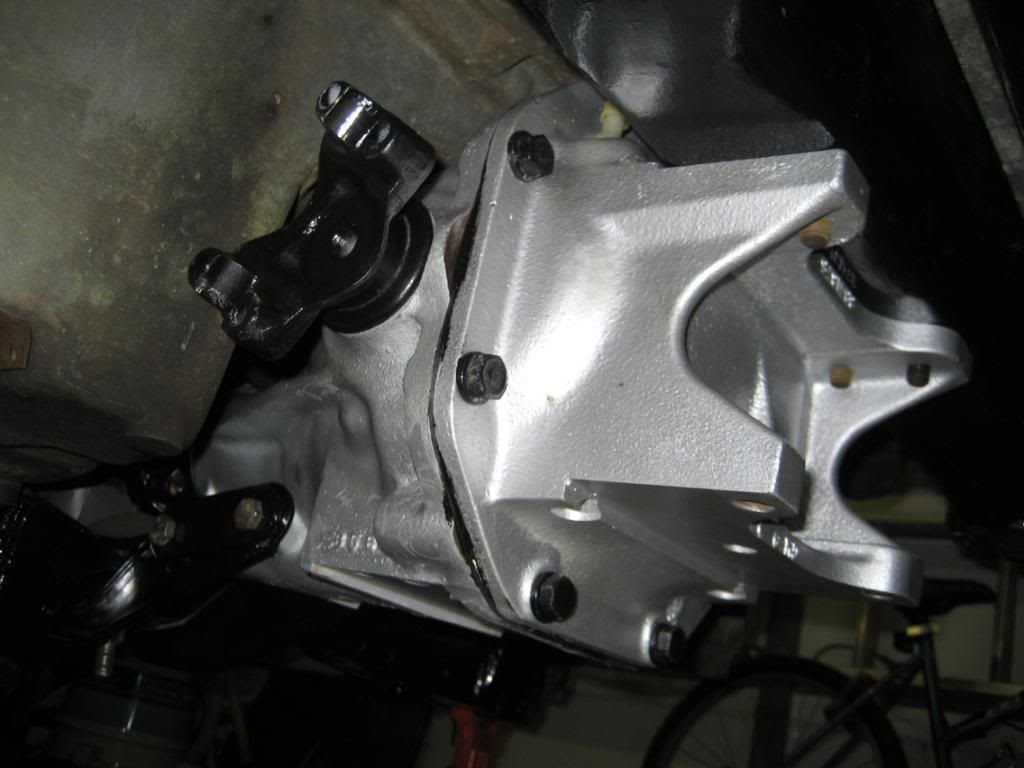
Rebuilt the Diff at work and changed over to 3.70 gears.
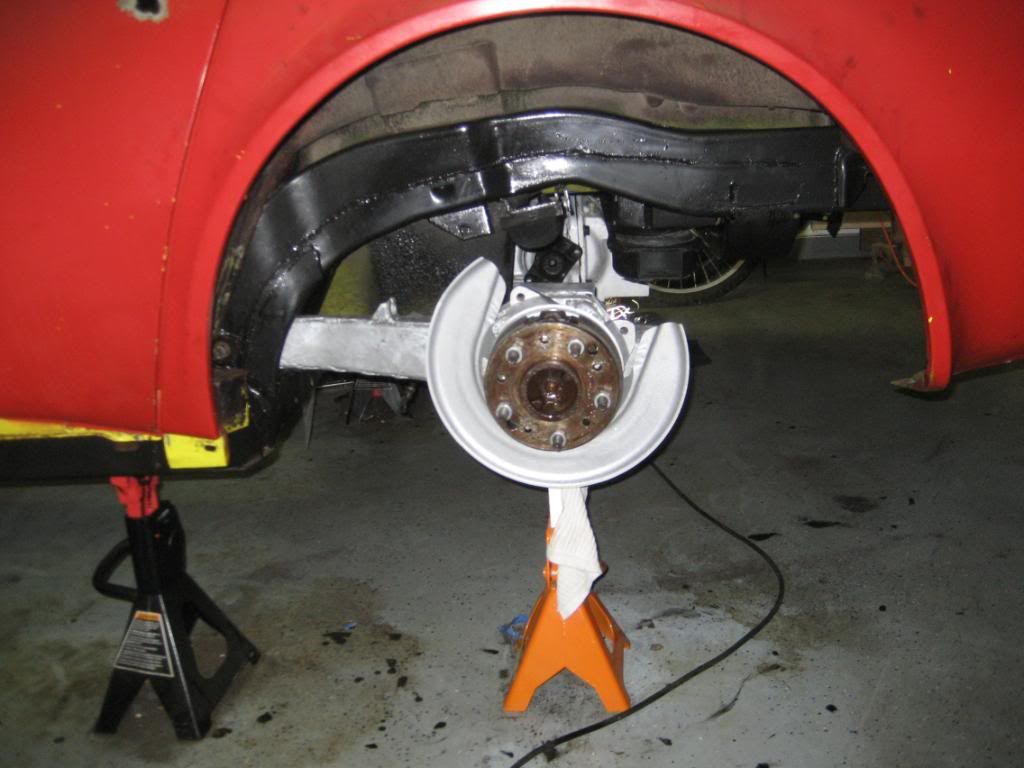
And the biggest PITA, the trailing arms. I teach Auto Tech at a community college, so I have a well equiped shop at my disposal. Even so, I can see why everyone says you must have all the special tools.
I didn't, and almost couldn't pull it off.
Currently I'm working on the brakes and front suspension. Future plans include dropping in a lt1/t56, hydroboost, and rack and pinion. Who knows what else!
I bought my '76 in 2008. It was rough, a theft recovery. No title, hood, t-tops, or drivetrain. I only knew enough about C3's to check the frame at the kick-up. Seemed cheap at the time, but I now know better.
Didn't do much for the next three years except start removing the interior.
Finally got my rear in gear about a year ago and stripped it all the way down. Then spent what seems like forever on my back cleaning and painting the frame with POR15.
One thing I was scared of was the floorpans. Didn't notice all the holes till I removed the interior. I got lucky that the birdcage wasn't in the same shape.
Help from my Dad.
Riveted and painted. Not all the pretty, but carpet should take car of it.
Rebuilt the Diff at work and changed over to 3.70 gears.
And the biggest PITA, the trailing arms. I teach Auto Tech at a community college, so I have a well equiped shop at my disposal. Even so, I can see why everyone says you must have all the special tools.
I didn't, and almost couldn't pull it off.
Currently I'm working on the brakes and front suspension. Future plans include dropping in a lt1/t56, hydroboost, and rack and pinion. Who knows what else!
 04-01-2012, 08:59 PM
#2
Drifting

i just completed a front rebuild and will tackle the dreaded trailing arms next.i too have no special tools and will make what i need to get it done,part of the fun.you are doing a great job there and great to see another '76 saved from the scrap heap.best of luck with the rest of your restoration.
04-01-2012, 09:16 PM
#3
Race Director


Welcome to the site!
Looks like you're making progress now. You still have a ways to go so keep the pictures coming. A lot of us enjoy following along as these projects come together.
Good Luck going foward!
Looks like you're making progress now. You still have a ways to go so keep the pictures coming. A lot of us enjoy following along as these projects come together.
Good Luck going foward!

 04-01-2012, 10:49 PM
#5
Drifting
Member Since: Jun 2011
Location: iowa city iowa
Posts: 1,540
Received 253 Likes
on
139 Posts
2020 Corvette of the Year Finalist (appearance mods)
C3 of Year Winner (appearance mods) 2019

Looks like a great project. Keep the photos and updates coming. We love this stuff.
-brent
-brent
04-01-2012, 11:21 PM
#6
Melting Slicks

Welcome LC and good luck on your project! Lots of great and knowledgable people on this forum to offer expert advice when you need it. Look forward to following your progress.
04-29-2012, 11:38 PM
#8
Burning Brakes
Thread Starter
So finals are over, which means more time for the car! Maybe with more garage time during the week the little lady will actually see me over the weekends.
I got my halfshafts reassembled last weekend, and got around to installing them today. As simple as the job seems, it was a PITA. Getting all the flange bolts lined up is bad enough, without having to hold the shaft with one are and start the bolts. Luckily the smart struts made it a little simpler. Adjust out to get the shaft in, adjust back in to seat the u-joints in the Diff yoke. The french locks were pretty rough, so Home Depot came to the rescue with some new lock washers.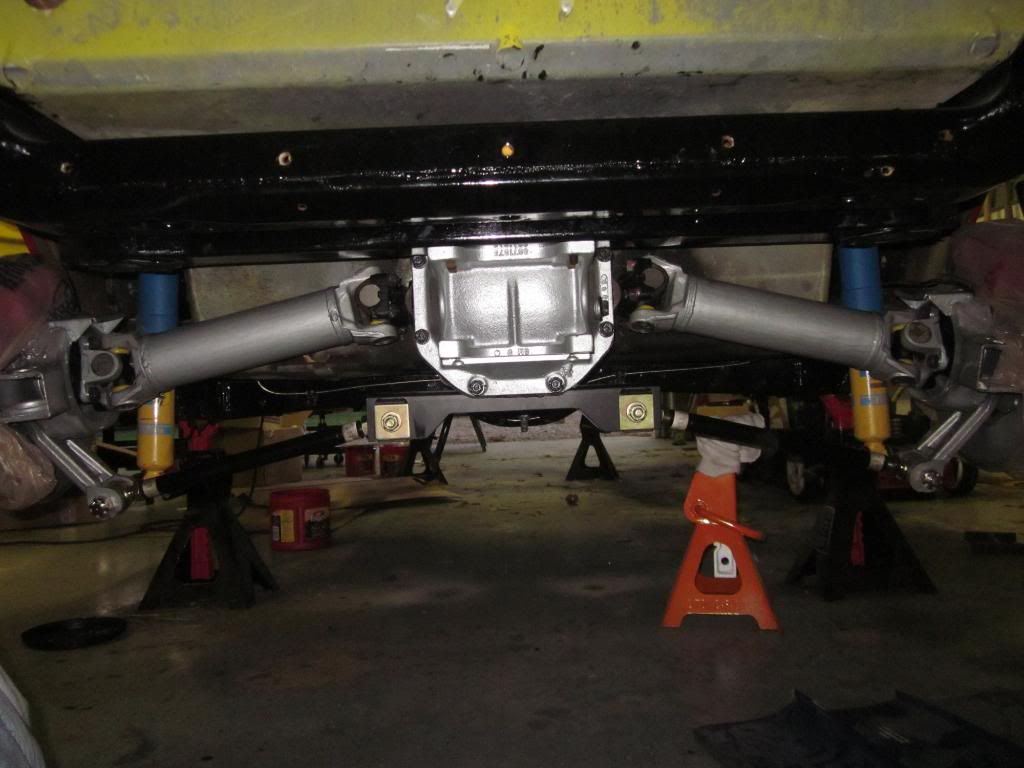
I've also been working on the pedals. Need them done before I can work up the clutch master cylinder mount for the Camaro hydraulics. I bought a pedal assembly off of ebay over a year ago because I didn't realize I could cut down my existing brake pedal and just buy a clutch pedal. It must have been out of an earlier c3 (or maybe a manual brakes model), the firewall mounting holes were off and I had to use some brake switch hardware from my old pedals.
Disassembled, sandblasted, and painted all the pieces. Ground out the old clutch pin from the pedal, and replaced it with a cut down 3/8 bolt that would fit the hydraulic master.
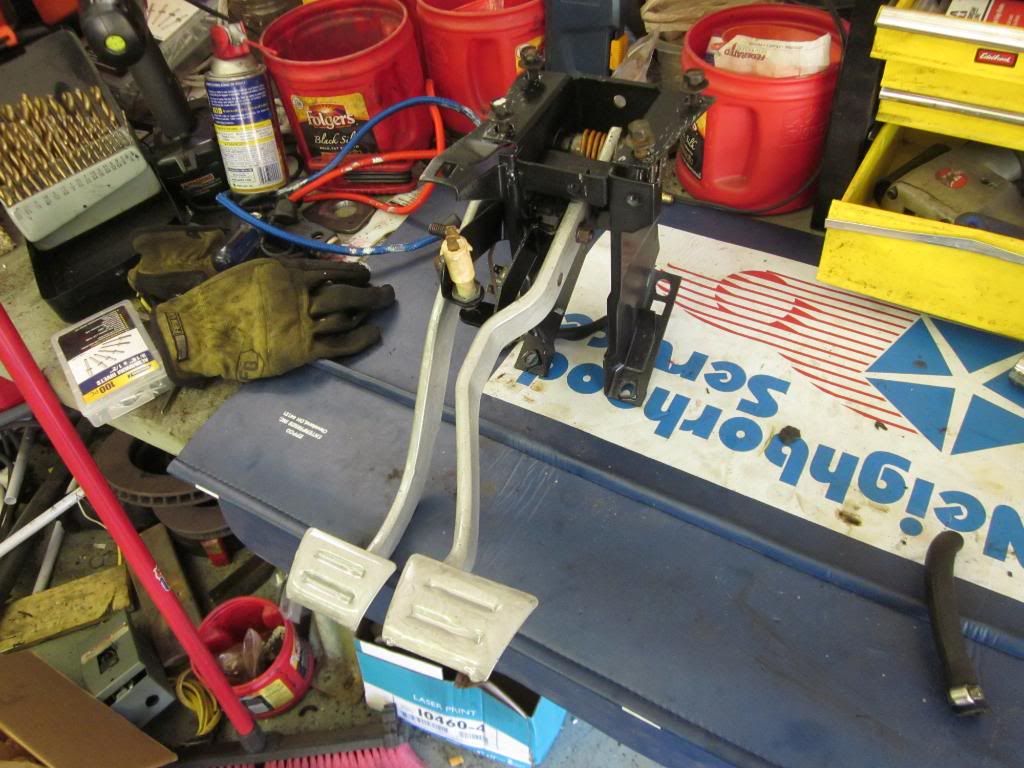
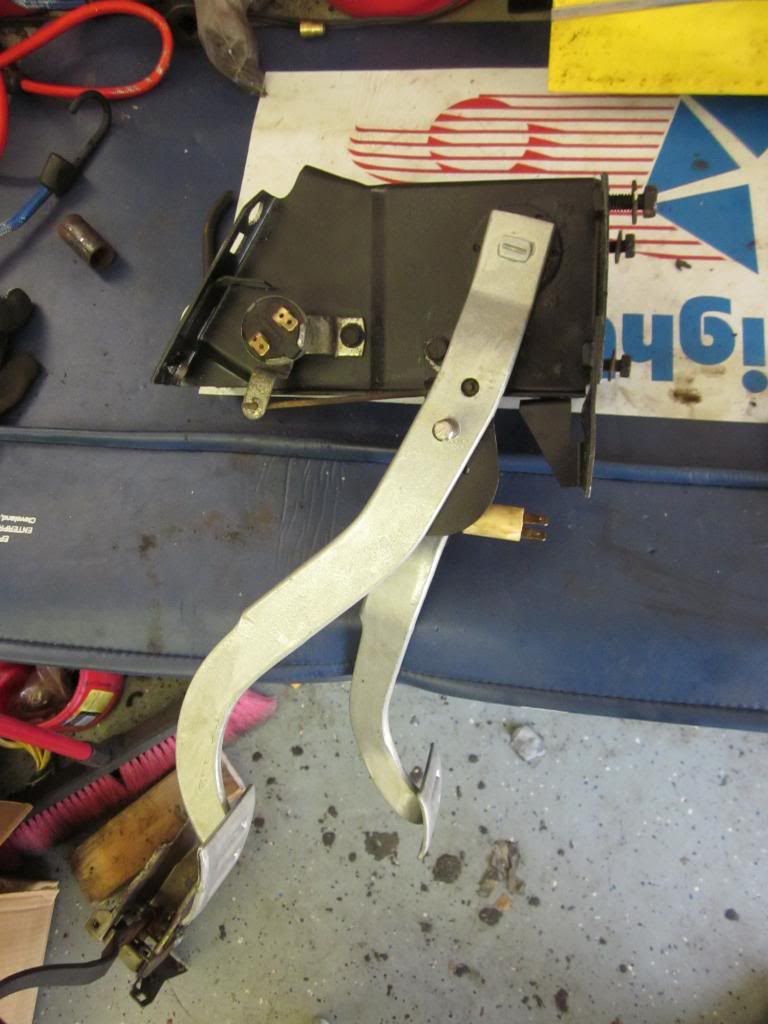
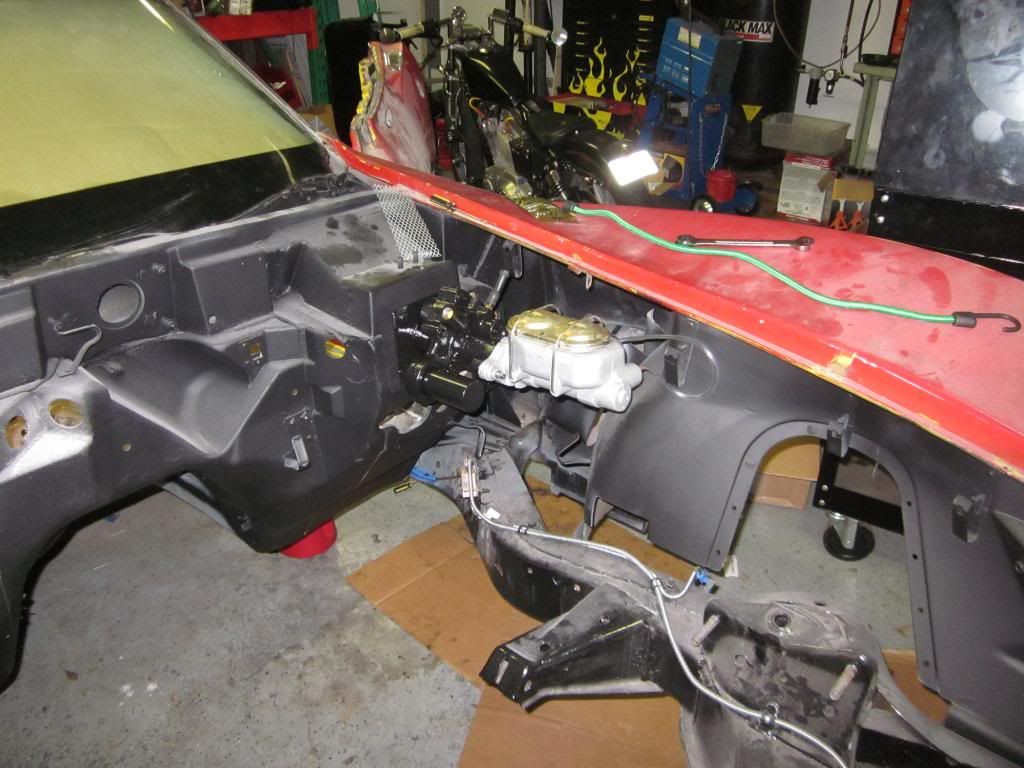
Once the pedals were in position I installed the hydroboost. Bought it at a pull-a-part off of an Astro van. Had to cut the pushrod and thread it to adapt to the Vette pedal. Cleaned it off and after a little black spray bomb, it looked like new.
Tech Tip: Oven cleaner makes a great degreaser. Sprayed some on, and got into every crevice with a toothbrush. Came out real clean.
With that on, why not the master while we're at it. Hopefully I got the right one for the hydroboost. It's a replacement for a '77.
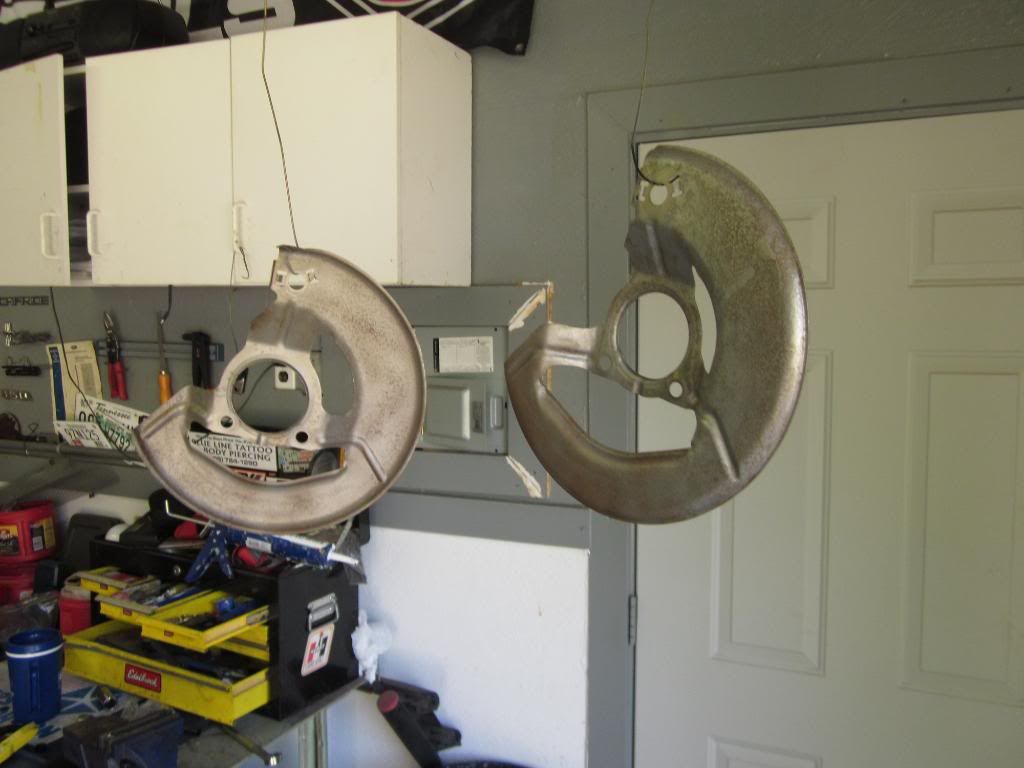
Now I just need my front suspension together so I can finish up the brakes. I've been working on getting everything disassembled. Managed to get the balljoints separated and removed, as well as the upper control arm bushings. For the lower bushings I had to use the press at work. Finally got everything apart and sandblasted (again, at work) on Friday. I had ridden the bike to work, and not wanting to have to come back to work and pick up the pieces over the weekend I stuck all the parts in my book bag for an uncomfortable ride home. I was just hoping the straps wouldn't rip!
Painted all the pieces with POR-15 and will start assembling this week.
Painted control arms.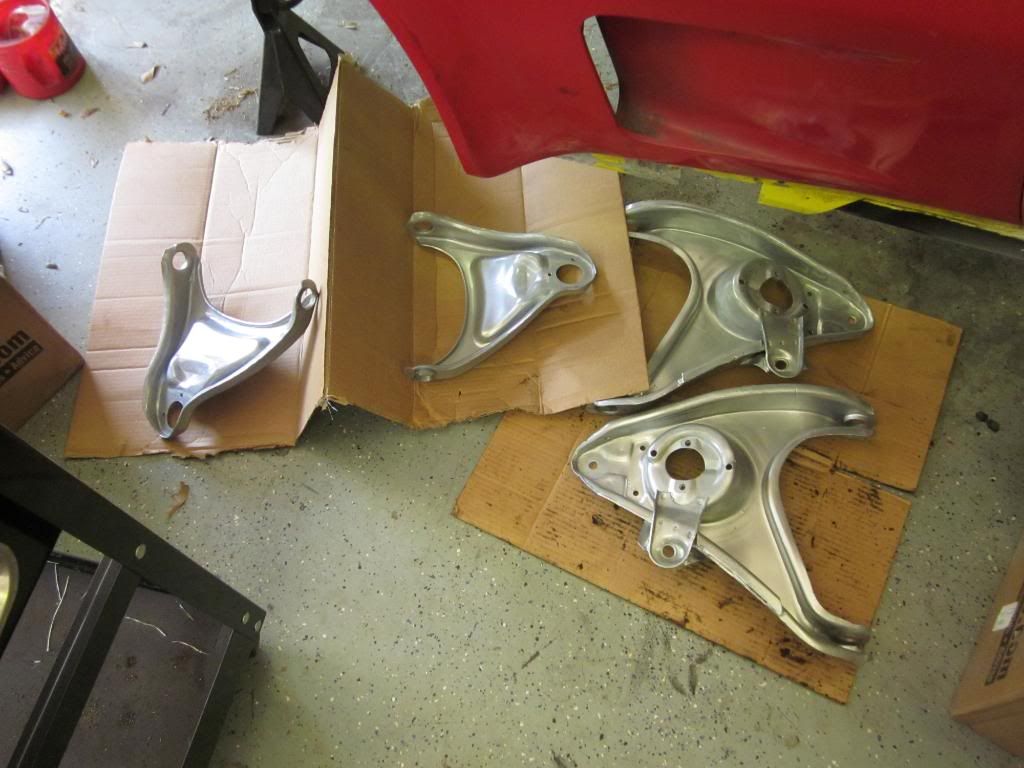
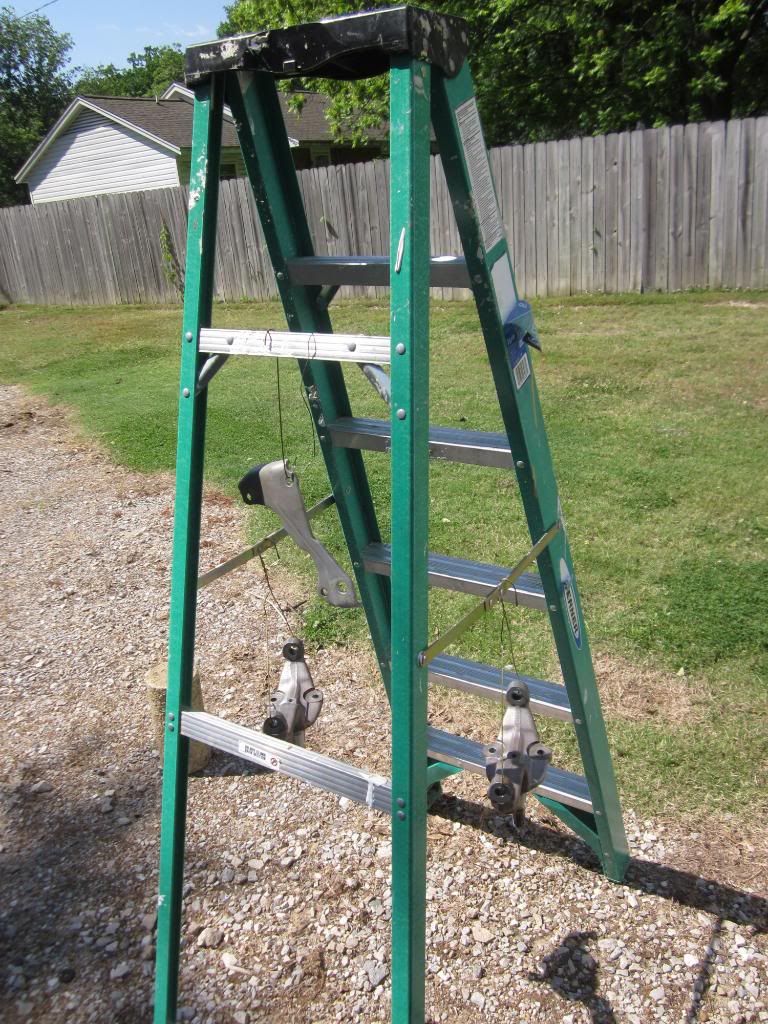
Cross shafts. I scratched my head over how to suspend them. This was my best idea.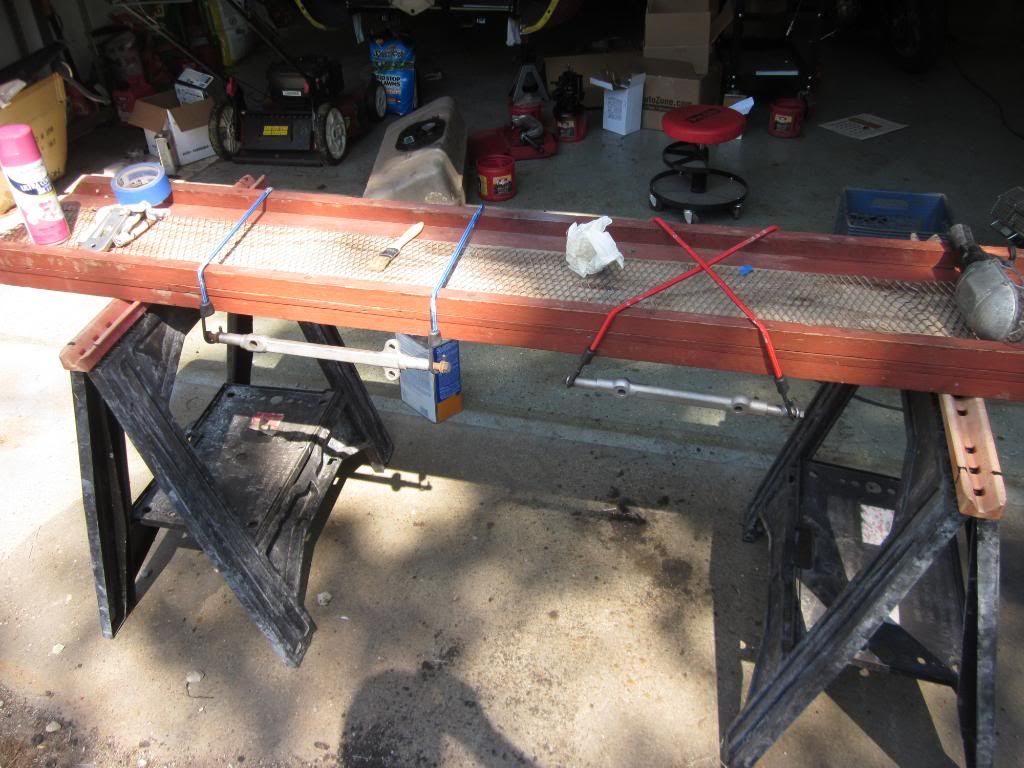
I had parts hanging from the bottom of the open garage door, inside the garage, and still had to dig out a ladder to hang a few more.
I�m taking the control arms to work this week to press in the bushings. And I just may visit the machine shop (next door to our classrooms) to cut out the clutch master cylinder mounts.
I got my halfshafts reassembled last weekend, and got around to installing them today. As simple as the job seems, it was a PITA. Getting all the flange bolts lined up is bad enough, without having to hold the shaft with one are and start the bolts. Luckily the smart struts made it a little simpler. Adjust out to get the shaft in, adjust back in to seat the u-joints in the Diff yoke. The french locks were pretty rough, so Home Depot came to the rescue with some new lock washers.
I've also been working on the pedals. Need them done before I can work up the clutch master cylinder mount for the Camaro hydraulics. I bought a pedal assembly off of ebay over a year ago because I didn't realize I could cut down my existing brake pedal and just buy a clutch pedal. It must have been out of an earlier c3 (or maybe a manual brakes model), the firewall mounting holes were off and I had to use some brake switch hardware from my old pedals.
Disassembled, sandblasted, and painted all the pieces. Ground out the old clutch pin from the pedal, and replaced it with a cut down 3/8 bolt that would fit the hydraulic master.
Once the pedals were in position I installed the hydroboost. Bought it at a pull-a-part off of an Astro van. Had to cut the pushrod and thread it to adapt to the Vette pedal. Cleaned it off and after a little black spray bomb, it looked like new.
Tech Tip: Oven cleaner makes a great degreaser. Sprayed some on, and got into every crevice with a toothbrush. Came out real clean.
With that on, why not the master while we're at it. Hopefully I got the right one for the hydroboost. It's a replacement for a '77.
Now I just need my front suspension together so I can finish up the brakes. I've been working on getting everything disassembled. Managed to get the balljoints separated and removed, as well as the upper control arm bushings. For the lower bushings I had to use the press at work. Finally got everything apart and sandblasted (again, at work) on Friday. I had ridden the bike to work, and not wanting to have to come back to work and pick up the pieces over the weekend I stuck all the parts in my book bag for an uncomfortable ride home. I was just hoping the straps wouldn't rip!
Painted all the pieces with POR-15 and will start assembling this week.
Painted control arms.
Cross shafts. I scratched my head over how to suspend them. This was my best idea.
I had parts hanging from the bottom of the open garage door, inside the garage, and still had to dig out a ladder to hang a few more.
I�m taking the control arms to work this week to press in the bushings. And I just may visit the machine shop (next door to our classrooms) to cut out the clutch master cylinder mounts.
 04-30-2012, 12:19 PM
#11
Burning Brakes
Thread Starter
Thanks. And it is great to have a shop full of tools and equipment at work. On the days I feel under paid, I just have to think of how much it would cost to stock my garage with half of what I have at work.
Not only that, I work some of the former employees of the Memphis General Motors Training Center. I was talking with one of them last week, and the topic of my trailing arms came up. I had searched through the schools tools, because a lot of tools came from the GM training center when it closed.
He just smiled, and told me he had given them to members of the local Corvette club.
Guess next time I'll know who to ask.
04-30-2012, 03:59 PM
#12
Melting Slicks
Looking really great....as an instructor, is there any part of your build that you could see your students assisting with in the fall?
04-30-2012, 08:08 PM
#13
Burning Brakes
Thread Starter
When I first started considering teaching, I thought that would be one of the perks. Free labor! But now that I've spent time with the students, there are definitely some that I would not want touching my car. Not only that, but working on a 36 year old car is not always the same as a new model. Hence my handle, Learning Curve. This car is a learning experience for me, and sometimes it's good to not have witnesses. Someone may not like my language.
But when I can drive back and forth to work I may use the car for some demonstrations. The alignment procedure should prove interesting
.
But when I can drive back and forth to work I may use the car for some demonstrations. The alignment procedure should prove interesting
.
 05-01-2012, 11:52 AM
#16
Burning Brakes
Thread Starter
It is in process. Car was a 76 l48 auto car. But when I bought it there was no engine or transmission. I pulled a 400 from a motorhome, and was going to run it with a 700r4, but I decided that it would be way to much money to build the engine like I wanted. I was debating a LS swap when I came across a 97 Z28 for cheap. This car was taken care of, but was junked by an insurance company because of a front impact.
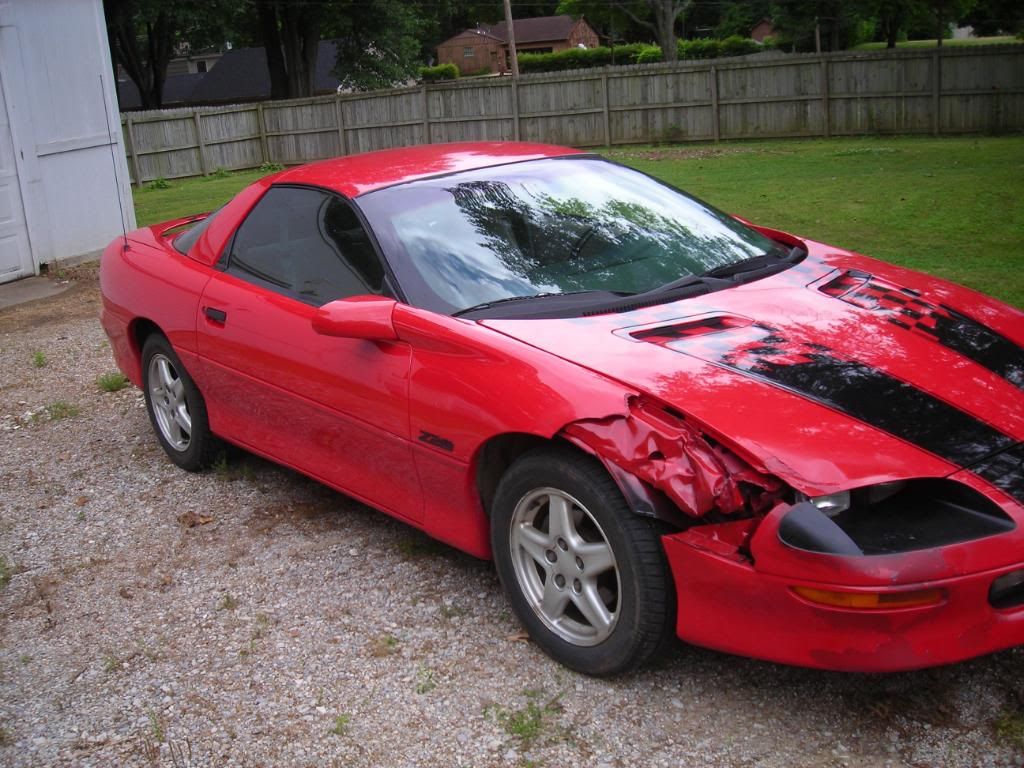
So after finding out I could not get a title for the Camaro, I knew I had the perfect motor and transmission for my Vette. The LT1 drops into the Vette with the same motor mounts, and I can use cheap side pipes unlike the LS motors. On top of that, it's a factory fuel injected aluminum headed engine. Added plus was the six speed trans.
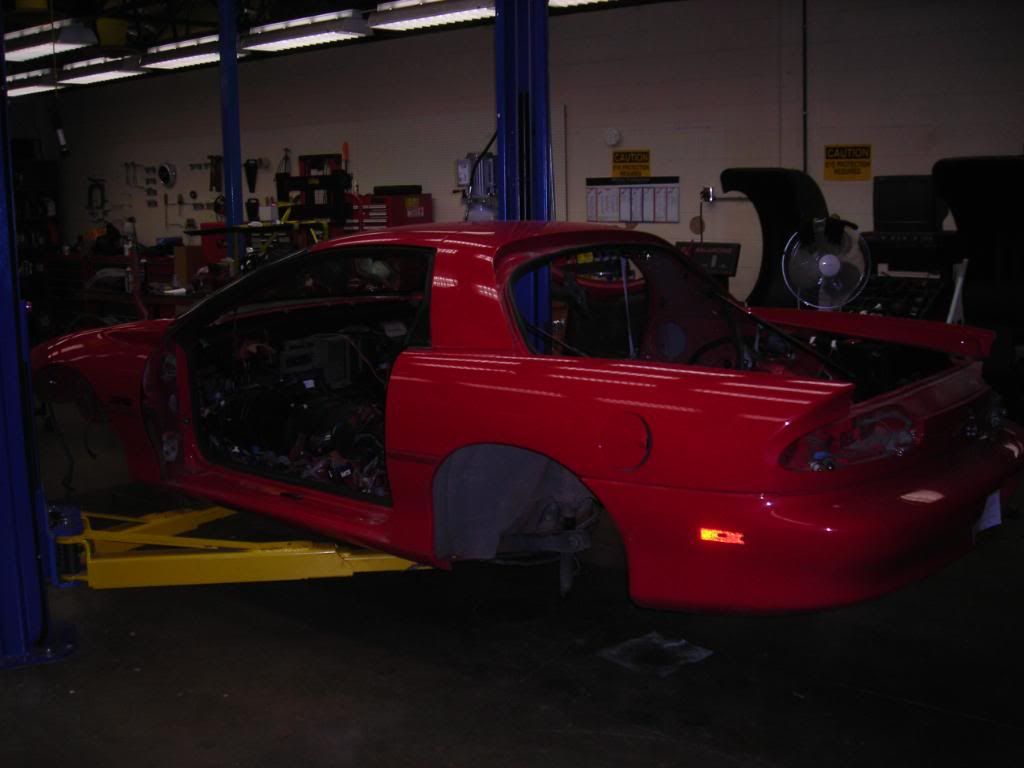
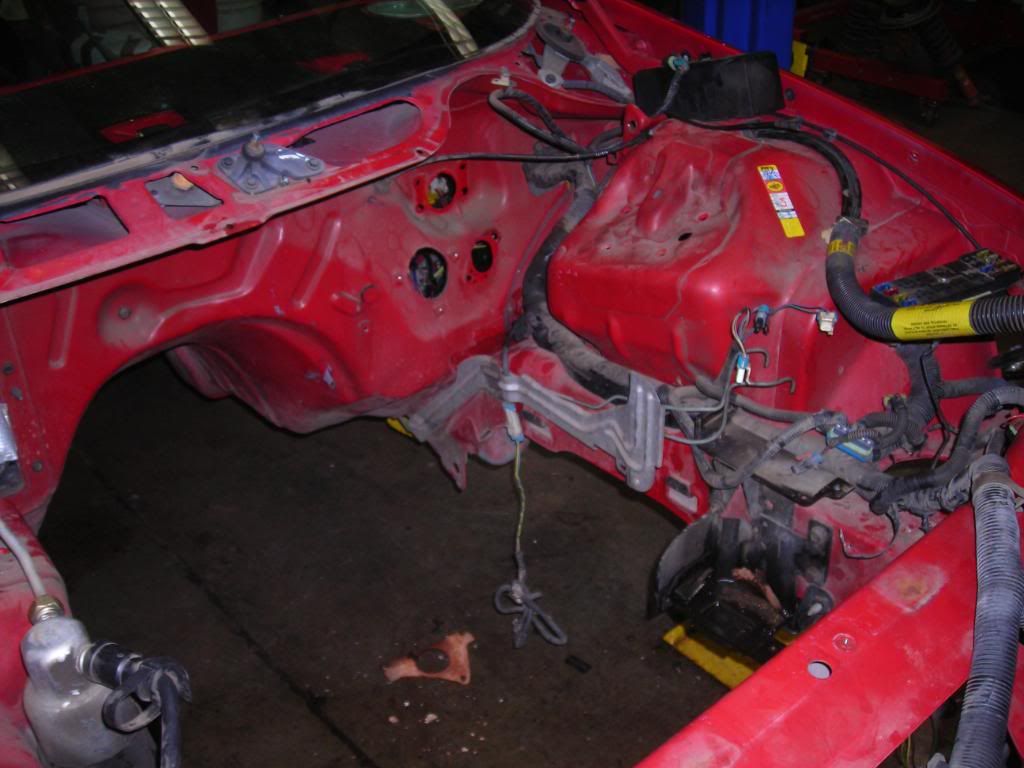
Stripping the car.
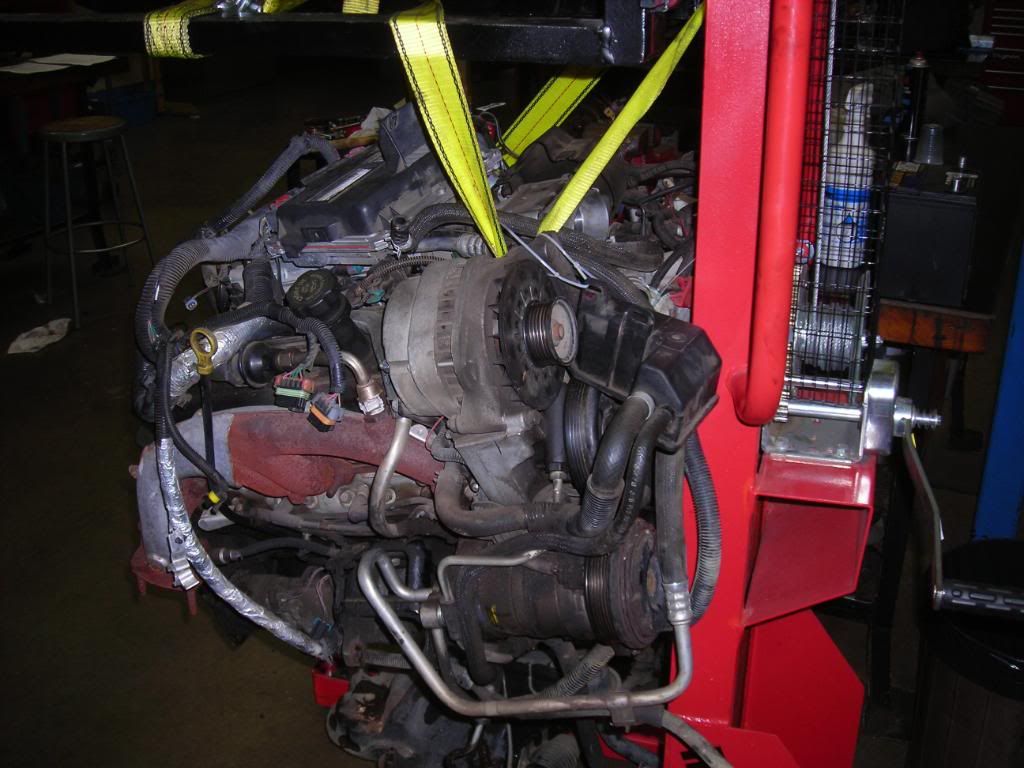
My new motor.
So after finding out I could not get a title for the Camaro, I knew I had the perfect motor and transmission for my Vette. The LT1 drops into the Vette with the same motor mounts, and I can use cheap side pipes unlike the LS motors. On top of that, it's a factory fuel injected aluminum headed engine. Added plus was the six speed trans.
Stripping the car.
My new motor.
05-04-2012, 11:05 PM
#17
Burning Brakes
Thread Starter
Been working on adapting the 97 Camaro hydraulic clutch setup, and a big sticking point has been using the master cylinder. Although I know you can use a chevy truck master, by the time I bought a new master cylinder and all the hydraulic hoses/adapters I would have around 100 bucks invested. And an adapter seemed like a simple idea...
Simple to design, yes. Simple to build, (for me) no.
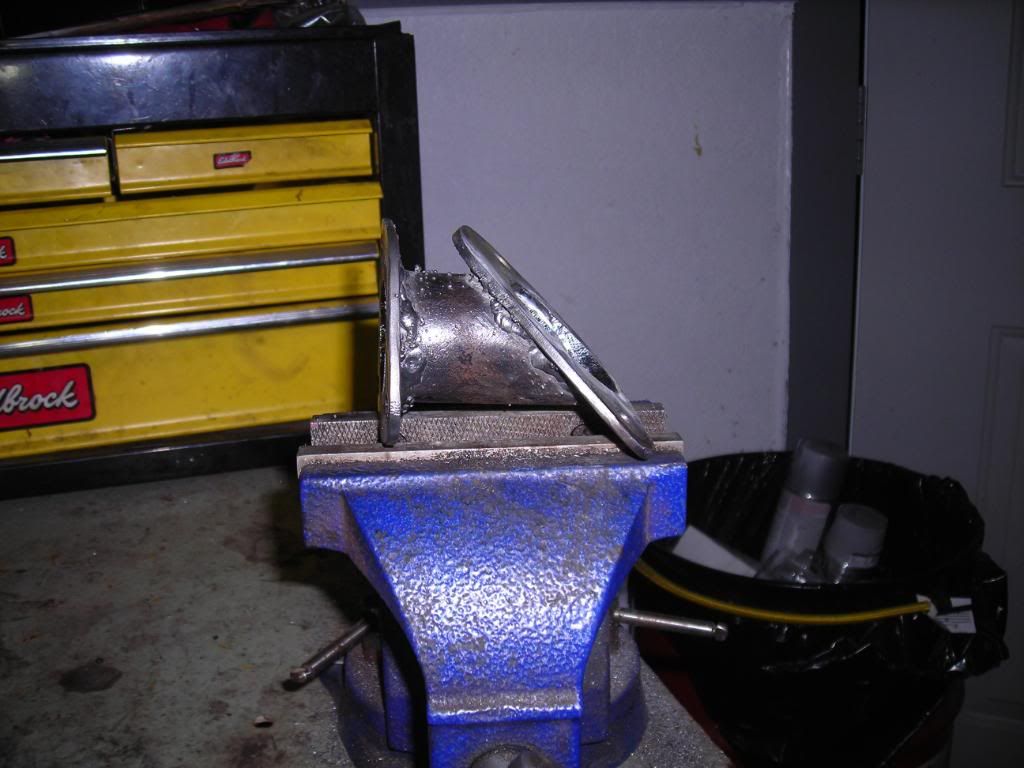
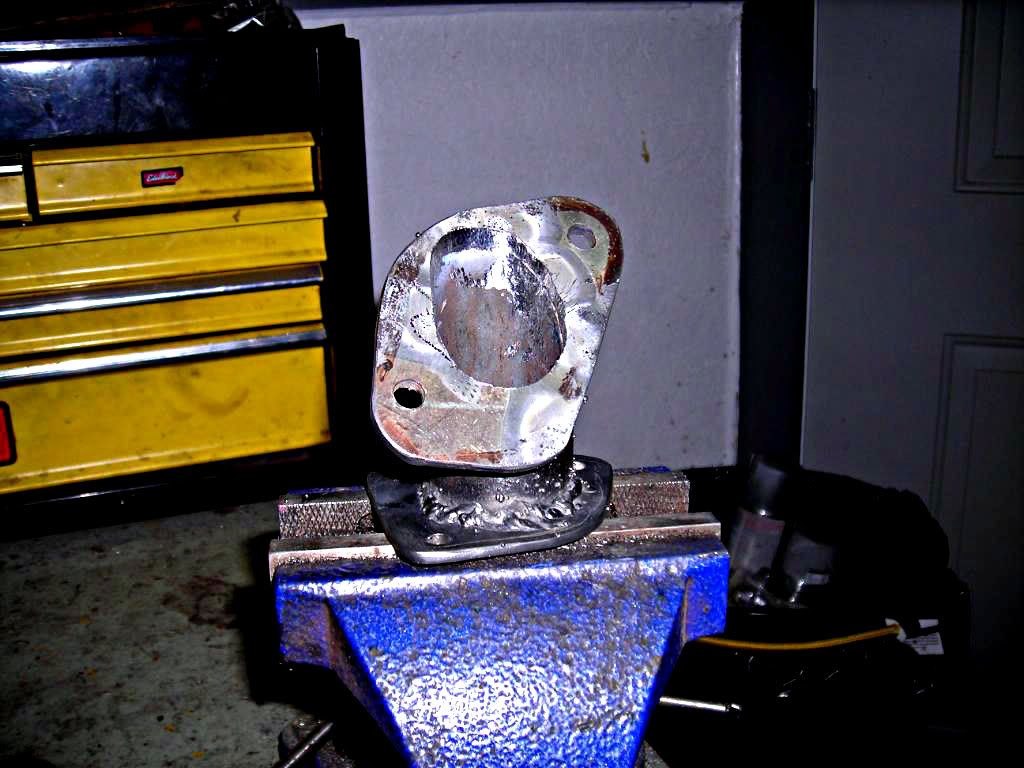
The only material needed two 1/8 steel plates, and a section of 1.5" ID pipe (actually a piece of black pipe I kept as a "cheater bar"). I used a bandsaw and drill press at work to rough out the plates, but all the final shaping and fabricating was done with a 4.5" angle grinder, a die grinder, a file, drill, sawzall, and 110 flux welder.
Adapter.
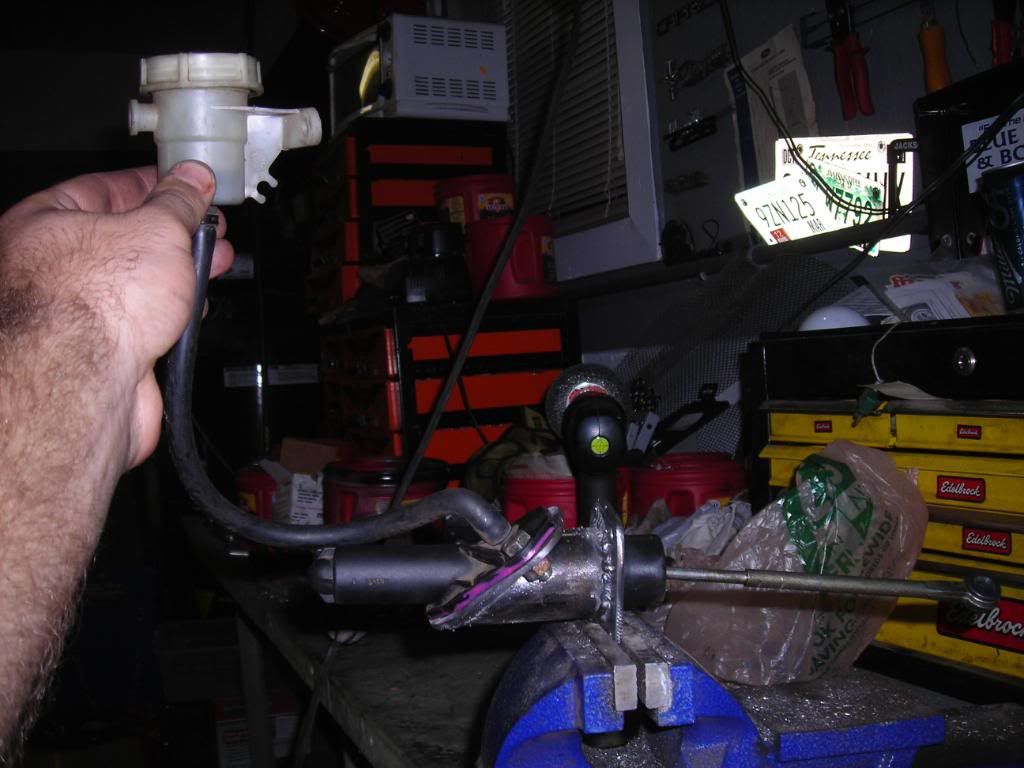
Adapter with master.
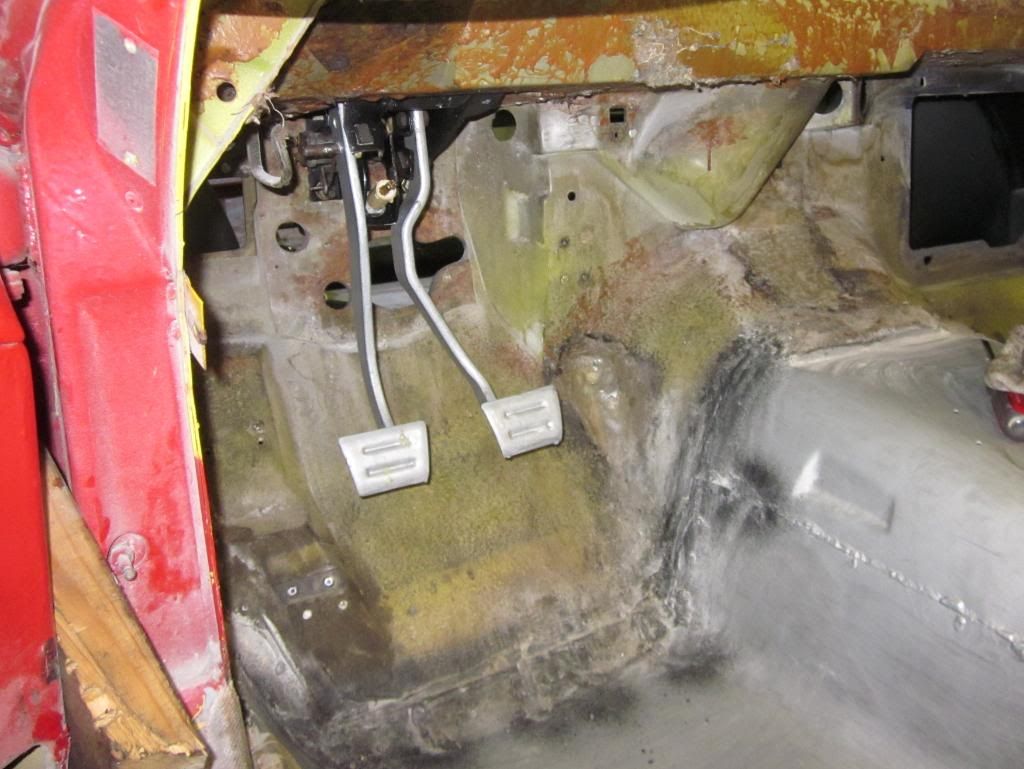
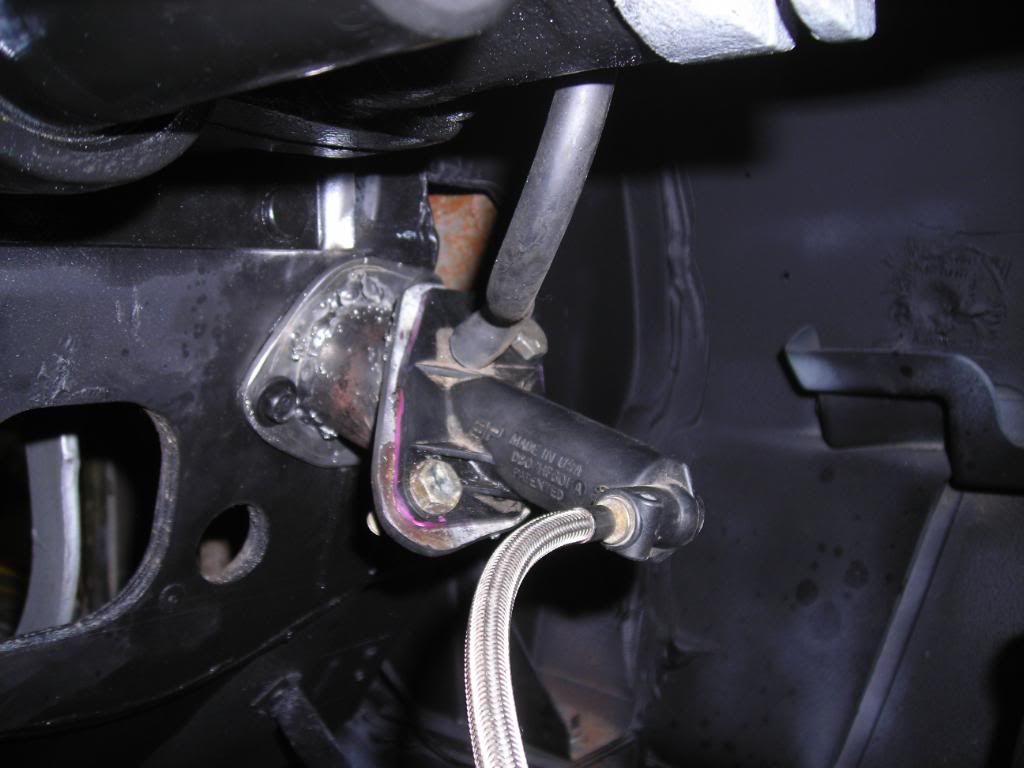
In car.
Top view.
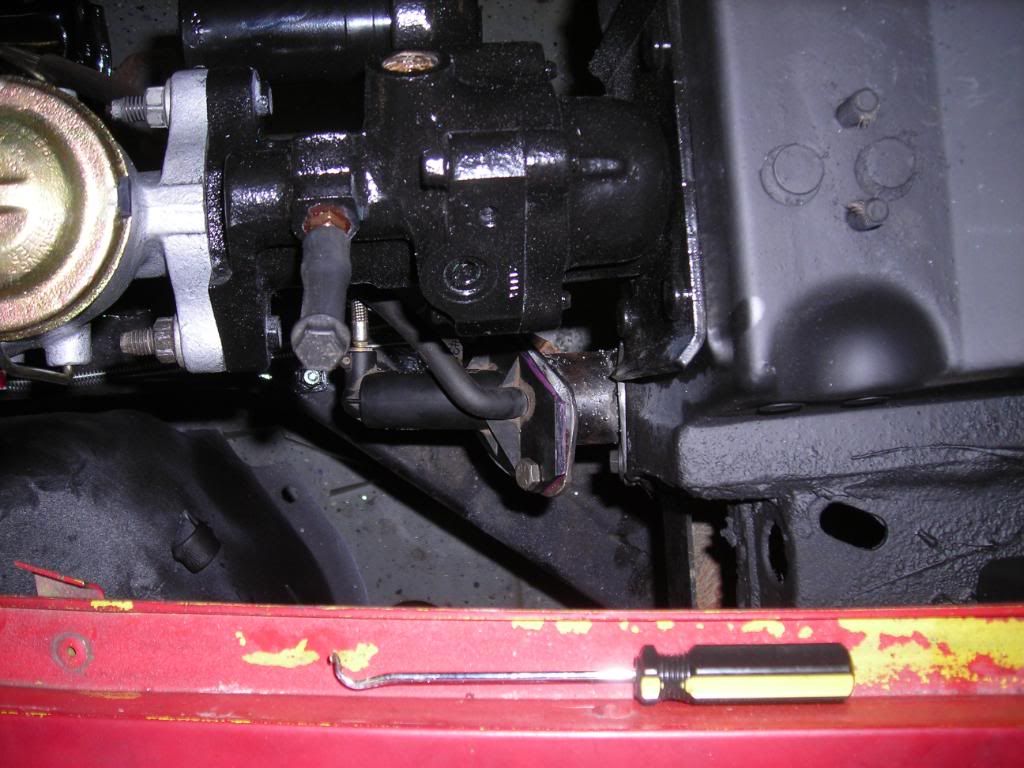
Bottom view.

Simple to design, yes. Simple to build, (for me) no.
The only material needed two 1/8 steel plates, and a section of 1.5" ID pipe (actually a piece of black pipe I kept as a "cheater bar"). I used a bandsaw and drill press at work to rough out the plates, but all the final shaping and fabricating was done with a 4.5" angle grinder, a die grinder, a file, drill, sawzall, and 110 flux welder.
Adapter.
Adapter with master.
In car.
Top view.
Bottom view.
05-17-2012, 07:21 PM
#18
Burning Brakes
Thread Starter
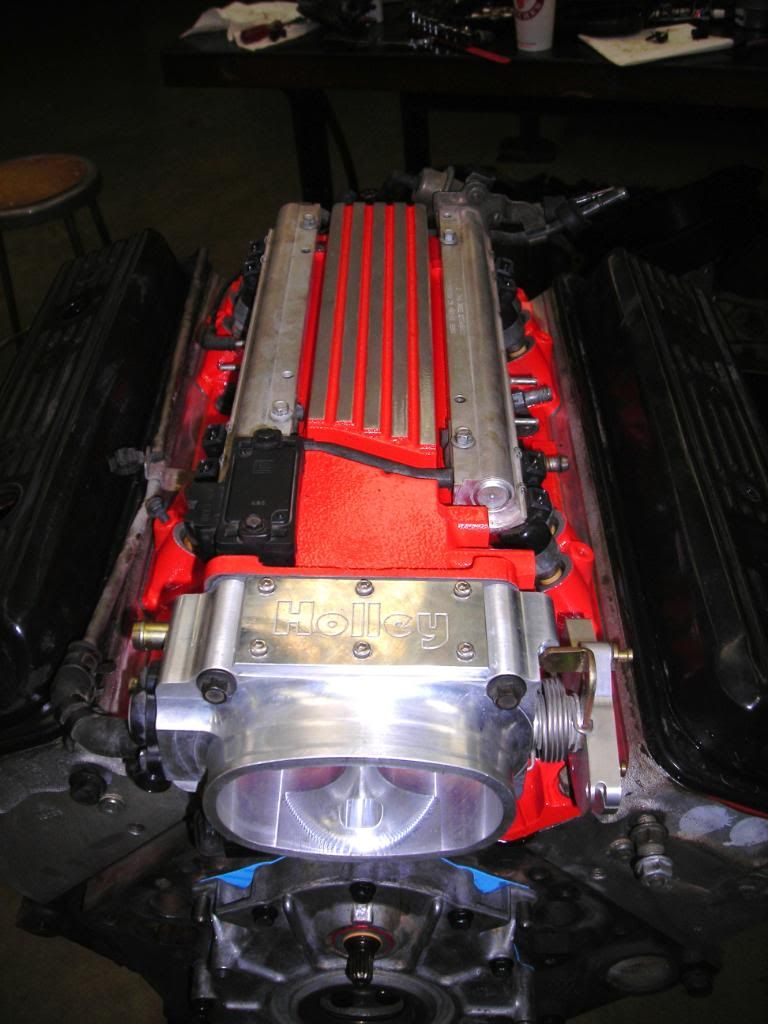
School�s out, so I have been able to use the shop at work. After sitting on an engine stand for nearly two years, it is time to get the LT1 ready for its new home.
It was pulled from a car with 120K miles which sounds like a lot, but I had faith that it was in good nick internally. The two hour drive back from getting the car proved it was a good runner, and the lack of sludge when I tore it down proved good maintenance.
It needed new gaskets all around, and while I'm at it...
Why not a cam? I went back in forth between a GMPP LT4 hot cam and Comp Cam's CC305. I went with the LT4. I know it gives up a little power, but it has less aggressive ramps that let me use $36 LT4 springs.
When changing the springs we used a leak down tester to keep the valves from falling into the cylinder. Leakage was consistent 15-20% in all cylinders, with all that going past the rings. I would prefer it to be closer to 10, but after two years of sitting I'm sure the rings are a little dry.
Motor is buttoned up now, but I still need to clean the block and spray on a quick coat of black paint.
06-05-2012, 10:18 PM
#20
Burning Brakes
Thread Starter
Got the motor installed today.
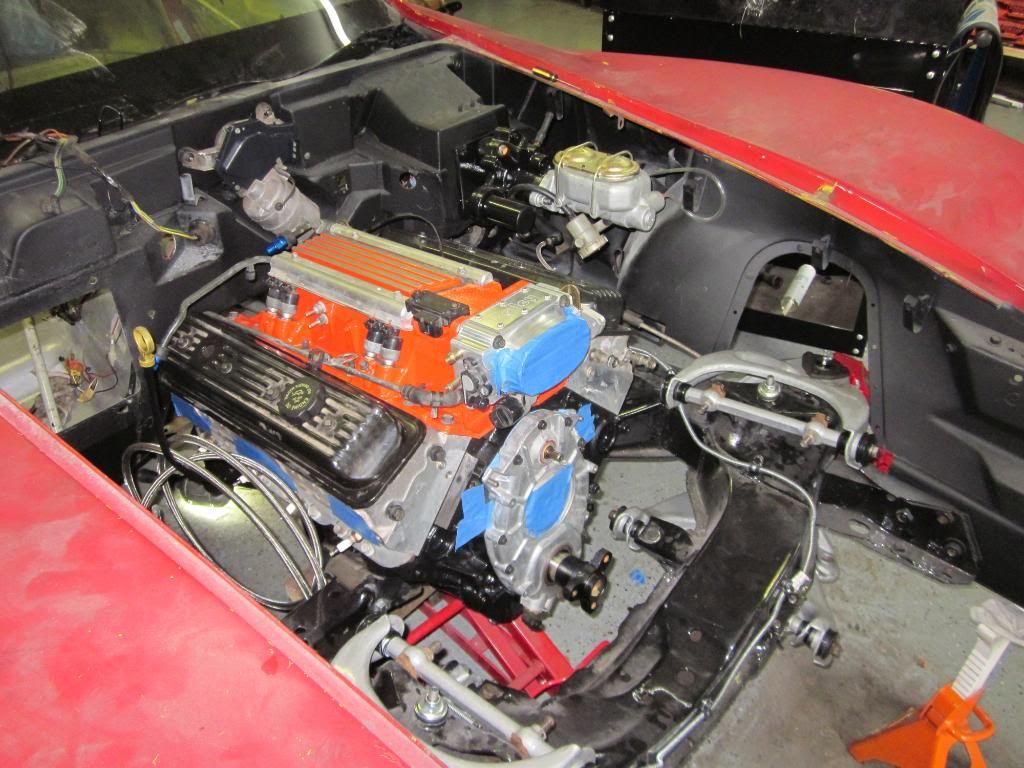
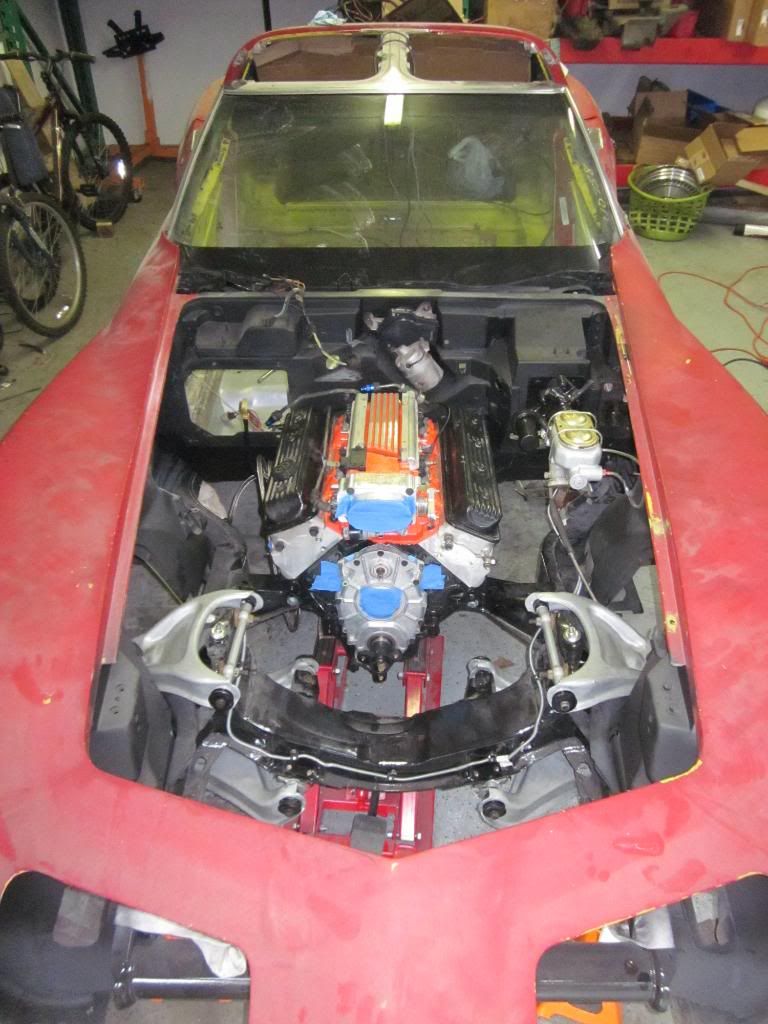
I'm working on running the fuel lines now. I have the pressure line ran from the fuel filter to the front of the car. I'm not sure how I'm going to route the lines in the engine compartment yet.
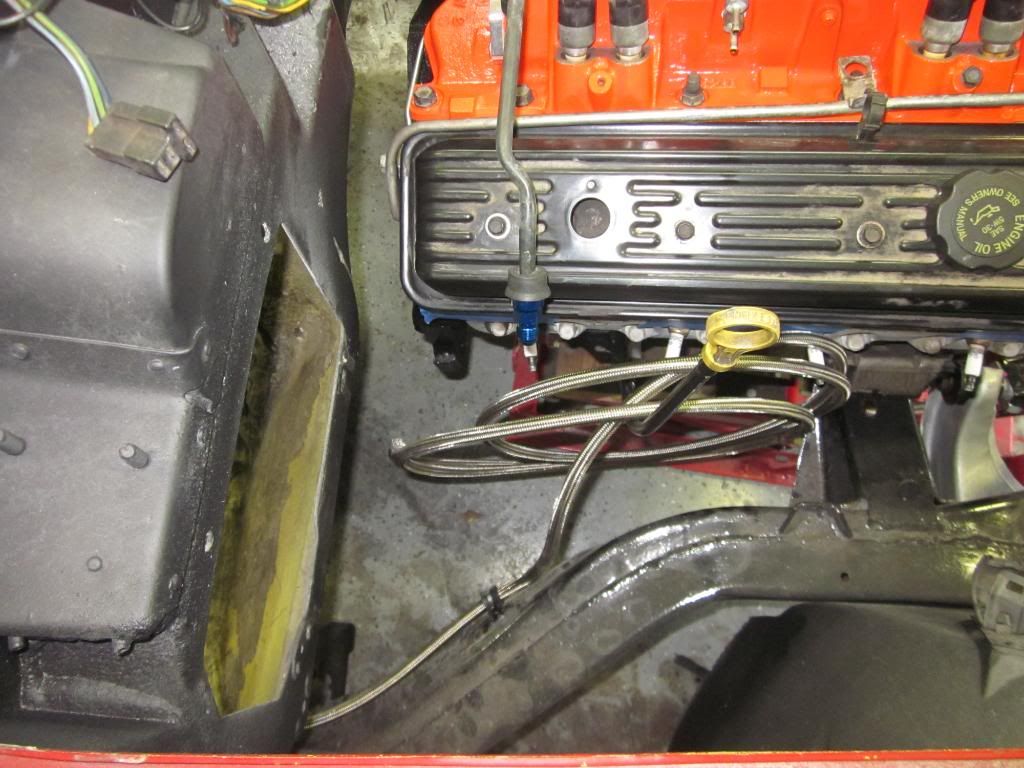
I had to rotate the inlet lines on the fuel rail, stock camaro fuel feeds from the drivers side. Now I have one fitting right over the valve cover, and if I run it straight up I'm worried about its proximity to the exhaust.
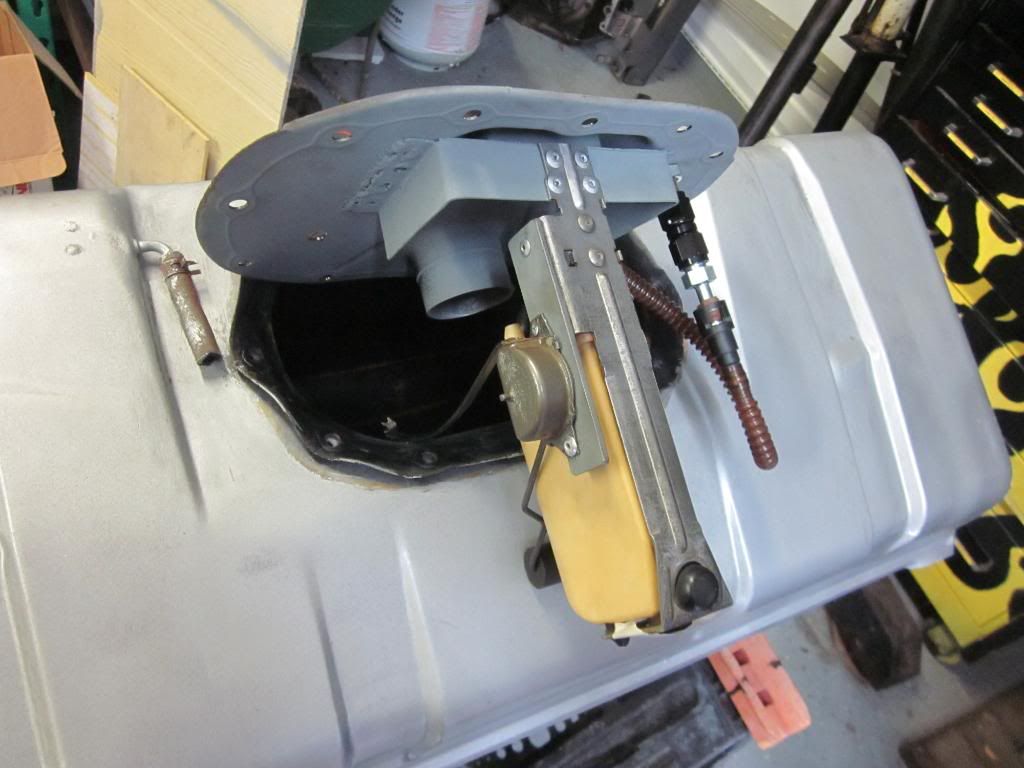
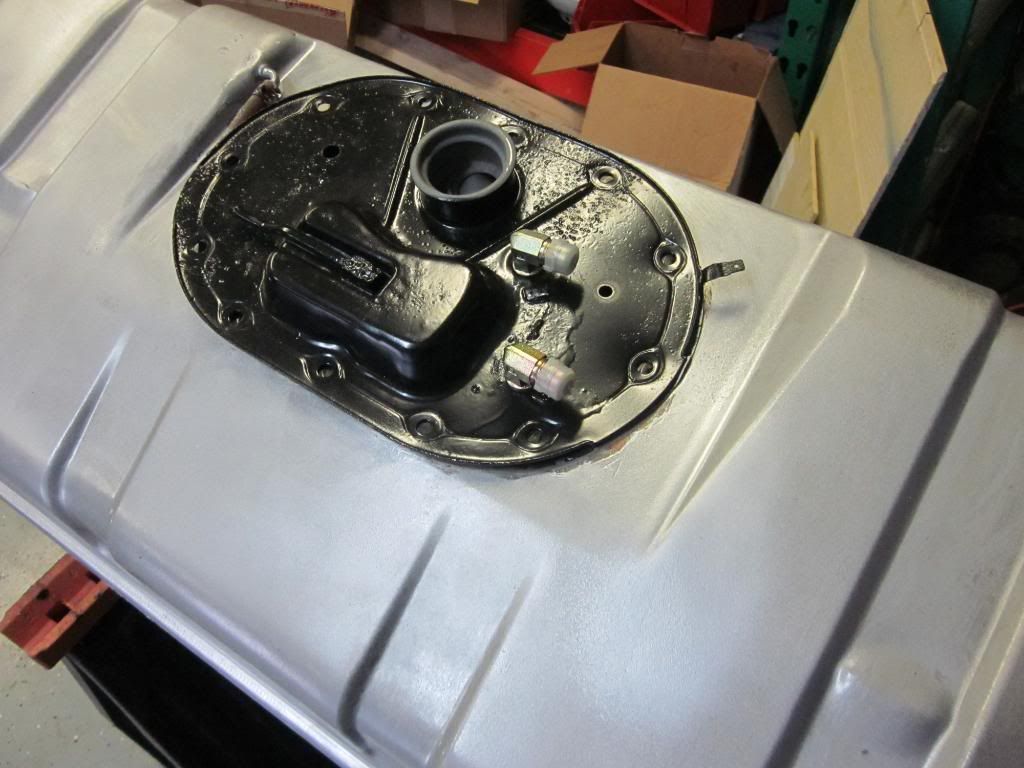
Here's my fuel pump setup. It's a mix and match of stock corvette/97 camaro/aftermarket. I removed the corvette sender and float guard, and welding in a c-shaped metal bracket. I cut the fuel pump assembly from the camaro and riveted it to the bracket. The fuel level sender is off of the old vette piece. So this is my "Bubba" setup that gives me an in tank pump with built in baffles. And if my pump goes out I can get a replacement at Autozone.
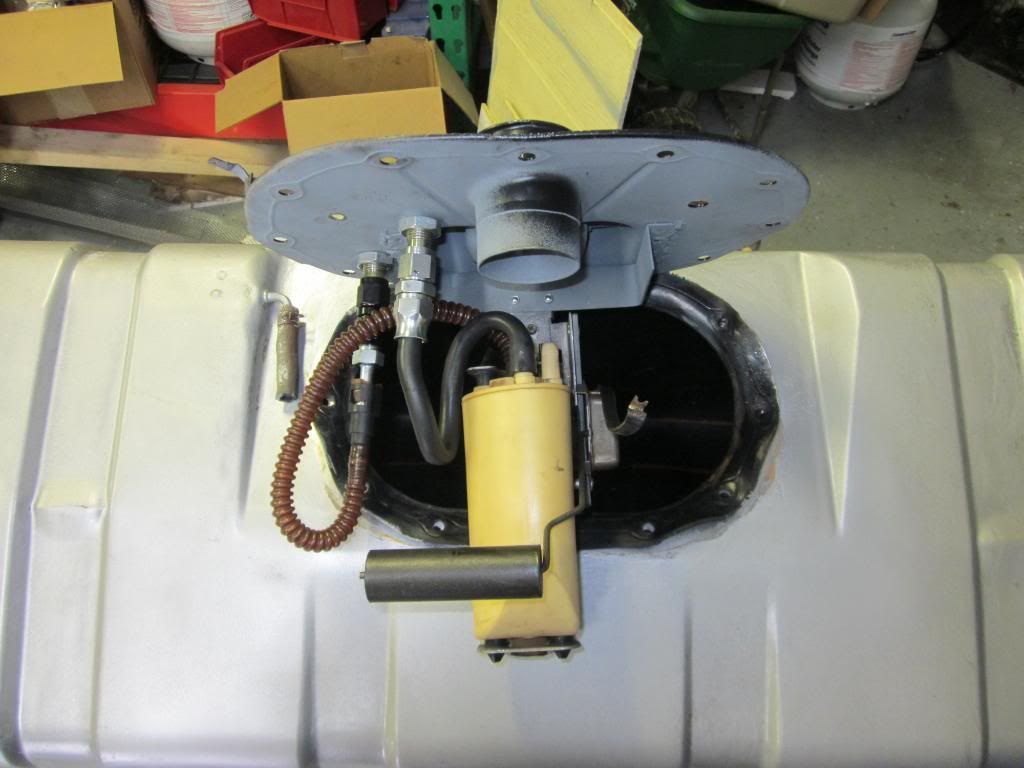
I'm working on running the fuel lines now. I have the pressure line ran from the fuel filter to the front of the car. I'm not sure how I'm going to route the lines in the engine compartment yet.
I had to rotate the inlet lines on the fuel rail, stock camaro fuel feeds from the drivers side. Now I have one fitting right over the valve cover, and if I run it straight up I'm worried about its proximity to the exhaust.
Here's my fuel pump setup. It's a mix and match of stock corvette/97 camaro/aftermarket. I removed the corvette sender and float guard, and welding in a c-shaped metal bracket. I cut the fuel pump assembly from the camaro and riveted it to the bracket. The fuel level sender is off of the old vette piece. So this is my "Bubba" setup that gives me an in tank pump with built in baffles. And if my pump goes out I can get a replacement at Autozone.