
body lift complete (with lessons learned of course)
 05-31-2011, 01:36 PM
#1
Racer

Thread Starter

Member Since: Nov 2010
Location: Flower Mound TX
Posts: 364
Likes: 0
Received 0 Likes
on
0 Posts
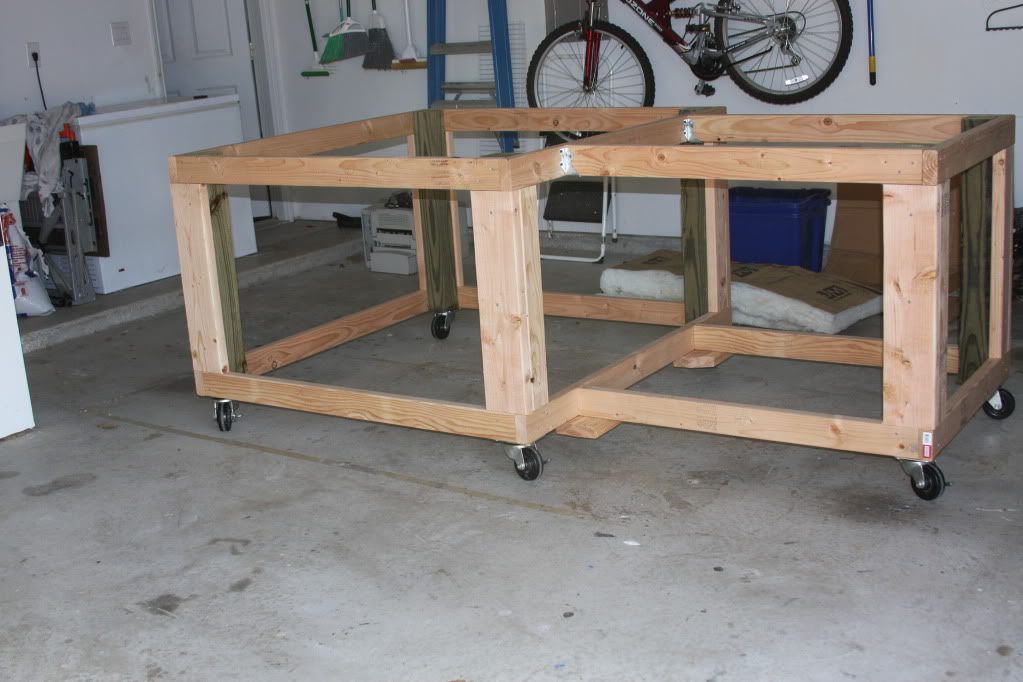
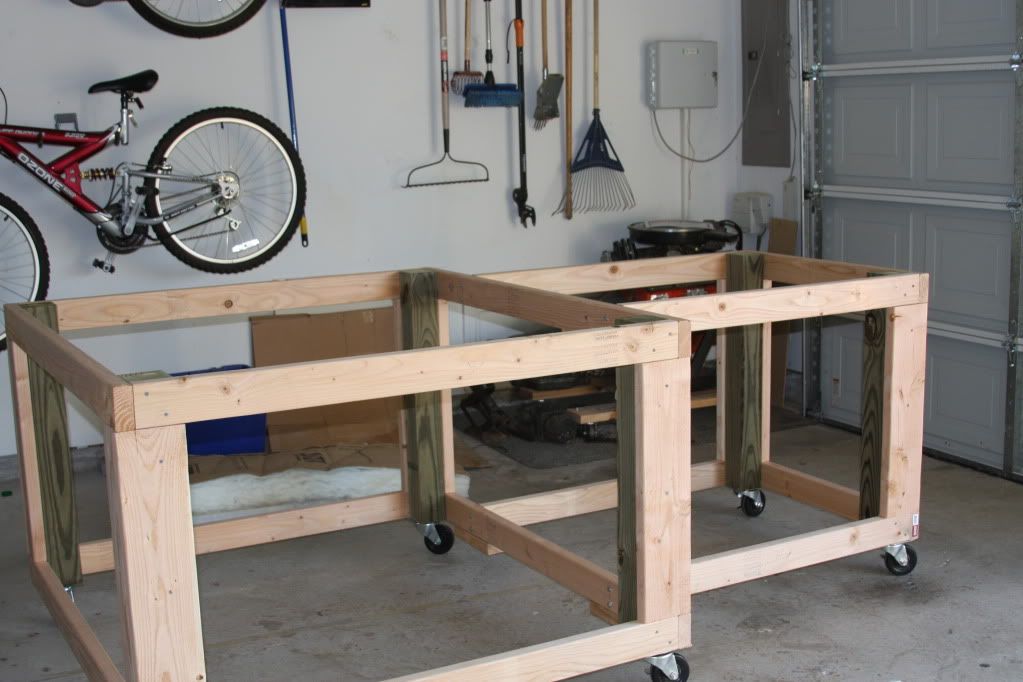
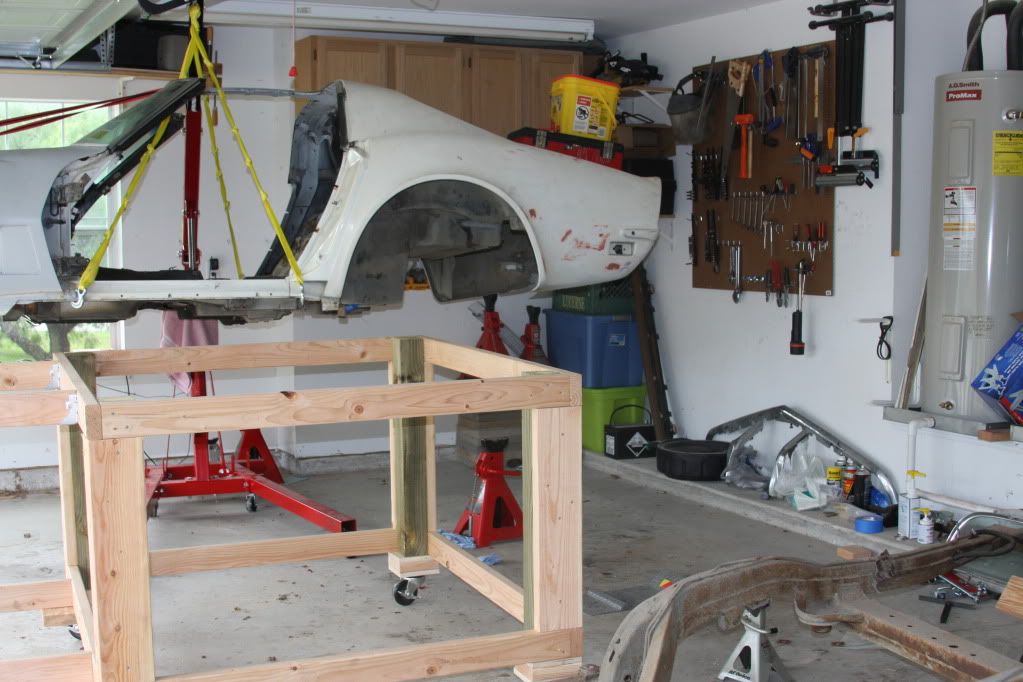
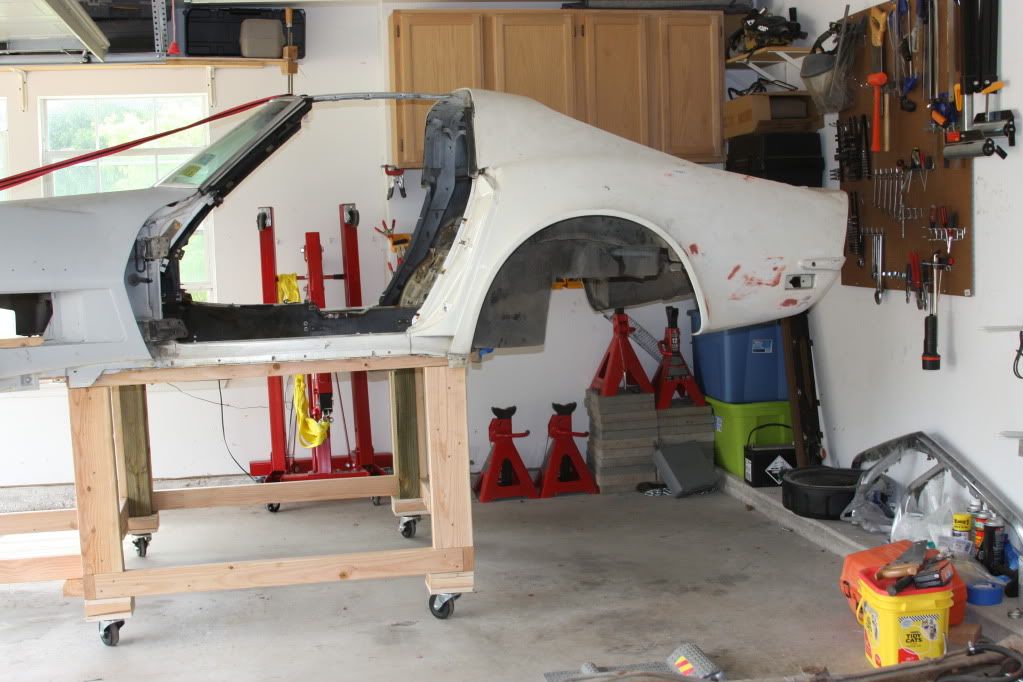
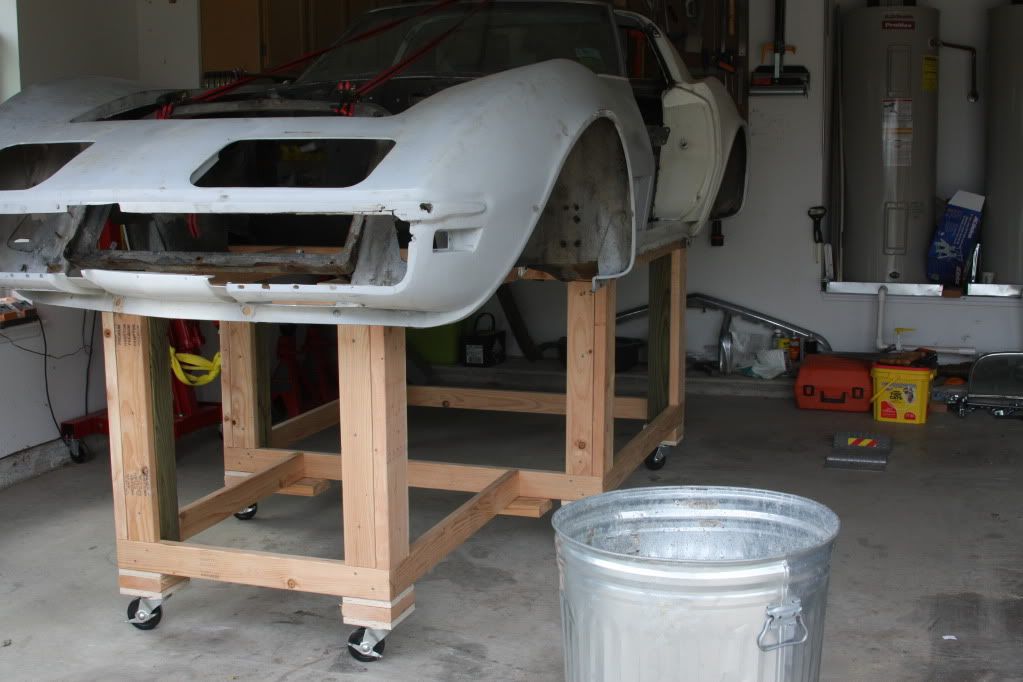
So, I did decide to go ahead and lift the body. I used the plan from auto restore site for the dolly. I need to do body work, so I wanted to do the taller one, but still have the nose support. so I combined the 2 plans into a tall one. I decided to cut the uprights to 32" not 34. I also wanted to beef it up some so I screwed the cross pieces to the 4X4 instead opf notching the 4X4. I then used 2X4 & 2X6 to reinforce it. The outside dimensions were just like the plans so I thought all was good (lesson to come here). I also did not want to have it so tall off the ground, so I connected the 4" casters to the 4X4 and cross pieces. (another lesson here).
So with that built, family was going to help me lift it and sit it on. well that turned out to not happen, so I decided to just use my engine hoist. Well lesson 1 turned out to be that the dolly would not fit overtop of my engine hoist legs. so I had to add about 3" to the bottom and now it fits over the legs. But is really tall now 40"
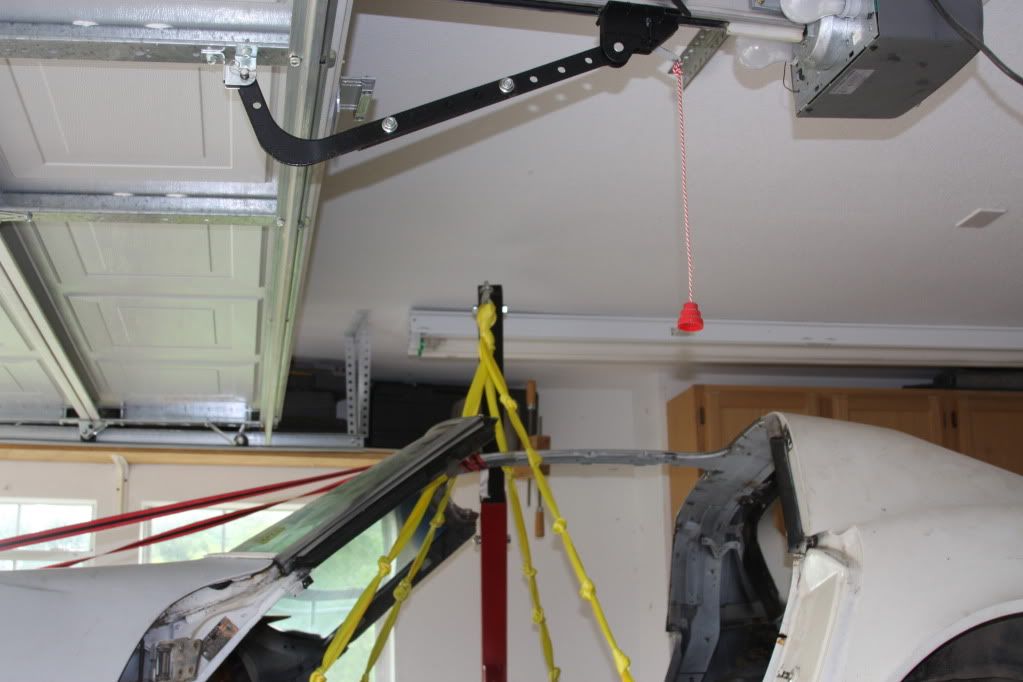
I used some tow straps to lift with, and reinforced with a piece of angle iron, it worked well, but normal lifting kit would have been reasier.
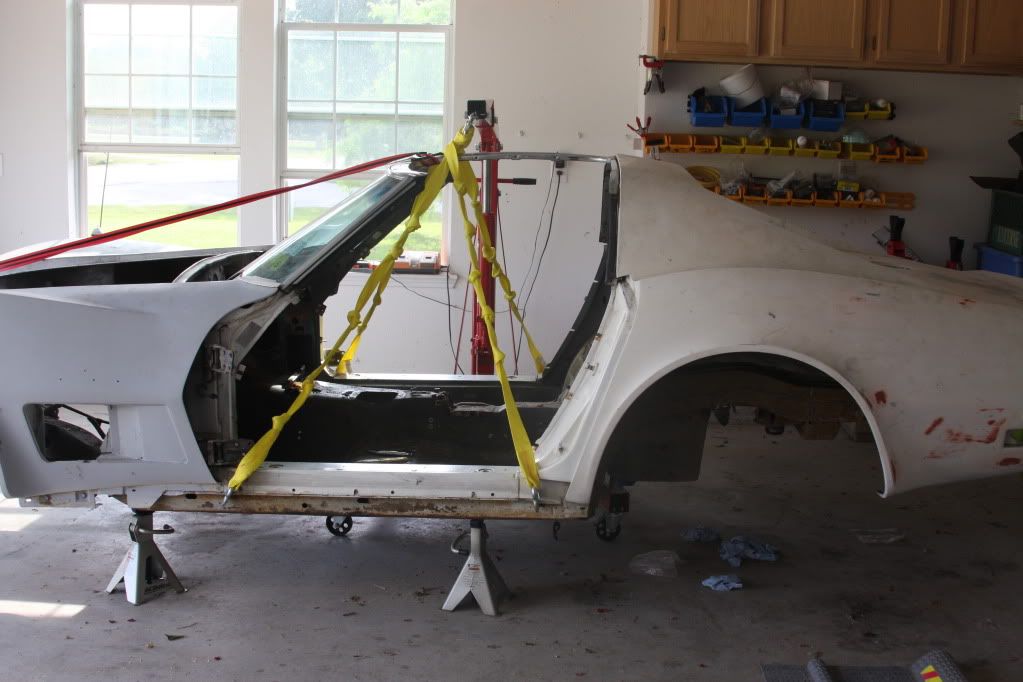
I strap the car and get it lifted (removed the doors so I could get in close which was a good decision). I had to raise the list to its highest point 93" to get it on the dolly. So the dolly mods I made fit on the outside.. BUT... the 4X4 post inside did not let it seat properly in the groove. So I had to pull it out, and cut it at an angle. to get it to sit properly. once I did that it sat nicely.
So Lessons...
1. Have a backup plan when your original plan fails.
2. If you use that plan, the notches to hold the cross pieces are important. Not just for strength, but to keep the upright out of the way when you drop it down.
3. Do not go more that like 34 inches (including the wheels) if you want a tall dolly. this will keep you from having to fully raise the boom (the jack part gets in the way, so you want the car to not pass the top of the jack (just easier).
4. Pay attention to those darn shims, I think I may have dropped a couple and got mixed up.
5. It can be done and I did it alone, but have 1 person there for you...
It is on sturdy and safely. It will be lots easier to lower it back to the frame when time comes just because it swings away from the jack as you lower it.
Now onto the pics (note the dolly pics are before the addition blocks were added)
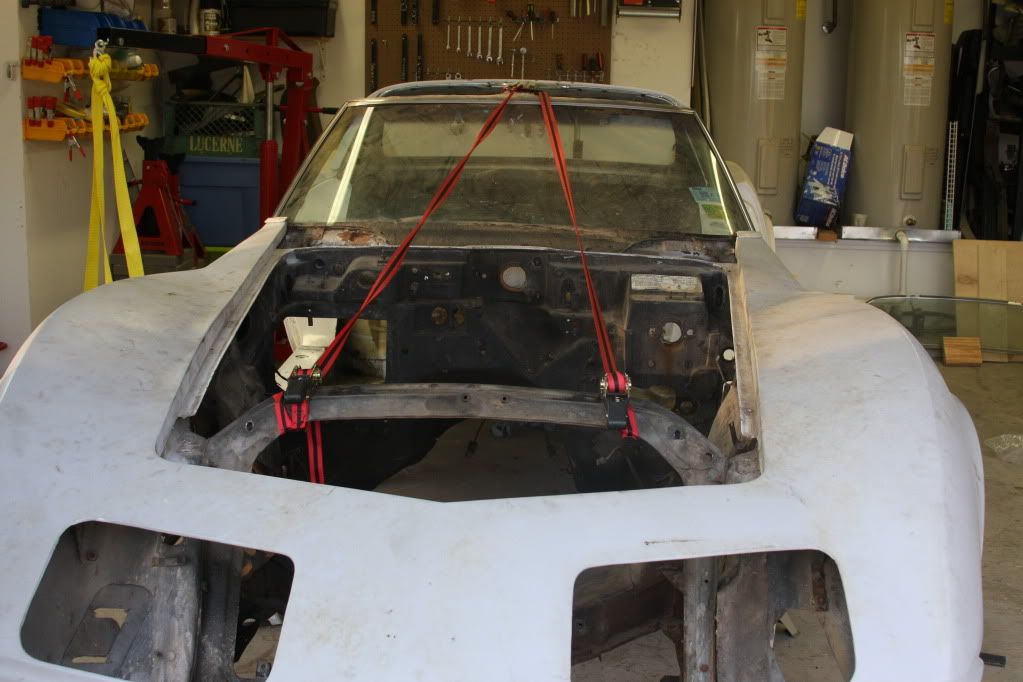
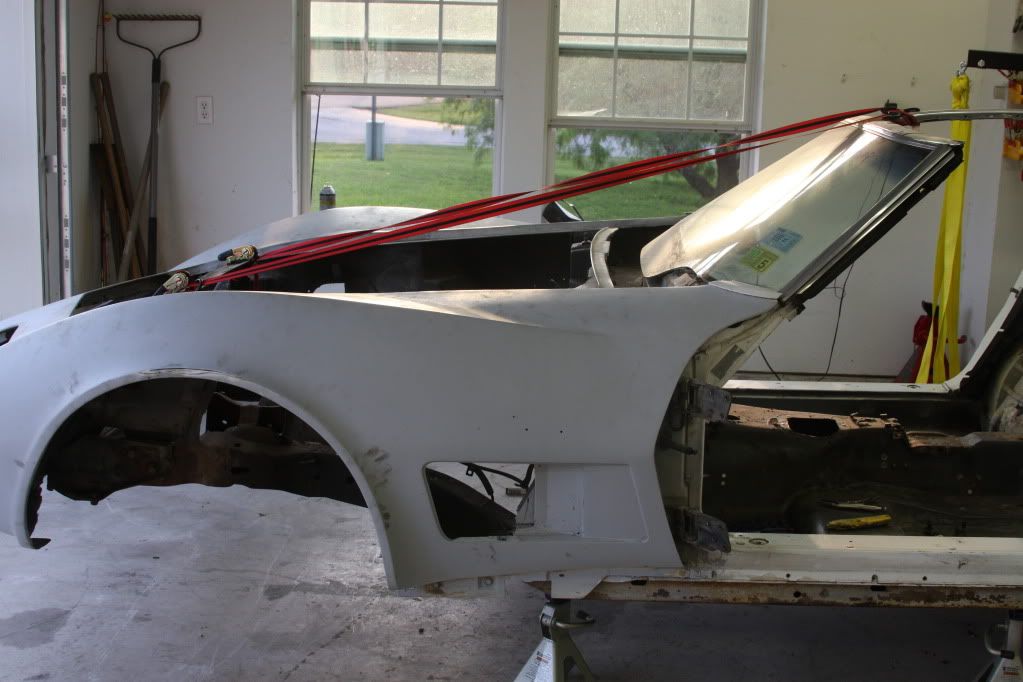


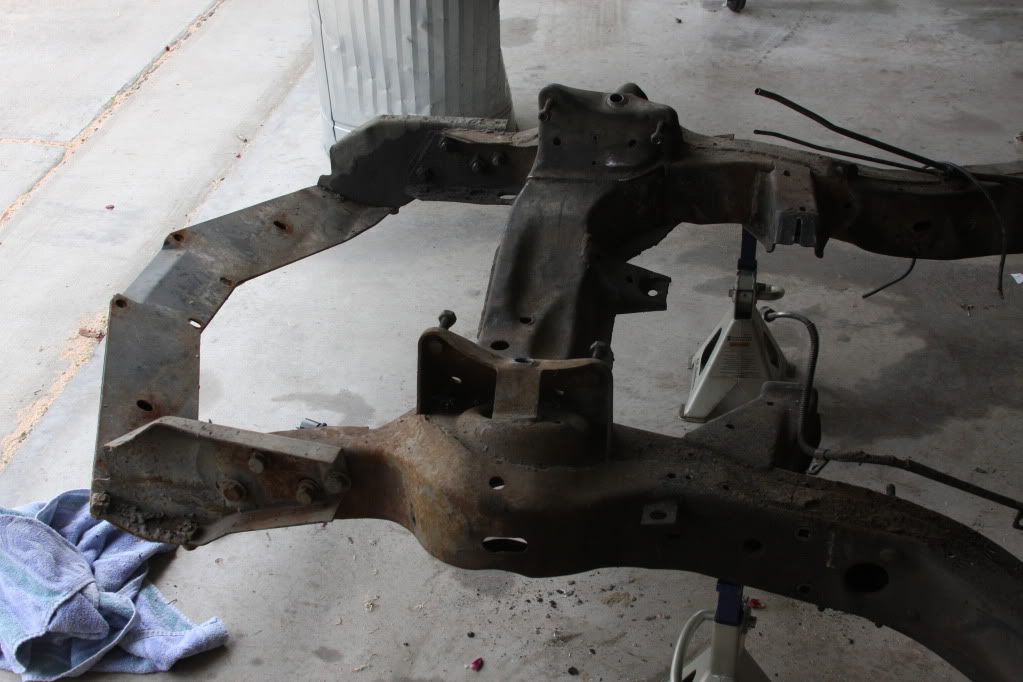
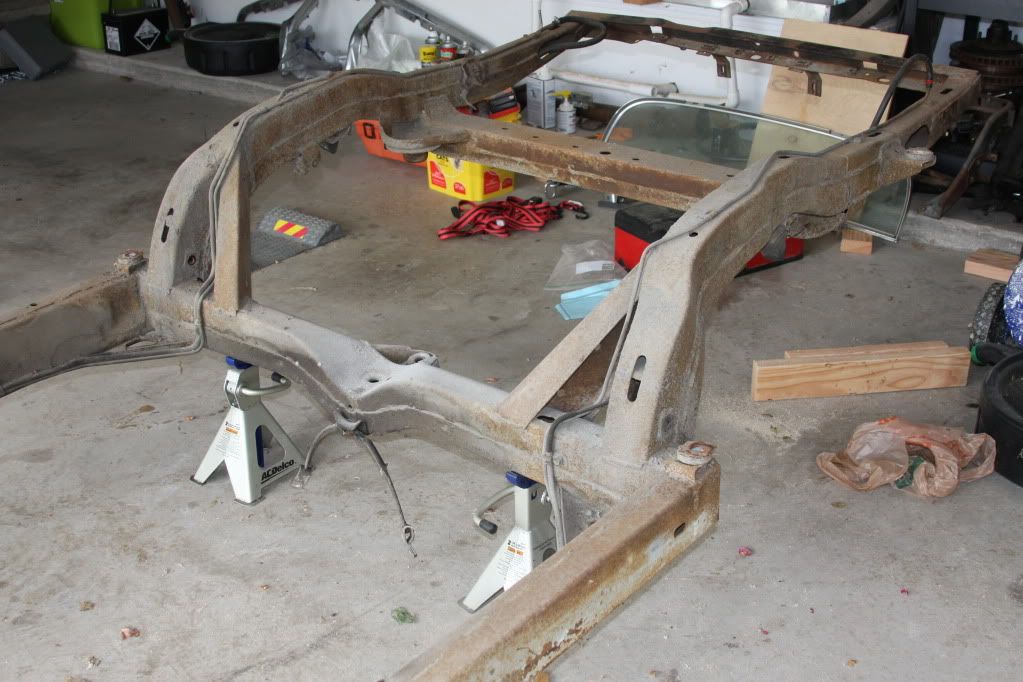
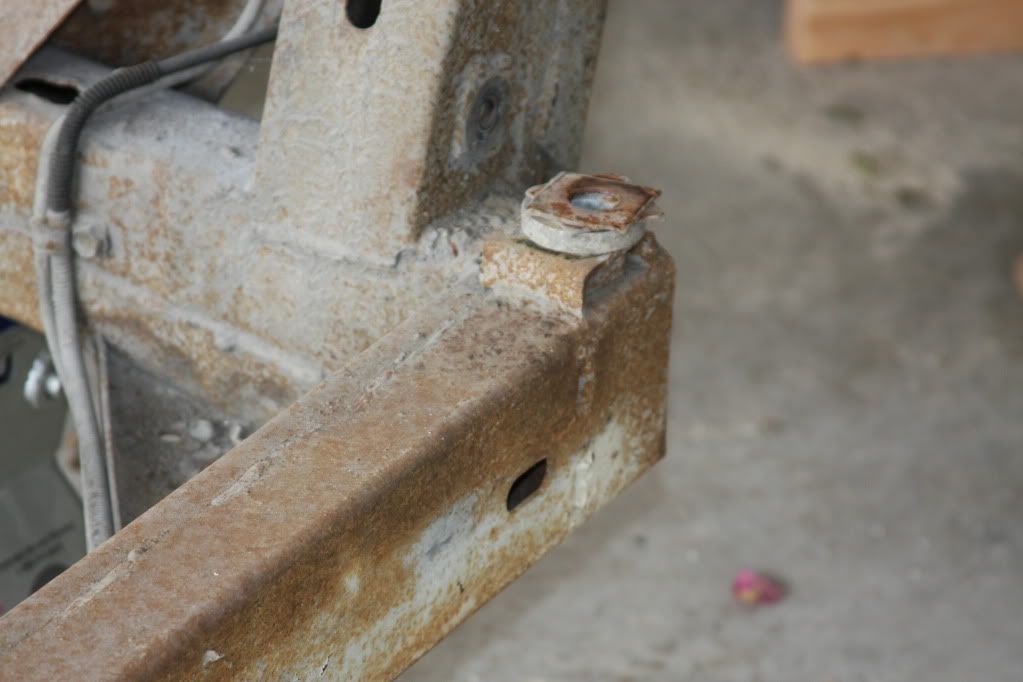
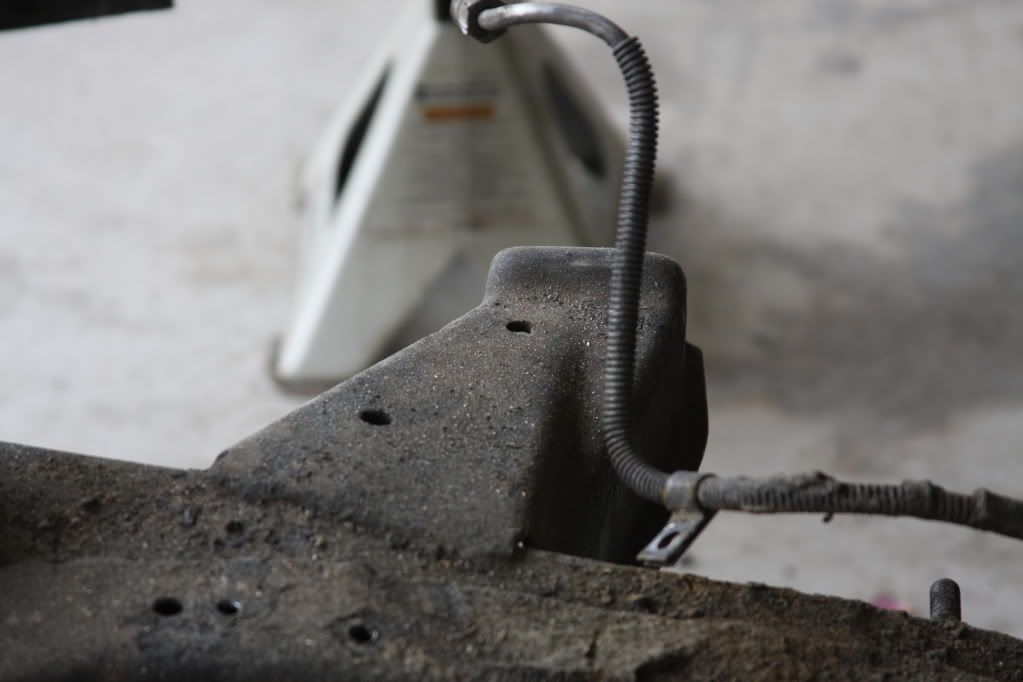
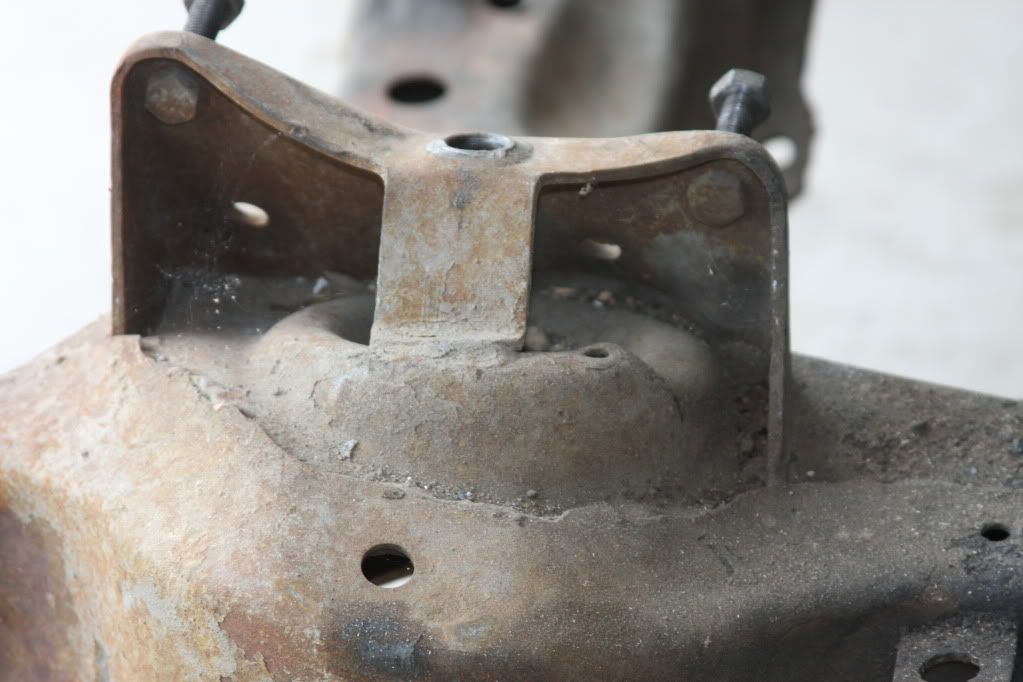
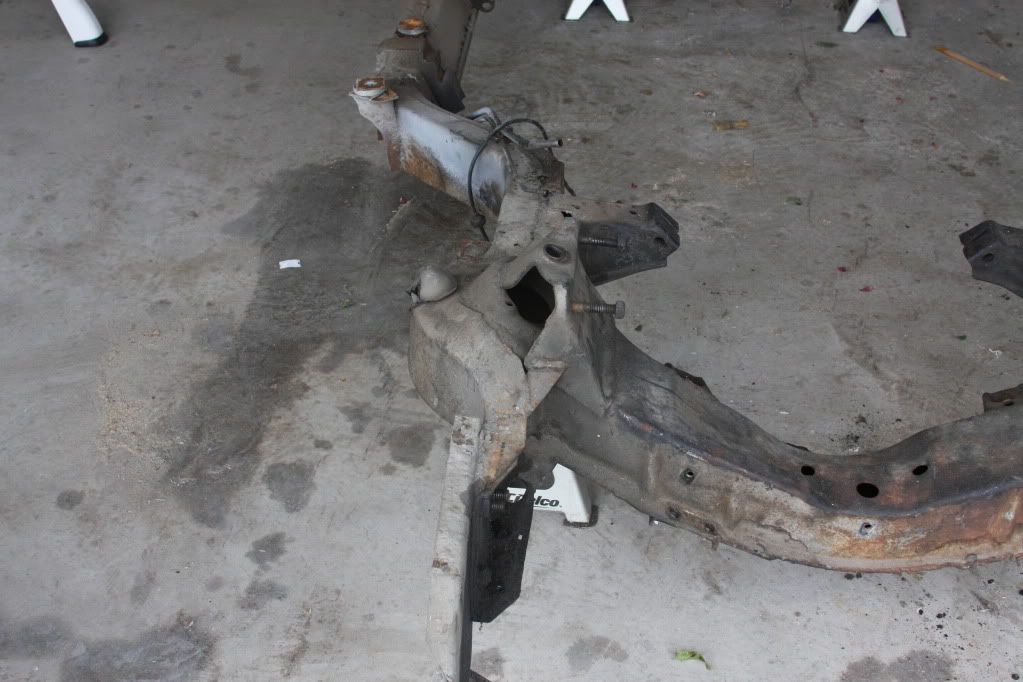
Here is the Frame, it is in good shape, I did not need to remove it, but I would not be happy if I didnt, so I took the body off.

So with that built, family was going to help me lift it and sit it on. well that turned out to not happen, so I decided to just use my engine hoist. Well lesson 1 turned out to be that the dolly would not fit overtop of my engine hoist legs. so I had to add about 3" to the bottom and now it fits over the legs. But is really tall now 40"
I used some tow straps to lift with, and reinforced with a piece of angle iron, it worked well, but normal lifting kit would have been reasier.
I strap the car and get it lifted (removed the doors so I could get in close which was a good decision). I had to raise the list to its highest point 93" to get it on the dolly. So the dolly mods I made fit on the outside.. BUT... the 4X4 post inside did not let it seat properly in the groove. So I had to pull it out, and cut it at an angle. to get it to sit properly. once I did that it sat nicely.
So Lessons...
1. Have a backup plan when your original plan fails.
2. If you use that plan, the notches to hold the cross pieces are important. Not just for strength, but to keep the upright out of the way when you drop it down.
3. Do not go more that like 34 inches (including the wheels) if you want a tall dolly. this will keep you from having to fully raise the boom (the jack part gets in the way, so you want the car to not pass the top of the jack (just easier).
4. Pay attention to those darn shims, I think I may have dropped a couple and got mixed up.
5. It can be done and I did it alone, but have 1 person there for you...
It is on sturdy and safely. It will be lots easier to lower it back to the frame when time comes just because it swings away from the jack as you lower it.
Now onto the pics
(note the dolly pics are before the addition blocks were added)Here is the Frame, it is in good shape, I did not need to remove it, but I would not be happy if I didnt, so I took the body off.
 05-31-2011, 02:59 PM
#2
Melting Slicks

Looks like a good job. Send the frame out to a shop for sandblasting.(about 300 dollars). It's better to do it that way then try it at home and fill the garage up with sand and debris along with choice words from the S/O.
Replace all the lines and paint and seal the frame. this is a good time to do suspension repair since it is easier to get to them with the body off. You might want to consider doing the steering parts also.
I am a big fan of kits. Suspension kits, steering kits, etc...., because you get all the parts you need without all the hassle of looking at different vendors. I recommend VanSteel or VBP for those kits and trailing arm parts.
Good luck on your endeavor.
05-31-2011, 03:23 PM
#3
Racer
Thread Starter
Member Since: Nov 2010
Location: Flower Mound TX
Posts: 364
Likes: 0
Received 0 Likes
on
0 Posts
yeah, I plan on doing the suspension, steering, motor/tranny, and put the tank back in before the body back down.
I am happy there were no hidden frame issues (thus far), that is why I popped the body, just would not feel right not knowing and feeling like I stopped just a bit short.
I am happy there were no hidden frame issues (thus far), that is why I popped the body, just would not feel right not knowing and feeling like I stopped just a bit short.
05-31-2011, 03:27 PM
#4
Drifting


I was serious when I told you that I would help you lift it. You should have told me and I would have come over and helped you. I'm not that far away. When you get ready to drop it back on the frame, if you need some help, let me know. Arlington is not that far away.
I'm almost there on lifting mine too. Just got to remove the steering column and front end. I still need to make a frame to hold the body. Mind sending me the plans you have for the body dolly?
If you find someplace that will sand blast the frame let me know. I don't even know where to start looking. I bought the kit from one of the venders for the rust inhibitors and paint, etc. I tried a grinder with a wire wheel and it seems to remove the rust pretty easy but blasting would be easier and definitely faster.
Looking good so far. Are you painting yourself or if not where are you planning on having it done? I'm still leaning towards doing mine myself.
Shoot me a PM and I'll give you my phone number if you need any help. Some of these things really need atleast 2 people to do safely.
Bobby
05-31-2011, 06:17 PM
#5
Team Owner

Member Since: Sep 2006
Location: Westminster Maryland
Posts: 30,173
Likes: 0
Received 2,878 Likes
on
2,515 Posts

Hi ef,
Very interesting pictures!
It looks like you're taking the time to do things right. For instance,
building a first rate body dolly.
I believe doing things well pays off big time as the project continues!
I'll be looking forward in seeing pictures as you progress.
Regards,
Alan
Very interesting pictures!
It looks like you're taking the time to do things right. For instance,
building a first rate body dolly.
I believe doing things well pays off big time as the project continues!
I'll be looking forward in seeing pictures as you progress.
Regards,
Alan
05-31-2011, 10:55 PM
#6


Looking very good. Now don't you wish you'd done that first then stripped the frame of eng, susp etc? Much easier to stand beside the exposed skelton and rattle bolts off to strip it than lie under and curse the dirt that fell in your eye.
Going back together you will find that you are at far less risk of scratching any of your new finish by assembling it all to the frame then setting the body on. Eng all together, all accesories on, belts tightened, shifter in place (manual), all drive shafts and suspension, fuel tank, lines, brakes all in and connected, parking brake cables run etc. Goes together very easily like that and the body drop is a snap.
Good luck with it.
Steve

 06-01-2011, 08:53 AM
#8
Racer
Thread Starter
Member Since: Nov 2010
Location: Flower Mound TX
Posts: 364
Likes: 0
Received 0 Likes
on
0 Posts
I am planning on blasting it and painting it myself. I do need to get an aircompressor and a blaster.
I think it will make it easier plus my step-son is moving in with us and will be bringing a 73 charger/challenger (I forget which) from Md and it needs a lot of work. He will be able to use it also, so it wont be a 1 project item.
I think it will make it easier plus my step-son is moving in with us and will be bringing a 73 charger/challenger (I forget which) from Md and it needs a lot of work. He will be able to use it also, so it wont be a 1 project item.
06-01-2011, 05:19 PM
#9
Melting Slicks
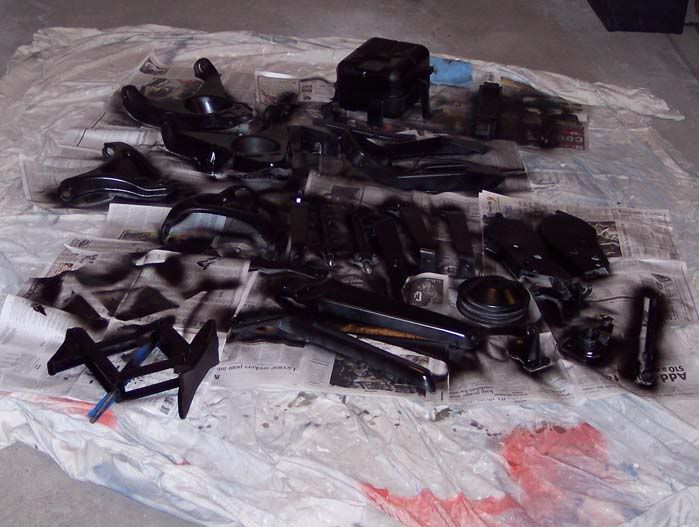
Well it is admirable you want to blast it yourself, but without a really big compressor, it will take you a long time and you will have a big mess. I paid $800. and they came picked up my frame blasted it dipped it, powder coated it and returned it to my driveway and it is way more durable than any spray paint. I made the mistake of doing all the little parts like control, arms bumper brackets and various other items in my blast cabinet and then painted with epoxy spray cans. It took a long time doing that and no question if I had to do it again I would send along with the frame.
This

This took a long time and wouldn't do it this way again.
This
This
took a long time and wouldn't do it this way again.
06-01-2011, 05:55 PM
#10
Instructor

Member Since: Feb 2008
Location: Raleigh NC
Posts: 111
Likes: 0
Received 0 Likes
on
0 Posts
St. Jude Donor '13,'15,'17,'18,'22-'23
Great write up and comments by others, this is definitely a great group with tons and tons of knowledge to share.
I ended up making the taller dolly as well since I have considerable work to do on the front fenders. This isn't a very good shot but I made an angled brace to hold the front end vs the extension with casters. Definitely not as strong and I will make the extension with casters before I start into the bodywork on the nose section. But for right now it lets me stuff things underneath the nose as as you can see my shop is pretty stuffed.
[IMG] [/IMG]
Here's a shot of lifting the body with my tractor, thanks to my friend Lynn from WV we didn't loose and fingers or toes and the body was in one piece at the end.
[IMG] [/IMG]
Glad your frame is in good shape, I've got to replace a section of mine due collision damage on the right front behind the front suspension. But I've found a donor frame and will git 'er done.
I ended up making the taller dolly as well since I have considerable work to do on the front fenders. This isn't a very good shot but I made an angled brace to hold the front end vs the extension with casters. Definitely not as strong and I will make the extension with casters before I start into the bodywork on the nose section. But for right now it lets me stuff things underneath the nose as as you can see my shop is pretty stuffed.
[IMG]
[/IMG]Here's a shot of lifting the body with my tractor, thanks to my friend Lynn from WV we didn't loose and fingers or toes and the body was in one piece at the end.
[IMG]
[/IMG]Glad your frame is in good shape, I've got to replace a section of mine due collision damage on the right front behind the front suspension. But I've found a donor frame and will git 'er done.
06-01-2011, 11:50 PM
#12
Drifting
check out craigs list. I got a great compressor on there that runs anything I will ever use. I looked last week and saw a few good deals on 60-80 gallon tank compressors.
I picked up an 80 gal, 7.5 hp almost new for $600. It's been the best investment that I have made so far.
I picked up an 80 gal, 7.5 hp almost new for $600. It's been the best investment that I have made so far.
06-02-2011, 07:04 AM
#13
Racer
Thread Starter
Member Since: Nov 2010
Location: Flower Mound TX
Posts: 364
Likes: 0
Received 0 Likes
on
0 Posts
i periodically check there. I think it will be a good investment also, especially seeing my step-son will be wanting to work on his car also.
I know cleaning up the frame and other parts by blasting will be messy, but this being a project makes it easier to do it in smaller batches and take my time to do it right.
I know cleaning up the frame and other parts by blasting will be messy, but this being a project makes it easier to do it in smaller batches and take my time to do it right.