
My '76 restoration (long post)
 02-24-2011, 11:38 AM
#101
Drifting


Thread Starter
Member Since: Aug 2010
Location: Kanuckistan
Posts: 1,617
Received 127 Likes
on
68 Posts
2022 C3 of the Year Finalist - Modified

The mounting brackets are homemade, inspired by McSpeed's killer light kit
His page is tell all you got to know to do the conversion.
 02-27-2011, 01:21 PM
#102
Drifting
Thread Starter
Member Since: Aug 2010
Location: Kanuckistan
Posts: 1,617
Received 127 Likes
on
68 Posts
2022 C3 of the Year Finalist - Modified
Yesterday I brought Jeff and Sovan home and we did a body cutting party.
No picture of during the cutting, sorry but we were all way too busy to take pictures. We had to move fast before the night comes down.
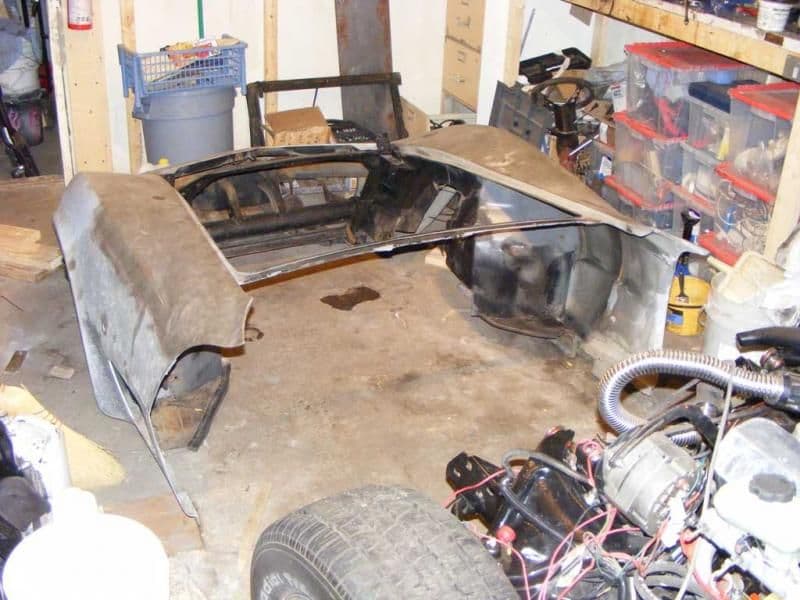
We took the new front clip out of the garage, cut the body in three, the rear clip, the windshield/pillar/firewall part and the front clip.
Here's the result :
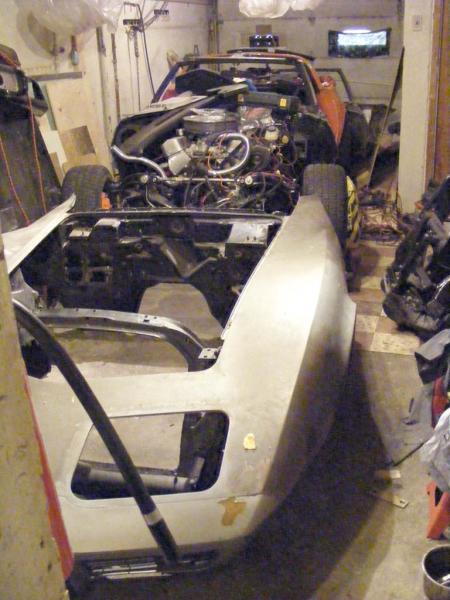
I was right thinking bad thing happened to the old front clip before because it just felt into part as soon as we start separating it.
Then we dismantled the body dolly and reclaimed the frame dolly it was sitting on.
Put the tires back on the new frame, and for the first time take the new version of my vette off the jackstands.

I was worried the frame dolly couldn't support the body of the car, turned out I was wrong, with those you can really move the whole car easily.
We move the front clip back in front of the new car, and I still have plenty of room to walk around.
Well, plenty if you've been like me climbing and crouching for months.
No picture of during the cutting, sorry but we were all way too busy to take pictures. We had to move fast before the night comes down.
We took the new front clip out of the garage, cut the body in three, the rear clip, the windshield/pillar/firewall part and the front clip.
Here's the result :
I was right thinking bad thing happened to the old front clip before because it just felt into part as soon as we start separating it.
Then we dismantled the body dolly and reclaimed the frame dolly it was sitting on.
Put the tires back on the new frame, and for the first time take the new version of my vette off the jackstands.
I was worried the frame dolly couldn't support the body of the car, turned out I was wrong, with those you can really move the whole car easily.
We move the front clip back in front of the new car, and I still have plenty of room to walk around.
Well, plenty if you've been like me climbing and crouching for months.
Last edited by Denpo; 06-11-2014 at 06:16 PM.
The following users liked this post:
Pegan2261 (08-10-2021)
02-28-2011, 07:38 AM
#103
Instructor

03-14-2011, 01:54 AM
#104
Drifting
Thread Starter
Member Since: Aug 2010
Location: Kanuckistan
Posts: 1,617
Received 127 Likes
on
68 Posts
2022 C3 of the Year Finalist - Modified
I didn't post update for two week. Not meaning I wasn't working in the garage, but what I did was long and not very spectacular.
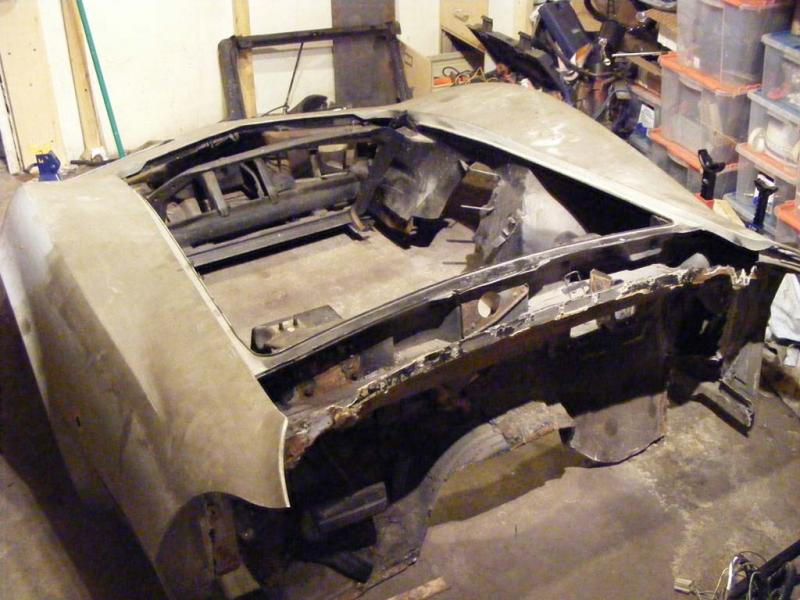
I could remove the firewall from the new front clip, it came out nicely.
I could even keep the fragile center piece. Sure it helps to have the part out of the car.
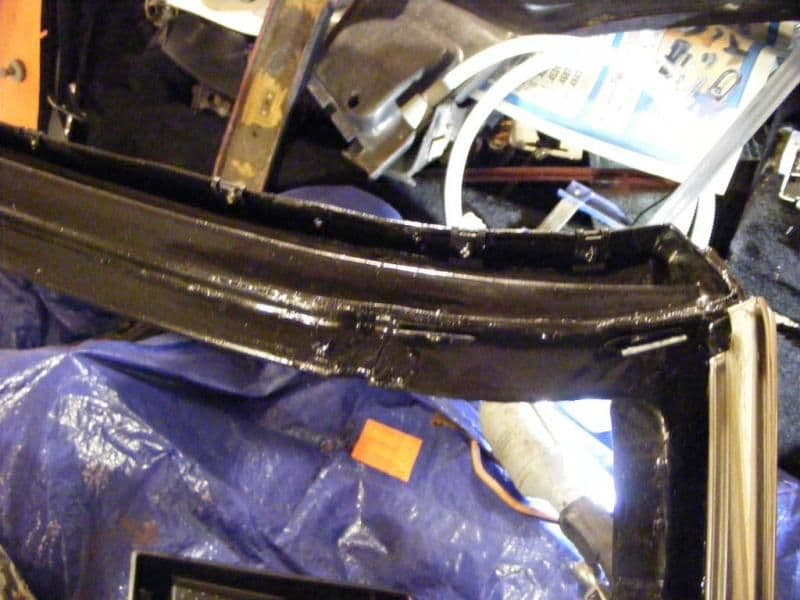
Since corvette's windshield frame seems very prone to rust I took special care of it.
It cleaned it to bare metal, hunting down rust in every crack.

Then filled all those gap and seams with welder's caulking.
Then painted and top coated it

I might have to grind some area back to metal to give windshield glue a good grip, I'm prepared, I don't mind
I also cleaned and painted all the small fasteners

The ttop can leak, the windshield frame won't give a damn.
This weekend I brough some help home, and we pushed the car back to the entrance of the garage, for a final separation.
I leveled the frame, with the help of this homemade ghetto tool:

I had four tubes going from the bottle to the #2 and #3 body mount.
A regular level was also used, but this tools was save me a lot time.
Now the frame is leveled.

We drop back it gently with some playdoo wrapped in plastic film at each body mount. We let it sit for a couple of minute then lifted it again.
I'm not sure the operation went right, when reading how playdoo have been pressed, the amount of bushing I would need seemed ridiculously low (a couple at most). I think I gonna try again, with some thicker material, like clay, and will let it sit for a shorter amount of time.
Then, here is a sneak peek of my LED taillight project.
I could remove the firewall from the new front clip, it came out nicely.
I could even keep the fragile center piece. Sure it helps to have the part out of the car.
Since corvette's windshield frame seems very prone to rust I took special care of it.
It cleaned it to bare metal, hunting down rust in every crack.
Then filled all those gap and seams with welder's caulking.
Then painted and top coated it
I might have to grind some area back to metal to give windshield glue a good grip, I'm prepared, I don't mind
I also cleaned and painted all the small fasteners
The ttop can leak, the windshield frame won't give a damn.
This weekend I brough some help home, and we pushed the car back to the entrance of the garage, for a final separation.
I leveled the frame, with the help of this homemade ghetto tool:
I had four tubes going from the bottle to the #2 and #3 body mount.
A regular level was also used, but this tools was save me a lot time.
Now the frame is leveled.
We drop back it gently with some playdoo wrapped in plastic film at each body mount. We let it sit for a couple of minute then lifted it again.
I'm not sure the operation went right, when reading how playdoo have been pressed, the amount of bushing I would need seemed ridiculously low (a couple at most). I think I gonna try again, with some thicker material, like clay, and will let it sit for a shorter amount of time.
Then, here is a sneak peek of my LED taillight project.
03-14-2011, 10:13 AM
#107
Instructor
Member Since: May 2003
Location: Cottonwood Heights UT
Posts: 119
Likes: 0
Received 0 Likes
on
0 Posts
I'm looking to see the finished product on those!
03-15-2011, 12:41 AM
#108
Drifting
Thread Starter
Member Since: Aug 2010
Location: Kanuckistan
Posts: 1,617
Received 127 Likes
on
68 Posts
2022 C3 of the Year Finalist - Modified
I love when things go as planned.
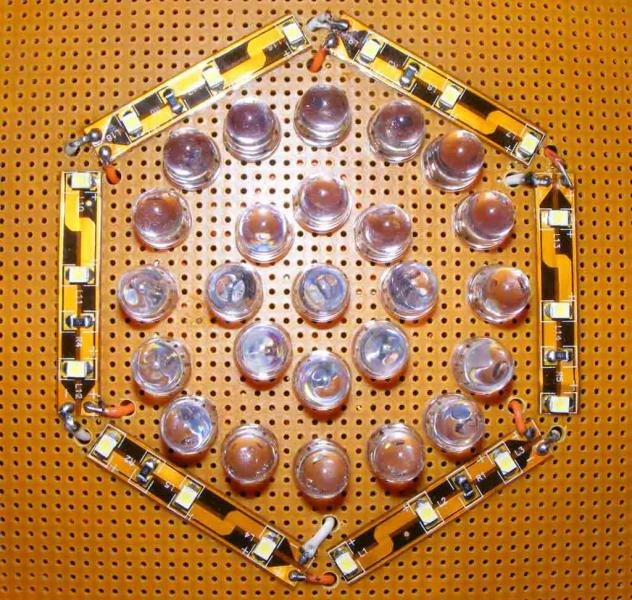
Tonight I finished welding the turn and brake light and juice it up.
The circuit is designed for 14v but only got 12v for test, it should be brighter in real life.
I tried to take picture, but it's almost impossible to get the real picture.

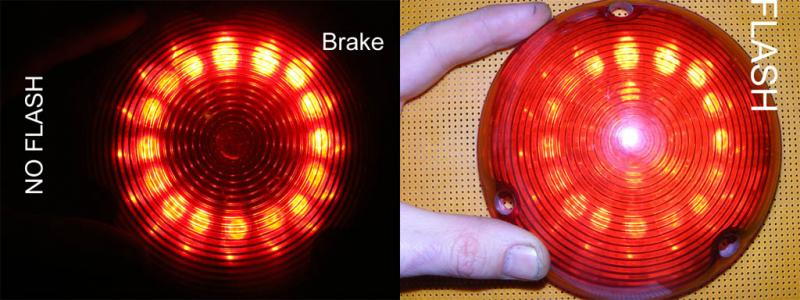
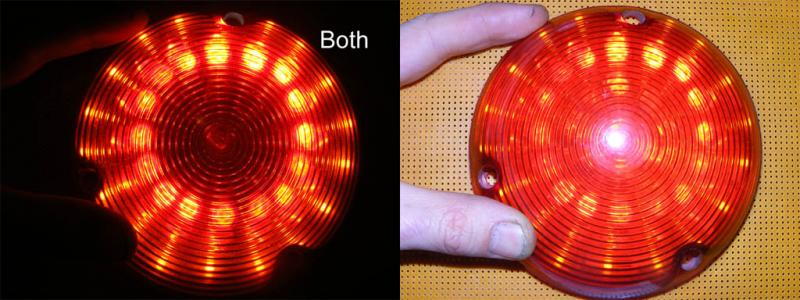
The very good news, it that white led and red led don't look the same through the red bubble lens. The outer ring is white smd led and they look orange through the lens. Orange turn signal with all red lens, I love that.
The high brightness red led look just red. I usually prefer smd led, but I gave those focuses allegedly 40000 mcd led a try.
They are extremely focused, 15� view angle. On the pictures, the red dot are not the led itself, it's the projection of it's beam on the lens.
I'm not sure it's the right choice, I'll have to try with bright ambient light. After that if I'm not convinced I'll get back to smd led for the brake and drive light also.
Tonight I finished welding the turn and brake light and juice it up.
The circuit is designed for 14v but only got 12v for test, it should be brighter in real life.
I tried to take picture, but it's almost impossible to get the real picture.
The very good news, it that white led and red led don't look the same through the red bubble lens. The outer ring is white smd led and they look orange through the lens. Orange turn signal with all red lens, I love that.
The high brightness red led look just red. I usually prefer smd led, but I gave those focuses allegedly 40000 mcd led a try.
They are extremely focused, 15� view angle. On the pictures, the red dot are not the led itself, it's the projection of it's beam on the lens.
I'm not sure it's the right choice, I'll have to try with bright ambient light. After that if I'm not convinced I'll get back to smd led for the brake and drive light also.
03-21-2011, 12:37 AM
#109
Drifting
Thread Starter
Member Since: Aug 2010
Location: Kanuckistan
Posts: 1,617
Received 127 Likes
on
68 Posts
2022 C3 of the Year Finalist - Modified
Ok guys, that will be a boring weekly update.
I'm kind of sick, maybe some half-*** flu virus.
No really knocked down, but a lot of energy drained down the fever, so I didn't feel like taking pictures, those would have been boring anyway.
This week I rebuilt my vapor canister, repacked with activated charcoal from the aquarium shop.
I've put the windshield washer and the overflow bottle back in.
I did clean and paint the inside of the front clip, what will soon be my engine bay.
I also dealt with the laborious task of cleaning all my door, hood, TA and body shims. Grind, evaporust, acid then metalized POR15.
One good news, we did test the led taillight in ambient light, and they do shine bright enough, the pattern of the flashers is just beautiful.
I'm hitting a speed bump on the body now, some parts are missing to finish the fuel line. I want the line installed before I drop the body for good. I think I'm gonna focus on the doors restoration in the meanwhile. I hope there's not ugly bad surprise awaiting in them.
All I know it that the passenger side motor was having such a hard time lifting the glass it was constantly blowing the fuse.
03-28-2011, 01:14 AM
#110
Drifting
Thread Starter
Member Since: Aug 2010
Location: Kanuckistan
Posts: 1,617
Received 127 Likes
on
68 Posts
2022 C3 of the Year Finalist - Modified
Michel came to the the rescue last week, bringing his engine hoist.
So I could put my front clip in the air, and while I was at it, I put it beside the lifted body.
I could for the first time envision what it will be once finished, and most important I'm reclaiming a fistful of square feet, I can know walk freely around my car yeah!!!!


The front clip being now virtually weightless I could put the radiator back in place, that will be one less thing off my overpopulated shelves.

So I could put my front clip in the air, and while I was at it, I put it beside the lifted body.
I could for the first time envision what it will be once finished, and most important I'm reclaiming a fistful of square feet, I can know walk freely around my car yeah!!!!
The front clip being now virtually weightless I could put the radiator back in place, that will be one less thing off my overpopulated shelves.
03-28-2011, 01:32 AM
#111
Drifting
Thread Starter
Member Since: Aug 2010
Location: Kanuckistan
Posts: 1,617
Received 127 Likes
on
68 Posts
2022 C3 of the Year Finalist - Modified
This weekend I've removed my trailing arm to put the final mod.
When installing the tires I noticed how close the parking brake bracket was from the tire. To I decided to move them.
Michel was kind enough to some MIG welding from me.


Then installed and shimmed my new rotors

One final paint job

And back in place, this time for good I hope

When installing the tires I noticed how close the parking brake bracket was from the tire. To I decided to move them.
Michel was kind enough to some MIG welding from me.
Then installed and shimmed my new rotors
One final paint job
And back in place, this time for good I hope
 03-30-2011, 02:35 PM
#113
Drifting
Thread Starter
Member Since: Aug 2010
Location: Kanuckistan
Posts: 1,617
Received 127 Likes
on
68 Posts
2022 C3 of the Year Finalist - Modified
Anyway, they are already annoyed by my read clip in the garage alley and fenders on the balcony. They harass my wife about it but never dare to tell is to me in face, those little cowards.
Body bolted for good next week.
Then come the front clip.
Add a little wiring and I'll be able to resurrect the beast's heart.
Let me know it you still got spare time in the weekend, I'll put it to good use.
See you soon.
04-01-2011, 04:22 PM
#114
 04-11-2011, 11:39 AM
#115
Drifting
Thread Starter
Member Since: Aug 2010
Location: Kanuckistan
Posts: 1,617
Received 127 Likes
on
68 Posts
2022 C3 of the Year Finalist - Modified
The motors are firebird's. I'm about to do a more in depth post about the conversion, but most of the info I used came from MC Speed's Killer light / "because vaccum sucks" page.
 Laches pas!
04-18-2011, 11:29 AM
Laches pas!
04-18-2011, 11:29 AM
#117
Drifting
Thread Starter
Member Since: Aug 2010
Location: Kanuckistan
Posts: 1,617
Received 127 Likes
on
68 Posts
2022 C3 of the Year Finalist - Modified
Ok, it's been a while since the last update.
I'm been stuck for 2 weeks waiting for my line and fitting order for my fuel lines. The package stayed stuck in the custom for 12 days
I actually had to call them to get it unstuck, they must have forgot it on some shelves.
So, in the meanwhile i decided to do some work I originally planned to be done in the "next winter phase".
I did shave all the gooey gunk off the rear wheel arches with a chisel.
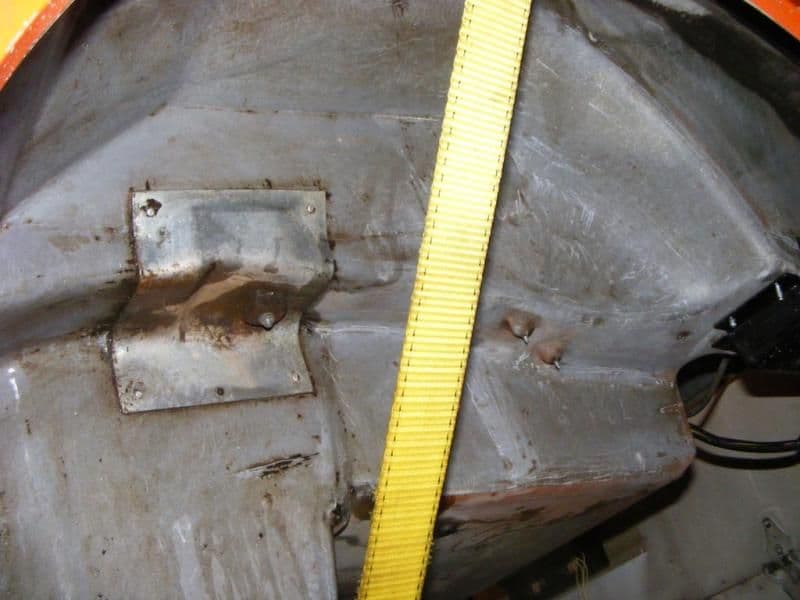
Them I restored my body mount#4 support and secured it with steel pop rivet

Ok, only one rivet so far, the deal is the body is hanging in the air, so I can't really get inside to pop the other ones, I'll get them done as soon as the body is landed.
I further cleaned the arches with paint thinner and steel wool, then applied a new asphalt/rubber coating

I did finish the spacers for my C4 blower upgrade.
I still have to get the connection sorted out, not the same connector.

and also found at the scrapyard another master cylinder reservoir, this time with the correct angle.

The line finally arrived and I could finish my gas tank overhaul.
I did open it to assert the its state. It's in absolutely pristine shape, at least something I don't have to try to salvage. I also took time to clean and paint the central area and redo the ground connection.

And here is it, installed with it's cover :

It's finally time to put the body back on once for good. I still hope starting the engine next month, as soon as the front clip is glued and all the wires/hoses sorted out. *finger crossed*
I'm been stuck for 2 weeks waiting for my line and fitting order for my fuel lines. The package stayed stuck in the custom for 12 days
I actually had to call them to get it unstuck, they must have forgot it on some shelves.
So, in the meanwhile i decided to do some work I originally planned to be done in the "next winter phase".
I did shave all the gooey gunk off the rear wheel arches with a chisel.
Them I restored my body mount#4 support and secured it with steel pop rivet
Ok, only one rivet so far, the deal is the body is hanging in the air, so I can't really get inside to pop the other ones, I'll get them done as soon as the body is landed.
I further cleaned the arches with paint thinner and steel wool, then applied a new asphalt/rubber coating
I did finish the spacers for my C4 blower upgrade.
I still have to get the connection sorted out, not the same connector.
and also found at the scrapyard another master cylinder reservoir, this time with the correct angle.
The line finally arrived and I could finish my gas tank overhaul.
I did open it to assert the its state. It's in absolutely pristine shape, at least something I don't have to try to salvage. I also took time to clean and paint the central area and redo the ground connection.
And here is it, installed with it's cover :
It's finally time to put the body back on once for good. I still hope starting the engine next month, as soon as the front clip is glued and all the wires/hoses sorted out. *finger crossed*
05-02-2011, 01:25 PM
#118
Drifting
Thread Starter
Member Since: Aug 2010
Location: Kanuckistan
Posts: 1,617
Received 127 Likes
on
68 Posts
2022 C3 of the Year Finalist - Modified
Big milestone reached this week, we finally bolted the body.
First, while I still had the body off, I did a crude wheel toe alignement using a technique I read somewhere on the forum.

Bolted my old rotor above the new ones, and ran a cord from from it. Having the cord just touching the rotor I could measure the distance between the line and the frame. Not remotely precise but enough to drive it to the alignment shop.

Then, this weekend I brought my usual weekend helpers (thanks again and again to Sovan and Jeff), and did drop the body.

It was unexpectedly simple, the frame was leveled, all we had to do it drop it and make sure all the bushing was well pressed. I had some clay prepared, but we didn't use it. It's maybe because I had long and (still) thin programmer's hand, I could touch all the bushing.
We first made sure mount #1 and #4 were put under pression, then we moved to #2 and #3. Took us maybe 4 or 5 drop-lift attempt to have it all good.


What helped us was to have 3" and 3"1/2 bolts. We first put the 3"1/2 so we could lift the body of 1/2" without removing the bolts. Once all is setup we did put the final 3" bolts. (we actually left 3"1/2 bolts on #1).
We didn't go deep in the door aligment process so far, but so far so good, the doors close nicely and the rear gap is even if still a bit large.

The reflexion on the door make it look uneven, but this is just a trick of the light.
I also started transforming my heater box. No regret cutting it, it was already totally backed anyway.

You can spot the new heater valve at the bottom. PO did remove all of this, so I had to completely rebuild it from scratch.
I was lamenting over the fact I had to fork out 50$ or so for a sheet of metal it make my new heater box when I stumbled upon a nice large piece laying in my street, leftover from a just redone neighbor's roof.
I love that.
I bought from forum member a pair of late C3 cowl screen, I already said that before, the cowl area on stock C3 is sporting a rather pathetic level of quality, with those it gets better.

Now with the body it on I can resume a lot of task, already reconnected the parking brake, the grounds and the battery connection.
I'm also moving forward with my power steering / hydroboost hoses, heater system and my pump to carb hoses. As soon as missing parts show up in my mailbox I'll post updates.
First, while I still had the body off, I did a crude wheel toe alignement using a technique I read somewhere on the forum.
Bolted my old rotor above the new ones, and ran a cord from from it. Having the cord just touching the rotor I could measure the distance between the line and the frame. Not remotely precise but enough to drive it to the alignment shop.
Then, this weekend I brought my usual weekend helpers (thanks again and again to Sovan and Jeff), and did drop the body.
It was unexpectedly simple, the frame was leveled, all we had to do it drop it and make sure all the bushing was well pressed. I had some clay prepared, but we didn't use it. It's maybe because I had long and (still) thin programmer's hand, I could touch all the bushing.
We first made sure mount #1 and #4 were put under pression, then we moved to #2 and #3. Took us maybe 4 or 5 drop-lift attempt to have it all good.
What helped us was to have 3" and 3"1/2 bolts. We first put the 3"1/2 so we could lift the body of 1/2" without removing the bolts. Once all is setup we did put the final 3" bolts. (we actually left 3"1/2 bolts on #1).
We didn't go deep in the door aligment process so far, but so far so good, the doors close nicely and the rear gap is even if still a bit large.
The reflexion on the door make it look uneven, but this is just a trick of the light.
I also started transforming my heater box. No regret cutting it, it was already totally backed anyway.
You can spot the new heater valve at the bottom. PO did remove all of this, so I had to completely rebuild it from scratch.
I was lamenting over the fact I had to fork out 50$ or so for a sheet of metal it make my new heater box when I stumbled upon a nice large piece laying in my street, leftover from a just redone neighbor's roof.
I love that.
I bought from forum member a pair of late C3 cowl screen, I already said that before, the cowl area on stock C3 is sporting a rather pathetic level of quality, with those it gets better.
Now with the body it on I can resume a lot of task, already reconnected the parking brake, the grounds and the battery connection.
I'm also moving forward with my power steering / hydroboost hoses, heater system and my pump to carb hoses. As soon as missing parts show up in my mailbox I'll post updates.
05-02-2011, 02:22 PM
#120
Instructor
Yeah, and Denis, my vette is gone so to help fill the void, let me know next time you need an extra pair of arms. I especially want to be there when it's time to turn her over!