
My '76 restoration (long post)
 11-27-2010, 05:15 PM
#41
Drifting


Thread Starter
Member Since: Aug 2010
Location: Kanuckistan
Posts: 1,617
Received 127 Likes
on
68 Posts
2022 C3 of the Year Finalist - Modified

Received some update from Gary "GTR1999" Ramadei.
He has finished preparing my rear wheel bearing assembly.
What is cool with Gary is that he sends you tons of picture of his process.
Here's for example how he reconditioned my spindle flange.


I ask him to just focus on the mechanical side of them, parallel grinding them and cleaning the outer diameter. He could have done a complete sandblast/repaint of them, but I opted out in order to same some cash.
The package is leaving his shop this monday, can't wait to start reassembling them, one of the lastest missing piece of the rolling chassis
He has finished preparing my rear wheel bearing assembly.
What is cool with Gary is that he sends you tons of picture of his process.
Here's for example how he reconditioned my spindle flange.
I ask him to just focus on the mechanical side of them, parallel grinding them and cleaning the outer diameter. He could have done a complete sandblast/repaint of them, but I opted out in order to same some cash.
The package is leaving his shop this monday, can't wait to start reassembling them, one of the lastest missing piece of the rolling chassis


 11-28-2010, 10:59 PM
#45
Drifting
Thread Starter
Member Since: Aug 2010
Location: Kanuckistan
Posts: 1,617
Received 127 Likes
on
68 Posts
2022 C3 of the Year Finalist - Modified
Hi everyone.
This weekend have been the occasion to put back a bunch on stuff.
Quiet rapidly part make their way back into the new frame, freeing some precious room, for the big operations to come.
First of all, I was sick of the picture quality I was having with this old 1.3mp canon. Rugged, it was very practical for reference picture, but for posting purpose I now switched to a more modern camera.
Ok, Fisrt I'm done cleaning the exhaust. Ceramic hitemp paint all along, and the new hiflow catalytics.


The cat are 2 1/2" model. My exhaust line it 2 1/4" but by using the pipe flange on one side and with an adapter on the other side they fit together nicely.

Then the spare tire carrier. A hefty dose of cleaning, cleaning and repainting, and voila. Not brand new but definitely good looking.


Ok, I still need the upper cover, someone on the forum told me he could get me one from a scraped '80. We'll see, in the meantime on less enormous part out of my way.
Finally as you saw, comes the fuel tank

Did the drilling to put back the support at the correct place for my tank size

I had to weld new square nut to the tank straps.
I also still need to check the internal rubber blader for leak, but given the very nice state of the send last time I checker, I'm pretty sure it is still goodL
Those element took me weeks to clean, repaint and change the decayed fasteners, but today was the rewarding moment they get back into the frame as almost complete module.

This weekend have been the occasion to put back a bunch on stuff.
Quiet rapidly part make their way back into the new frame, freeing some precious room, for the big operations to come.
First of all, I was sick of the picture quality I was having with this old 1.3mp canon. Rugged, it was very practical for reference picture, but for posting purpose I now switched to a more modern camera.
Ok, Fisrt I'm done cleaning the exhaust. Ceramic hitemp paint all along, and the new hiflow catalytics.
The cat are 2 1/2" model. My exhaust line it 2 1/4" but by using the pipe flange on one side and with an adapter on the other side they fit together nicely.
Then the spare tire carrier. A hefty dose of cleaning, cleaning and repainting, and voila. Not brand new but definitely good looking.
Ok, I still need the upper cover, someone on the forum told me he could get me one from a scraped '80. We'll see, in the meantime on less enormous part out of my way.
Finally as you saw, comes the fuel tank
Did the drilling to put back the support at the correct place for my tank size
I had to weld new square nut to the tank straps.
I also still need to check the internal rubber blader for leak, but given the very nice state of the send last time I checker, I'm pretty sure it is still goodL
Those element took me weeks to clean, repaint and change the decayed fasteners, but today was the rewarding moment they get back into the frame as almost complete module.
12-04-2010, 01:52 AM
#46
Instructor

Member Since: Oct 2010
Location: columbia south carolina
Posts: 216
Likes: 0
Received 1 Like
on
1 Post
I'd like to share with you my experience of electrolytic derusting since I'm pretty happy with it.
Here's my trailing arm treatment:

The setup is ghetto, but you don't need to have it fancy, I will eventually get disgusting anyway.
Used a old laptop charger, the positive wire is tied to the metal bar, the negative wire to the part you want to treat.
In the bucket I have water and sodium carbonate (washing soda). 1 spoon per gallon of water.
If you don't have sodium carbonate, take sodium bicabonate (backing soda) and heat it in the oven at 200� F for one hour.
Before putting it into the bath I roughly cleaned it with a wire brush. The aim was not cleaning it, rather expose as much rust as possible.
If the electrolysis can reach the inner layer of rust, the crap that sits on it will go at the same time.
12h later :

Now that's what I call gross.
I ran the setup outside, I don't think that the quantity of hydrogen released by the process is enough to be a threat, but this is not a risk I want to take.
It's almost freezing outside, and surprisingly it didn't stopped the process. So far so good, I bet in the middle of the Quebec winter I won't be the same.
Here's the arm once washed :

The picture don't do justice to the result, the clear spot on the treated side of the arm are bare metal showing up. The black is
One dried, the treated part will re-rust in a matter of hour, I wire brush it quickly and treat it with phosphoric acid spray.
The good thing with this method is that is goes everywhere, the TA has a lot of unreachable areas, like the inner of it or all the gaps between the crappy point-welds. With elecrolysis ALL the rust will be eaten.
Disclaimer: this is not a actual guide, get yourself documented, I might be wrong.
Here's my trailing arm treatment:
The setup is ghetto, but you don't need to have it fancy, I will eventually get disgusting anyway.
Used a old laptop charger, the positive wire is tied to the metal bar, the negative wire to the part you want to treat.
In the bucket I have water and sodium carbonate (washing soda). 1 spoon per gallon of water.
If you don't have sodium carbonate, take sodium bicabonate (backing soda) and heat it in the oven at 200� F for one hour.
Before putting it into the bath I roughly cleaned it with a wire brush. The aim was not cleaning it, rather expose as much rust as possible.
If the electrolysis can reach the inner layer of rust, the crap that sits on it will go at the same time.
12h later :
Now that's what I call gross.
I ran the setup outside, I don't think that the quantity of hydrogen released by the process is enough to be a threat, but this is not a risk I want to take.
It's almost freezing outside, and surprisingly it didn't stopped the process. So far so good, I bet in the middle of the Quebec winter I won't be the same.
Here's the arm once washed :
The picture don't do justice to the result, the clear spot on the treated side of the arm are bare metal showing up. The black is
One dried, the treated part will re-rust in a matter of hour, I wire brush it quickly and treat it with phosphoric acid spray.
The good thing with this method is that is goes everywhere, the TA has a lot of unreachable areas, like the inner of it or all the gaps between the crappy point-welds. With elecrolysis ALL the rust will be eaten.
Disclaimer: this is not a actual guide, get yourself documented, I might be wrong.
i use the same exact method on old motorcycle fuel tanks. works great, just watch out for sparks as hydrogen gas is produced during this process.
The following users liked this post:
n110ag (10-23-2016)
12-07-2010, 02:10 AM
#47
Drifting
Thread Starter
Member Since: Aug 2010
Location: Kanuckistan
Posts: 1,617
Received 127 Likes
on
68 Posts
2022 C3 of the Year Finalist - Modified
phew, it's been a hell of a week end, in the best way possible.
Now It's done, I can tell the story I've been holding for some time.
This week end I went picking a new birdcage I've been given.
I will use it to retreive part to fix mine.
Not a typo, given, for free. By Tom "Santa" Sarno, my own great Samaritan

Looks like Tom appreciated the good use of the frame I bought him month ago, and contacted me with this awesome offer.
But for those that read my thread, you know that my garage is tiny, with on entrance blocked by the body hanging in the air sitting on wood beams.
So I had to devise a plan.
Saturday I bought three 2x10x12 at home depot and built a giant dolly, using the car dolly as bases. It has to be low, my garage has a steep enough ramp to cause problems.
It's basically a giant frame, with to higher beams on the middle for the rocker channels to sit on.

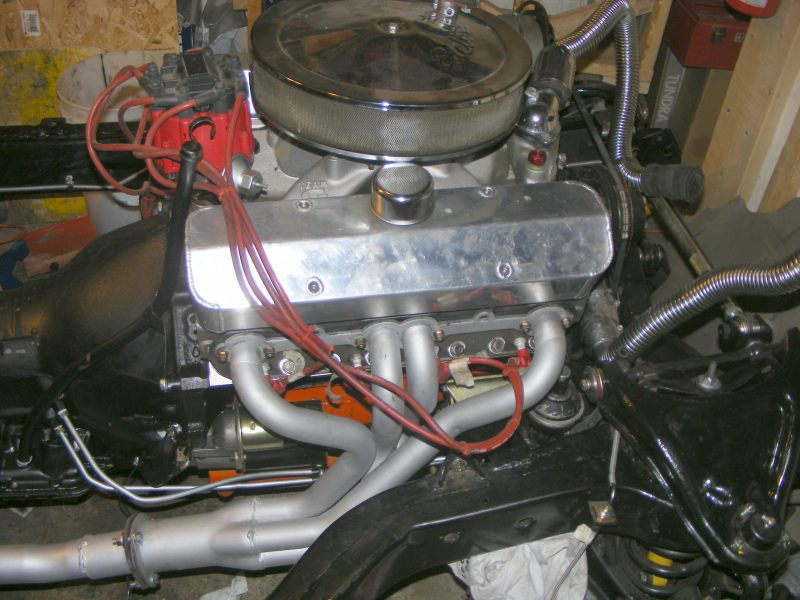
Here seen for inside the engine bay

I'll try to get a better overall view of the body dolly.
I reused the support beam to finish it. No room for wood surplus.
So the plan was to go get the new birdcage, then pull the old body out of the garage


Once out, we put it aside and the pavement (now neighbors KNOWS i'm crazy).
Then slowly back up the trailer down the garage with the car.

Then once the trailer coasted to the new frame, with all the friend I could bring, when dropped it on the new frame.
Then put back the old body at his place.
Close de garage door, et voila!

Enough for today, more details about the new birdcage condition soon (in two world : absolutely gorgeous).
Now It's done, I can tell the story I've been holding for some time.
This week end I went picking a new birdcage I've been given.
I will use it to retreive part to fix mine.
Not a typo, given, for free. By Tom "Santa" Sarno, my own great Samaritan
Looks like Tom appreciated the good use of the frame I bought him month ago, and contacted me with this awesome offer.
But for those that read my thread, you know that my garage is tiny, with on entrance blocked by the body hanging in the air sitting on wood beams.
So I had to devise a plan.
Saturday I bought three 2x10x12 at home depot and built a giant dolly, using the car dolly as bases. It has to be low, my garage has a steep enough ramp to cause problems.
It's basically a giant frame, with to higher beams on the middle for the rocker channels to sit on.
Here seen for inside the engine bay
I'll try to get a better overall view of the body dolly.
I reused the support beam to finish it. No room for wood surplus.
So the plan was to go get the new birdcage, then pull the old body out of the garage
Once out, we put it aside and the pavement (now neighbors KNOWS i'm crazy).
Then slowly back up the trailer down the garage with the car.
Then once the trailer coasted to the new frame, with all the friend I could bring, when dropped it on the new frame.
Then put back the old body at his place.
Close de garage door, et voila!
Enough for today, more details about the new birdcage condition soon (in two world : absolutely gorgeous).
Last edited by Denpo; 01-27-2013 at 04:25 PM.
12-07-2010, 11:28 AM
#49
Racer
Member Since: Jul 2010
Location: Manahawkin NJ
Posts: 261
Likes: 0
Received 0 Likes
on
0 Posts
Denis,
Good luck with it. I know that the back half will actually get back on the road some day.
When I told everyone that I was giving it away and driving 4.5 hours each way to help get it to you, they thought I was nuts. I didn't even tell them about the 3 hours at NJDMV to get the title straight for customs. (you did pay my gas and tolls plus the DMV fees) I was told to smash it with the backhoe and spend Sunday watching the game.
I have a motto in life, 'good things happen to good people'.
Special thanks go to my friend Dan who used his truck and trailer to get it to Albany. Even though he is a Ford guy he is all right in my book. P.S. he is looking for a 390 FE aluminum intake if anyone has one the are using as a door stop.
Hope to meet up with you when you are done so I can get a pic of my car and yours together again since they sat in the same garage for years and consider each other brothers
Tom
12-07-2010, 10:06 PM
#50
Burning Brakes

12-14-2010, 12:31 AM
#51
Drifting
Thread Starter
Member Since: Aug 2010
Location: Kanuckistan
Posts: 1,617
Received 127 Likes
on
68 Posts
2022 C3 of the Year Finalist - Modified
To continue my ode to my generous donor, I'm posting picture of the good shape of my new birdcage.
The one I'm replacing had so much hidden rust and nasty patches it gave me nightmares. This one on the opposite make me all warm in the pants everytime I inspect it.
The windshield is almost rust free, just a tiny patch of surface rust on the lower corner.

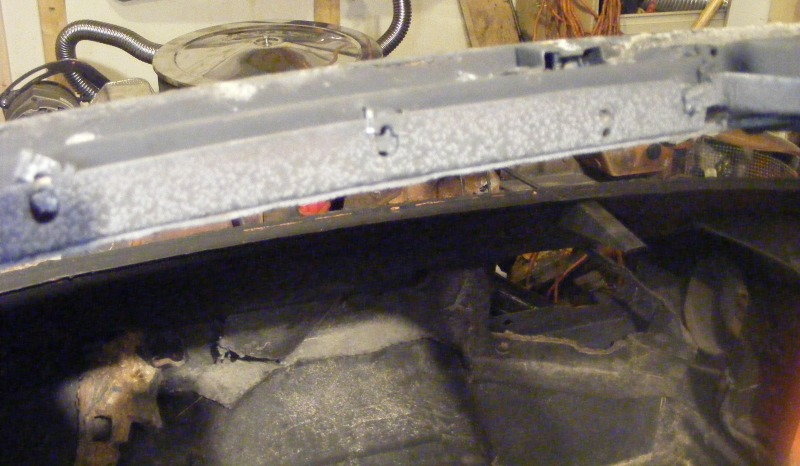
The orange spot you can see it factory paint showing up through the black coating.
Look what I found under the dash

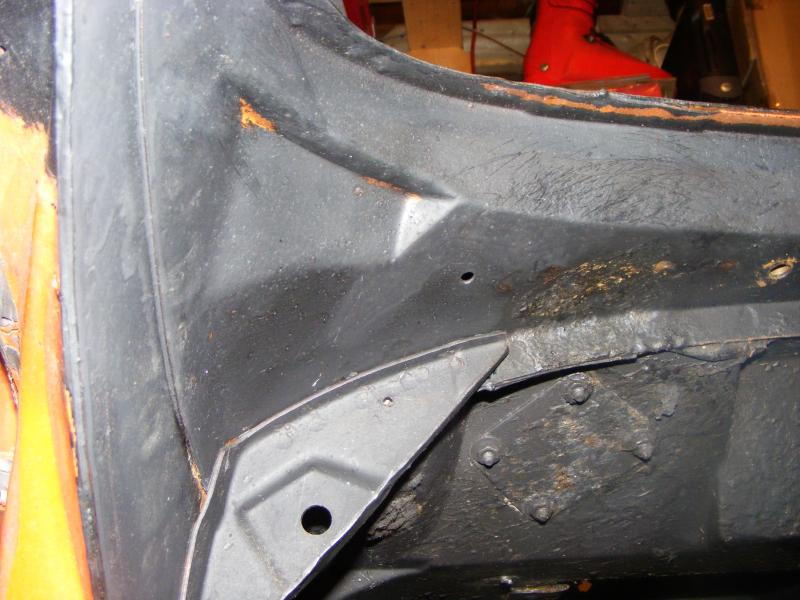
Same thing for the body mount, a little of rust, a lot of sand.


The only place that ever saw water are front of floorpan and exterior side seatbelt reinforcement pocket.


Water must have stayed inside the car for too long, but only inside, because as you can see the underside of the floor pan is still sporting large area of unpainted, unrusted steel area.
Sand, no rust, this can is a desert can for sure, I didn't know you could have steel that old without even a little surface rust.
Guys I'm so happy to start rebuilt my vette around such a piece of clean metal. Sometimes I put my finger in small recesses only to feel the cold and hard surface of unharmed metal. Damn, my pants again.
The one I'm replacing had so much hidden rust and nasty patches it gave me nightmares. This one on the opposite make me all warm in the pants everytime I inspect it.
The windshield is almost rust free, just a tiny patch of surface rust on the lower corner.
The orange spot you can see it factory paint showing up through the black coating.
Look what I found under the dash
Same thing for the body mount, a little of rust, a lot of sand.
The only place that ever saw water are front of floorpan and exterior side seatbelt reinforcement pocket.
Water must have stayed inside the car for too long, but only inside, because as you can see the underside of the floor pan is still sporting large area of unpainted, unrusted steel area.
Sand, no rust, this can is a desert can for sure, I didn't know you could have steel that old without even a little surface rust.
Guys I'm so happy to start rebuilt my vette around such a piece of clean metal. Sometimes I put my finger in small recesses only to feel the cold and hard surface of unharmed metal. Damn, my pants again.
12-14-2010, 01:09 AM
#52
Pro

I'm very happy for you, it looks like your good to go on that birdcage. Also what a great story of people going out of there way to help others. A big thumbs up to all involved
Merry Christmas
ikwhite
Merry Christmas
ikwhite
12-14-2010, 01:11 PM
#53
Racer
Member Since: Jul 2010
Location: Manahawkin NJ
Posts: 261
Likes: 0
Received 0 Likes
on
0 Posts
Denis,
The water damage was form only six moths of sitting outside stripped to the point that you received it. That body had spent it life garaged. It shows just how fast the metal rots when exposed to the elements.
If that body makes you feel warm and fuzzy, you would enjoy caressing the underside of my "good" 74. It has never been left outside for more then a night and only if it was nice.
12-14-2010, 01:58 PM
#55
Drifting
Thread Starter
Member Since: Aug 2010
Location: Kanuckistan
Posts: 1,617
Received 127 Likes
on
68 Posts
2022 C3 of the Year Finalist - Modified
You gonna cry when you see the reinforcement I made for the rusted out seatbeat anchor point with my hobby arc welder

I'll post pictures this evening if I get the courage.
12-16-2010, 01:04 AM
#56
Drifting
Thread Starter
Member Since: Aug 2010
Location: Kanuckistan
Posts: 1,617
Received 127 Likes
on
68 Posts
2022 C3 of the Year Finalist - Modified
Ask say before, my exterior seat belt are rusted out.
So I cut all the bad parts :


And reused the square nut to make new reinforcement.
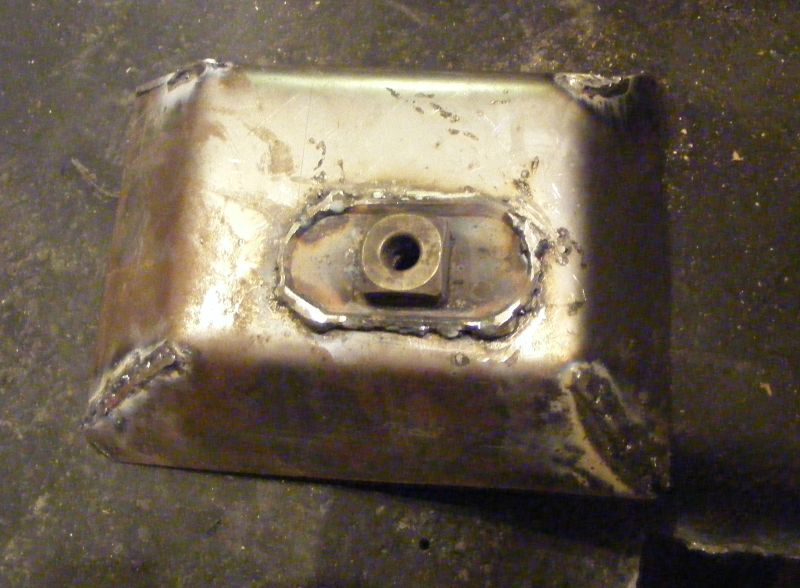

I can hear you from here yelling : "you suck at welding"
I know, I know.
But it's hard to do nice welds with an arc welder. However it's sturdy enough to break way after the floor pans themselves.
So I cut all the bad parts :
And reused the square nut to make new reinforcement.
I can hear you from here yelling : "you suck at welding"
I know, I know.
But it's hard to do nice welds with an arc welder. However it's sturdy enough to break way after the floor pans themselves.
12-29-2010, 02:10 PM
#57
Drifting
Thread Starter
Member Since: Aug 2010
Location: Kanuckistan
Posts: 1,617
Received 127 Likes
on
68 Posts
2022 C3 of the Year Finalist - Modified
Haven't been updating this thread for a while.
Thing is, the more I post the less I work on the Vette.
These lastest weeks have been really busy ones.
First I had to do big preparation work, consisting of a complete cleaning of the underside of the birdcage and the firewall. brush off rust, treat and paint.
Then I was set for the reassembly
The floorpan :
As said before, the floorpan of this new birdcage did rust from the inside, down to a point the front part of the driver side is paper thin. So with some paint remover and a sharp chisel I removed all the thick paint and the rust stuck under. Wire-brushed the remaining surface rust and treated it. Topped that with some fiberglass. Not the prettiest fix, but now my floorpan is firm and sturdy.

The wiper compartiment.
One thing that surprised me the most when looking for a C3 to buy was the poor job done here. You could tell the guy on the assembly line just had a couple of minutes to do the job. I removed the wiper support and clean off all the black goo I could. Some paint over that and It already looks cleaner.


Sure I could have sanded all the hard beads, but time is scarce and I want to work fast.
Need to cut some corners from the show car path.
Then I put back together the wiper assembly after some good cleaning and painting.
I took care to reapply generous beads of sealant.
Wiper motor.
I opened it, clean the gears and repacked it with a good load of white lithium grease. The plastic cover was broken in two. I put the pieces back together with tape of the front, then I filled the crack from behind with some bumper repair epoxy, the one that stays soft. Once cured and the tape removed, you could barely see the repairs and the piece feel strong. Here again, some cleaning and painting.

Pedal setup.
Cleaning, prep'ing, Por15ing.... as usual

Same thing for the hood latches :

I've put the rear compartiment door, temporary, until I received that insulation kit that took so long to get shipped.
I also reinstalled the rear wiring, including the central storage light and the electrical component hidden here.

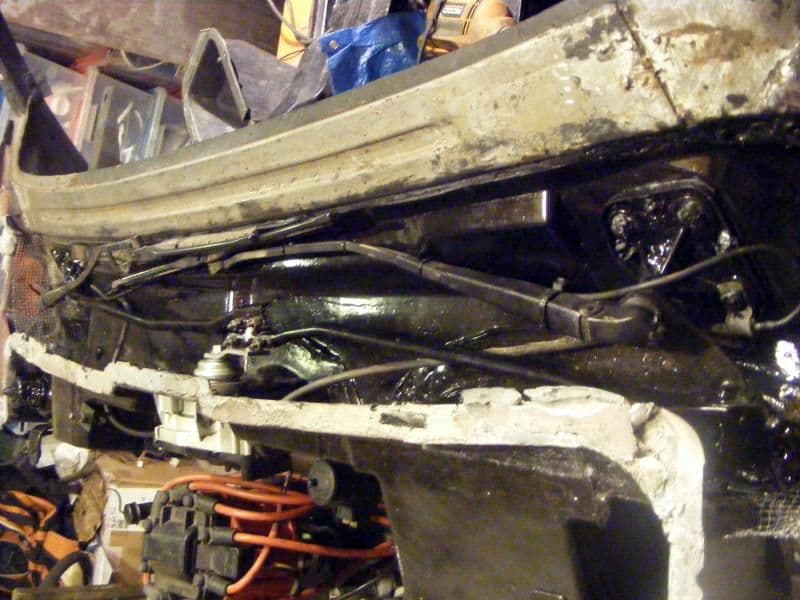
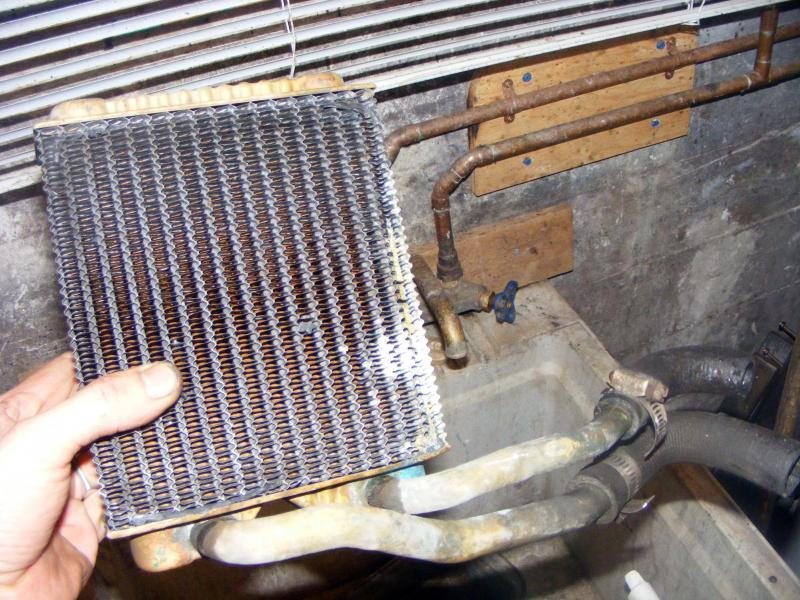
I dismantled the heater system today just to discover another Bubba disaster.
The core was leaking bad and as a repair, the PO just simply cut whole system, yes, I didn't cut those hoses, that's how it came out of the car. I now know why the heating didn't work. NIB core found on ebay for 25$, on its way.
Ok, back to work, I was to pack as much work I can in those holiday Santa brought me.
I'm still confident I can have the whole interior put back before I get back to work. *finger crossed*
Thing is, the more I post the less I work on the Vette.
These lastest weeks have been really busy ones.
First I had to do big preparation work, consisting of a complete cleaning of the underside of the birdcage and the firewall. brush off rust, treat and paint.
Then I was set for the reassembly
The floorpan :
As said before, the floorpan of this new birdcage did rust from the inside, down to a point the front part of the driver side is paper thin. So with some paint remover and a sharp chisel I removed all the thick paint and the rust stuck under. Wire-brushed the remaining surface rust and treated it. Topped that with some fiberglass. Not the prettiest fix, but now my floorpan is firm and sturdy.
The wiper compartiment.
One thing that surprised me the most when looking for a C3 to buy was the poor job done here. You could tell the guy on the assembly line just had a couple of minutes to do the job. I removed the wiper support and clean off all the black goo I could. Some paint over that and It already looks cleaner.
Sure I could have sanded all the hard beads, but time is scarce and I want to work fast.
Need to cut some corners from the show car path.
Then I put back together the wiper assembly after some good cleaning and painting.
I took care to reapply generous beads of sealant.
Wiper motor.
I opened it, clean the gears and repacked it with a good load of white lithium grease. The plastic cover was broken in two. I put the pieces back together with tape of the front, then I filled the crack from behind with some bumper repair epoxy, the one that stays soft. Once cured and the tape removed, you could barely see the repairs and the piece feel strong. Here again, some cleaning and painting.
Pedal setup.
Cleaning, prep'ing, Por15ing.... as usual
Same thing for the hood latches :
I've put the rear compartiment door, temporary, until I received that insulation kit that took so long to get shipped.
I also reinstalled the rear wiring, including the central storage light and the electrical component hidden here.
I dismantled the heater system today just to discover another Bubba disaster.
The core was leaking bad and as a repair, the PO just simply cut whole system, yes, I didn't cut those hoses, that's how it came out of the car. I now know why the heating didn't work. NIB core found on ebay for 25$, on its way.
Ok, back to work, I was to pack as much work I can in those holiday Santa brought me.
I'm still confident I can have the whole interior put back before I get back to work. *finger crossed*
Last edited by Denpo; 12-29-2010 at 09:58 PM. Reason: Typo and bad grammar
01-01-2011, 07:44 PM
#59
Drifting
Thread Starter
Member Since: Aug 2010
Location: Kanuckistan
Posts: 1,617
Received 127 Likes
on
68 Posts
2022 C3 of the Year Finalist - Modified
Trying hard to keep the pace.
Yesterday the interior harness landed in its new home. It's just a layout phase, I'll have to remove the duct to reput the new heater core anyway. Last summer I already did a complete interior tear down and wiring review, so everything was already labeled and I start to get familiar with it.

Madvette's insulation kit finally arrived yesterday. So today I took care of the rear of the interior.

Then put the new carpet. The kit was actually inside the car when I bought it but the PO didn't installed it.
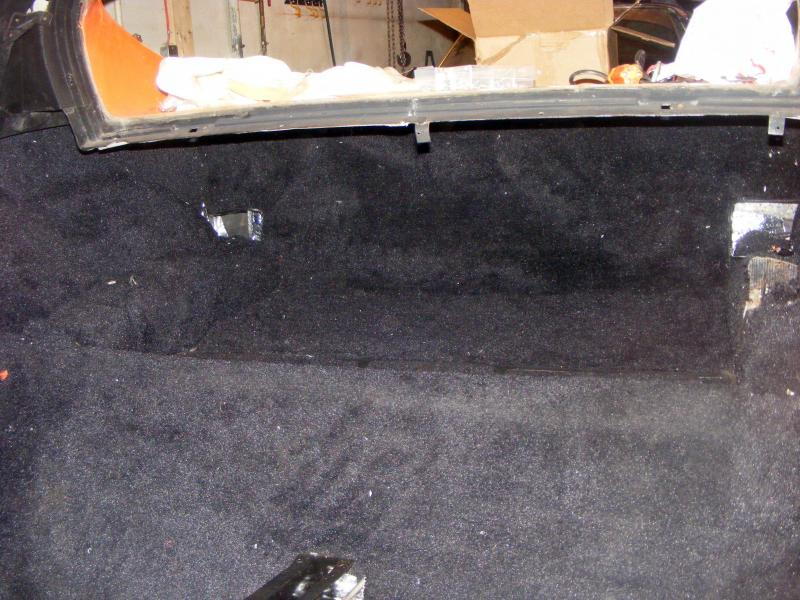
I won't have to deal with those rear storage box door anymore. Ok, I will put new door frame at some point, but that's a detail.

At least something finalized, something I can call done.
Feels good and rewarding.
I'm just a grade 8 bolt away from installing the F-body seat belts I bought last year.
Yesterday the interior harness landed in its new home. It's just a layout phase, I'll have to remove the duct to reput the new heater core anyway. Last summer I already did a complete interior tear down and wiring review, so everything was already labeled and I start to get familiar with it.
Madvette's insulation kit finally arrived yesterday. So today I took care of the rear of the interior.
Then put the new carpet. The kit was actually inside the car when I bought it but the PO didn't installed it.
I won't have to deal with those rear storage box door anymore. Ok, I will put new door frame at some point, but that's a detail.
At least something finalized, something I can call done.
Feels good and rewarding.
I'm just a grade 8 bolt away from installing the F-body seat belts I bought last year.
01-07-2011, 12:29 AM
#60
Drifting
Thread Starter
Member Since: Aug 2010
Location: Kanuckistan
Posts: 1,617
Received 127 Likes
on
68 Posts
2022 C3 of the Year Finalist - Modified
It's been a week I order my new heater core I need to complete my interior rebuild. The tracking # still tells me the package is waiting a the departure post office. Not sure it's still actually there, but it's still a bad sign.
Damn, I hate to be stuck.
So this leaves me with time to take extra care of some "details" and to document my work.
I decided to refresh the air inlet door mechanism.
My main concern was the foam seal, or what remained of it.


I the looked for a replacement material that would be inexpensive and durable, and I came up with some flat silicone mat sold has cookie sheet. If it's tough enough to withstand oven heat, It's tough enough for me.
Once cleaned and painted, the door panel is riveted on the sheet. Too bad it's not black, but hey, it's at well hidden part, who cares.

Then I did a rough 3/8 cut

After a bunch of fitting test I came up with this cut

To have a freely moving door while having optimal sealing. I admit, It could have been to little bit better of the back corners

A little shoot of silicon oil on the rubber membrane, and voila.

Good to go for a decade or two.
Damn, I hate to be stuck.
So this leaves me with time to take extra care of some "details" and to document my work.
I decided to refresh the air inlet door mechanism.
My main concern was the foam seal, or what remained of it.
I the looked for a replacement material that would be inexpensive and durable, and I came up with some flat silicone mat sold has cookie sheet. If it's tough enough to withstand oven heat, It's tough enough for me.
Once cleaned and painted, the door panel is riveted on the sheet. Too bad it's not black, but hey, it's at well hidden part, who cares.
Then I did a rough 3/8 cut
After a bunch of fitting test I came up with this cut
To have a freely moving door while having optimal sealing. I admit, It could have been to little bit better of the back corners
A little shoot of silicon oil on the rubber membrane, and voila.
Good to go for a decade or two.