
My '76 restoration (long post)


 03-31-2014, 08:38 AM
#423
Drifting


Thread Starter
Member Since: Aug 2010
Location: Kanuckistan
Posts: 1,617
Received 127 Likes
on
68 Posts
2022 C3 of the Year Finalist - Modified

 .
.It's still open because the shape transition is more complicated, steeper curves, smaller contact area.
So I wanted to first try on the simple area.
Now the easy part is done I've gathered enough know-how to tackle this this week.

 03-31-2014, 12:32 PM
#426
Cruising


Member Since: Mar 2014
Posts: 11
Likes: 0
Received 0 Likes
on
0 Posts
Wow! Impressive "restoration" artists here on this forum!
Very impressed by all the threads of sharing!
I can see myslef referring to this hyperlinked thread quite often in the future!
Thank you very much for sharing!
Here was my big restoration project on a motor home (beginning on picture # 14) Not as intensive as yours but fun none the less!
"A picture is worth a 1000 words"
https://picasaweb.google.com/1085301...etwoodJamboree
03-31-2014, 01:00 PM
#427
Drifting
Thread Starter
Member Since: Aug 2010
Location: Kanuckistan
Posts: 1,617
Received 127 Likes
on
68 Posts
2022 C3 of the Year Finalist - Modified
Wow! Impressive "restoration" artists here on this forum!
Very impressed by all the threads of sharing!
I can see myslef referring to this hyperlinked thread quite often in the future!
Thank you very much for sharing!
Here was my big restoration project on a motor home (beginning on picture # 14) Not as intensive as yours but fun none the less!
"A picture is worth a 1000 words"
https://picasaweb.google.com/1085301...etwoodJamboree
Very impressed by all the threads of sharing!
I can see myslef referring to this hyperlinked thread quite often in the future!
Thank you very much for sharing!
Here was my big restoration project on a motor home (beginning on picture # 14) Not as intensive as yours but fun none the less!
"A picture is worth a 1000 words"
https://picasaweb.google.com/1085301...etwoodJamboree
This is a win-win situation, I get the uplifting comments, you get the pictures and information.
Right now I'm all pumped up, the flares give very good return for the work invested, but when you're stuck on some not so sexy tasks like fighting the wiring harness gremlins, it's good to remember there's people are watching.
By the way you make me think about updating my first page index, haven't done it for a while.
I'm at work right now and don't seem to be able to browse picasa URLs, will have a look at it tonight.
04-01-2014, 09:19 PM
#428
Drifting
Thread Starter
Member Since: Aug 2010
Location: Kanuckistan
Posts: 1,617
Received 127 Likes
on
68 Posts
2022 C3 of the Year Finalist - Modified
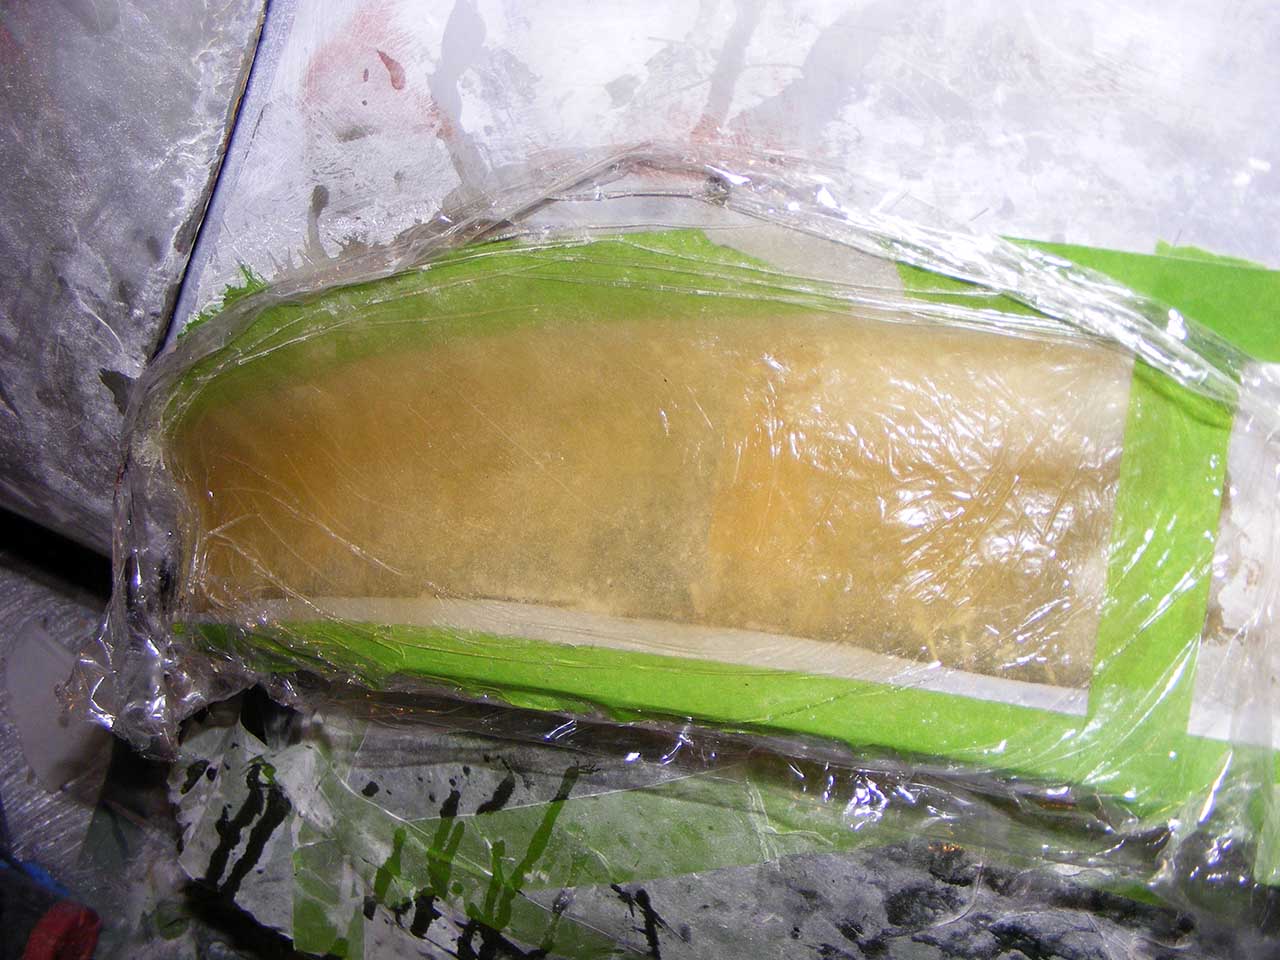
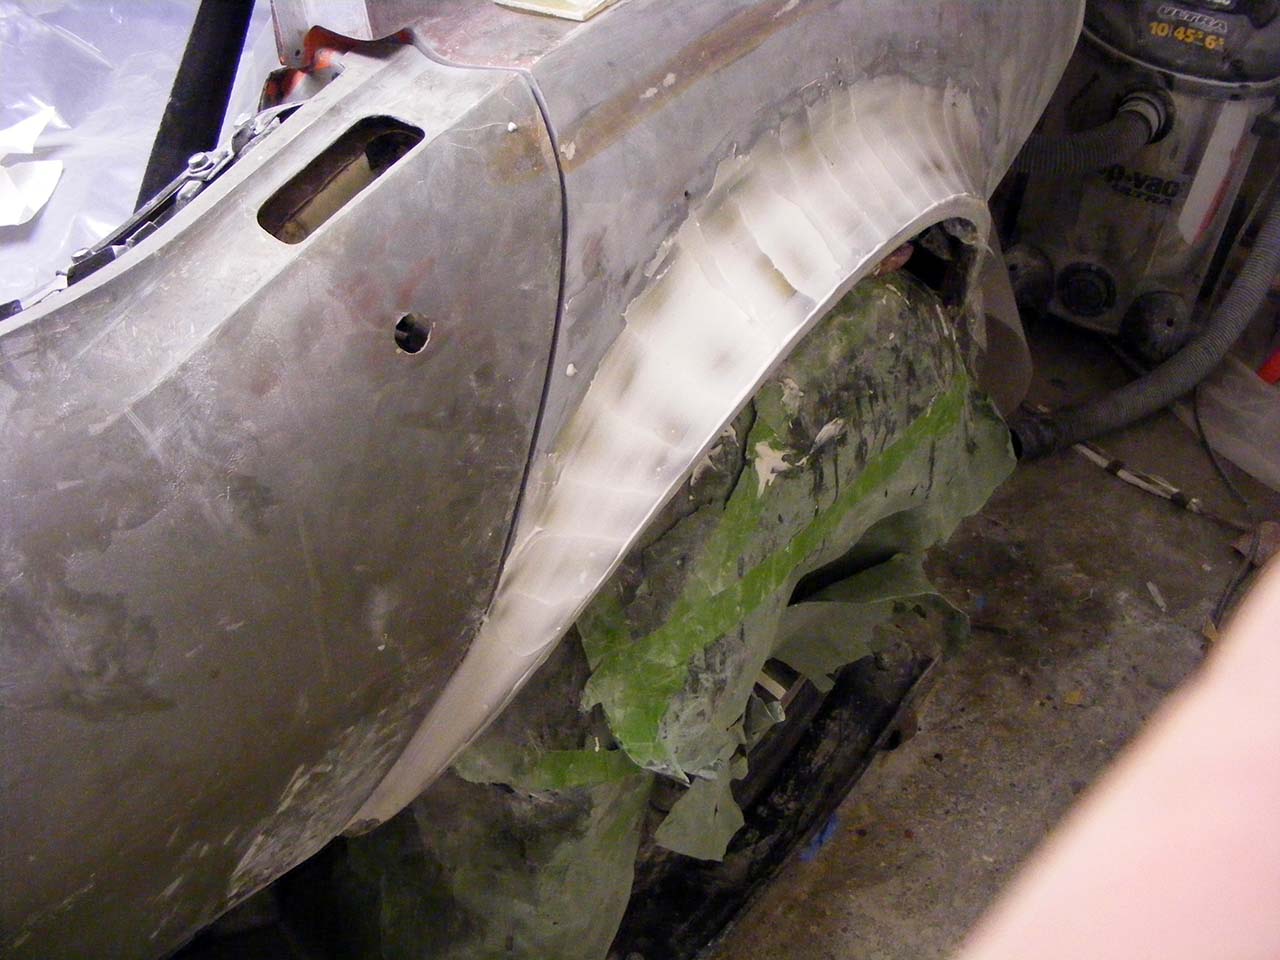
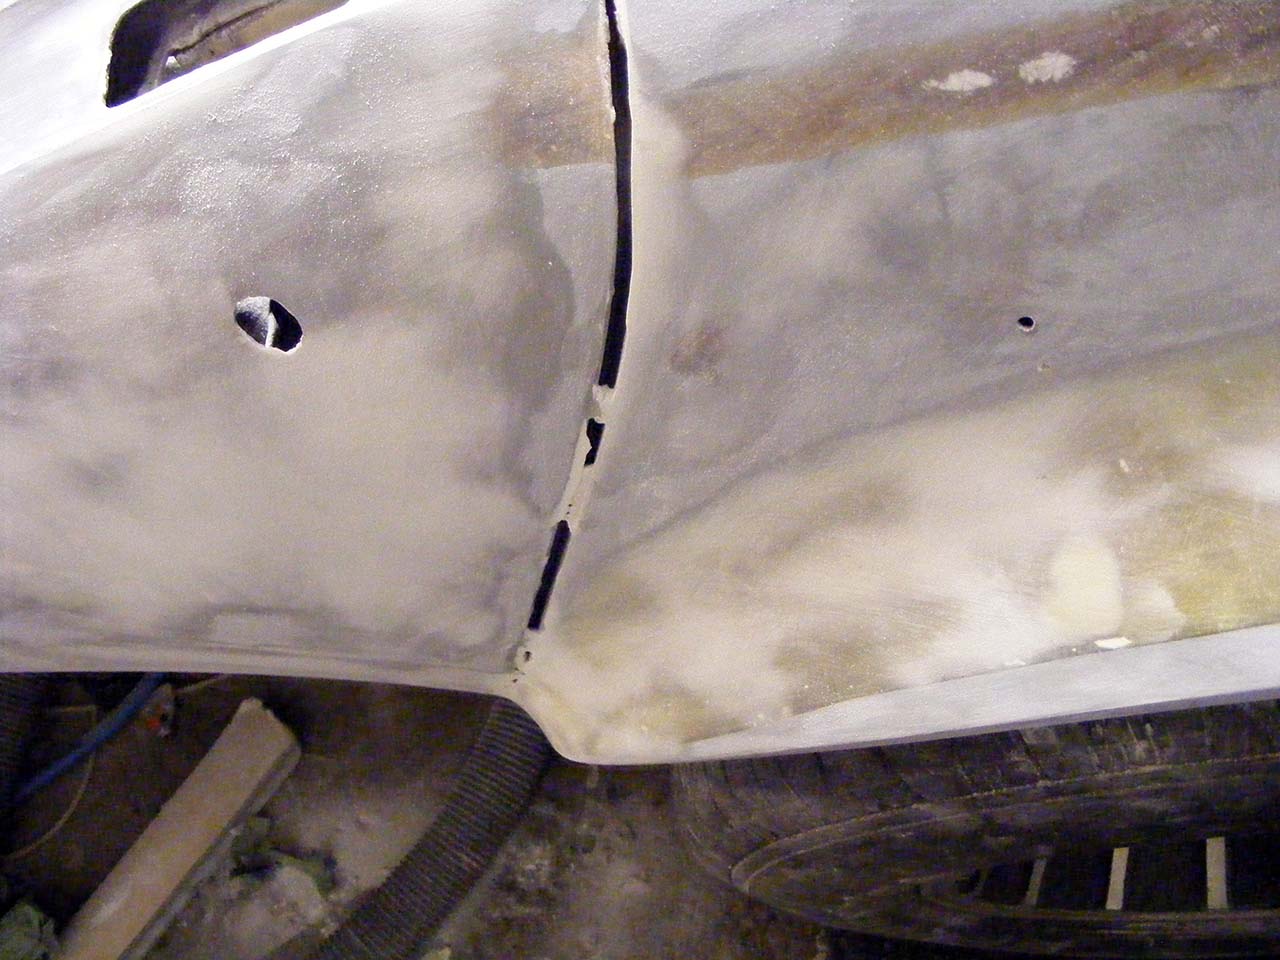
That's how I cleaned the front area.
Still reluctant to cut further, it could be structural and it won't show anyway.
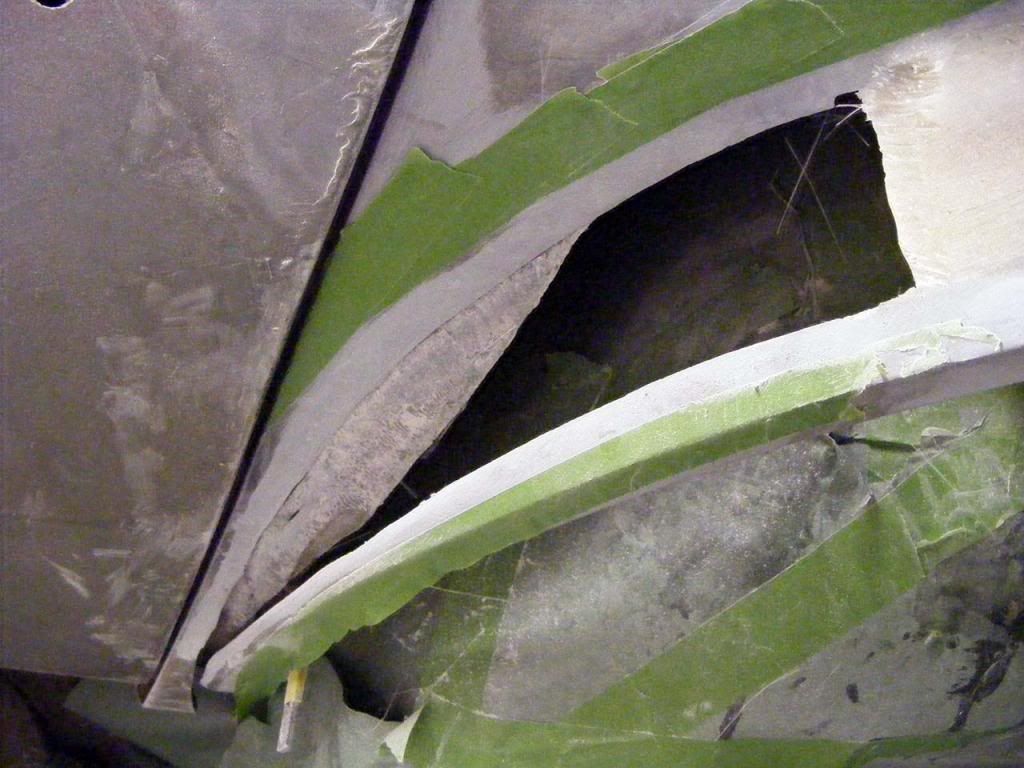
I decided to bridge the area with fiberglass mat this time, it was okay, but I think I'll stick to fabric for now on when it's about bridging.
This time I put the bridge on the exterior of the body.
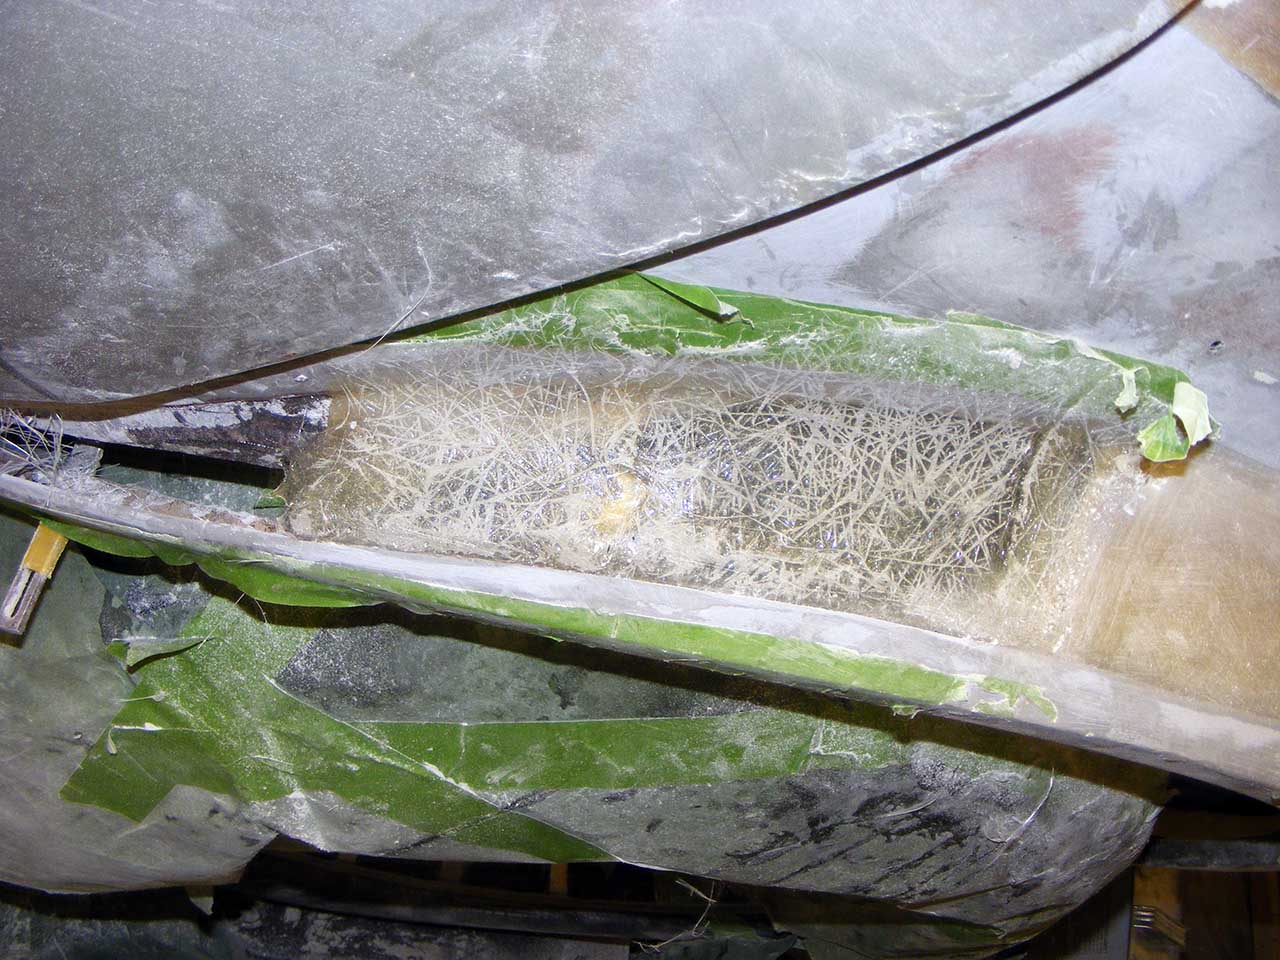
Here's my poor's man vaccum setup.
Saran wrap!
It allows me to force the fiber to stick at stiffer angle and use muuuch less resin. You push the bubbles out and nothing can come back in.
You can massage it while it cure with your bare hand, and it never stick.
In the middle of the fender I'm laying 7 layers of mat with barely any bubbles despite what the picture seems to show.
I've been using this trick since I started the fenders, but I wanted to wait before boasting about this.
However now I can say I love it, makes the job easier and less messy.
I started mudding the back area.
Still reluctant to cut further, it could be structural and it won't show anyway.
I decided to bridge the area with fiberglass mat this time, it was okay, but I think I'll stick to fabric for now on when it's about bridging.
This time I put the bridge on the exterior of the body.
Here's my poor's man vaccum setup.
Saran wrap!
It allows me to force the fiber to stick at stiffer angle and use muuuch less resin. You push the bubbles out and nothing can come back in.
You can massage it while it cure with your bare hand, and it never stick.
In the middle of the fender I'm laying 7 layers of mat with barely any bubbles despite what the picture seems to show.
I've been using this trick since I started the fenders, but I wanted to wait before boasting about this.
However now I can say I love it, makes the job easier and less messy.
I started mudding the back area.
Last edited by Denpo; 08-18-2017 at 10:22 PM.
04-01-2014, 11:07 PM
#429
Drifting
Member Since: Jun 2011
Location: iowa city iowa
Posts: 1,540
Received 253 Likes
on
139 Posts
2020 Corvette of the Year Finalist (appearance mods)
C3 of Year Winner (appearance mods) 2019
Neat trick with the servant wrap. I have never tried that but it looks like a great idea.
Last edited by brent319; 04-02-2014 at 08:46 AM. Reason: Auto correct failure.
 04-04-2014, 12:07 AM
#431
Drifting
Thread Starter
Member Since: Aug 2010
Location: Kanuckistan
Posts: 1,617
Received 127 Likes
on
68 Posts
2022 C3 of the Year Finalist - Modified
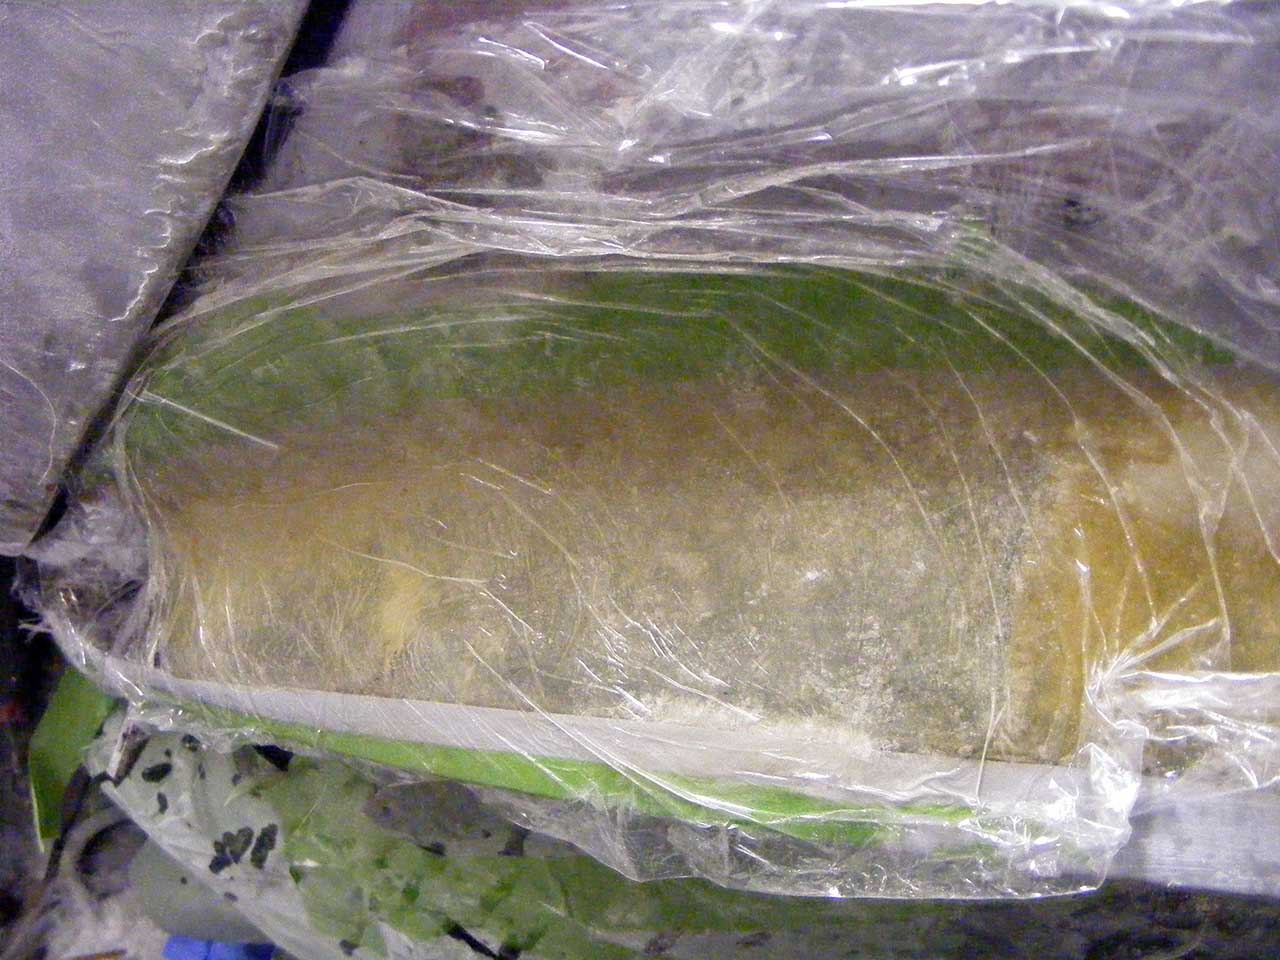
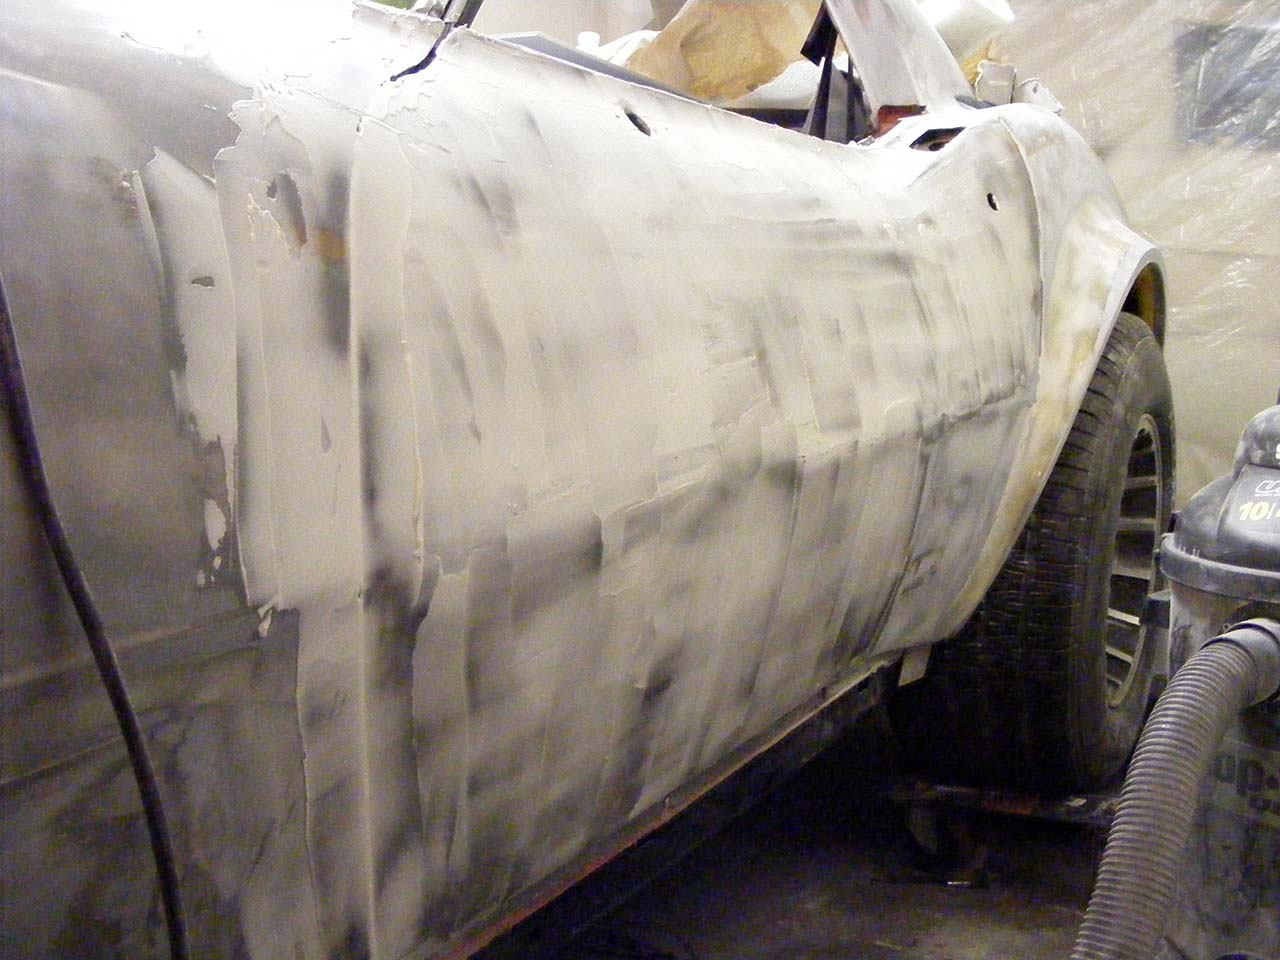
After a quick sanding, I glassed again (4 layers)
FYI this how it looks unwrapped.
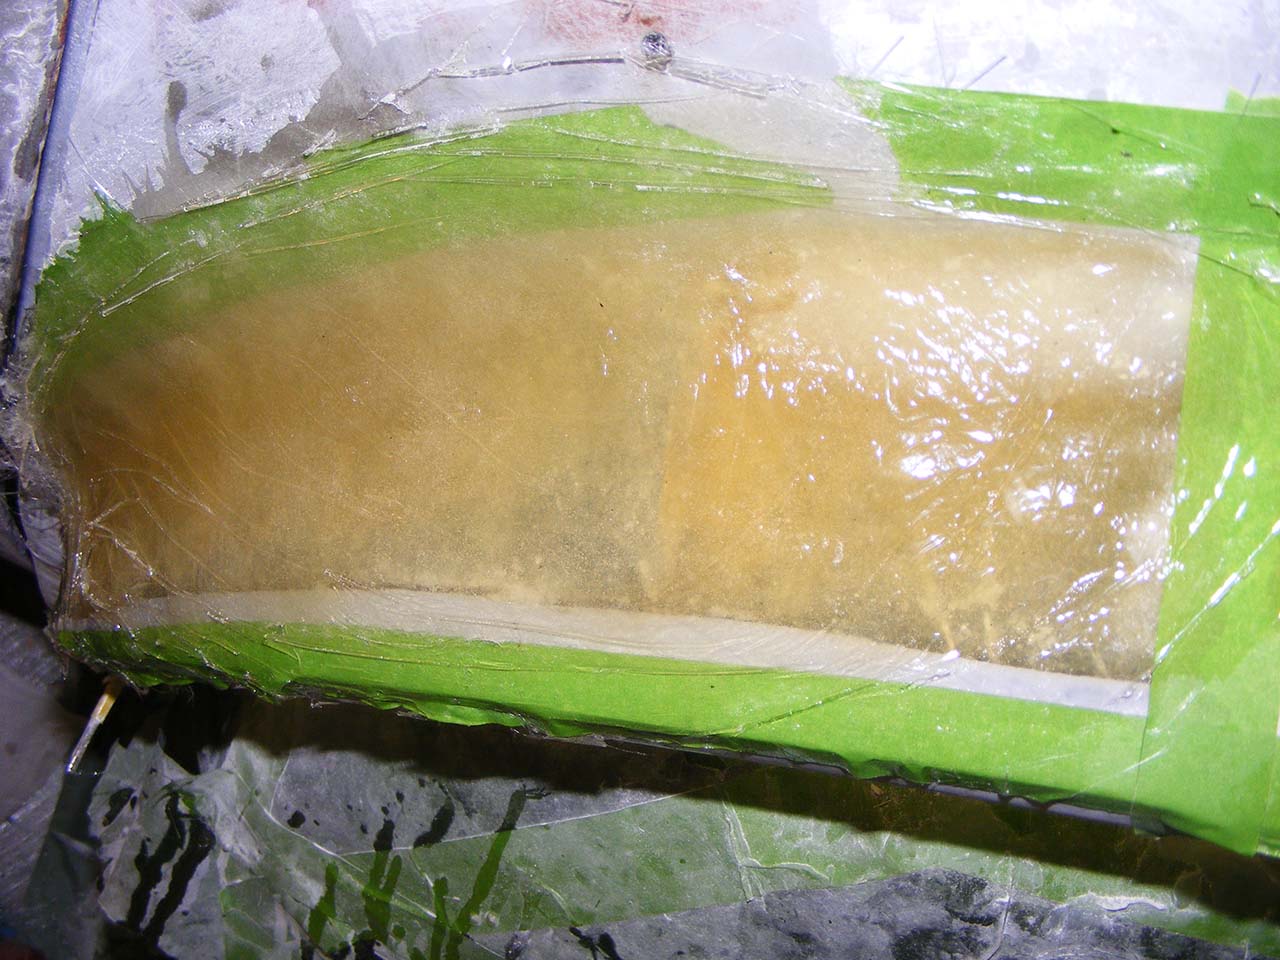
After sanding the second layer down, I stumbled on what I think was my problem in this area.
It's actually pretty stupid for me not realizing it.
I just CAN'T use the lip's slope in this particular area, simply because in the unflared stock situation, in this area, the fender lips is blending straight into the body. Doh.
I make a exagerated highlight for you to see.
Red is was I have now
Blue is where I'm heading.
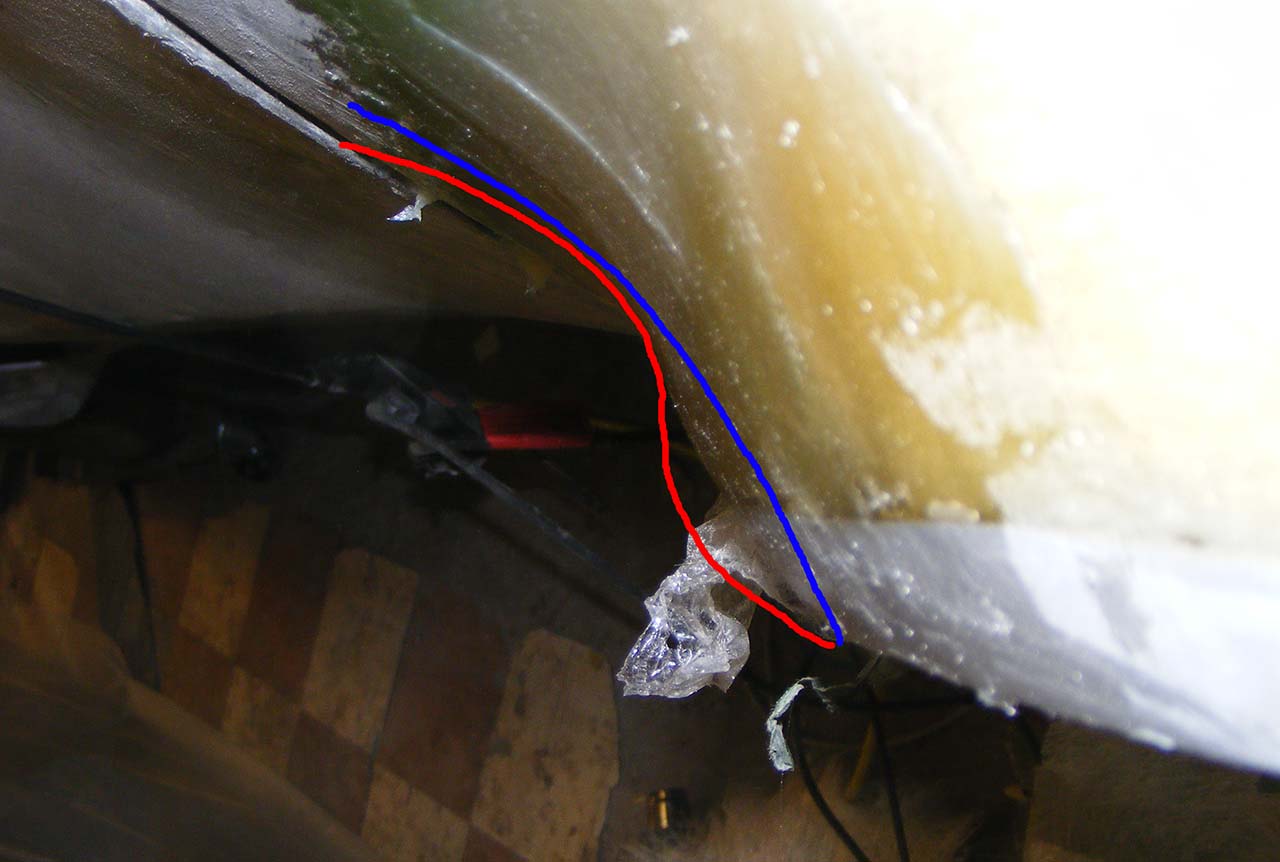
Here the flash reveal the bump, even with the filler on the back, it still shows.
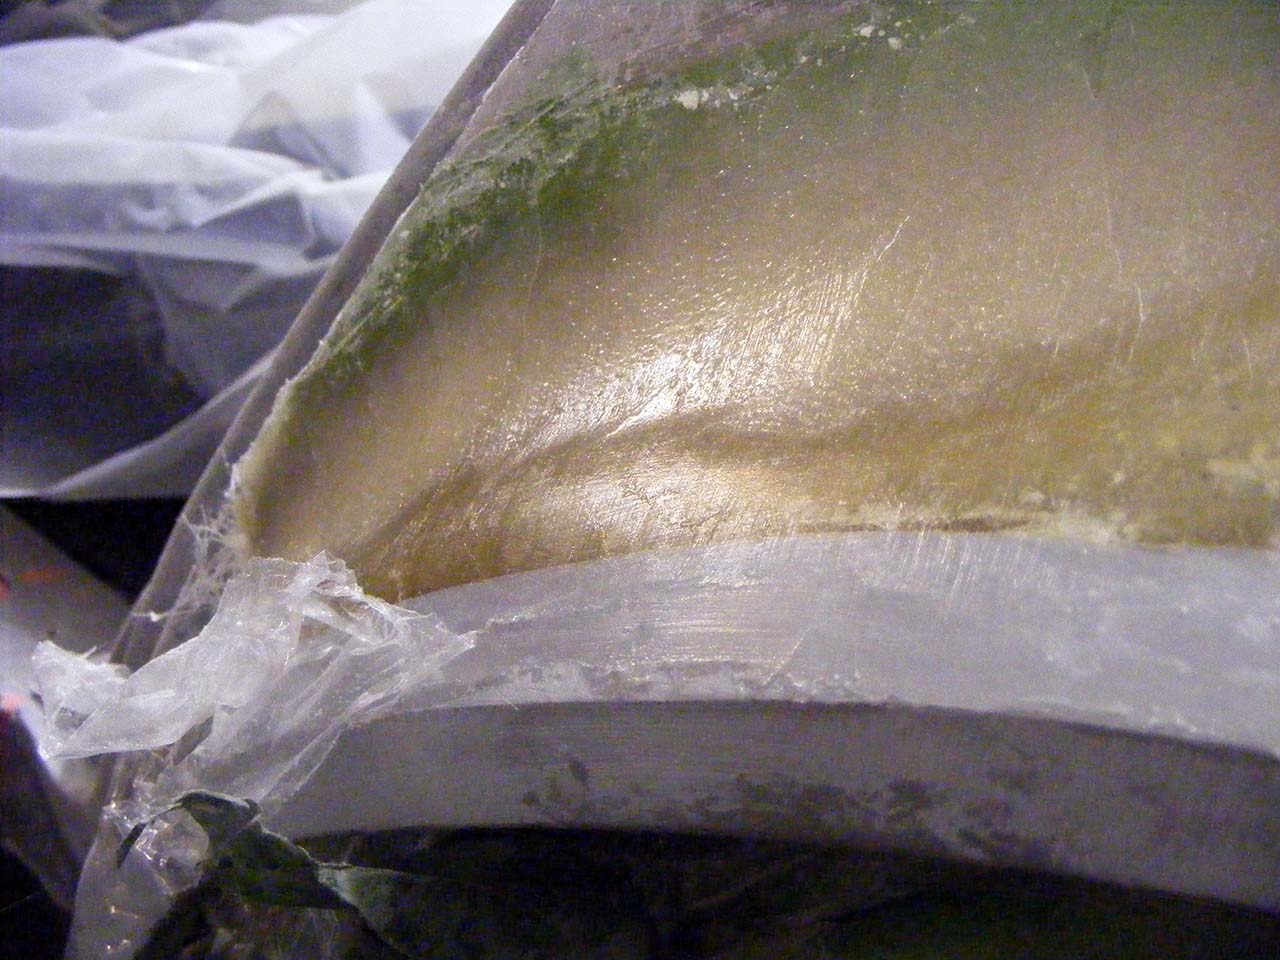
So I've put 4 layers on the backside, on the outside (the wrap is visible in the above picture), and tomorrow I'll sand my way into this, and reach the perfect tangent.
Hopefully the other side will take a fraction of the time spend on this side.
FYI this how it looks unwrapped.
After sanding the second layer down, I stumbled on what I think was my problem in this area.
It's actually pretty stupid for me not realizing it.
I just CAN'T use the lip's slope in this particular area, simply because in the unflared stock situation, in this area, the fender lips is blending straight into the body. Doh.
I make a exagerated highlight for you to see.
Red is was I have now
Blue is where I'm heading.
Here the flash reveal the bump, even with the filler on the back, it still shows.
So I've put 4 layers on the backside, on the outside (the wrap is visible in the above picture), and tomorrow I'll sand my way into this, and reach the perfect tangent.
Hopefully the other side will take a fraction of the time spend on this side.
Last edited by Denpo; 08-18-2017 at 10:23 PM.
04-12-2014, 04:10 AM
#432
Drifting
Thread Starter
Member Since: Aug 2010
Location: Kanuckistan
Posts: 1,617
Received 127 Likes
on
68 Posts
2022 C3 of the Year Finalist - Modified
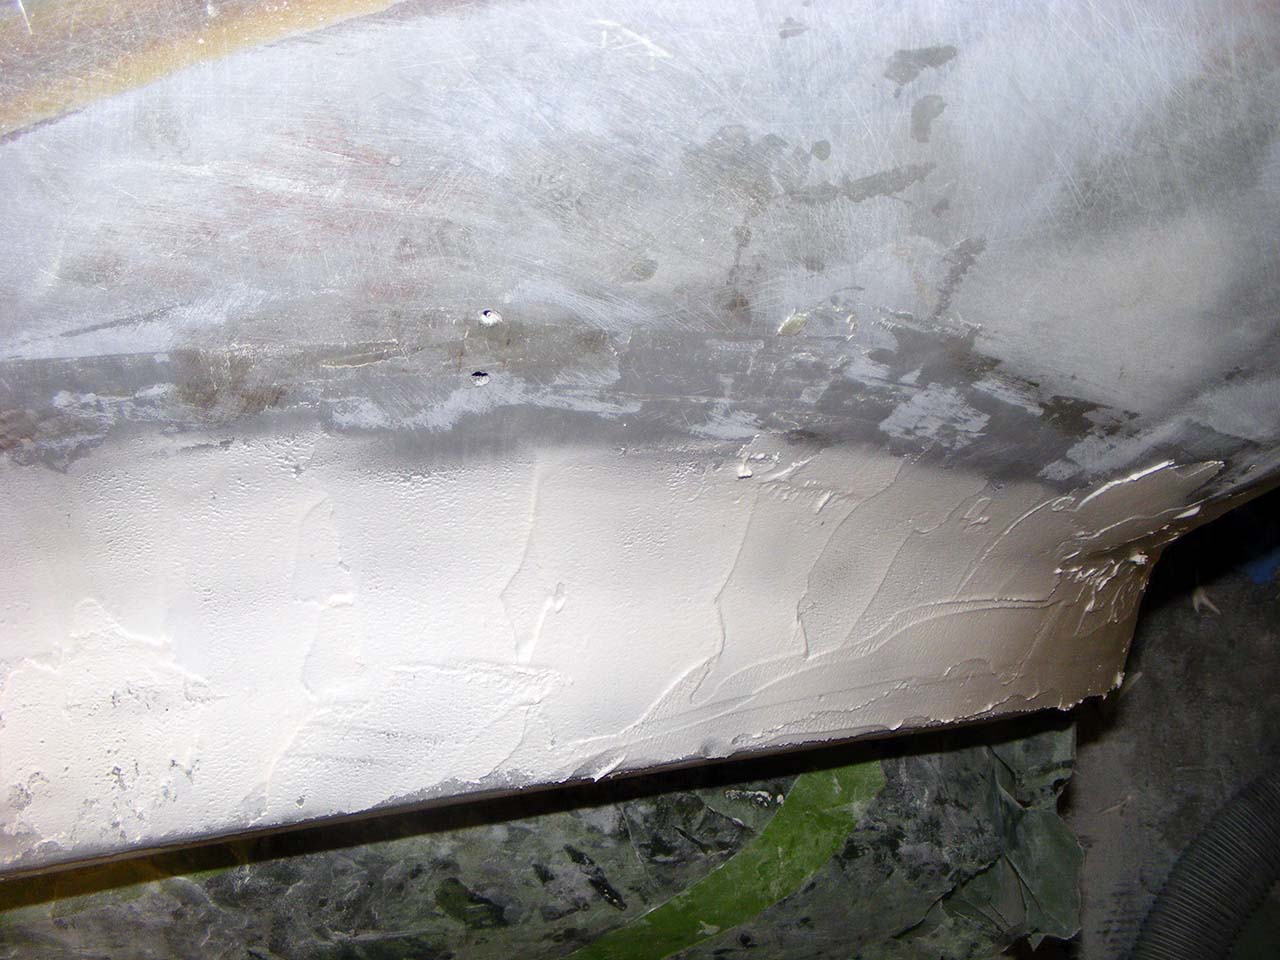
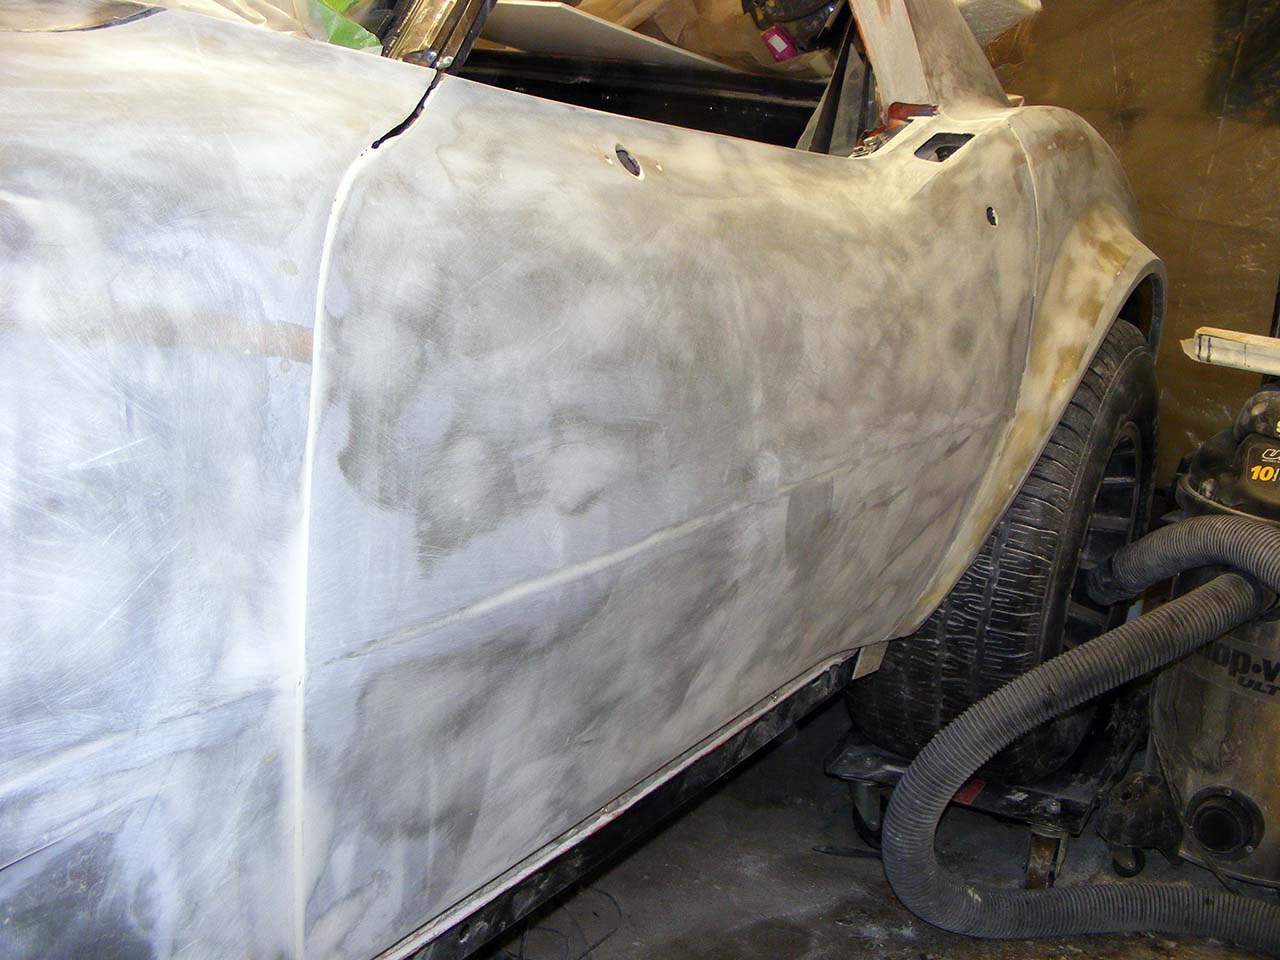
I'm getting closer....
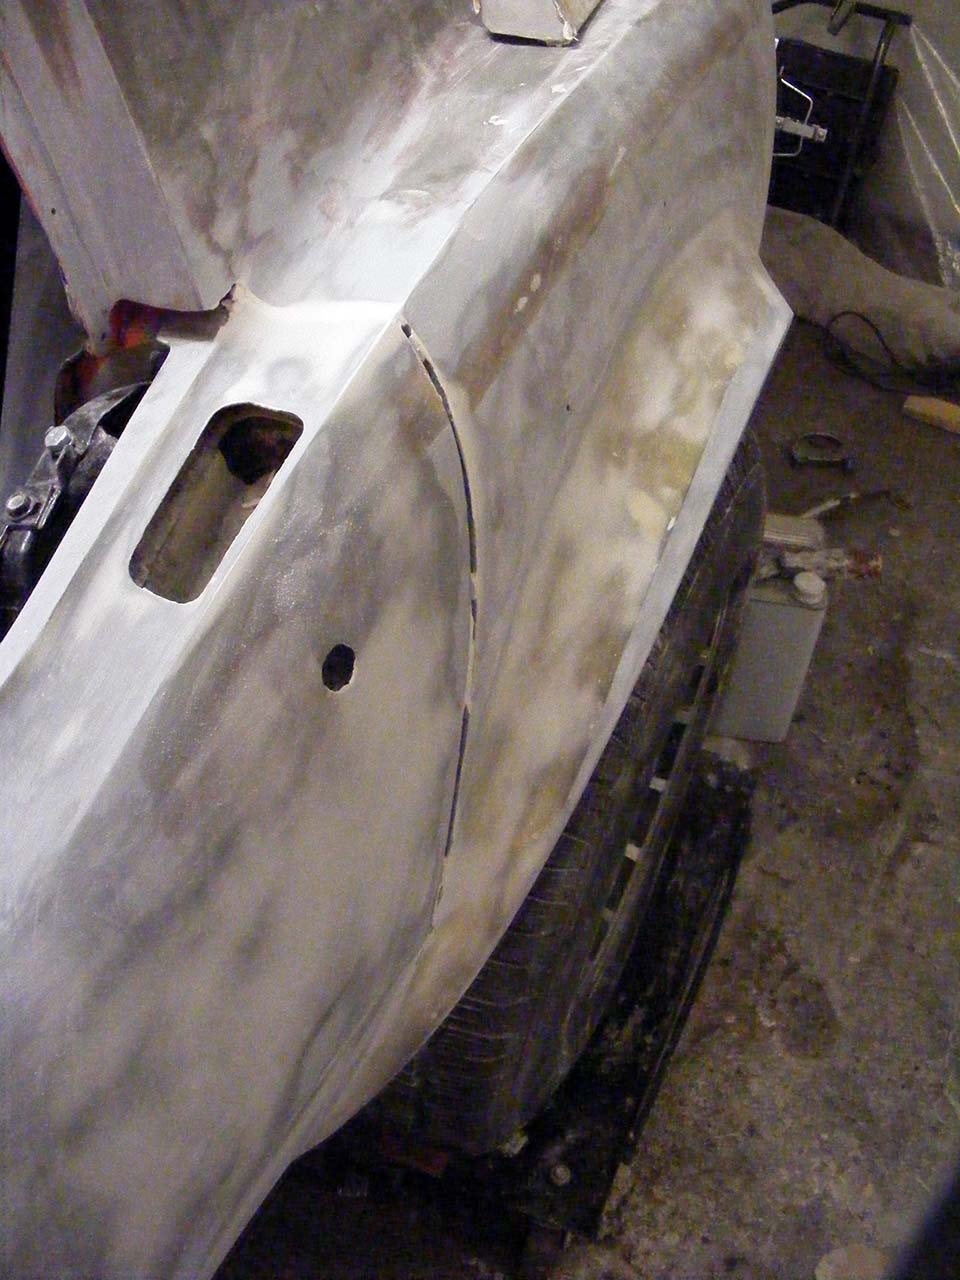
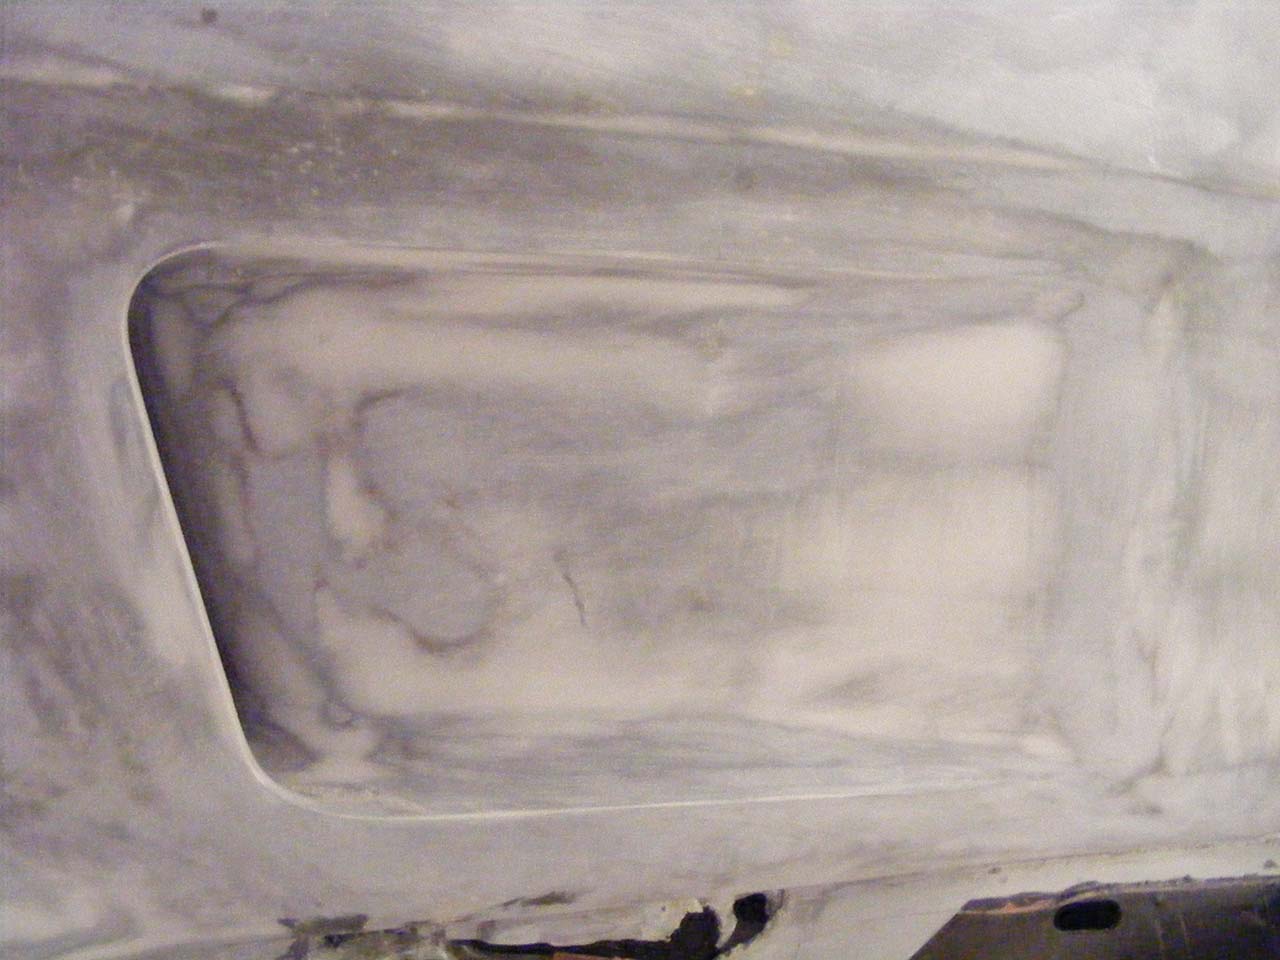
The fiberglass piece in the pic is the replacement for the quarter panel mounting tab, which was broken.
I had a lot more sanding than expected, simply because I blindly followed the lip curvature. I won't get caught on the other side.

It's gonna be soon time to glass shut the door and make final body/door shape matching.
The fiberglass piece in the pic is the replacement for the quarter panel mounting tab, which was broken.
I had a lot more sanding than expected, simply because I blindly followed the lip curvature. I won't get caught on the other side.
It's gonna be soon time to glass shut the door and make final body/door shape matching.
Last edited by Denpo; 08-18-2017 at 10:24 PM.
05-01-2014, 08:26 PM
#435
Burning Brakes


Thanks for sharing your adventure, I scanned each reply quickly. While you have the differential out, if already thought of it great. Install a drain plug for the differential for future draining of the fluid instead of sucking it out.
05-05-2014, 10:36 AM
#437
Drifting
Thread Starter
Member Since: Aug 2010
Location: Kanuckistan
Posts: 1,617
Received 127 Likes
on
68 Posts
2022 C3 of the Year Finalist - Modified
Boy, the diff have been back in for years, I guess you haven't read the thread entirely.
Still thanks for bringing in advices.

I've been in Florida for 2 weeks for vacations, hence the hiatus.
As soon as I recover for the 4500 miles I drove during this time, I'm back in the garage.
Right now the door is fused to the body and I'm doing the final mudding to the driver flare.
05-13-2014, 12:22 PM
#438
Drifting
Thread Starter
Member Since: Aug 2010
Location: Kanuckistan
Posts: 1,617
Received 127 Likes
on
68 Posts
2022 C3 of the Year Finalist - Modified
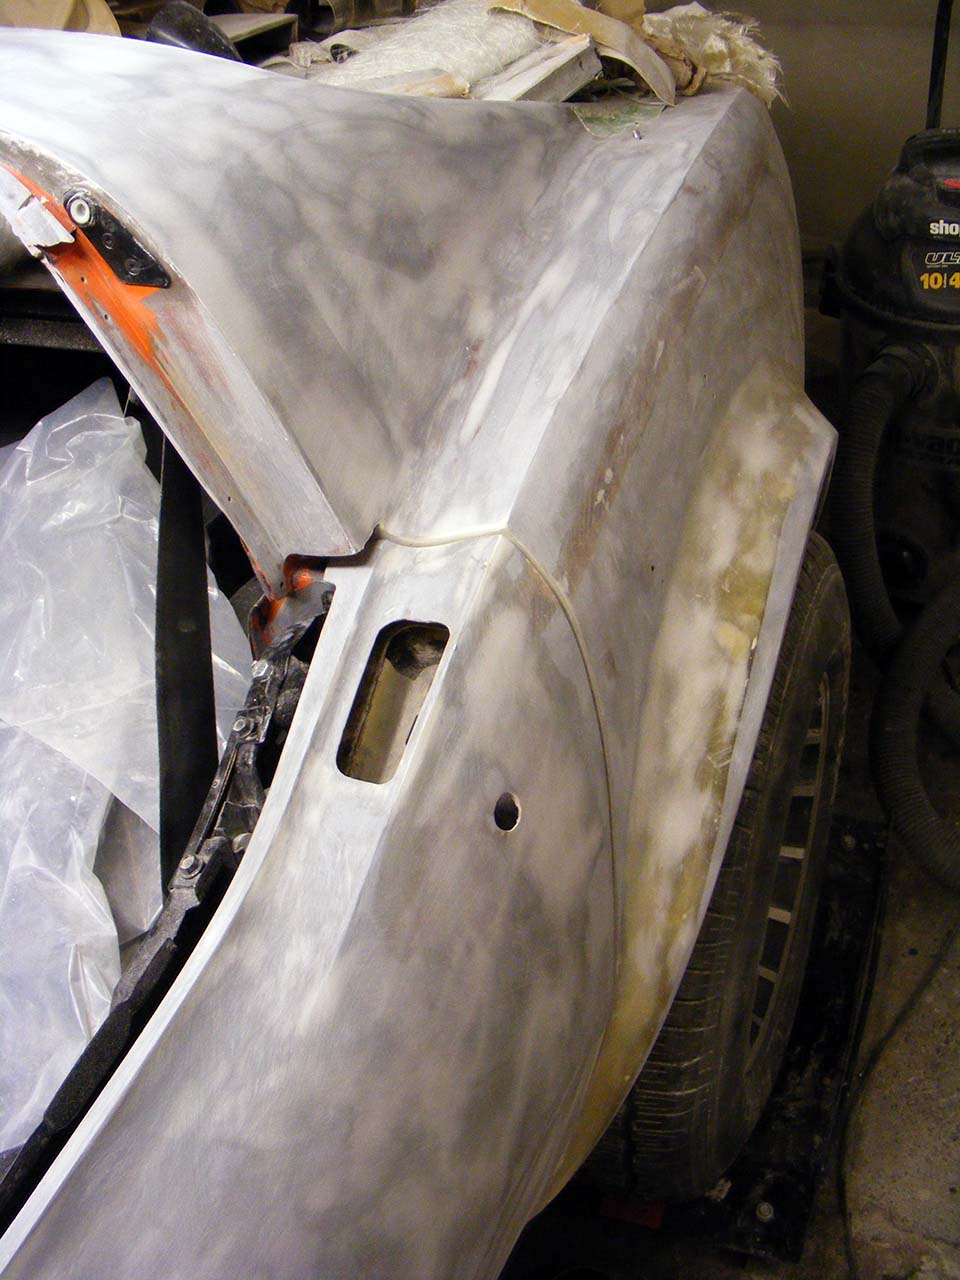
So, back in the garage, all pumped up on Florida orange juice.
The drivers side is nearing completion, time for a complete mudding on the door
After the sanding
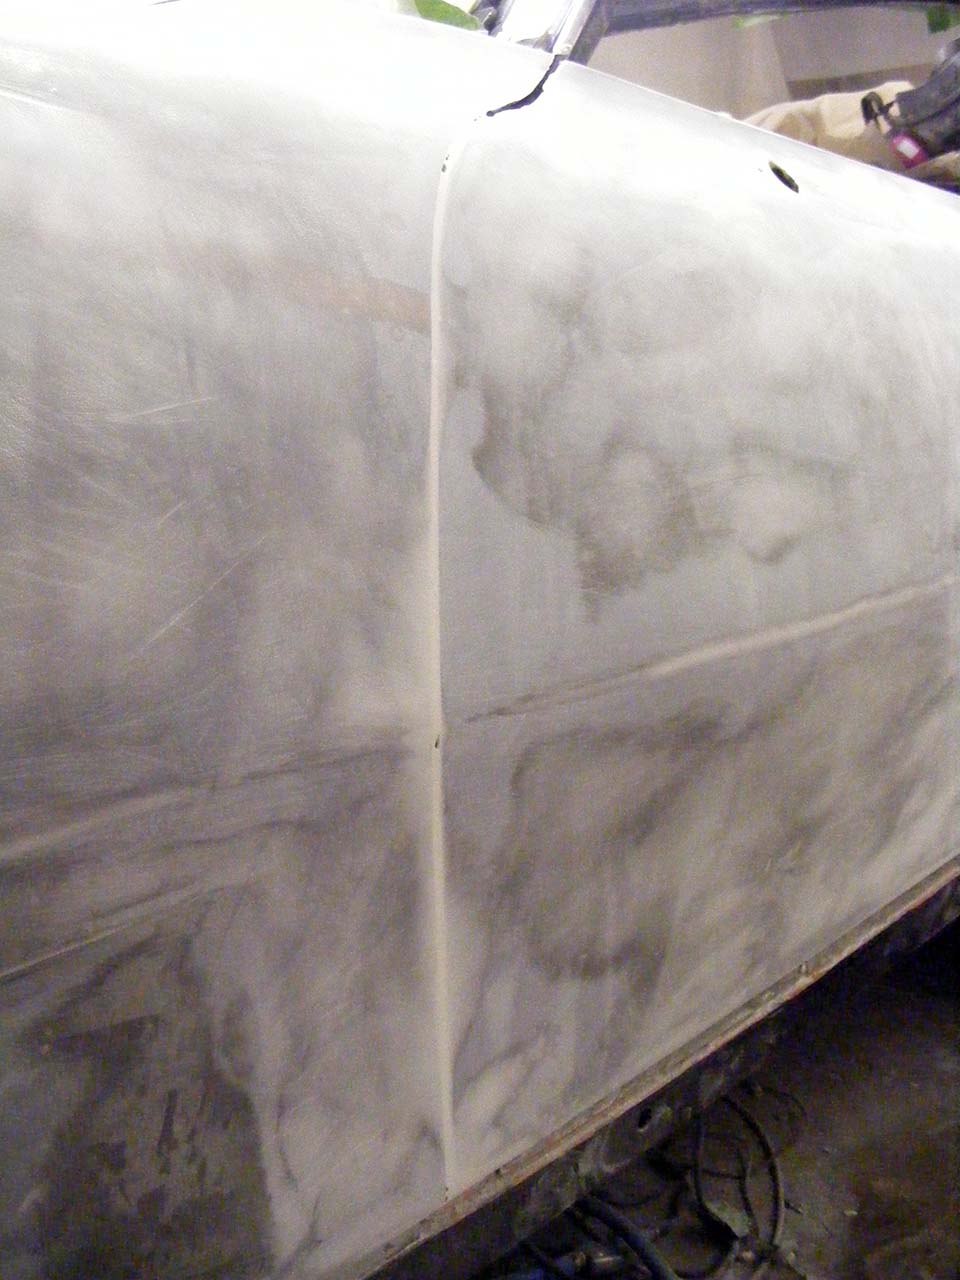
All I need now it to deal with the width of the door gap (note to self : do it before the mudding on the other side), the I can call a wrap on the entire driver side.... at last.
The drivers side is nearing completion, time for a complete mudding on the door
After the sanding
All I need now it to deal with the width of the door gap (note to self : do it before the mudding on the other side), the I can call a wrap on the entire driver side.... at last.
Last edited by Denpo; 08-18-2017 at 10:25 PM.
 05-20-2014, 09:22 PM
#440
Drifting
Thread Starter
Member Since: Aug 2010
Location: Kanuckistan
Posts: 1,617
Received 127 Likes
on
68 Posts
2022 C3 of the Year Finalist - Modified
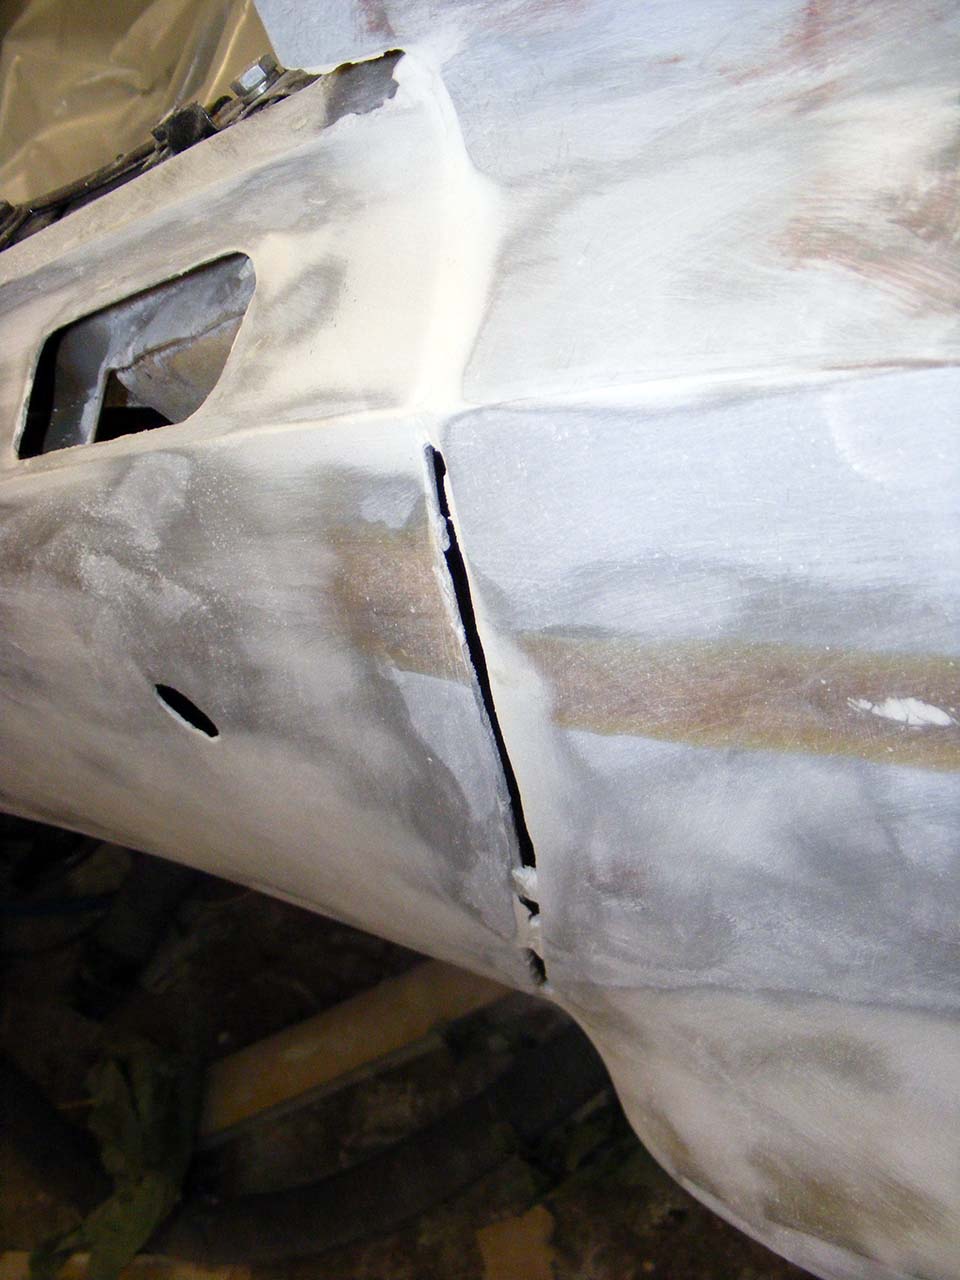
Ok, a bit of update on the bodywork.
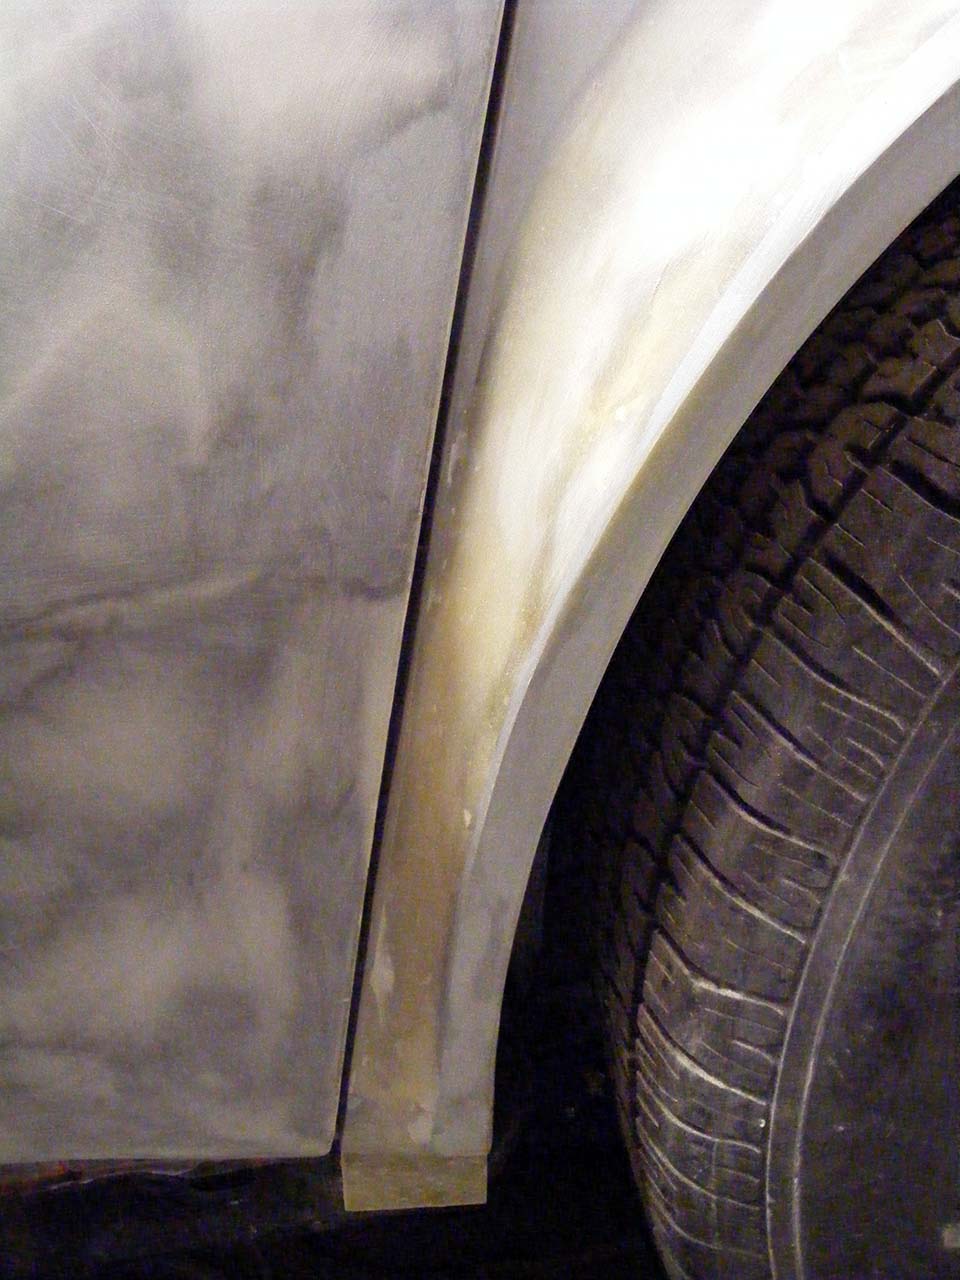
I now have my gap dressed up. 13/64 wide.
I watched the door opening, how on the top of the front, just above the upper hinge the door edge gets very close to the fender. I grinded this area until I got a good clearance. Then I took the gap width there as global reference.
So basically the smaller gap that allowed me enough clearance in the critical area.

On the front edge I added material only on the door side, so I'm sure I don't make the clearance any worse.
Filling is done with the usual epoxy + fiberglass 'fume' mix.
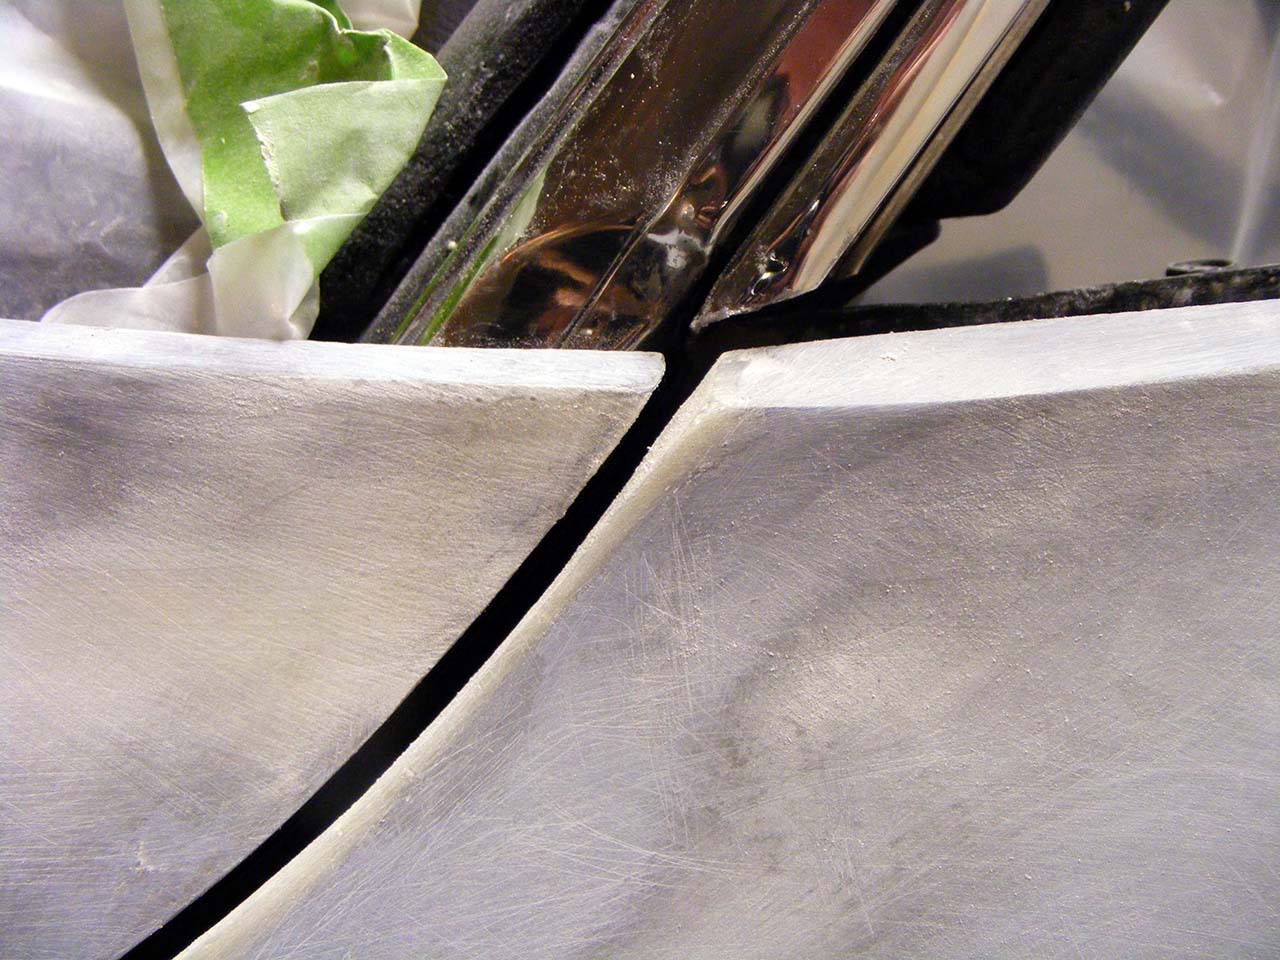
The gap is so perfect I'm worried taking my door down for painting, even with guide hole I'm not sure I could get it THAT perfect
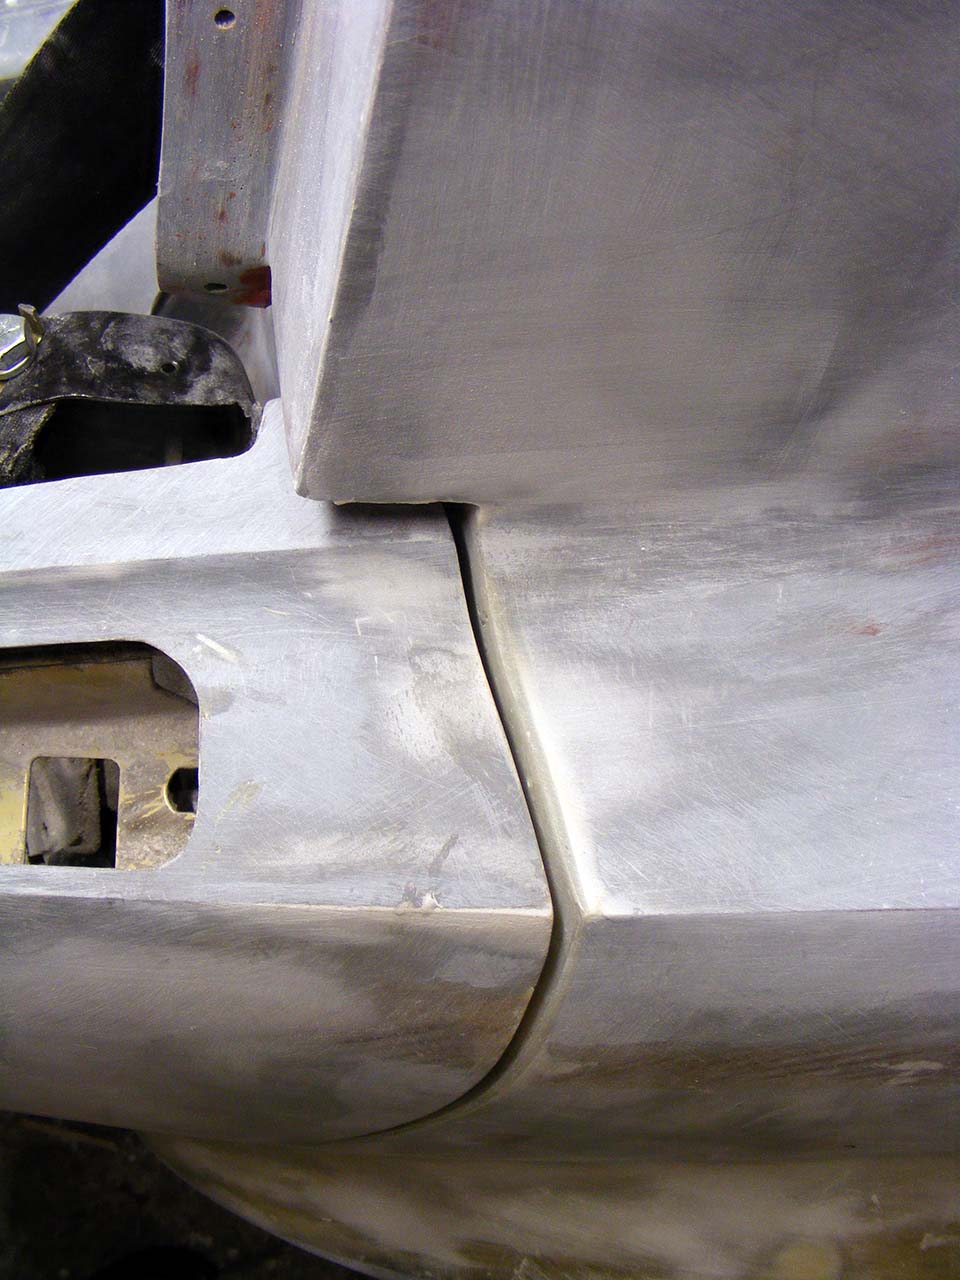
I also 'mudded' the roof arch and the side vent, making the driver side rather complete.
I still have to rebuild the front rocker moulding mounting tab, and remove the t-top anchor to finish the arch. Oh details...
I now have my gap dressed up. 13/64 wide.
I watched the door opening, how on the top of the front, just above the upper hinge the door edge gets very close to the fender. I grinded this area until I got a good clearance. Then I took the gap width there as global reference.
So basically the smaller gap that allowed me enough clearance in the critical area.
On the front edge I added material only on the door side, so I'm sure I don't make the clearance any worse.
Filling is done with the usual epoxy + fiberglass 'fume' mix.
The gap is so perfect I'm worried taking my door down for painting, even with guide hole I'm not sure I could get it THAT perfect
I also 'mudded' the roof arch and the side vent, making the driver side rather complete.
I still have to rebuild the front rocker moulding mounting tab, and remove the t-top anchor to finish the arch. Oh details...
Last edited by Denpo; 08-18-2017 at 10:27 PM.