
My '76 restoration (long post)


 12-24-2013, 07:31 PM
#383
1st Gear


Member Since: Dec 2013
Posts: 1
Likes: 0
Received 0 Likes
on
0 Posts
01-01-2014, 06:28 AM
#384
Drifting


Thread Starter
Member Since: Aug 2010
Location: Kanuckistan
Posts: 1,617
Received 127 Likes
on
68 Posts
2022 C3 of the Year Finalist - Modified

Happy New Year everyone!
Xmass holidays are ending and I'm can confirm the bodywork virus is back.
I didn't do as much as I could, mostly cleaning and mudding the door, remember I stopped at the front clip last spring.
Turn out what was just a detail because a major job.
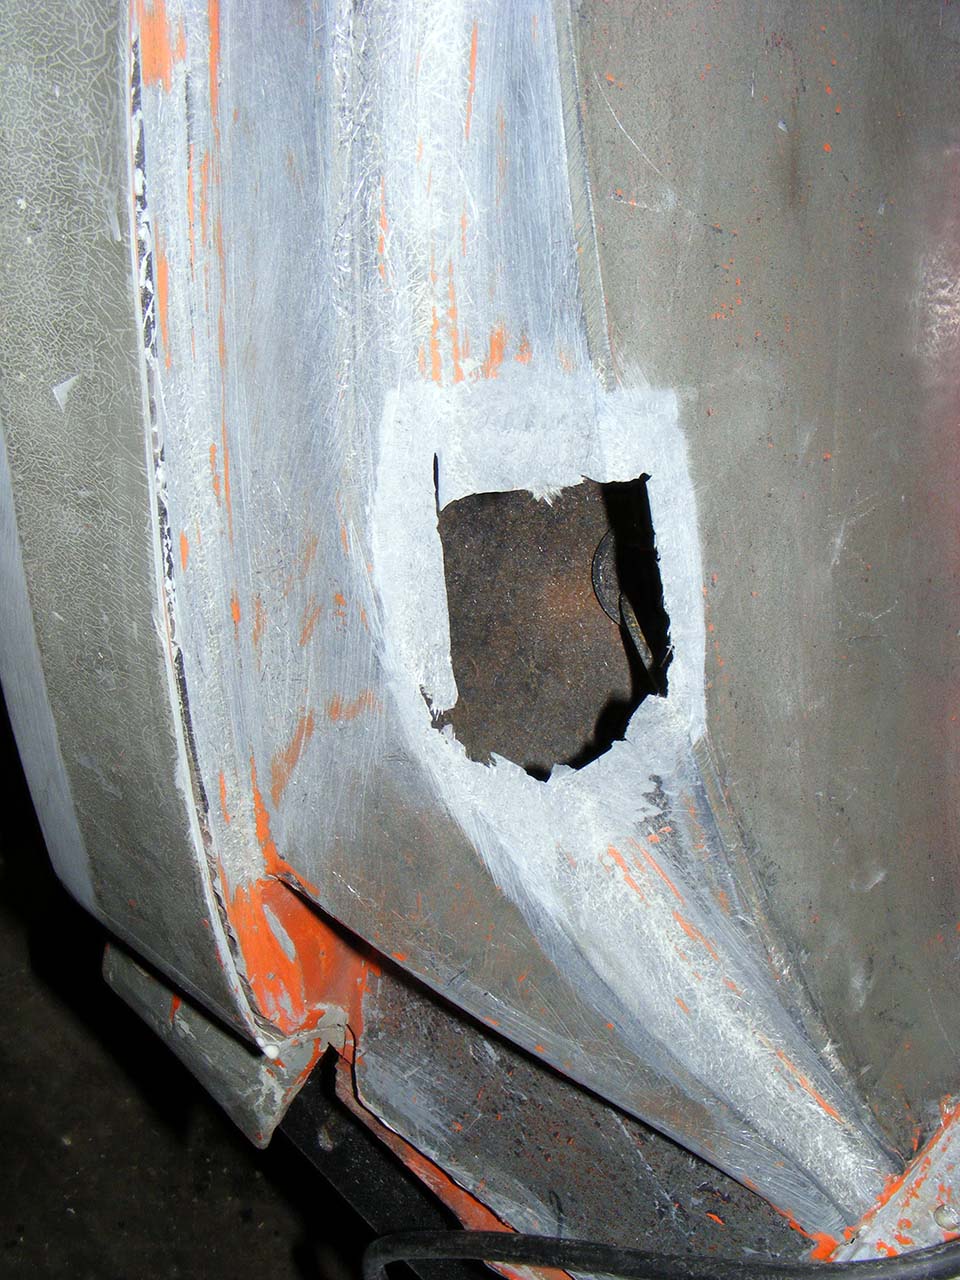
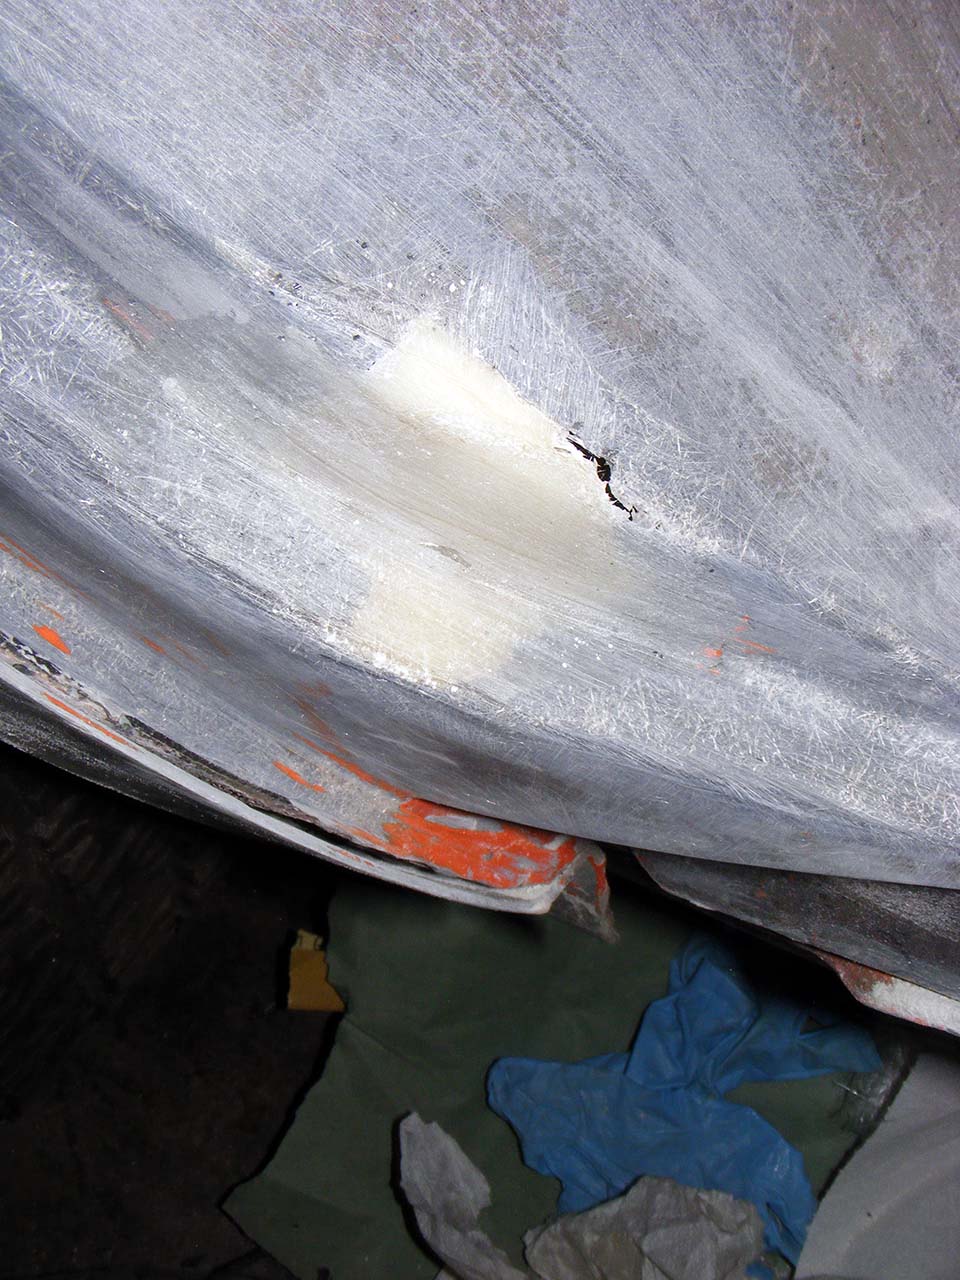
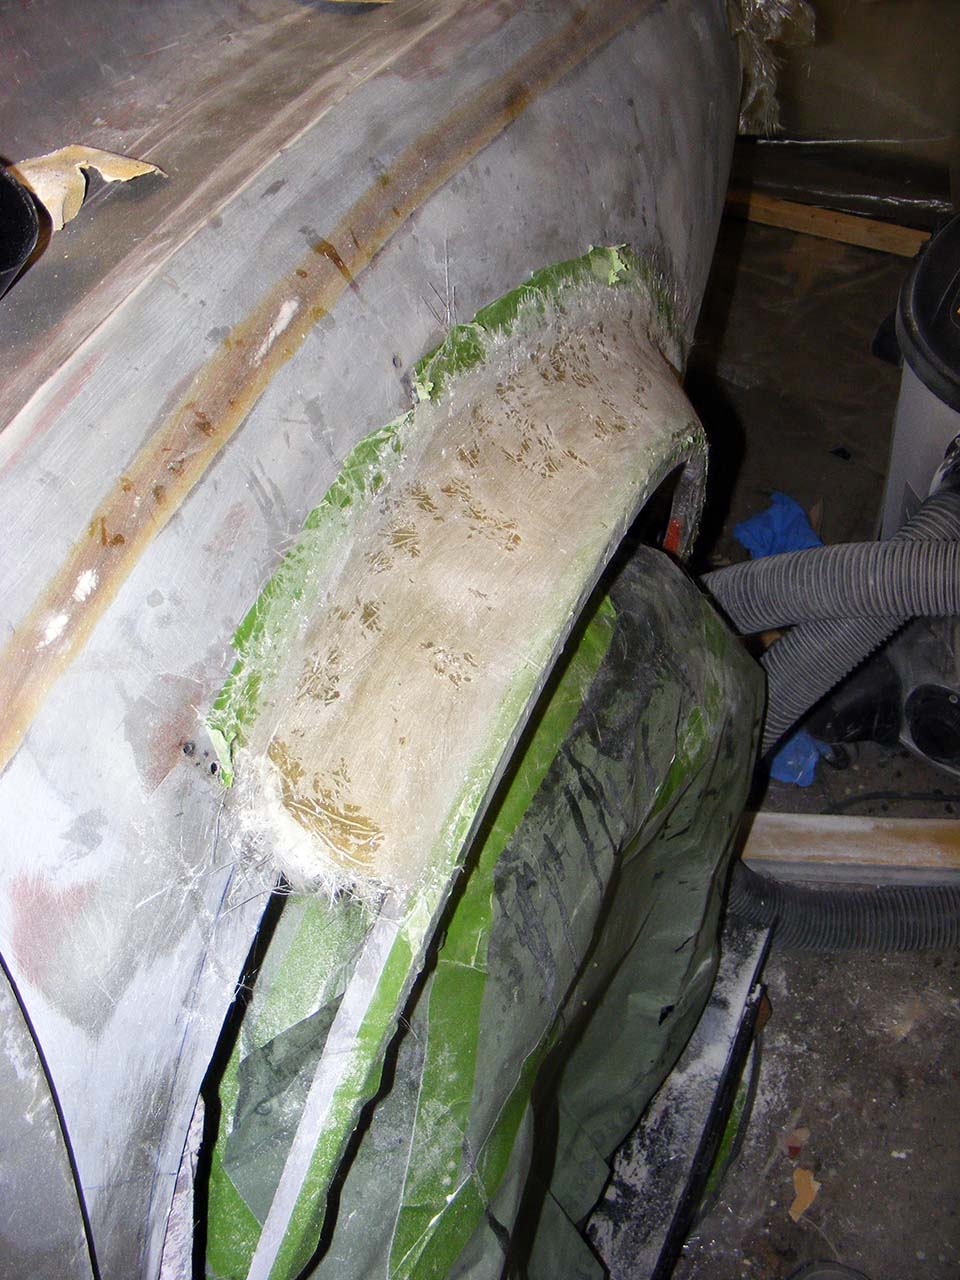
Here is the thing, I has my driver side back door switch area severely damaged.
I suspect someone tried to slam the door without the striker pin installed.
Since I ditched the stock alarm system and the new one don't rely on those switch, I decided remove it as the complete surrounding needed repair.
And since I do that on the driver side, I have to do it also on the passenger side. Witch I took pic of.
Area just after cutting off the switch and grinding a contact area.
Masking
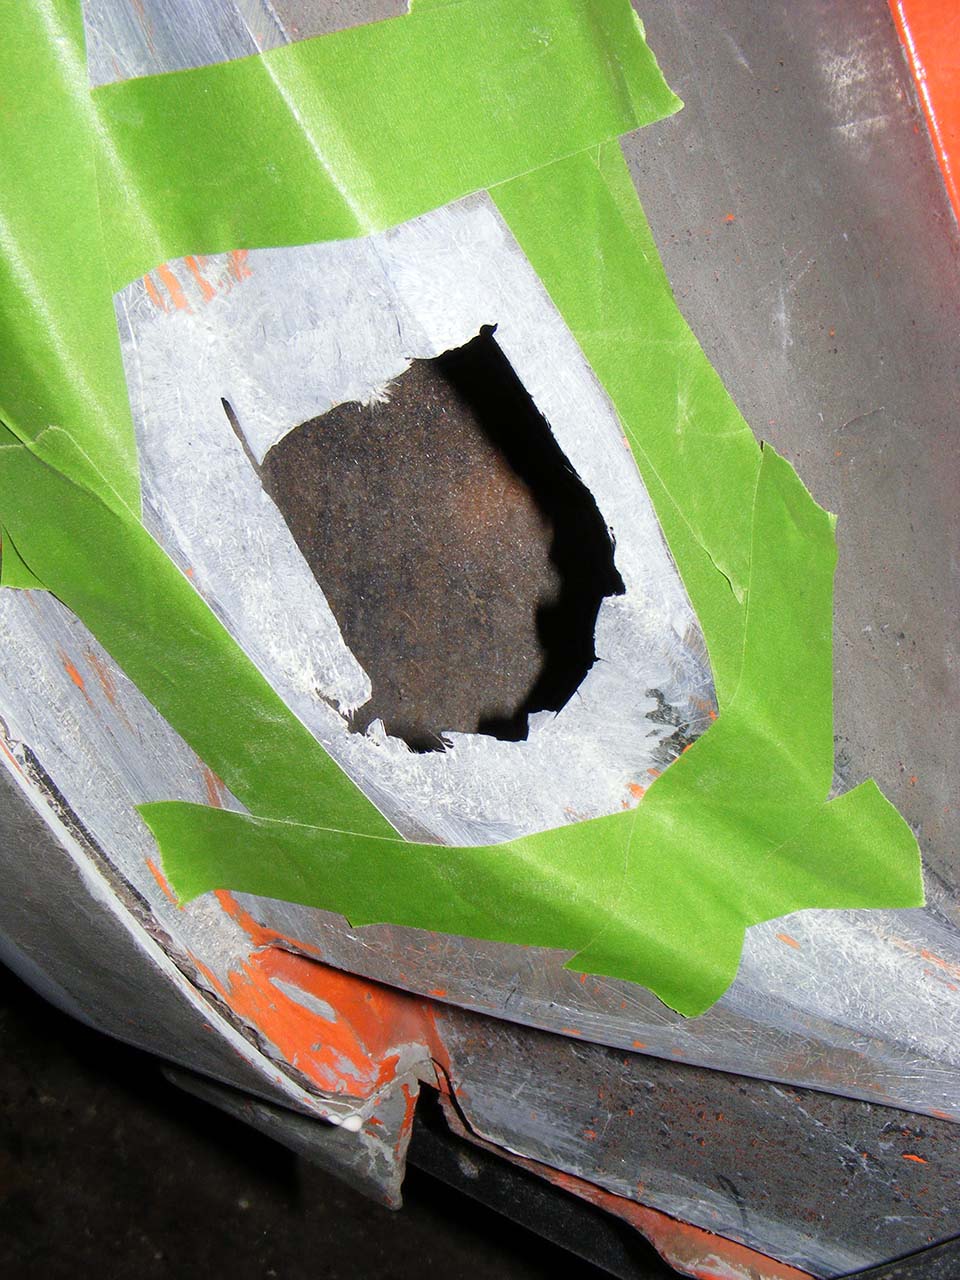
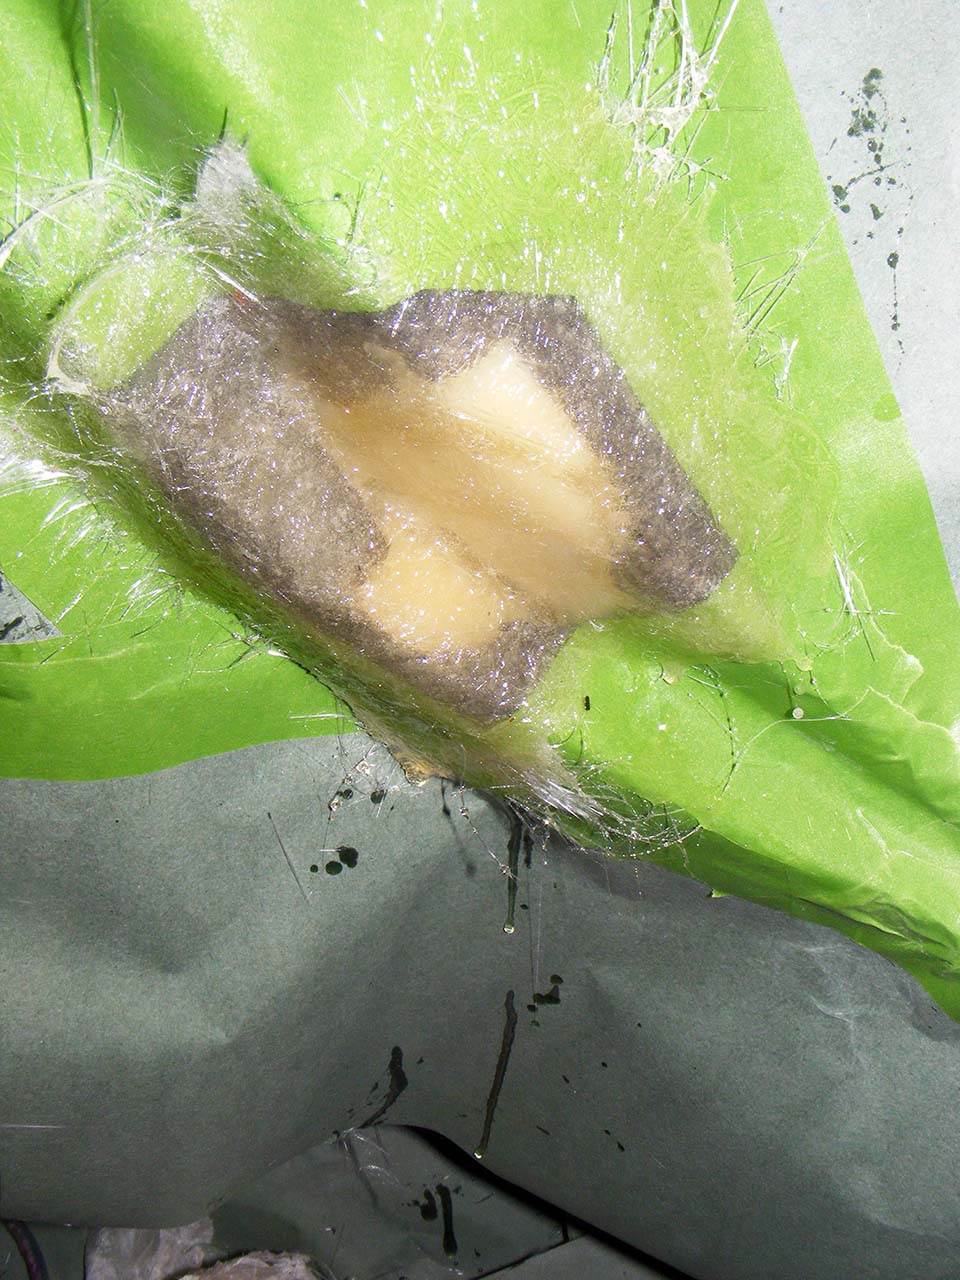
A small band of wet fiberglass backed with the usual resin+fiberglass powder mix. I've waited until it was well into curing.
I then dabbed the back side of the hole with some mix, then applied some fiber back with mix. I pushed the whole thing as far as I could.

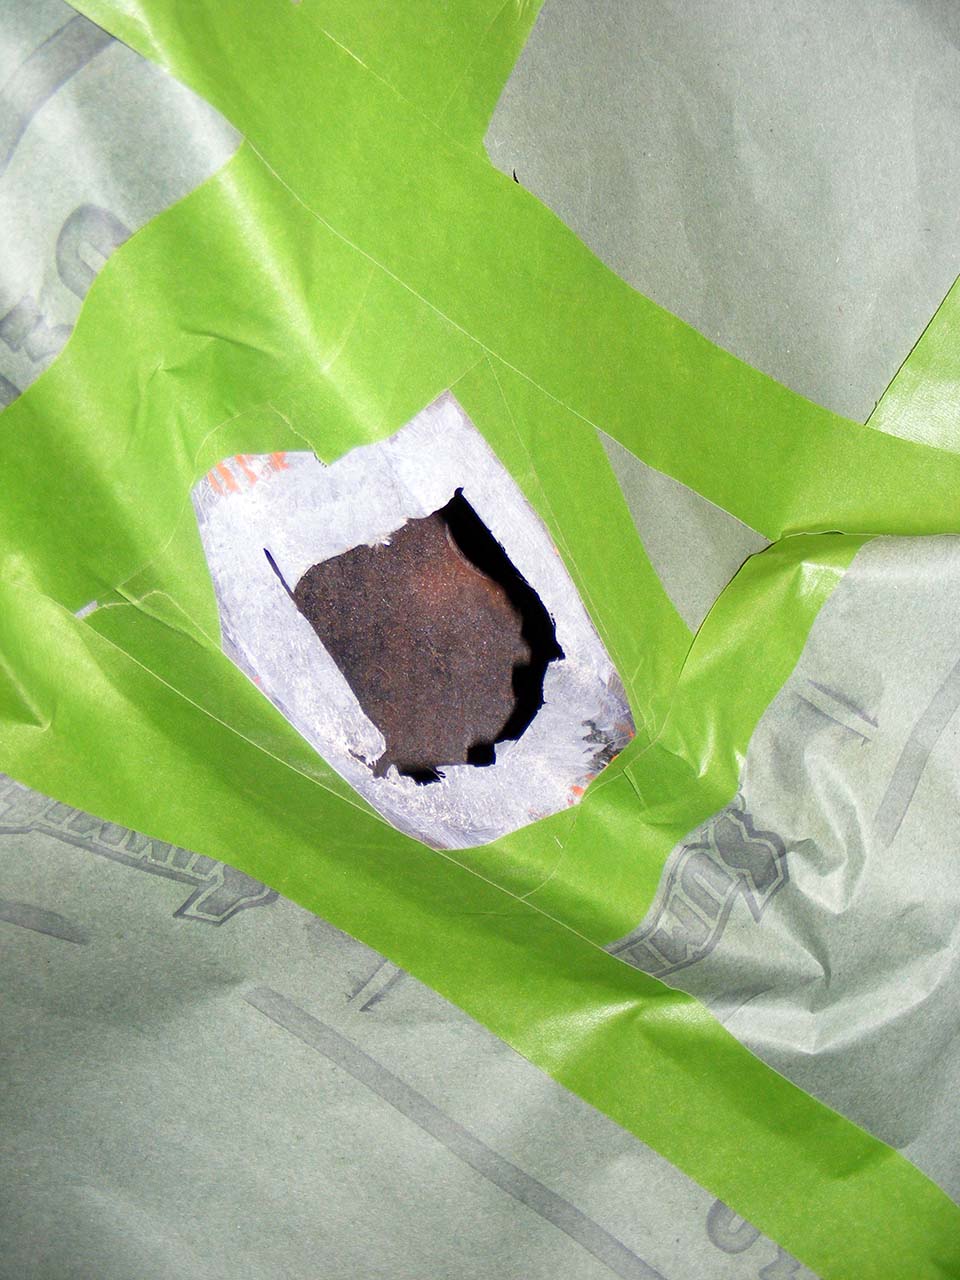
Then sanded the whole thing off, down to the level in first picture. I just wanted a clean uniform backing for my actual glassing.
Masking again

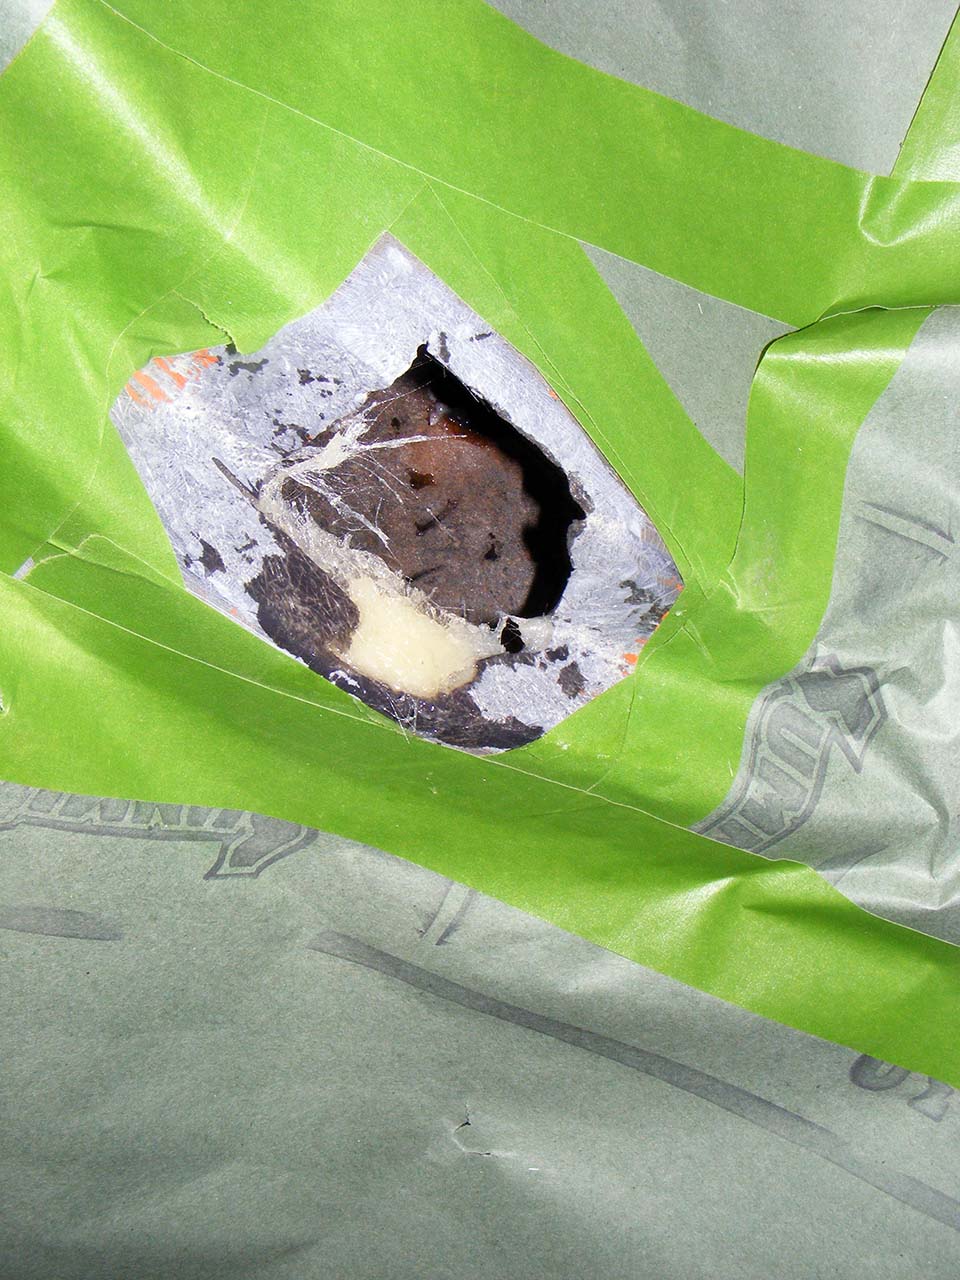
Fiberglass, 3 layers, in one pass.
Sanding again, halfway through
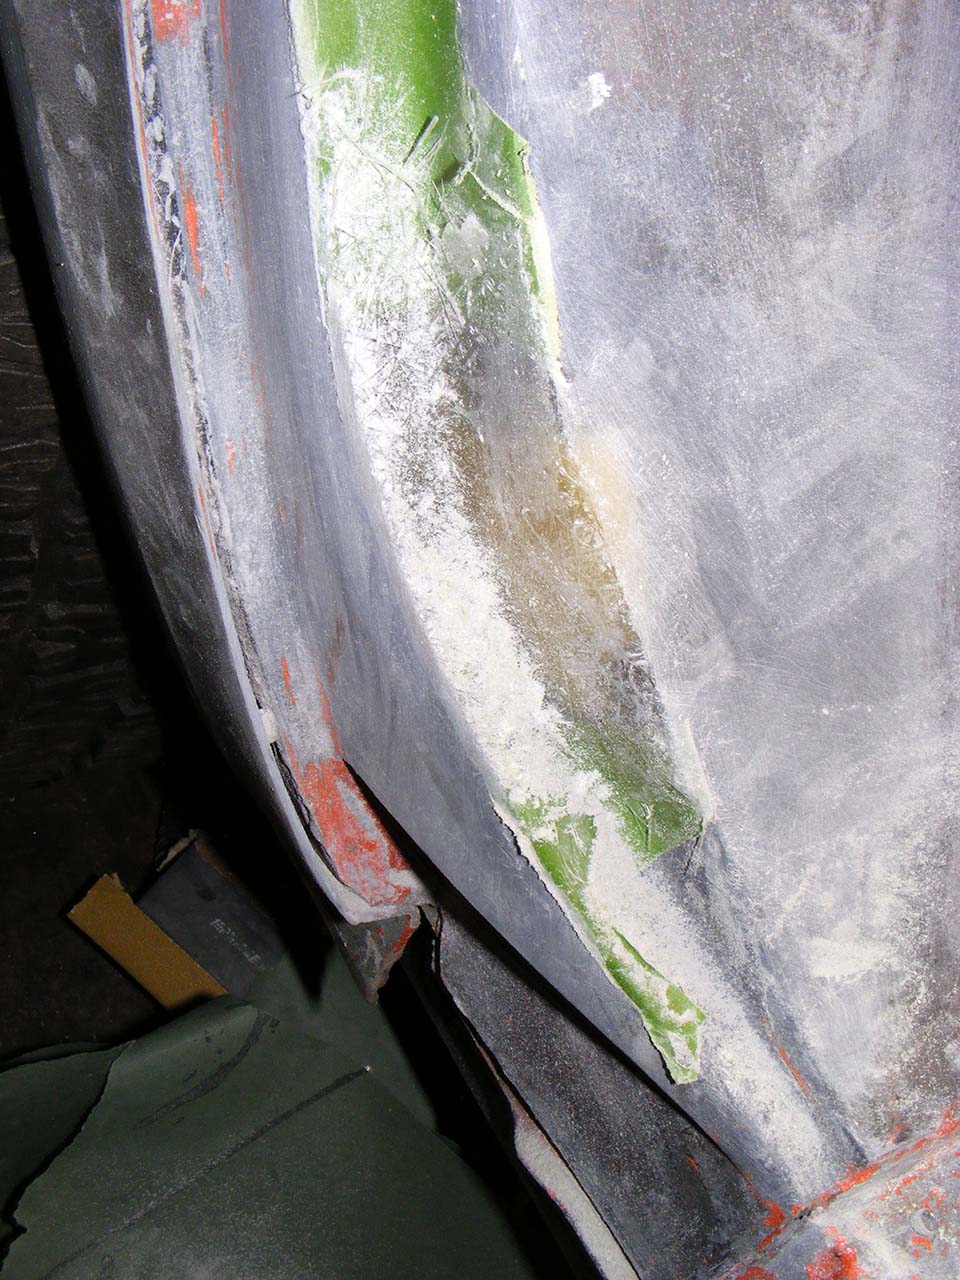
Rough sanding done
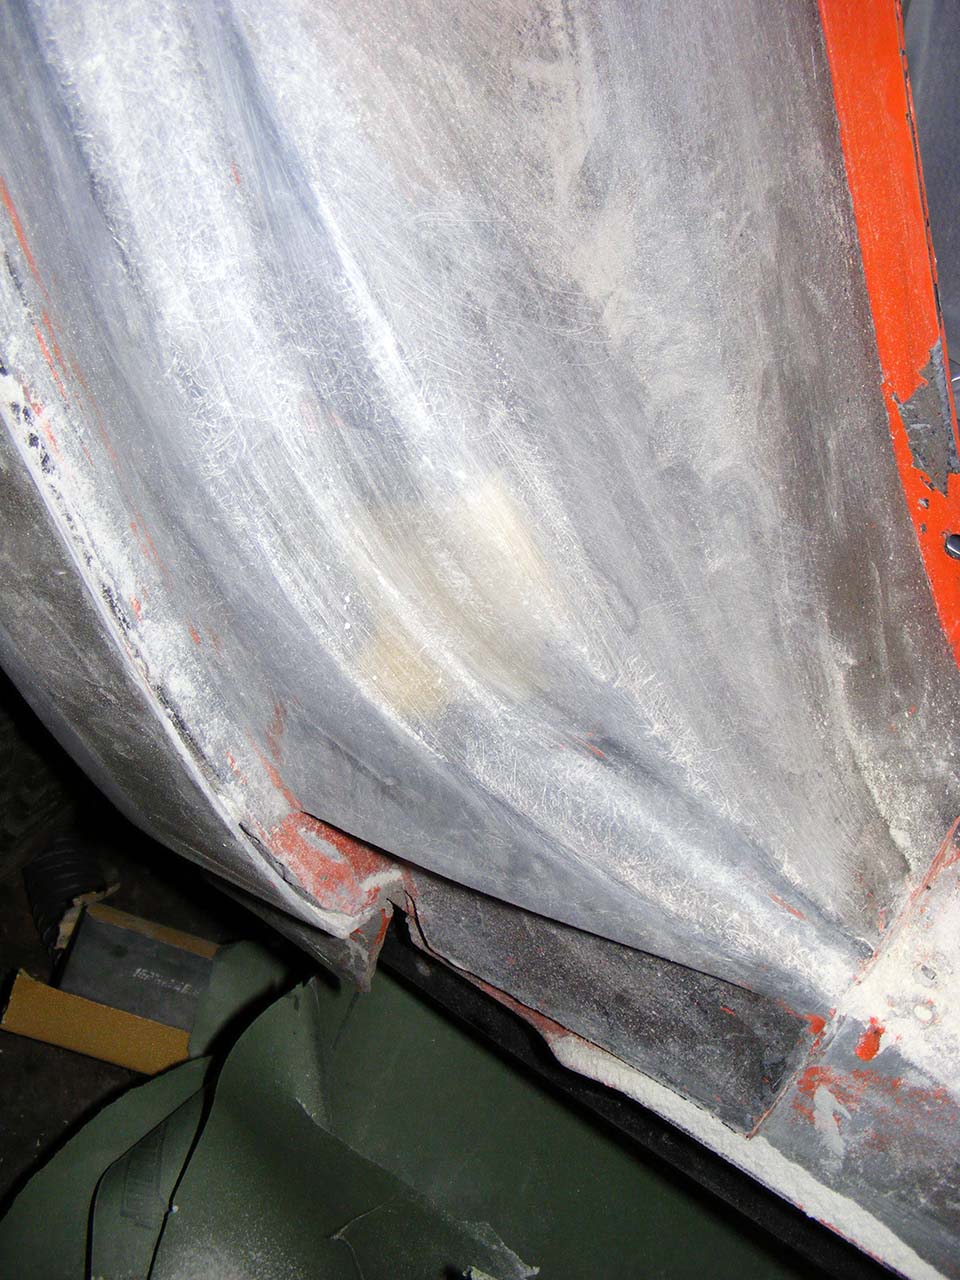
I now got to fine sand and mud the area.
I'm really close to call a wrap on the repairs and the preparation of the body.
Now I got to seriously start thinking how deep in want to go in the custom bodywork thing.
Xmass holidays are ending and I'm can confirm the bodywork virus is back.
I didn't do as much as I could, mostly cleaning and mudding the door, remember I stopped at the front clip last spring.
Turn out what was just a detail because a major job.
Here is the thing, I has my driver side back door switch area severely damaged.
I suspect someone tried to slam the door without the striker pin installed.
Since I ditched the stock alarm system and the new one don't rely on those switch, I decided remove it as the complete surrounding needed repair.
And since I do that on the driver side, I have to do it also on the passenger side. Witch I took pic of.
Area just after cutting off the switch and grinding a contact area.
Masking
A small band of wet fiberglass backed with the usual resin+fiberglass powder mix. I've waited until it was well into curing.
I then dabbed the back side of the hole with some mix, then applied some fiber back with mix. I pushed the whole thing as far as I could.
Then sanded the whole thing off, down to the level in first picture. I just wanted a clean uniform backing for my actual glassing.
Masking again
Fiberglass, 3 layers, in one pass.
Sanding again, halfway through
Rough sanding done
I now got to fine sand and mud the area.
I'm really close to call a wrap on the repairs and the preparation of the body.
Now I got to seriously start thinking how deep in want to go in the custom bodywork thing.
Last edited by Denpo; 08-18-2017 at 10:00 PM.
01-01-2014, 08:53 AM
#385
Racer

Great work, must be hard to do those small hard-to-reach-area's.
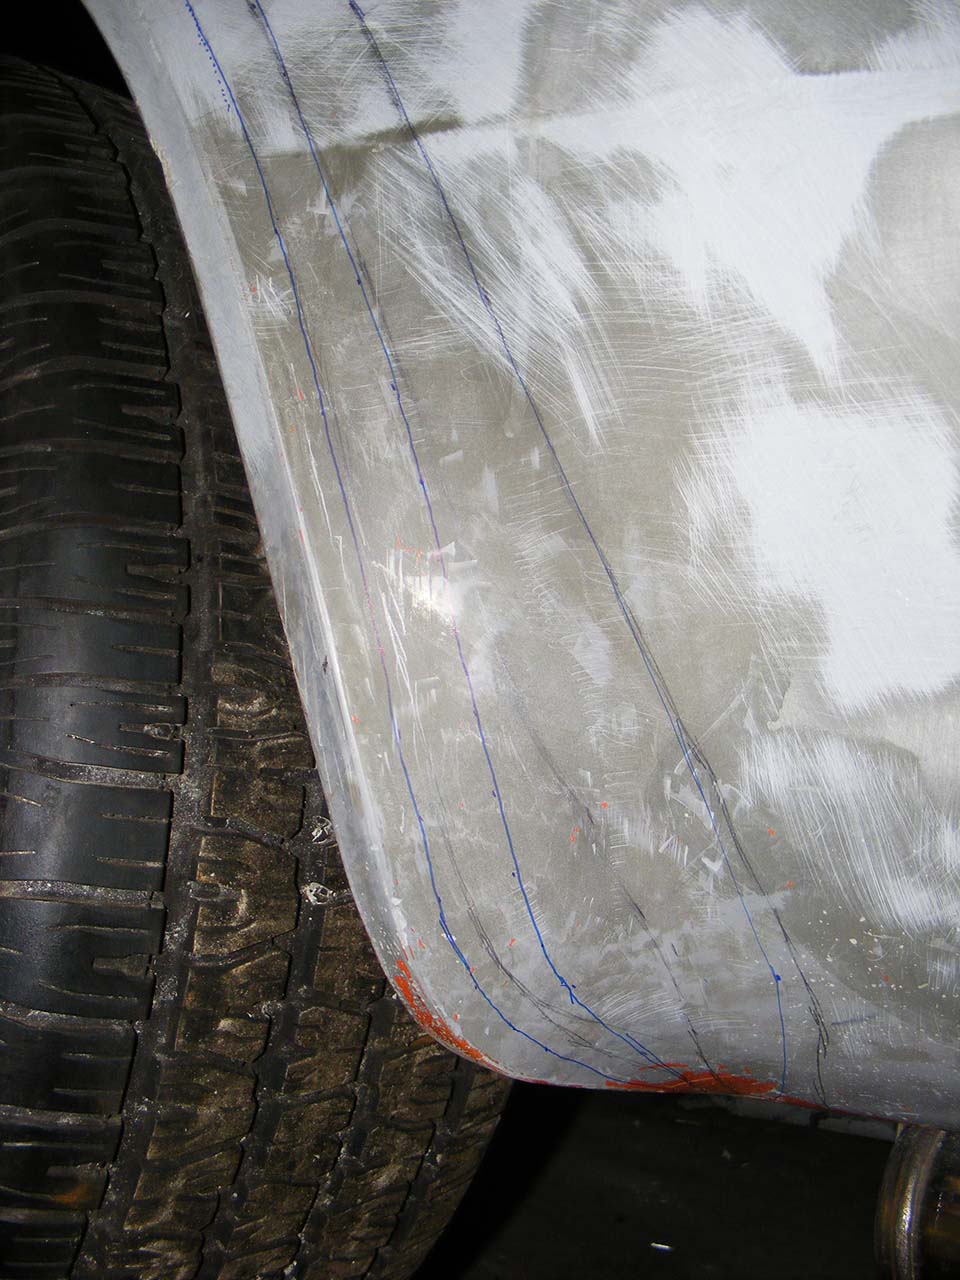
It does seem your rear quarter panel is separating from the body, i see sort of a gap between them, or are the pics misleading?
It does seem your rear quarter panel is separating from the body, i see sort of a gap between them, or are the pics misleading?
01-01-2014, 01:52 PM
#386
Drifting
Thread Starter
Member Since: Aug 2010
Location: Kanuckistan
Posts: 1,617
Received 127 Likes
on
68 Posts
2022 C3 of the Year Finalist - Modified
Thanks, you're right about the hard to reach thing. It's probably the worst area I had to sand so far.
No, you see it right. It was seperating from day 1, and I opened up the gap all the way down.
So when I glue it back, I can play on the gap to get perfect matching curves between the real quarter and the door panel.
So when I glue it back, I can play on the gap to get perfect matching curves between the real quarter and the door panel.
01-24-2014, 12:06 AM
#387
Drifting
Thread Starter
Member Since: Aug 2010
Location: Kanuckistan
Posts: 1,617
Received 127 Likes
on
68 Posts
2022 C3 of the Year Finalist - Modified
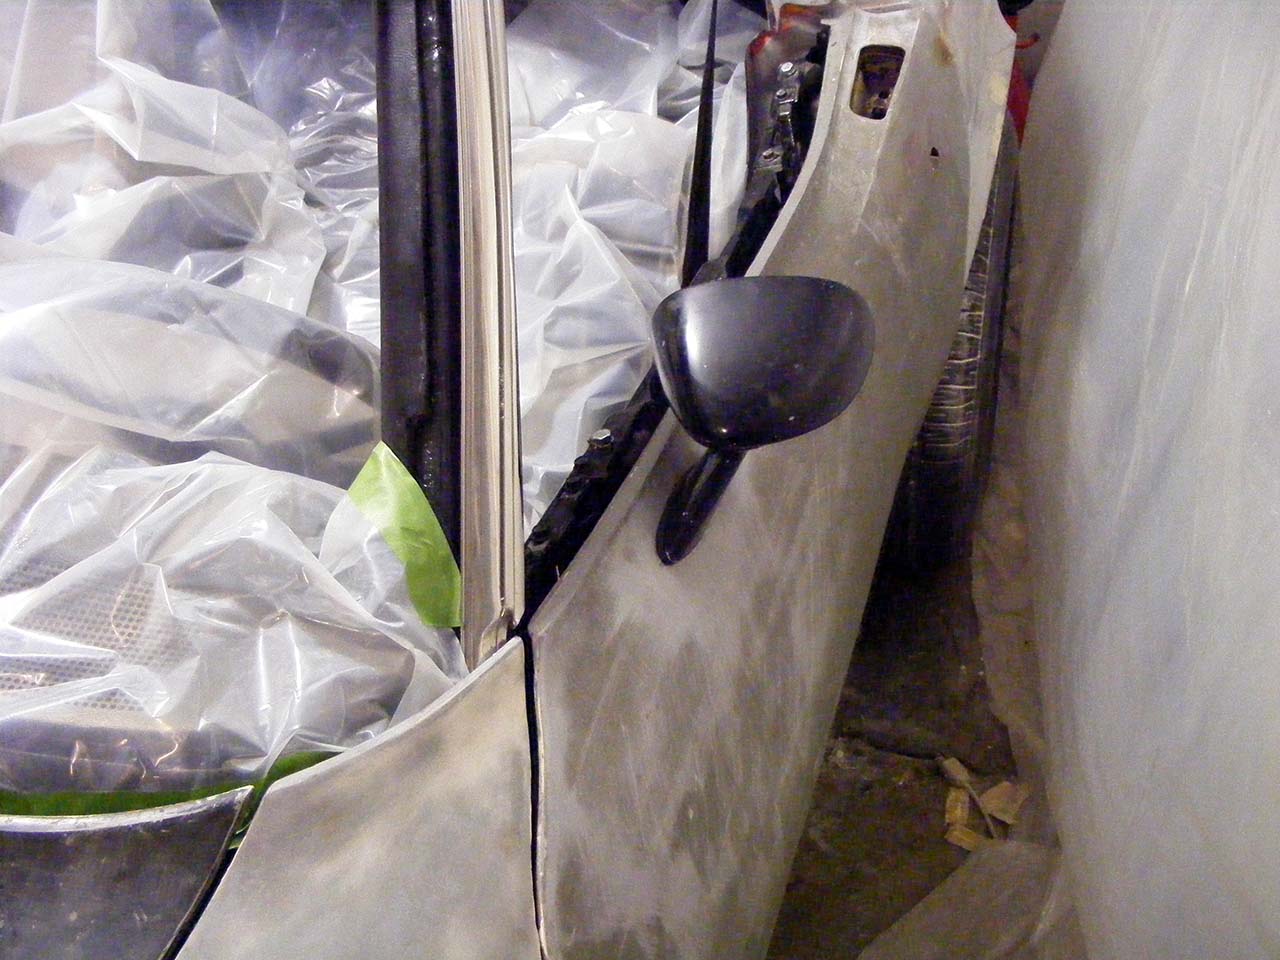
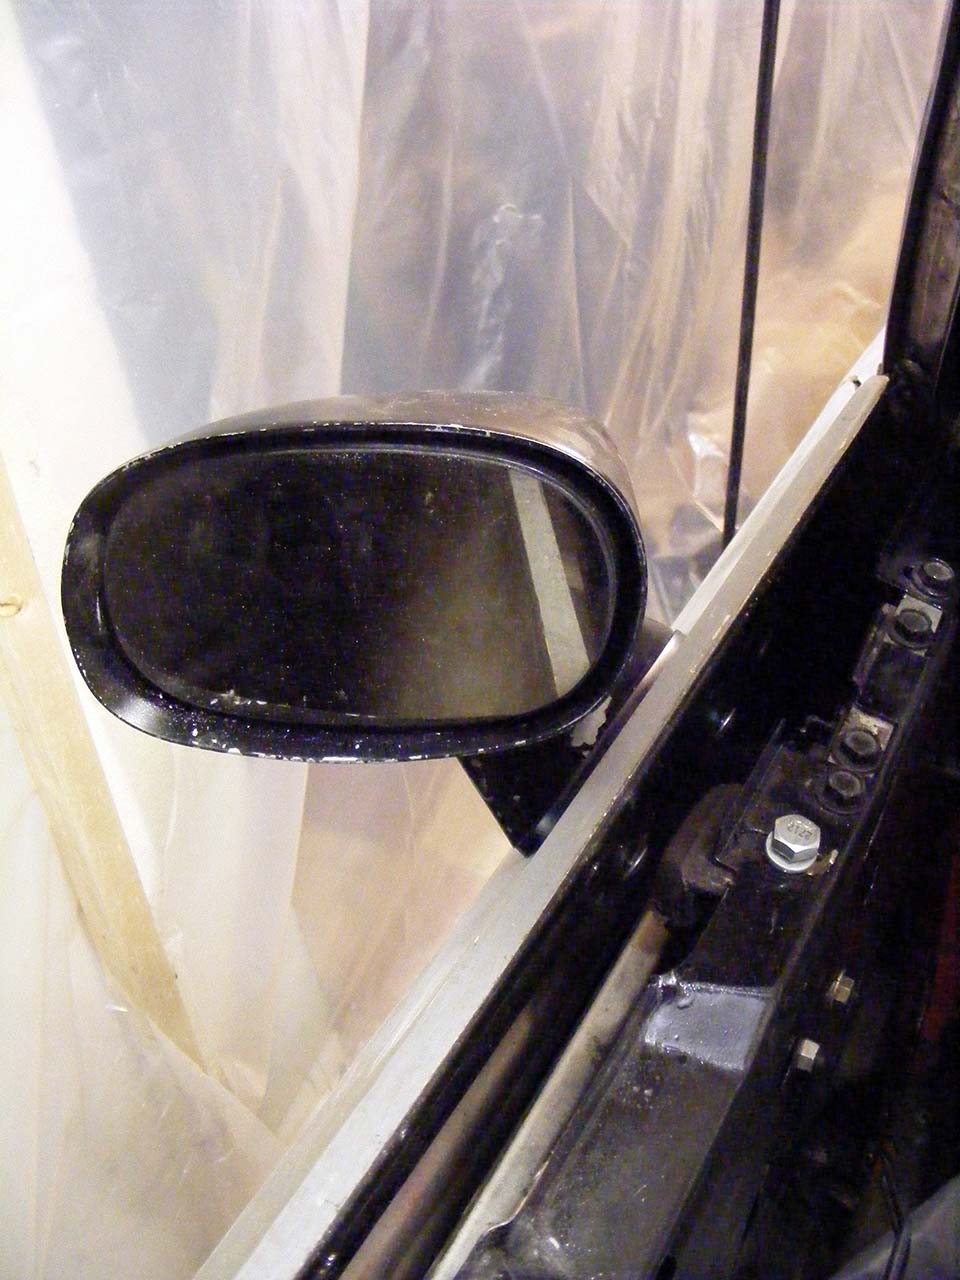
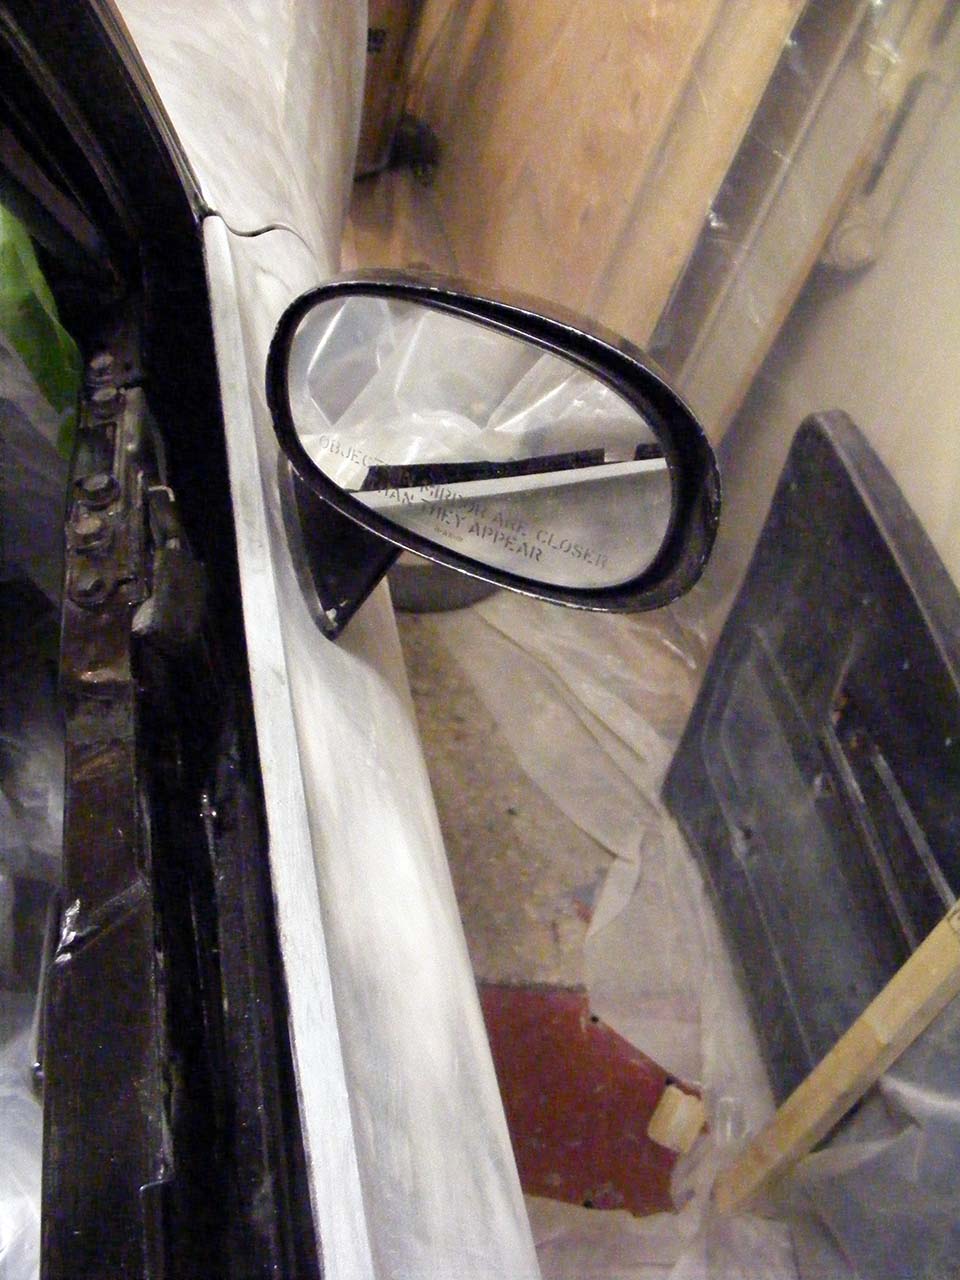
In order to consider the doors complete I had to install the mirrors.
I followed the advice from Ignatz (CF) and fastened my mirrors again the door metal frame.
I had a drilling guide machined. For those wondering the angle is 8�.
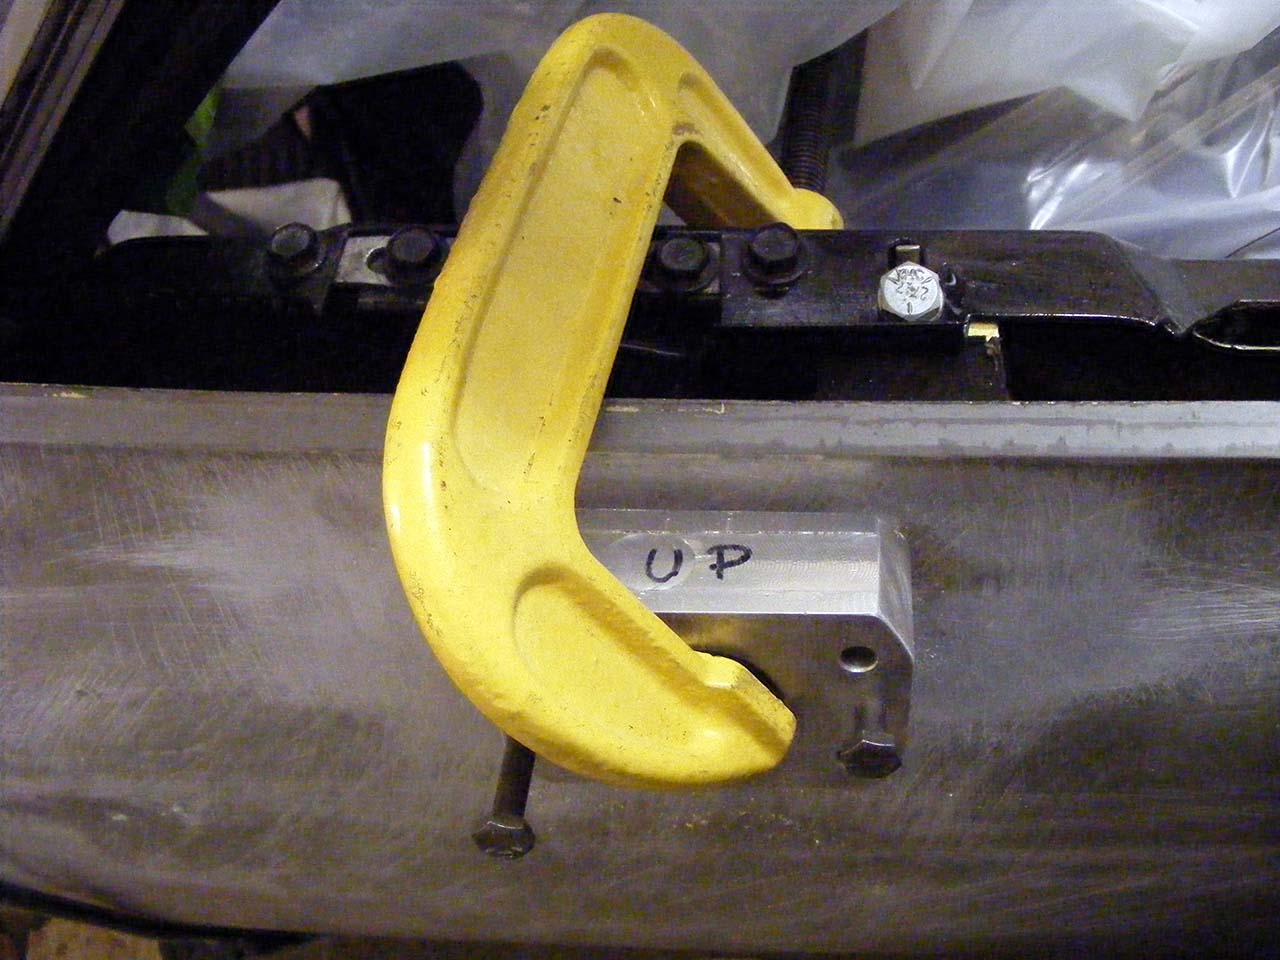
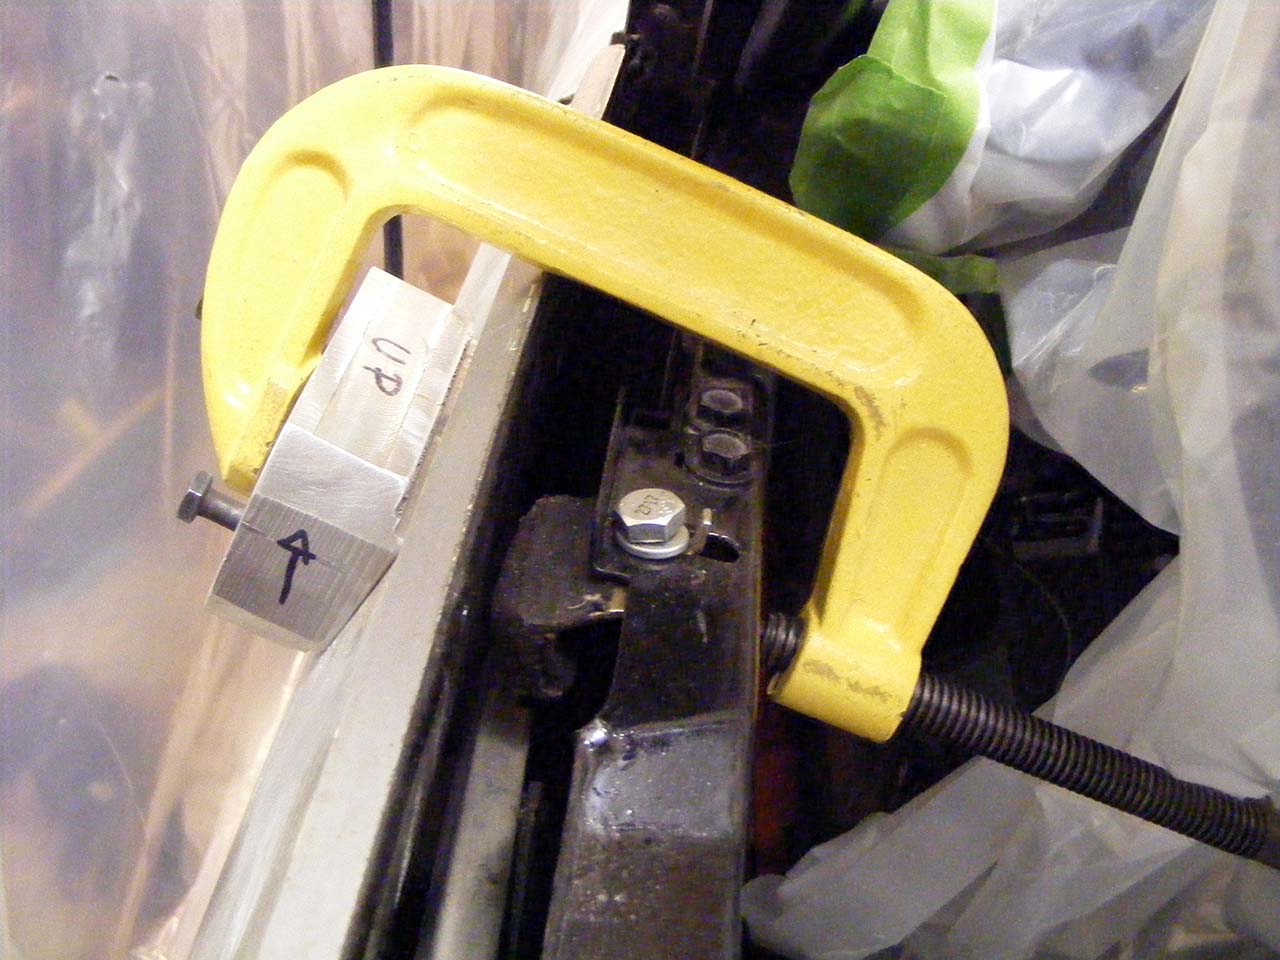
Took me longer as expected as I realised the driver side mirror was bent. I reformed it again the passenger side mirror and trimmed a bit of the back of the mirror to make sure the mirror would not get stuck when rotated at its maximum angles. What the point of having a remote ft you have to unstuck it by hand.
On that pic you can see the bolt heads again the frame.
Those are the bolt I used. 1/4 coarse thread, 2".
I think I trimmed them down to 1.8"
Took some time, you have to get the length right down to a single thread, lot of install/remove.
I like those square hole head, a lot of grip.
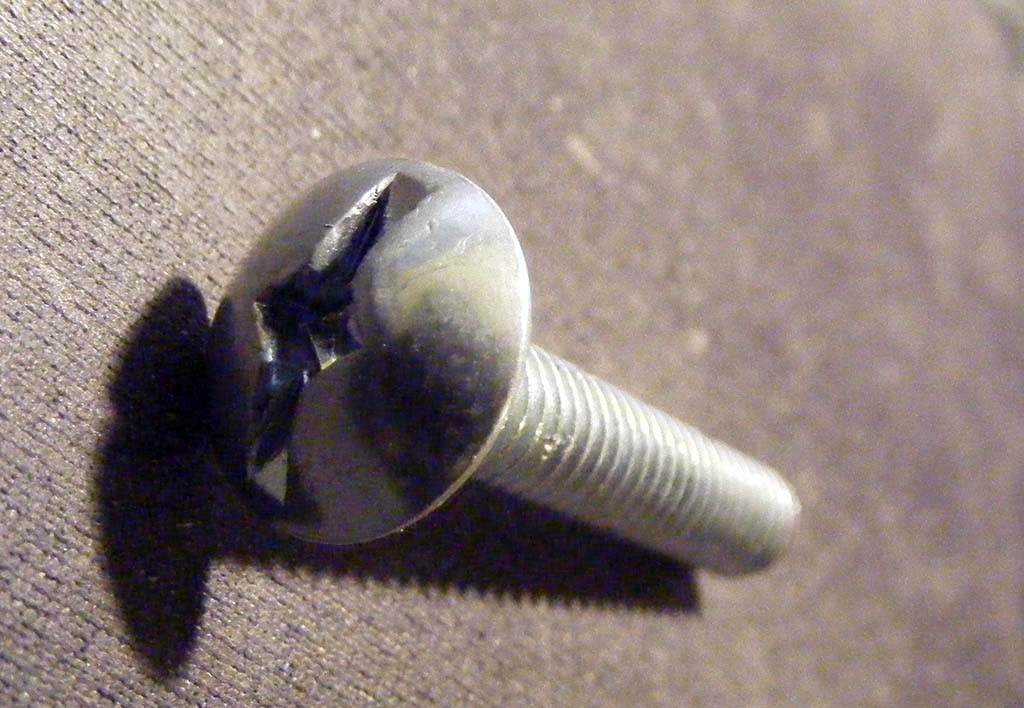

the gasket : fat side up.
On the electronic front I've completed my breadboard validation for my headlight dimmer reader/led dash light dimmer project.
The PCB is eager to get printed, I just need to go pick some fine tune potentiometer before. I learned to wait to have all the needed components before etching a PCB.
I followed the advice from Ignatz (CF) and fastened my mirrors again the door metal frame.
I had a drilling guide machined. For those wondering the angle is 8�.
Took me longer as expected as I realised the driver side mirror was bent. I reformed it again the passenger side mirror and trimmed a bit of the back of the mirror to make sure the mirror would not get stuck when rotated at its maximum angles. What the point of having a remote ft you have to unstuck it by hand.
On that pic you can see the bolt heads again the frame.
Those are the bolt I used. 1/4 coarse thread, 2".
I think I trimmed them down to 1.8"
Took some time, you have to get the length right down to a single thread, lot of install/remove.
I like those square hole head, a lot of grip.
the gasket : fat side up.
On the electronic front I've completed my breadboard validation for my headlight dimmer reader/led dash light dimmer project.
The PCB is eager to get printed, I just need to go pick some fine tune potentiometer before. I learned to wait to have all the needed components before etching a PCB.
Last edited by Denpo; 08-18-2017 at 10:03 PM.
01-24-2014, 12:45 AM
#388
Burning Brakes

Denis, when I grow up I want to be just like you!  This is an awesome thread and gives me some faith and motivation for my '77 basket case.
Keep up the great work and thanks for sharing your tips (and the tips of others) and enthusiasm!
Later,
Lee
This is an awesome thread and gives me some faith and motivation for my '77 basket case.Keep up the great work and thanks for sharing your tips (and the tips of others) and enthusiasm!
Later,
Lee
01-24-2014, 08:44 AM
#389
Drifting
Thread Starter
Member Since: Aug 2010
Location: Kanuckistan
Posts: 1,617
Received 127 Likes
on
68 Posts
2022 C3 of the Year Finalist - Modified
It's like the horror movie "the ring" only this time it's for the good.
Mainvette is the one with his thread that convinced me to attempt to save my basket case. Glad to know it's contagious.
01-29-2014, 02:29 PM
#390
Drifting
Thread Starter
Member Since: Aug 2010
Location: Kanuckistan
Posts: 1,617
Received 127 Likes
on
68 Posts
2022 C3 of the Year Finalist - Modified
Do you remember when I mentioned those cool fuse adapter I got for Xmass?
Well, I got a little sad update about those.
Attachment 48373974
They come in pack of 8. As you can see, there is only 7 on the picture.
That's because I received only that much.
I didn't mention it at the time, I saw no reason to bash a vendor about something I'd probably get fixed.
Well, no so much.....
After I let him know I only got 7, he says he's sending me the missing one....
Two weeks later the replacement is not here (and to this day didn't make it), the ebay case is about to close and the guy's messages start to sound annoyed : he's sending me another replacement, with tracking #.
Allright then, let's wait again.
The tracked package arrive only to realise the UPS guys wants 26$ of brokerage fee before he hand me the package.
26$ buck for a mere 2.5$ part. Are you freaking kinding me???
Told the UPS he can keep his package.
I message the guy again, and he's all "I already paid plenty to get it fixed, what do you want me to do more".
Well I guess I want him to pay for the 26$, but looks like it didn't crossed his mind.
At this point I had enough, dropped the ball and gave him a bad review, no time to deal with incompetency.
So, if you feel like buying those "Automotive fuse adaptor 8 pack" on Ebay, don't say you haven't been warned.
***** UPDATE *******
02-10-2014:
I just received a package with not one replacement, but 12!, plus a corporate notepad and a pen.
I didn't ask for that much, but I appreciate the move, I'll take that as apologies.
Communication may not be their main strength but they still have a cool and unique product.
Case closed.
Last edited by Denpo; 08-18-2017 at 10:03 PM.
 01-29-2014, 03:52 PM
#392
Drifting
Thread Starter
Member Since: Aug 2010
Location: Kanuckistan
Posts: 1,617
Received 127 Likes
on
68 Posts
2022 C3 of the Year Finalist - Modified
http://www.engineeredsource.com/news.html
Looks like this may be another source for the part, unless they are the ones selling on Ebay......
Looks like this may be another source for the part, unless they are the ones selling on Ebay......
01-29-2014, 04:37 PM
#393
Drifting
Member Since: Jun 2011
Location: iowa city iowa
Posts: 1,540
Received 253 Likes
on
139 Posts
2020 Corvette of the Year Finalist (appearance mods)
C3 of Year Winner (appearance mods) 2019
Wow that is an amazing ordeal with the fuse adapters. Can't believe anybody would go that far out of their way to be an ***-hat.
Looks like the car is coming along well though. We had a discussion a long time ago about high side vs low side PWM on LEDs. I could not for the life of me understand why you were worried about it, and it finally makes sense to me now. I am a little slow sometimes.
Wish I knew as much about this stuff as you do. I have some ideas in my head that I am not smart enough to make happen.
Looking forward to seeing it all come together.....
01-29-2014, 05:22 PM
#394
Drifting
Thread Starter
Member Since: Aug 2010
Location: Kanuckistan
Posts: 1,617
Received 127 Likes
on
68 Posts
2022 C3 of the Year Finalist - Modified
Wow that is an amazing ordeal with the fuse adapters. Can't believe anybody would go that far out of their way to be an ***-hat.
Looks like the car is coming along well though. We had a discussion a long time ago about high side vs low side PWM on LEDs. I could not for the life of me understand why you were worried about it, and it finally makes sense to me now. I am a little slow sometimes.
Wish I knew as much about this stuff as you do. I have some ideas in my head that I am not smart enough to make happen.
Looking forward to seeing it all come together.....
Looks like the car is coming along well though. We had a discussion a long time ago about high side vs low side PWM on LEDs. I could not for the life of me understand why you were worried about it, and it finally makes sense to me now. I am a little slow sometimes.
Wish I knew as much about this stuff as you do. I have some ideas in my head that I am not smart enough to make happen.
Looking forward to seeing it all come together.....
What a timely comment.
I'm actually finalizing a little piece of hardware that reads the headlight switch rheostat (you know the big coil in the ceramic casing), and translate it into a high side PWN dimming fed to the entire grey wire dash lighting.
That way, you put leds in the sockets and that's it.
The PCB is printed, I'm soldering the components tonight.
Once it's all bug free I let you know, I can probably roll you one for some beer money.
In the name of the rubber bumper restomod fraternity
 01-29-2014, 05:39 PM
#395
Drifting
Member Since: Jun 2011
Location: iowa city iowa
Posts: 1,540
Received 253 Likes
on
139 Posts
2020 Corvette of the Year Finalist (appearance mods)
C3 of Year Winner (appearance mods) 2019
And you also with the timely comments.
I have my dash LEDs wired right now but have not put it back together yet. That is a ways out. I used a low side PWM to control the LEDs and have the wires for the box hanging under the steering column. The original plan was to take the pot out of the box and mount it under the dash like the original switches were mounted for the (I think) trip reset and headlight over ride. I may have to rethink how much work it would be to take your route. Pm me and let me know how much beer money you would need for it and I will go look at my wiring and try to decide how ambitious I feel. I have plenty of unsolvent mysteries to work on and so I may just take the easy way out and leave it.
Thanks for the offer either way. That is very cool of you to be willing to share all of that work.
02-22-2014, 12:28 AM
#398
Drifting
Thread Starter
Member Since: Aug 2010
Location: Kanuckistan
Posts: 1,617
Received 127 Likes
on
68 Posts
2022 C3 of the Year Finalist - Modified
Car is stuck against the wall, here's all the room I have :
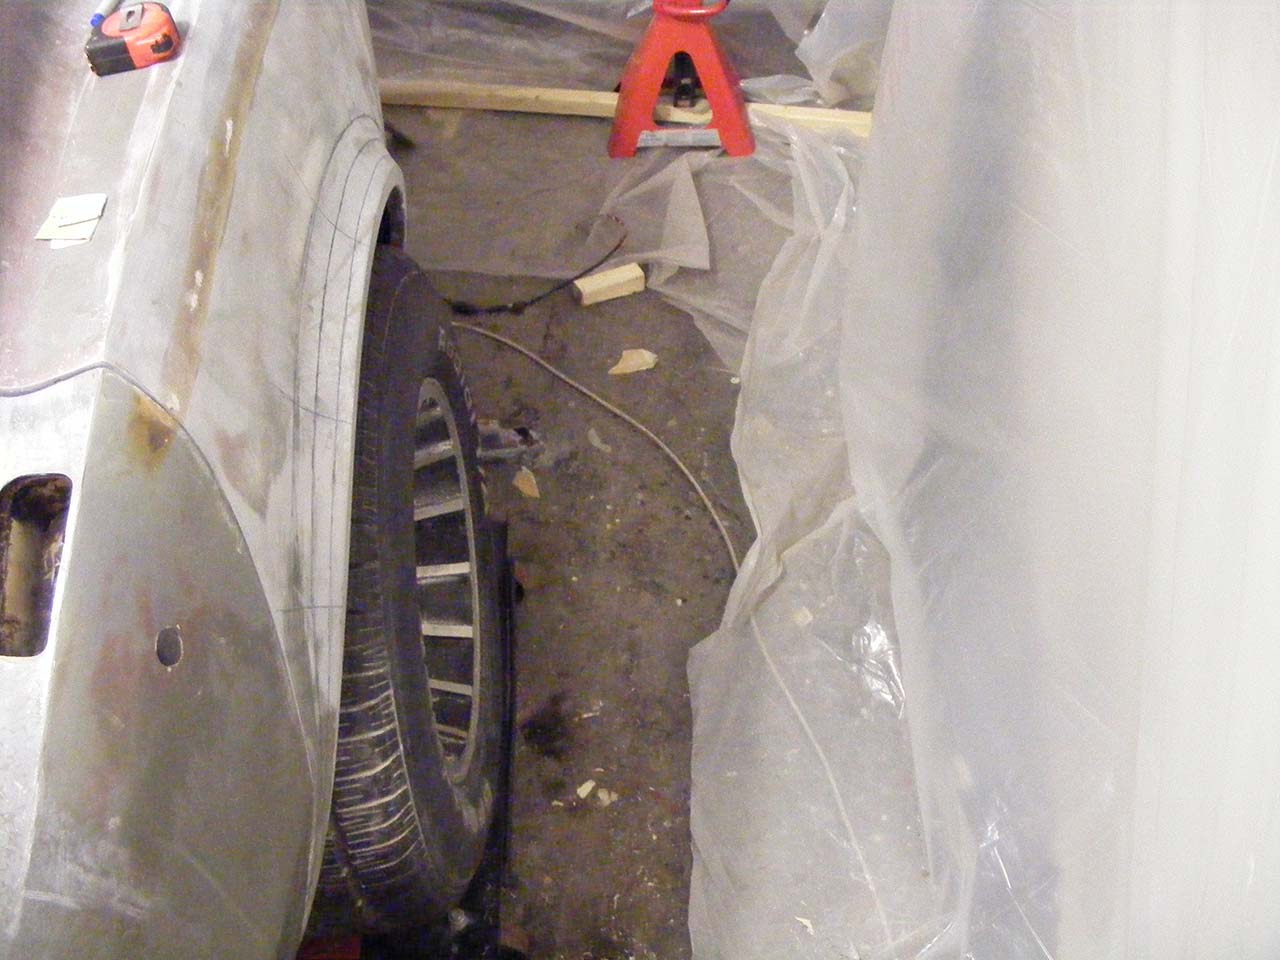
Gettin' serious...
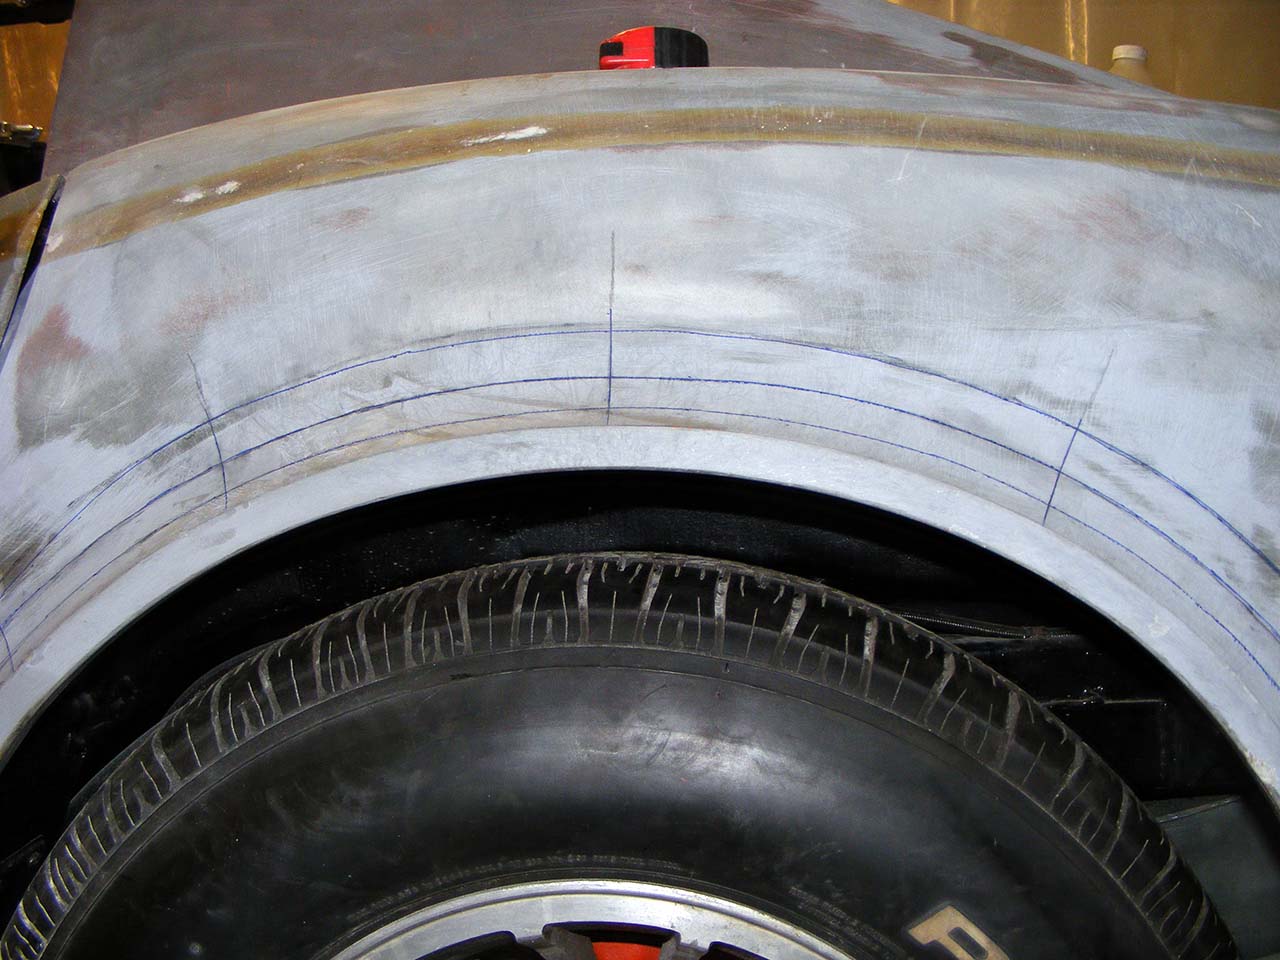


Gettin' serious...
Last edited by Denpo; 08-18-2017 at 10:06 PM.
